

Transcripted Summary
Welcome to Chapter 4.
Now, we are going to build the end-to-end pipeline with GitHub Actions.
Let's see what we want to achieve.
We set up a CI/CD pipeline with GitHub Actions, and therefore, we need to do the following.
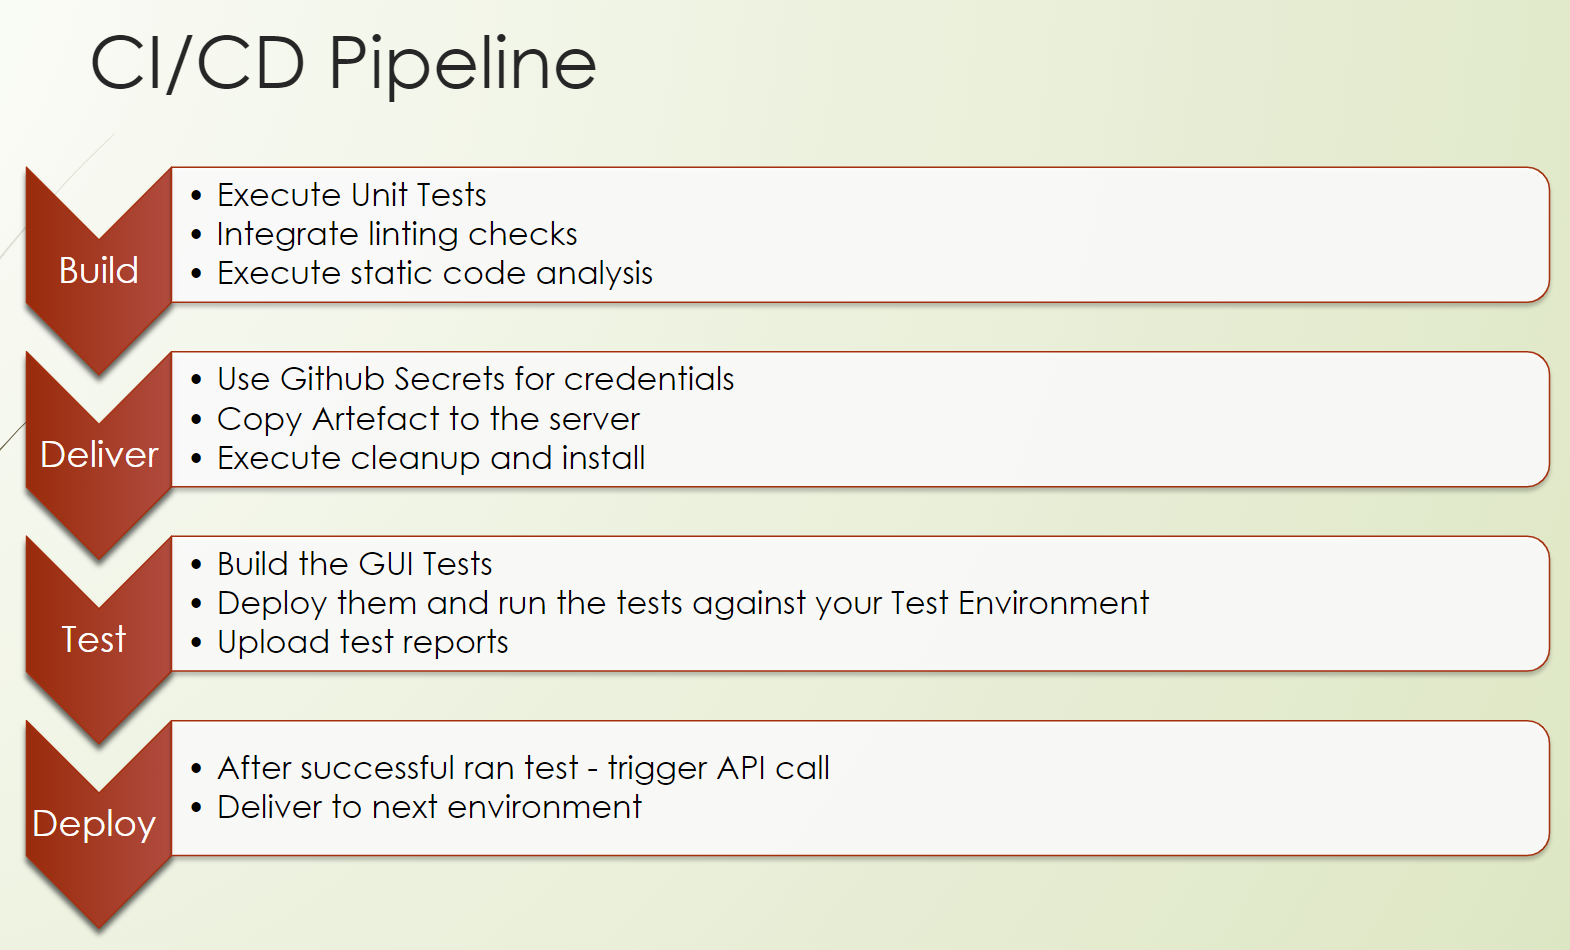
First, we need to create the CI part for continuous integration. This means we are building our product.
So, we do unit tests, we do lintings, we do static code analysis.
This is followed by delivering our artifact to the test environment, including some starting scripts to ensure that our software is up and running.
Then, we will build our GUI tests, so our GUI test repository, and run our tests against the test environment which we have installed in the previous step.
And after a successful run of the tests, we can provision our artifact to the next environment up to production.
So, let's focus on the build.
# CI/CD Pipeline: Build
We are now in the build phase, the so-called continuous integration part of a pipeline.
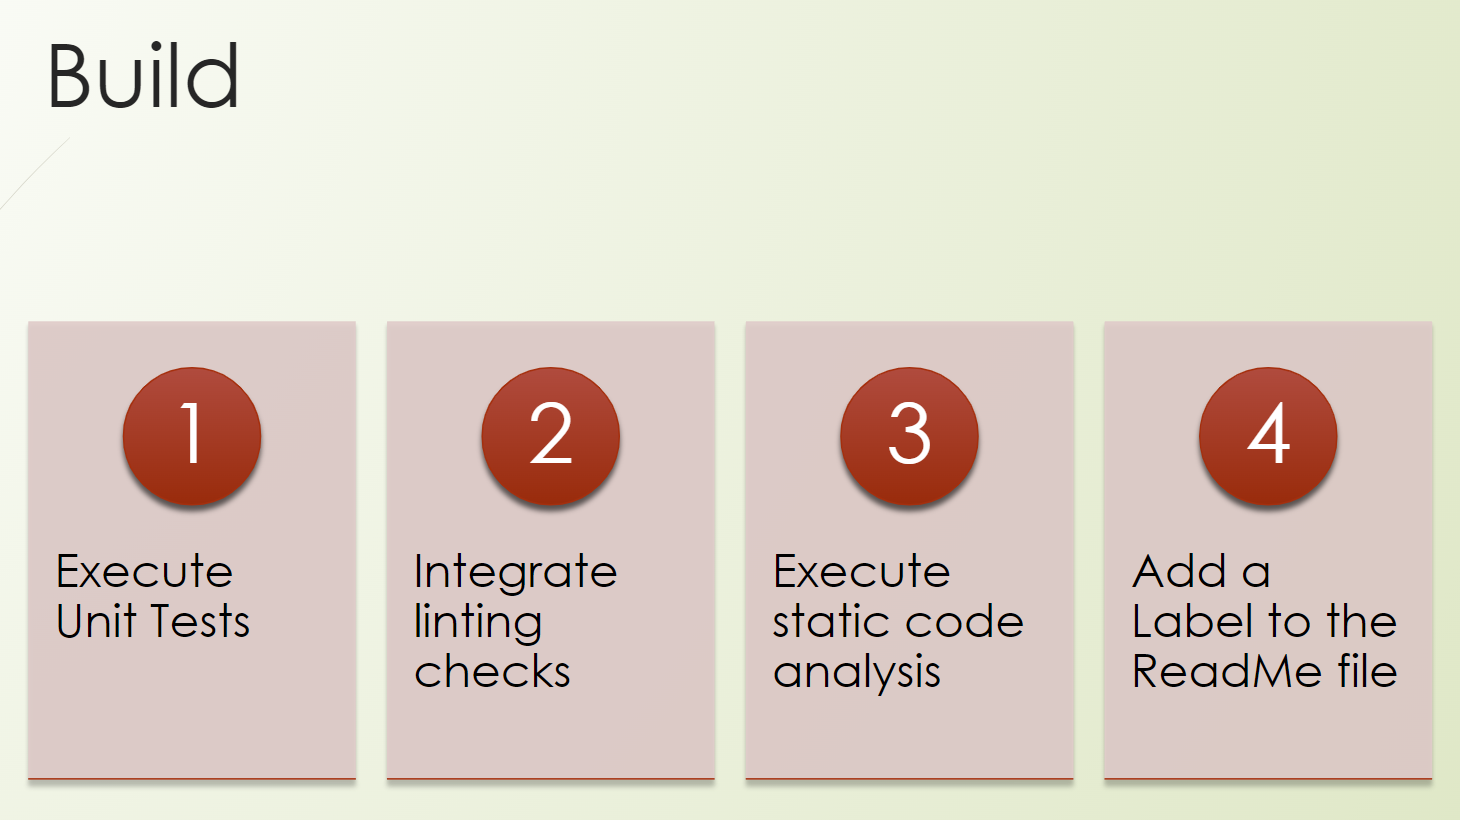
We will write a workflow, and we will trigger our unit tests.
We will also check the possibilities of integration of lintings, or linting checks.
We will execute static code analyzers, which is kind of a security, a “shift-left” approach of security testing.
And we will add a label to our README file. I'm sure you have seen this already a lot, but maybe you have no clue how to do it. And so we will also include it in our product.
Good, we are good to go.
Let's go to GitHub.
We are already at our product, at our repository.
https://github.com/tau-github-actions-for-testing/tau-digital-bank/
So, we want to create a new action, a New workflow without any starters.
We call this “chapter4-e2e-pipeline.yml”.
And because it's not so fancy seeing me typing, I copy and paste it here.
name: e2e pipeline
run-name: Build, Deploy, Test - from user @${{ github.actor }}

on:
  workflow_dispatch:

jobs:
  build:
    runs-on: ubuntu-latest
    steps:
      - uses: actions/checkout@v3


      - name: Set up JDK 11
        uses: actions/setup-java@v3
        with:
          java-version: '11'
          distribution: 'temurin'
          cache: maven

      - name: Run Unit Tests
        run: mvn test
Here we have an end-to-end pipeline workflow.
We use here the run-name for “Build, Deploy, Test” from the user who triggered the workflow.
At the beginning, we will just use here the workflow_dispatch event, which means a manual trigger.
We have the build job, which runs on the Ubuntu, which checks out our repository.
We set up JDK with Maven and run our unit tests.
What we also could do here is, for example, as I mentioned, we can do some linters.
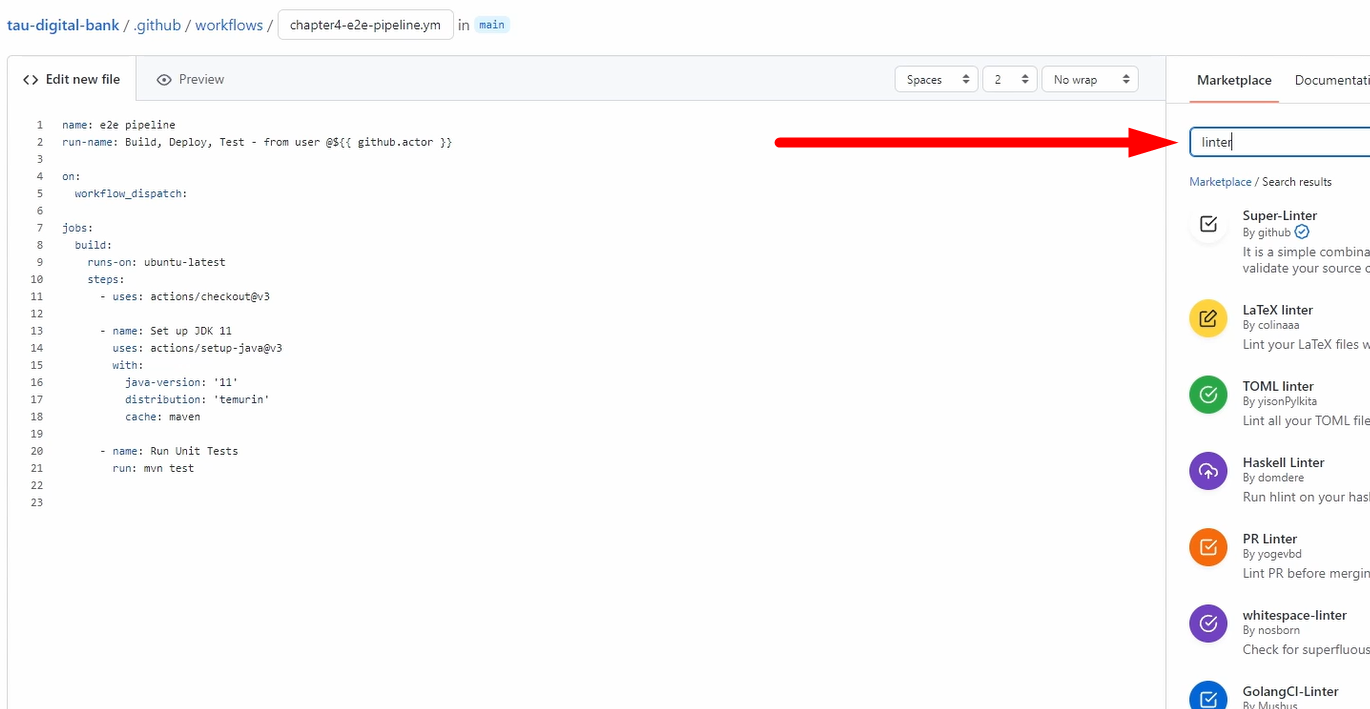
Just go here to the Marketplace and search for “linter” and choose the linter which you like.
So, you can do the check to see if you develop in the same way, so that all developers use these linters, which is, of course highly recommended.
Also, in the pull request, it's also recommended to do it there.
We will not do it now because what I want to do is security checks with CodeQL.
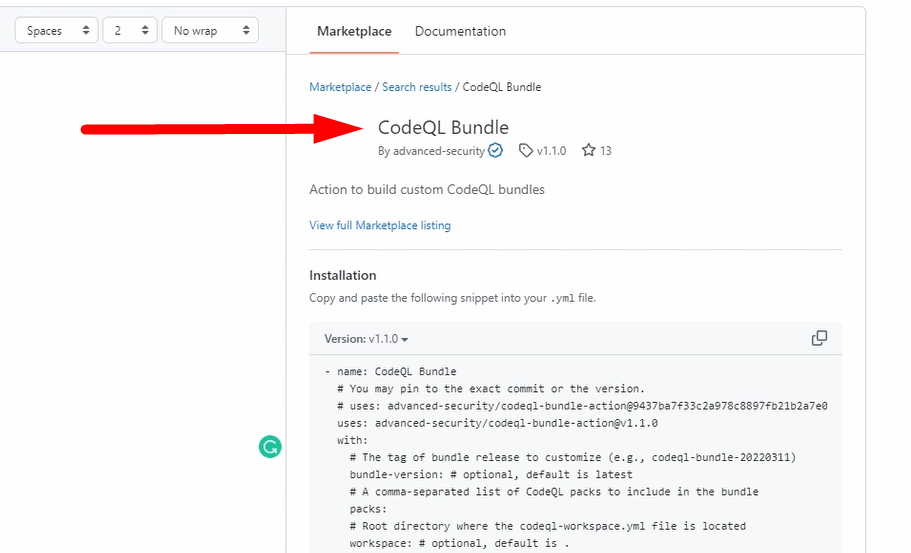
So, using this one, let me copy it because I have it prepared for you.
This step is called “analyze”.
  analyze:
    name: Analyze
    runs-on: ubuntu-latest
    permissions:
      actions: read
      contents: read
      security-events: write

    strategy:
      fail-fast: false
      matrix:
        language: [ 'javascript', 'java' ]
        # CodeQL supports [ 'cpp', 'csharp', 'go', 'java', 'javascript', 'python', 'ruby' ]

    steps:
    - name: Checkout repository
      uses: actions/checkout@v3

    - name: Initialize CodeQL
      uses: github/codeql-action/init@v2
      with:
        languages: ${{ matrix.language }}

    - name: Autobuild
      uses: github/codeql-action/autobuild@v2

    - name: Perform CodeQL Analysis
      uses: github/codeql-action/analyze@v2
      with:
        category: "/language:${{matrix.language}}"
We run here on Ubuntu.
We need some permissions.
So, we just set here the read ones to the actions and to the contents that we don't do anything writing,
But we will write to security-events. I will show you this afterward.
We use here the strategy keyword, and we fail-fast: false, which means in the matrix, which we define, we execute all of them because if it's fail-fast: true, we will then fail.
But we go through all of them.
And here, we can define more values so that we can execute the steps more often.
You can see this in action, then it's much more clear.
Which steps are we doing?
We check out the repository — - name: Checkout repository.
We initialize CodeQL — - name: Initialize CodeQL. Here, you can already see that we use this parameter from the matrix. So, we will initialize it for JavaScript and for Java.
Then, we do the auto build — - name: Autobuild
And we analyze it — - name: Perform CodeQL Analysis — with, again, the language for Java and JavaScript
And you can see this will run in parallel.
Good, let's Commit it.
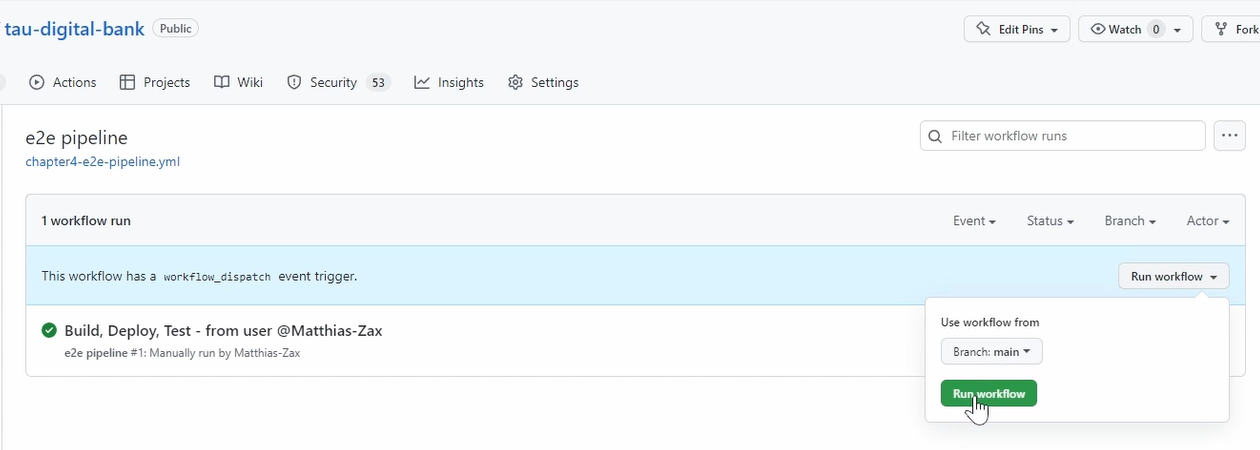
We have it here; we go to Actions.
We have set the manual build, so we need to trigger it manually.
This execution is from before, as I used the same name. So, it's already here.
You can see here is the build step.
And this one is run in parallel because they're not dependent.
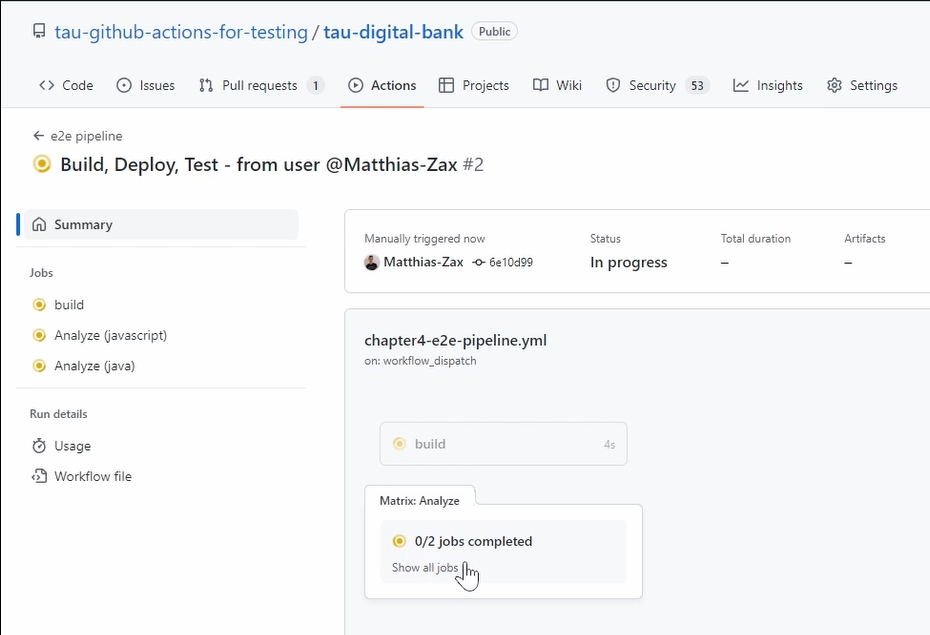
Here, we can see we run our unit tests.
And if we go back, you can see here that there are 2 jobs — one is for Java, and one is for JavaScript.
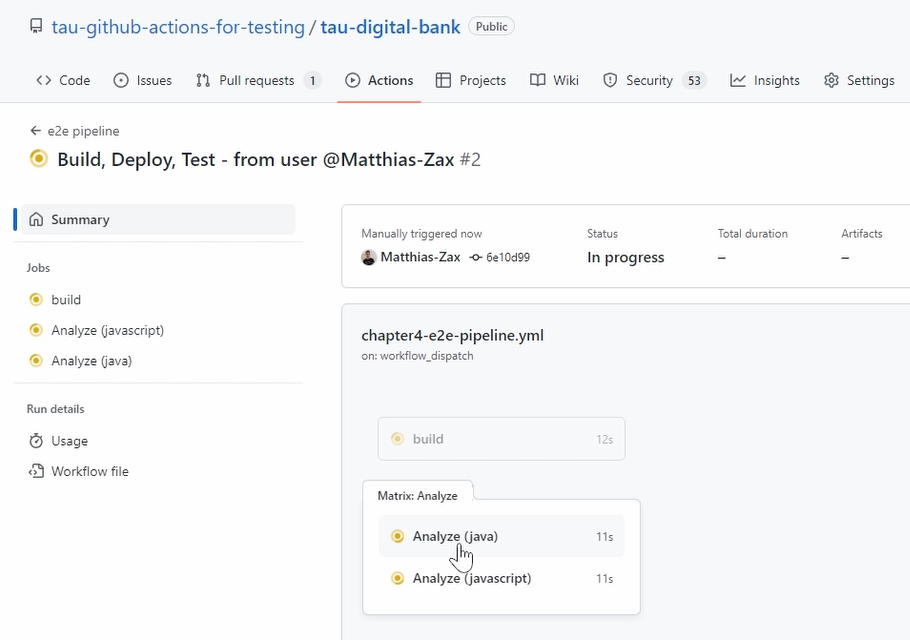
And here we do static code analyses.
Yeah, so let's wait a little bit, and let's check the result.
Good, it's finished. You see the build or the unit test are quite fast.
And the analyzing has also finished after some minutes.
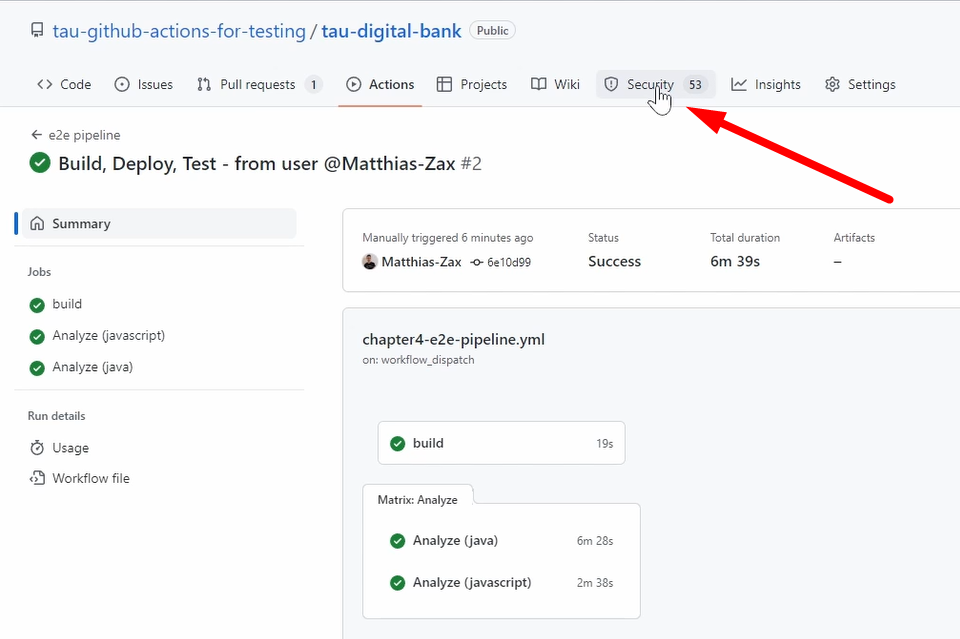
And you don't need to check any reports because CodeQL is very well integrated to GitHub, to the GitHub platform.
And you can see here, the Security tab.
If you go there and you go to Code scanning, you see it found a lot of things, which is okay. It's a demo project, so we have not invested so much here into security.
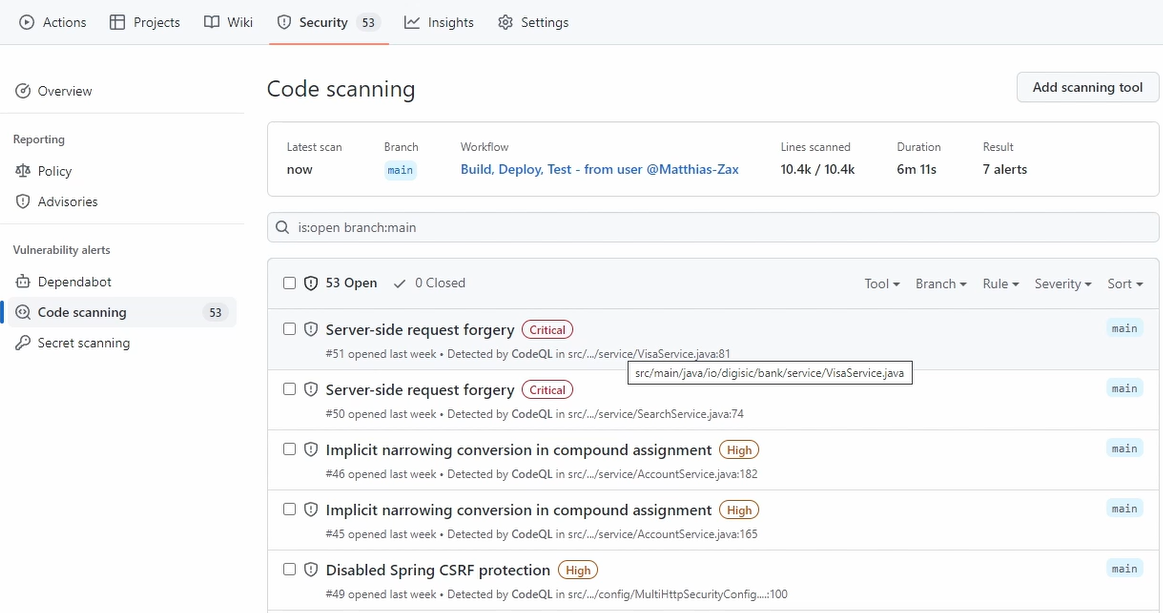
But you have seen how easy it is to integrate, to get already the first things.
If you go here, then you can see all the things, how to fix it, what are the findings, the CWE numbers, and so on.
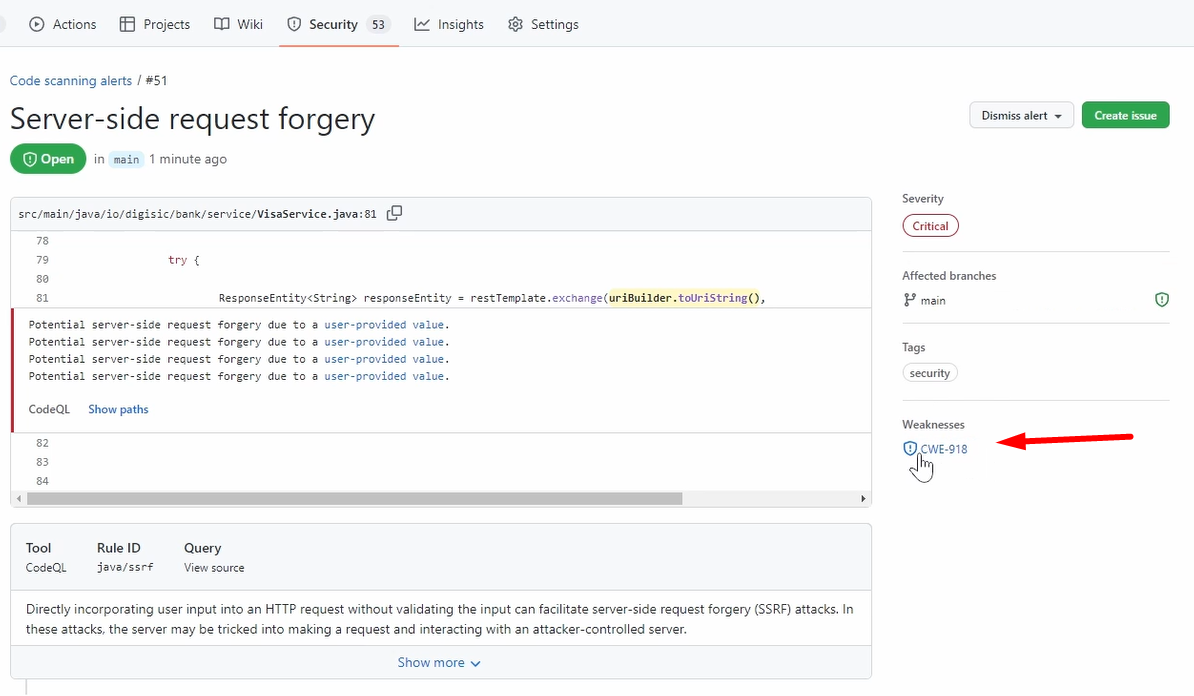
But that's, of course, not the focus now.
You can see how easily we finish now the first phase, the build phase.
And one thing is missing, which I also promised you, is how to create in here a status batch to our README file.
And therefore, we use our nightly-build.yml which we developed.
So, every day at 11:00 PM, we run our build, we run our unit test, and so on.
name: nightly build at 11pm

on:
  schedule:
    - cron: '0 23 * * *'

jobs:
  nightly_build:
    runs-on: ubuntu-latest
    steps:
      - name: Checkout
        uses: actions/checkout@v3.3.0


      - name: Run Unit Tests
        run: mvn test

      - name: Build with Maven
        run: mvn -DskipTests -B package --no-transfer-progress --file ./pom.xml

      - uses: actions/upload-artifact@master
        with:
          name: digibank.war
          path: ./target/*digitalbank*.war
And from this one, we want to add a status batch so that the unit test is successful, the nightly build was successful.
What we need to go do is we need to go to our workflow. We need to go to our last execution.
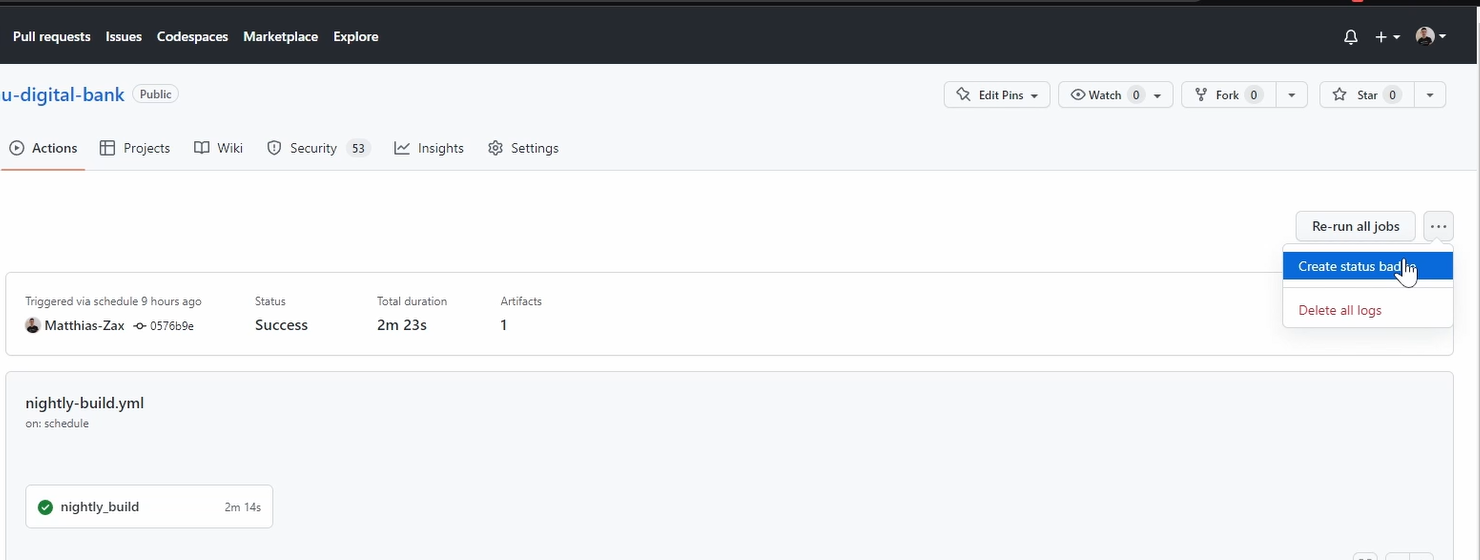
And here, you have this menu where we can say, Create status dispatch.
And you get here already the syntax. Just copy it.
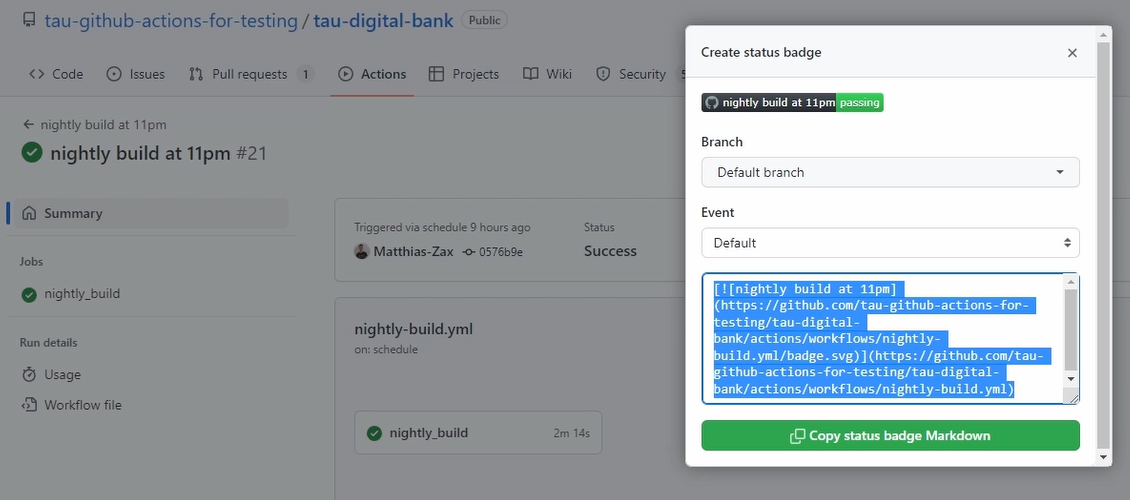
Let's go back. Now, we need to go to our README file.
Yeah, let's edit here. Of course, you can rename that part.
This is the one that we've shown, and this is the part where it gets the status from.
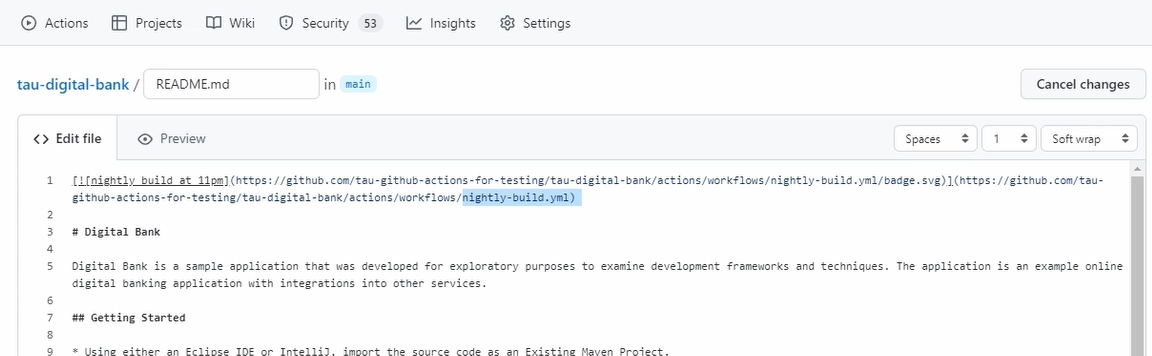
You can see it here from our “nightly-build.yml”.
Good, let's save it.
You can see it's already displayed. But let's go back to the main page, and you can see here our cool status badge.
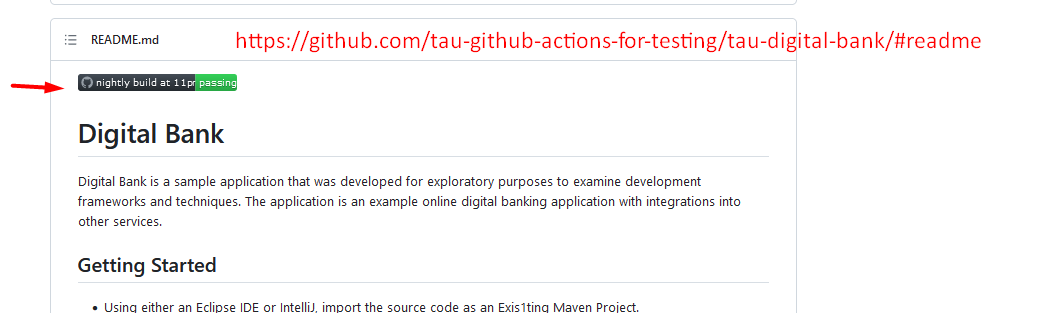
So, this gives the information that the last job or last execution of this workflow was passing.
That's very valuable because this is mainly now talking about the unit tests, and of course, the artifact is there.
And it shows the potential. You can create several batches. You can add their information, which you want to provide for everyone.
This is a very powerful feature and very broadly used.
Now, we covered everything that we wanted to cover.
We build and run unit tests, linter static code analyzers, and now, the status batches.
And let's go to the next phase.
Resources
- GitHub Documentation: Events that trigger workflows
- Git Repo Course Code: workflows
- Git Repo Course Code: Chapter 4 End-to-End Pipeline
Quiz
The quiz for this chapter can be found in section 4.3
