

Transcripted Summary
In this course we'll be using .NET Core version 2.2 — this isn't a specific requirement for using NUnit though.
NUnit supports .NET 3.5, .NET 4.0, and .NET 4.5, as well as .NET Standard 1.4 and .NET Standard 2.0, which means pretty much wherever you or your team is running .NET, you can use NUnit.
NOTE FROM MICROSOFT
.NET Core 2.2 has reached end of life, meaning it is no longer supported. We recommend moving to a supported release, such as .NET Core 3.1. See our support policy for more details.
# Installing the SDK
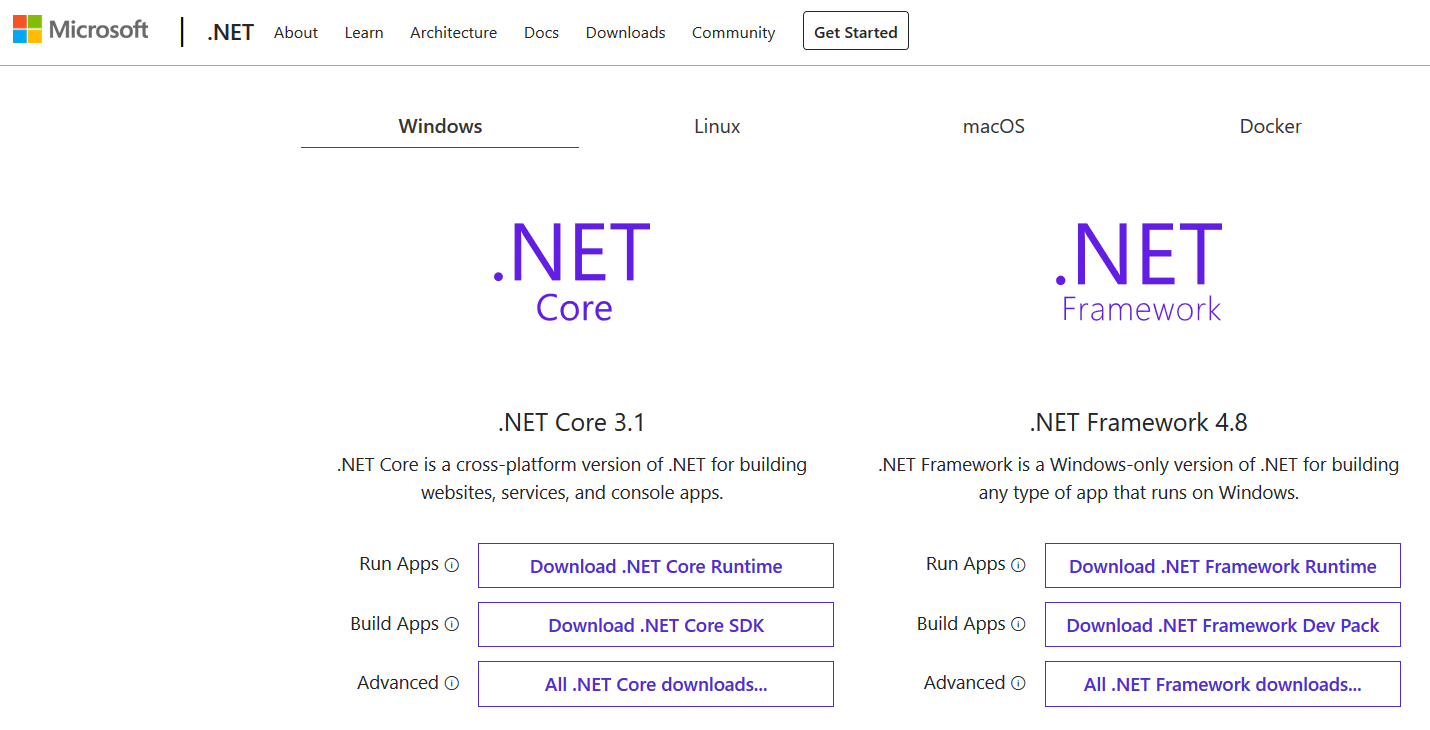
In order to get started with .NET Core, first I need to download and install the .NET Core SDK.
You can download the SDK from the download page on a Microsoft's .NET website.
Alternatively, if you'd like to use a package manager, the .NET SDK has packages available for both Windows and Mac.
For Windows, you can use Chocolatey.
Just navigate to chocolatey.org and we'll search for the .NET SDK, and you'll see the first result is what we're looking for.
If you're using a Mac, you can use Homebrew.
Go to brew.sh and search for .NET SDK and you'll find the cask package. So now that I've found the package name.
Since I'm using a Mac, I open up a command prompt, enter brew cask install dotnet-sdk and Homebrew will download and install the SDK for me.
If you don't already have a package manager installed but are intrigued, both sites have documentation that will guide you through installing and using them.
I really recommend using one. They come in particularly handy whenever you need to install new software or set up a new machine.
# Choose Your IDE/Editor
Next, we need a place to write our code.
There was a time when this wasn't even a question, but today with .NET Core we have a quite a few really nice options for where you write, build and test your .NET code.
Visual Studio is probably the most common choice for .NET development.
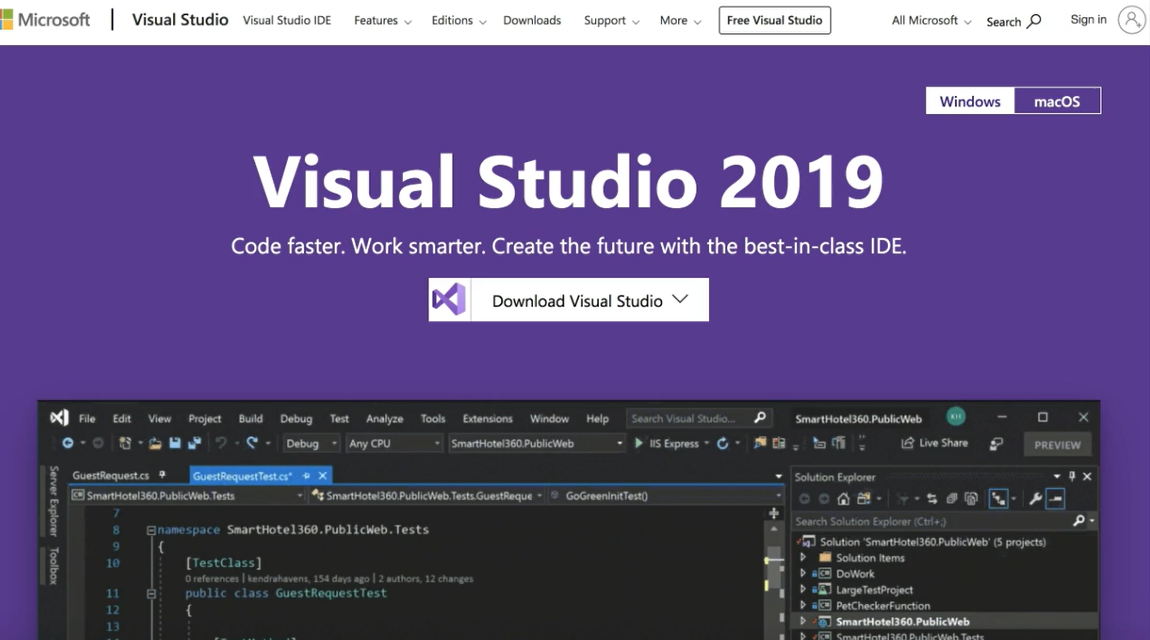
You may already have Visual Studio installed, but if you don't, don't worry. Microsoft offers the community edition, which is fully featured and can be downloaded from their site for free.
In terms of other IDE experiences, there's also JetBrains Rider and this is built by the same team that created the popular ReSharper plugin. It's not free but it's cross-platform and it has all the bells and whistles and refactorings that ReSharper offers.
If you prefer, you can choose a code editor like VS Code and with the right combination of plugins and extensions, have a very nice test automation authoring experience with code completion and Intellisense and even debugging.
All of these choices have great support for NUnit with integrated test runners to let you run or debug a single test or group of tests.
Some provide support inside the actual code editor window for running and debugging tests and this helps produce context switching, which makes the test writing process even more convenient.
You could even choose your operating system. Any of these choices or quite nicely with Windows or Mac OS. So, depending on your test automation frameworks architecture or your testing needs.
If you're using a Mac, you may not even need Windows or Virtual Machine. In fact, I'll be using a Mac with the Rider IDE for this course.
# Create a Test Project
Next, we'll create a new project which will serve as a home for our tests.
If your team has already started automating tests, this is likely already been done. But it's still a good idea to know how projects are constructed, in case you are starting a fresh project or need to address potential merge conflicts in these files in the future.
To take some of the magic out of what our IDEs do, we'll start by creating a project on the command line using the .NET CLI.
Since we're starting from scratch, we'll first create a solution file.
If you weren't familiar with solution files, they basically act as a way to group projects together and help make the build process easier. If you're used to using Visual Studio, these are the .SLN files, you're typically opening.
To create a solution file from the command line we'll enter
dotnet new sln –name TestAutomationU
Now we have a solution file.
Let's create a new test project.
To make the process of starting a new project with NUnit easy, the NUnit team has created a project template for the .NET CLI. The template is included with the .NET SDK.
And to use it, we enter...
dotnet new nunit
...and then to give it a name -n and the name we'll be using is TestingWithNUnit.Tests.
dotnet new nunit -n TestingWithNUnit.Tests
We can see what this command did on the command line using the name provided, it created a folder for us with a .csproj file inside of it.
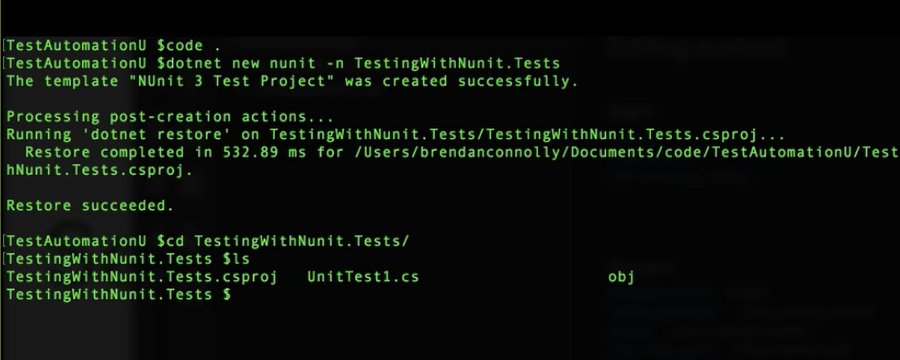
It also created a sample test file to help people get started.
If we open the project file using our IDE, you can see that all the package dependencies required for using NUnit are included.

Finally, we'll link the new project with our solution using the command dotnet sln add, along with a path to the new project file.
dotnet sln add Tests/TestingWithNUnit.Tests.csproj
The command line may not be your cup of tea but don't stress.
Both Visual Studio and Rider have any of the templates built in ready for you to use. And ultimately, they do exactly the same things as we did on the command line.
With Rider open, just right click on the solution, and go to Add and then choose New Project.
Choose unit test project from the .NET Core section and you'll see that the default has NUnit already selected.
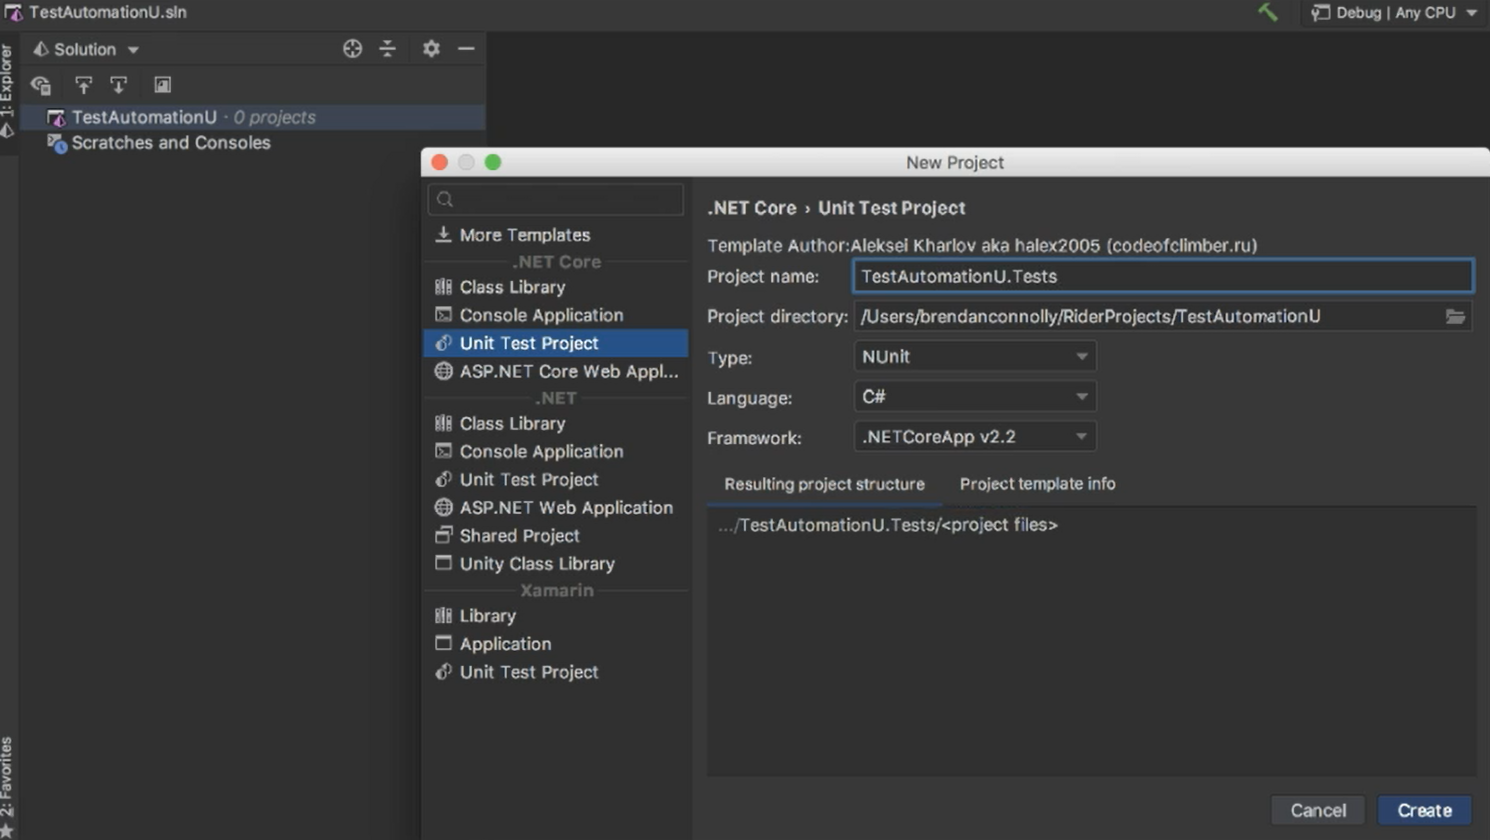
We just need to enter the name of our project and click Create.
Now if we take a look at the new project file, you'll see that it looks just like the one we created using the .NET CLI.
If you prefer not to use any of the template options, you can also add the NUnit Nuget packages directly to any project.
To do this, right click on the project and select, Manage Nuget Packages, and then search for “NUnit”.
Then add the NUnit and NUnit 3.0 test adapter packages if your environment requires that the NUnit GitHub repository has a releases page, where you can download a zip file of either the pre-compiled files or the full source of the project that you can extract and use as your context needs.
