

Transcripted Summary
Now that we've got the environment set up with the solution and test project, we can get down to the business of actually using a unit by writing and running tests.
Let's jump into writing our first test and in that process step through the components we need to add so that we can utilize the NUnit framework.
# Components of a Test
We'll start out with the new empty class file since one was created for us when we created the project.

We can make use of that one.
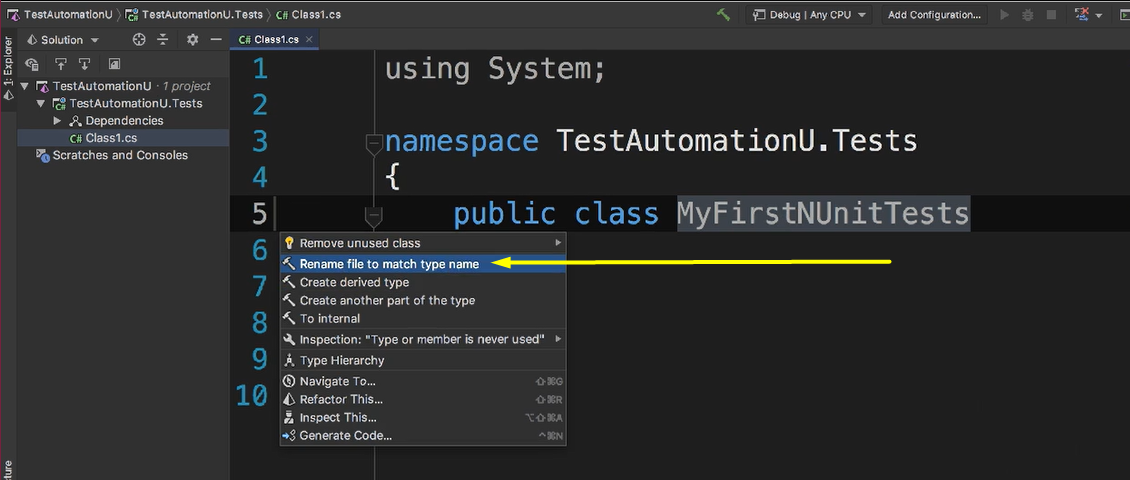
“Class1” isn't the most useful or descriptive name and since code is read more often than it's written, we want to model good behaviors for all of those that come after us.
Let's start off on the right foot and rename the class to something a little more descriptive. Let's call it “MyFirstNUnitTests”.
It's also a common practice to have your file name match the class name.
Don't worry if these conventions are new unfamiliar to you. They're optional, so don't let that block your progress and you tend to pick them up over time. And in fact, your IDE or editor may help you recognize and maintain these common conventions. And this is one of those cases.
We can click the light bulb icon and choose the Rename File option.
Now that we have a test class, in order for NUnit to be able to recognize and execute our tests, we need to do a couple of things.
To help visualize this, I have the integrated test runner in my IDE visible, and you can see there's nothing for us yet. So, let's work on changing that.
First, we need to add a using statement at the top of the file for NUnit.Framework. And this is just so the compiler can know that we'll be using NUnit inside of this class.
We don't need to do anything at the class level for NUnit to discover our tests, but we do need to add a method within the class to create our first actual test.
To create one, we'll enter a public void and let's call the method, “IAmDoingGreat”.
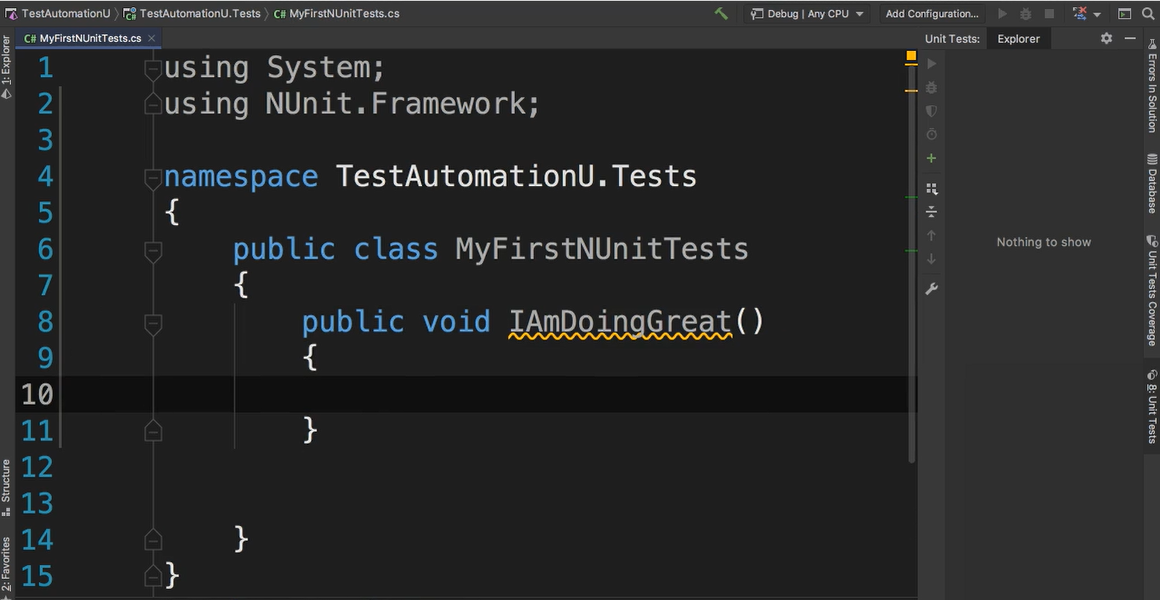
And you may have noticed that even though we added a method for our test, there's still no change to our test runner.
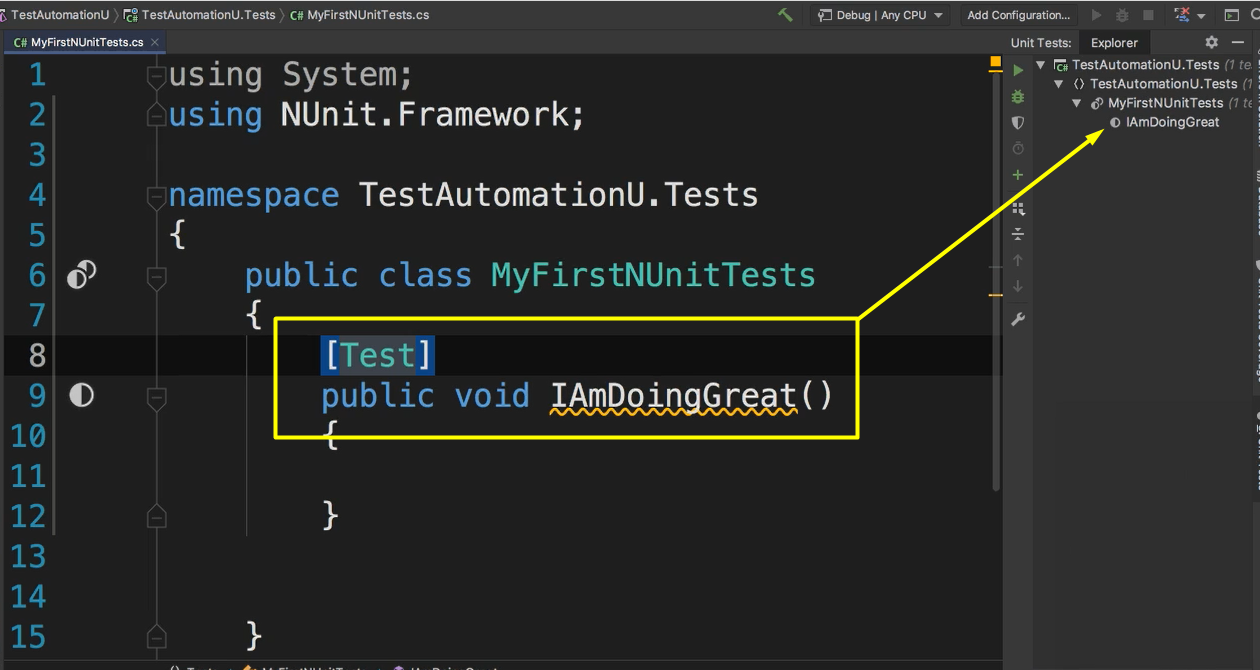
This is because NUnit expects us to identify our tests — and we can do this using the test attribute.
And once we add the test attribute — [Test] — you'll see that the test runner now updates, and we have a test we can run.
While we have a test we can run, we're still missing probably the most important component of a test — and that's an assertion.
Without assertions, barring any unhandled exceptions interrupting test execution, whatever actions and behaviors inside the test we have, there'll be no verification. The test will always show as passing.
So, to remedy this, we'll add a simple assert to the test. We'll use Assert.True. And because it is, we'll pass the value “true”.
using System;
using NUnit.Framework;

namespace TestAutomationU.Tests
{
	public class MyFirstNUnitTests
	{
		[Test]
		public void IAmDoingGreat()
		{
			Assert.True(true);
		}
	}
}
And with that now we have all the components for a good and functioning NUnit test.
# Running and Debugging
Now that we have our first test, let's take a look at how we can start running and debugging our tests right here inside of the IDE.
To do this, we'll turn our attention to the test explorer.
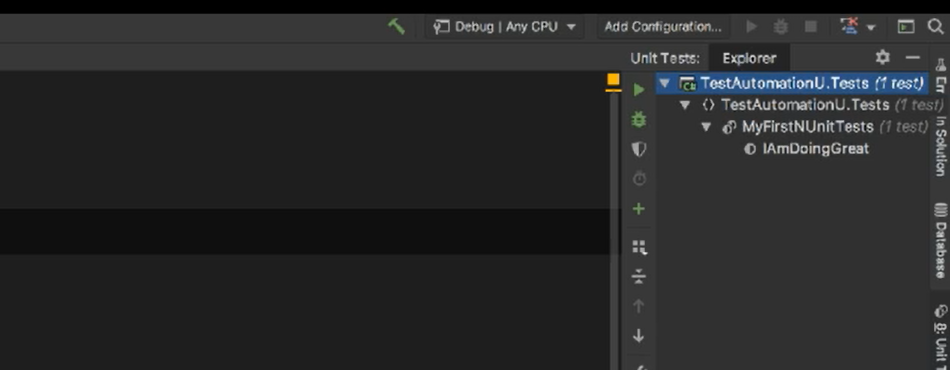
The first thing you might notice is how it's grouping our tests.
This will vary depending on the IDE or editor you're using, but in this case, the default grouping has the top level as our test project.
And below the project level we'll see the namespace and then the test class and finally we'll see our test methods.
To run our test, we'll select it in the test explorer and then click the green triangle icon.
Alternatively, you can right click on the test and choose the Run Test option.
Now we've started a test run.
You can see the status change in the test explorer indicating that the test is being executed. And once it completes, we'll see visually the result indicated here.
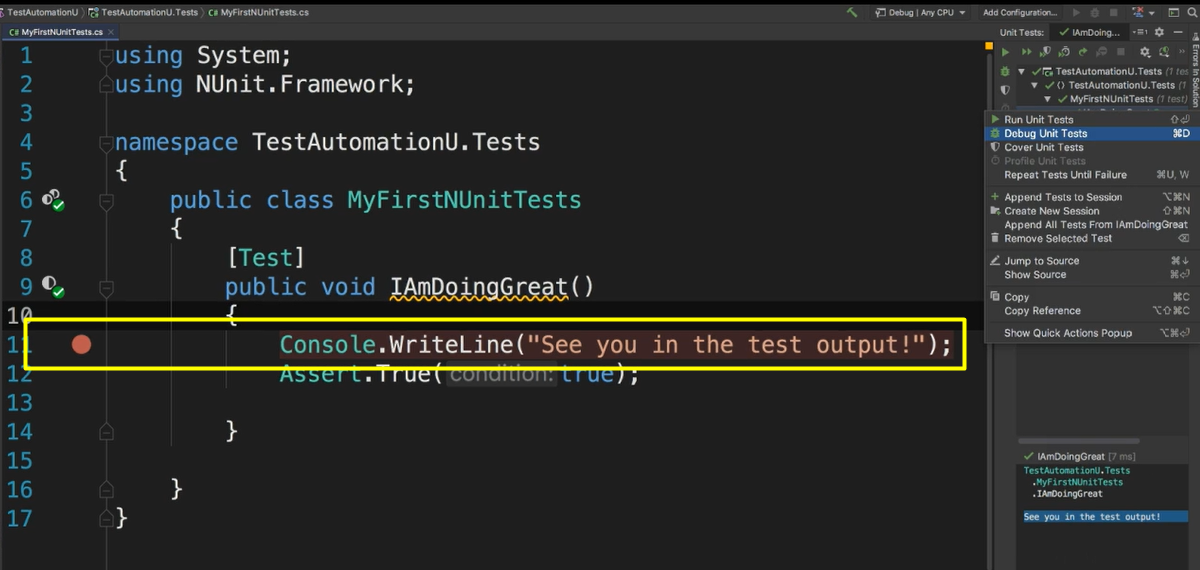
In addition to the test result status, any output from the test like logging or console and debug statements will also be captured and directed to the test explorers output pane.
To see this, we can add a console write line statement by entering Console.Writeline( ) and we'll pass the message, “See you in the test output”.
And run the test again.
The process is pretty much identical for debugging tests — I'll set a break point inside of our test so that we can break before the console statement.
Then we'll select the test again in the test explorer and we can either click the bug icon here or right click and select the _Debug Test _option.
Our test is now running with the debugger attached and we can see that our breakpoint gets hit.
From here we can inspect, step over or into methods, and investigate or uncover what might be causing our tests to not behave exactly how we expect it to.
From here, we'll step over the console statement and you can see that a message gets logged to the test output pane and our test finishes successfully.
If you want or need to run multiple tests, you can do that here too.
We have the ability to execute tests at any level in the hierarchy by clicking the group we want and then using the run or debug icons or right clicking and choosing the desired option.
# Adding Test Methods
Since we know the mechanics of writing a basic test and how to run and debug it, we can take a closer look at our options for adding more tests with NUnit.
Tests in NUnit are just methods.
Your test methods can be instance methods like this one, or a static method.
So, if we add a new test as a static method entering public static void ThisIsAStaticTest.
And then take a look at our test Explorer. You can see that it gets added to our list of available tests.
Your test methods also need to be marked as public.
So, if we change the method to private or internal, we can see that the tests are no longer available for us to run in the test explorer.
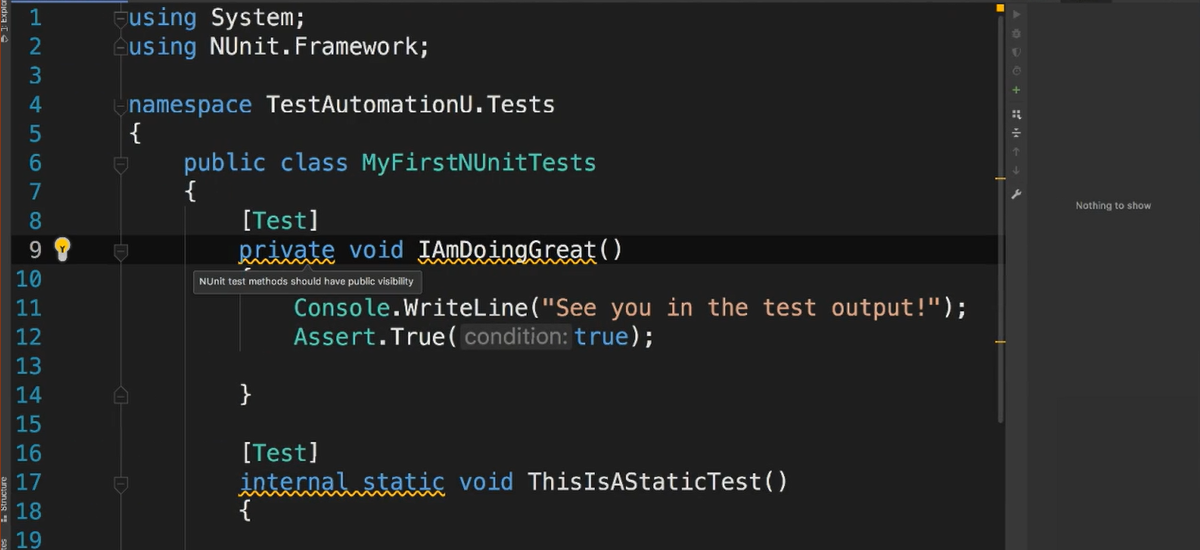
Your IDE may also be warning you here, so let's make it happy and get our test back into the test explorer by making these methods public again.
In all but a select few cases NUnit test methods do not use the return value of the method, so they should return void.
One exception to this though are asynchronous test methods.
NUnit does support async test methods. They just need to return a Task or a task of T if your async test needs to return a specific type.
So, if we change the test to be async by adding the async keyword, you see we get a warning from our IDE reminding us that we need to change the return value.
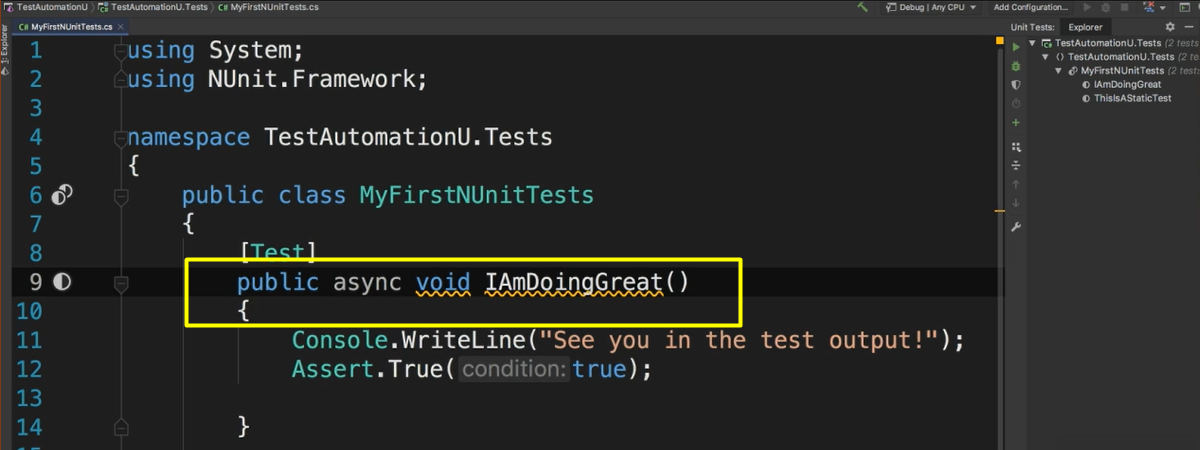
You may have noticed that the test is still being recognized in the test explorer.
If we attempt to run this test, you'll see that it fails, and the message return reminds us that the async test methods must have non-void return types.
To resolve this, we'll replace void with Task.
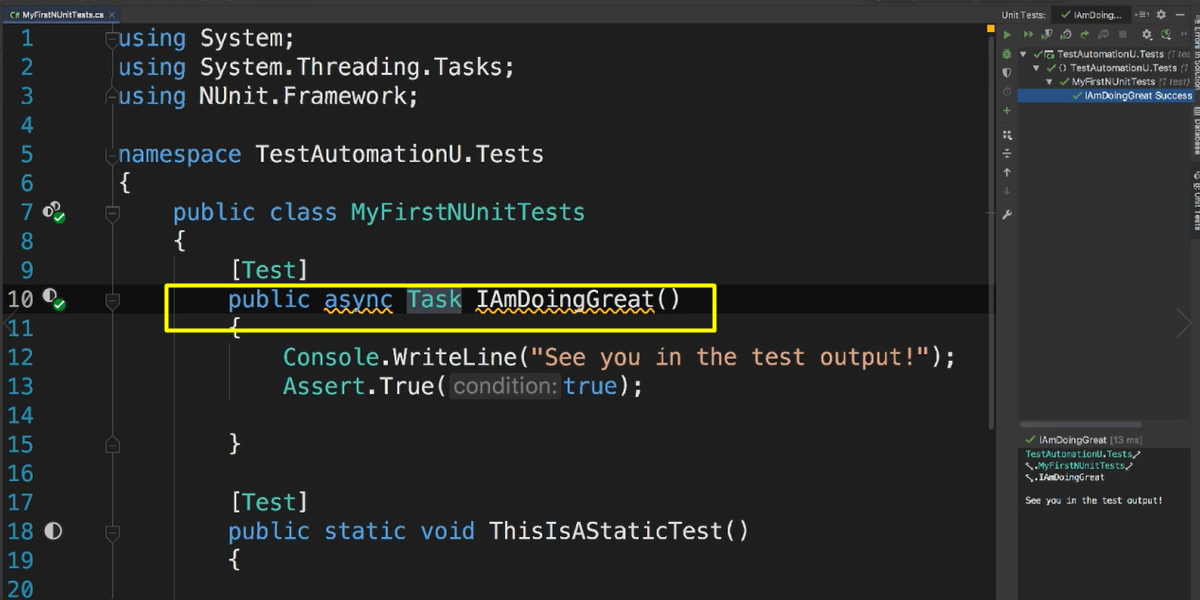
And then if we rerun the test, you'll see that it now passes.
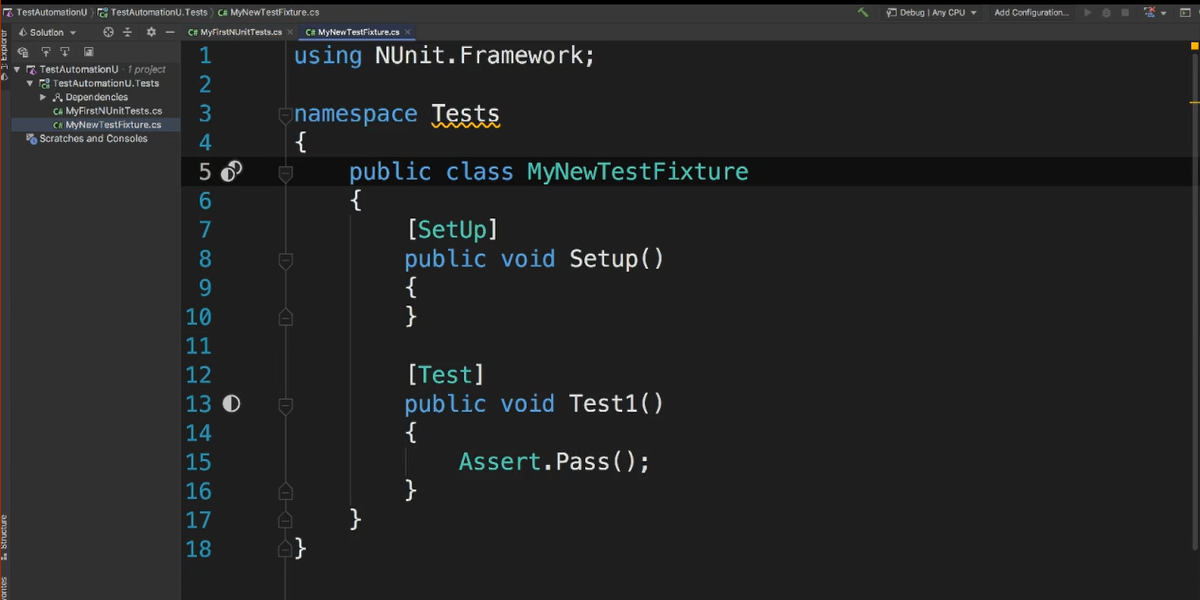
# Adding Test Classes
When it comes time to test a new component or page, you'll want to start adding files to the project for new test classes.
NUnit refers to these test classes as test fixtures.
Similar to when we created the test project, we'll have a few different options for easily adding test fixtures.
First, we'll look at using the command line — we can use the .NET CLI and the NUnit test template.
To use it from inside our test projects directory, we’ll type:
dotnet new nunit-test -n MyNewTestFixture -o .
And run it — -n is the name of our test class, and -o is going to be the output directory.
If we return to the IDE, we'll see that this created a new .cs file. And we'll open that file and you can see it created a test fixture class with a reference to NUnit and a class inside of it that we can start adding tests to.
We don't have to use the command line though.
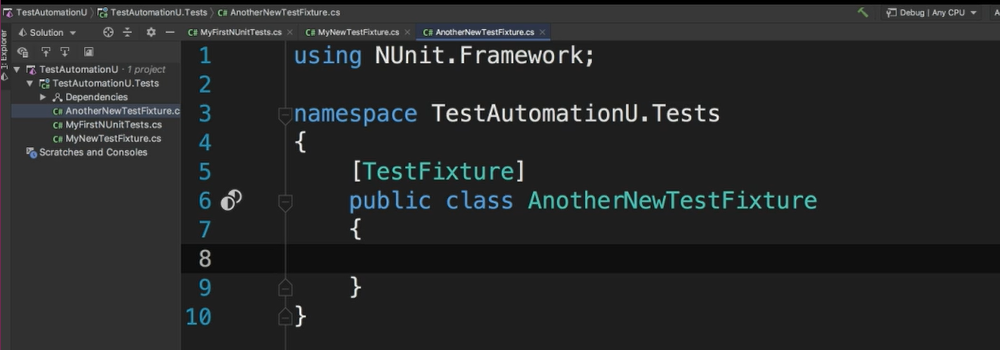
We can right click on the project and select Add and then choose the _Test Fixture _option.
Then we just need to give it a good name and click OK.
Opening up the file that was created, you can see that the Rider template is slightly different, but it still has all the references that we need to start adding tests.
Your editor may not have a built-in test fixture option by default.
The templates are really just a convenience though, and all you need is to create a new class. So however, you prefer to do that will work.
Visual Studio does have an NUnit template extension that you can install if you like, and I've included a link to it in the resources.
You may have noticed the test fixture attribute added to the class decoration on these new test fixtures that we've created and be wondering about it, since we didn't add this to our first test class.
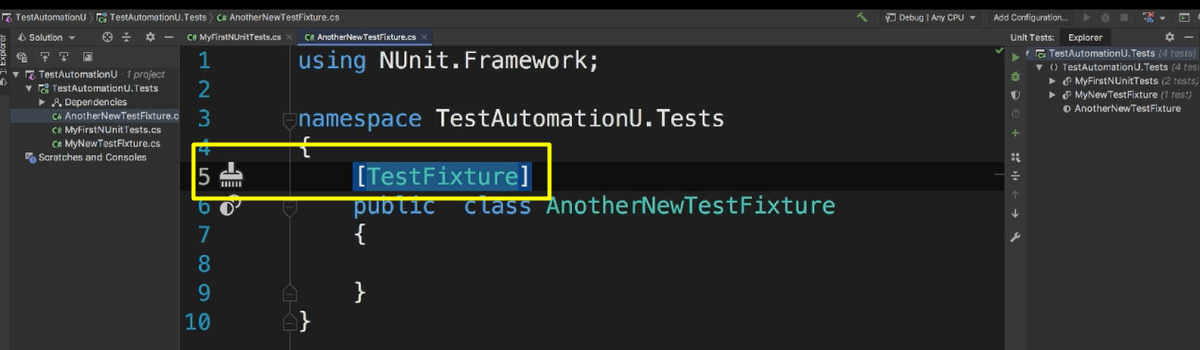
This attribute is used to indicate the class contains tests. However, it's optional in NUnit three and has been since NUnit 2.5.
In most cases, unless you're using parameterized or generic fixtures, you won't need to include this attribute.
Don't worry, we'll be talking more about the test fixture attribute and about the different ways to use test fixtures later in this course.
