

Transcripted Summary
The Constraint Model is the recommended model of assertions to use in NUnit 3, and it's been a part of NUnit since version 2.4.
Unlike the Classic Model where each assertion was a different method on the Assert class, when using the Constraint model, we'll still be using the Assert class but all the assertions start with the That method.
So, it reads as Assert.That, and the first parameter is the actual value, and the next parameter is the constraint that you want to apply to that value.
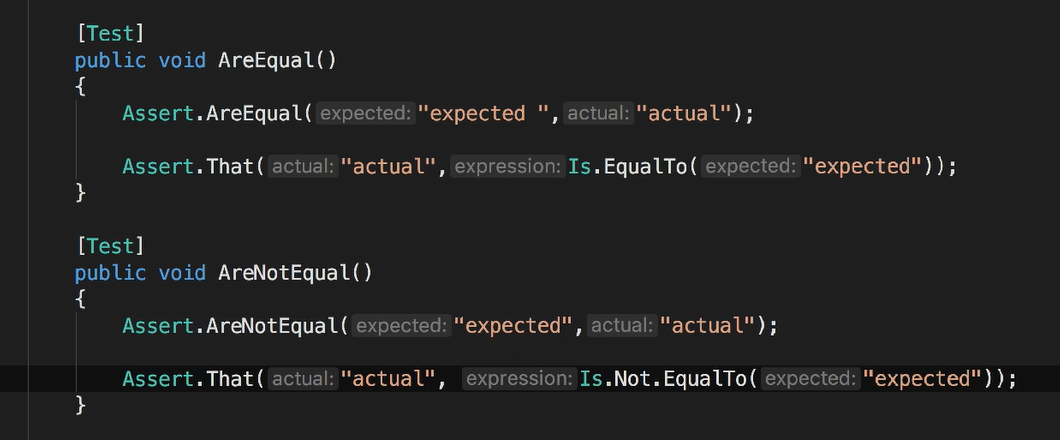
For example, in our first test where we wrote 'Assert.AreEqual' and then we pass the “expected” and then “actual” values.
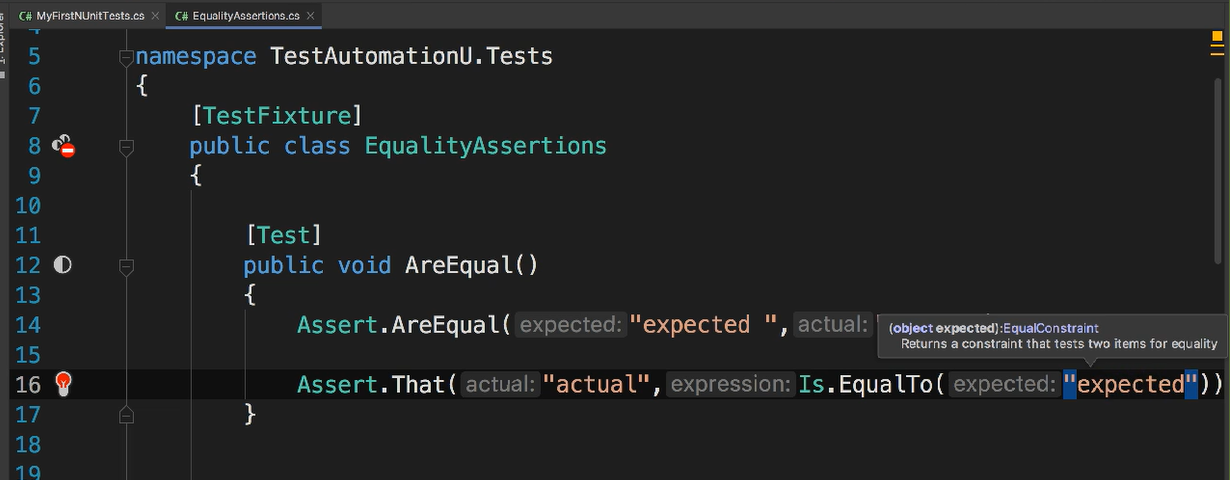
Using the Constraint model, this becomes Assert.That and then we pass the “actual” value, and then for the next parameter we'll say Is.EqualTo and then we'll pass the “expected”.
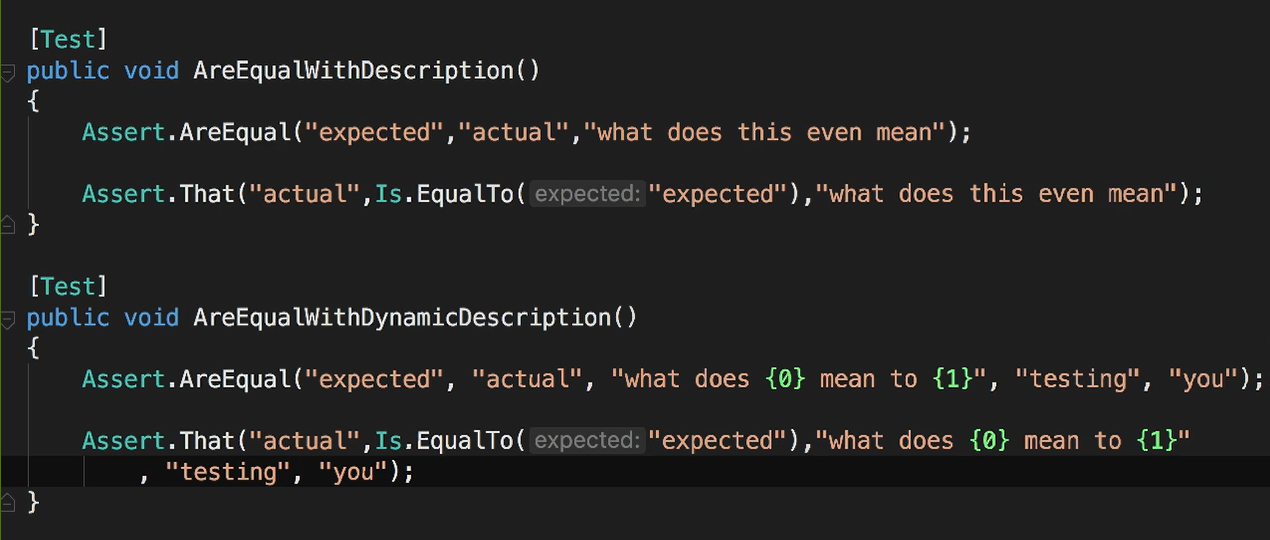
The That method also has the same optional parameters for including a description.
The concept of constraints in NUnit was modeled after a concept from jMock and NMock.
And I really like the way NMock describes constraints as 'mini rules'.
It frames things nicely, because the Constraint model in NUnit is more than just a syntax change. It lets you compose a series of these mini rules, and then apply them to your actual value.
# Using Constraints
As we started using the Constraint model, I wanted to draw your attention to the order of 'expected' and 'actual' values.
The Constraint model flips the order so that the 'actual' value is the first parameter, instead of the 'expected' value.
Personally, I find this more intuitive and readable, but it can be something to keep in mind if you find yourself upending existing assertions to use the Constraint model.
# Constraint Groupings
Now that the Assertion class is not our starting place for discovering the different types of assertions, NUnit helps you by grouping the constraints into helper classes.
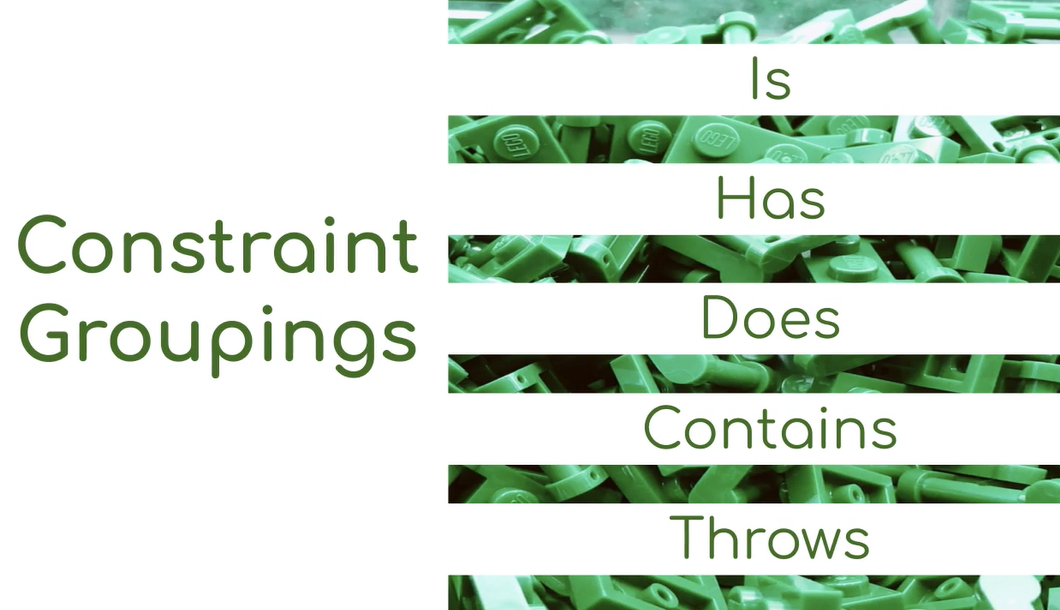
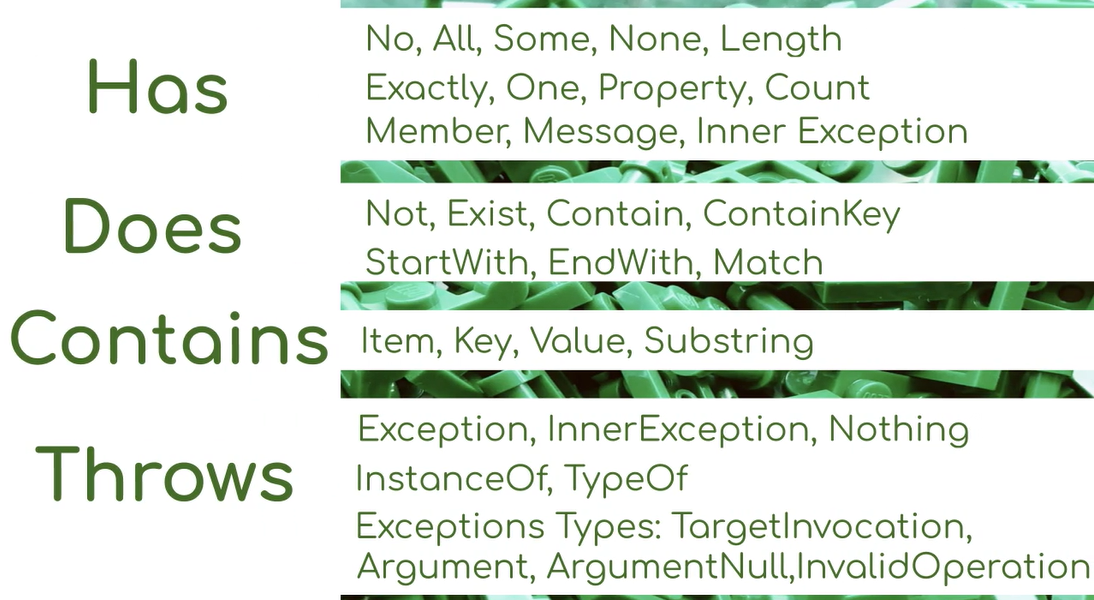
Your constraint expressions will start with Is, Has, Does, Contains or Throws.
For your reference, I've listed here, the methods available on all of these helper classes.
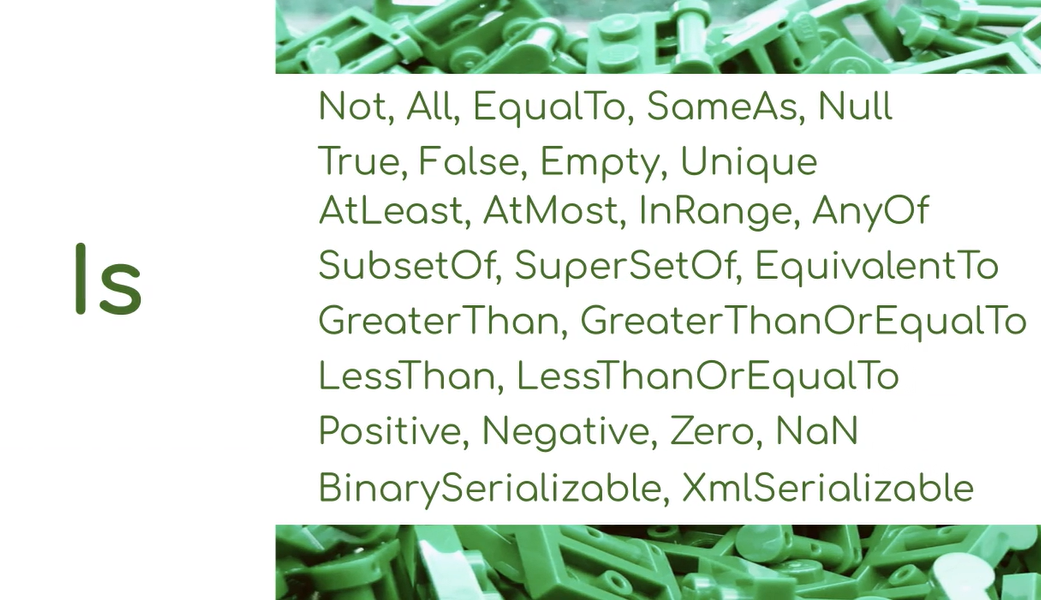
And you'll notice Is contains the bulk of the constraints.
Is is a keyword in VB.NET, and to get around this NUnit provides the IZ version of that class to avoid the conflict.
As you look at these helper classes, you can see that the grouping isn't really based on a particular type of assertion.
It's more aligned with how the constraint would be said verbally, as you might explain your assertion to a person.
In the Classic model, each condition you want to validate required a separate method to contain the logic for the assertion.
The Constraint model allows you to compose multiple mini rules together and use them inside a single assertion.
To do this, the constraint model provides a fluent interface that allows you to chain constraints together.
To see this will use EqualTo as an example again.
The Classic model had two separate methods for 'AreEqual' and 'AreNotEqual'.
The Constraint model though, doesn't have a specific NotEqual method. Instead, we use the Not. constraint and then the EqualTo constraint.
Again, I find this syntax easier to understand. You don't have to keep as much context in your head, you just read the assertion like a sentence.
# Flexibility of Constraint Model
There's more to it though than just readability — this flexibility allows us to create assertions that just aren't possible using the Classic model.
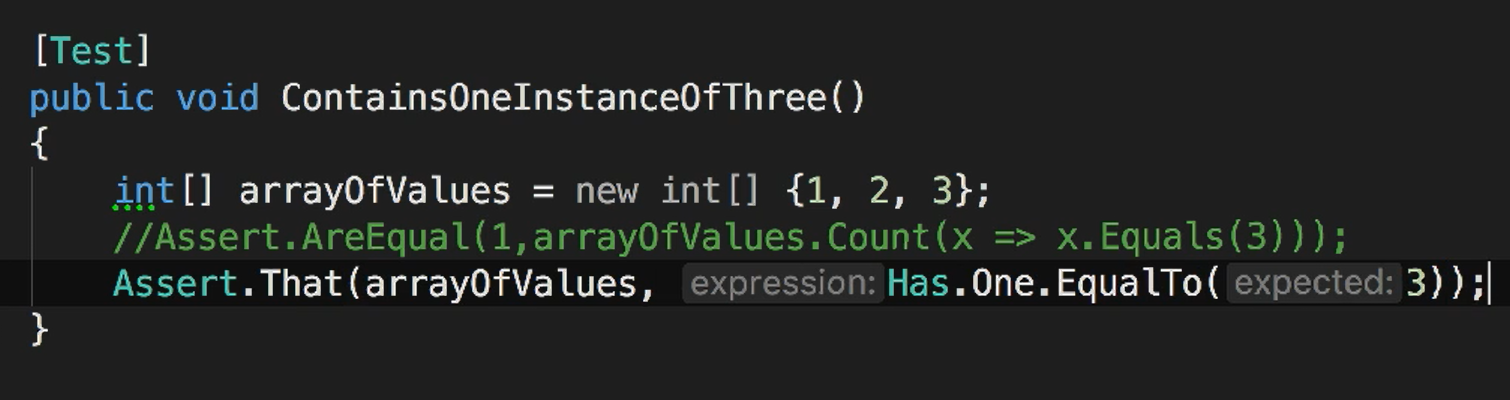
For example, if you want to verify an array contains just one instance of the number 3 in it, there really isn't a clean way to do this in the Classic model. You could do something like this and use the Count method on the array, and it will pass.
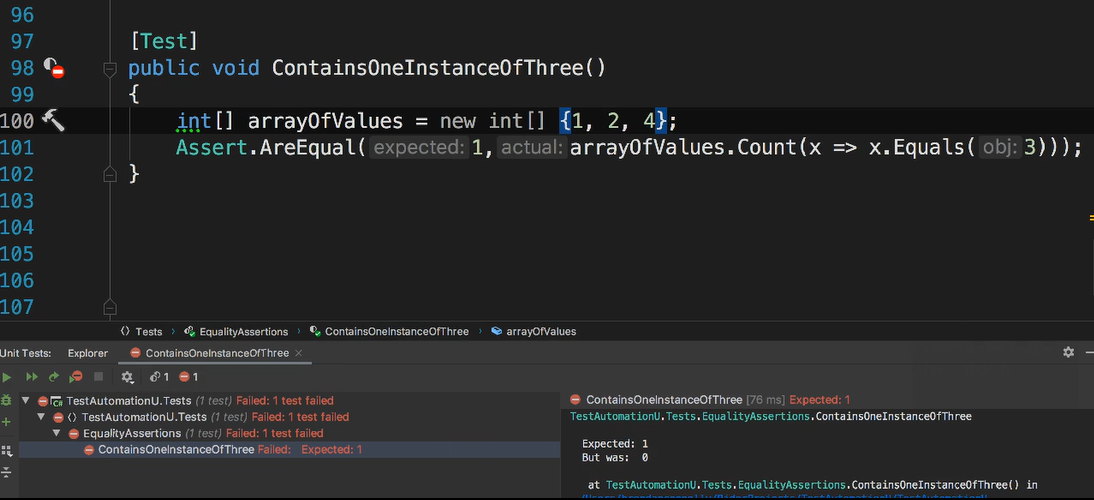
But if we change the value so that the test fails, which you'll see is the failure message, just isn't very helpful.
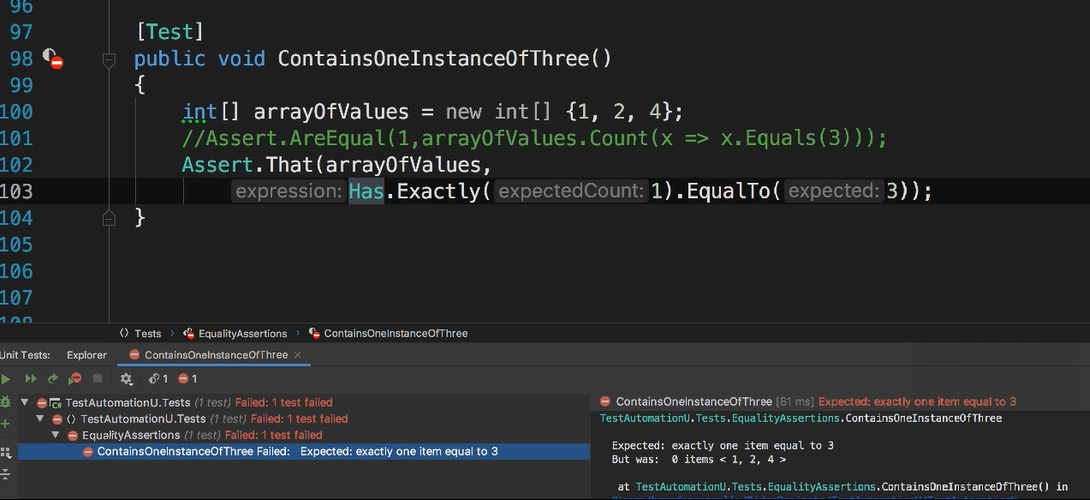
Using the Constraint model, we can write Assert.That and then for our constraint say Has.Exactly 1 to 3.
And if you'd make this test fail, you can see that the failure message is much more useful.
In many cases there are different series of constraints that can accomplish the same result.
Using the same example, we can replace the Exactly constraint with the One constraint and have the equivalent result.
# Compound Constraints
The Constraint model also provides what are called Compound Constraints.
We saw an example of this earlier when I used to Not constraint to demonstrate Not.EqualTo.
In addition to Not, there are 2 additional compound constraints — And and Or.
This allows us to write assertions with multiple conditions that will only succeed if both conditions are met.
For instance, to check if this value is more than 5 and less than 100, we can enter Is.GreaterThan, put the value 5. And then using the compound constraint And we can apply the LessThan constraint with the value 100.
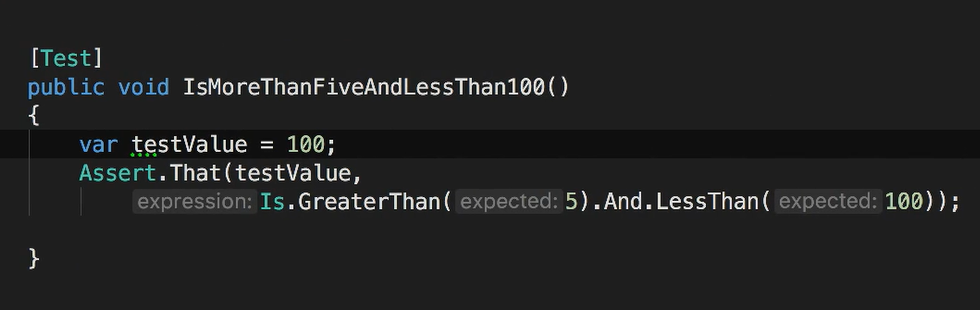
And if we replace And with Or the test will pass, since only one of the conditions needs to be met.
This can be a useful tool, but with great power comes great responsibility.
With each compound constraint you chain together, the complexity grows, and the order of constraints can start to have an effect.
Constraints are going to be evaluated from left to right.
Also, when used in the same assertion, the
Orconstraint has precedence over theAndconstraint.
This is another case where you'll need to use your best judgment, because just because it can be written, doesn't mean you should use it.
After all, you could end up writing the equivalent of something like Assert.That “true” is True.Or.False.
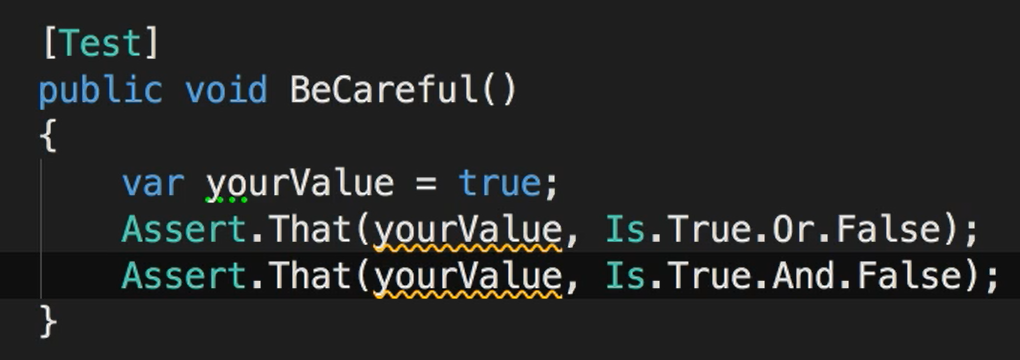
Or even Assert.That “true” is True.And.False.
