

Transcripted Summary
Next, I want to share how to use the API in order to successfully write tasks with WebDriver.
I will be using the Ruby API documentation for WebDriver to get familiar with all the classes and methods available to perform actions on the browser.
Throughout this video, I will refer back to this API documentation.
First, I'm going to show an example of a sample test written with WebDriver and break down each step. I'll open that sample test and Atom now. It's the file called sample-test.rb, and it's also included as a downloaded in this course.
# Example Code - sample-test.rb
require "selenium-webdriver"

driver = Selenium::WebDriver.for :chrome

driver.navigate.to "http://google.com"

element = driver.find_element(name: 'q')

element.click

element.send_keys "Hello WebDriver!"

element.submit

driver.quit
Take a minute to glance through the steps of this test and try to get an idea of what it's doing.
In this test, first I see that selenium-webdriver is required. Then, I see that a Chrome driver is created, navigates to google.com, types in the search box, and then clicks on the search button to submit.
Now we'll talk about each one of these steps and break them down to get a better understanding of what's going on.
# Require gems
Before defining any test steps, I'll start any Ruby class by using the require function — require "selenium-webdriver"
Require is used to load another file and execute all its statements. By specifying "selenium-webdriver" we load the webdriver gem and are able to use this API functionality.
# Create a new Chromedriver
The test then starts by creating a new instance of the Chrome driver:
driver = Selenium::WebDriver.for :chrome
At a minimum, it's necessary to provide the browser name. There are many other capabilities such as the version of the browser, the screener solution, or the platform name. And I can start a more custom instance of Chrome.
# Driver class
In the third and last line of the test, the driver is used to perform an action of navigate and quit respectively
driver.navigate.to http://google.com
driver.quit
I'll take a moment to look at the driver class now on the API docs.
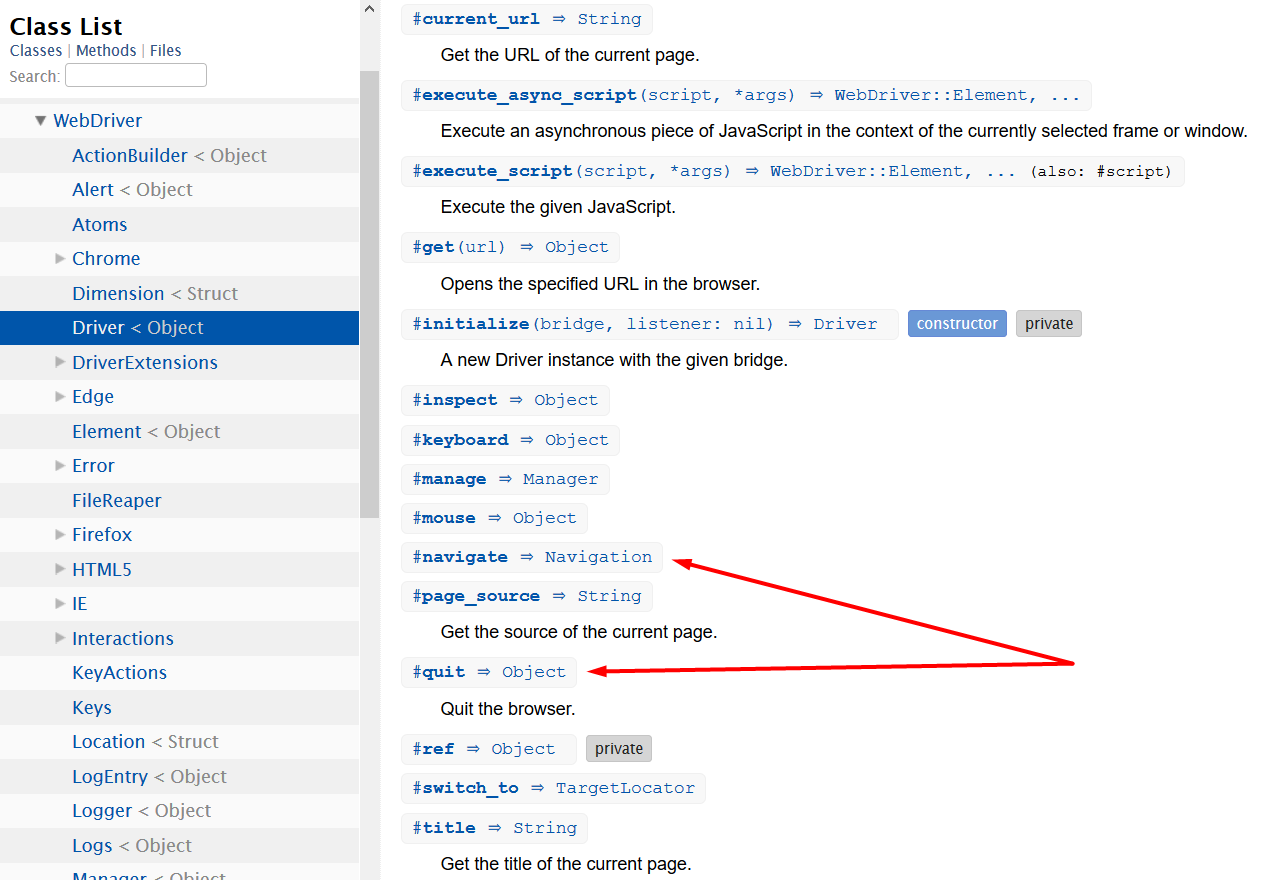
Glancing through this class, you see that there are various methods available for how to use the driver.
Commonly used methods available include navigate and quit, both of which are used in this test.
navigate, which takes a URL parameter and navigates to a specific URL, which in this situation is google.com.In the last line of the test, we simply
quitthe driver, and this will close the driver's session.
# SearchContext class
After creating a driver, it's necessary to search for elements in the webpage before interacting with them and performing actions
element = driver.find_element(name: 'q')
In the example test, after navigating to google.com, we tell the driver to find an element with the name of “q”. When I right click on the search bar and press “inspect”, the inspector opens up, highlighting the element that I selected. When I look at it, I see that there is in fact, an element with a name of “q”.
Finding elements is made possible with the SearchContext class,) which is shown now.
The primary method of the search context class is find_element.
This will find the first element matching the given arguments. There are many options available to find an HTML such as class name, CSS selector, ID or tag name.
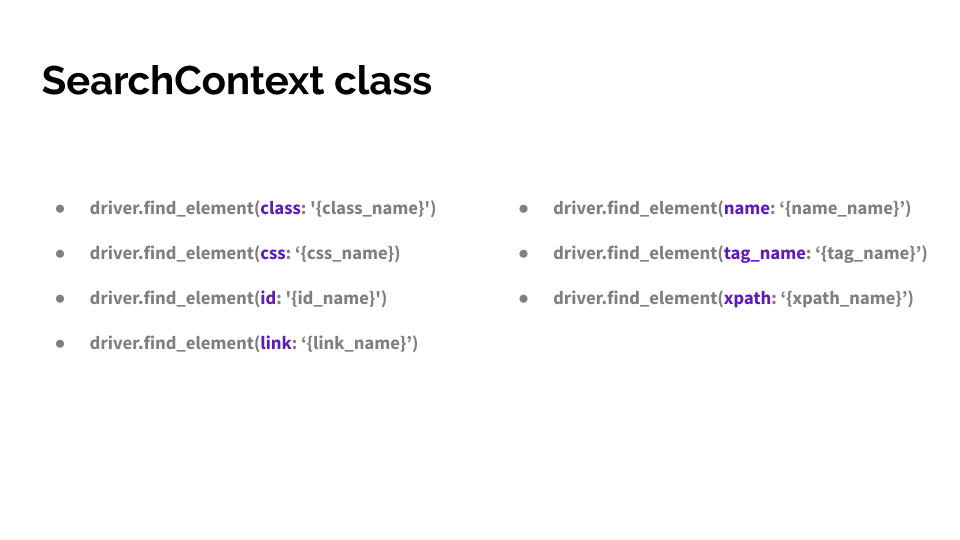
As a rule of thumb, try to stick with one type of locator when possible.
# Element class
After finding an element, the next step is to perform some action on that element. This happens with the help of the Element class.
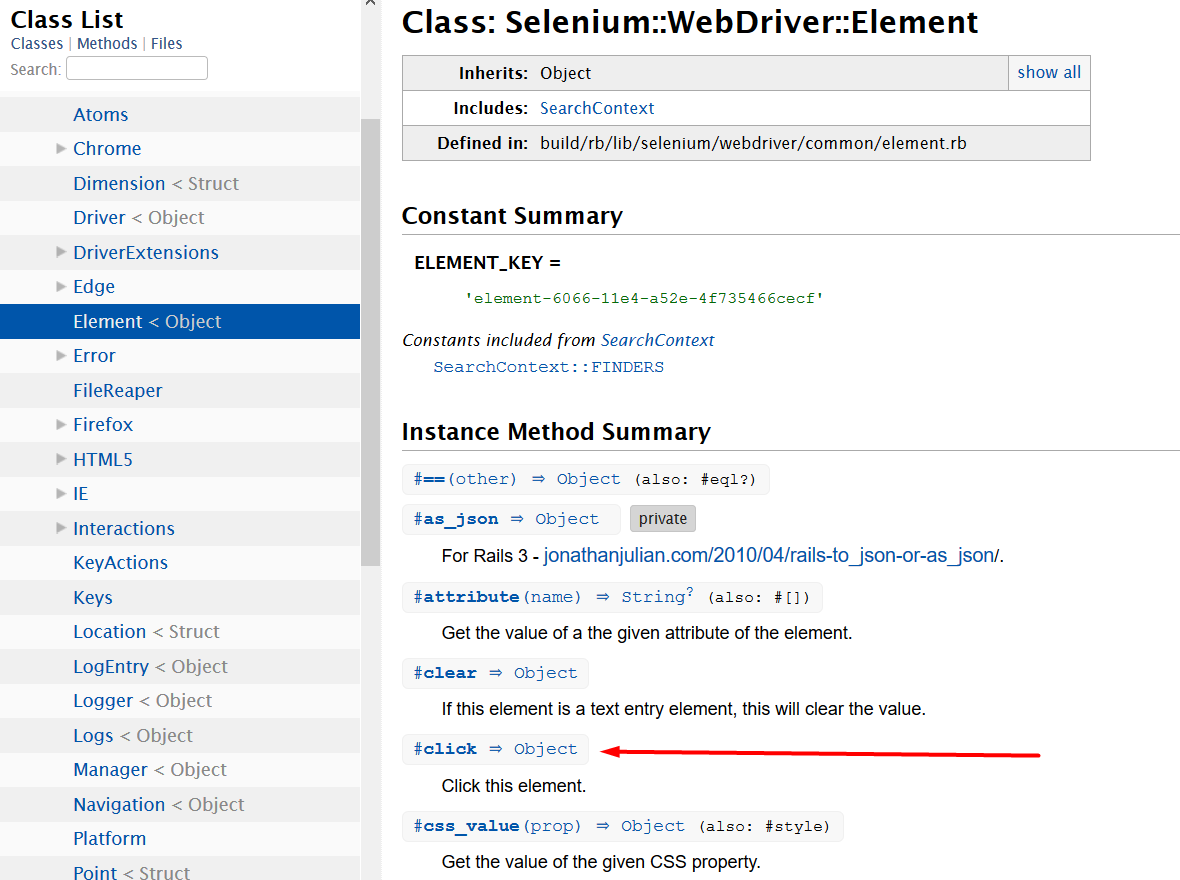
Driving web elements is what brings the test to life. In the element class, there are tons of options that can be used to drive action on elements. In the sample test, the actions that we use are click, send_keys, and submit.
Because Webdriver's APIs are focused on driving the browser from the user's point of view, the names of methods are represented as the actions they perform.
clickwill click the given elementelement.clicksend_keyswill send texts or emulate typing keyboard keyselement.send_keys "Hello WebDriver!"submitwill click and submit the specified forum elementelement.submit
That's it for now.
When writing tests, it's always best to refer back to the API documentation to see all the functionality available from Webdriver.
