Transcripted Summary
In this chapter, I want to automate an example of filling out a form, adding some structure to the test, and then run the test.
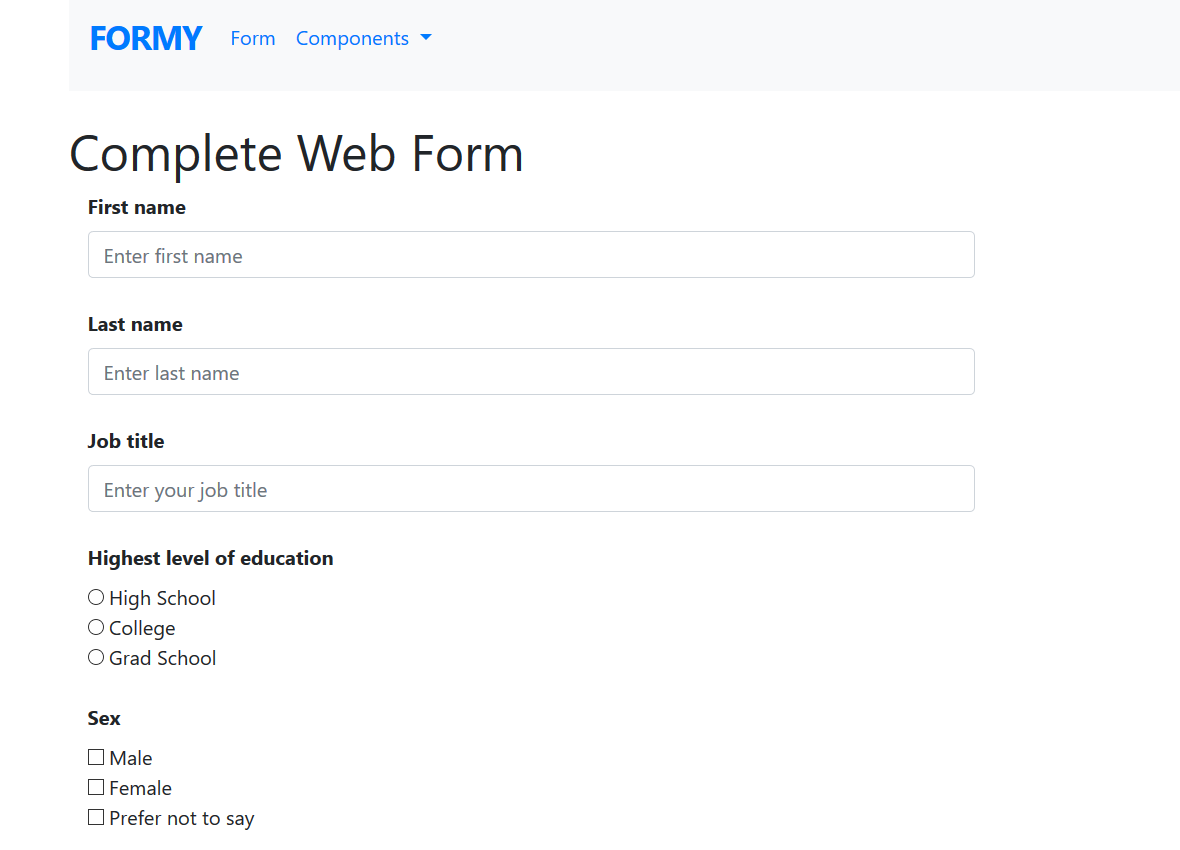
For this, I'm going to be using the form titled Complete Web Form on the test application.

I'll start by creating a new test and save this as “form_test.rb”
# Form Test Example Code
require "selenium-webdriver"

driver = Selenium::WebDriver.for :chrome

driver.navigate.to "https://formy-project.herokuapp.com/form"

driver.find_element(id: 'first-name').send_keys('John')

driver.find_element(id: 'last-name').send_keys('Doe')

driver.find_element(id: 'job-title').send_keys('QA')

driver.find_element(id: 'radio-button-2').click

driver.find_element(id: 'checkbox-2').click

driver.find_element(css: 'option[value="2"]').click

driver.find_element(id: 'datepicker').send_keys('05/25/2025')

driver.find_element(id: 'datepicker').send_keys :return

driver.find_element(css: '.btn.btn-lg.btn-primary').click

driver.quit
Let’s run through these lines of code.
I'll start out by requiring Selenium WebDriver
require "selenium-webdriver"Then, I'll create a new instance of the ChromeDriver
driver = Selenium::WebDriver.for :chromeAnd tell the driver to navigate to the test application where the form is. Go ahead and copy that, and paste it back in my test
driver.navigate.to "https://formy-project.herokuapp.com/form"
Now let's start automating each piece of the form.
First, I'll focus on this first name.
I'll go ahead and inspect this element and see that it has an ID of first-name. I'll copy that and then go back over to the test and write this step.
I'm going to do something a little bit different here and not define variables with web elements. I'll just go ahead and find the element, and then chain the send keys method to that. I'll specify —
driver.find_element(id: 'first-name')— and then I'm going to go ahead and send keys to that field. I'll send the name of John —.send_keys('John'):driver.find_element(id: 'first-name').send_keys('John')
Next, I want to move on to the last name field.
In inspecting that, I see it has an ID of last-name, so I'll copy that.
On line 7 of the test, I can say, driver, find the element with the ID of
last-nameand to send the keys of “Doe”driver.find_element(id: 'last-name').send_keys('Doe')
Next, there is a field for job title.
Upon inspecting that, I will go ahead and grab this ID of
job-titleand copy that to my clipboard. Going back to Atom on line eight, I will find this element with an ID ofjob-titleand send the keys “QA” to say John Doe is a QAdriver.find_element(id: 'job-title').send_keys('QA')
The next step is the radio button, which asks for the highest level of education.
I'm going to go ahead and inspect one of the options I want to choose, and I see that it has an ID of radio-button-2, so I can go ahead and select that to copy.
Go back over to the test, on line nine, and tell the driver to find this radio button element with an ID of “radio-button-2” and click on that
driver.find_element(id: 'radio-button-2').click
Scrolling down the page back at the test application, I see the next question is for sex.
I will go ahead and select one of the options. I see that this has an ID of checkbox-2, so I'll copy that.
Going back over to the test, on line 10 you can say, driver find the element with an ID of “checkbox-2” and then click on that
driver.find_element(id: 'checkbox-2').click
Back at the test application, we're making great progress here.
The next question is about years of experience, so I want to inspect that.
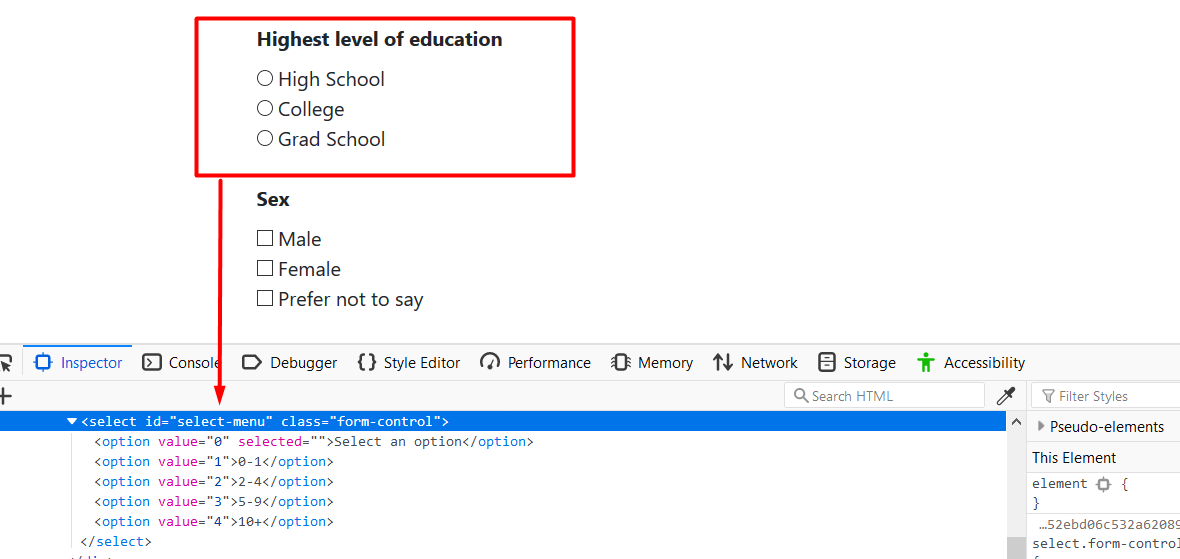
Upon inspecting this element, I see that it is a select menu, which we have not encountered yet in this class. Let's go ahead and expand this option here.

I see that the “select-menu” has various options based on the years of experience. Let's just go ahead and say that I want to select the second option here. Since there's not really anything that's super descriptive about this besides the value, I just want to go ahead and copy this value to select.
Going back over to my test, on line 11, what I can do is tell the driver to find this element using its CSS selector. What I want to do there is just specify its option, which is the tag name, and then go ahead and specify the value, which is equal to two, that second option then, I can click on that value to select it.
driver.find_element(css: 'option[value="2"]').click
In the last field on this page, we have a datepicker.
Inspecting the datepicker, I see that it has an ID of datepicker. Luckily, we've just done this, and this should feel pretty familiar.
On line 12, I want to find the element with an ID of
datepicker, and then send some keys for a random date in the future. I'll pick May 25th, 2025 to send the keys to that fielddriver.find_element(id: 'datepicker').send_keys('05/25/2025')
After this, I'll need to close the date picker since we just send keys directly and did not close the calendar after clicking on this field.
If you remember from before, I can say, driver find the element again with this ID of “datepicker”, and then what I can do is just send keys to that field to press the return button and close it
driver.find_element(id: 'datepicker').send_keys :return
All right, so now I can finally click on the submit button here, on the bottom of the page.
Upon inspecting this element, I see that it has various classes here, so I'll go ahead and just copy all the classes and I'll decide to find this button by its CSS selector.
What I'll do is find the element using its CSS selector, and then I can copy all these class names here, and then, I need to remember to annotate them as classes, which I can do by using the dot (and then make sure to do that for each class). At the end of that, click.
driver.find_element(css: '.btn.btn-lg.btn-primary').clickThen, on line 15, quit the driver after filling out the form and pressing the submit button
driver.quit
`
Now this should complete our web form test.
Resources
Quiz
The quiz for Chapter 3 can be found at the end of Section 5.3
