

Transcripted Summary
Chapter 1 is all about the machine setup.
But it's pretty straightforward, there are only two requirements — you need to have .NET Core installed and VS Code.
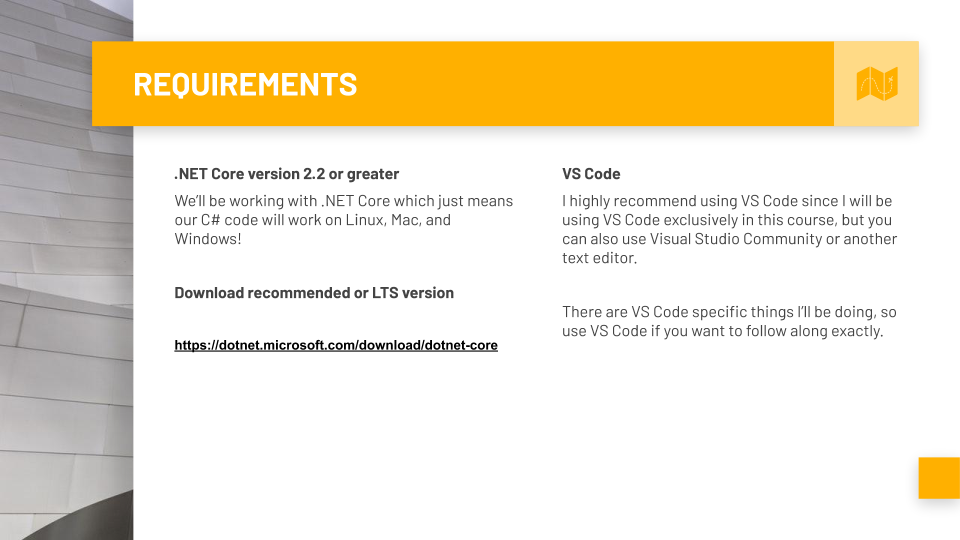
.NET Core is the C# version that works for Windows, Mac and Linux.
VS Code is what I'll be using exclusively in this course. There are VS Code specific things I'll be doing, so I highly recommend you use it as you follow along.
Of course, you can use Visual Studio Community or any other text editor if you'd like to as well.
I do want to go over some things with my setup because, for example, my terminal may look different than yours.
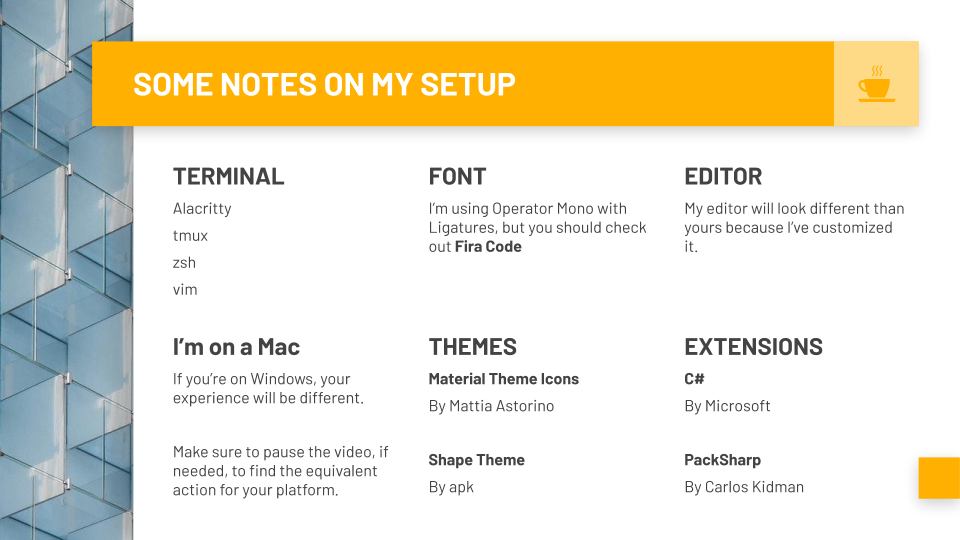
Here's some of the tools I'm using:
I'll be using the Operator Mono font with Ligatures — you can check out something like Fira Code for a free version.
My editor will look different because of the themes and things I have.
I'm on a Mac, so if you're on a Windows, your experience will be a little bit different. If you need to pause the video to find your Windows equivalent, please do so.
The themes I'm using are the Material Theme Icons by Mattia Astorino. Thanks for your contribution. This is an amazing icon theme; I really like it.
And then the Shape Theme for all of my font and colors and everything to make things look pretty.
Extension-wise, we'll need C# by Microsoft.
And then we'll also install an extension called PackSharp, by yours truly.
# .NET Core Installation
I'll let you handle the installation of VS Code, but let's install .NET Core real quick.
In a new tab, I'm going to search for “.NET Core 2.2”.
This first link right here is perfect and then you want to make sure to install the SDK installer.
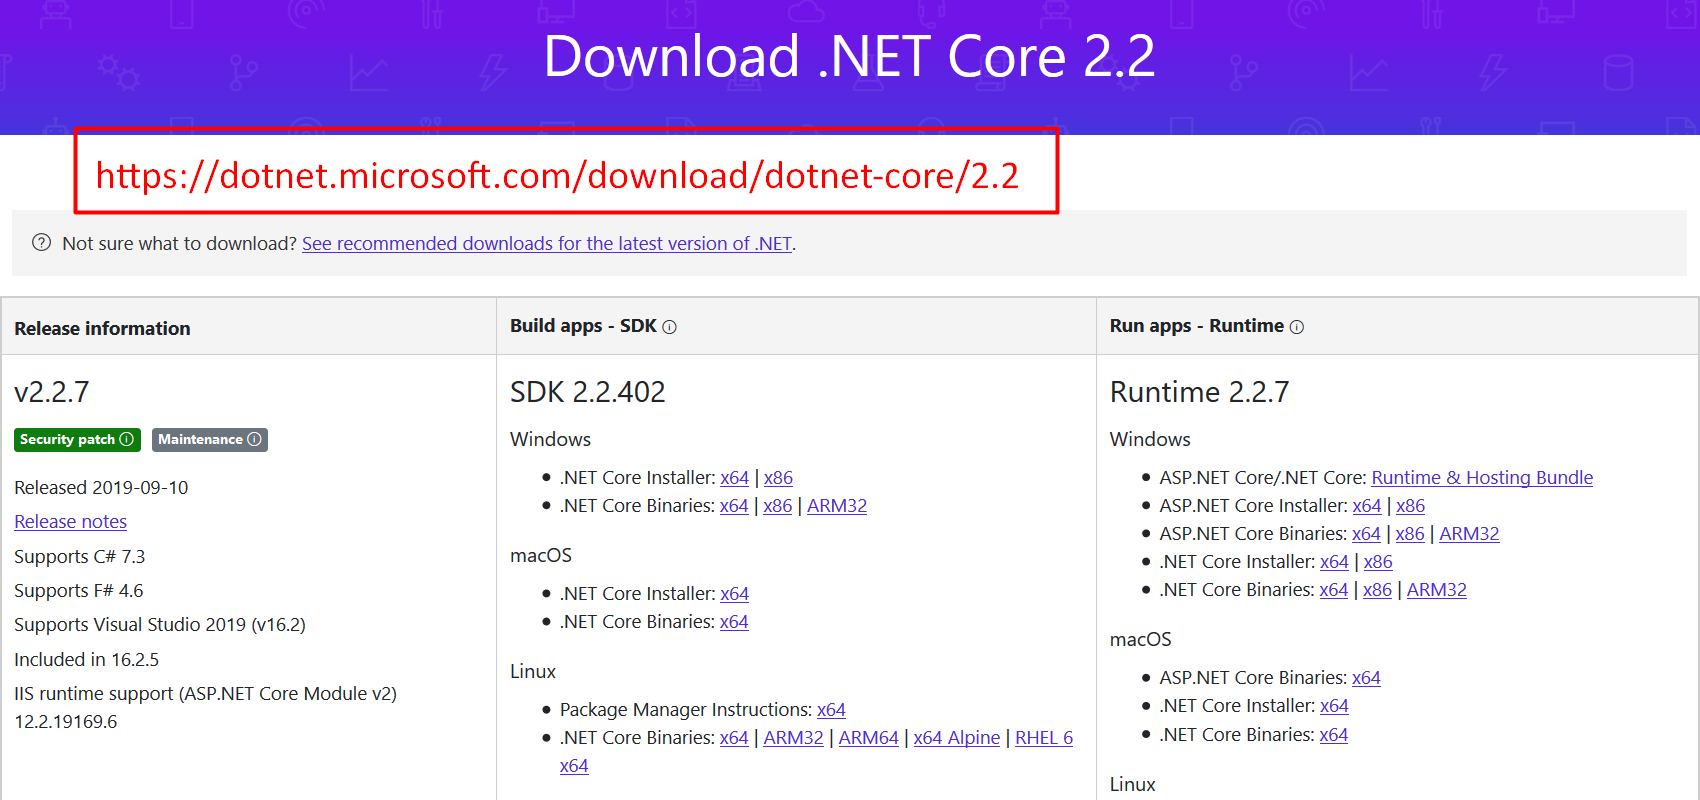
So, for me, since I'm on Mac I would install this one here, this installer.
If you're on Windows, you want to install this one.
I'm not going to do it because I already have it, but once you click on it, it'll download the installer for you.
Open up the installer, run through the directions really quick. It's just a simple wizard and then from there you'll open a new terminal.
Let me go to mine here and I'll throw it over here to the side.
Once it's complete, you should be able to run dotnet --version and if you get something like this, it's working.
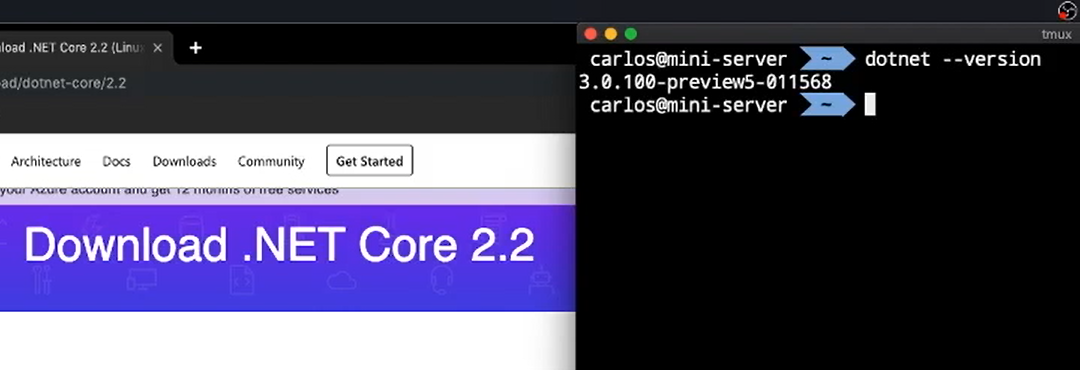
Now I have the Preview 3.0, but you guys will see that you will have 2.2.3, and that's awesome.
Note
If you see an error message that says something like ".NET command is not recognized", the first thing I would say is make sure that all of your terminals are closed completely and open a new one and try again. Worst case scenario, you may need to restart your machine for it to kick in. But that's pretty rare, I haven't seen that happen in a long time.
Once you have that, .NET Core is now installed.
# Solution and Project Structure
Now we'll create a new C# solution where we'll be coding.
I like to keep my projects in a directory called dev or projects, but for this I'll create a tau folder with a folder inside of that called scripting-to-framework.
Feel free to put this into any directory you would like, one that you're already using or something or follow along here.
First things first, let's make our tau folder using $ mkdir tau and a little cd inside of this guy.
Then we'll make another one called "scripting-to-framework" and then we'll cd inside of this.
Now once I have this, I'm going to open Visual Studio Code by just doing this — $ code . — I want to open within this context and now we have it open all the way.
mkdir tau

cd tau

mkdir scripting-to-framework

cd scripting-to-framework

code .
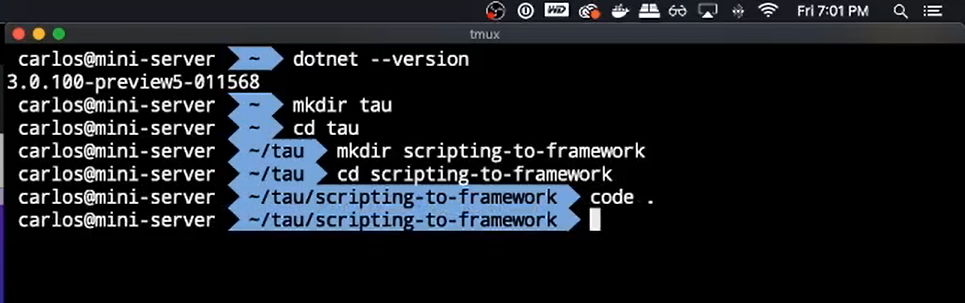
We'll maximize this screen here and now I'm inside of my scripting-to-framework folder.
Awesome stuff.
With C#, you will be using the dotnet command quite a bit.
There's amazing documentation about all the things you can do with it.
We're actually going to install the PackSharp extension, that way we can start using some of that functionality as well as a dotnet command in the terminal.
I'm going to click on this Extension Marketplace and I'm going to search for PackSharp.
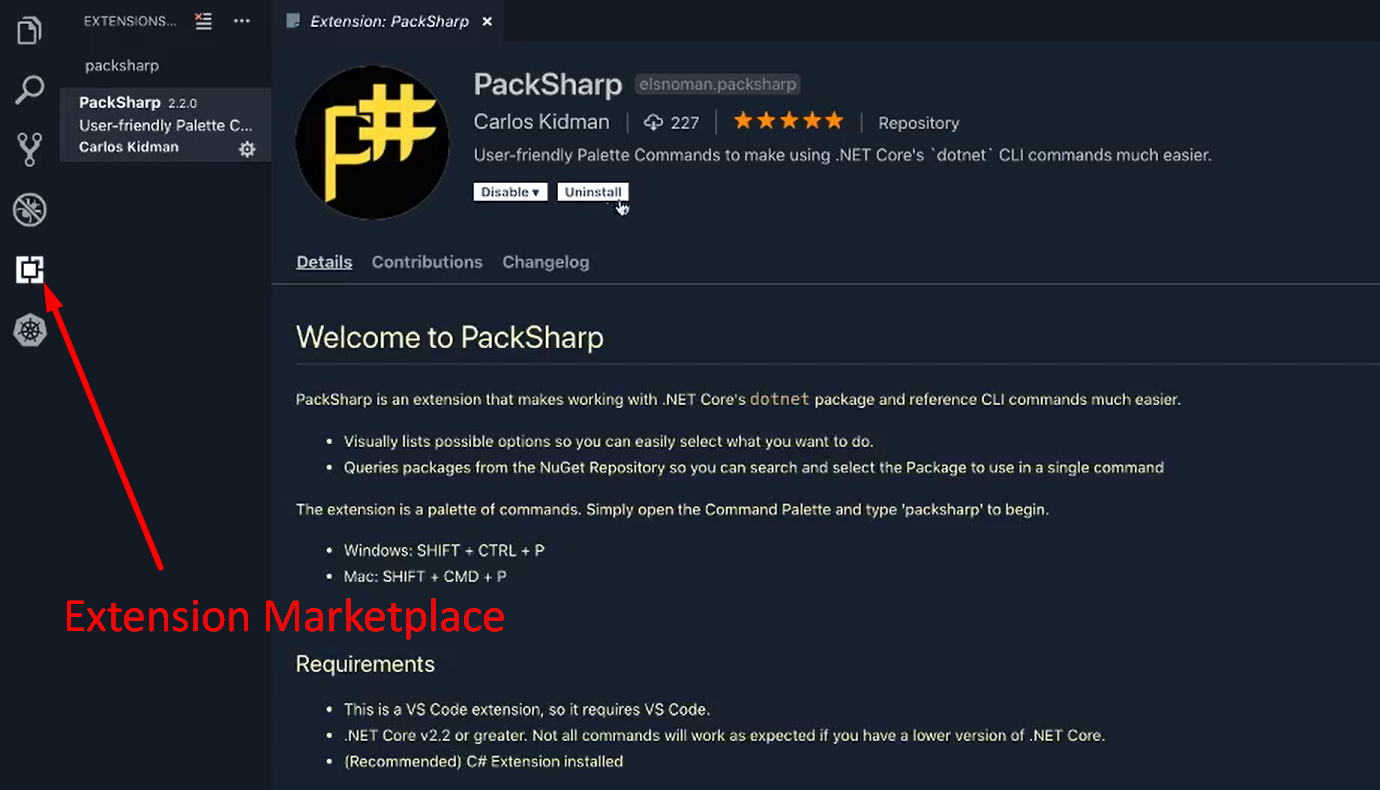
There we are, make sure you install it.
Once it's installed, the way that you use it is by opening the Command Palette.
Now you can either go up to the top and say — Open via Menu: View -> Command Palette — or as you saw there, there was an actual shortcut as well.
- For Mac you would: SHIFT + COMMAND + P
- For Windows: SHIFT + CTRL + P
So, we'll open this up and then inside of here we're going to type “PackSharp”.
Now you'll see a bunch of commands that you can use.
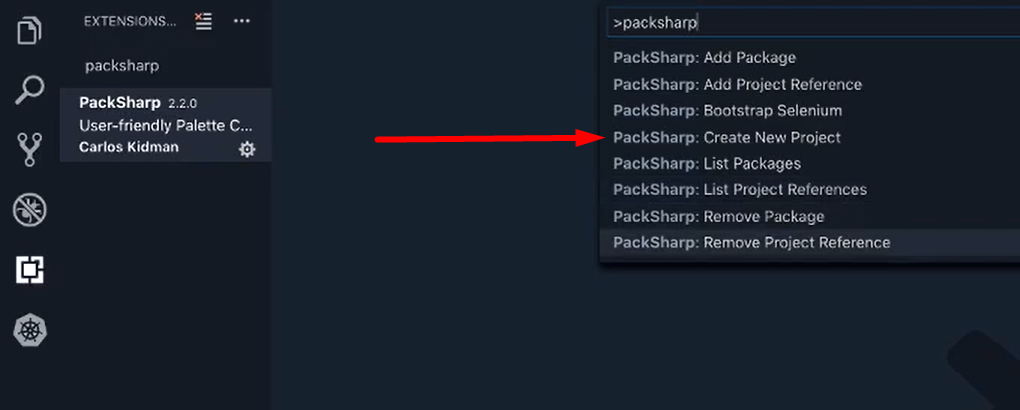
The one we're going to be using is the “PackSharp: Create New Project”.
So, if we click on this, what we want is to use a “Class Library” and we're going to call this "Framework", which is kind of our main dude.
And I'm going to go back over here to our File Explorer, so we can see things actually get created, which is awesome.
Another feature that I have in PackSharp is (I'll actually open up a terminal for you, the integrated terminal, and show you the command that we're running). That way you can see exactly what the extension is doing and what commands you can use to achieve these things as well.
And now that we have the "Framework" project ready to go, we're going to do _SHIFT + COMMAND + P _(or SHIFT + CTRL + P on Windows) to, open this up, I need to make a new project.
It's another “Class Library” and this one we're going to call "Royale".
Wait for it to finish, there we go.
And then in the very last one.
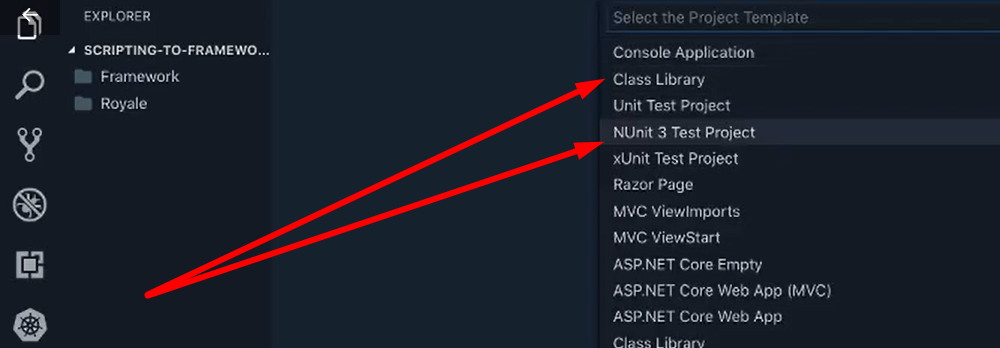
Create a new project, we're going to make an “NUnit 3 Test Project”, and we'll call this one “Royale.Tests".
The last thing we need to create is a solution file.
So, the very last option, Solution File, and we'll call this thing "StatsRoyale".
And now we have our "StatsRoyale" solution [statsroyale.sln].
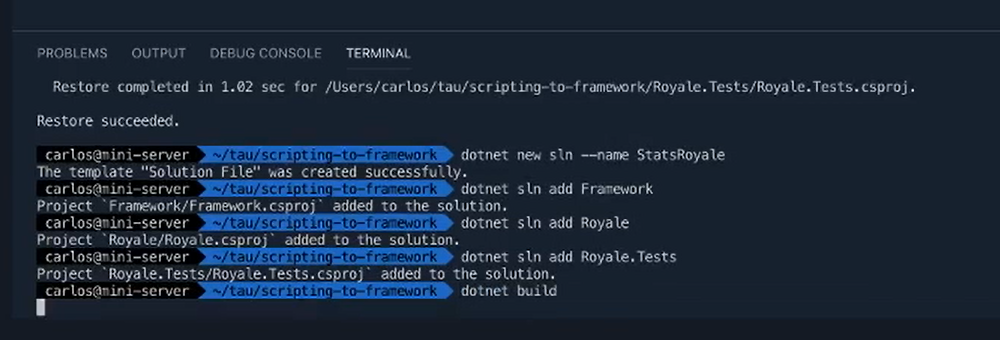
Go into the integrated terminal and inside of here we're actually going to add the projects into the solution.
It sounds a little funny, but the solution file will actually keep track of all your projects and your projects will keep track of all your dependencies.
You will never really have to open that solution file. C# will take care of all the building and bundling and all that stuff for you kind of automatically, which makes it really, really nice and convenient.
You don't need to worry about that stuff, you just add what you want, and your intent is already shown because of C#.
So, inside the terminal I'm going to put:
dotnet sln add Framework

dotnet sln add Royale

dotnet sln add Royale.Tests
To make sure everything's working, we're going to do a $ dotnet build to make sure everything builds correctly and hopefully we get the green "Build succeeded" with zero warnings and errors.
Lastly, we'll go to our “Royale.Tests" directory.
We'll click inside of here; you'll see tons of things already created for you.
We'll double-click on this UnitTest1.cs.
You should get prompts like this.
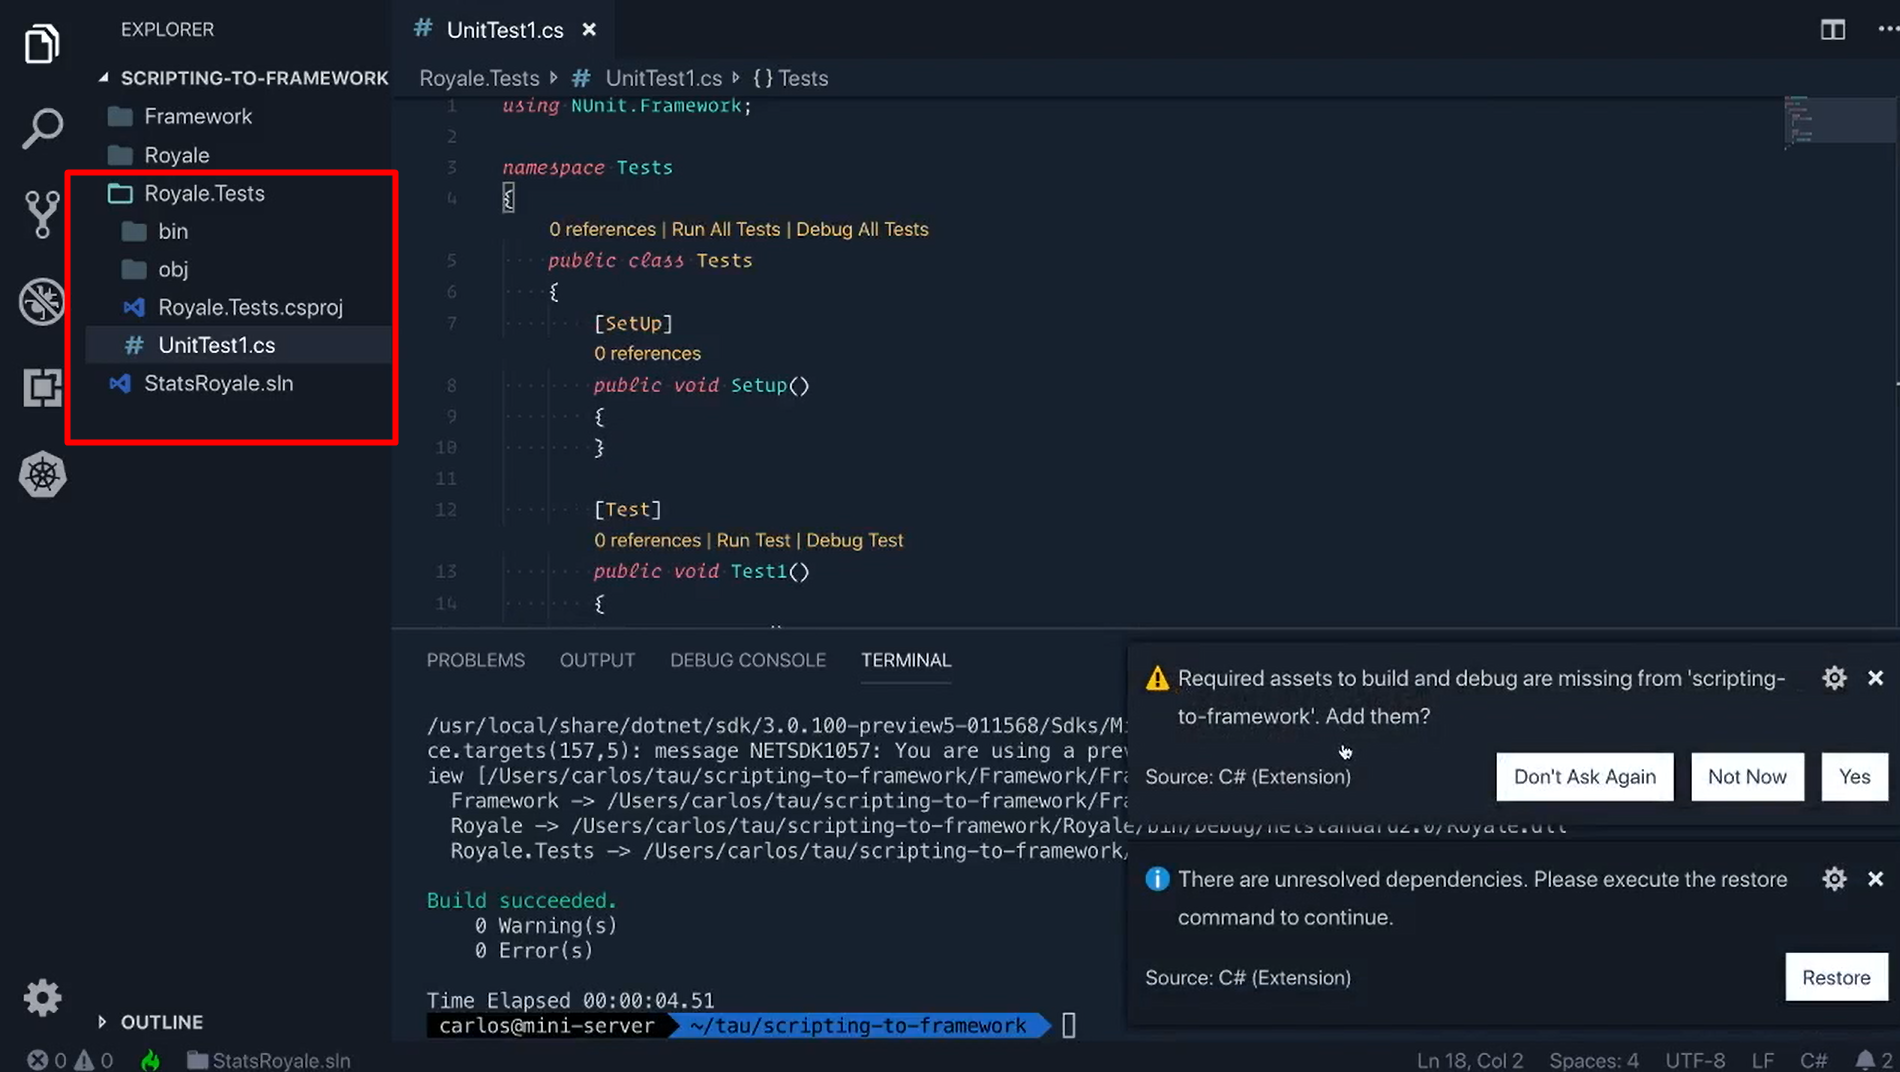
These are the things that you want, so this “Required assets to build and debug”, we want to add this.
So, click "Yes" on this, this'll add a .vscode folder here.
That's what VS Code uses to do things with C# and debugging and everything.
If you see things like this, make sure you click that “Restore” button.
And really what it's doing is just getting VS Code set up for you to be able to do “C-Sharpy” things.
So, I'll wait for that to be completed. Everything should be good there and now we have our test file ready to go.
If we open up our terminal and do a $ dotnet test it'll actually run all the tests within our solution.
Since we only have one test project, “Royale.Tests", it's only going to look in that project and look for all the tests we have in there.
We only have one and it passed.
So, with that, now our machine's set up and everything for VS Code is set up and ready to go.
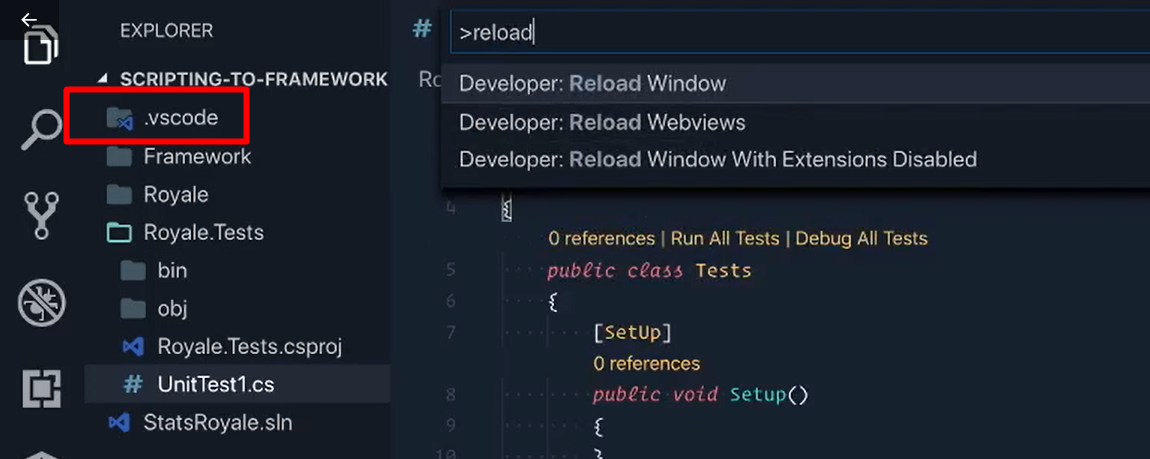
Important
Remember, make sure that you have that .vscode folder. If you don't see it quite yet, you may need to run the “Developer: Reload Window” command in the Command Palette to get those notifications to appear. It'll refresh everything and might kick it into gear. You may also want to make sure that you do the dotnet build inside of the terminal as well, that may also kick it in.
We're actually ready to start coding now and in the next chapter we will be using Selenium.
