
Transcripted Summary
Before we dive into the Page Object Model, I want to start with another amazing quote.
"Code should be written to minimize the time it would take for someone else to understand it."
That's our goal and you should be using and following best practices, patterns and other things that every other developer should be doing. We want to write awesome code.
With that, we'll briefly talk about the Page Object Model and then we'll dive into code.
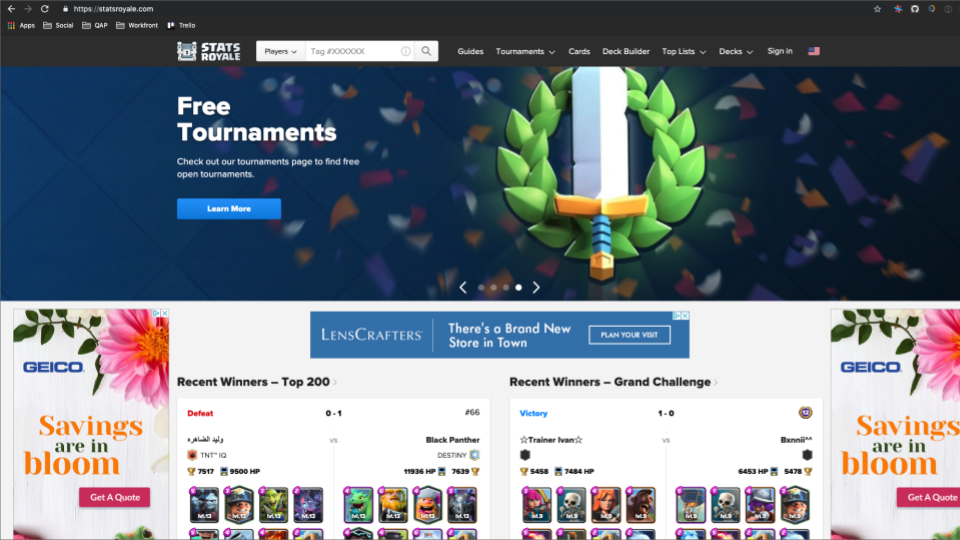
In our tests, we're currently working with 3 sections:
- the shared header navigation bar
- the cards page
- the card details page
What we want to do is represent these webpages as objects and code.
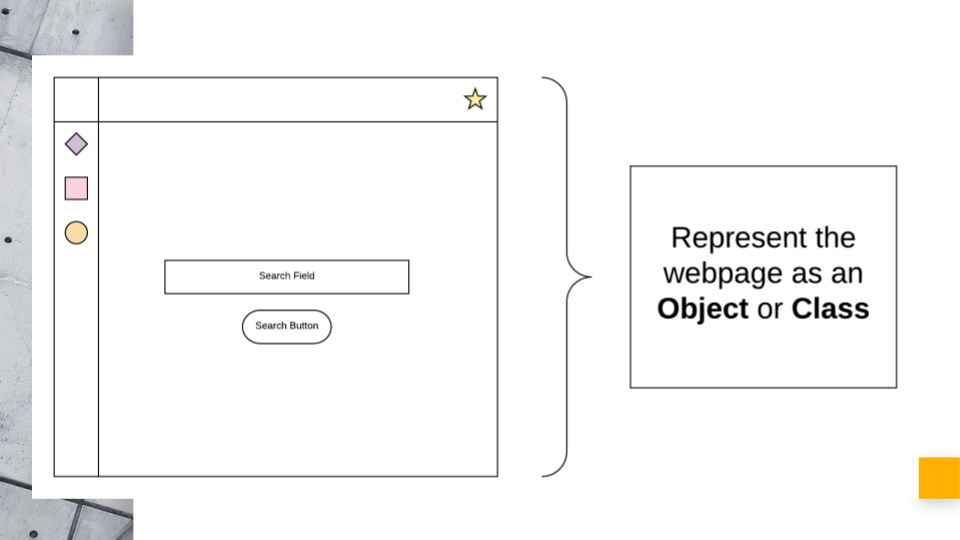
If you think of each page as an object with properties, then you can think of two primary things about the page:
- the things on the page
- the things you can do on the page
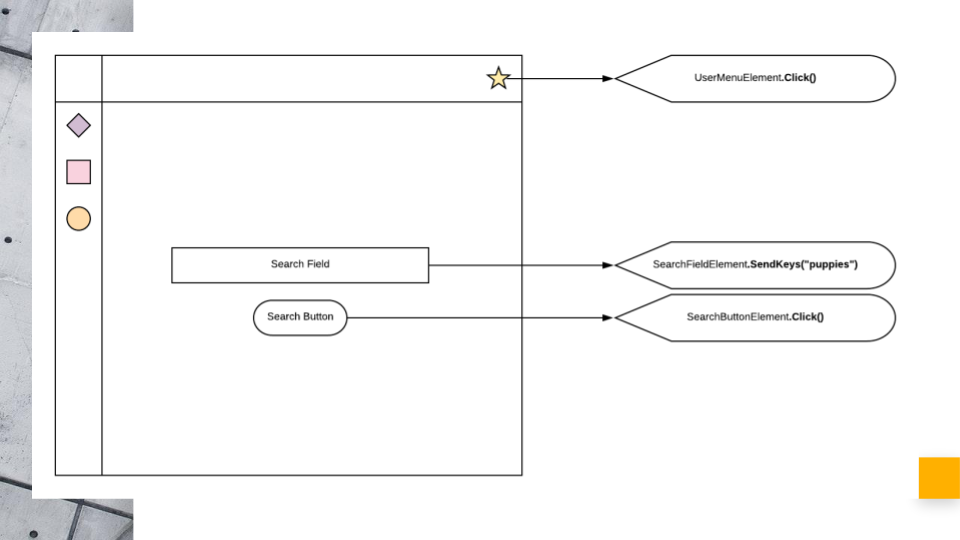
This is the very concept of the page object model.
In C#, I like to have two classes per page.
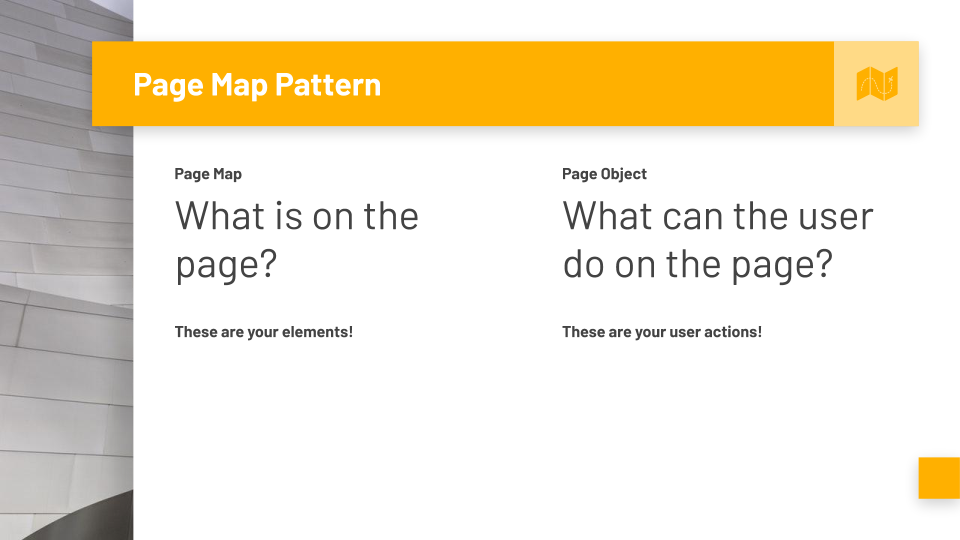
The first class is called the Page Map or just Map.
It answers the question, "What is on the page?" — these are your elements.
The second class, which is the main class, is simply the Page Object or Page.
It answers the question, "What can the user do on the page?" — these would be your functions and methods that use the elements in the map to perform those user actions.
I call this approach the Page Map Pattern and it works really, really well with the Page Object Model.
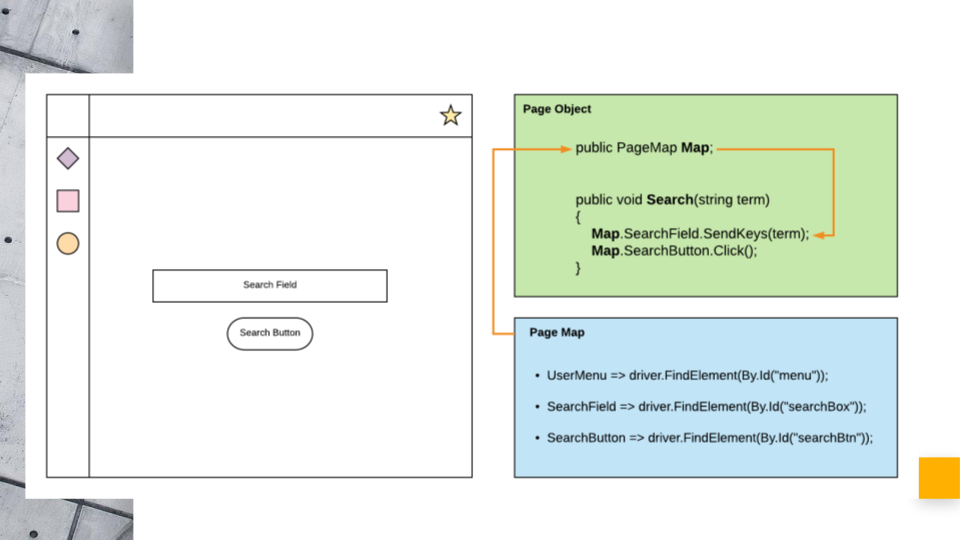
Separating the concerns of what's on the page and what you can do on the page into their own classes simplifies the overall structure and usability of the Page Objects.
Note on Page Map Pattern
I want to clarify that the Page Map Pattern is not required for the Page Object Model. It is a style pattern that I like to use in my frameworks.
# Refactoring Our Tests into Page Objects
We'll start with cleaning the first test by refactoring things out of the “Royale.Tests” project.
Your Page Objects will live in the Royale project and your tests will use those Pages.
First, we'll open up our “Royale” folder, we'll make a new folder called “Pages”.
Then we'll move this “Class1.cs” into “Pages”.
Then we'll change this [
namespace] from “Royale” to now “Royale.Pages” since that's we're this file lives.We're going to change this
Class1to say “HeaderNav”.Then we'll make another class right beneath it and we'll call this one the “HeaderNavMap”.
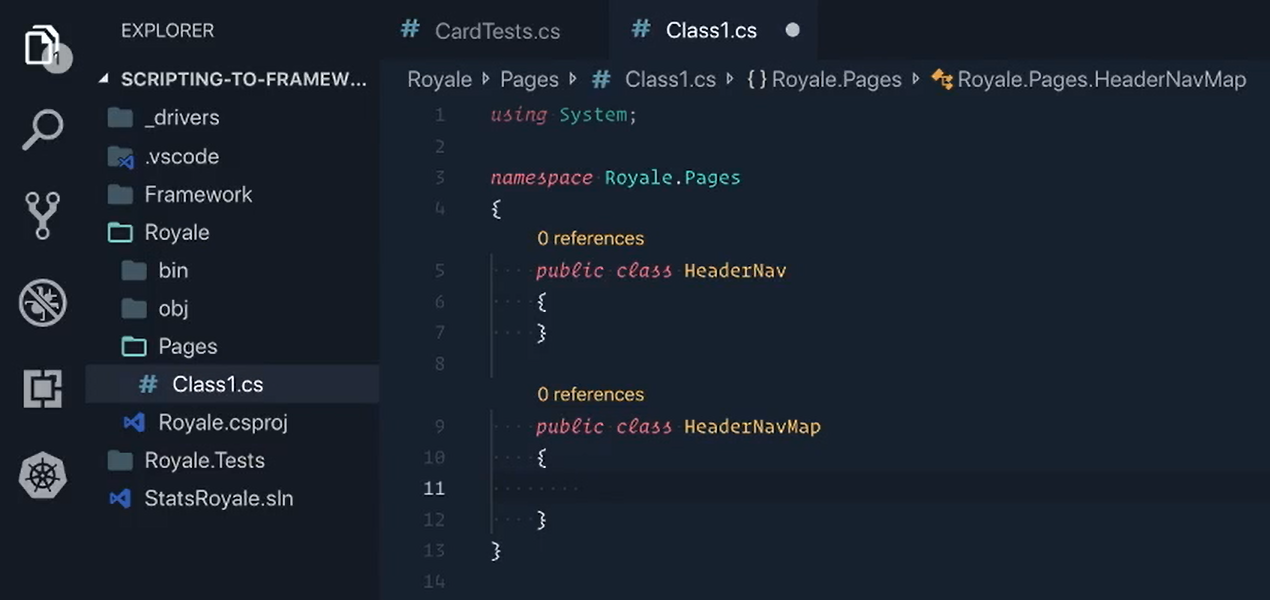
The naming convention of Pages and Maps is very simple — you give your page a name ( [Name]Page ), like HeaderNav, and then the map is just the name of the page plus “Map” ( [Name]PageMap ).
Disclaimer
Quick disclaimer, we're about to start diving into C# and programming concepts, so please feel free to follow along as best as you can or pause to Google something you don't quite understand. Diving into C# is out of the scope of this course. But you are also welcome to ping me at any time with questions and I will do my best to answer. With that out of the way, let's dive in.
# HeaderNav POM
Let's add our first element to the “HeaderNavMap” — the Cards tab.
I'm going to start by saying public IWebElement and we'll say CardsTabLink. And immediately, we're going to see that IWebElement is giving us an error.
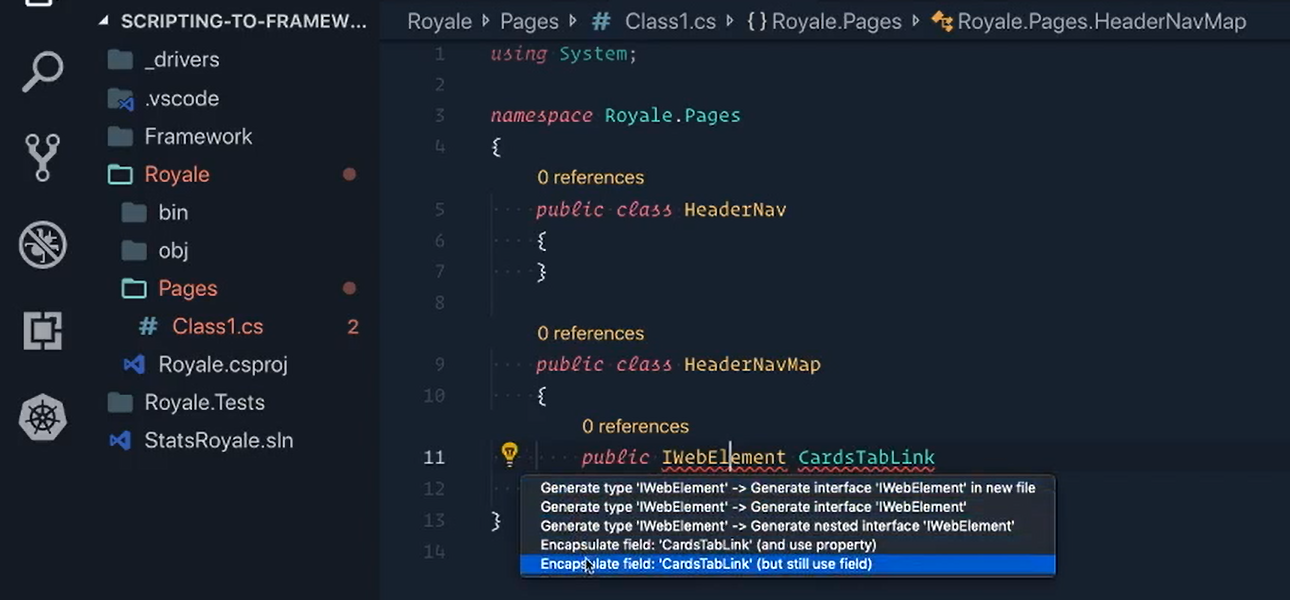
If we try to fix it, it actually doesn't know what really to do.
And it's because the IWebElement is part of Selenium and Selenium is not currently inside of our “Royale” project — it's inside of “Royale.Tests”.
So, we actually need is restructure our packages and dependencies a little bit for our new framework.
We're going to use PackSharp to do that.
Let's open up our Command Palette and we're going to Bootstrap Selenium to the Framework.
Because our framework is going to have Selenium, we don't need to have Selenium inside of “Royale.Tests”. So, what we're going to do is we're going to remove Selenium from that project by using PackSharp.
We'll say “packsharp” and we're going to Remove Package from “Royale.Tests”.
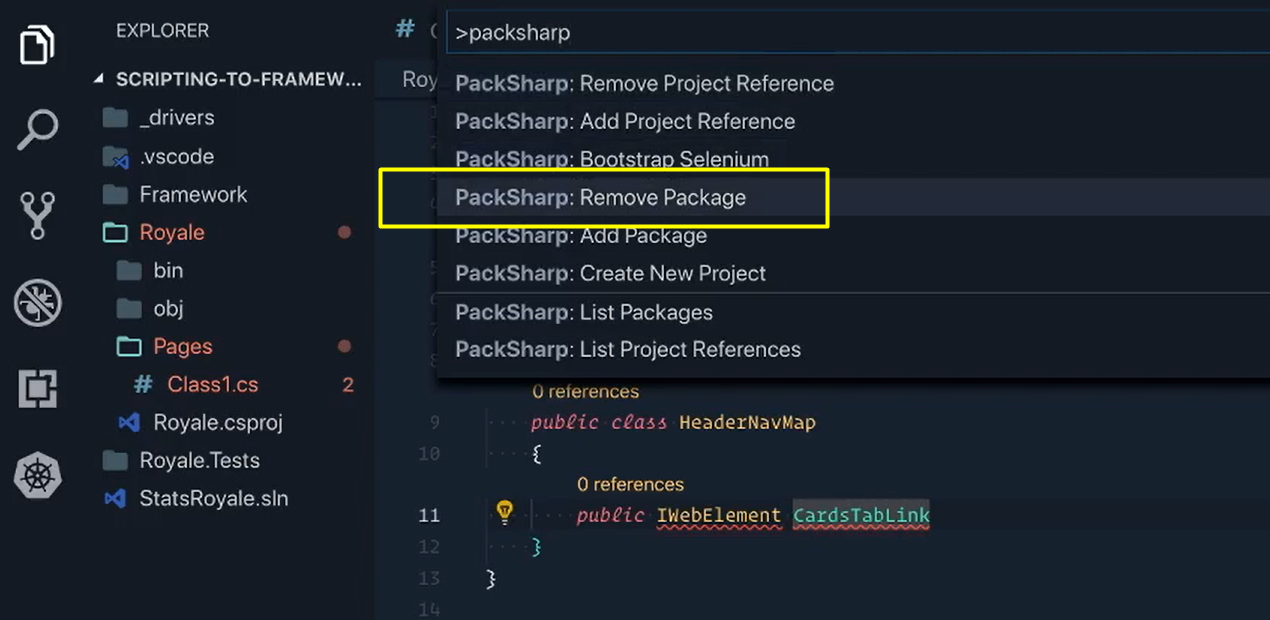
We want to remove Selenium.Support and then we also want to remove Selenium.WebDriver.
The next part is to have the projects reference each other.
“Royale.Tests” is going to be using the pages inside of “Royale”, but “Royale” is going to be using Selenium within the framework.
We'll achieve this with PackSharp, of course.
We're going to say: PackSharp > Add a Project Reference.
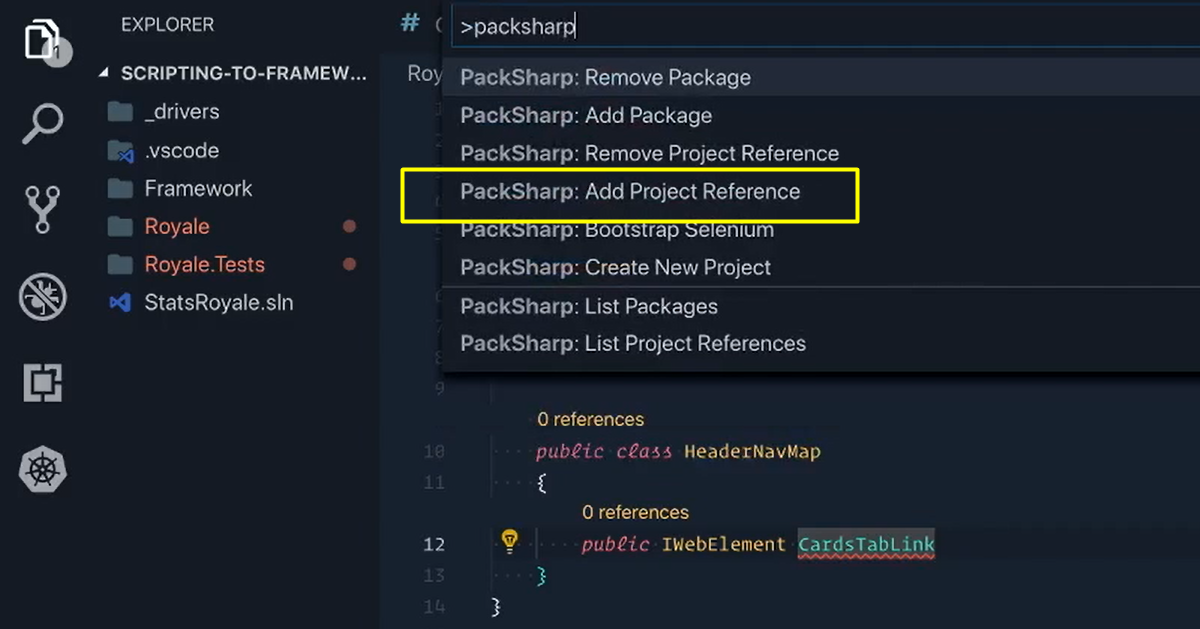
For “Royale.Tests” we want to reference “Royale”.
Do it again, Add Project Reference.
For “Royale”, we want to reference “Framework”.
We'll comment this line of code for the IWebElement out for now.
We'll switch over to our terminal and say dotnet clean and then dotnet build. We'll Restore these dependencies just to make sure.
Now we can uncomment this and let's give it another try.
You'll now see that we actually have this “using OpenQA.Selenium” option.

We'll click on that, bring it in and that resolves that error.
From there, we're now going to say that this CardsTabLink is going to equal driver.FindElement — but you'll see immediately that it actually has no idea what driver was.
If we do that again, we'll say driver and there is no driver for us to work with. That's because we need to specify a driver in this class, driver doesn't exist anywhere.
So right here, we're going to declare a new driver and then we're going to make a constructor as well.
I'm going to use the shortcut ctor for constructor and tap twice.
The constructor needs to be the same name as the class, so “HeaderNavMap”.
And then as for the parameter, where you see the passing 1 perimeter, the IWebDriver.
I’m going to put an underscore in front of this driver just to show that this is a private driver that's only assigned to this class.
So, my _driver is going to equal the driver that we pass in.
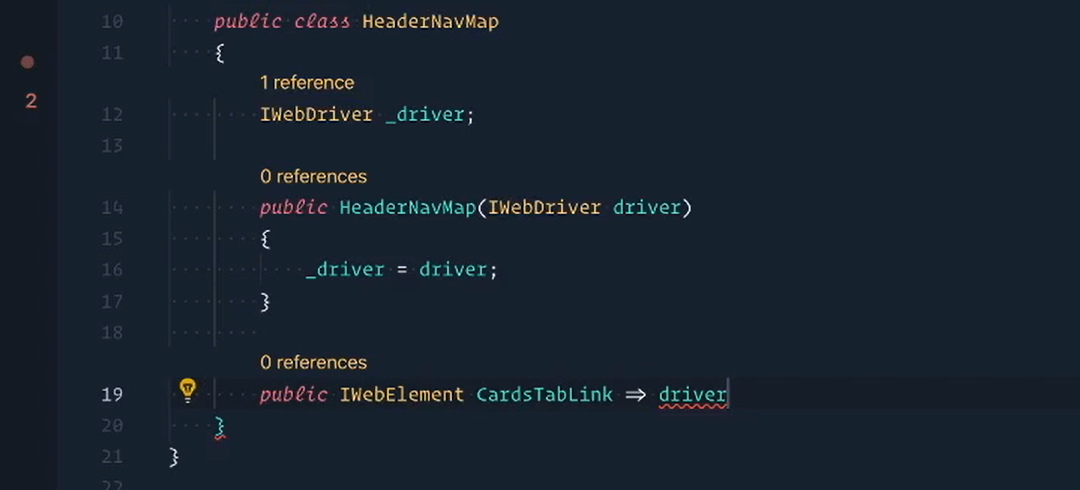
Now, my driver has a value.
If I say driver., and it needs to be _driver. of course — _driver.FindElement — now we have it.
And we had our CssSelector here, but I'm going to switch over to “CardTests” and bring it from there.
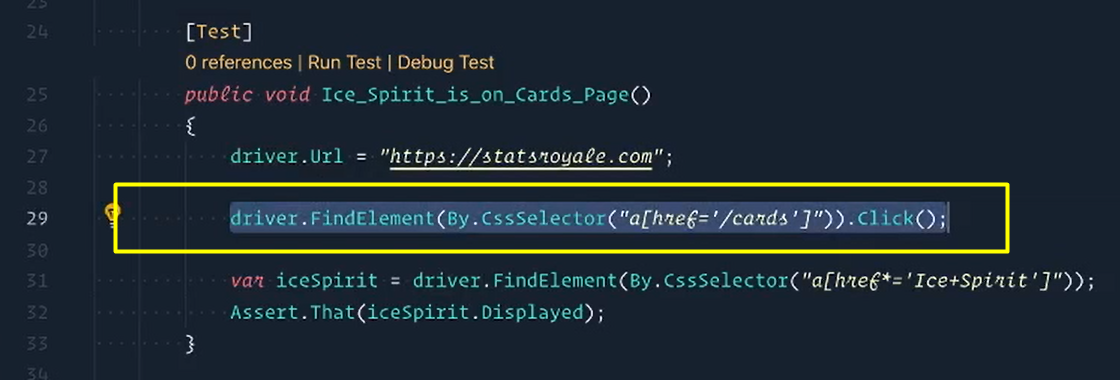
This is what we had before, so let's copy this line here.
Switch back over.
Now I'm going to replace it with this. Change this back to underscore of course.
And then instead of the Click, we want to actually just return the element itself.
We'll save this file and we have our first element in there.
Last thing I want to do is make sure I change this [default “Class1.cs”] to also say “HeaderNav.cs”.
Save this and there we go.
public IWebElement CardsTabLink => _driver.FindElement(By.CssSelector("a[href='/cards']"));
Now that we have our “HeaderNavMap” complete, we now want to use it inside of our “HeaderNav” class so that way we can create a user action off of it.
So inside of here, we're going to make a new method and we're going to say public void GoToCardsPage().
And inside of here, we want to use the element inside of our Map. But how do we access our Map?
What we need to do is declare our Map.
So, we're going to say public readonly HeaderNavMap and we'll just call it “Map”.
We'll make a constructor just like we did before, “HeaderNav” and here we need to pass in IWebDriver as well.
Then for our Map, we're going to say we want our Map to equal a new HeaderNavMap.
And you'll see here, it's asking for a driver, which is the one that we're already passing into this constructor.
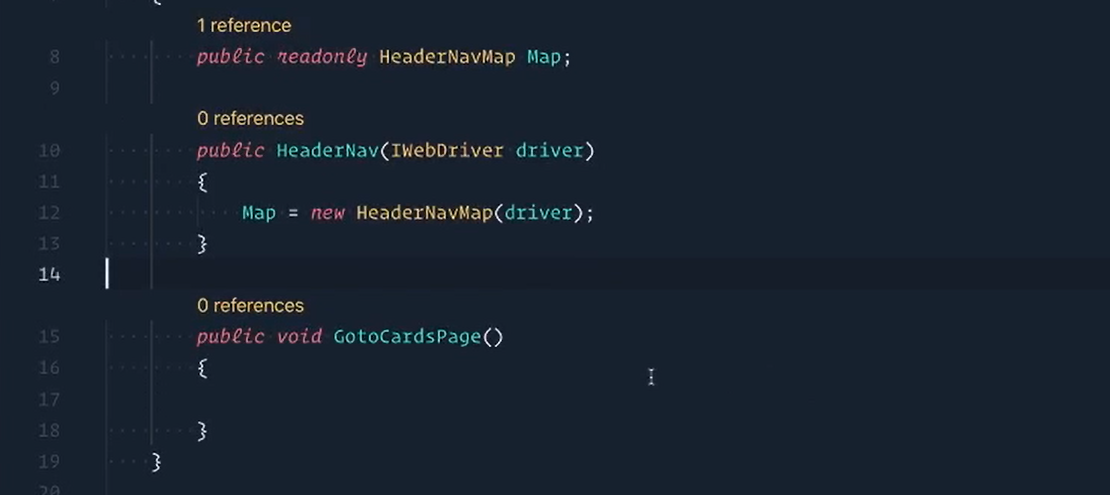
Now that we have that declared and with a value, we can now use it inside of our user actions.
So, in here, we can say Map. and here's everything we have access to, including our CardsTabLink.
We can then Click it:
public class HeaderNav
{
    public readonly HeaderNavMap Map;

    public HeaderNav(IWebDriver driver)
    {
        Map = new HeaderNavMap(driver);
    }

    public void GotoCardsPage()
    {
        Map.CardsTabLink.Click();
    }
}
Save it.
Now we're good to go on the “HeaderNav”.
# CardsPage POM
Next up is the Cards Page.
So inside of “Pages”, we'll _right-click > New File _and we'll say “CardsPage.cs”.
Inside of here, we're going to start with our namespace. Our namespace, we're inside of Royale.Pages.
We'll then make our first class, which is CardsPage.
And then under this, will make the Map, which is CardsPageMap.
And just like we did before, we're going to do everything almost the exact same.
We're going to declare an IWebDriver, we'll call _driver. It's not going to know what it is, we need to bring in.
Let's get our constructor going, CardsPageMap. We know we need our IWebDriver. And then the _driver is going to equal the driver we pass in.
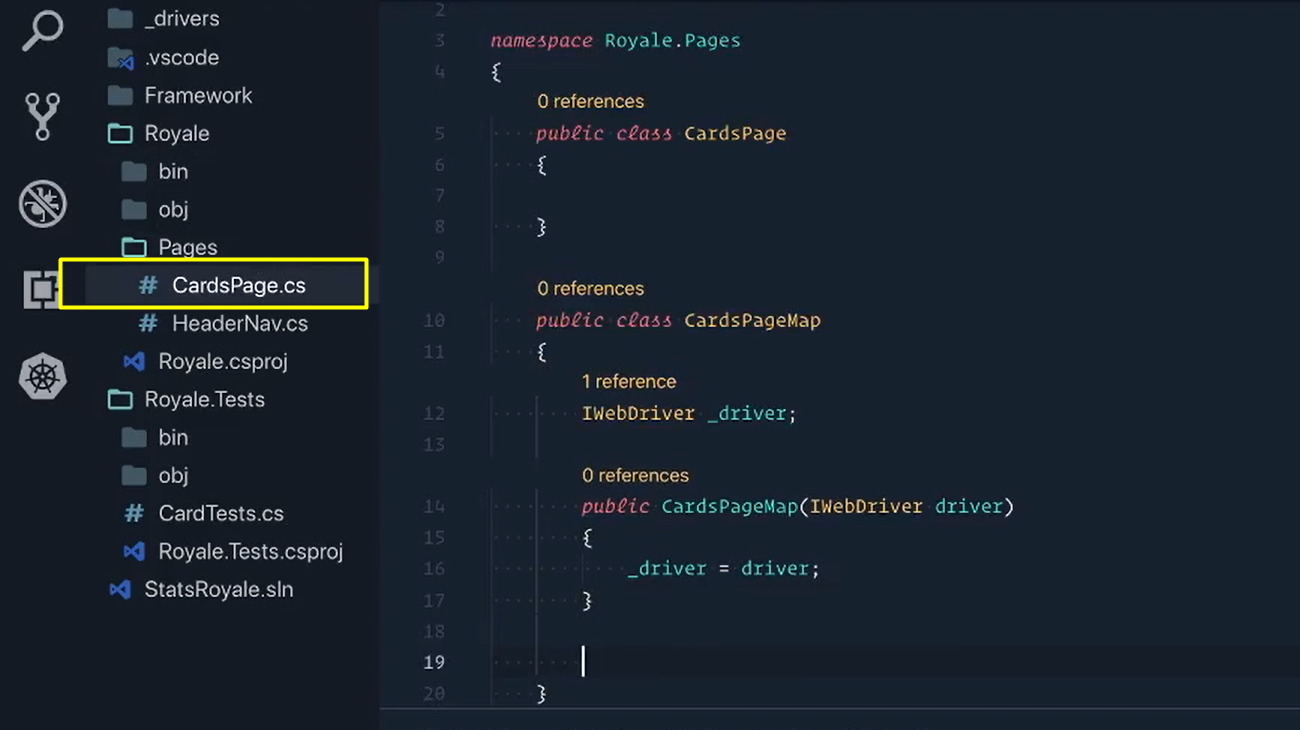
Let's go back to our “CardTests” here.
And then I'm going to copy this line here, which is the locator for our Ice Spirit card.

Switch back over to “CardsPage”, let's say public IWebElement IceSpiritCard.
Paste this in here and we'll put our underscore right in front [_driver].
And now we're holding our “IceSpiritCard”. However, just like we said before, we don't really want to hold just the “IceSpiritCard”.
We want to be able to find any card with one function.
So instead, underneath this, we're going to say public IWebElement and I'm just going to say Card and in here we can pass in the name.
Now, I'm going to be using what we had here, but instead of having just Ice Spirit hard-coded in there, we're actually going to use some string concatenation here or interpolation.
We're going to grab this piece here [“Ice+Spirit”], delete this and we'll pass in whatever name there.
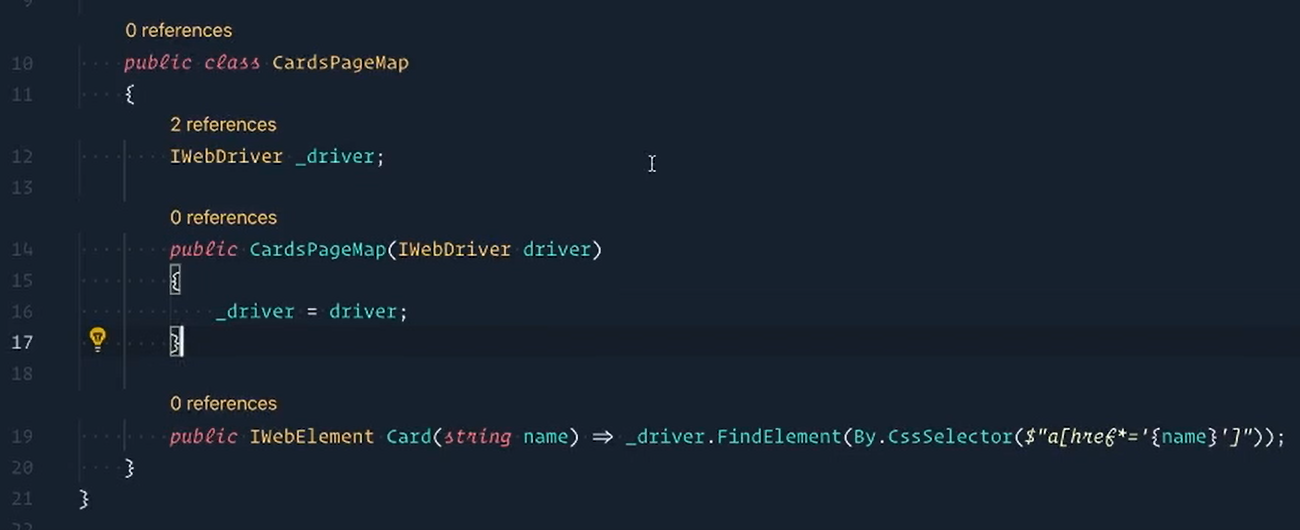
We can then make a user action, inside of our “CardsPage” to leverage this format where we can grab any card on the page given the name that we pass in.
So, in our “CardsPage”, let's add a method.
We're going to say public IWebElement and we'll say GetCardByName.
And in here, we'll say “cardName” and then we'll use an if statement to format the name that we grabbed back.
public IWebElement GetCardByName(string cardName)
Now, if you remember, if we had a single named card like “Golem”, this is what it would look like [“Golem”].
However, if we had something like “Ice Spirit”, what we'd want this to turn into is “Ice+Spirit” to work with our locator. So, we're going to make an if condition to actually take care of this for us.
We're going to say if the card name contains any spaces, then we know that it needs to remove those spaces and replace it with a plus sign.
So, then we can say “cardName” is equal to “cardName.Replace” and get that space out of my face and replace it with the plus sign.
Then, we can return the card with the proper card name.
public IWebElement GetCardByName(string cardName)
{
    // Given the cardName "Ice Spirit" => should turn into "Ice+Spirit" to work with our locator.
    if (cardName.Contains(" "))
    {
        cardName = cardName.Replace(" ", "+");
    }
    return Map.Card(cardName);
}
The last part of the “CardsPage” is to actually get to it.
So, we're going to say public CardsPage. We'll call this method GoTo().
We need to access the cards link, but that's inside of our “HeaderNav”.
However, the HeaderNav is shared between all of our pages and whenever something is shared between objects like that, it's best to use something called a base.
What we're going to do now is create a page base. So right click on Pages, make a new file and say “PageBase.cs”.
The namespace, we know we are inside of “Royale.Pages”.
And then here we'll make a public class called “PageBase”.
Then we're going to declare our HeaderNav, let’s call it “HeaderNav”.
And then a constructor to give this a value. So PageBase and right here we'll say theHeaderNav = new HeaderNav()`.
(Ooh, and I forgot to change my parameters here. This should say IWebDriver).
And then we're going to bring in Selenium.
The last thing we'll do is change this [public class] to say public abstract class PageBase.
# PageBase.cs
using OpenQA.Selenium;
namespace Royale.Pages
{
    public abstract class PageBase
    {
        public readonly HeaderNav HeaderNav;

        public PageBase(IWebDriver driver)
        {
            HeaderNav = new HeaderNav(driver);
        }
    }
}
This just means that this class can only be inherited by other objects and it cannot be instantiated by itself.
Now this is true because we don't want to just instantiate the HeaderNav all by its lonesome, we actually want it to be part of every single page that we are using.
So now that we have this, we can switch back over to CardsPage and we can actually inherit this now; and in C#, it's really easy to inherit things, just with the colon.
public class CardsPage : PageBase
And now we have our PageBase.
You'll notice that the constructor gives us an error and that's because we need to also pass in the driver into our PageBase because that also has a constructor. And so right here, we'll say base and the driver that we're also passing in there to resolve that issue.
public CardsPage(IWebDriver driver) : base(driver)
And now, inside of our GoTo method, we can call HeaderNav directly and we already have our GoToCardsPage.
Last thing, we'll say return this page.
public CardsPage Goto()
{
    HeaderNav.GotoCardsPage();
    return this;
}
And there we go.
# Modifying Test 1
We'll now use this inside of our CardTests class, so let's go inside of here.
We're going to statsroyale.com and then right here instead of this, we're going to say var cardsPage is equal to a new CardsPage.
Need to pass in the driver here. It doesn't know what CardsPage is, so we'll bring it in. It's from Royale.pages.
And now you have CardsPage.GoTo and then .GetCardByName and the card we want is “Ice Spirit”.
We're going to hold this in a variable called “iceSpirit”.
Awesome, we'll grab this [driver.url = [https://statsroyale.com](https://statsroyale.com)], we'll cut it out and put it right inside of our beforeEach, since all of our tests are going there at the very beginning.

Now, looking at this test, it's much cleaner and much simpler than what we had before, so already, test 1 is looking pretty great.
# CardDetailsPage POM
The last page is the Card Details Page.
We'll right-click on Pages > make a New File, “CardDetailsPage.cs”.
Our namespace, which is “Royale.Pages”.
We'll make our class, public class CardDetailsPage.
And then public class CardDetailsPageMap.
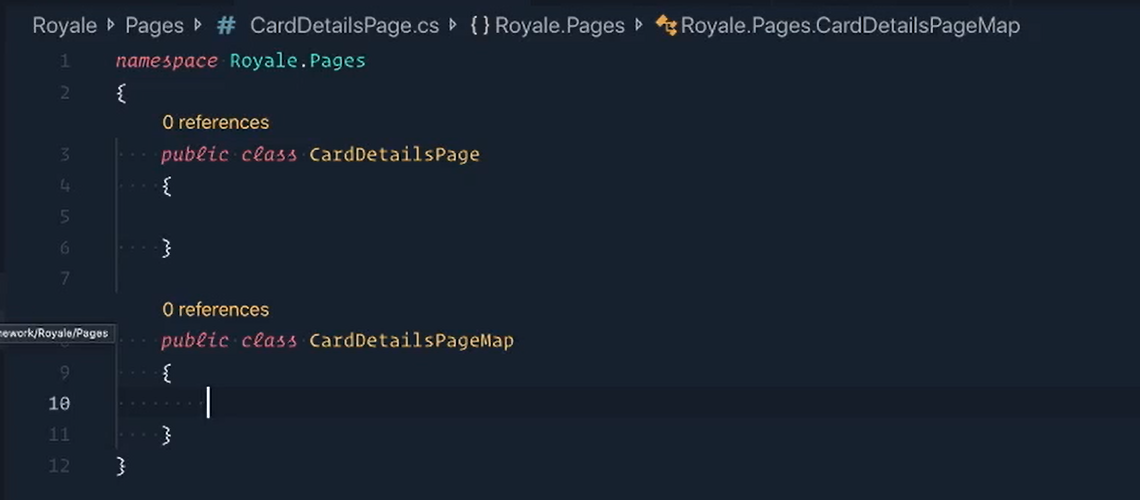
And hopefully, you are seeing the pattern here because each page is going to be following the same steps to get started.
So, I'm going to skip ahead a little bit just so we can save on time.
Hey, you finally caught up. Glad to have you back.
You'll see that I've got quite a bit done already, but I really just put the card name, card category and card rarity into my map.
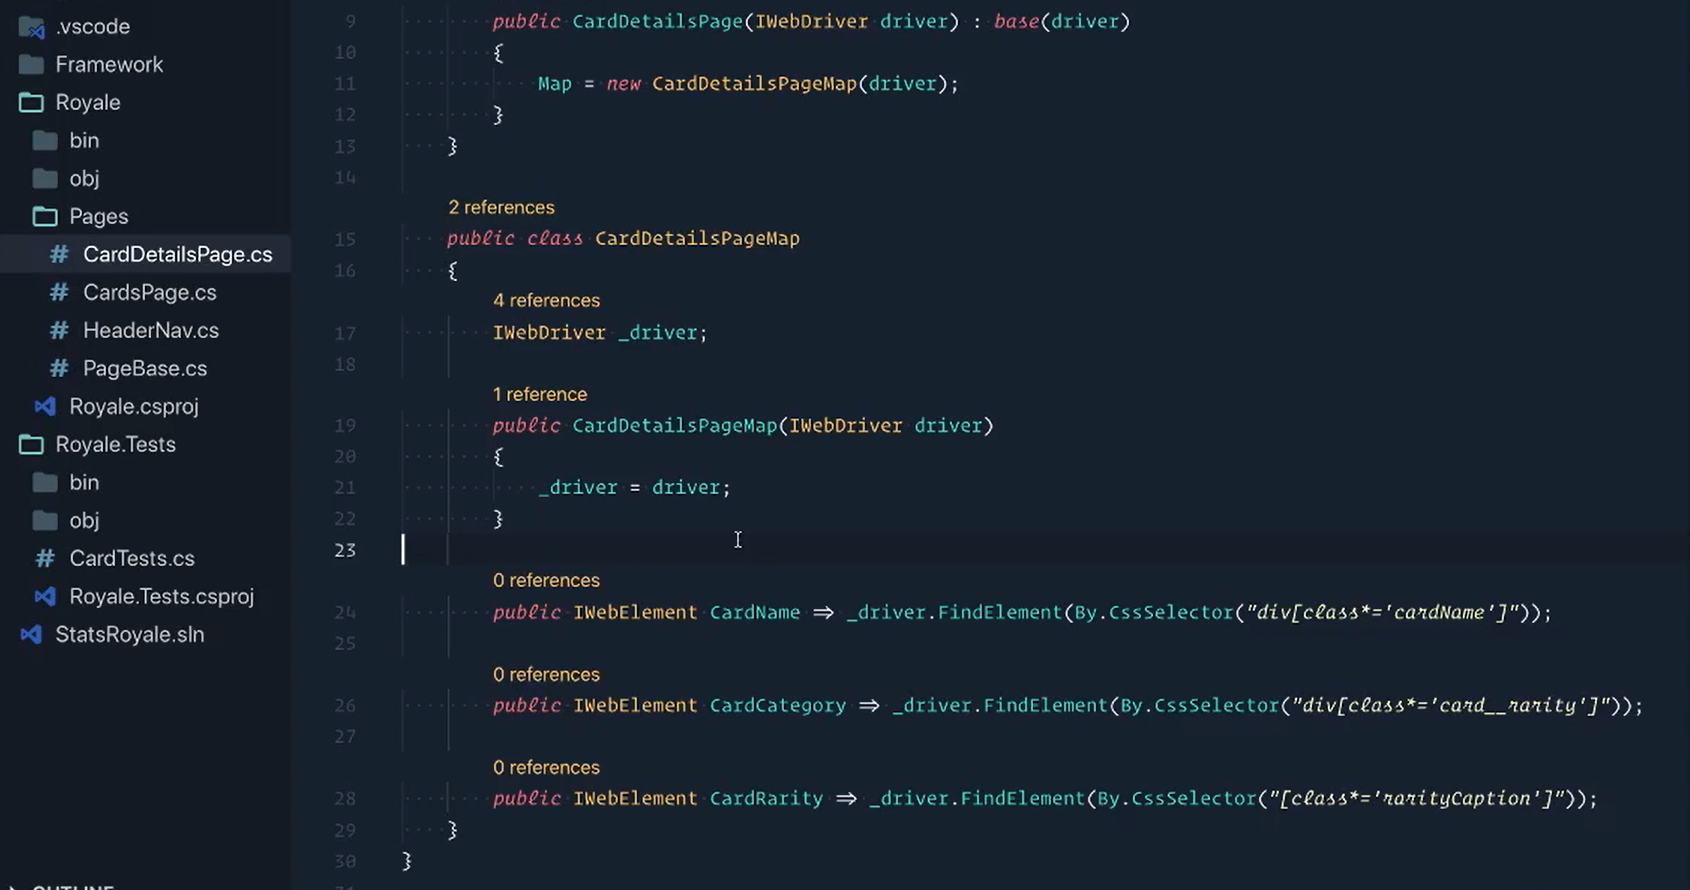
But that doesn't leave the categories of Arena and Type as well.
So inside of our Page Object, we're going to want to include that logic here.
We're going to make a method called GetCardCategory.— public string Category instead of “Type” (they'll be synonymous here), GetCardCategory.
Let's grab our categories and we already have our Map.CardCategory.Text.Split.
Inside of here, we'll chop it by the comma.
Then we can return categories.
The first category we have, we know is the category or type and we'll trim any white space.
And the second one is the arena and we'll also trim any white space as well.
public (string Category, string Arena) GetCardCategory()
{
    var categories = Map.CardCategory.Text.Split(',');
    return (categories[0].Trim(), categories[1].Trim());
}
# Modifying Test 2
Now we can update test 2 in “CardTests”.
We're already navigating to the website, so we don't need this.
I'm going to start by commenting out these 2 lines just because both of these are just getting us to the details page.
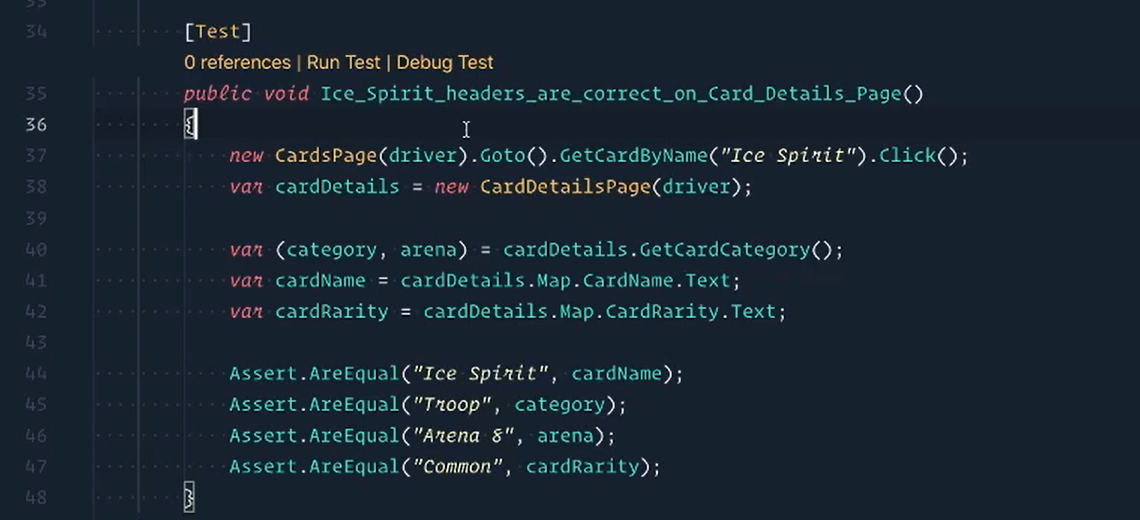
And really, we can handle that by just saying — We need a new CardsPage passing the driver; we'll GoTo the CardsPage; we'll GetCardByName (we're doing “Ice Spirit”) and then we can just Click on this and that will get us to that page.
From there, we can then hold a “CardDetails” page [in a variable], passing our driver .
We'll start with our category and arena. That's cardDetails.GetCardCategory.
For our cardName, we can actually get rid of all of this here because we already have it in our Card Details — cardDetails.Map — it's inside of our Map. So, here's our cardName.text.
We don't need this [the old cardCategories variable], that's already taken care of.
For the cardType, we're currently calling it cardCategory — so I'm just going to get rid of this cardType and get rid of this cardArena.
And as for the cardRarity, we can also change this to be cardDetails.Map.CardRarity and we'll grab the text from that.
So here [in our Assert] we'll go to cardName, change this here.
The type, we've changed to say category. And the cardArena is just arena.
Let's delete these last two [commented out] lines here since we don't need this.
Great work.
Our test is looking much better and we don't have complicated logic exposed in the test, so it's easier to follow.
But does that mean we're done?
Of course not. There is so much more work to be done.
Challenge
On the CardDetailsPage, I skipped ahead to save on time. If you paused the video to copy what I had down in my CardDetailsPageMap, you may have noticed that Test 2 fails on the rarity assertion with a message like:
Expected string length 6 but was 13.
Expected: "Common"
But was: "Rarity\nCommon"
The challenge is for you to solve the failure so the tests pass.
HINT: We don't want the "Rarity\n" part.
