
Transcripted Summary
In this chapter, we'll be wrapping Selenium's WebDriver with our own driver class, and then start to use it in our pages and tests.
In the previous chapter, we saw that our tests can't run in parallel because they are sharing the same instance of WebDriver.
We could fix this by instantiating a new WebDriver within each test, rather than declaring it at the top of our class.
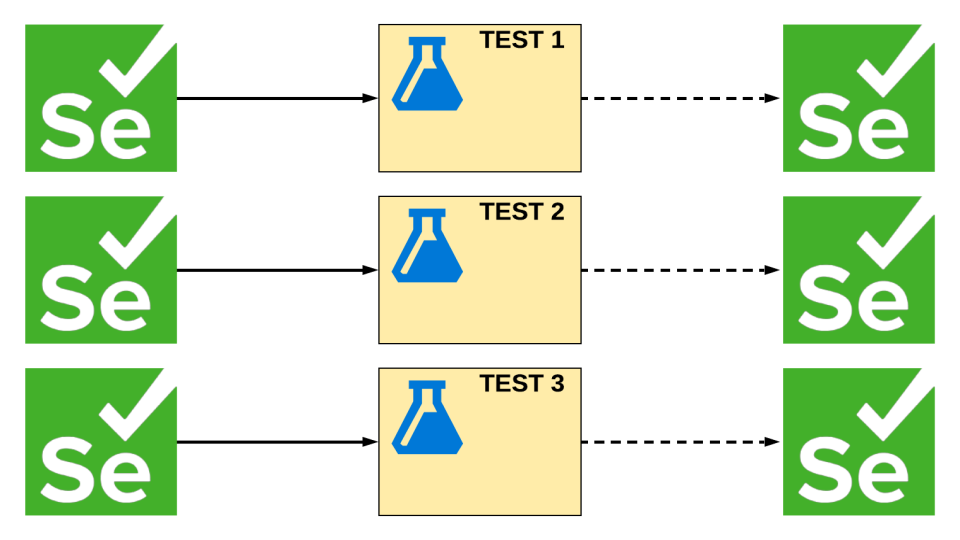
However, we've already seen some nasty side effects to this approach.
Remember when we were making our Page Objects and we had to pass around a driver and _driver all over the place? Yeah, not so fun.
We could create a static or global WebDriver, so we could avoid all that "pass driver here" or "_driver there" and make working with it so much easier.
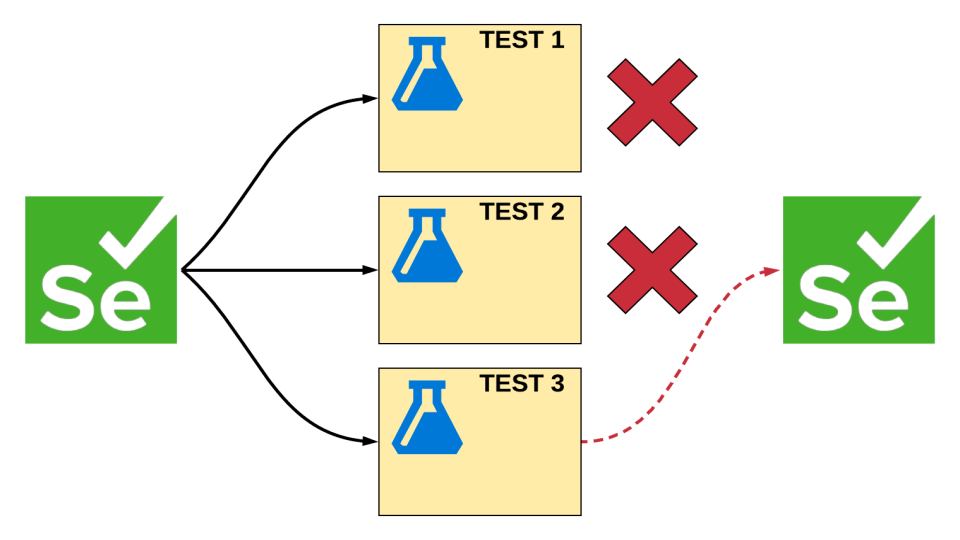
But, a single instance of WebDriver gets us right back to not being able to run tests in parallel.
What if I told you that there was a way for us to get multiple instances of a driver, while also being able to use it like a static driver?
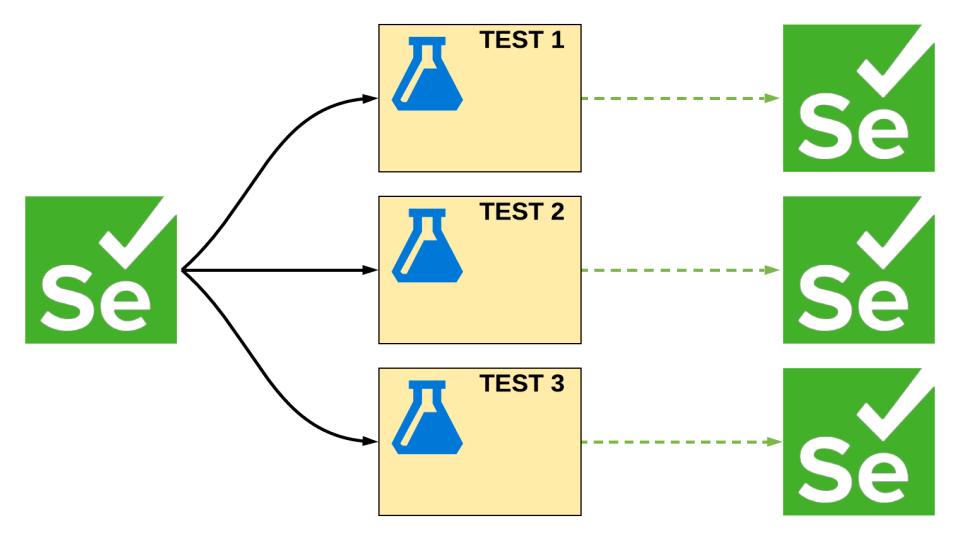
That is exactly what we're going to do right now.
# ThreadStatic Driver
We'll start by creating a “Selenium” folder inside of our “Framework” project.
Then inside of here, we're going to make a new file called, “Driver.cs”.
We know the namespace is “Framework.Selenium”, and this will be a public static class called the “Driver”.
The first thing we'll do is declare a private field, private static IWebDriver, and this is going to be our _ driver that we're going to be holding and wrapping things around. just make sure to bring in Selenium.
We've got to give driver a value now.
So, we're going to make a method called public static void Init.
When we call this, we'll give _driver the value.
Right now, we're giving this value inside the test.

So, let's just copy and paste that real quick. We just need this new part, copy.
Switch back to driver, paste it in.
Now, let's make sure to bring in our ChromeDriver.
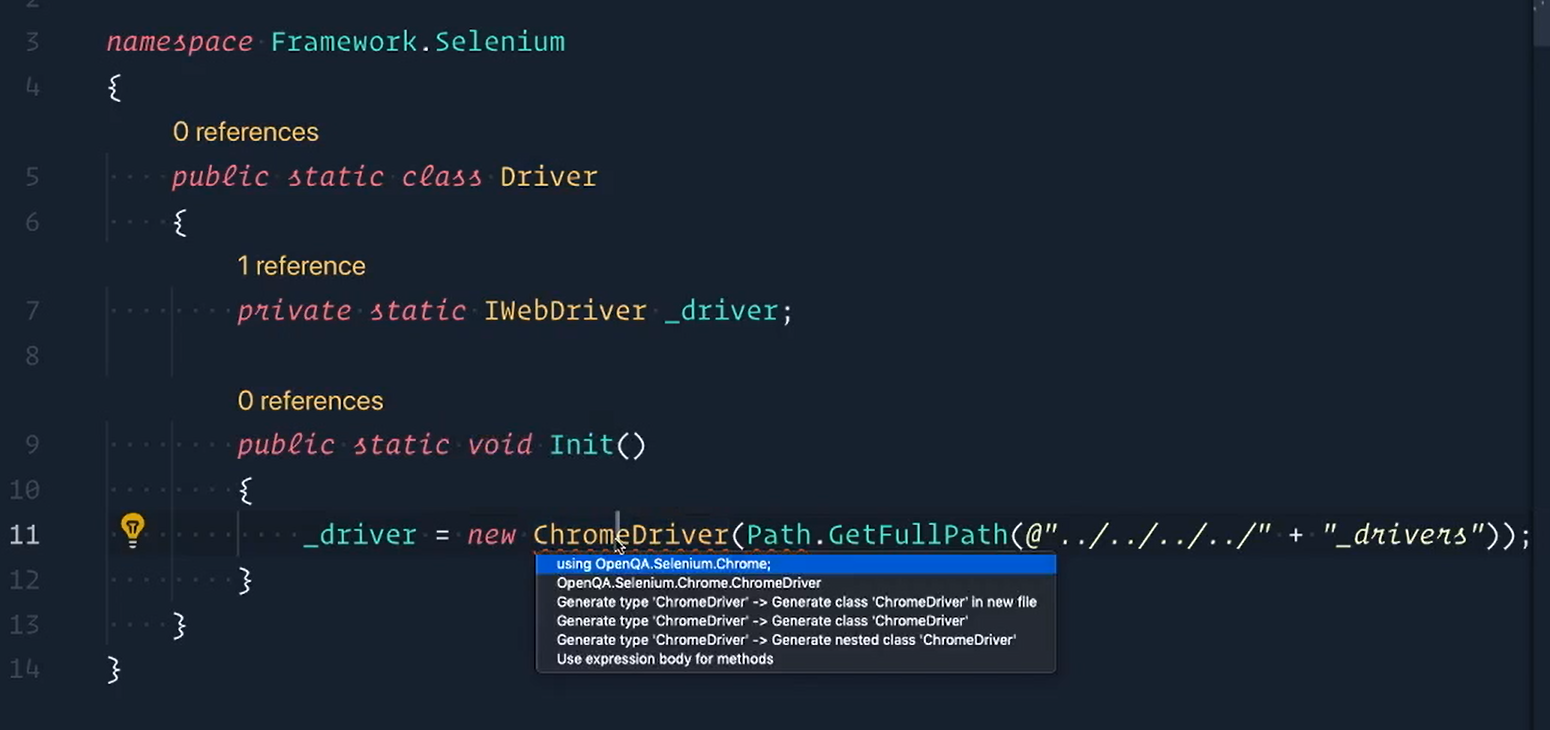
And we'll do the same thing for Path (System.io).
using System.IO;
using OpenQA.Selenium;
using OpenQA.Selenium.Chrome;

namespace Framework.Selenium
{
    public static class Driver
    {
        [ThreadStatic]
        private static IWebDriver _driver;

        public static void Init()
        {
            _driver = new ChromeDriver(Path.GetFullPath(@"../../../../" + "_drivers"));
        }
}
We're going to label our field with the ThreadStatic attribute.
This is the attribute that does all the magic.
Then from there, let's add a property public static IWebDriver Current.
Current is going to give us the current value of the _driver, but if it's null, we're going to throw a NullReferenceException. Let's just say driver is null.
public static IWebDriver Current => _driver ?? throw new NullReferenceException("_driver is null.");
There we go.
Back in our “CardTests” now, we can get rid of this “lower case” driver [in our SetUp].
So, we'll delete that and replace it with our own Driver.
Import Framework.Selenium; Driver.Init().
Perfect, we don't need this [IWebDriver] anymore.
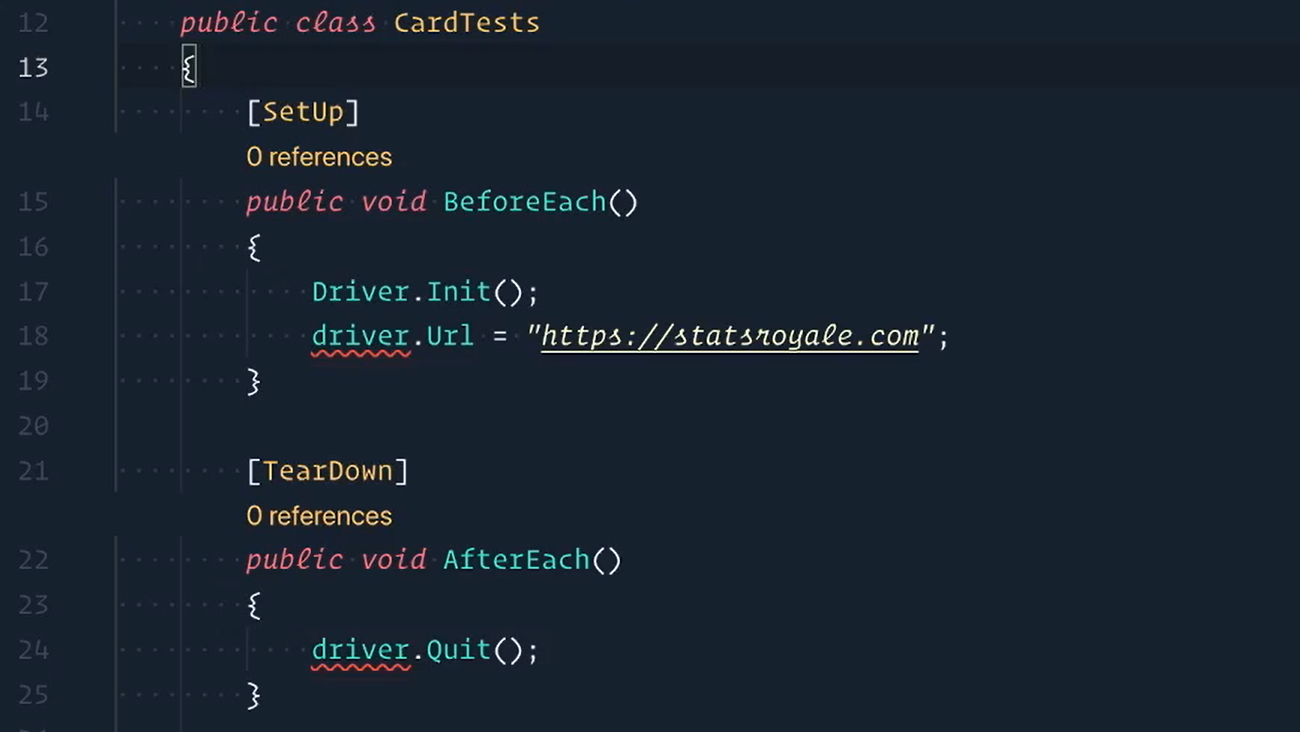
Well now, we get red squigglies kind of everywhere because we're still referencing the “lower case driver”.
You'll see red squigglies kind of throughout the pages.
Let's replace it with Driver.Current.
Driver.Current.Url= “https://statsroyale.com”;Driver.Current.Quit();
So now what we're saying is we want the current instance of driver to go to this URL; and the current instance of driver to Quit.
And now we can also pass in the current instance of driver into our pages.
I think this second test actually we can just delete since we're taking care of that in the third test.
And now on this test we're going to pass it in the current instance of driver to our pages as well.
So, CardDetailsPage(Driver.Current).

Save the file.
Awesome.
So now let's open up our terminal and let's run our tests.
Filter with the test category equals cards.
dotnet test --filter testcategory=cards
Okay, now we're going to see 2 browsers open up like we did before, but now each one of these browsers is now has its own instance of WebDriver.
So, the one on the right is going to go to Mirror and then close; and the one on the left is going to go to Ice Spirit and close.
Perfect.

So now you get the 2 browsers running correctly and in parallel also the test passed.
That was pretty easy.
But what just happened?
Well if you remember, we labeled our _driver with a ThreadStatic attribute and that indicates that the value of the static field is unique for each thread.
So, if I had 4 tests running on their own threads, then each thread would have its own instance of driver. Very cool stuff.
# ThreadStatic Pages
We can actually apply this to the Page Objects as well by putting them into a wrapper class.
We'll start by going to our “Royale” project and we're going to go inside of the “Pages directory”, create a “Pages.cs” file.
First thing is the namespace and we know what that is, we're inside of “Royal.Pages”.
Then we'll create the class, public class Pages.
Now just like we did in Driver, we're going to create a field for our Pages.
So,
public static CardsPage, we'll call it “Cards”And
public static CardDetailsPage, we'll call this one “CardDetails”
Now to create the initialize method, void Init.
When we call this, we'll give our “Cards” page a new cardPage and pass in whatever the current instance of driver is at the time. Then same thing for “CardDetails”
Good, and now let's bring in Framework.Selenium since that's what we're using.
And the last thing is now to add the ThreadStatic attribute to both of these pages.
# Pages.cs
using System;
using Framework.Selenium;

namespace Royale.Pages
{
    public class Pages
    {
        [ThreadStatic]
        public static CardsPage Cards;

        [ThreadStatic]
        public static CardDetailsPage CardDetails;

        public static void Init()
        {
            Cards = new CardsPage(Driver.Current);
            CardDetails = new CardDetailsPage(Driver.Current);
        }
    }
}
Save the file.
And there we go our pages wrapper class is now done. We can now use this inside of our tests.
So, before each one of our tests, we're giving it a new instance of driver, and now we're going to say we want new instances of our pages and we're going to pass in that instance of WebDriver.
That's that.
Now let's call it inside of our test.
We don't actually need to use new CardsPage anymore because our Pages wrapper is handling the pages. So we can replace CardsPage with Pages.Cards.Goto and GetCardByName.
And this test is done.
[Test]
public void Ice_Spirit_is_on_Cards_Page()
{
    var iceSpirit = Pages.Cards.Goto().GetCardByName("Ice Spirit");
    Assert.That(iceSpirit.Displayed);
}
Very, very nice, it looks awesome.
On to the next test.
Same thing here we don't need this new CardsPage — we'll replace this with Pages.Cards.
And the second one here, new CardDetailsPage you don't need this. And you guessed it, card details is now Pages.CardDetails.
Pages.Cards.Goto().GetCardByName(cardName).Click();
var cardOnPage = Pages.CardDetails.GetBaseCard();
Save the file.
And if you run the test now, you'll see that they pass as expected.
# Creating Our Own Driver Implementation
We can continue to use our static Driver within the Page Objects themselves, but we'll need to give our Driver some familiar functionality instead of just using Driver.Current everywhere.
First things first, we need to navigate to URLs.
So, let's add a GoTo method to our Driver class — public static void Goto(string url) — and then we'll pass in a URL.
Now we can use Current, since this is an IWebDriver, we'll say Navigate and GoToUrl(url), whichever one we pass in.
public static void Goto(string url)
{
    Current.Navigate().GoToUrl(url);
}
One of the cool things about approaching it in this way is that we can add any functionality that we want.
For example, if we wanted to, we could actually say in debug mode — Debug.WriteLine(url); — whenever I'm running my tests in debug mode, I want to actually list the URL that I'm going to.
And you can imagine putting some debug lines throughout your tests to actually see console output, and that's just one thing.
Another thing that we could do is to also check to see that the URL we're passing in has the proper HTTP or HTTPS protocol.
Let's check for that.
We're going to say if the URL does not start with HTTP, then we're going to prefix it for the user. Then we'll debug and write that line out, so we know exactly what URL we went to.
And then ultimately the method will then get the driver to go to that URL.
public static void Goto(string url)
{
    if (!url.StartsWith("http"))
    {
        url = $"http://{url}";
    }

    Debug.WriteLine(url);
    Current.Navigate().GoToUrl(url);
}
So even if they pass in something like “google.com” that normally would break, it would say “google.com, go into our if statement and then prefix HTTP at the beginning of it” so it would navigate correctly.
But like I said, you can customize the way you navigate to URLs and really do anything.
You could even have it where the GoTo method wouldn't go anywhere.
And that's the power of being able to wrap Selenium with your own functionality is you now get the base piece of what Selenium is meant to do and actually customize it to what you need, your app and your stack.
So now let's use this GoTo method inside of our tests.
We'll switch back here up to the top [in our SetUp] and instead of Driver.Current.Url , we can now just say Driver.Goto.
[SetUp]
public void BeforeEach()
{
    Driver.Init();
    Pages.Init();
    Driver.Goto("https://statsroyale.com");
}
And of course, if you run the tests, you would see that everything would pass as expected.
# Using Driver.FindElement[s] in Our Pages
The last thing we'll do is to add a FindElement and FindElements method to our Driver class.
That way we can use our own implementation of driver to return elements and that will simplify our pages as well.
So, in our Driver class we're going to make 2 new methods.
The first one, public static IWebElement, and this one is just called FindElement and we'll make sure to pass in By.
We'll then return Current.FindElement with however we're finding it by CSS or by ID or, however.
The next one will look very, very similar, but this will be an IList of IWebElement, and this one will be called FindElements.
We'll need to make sure to bring this in, System.Collections.Generic. And this one is return Current.FindElements(by).
public static IWebElement FindElement(By by)
{
    return Current.FindElement(by);
}

public static IList<IWebElement> FindElements(By by)
{
    return Current.FindElements(by);
}
We now have the same functionality as the IWebDriver to be able to find an element and find elements.
Now let's use this in our Pages.
Let's open up our “Pages” (this is inside of “Royale.Pages”) and we'll just go down the list.
We'll start with “CardDetailsPage.cs” and go to the very, very bottom.
And here's where we want to change stuff.

So, we're going to get this lowercase _driver and replace it with just a large Driver.
This is Our Driver; or Big Daddy Driver.
Let's bring this in using Framework.Selenium.
And then we actually don't need this part here — _driver = driver — the whole constructor in this.
We don't need this anymore cause that's being handled by our ThreadStatic Driver.
Let's scroll up to our Page Object.
We'll get a few errors here.

We don't need to do this either. So, I don't need to pass in any of these drivers, this as well. Save this.
public class CardDetailsPage : PageBase
{
    public readonly CardDetailsPageMap Map;

    public CardDetailsPage()
    {
        Map = new CardDetailsPageMap();
    }
}
And now here it's saying that our PageBase requires an IWebDriver — but because of our ThreadStatic Driver; we don't need to do that anymore either.
So, let's go to our PageBase right here.
Let's take care of that.
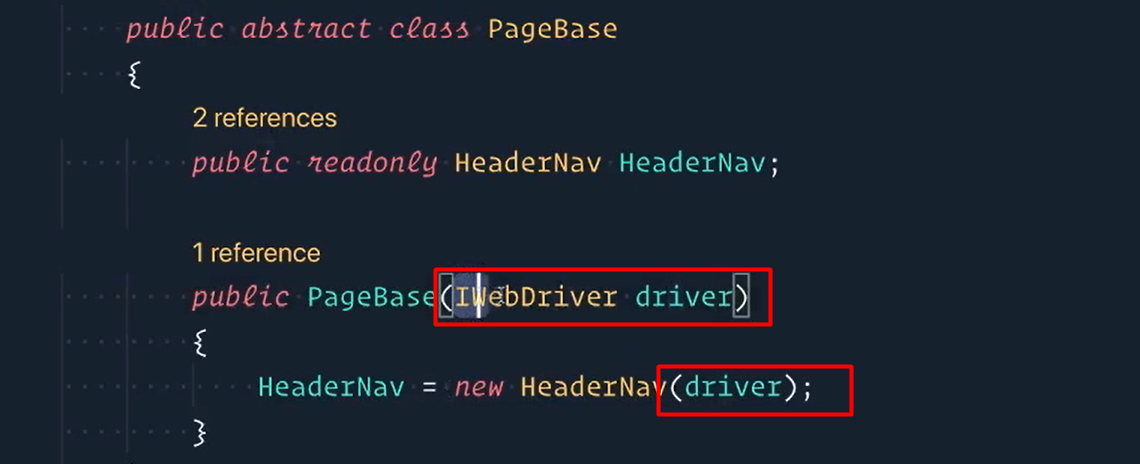
We don't actually need to do this or this.
namespace Royale.Pages
{
    public abstract class PageBase
    {
        public readonly HeaderNav HeaderNav;

        public PageBase()
        {
            HeaderNav = new HeaderNav();
        }
    }
}
Let's save it.
Now it's saying, “Hey wait a second HeaderNav needs something”.
So, we're going to go there and clean that up as well.
Lots of things that we're deleting this is good.
PageBase is taken care of and you'll see the errors are gone from our CardDetailsPage.
Switch over to our HeaderNav.
You don't need to pass in driver.
And then for our Map as well we don't need this anymore [IWebElement constructor and this [_driver] is now uppercase Driver.
Let's bring it in.
All right, all the errors are taken care of here, save it.
Back over here let's switch back to our CardsPage now.
Our CardsPpage, just like the other pages, we don't need to pass in drivers anymore.
Our base class doesn't require a driver either. This shouldn't require a driver.
Down to our Map. We can get rid of these lines and then this _driver is the uppercase Driver.
Bring it in, save.
Open up our Pages right here.
And the last thing here is just to remove these Driver.Current because we don't have to pass anything in anymore.
My goodness, are we done? Let's save it.
Let's open up a terminal and I'm going to say dotnet build, just to make sure that everything passes correctly.
Huzzah, we did it!
Excellent. Awesome, awesome.
Goodness, we deleted a lot of stuff and that's awesome. Wow!
So, lots of refactoring there and really all because we wrapped IWebDriver with our own Driver.
Something cool to point out as well is that we didn't have to change anything in our tests this time. That means our framework is doing its job well.
Of course, if you run the tests again, they should still pass. Our framework is really starting to come together.
Challenge
We wanted to stop using Driver.Current as much as possible, but we currently have Driver.Current.Quit(); in our TearDown method.
The challenge is to create your own implementation of Quit() inside our new Driver class. Then use it in the TearDown method.
