

Transcripted Summary
The last suite of tests will be around the site's Deck Builder functionality.
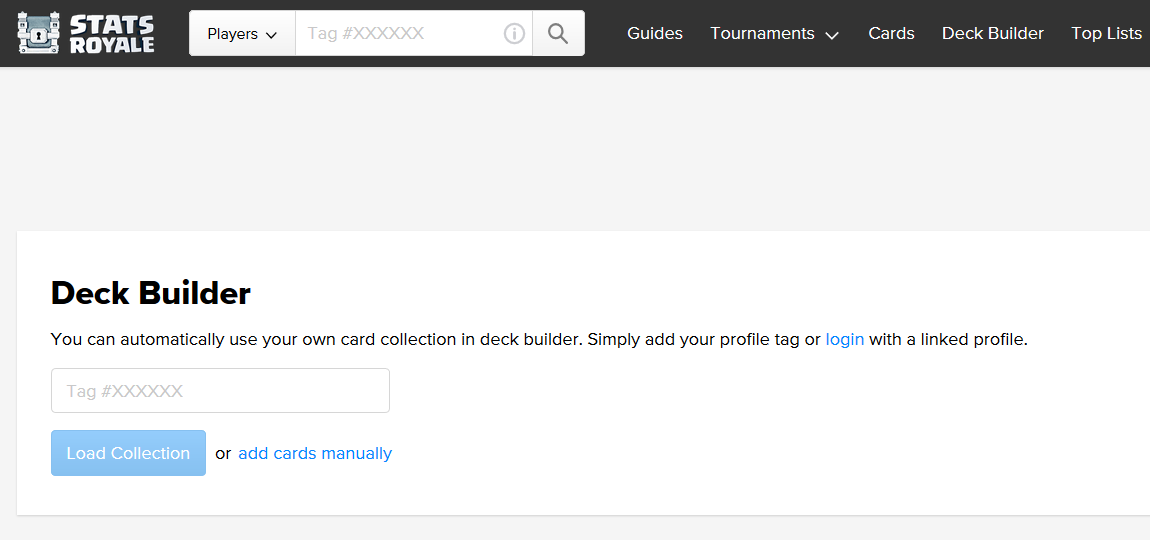
On the Deck Builder page, users have the option to copy the deck.
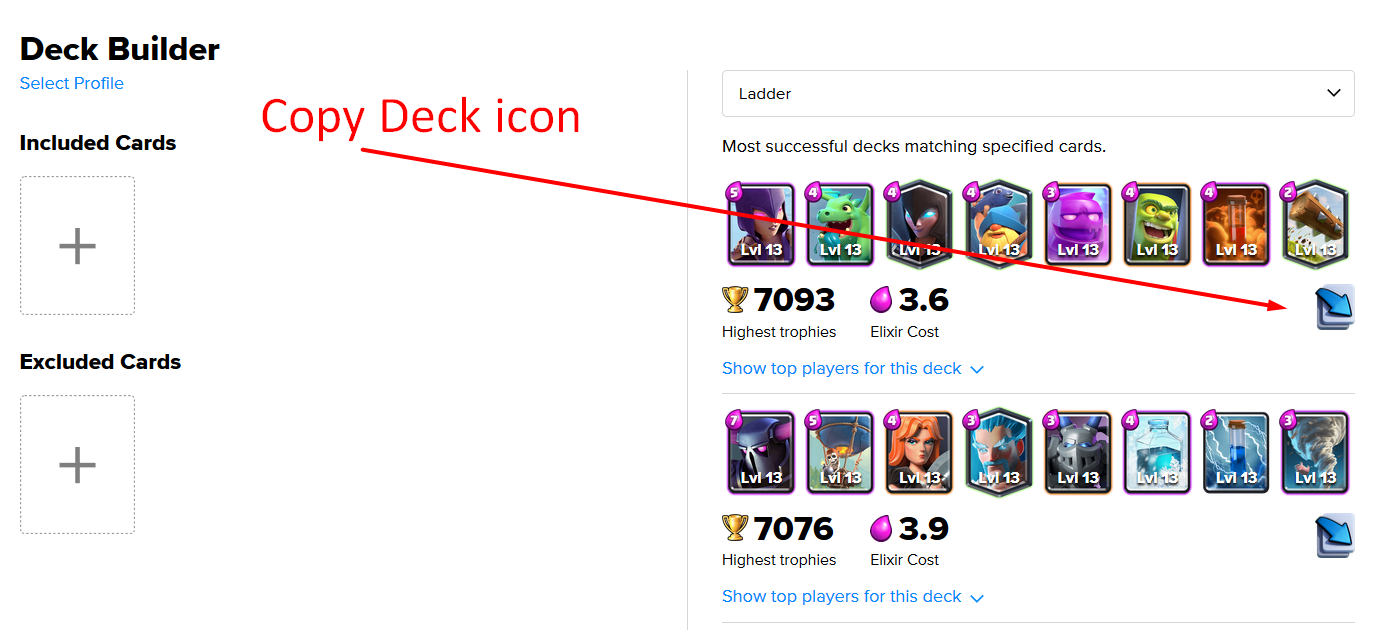
They'll click on this add cards manually or Load Collection, it'll display different decks.
And then you can actually click on this Copy Deck icon to take it to the Copy Deck page.
From here, they can either click Yes to copy the deck.
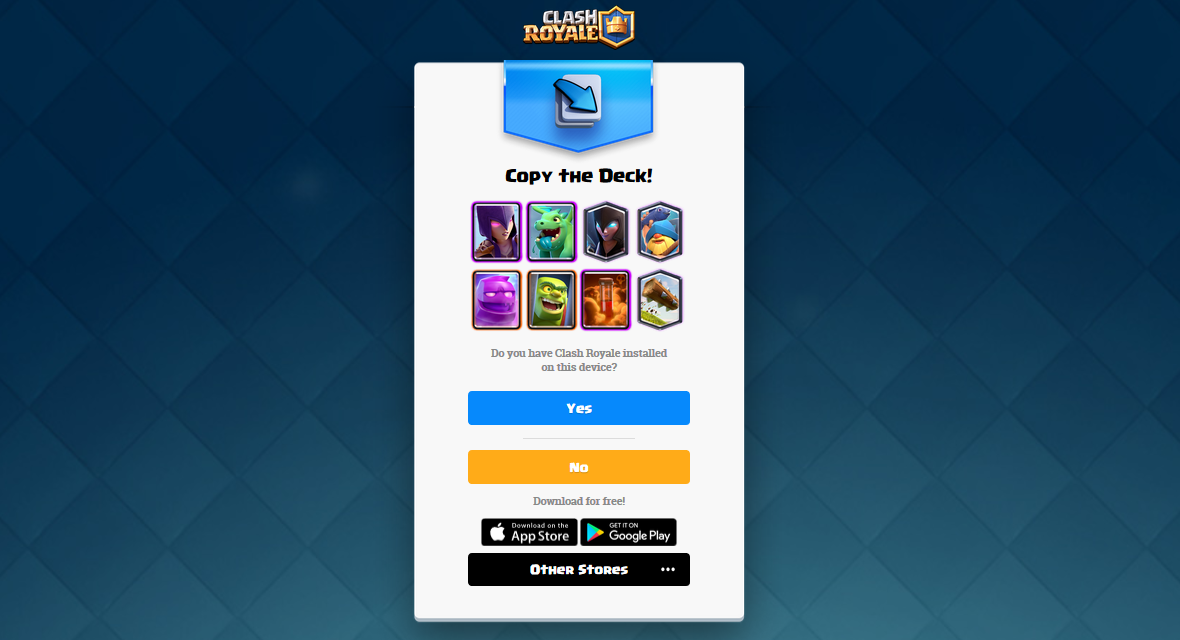
Or they can click No to go to one of the app stores to download the app.
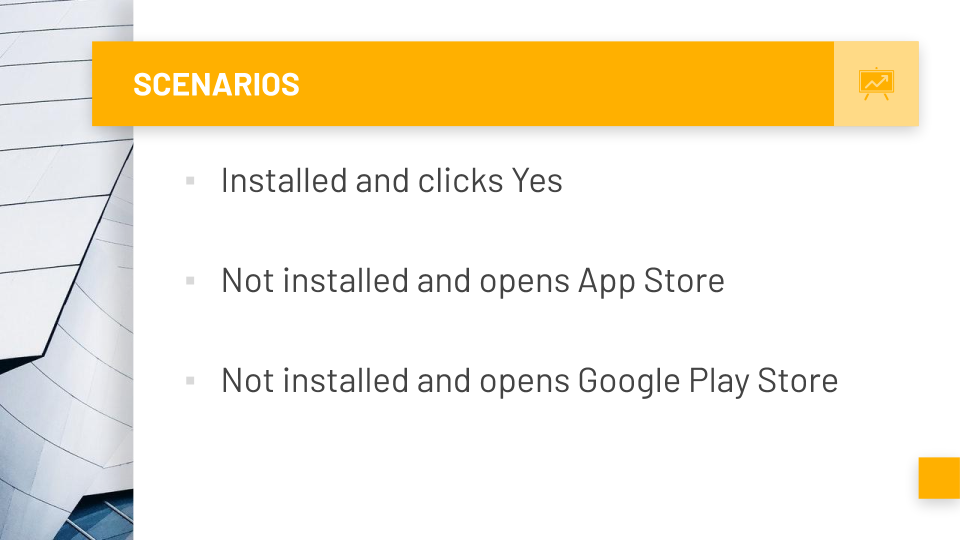
There are 3 scenarios.
The user has the app installed and clicks Yes to copy the deck.
The user does not have the app installed and opens the App Store.
The user does not have the app installed and opens the Google Play Store.
# Create the First Copy Deck Test
We'll start with the easiest test, which is that the user can copy the deck.
Some pieces of the video will be accelerated, so feel free to pause as often as you need. Let's get started.
First thing we'll do is copy the [SetUp] and [TearDown] [from our “CardTests.cs”].
Then we'll make a new test class —this one will be called “CopyDeckTests.cs”.
Put in the namespace [Tests], and give this class a name, CopyDeckTests.
namespace Tests
{
    public class CopyDeckTests
    {
        [SetUp]
        public void BeforeEach()
        {
            Driver.Init();
            Pages.Init();
            Driver.Goto("https://statsroyale.com");
        }

        [TearDown]
        public void AfterEach()
        {
            Driver.Quit();
        }
    }
}
We'll paste everything in, and make sure to bring in those “using” statements.
From there, we'll make the [Test] method itself.
We'll call this one “User_can_copy_a_deck”, and then let's list out the steps, so we know exactly what we're doing.
Then we can start bringing things in. I've already found all of these already and tried them out in the console.
[Test]
public void User_can_copy_the_deck()
{
    // 2. go to Deck Builder page
    Driver.FindElement(By.CssSelector("[href='/deckbuilder']")).Click();

    // 3. Click "add cards manually"
    Driver.FindElement(By.XPath("//a[text()='add cards manually']")).Click();

    // 4. Click Copy Deck icon
    Driver.FindElement(By.CssSelector(".copyButton")).Click();

    // 5. Click Yes
    Driver.FindElement(By.Id("button-open")).Click();

    // 6. Assert the "if click Yes..." message is displayed
    var copyMessage = Driver.FindElement(By.CssSelector(".notes.active"));

    Assert.That(copyMessage.Displayed);
}
# Create the Pages for Our Test
From there, we're going to now make the Pages.
The first page we're going to make is the “DeckBuilderPage.cs”.
Now, let's fill this in, starting with namespace [“Royale.Pages”].
And then the 2 classes — DeckBuilderPage and DeckBuilderPageMap.
I'm just going to grab these from the tests. Just copy and paste them in and then bring in those using statements.
The second element here is for the CopyDeckIcon.
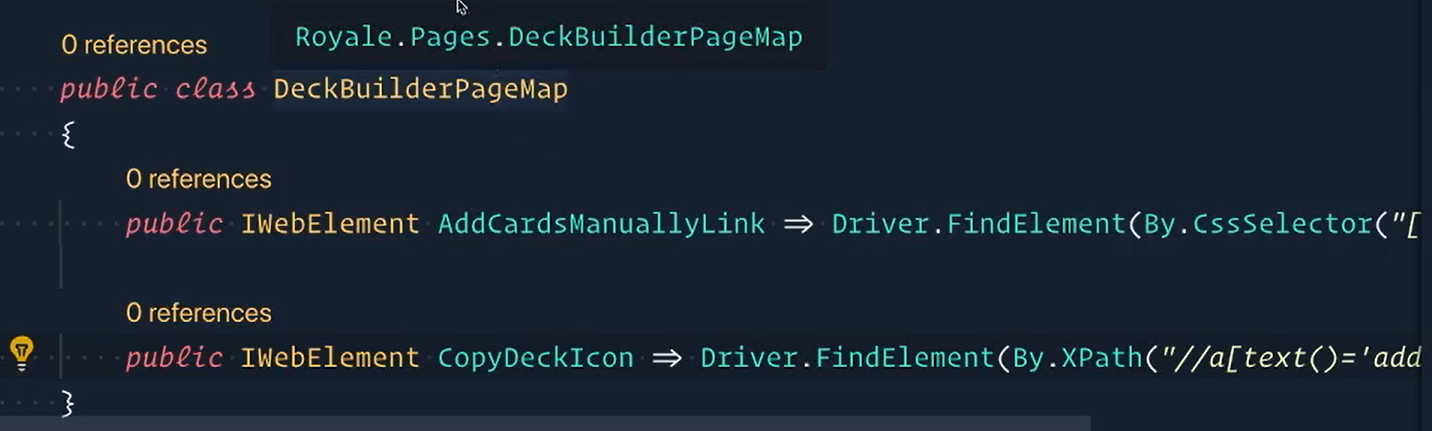
public class DeckBuilderPageMap
{
    public IWebElement AddCardsManuallyLink => Driver.FindElement(By.CssSelector(""));
    public IWebElement CopyDeckIcon => Driver.FindElement(By.XPath("//a[text()='add cards manually']"));
}
There we go. The Map is done, and now we can switch over to our Page.
We'll start with a GoTo method.
Clicking on the Deck Builder link is inside of the header nav, so let's switch to that [“HeaderNav.cs”] and add it there.
public class HeaderNavMap
{
    public IWebElement CardsTabLink => Driver.FindElement(By.CssSelector("a[href='/cards']"));
    public IWebElement DeckBuilderLink => Driver.FindElement(By.CssSelector("a[href='/deckbuilder']"));
}
We'll slow things down now.
Inside of here back at our GoTo method, we're going to now call it a different way.
We'll just call the Map of the HeaderNav directly and Click on that.
Then, we can return the page.
public DeckBuilderPage Goto()
{
    HeaderNav.Map.DeckBuilderLink.Click();
    return this;
}
Awesome.
Now, the next method we're going to make is just called AddCardsManually.
In order to use this, we have to access the elements inside the map.
So, let's define the Map — DeckBuilderPageMap — and its Map with uppercase M because it's public.
Make a constructor — this is DeckBuilderPage — we don't need any parameters. Now, we can say Map is equal to a new Map.
public readonly DeckBuilderPageMap Map;

public DeckBuilderPage()
{
    Map = new DeckBuilderPageMap();
}
Now that we have this, we can call the Map inside of this AddCardsManually function.
public void AddCardsManually()
{
    Map.AddCardsManuallyLink.Click();
}
The next one we'll do is a method called CopySuggestedDeck.
Now, all of those Copy Deck icons, there's quite a few of them on the page, so this one is just going to grab the first one.
So, the first suggested deck, click on that one.
public void CopySuggestedDeck()
{
    Map.CopyDeckIcon.Click();
}
Now, that deck is done. We'll look here.
The next one we need to do is the Copy Deck Page.
Back into Pages, we'll right-click > New File — “CopyDeckPage.cs”.
We'll fill this namespace in as well, “Royale.Pages”,
Then put in the Page [CopyDeckPageMap] and the Map [CopyDeckPageMap `] as well.
Fill it in with the elements on the page — we'll have the YesButton and we'll also have the CopiedMessage.
Note
I think you have been doing this so much that hopefully, it starts to get boring because you've just followed this model. And it's becoming so easy for you to understand that you're like, "I know exactly how to make pages now." Because that's the whole point of a pattern is that you follow, well, the pattern for every one of these pages.
We'll make a Yes method that just clicks on Yes.
namespace Royale.Pages
{
    public class CopyDeckPage
    {
        public readonly CopyDeckPageMap Map;

        public CopyDeckPage()
        {
            Map = new CopyDeckPageMap();
        }

        public void Yes()
        {
            Map.YesButton.Click();
        }
    }

    public class CopyDeckPageMap
    {
        public IWebElement YesButton => Driver.FindElement(By.Id("button-open"));
        public IWebElement CopiedMessage => Driver.FindElement(By.CssSelector(".notes.active"));
    }
}
# Refactor the CopyDeckPage Actions
Then we need to add these to the Pages wrapper [“Pages.cs”].
We'll slow down again because I want to make sure that this is very, very clear.
We're going to add the [ThreadStatic] attributes and then the member, public static DeckBuilderPage and we'll call it “DeckBuilder”.
The next one is our public static CopyDeckPage, and we'll call this one “CopyDeck”.
Now, we need to give these values inside of that Init method, so DeckBuilder is going to equal a new DeckBuilderPage, and CopyDeck is going to equal a new CopyDeckPage.
# Pages.cs
namespace Royale.Pages
{
    public class Pages
    {
        [ThreadStatic]
        public static CardsPage Cards;

        [ThreadStatic]
        public static CardDetailsPage CardDetails;

        [ThreadStatic]
        public static DeckBuilderPage DeckBuilder;

        [ThreadStatic]
        public static CopyDeckPage CopyDeck;

        public static void Init()
        {
            Cards = new CardsPage();
            CardDetails = new CardDetailsPage();
            DeckBuilder = new DeckBuilderPage();
            CopyDeck = new CopyDeckPage();
        }
    }
}
Now, we can use these in the tests.
Let's start commenting out these lines that we don't need any more and replacing it with what we've created.
Now, let's clean our test up, and let's see what we have.
There we go, much cleaner.
namespace Tests
{
    public class CopyDeckTests : TestBase
    {
        [Test]
        public void User_can_copy_a_deck()
        {
            Pages.DeckBuilder.Goto();
            Pages.DeckBuilder.AddCardsManually();
            Pages.DeckBuilder.CopySuggestedDeck();
            Pages.CopyDeck.Yes();
            Assert.That(Pages.CopyDeck.Map.CopiedMessage.Displayed);
        }
    }
}
Let's try to run this now.
Let's open up a terminal.
Say dotnet test --filter and the default filter's by name, so we'll just pass in user_can_copy_the_deck.
dotnet test --filter user_can_copy_the_deck
We'll open up a browser,
And even before things get started, it seems like it'll crash and break on us.
We'll go back over to code, and it did fail.
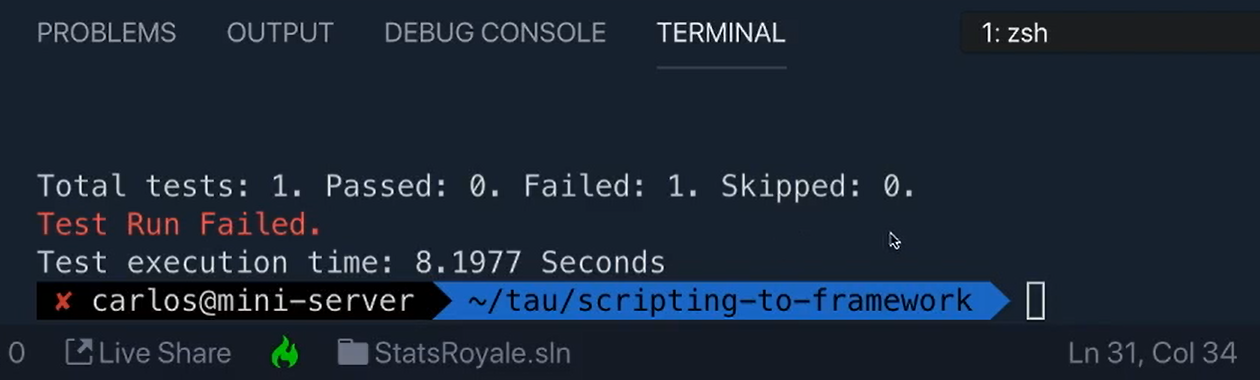
If you haven't guessed it already, the test is going way too fast.
# WebDriverWait Out of the Box
In our tests, let's initialize a new WebDriverWait.
Right here, we're going to say var wait = new WebDriverWait.
Let's bring this in. This is from OpenQA.Selenium.Support.UI.
And this requires two things.
- It needs an IWebDriver, which we know is our current driver
- Then a
TimeSpanas well (TimeSpanis using System), and then we can sayFromSeconds
Let's put in 10 seconds for now.
var wait = new WebDriverWait(Driver.Current, TimeSpan.FromSeconds(10));
I don't think anything should take longer than that.
And now we can use wait.
Now, what I saw from the error log, it said that it was unable to find the Copy Icon element.
That's probably right after the AddCardsManually, so let's put that here.
We're going to say wait.Until and we have to pass in a driver.
Note
Lambdas and things are advanced C#, and we're not really going to talk about it too much. Just know that for when you're using it out of the box like this, you do need to pass in a driver.
I'm misspelling it this way [“drvr” instead of “driver”] just so you know that it's kind of like this throwaway driver.
We can actually use it inside of this function if we wanted to.
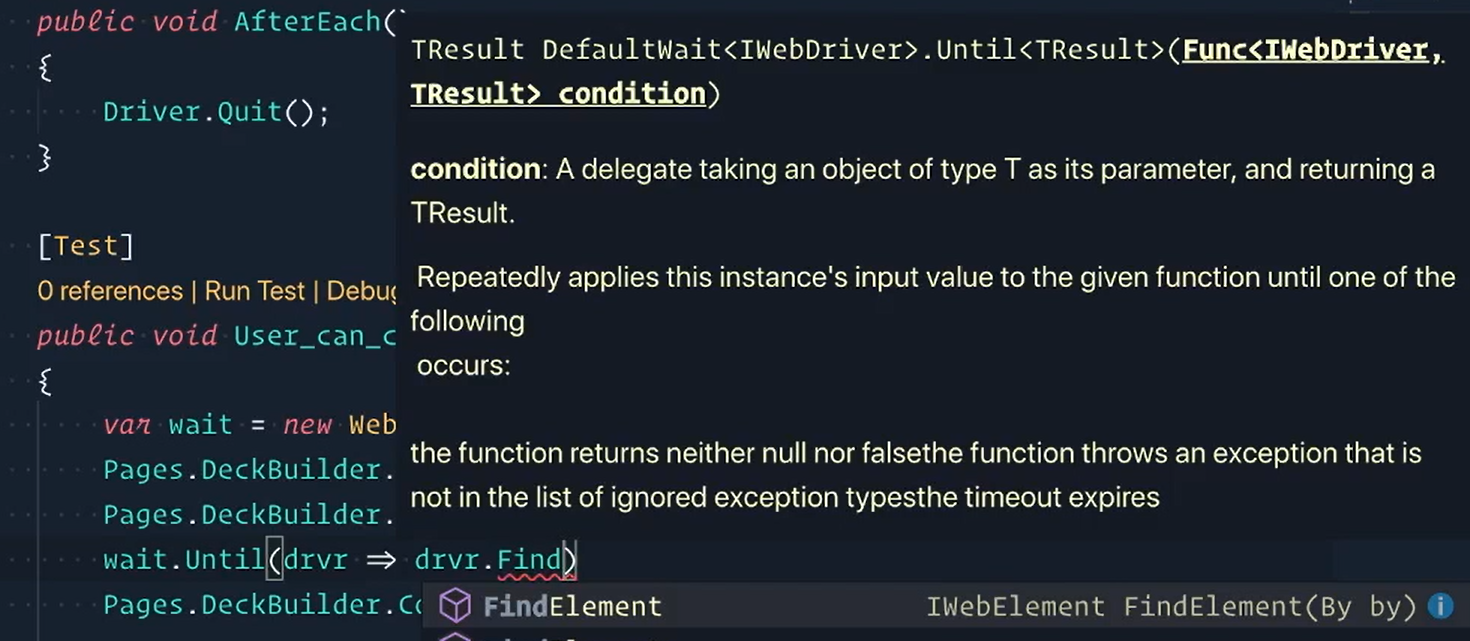
You can see that it is an actual driver.
But we're using a driver already, so let's just keep using that guy.
We're going to say:
wait.Until(drvr => Pages.DeckBuilder.Map.CopyDeckIcon.Displayed);
Okay, we'll wait for that to be displayed.
However, if we were to run the tests again, it would actually break somewhere else.
That wait would work, which is awesome, but it would say that the CopiedMessage is not displayed either.
It would say unable to find CopiedMessage, so we need to put one right here as well.
We'll use our throwaway driver and say:
wait.Until(drvr => Pages.CopyDeck.Map.CopiedMessage.Displayed);
Assert.That(Pages.CopyDeck.Map.CopiedMessage.Displayed);
Now, this looks really funny because we're saying wait for it to be displayed, and then we're asserting that it's displayed.
Technically, the way it's written right now, we could get rid of the assertion because if this passed and didn't throw an exception, we know that it was found, and it was displayed.
For now, we'll leave it like this, and if you were to run the tests, this would actually pass now.
Note
Now, for those of you at home who are watching, and you have run the tests right now and it failed, this would be a great time to pause the video, scroll down to the challenge, and try to complete the challenge. Once you have that done, come back, and we'll continue.
# Refactor WebDriverWait into a Wait class
What we'll do now is to add WebDriverWait to our Driver implementation. That way, it's inside of our wrapper, and it kind of follows Driver around.
We can also, of course, with this approach, add our own functionality to wait, but we don't really need to do that right now.
I'm going to switch over to “Framework.Selenium” and then here, make a new file called “Wait.cs”.
The namespace is “Framework.Selenium”, and then we'll say public class Wait.
Now, we're going to have a private readonly, and we're going to hold a wait.
Just like we did with _driver inside of the Driver class, we'll do something very, very similar where we have a _wait for this class. Yeah, you can kind of think of this as a wrapper class around Selenium's WebDriverWait.
Now, for the constructor, this is where we're going to be giving or setting the _wait with a value.
So, we'll have waitSeconds, and that's what we'll pass in.
Now, whenever we make a new one of our Waits, we'll say _wait is equal to a new WebDriverWait, whichever the current driver is, and the TimeSpan.
This needs to come in using System.FromSeconds (however many seconds we pass into our constructor).
Then we can even set the PollingInterval.
By default, it's 500 milliseconds, but we'll just be real explicit about that.
There we go.
Then the last piece is we're going to include some IgnoreExceptionTypes.
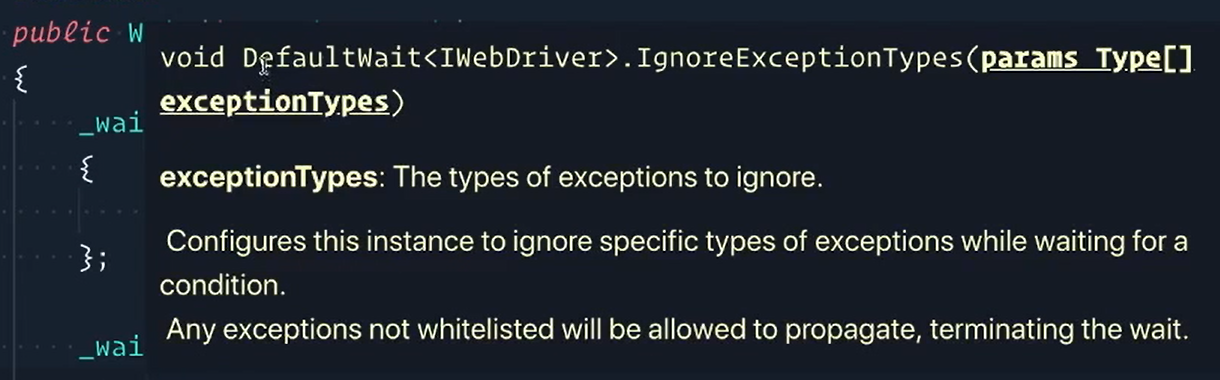
We'll do this because, by default, it only ignores 1 exception, and you may want to customize this.
What I'm showcasing here is that you're able to customize your wait quite a bit from all the way from:
- The time span - how long that cap is
- How many times you're actually polling
- Do you want to poll faster or slower
The exception types, you can comment some of these out if you'd like or add more.
You can really customize it to what you need, and the cool thing is anytime you make a new WebDriverWait, you can customize it at that time as well. So, it's very customizable.
The last thing we'll do is add an Until function just so we match the functionality of WebDriverWait.
This is a public bool Until, and now what we need to pass in a function.
Functions are a little bit different in C# than what you might be thinking of, but here we go. We'll call the function a condition, and then inside of here, we'll say return _wait.Until and pass in that condition.
# Wait.cs
namespace Framework.Selenium
{
    public class Wait
    {
        private readonly WebDriverWait _wait;

        public Wait(int waitSeconds)
        {
            _wait = new WebDriverWait(Driver.Current, TimeSpan.FromSeconds(waitSeconds))
            {
                PollingInterval = TimeSpan.FromMilliseconds(500)
            };

            _wait.IgnoreExceptionTypes(
                typeof(NoSuchElementException),
                typeof(ElementNotVisibleException),
                typeof(StaleElementReferenceException)
            );
        }

        public bool Until(Func<IWebDriver, bool> condition)
        {
            return _wait.Until(condition);
        }
    }
}
Now, we can actually say _wait.Until just like Selenium's WebDriverWait was able to — we've matched almost 1-for-1 the functionality of that.
And we're about to use this in Driver so that way our Driver has a wrapped implementation of Wait, which will make a lot more sense here real soon.
Let's open this up, go to our “Driver.cs” file.
Here at the very, very top, we're now going to make another [ThreadStatic] member.
This one will be public though, and this one is going to be our own Wait.
[ThreadStatic]
public static Wait Wait;
Now, inside of our Init method, we'll say that Wait is equal to a new Wait, and however many seconds we want.
For now, let's just say 10 just so we have what we had in the test currently.
public static void Init()
{
    _driver = new ChromeDriver(Path.GetFullPath(@"../../../../" + "_drivers"));
    Wait = new Wait(10);
}
Our Driver is done.
So now let's go back to our tests.
We can get rid of the var wait instantiation.
Right here [changing the wait.Until] to Driver. with a “capital W” Wait.
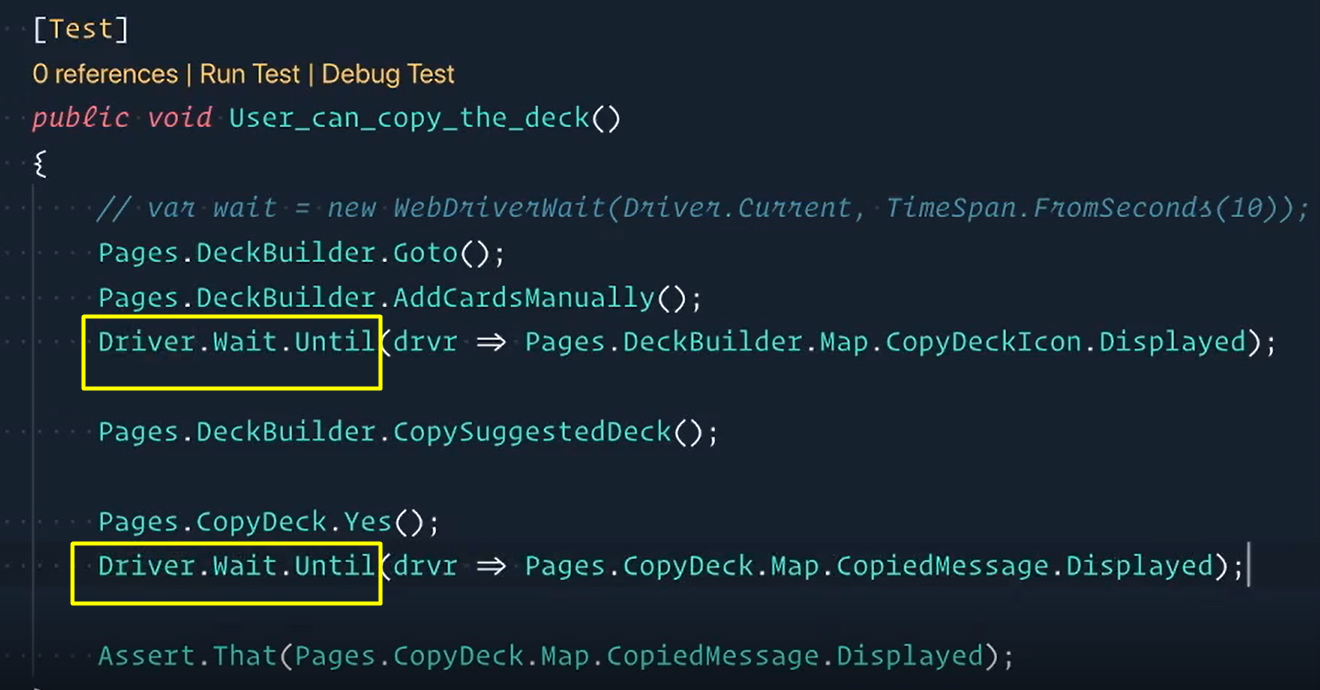
Down here, same thing. Driver.Wait.Until.
We didn't really get much gain off of that. I know it's kind of like, "So, we capitalized the W. Is that all we did?"
Well, no. Yes.
Hold on. Yes and no.
If we didn't do it this way, then we would have to do that whole Wait = new WebDriverWait everywhere we wanted this.
The fact that we now have wrapped it in within Driver means that we can just say Driver.Wait anywhere without needing to instantiate a whole new instance of WebDriverWait.
So, that's really the big payoff.
We're going to make this a lot better, so that way, you don't see that “drvr” driver, but we'll do that in a different chapter.
All that's left to do is to refactor the waits in the test into their respective actions to clean up the test again.
Challenge
If you followed me along and copied exactly the code I wrote, then your tests should be failing! You can't always believe what the devs tell you because they can make mistakes too!
The challenge is, if you haven't already, fix the errors so the User_can_copy_the_deck test passes.
HINT: I copied and pasted my locators when I refactored the scripted test into their respective pages. They might be wrong! Oh no!
Resources
Quiz
The quiz for this chapter can be found in section 7.2
