

Transcripted Summary
Hello there. Welcome to sub chapter 1.3 in which we are going to talk about an overview of Flutter. We will also be installing Flutter and getting your local environment set up so that you can start developing and following along this course.
First, there are a couple of concepts that I want to talk about.
The biggest one is the layer architecture of Flutter.
# Flutter Overview: Layered Architecture
I'm going straight to the Flutter docs, which explains very clearly about what are the architectural layers that Flutter has and how you can think about developing in Flutter.
So, if you think about it, so there are three layers.
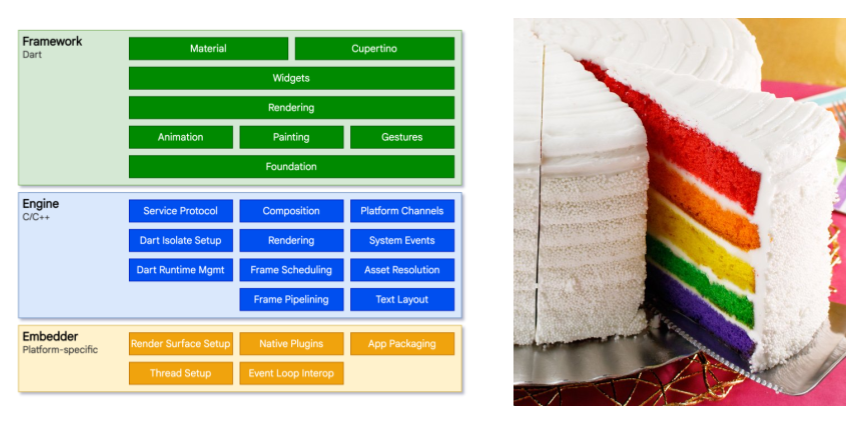
There are three main layers.
The **framework layer, **which is in Dart, meaning you can step through the code one by one and see what the wrappings are around. This is all in Dart.
There's engine layer, which powers the Dart level, and which has the low-level details like threading or networking.
Underneath the engine, there is the embedder. Because Flutter is multi-platform, there is a embedder, which is specific to each of the iOS, Android, web, or whatever the platform it is, there is an embedder that is specific to it. Because each of them has their own API, this embedder sits in between the device API and the engine, so that it gives a uniform way for the engine to access those lower-level details.
You can read more about this in this document, which I would definitely link to in the resources.
One analogy that I like very much, when you are thinking about a layer architecture is a cake, a layered cake.
As a developer, with Flutter you only are bothered with the first layer, the framework level
But underneath, you can assume that there are a lot of layers, which you can really look into if you want to, and if there is anything that is really wrong or that you need to configure.
In very advanced cases, you may have to look into that code, but for the most part, for the 99% of the time, you are only with the topmost layer.
# Flutter Overview: Widgets
The second concept that I wanted to introduce is this concept of a widget.
In Flutter, in Flutter's UI, everything is a widget.
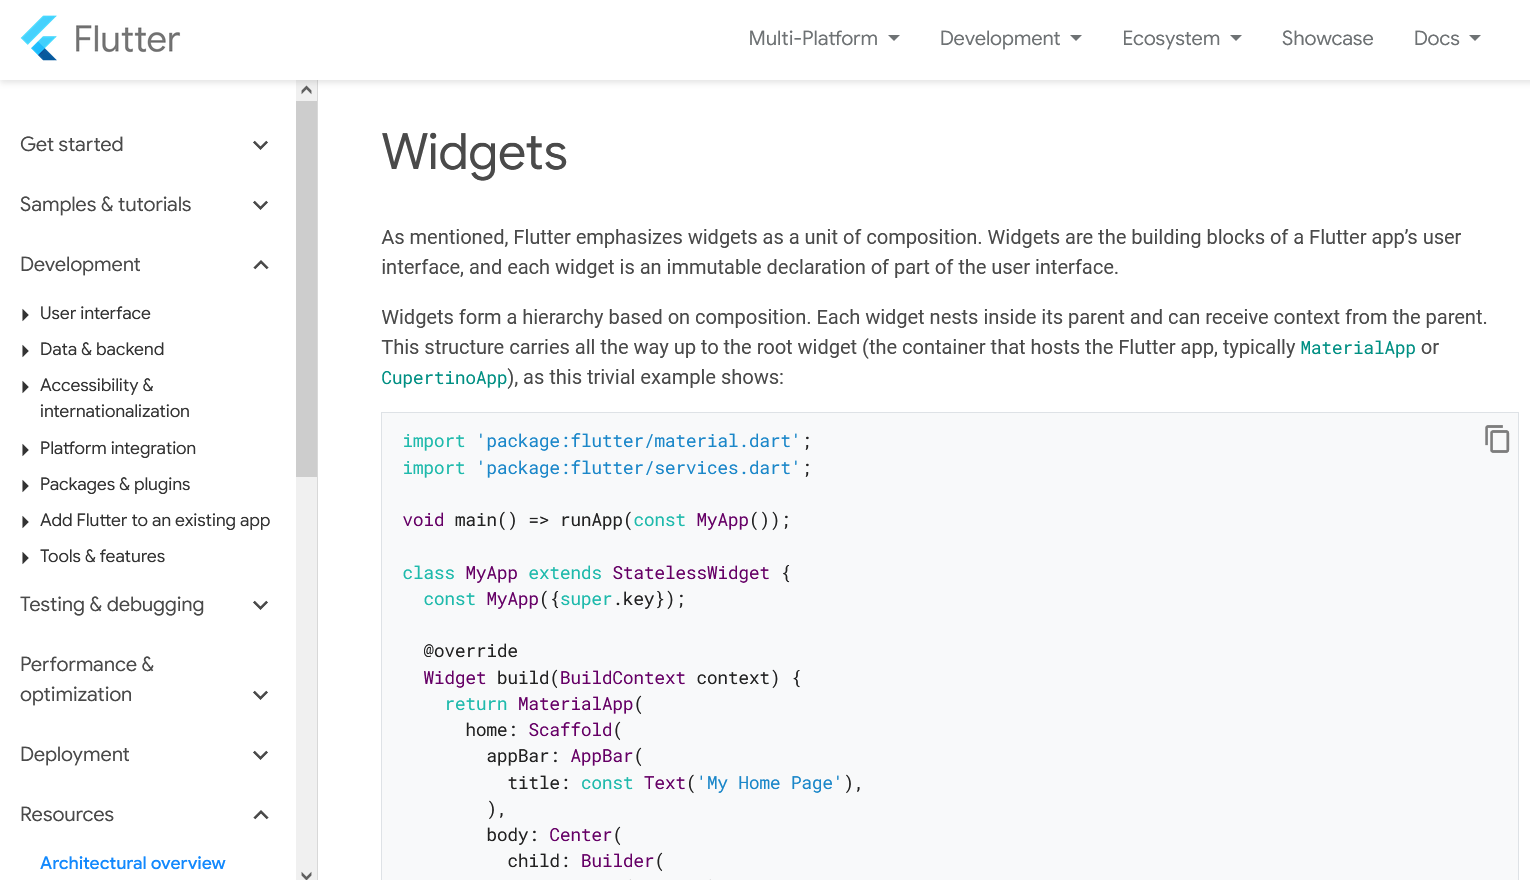
Starting from the very small text box, all the way to the top of the container, everything is a widget.
These widgets are recursive, meaning a top-level container widget can have smaller widgets and which can have smaller widgets and so on. And these widgets can be given by the platform itself, or you can create your own widgets.
We'll follow along with this in the course quite a bit, and we'll see the widgets and the associated testing in the course.
# Flutter Overview: Installation
Now let's move forward with installing Flutter itself.
The first website that I want to highlight is the Flutter.dev.
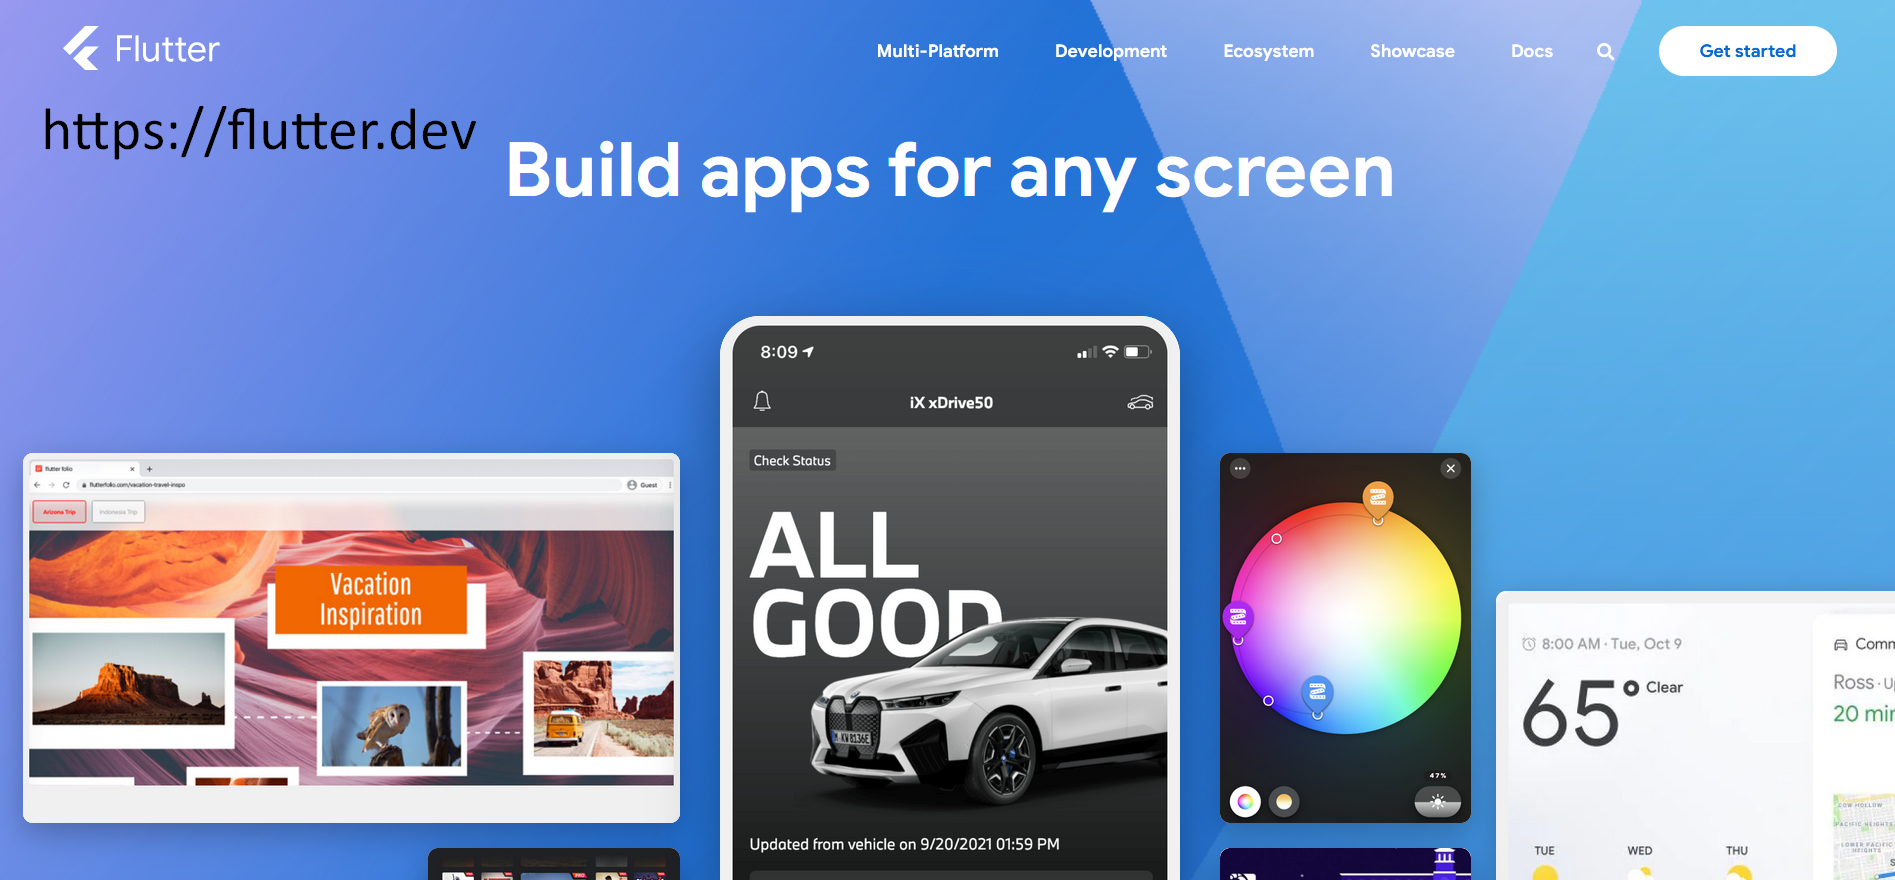
Just like docs.flutter.dev in the previous subchapter, we have Flutter.dev, which gives an overview of the framework and also the links to the documentation and installing.
Let's go with the install.
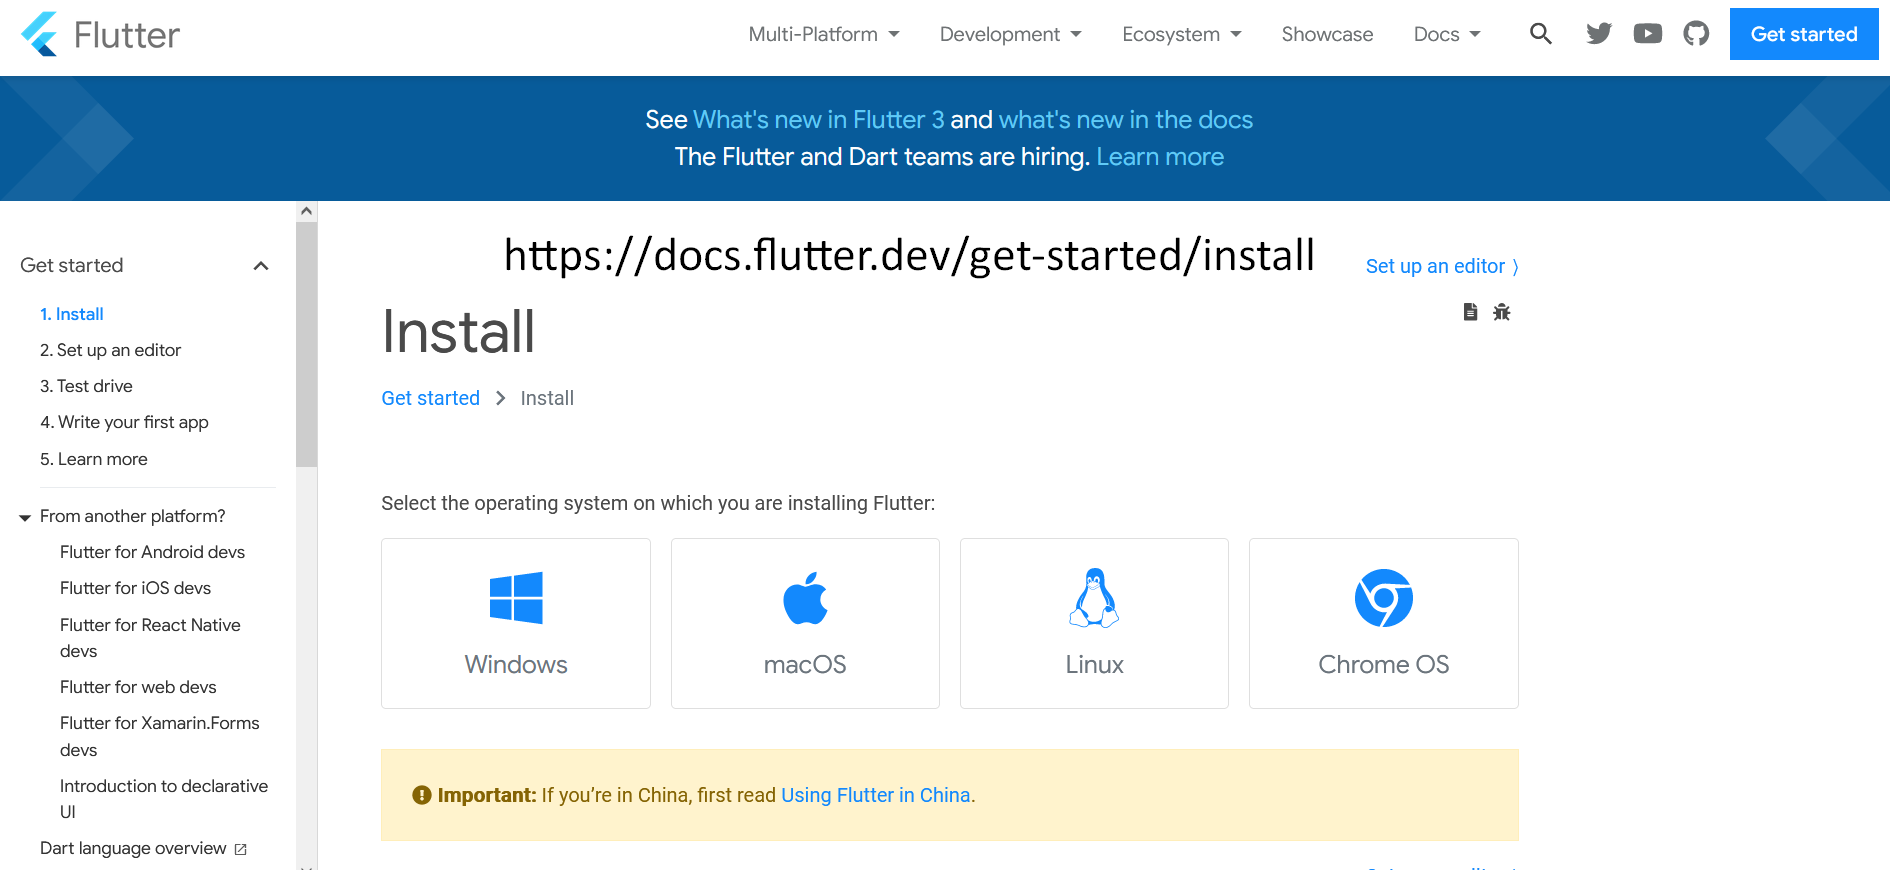
Flutter is a multi-platform, so you can install it in either Windows, macOS, Linux, or even Chrome OS. So it doesn't matter which operating system you are on, you can still be able to create Flutter apps and code.
IMPORTANT
One thing to note, if you want to run and test iOS apps, you definitely have to be on a Mac machine. And similarly, if you want to test a Windows desktop app, you want to be on a Windows desktop app. But that doesn't preclude you from developing the apps on any platform of your choice.
In this course, I'll be dealing with only macOS, and you can follow the instructions along here.
This is a zip file, and you can download it, or if you are familiar with Homebrew, you can also do brew install flutter.
Now Flutter is a framework, so you need an IDE for this.
The choice of IDE for this course is Visual Studio Code.
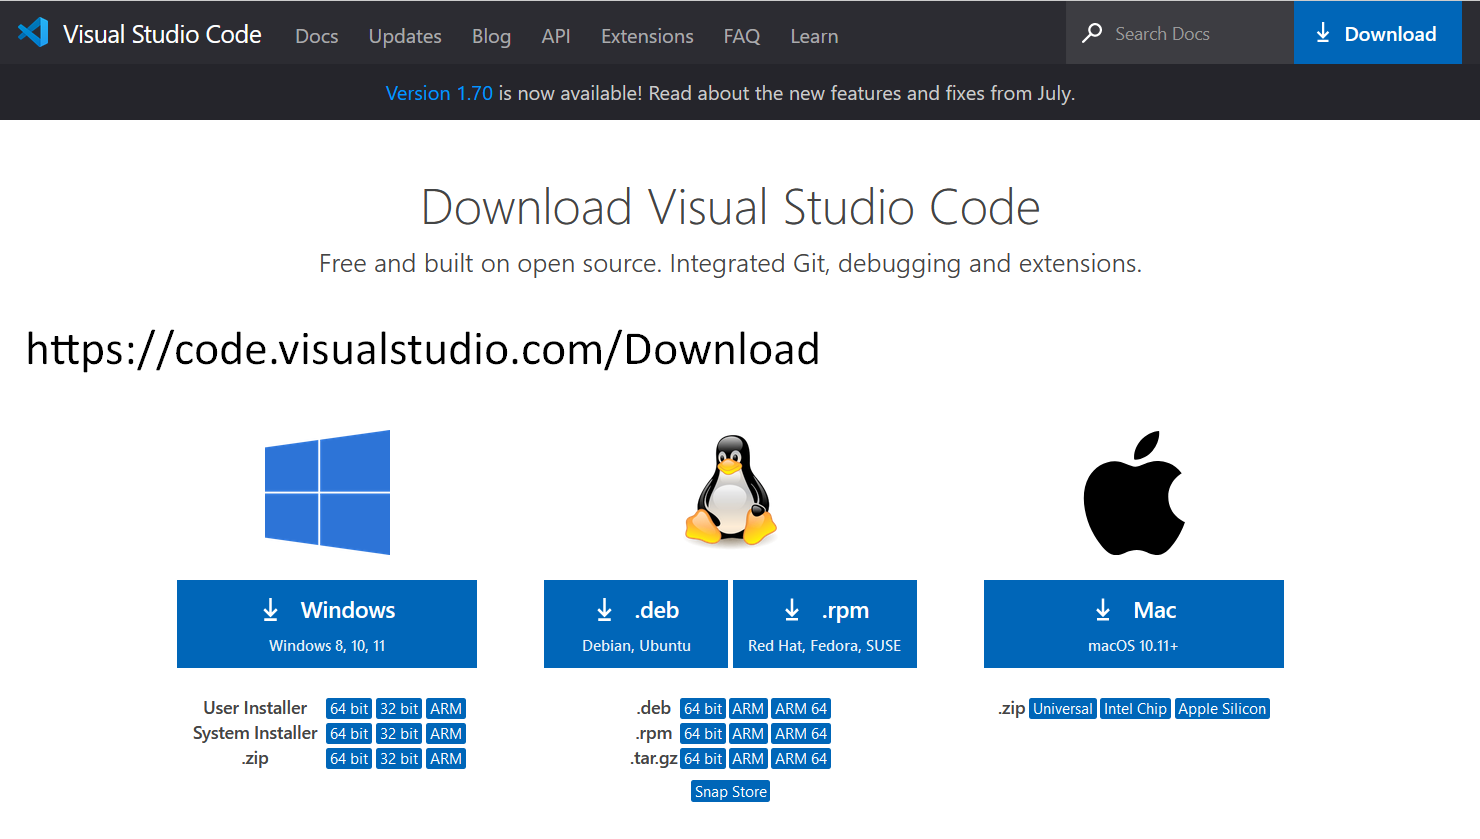
This is from Microsoft, and it is an excellent editor. It’s lightweight editor that has very good extensions and community support for Flutter. Again, it is available for Windows, Linux, or Mac.
I would highly encourage you to download this first before you go further.
# Flutter Overview: Flutter Doctor
Before we move on, I wanted to introduce you to a utility that comes with Flutter.
Once you install Flutter and you configure your Flutter framework, you need to make sure that your Flutter local environment setup is good. And for you to know that, it's hard to know.
So, there is this command called flutter doctor.
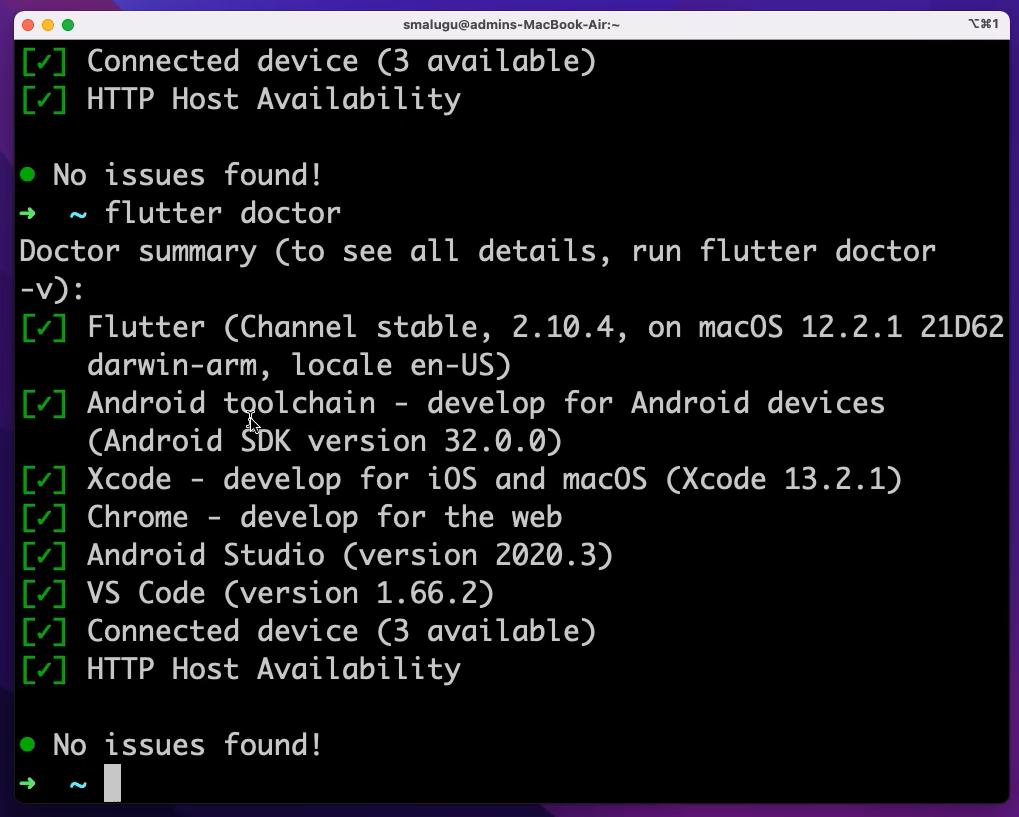
This is an excellent one.
This follows the brew paradigm, which has brew doctor, and you can type flutter doctor, and you can see which of these are configured and which of these are not configured for your local setup.
For example, my Flutter is 2.10.4, and I'm running on a macOS. I have all of these set up already, like the Android toolchain, Xcode toolchain, Chrome, and I have both Android Studio and VS code.
You would not need all of this.
For you to get started and follow along this course, you can just choose one, but you have to choose one. You have to choose an IDE, like let's say VS code, and either Android or Xcode.
Let's go back to Android Xcode.
In this document, you can see there is the iOS setup, if you're on a macOS. Or there is the Android setup, if you're on Windows only. So, I would recommend choose one of these and follow along the steps.
By this point, I'm assuming you would be able to run flutter doctor, and see most of them as greens.
If you are not seeing that, never fret, and these documents are good. Or if they're not good enough to help you, I would encourage you to ping back in this Slack channel or search for things from the internet. And you'll definitely find help.
Resources
- Getting Help – Test Automation U Slack - #course-flutter-testing
- Flutter Architectural Layers
- Flutter Widgets
- Flutter Download
- Flutter Android Setup
- VS Code Download
