

Transcripted Summary
Welcome to chapter 4 of Automating Tests in Flutter Apps.
In this chapter, we are going to talk about widget testing.
If you recall from previous lessons, everything in Flutter is a widget.
From the biggest screen to the smallest text element, everything is a widget.
With that in mind, let's see the changes that I made to make widget testing easier.
Going to the code (chapter_4_starting_point and chapter_4_ending_point)), I didn't really change much of the functionality, but I just created a widget from the house card (HouseCardWidget).
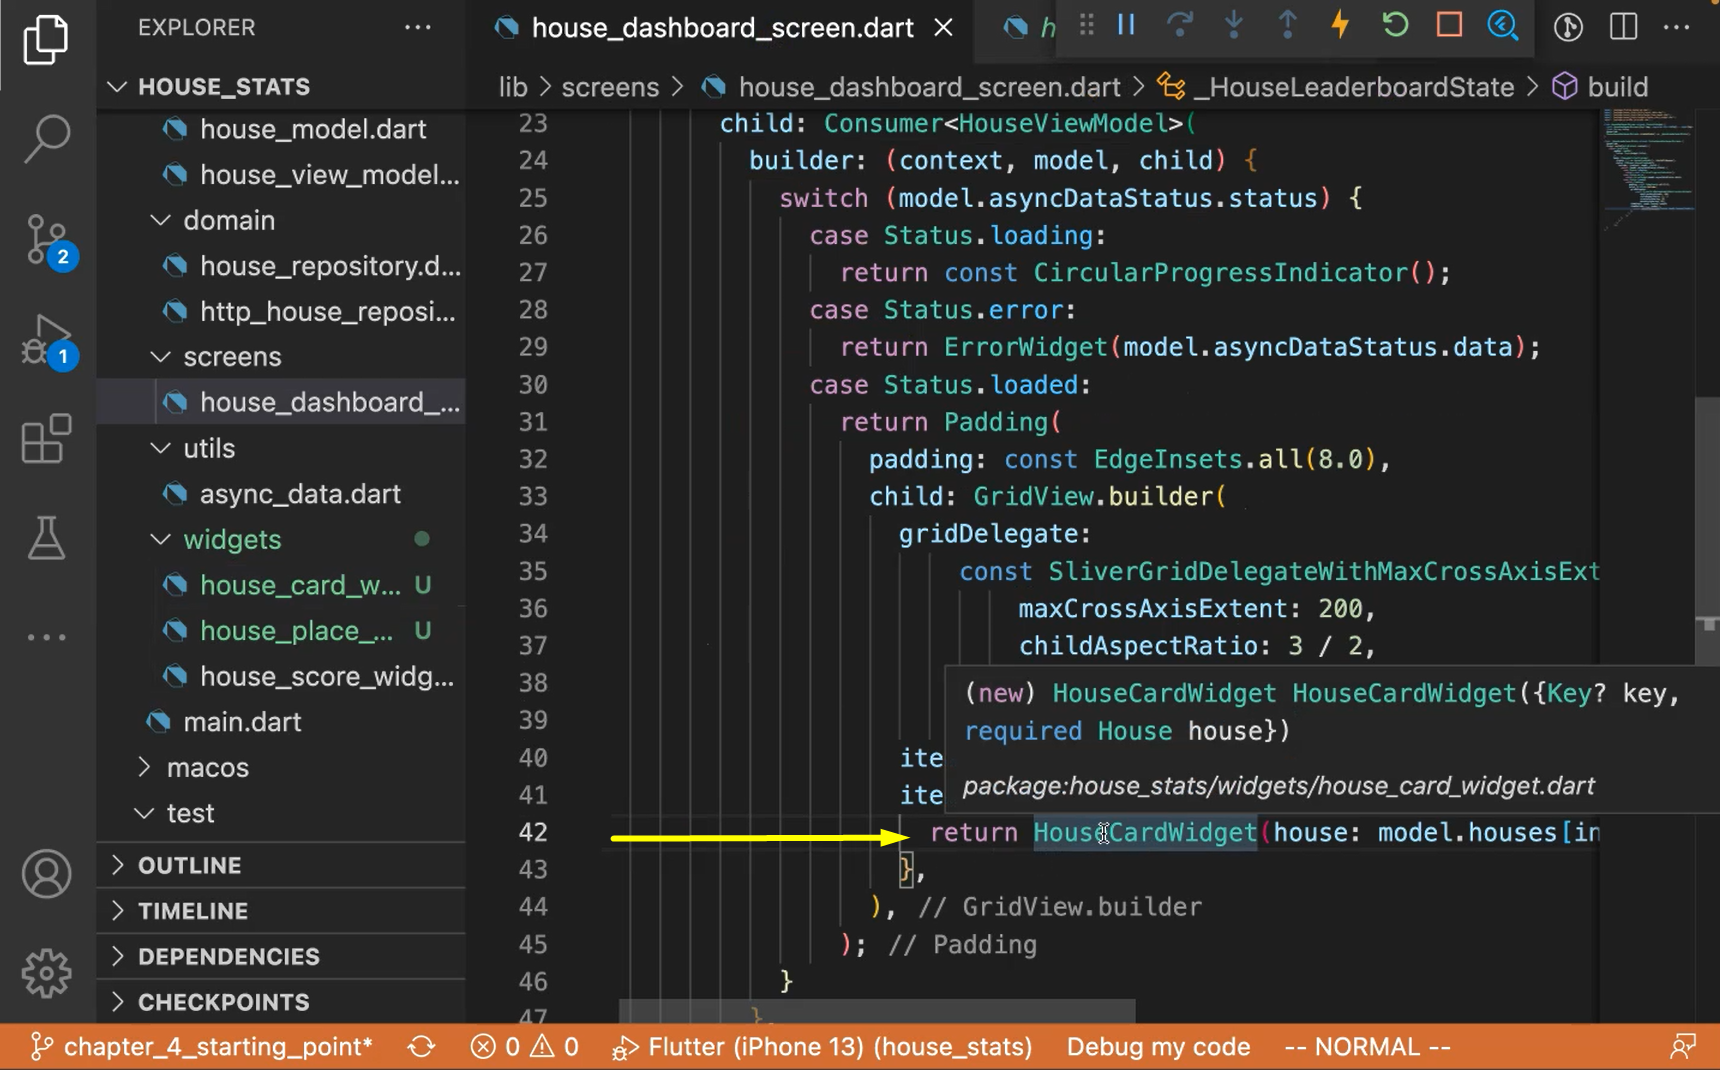
For this small card, I made this a widget.
What we are passing is the house's model — return HouseCardWidget(house: model.houses[index]); — and that's a widget.
If you step into it (house_card_widget.dart) it's again, the same code with the title name.
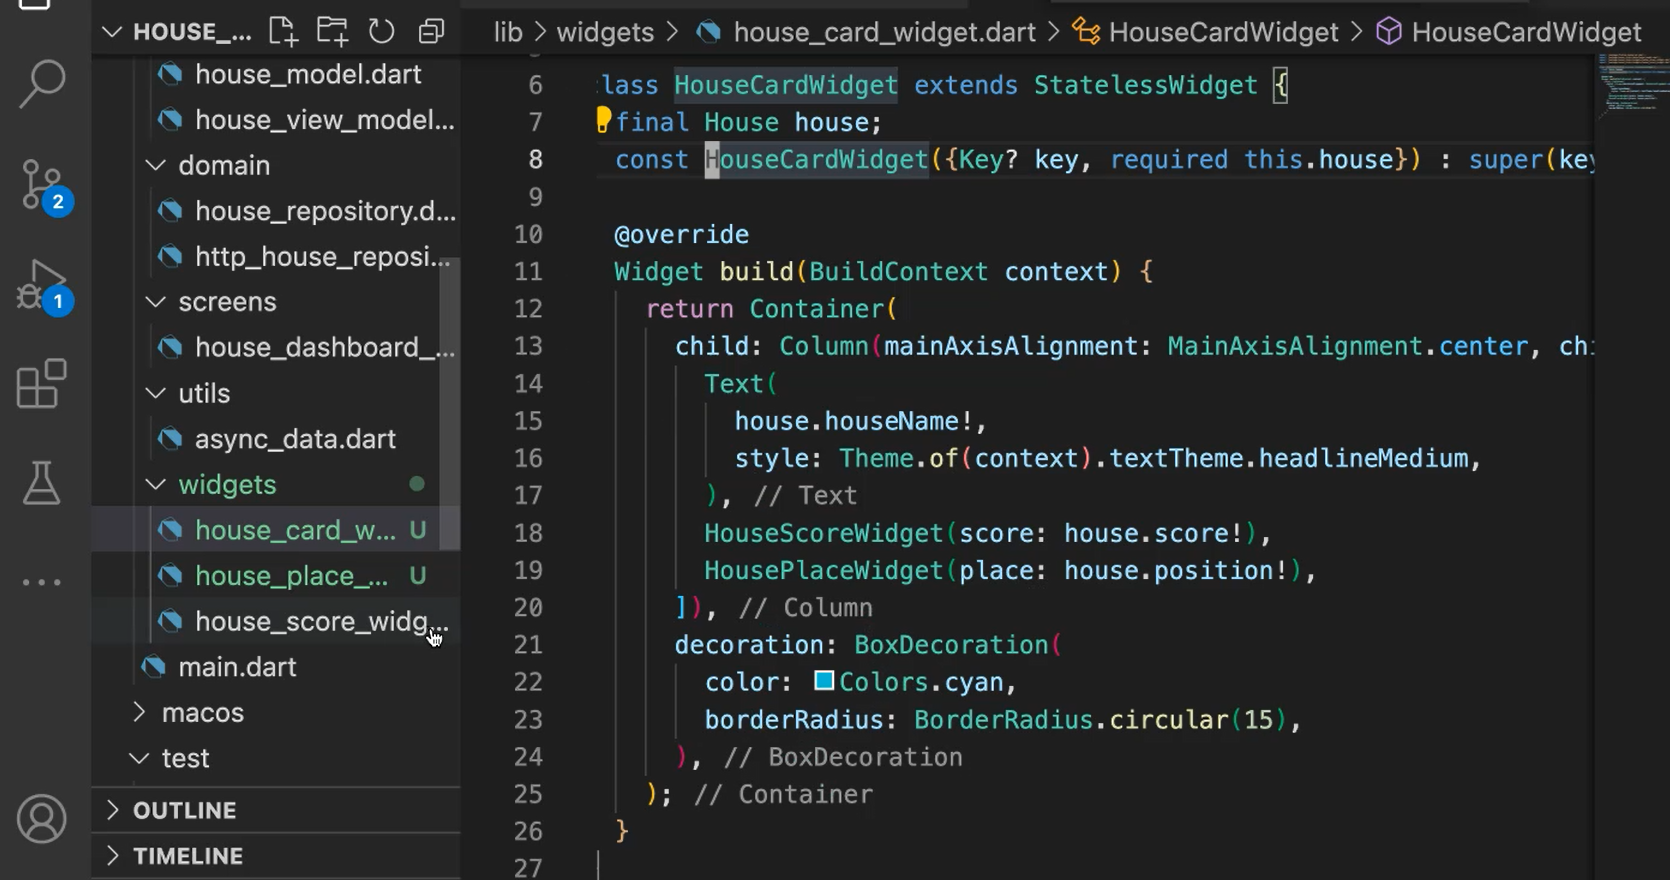
And we have 2 more smaller widgets: the score widget (HouseScoreWidget) and the place widget (HousePlaceWidget).
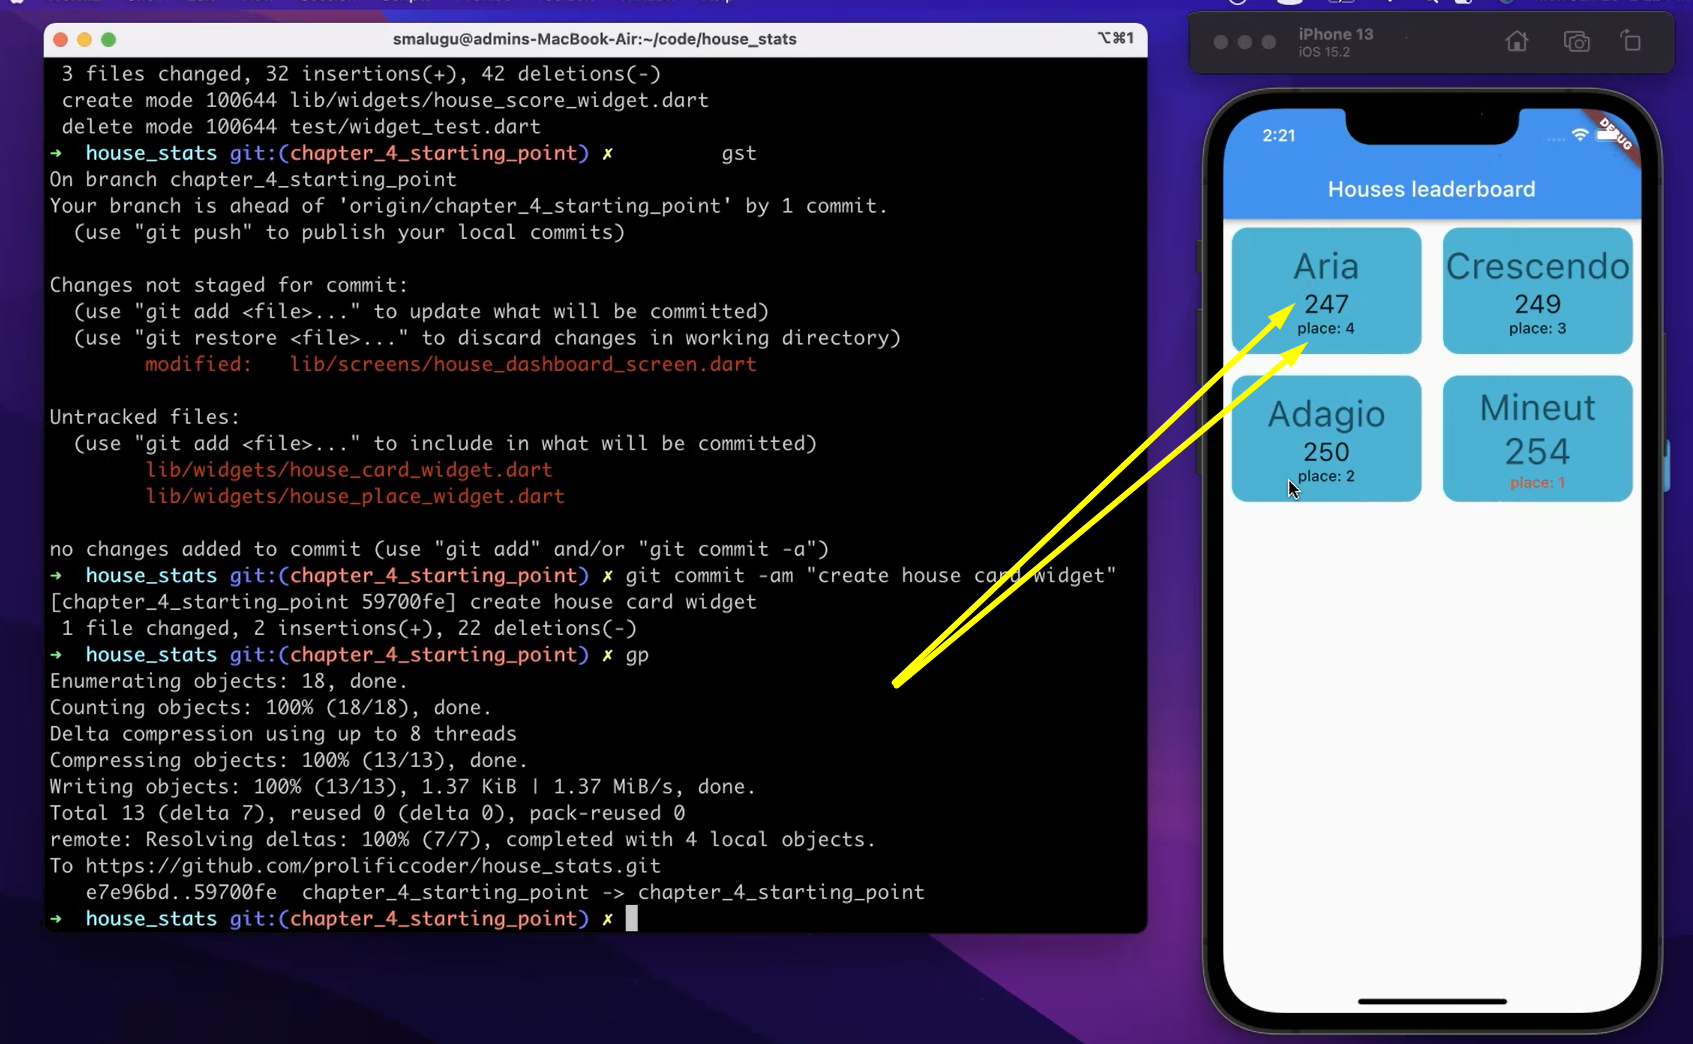
The score numbers (for example “247”) in each of these cards is also widget, and the places are also widget.
In Flutter, you can have your own custom widgets, and Flutter encourages you to create a lot of widgets.
# TestWidget Wrappers
All that is different, is a simple wrapper on top of text.
For example, for HouseScoreWidget I have a small logic saying that if the score is more than 250, show a different styling (headlineMedium).
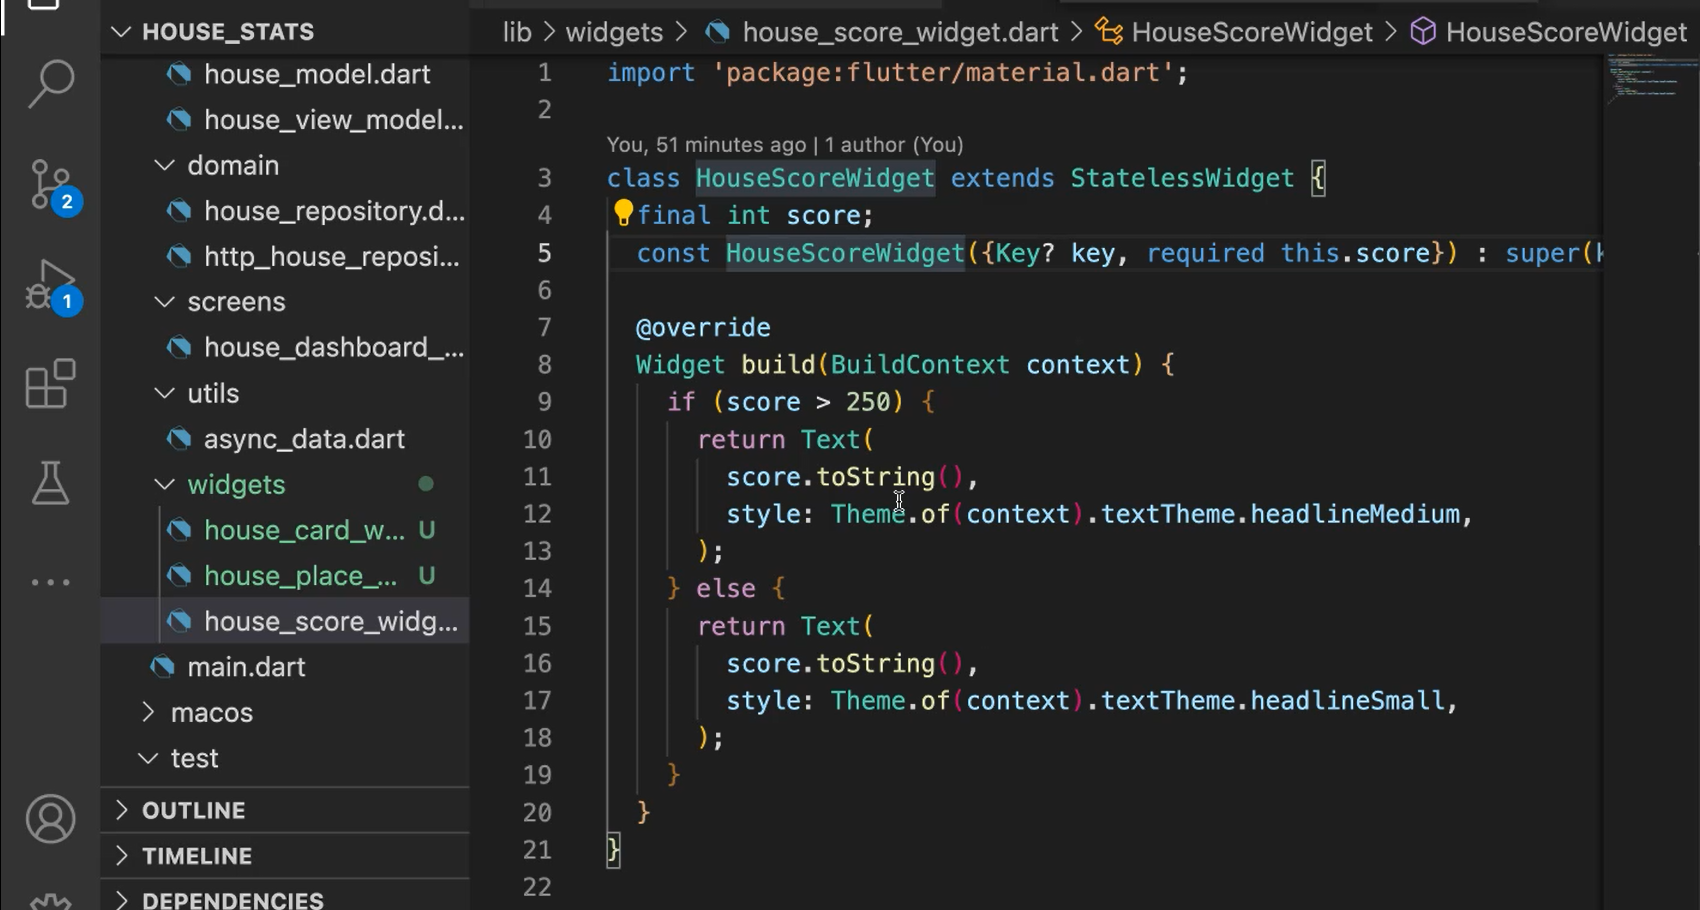
But if the score is less than 250, you show the headlineSmall styling.
Similar to HousePlaceWidget.
If the place is 1 make, make it red.

Otherwise, everything stays the same.
And you can see that being different in the app.
Let's start by creating a test widget for the place card, which has 1 place, and it should show red.
For creating the widget, it's pretty simple, but we need to keep some things in mind.
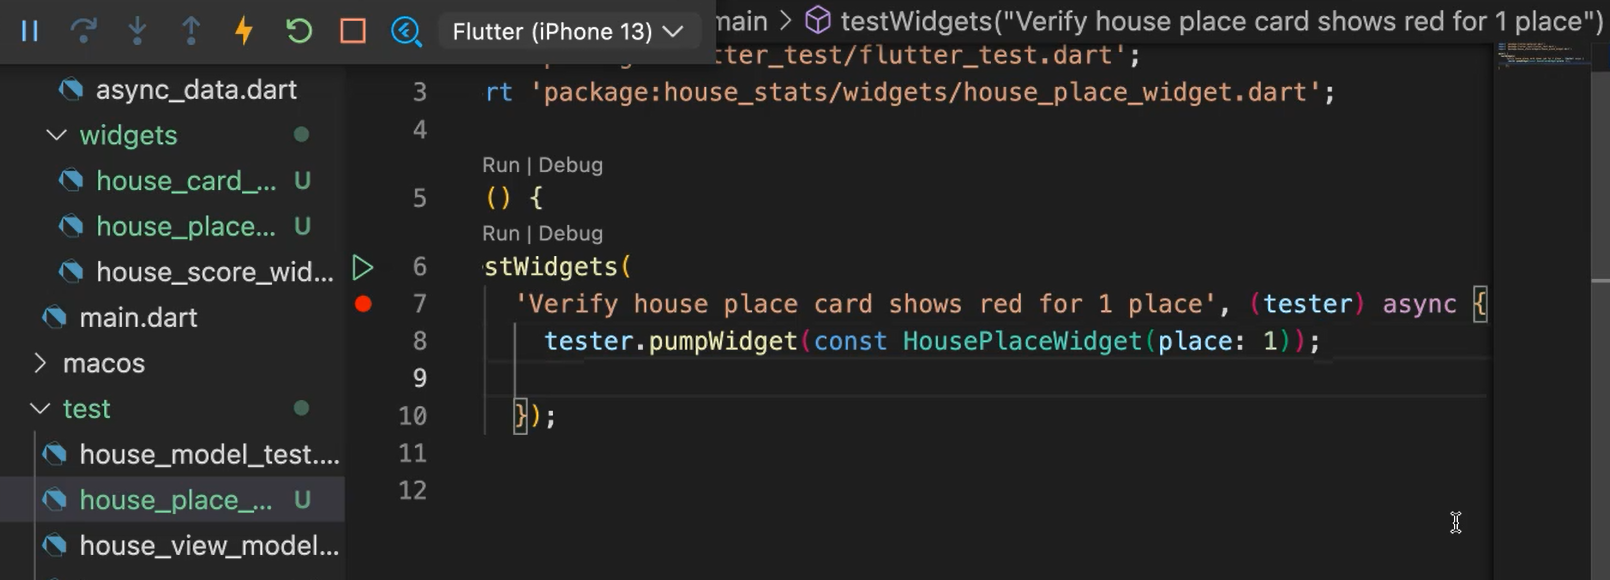
First, let's create the widget, tester.pumpWidget.
And we need to give the widget in our mind, which is HousePlaceWidget.
And let's give it the place “1” — tester.pumpWidget(const HousePlaceWidget(place: 1));
So now this widget is on the screen.
Now, let's verify that this widget can be found, right?
Let's find a widget, and in the final widget we will do tester find.text(‘place:1’)). And let's do place 1. Yeah.
One syntax to remember here is that we need to wrap this one in a widget — tester.widget<Text>.
final widget = tester.widget<Text>(find.text('place: 1'));
And import the find.text.
Now we do an expect — expect(widget.style.)
Color is a property under style, so, we will do that.
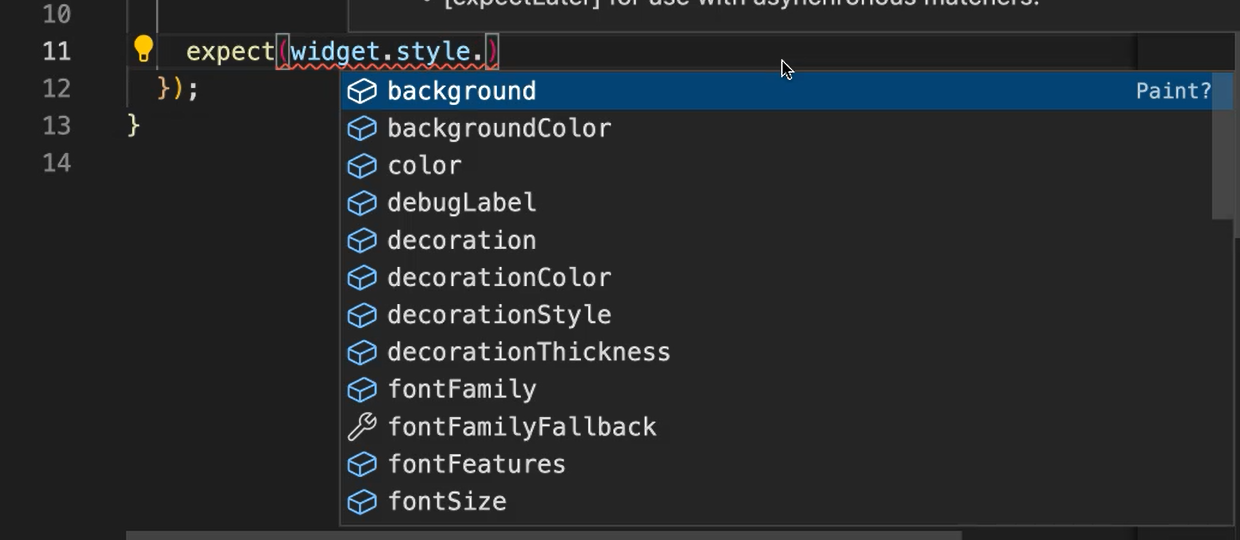
And we will assert that the color is red.
expect(widget.style?.color, Colors.red);
Because style can be nullable, so we also need to give it nullable value (style?).
So, we are run the test from within the IDE, and it failed.
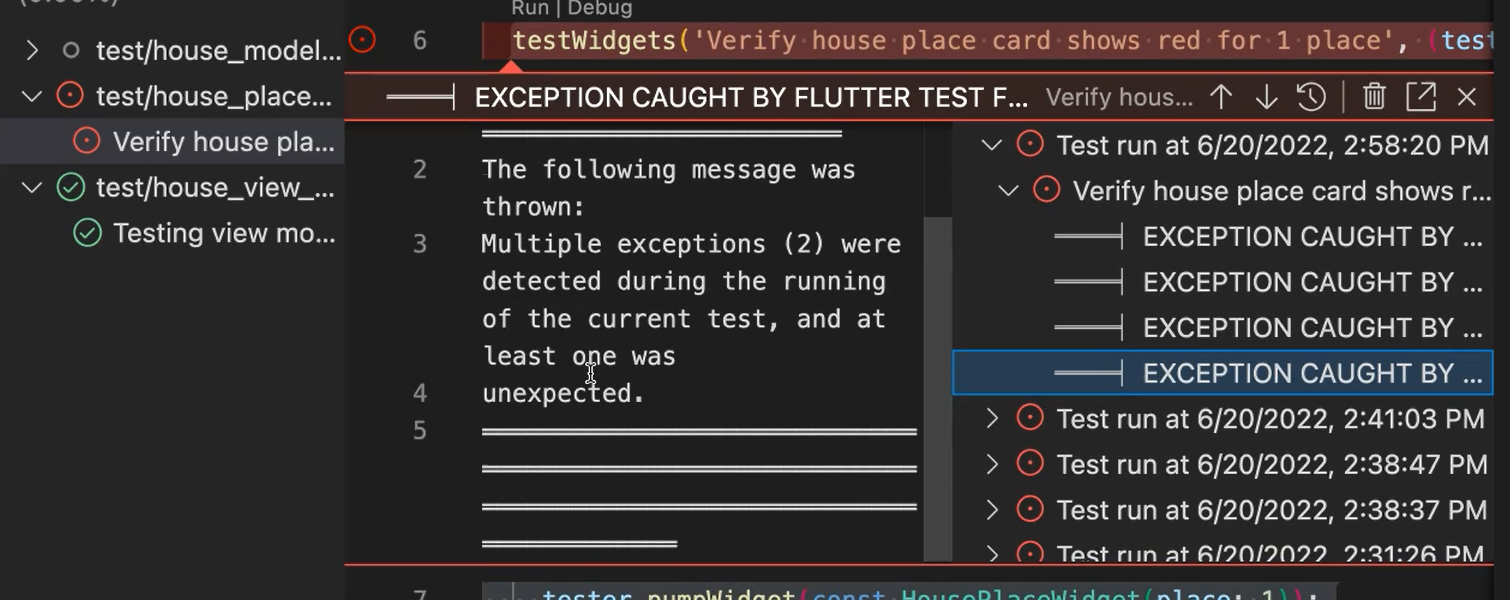
One of the reasons is that this widget has to be placed in something. It needs a directionality.
If you look at the error message, it complains that it needs the directionality.
So, let's wrap this up in a direction.
And we are using this one.
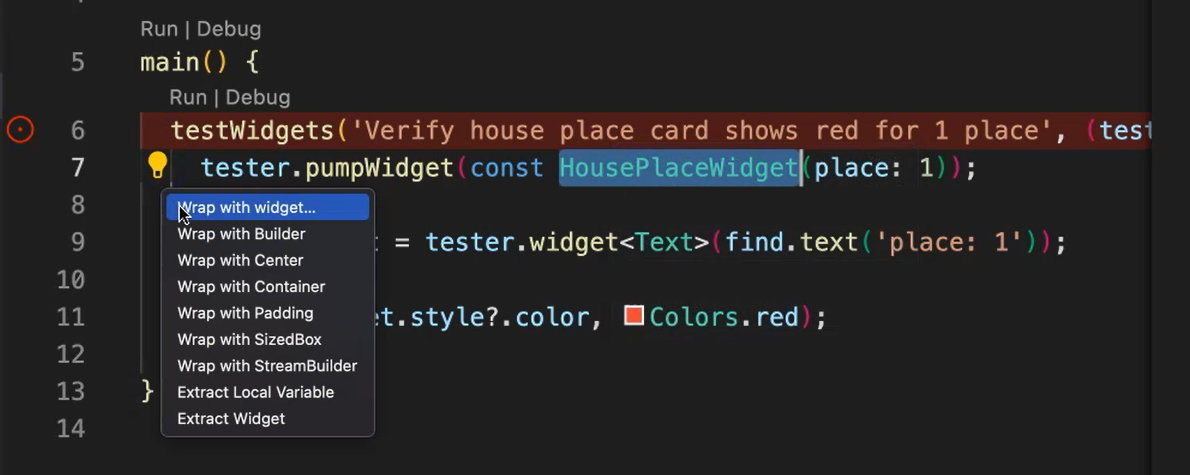
That's the tool tip from the VS Code extension for Dart.
So, let's add Directionality and textDirection.
Text direction. Text.
Okay, let's put a constant here.
Let's see if this test passes now. Okay.
No.
So, I'm missing an await. Because we are doing an async operation, all the test widgets are in async. So, we should make sure to do await. Good.
main() {
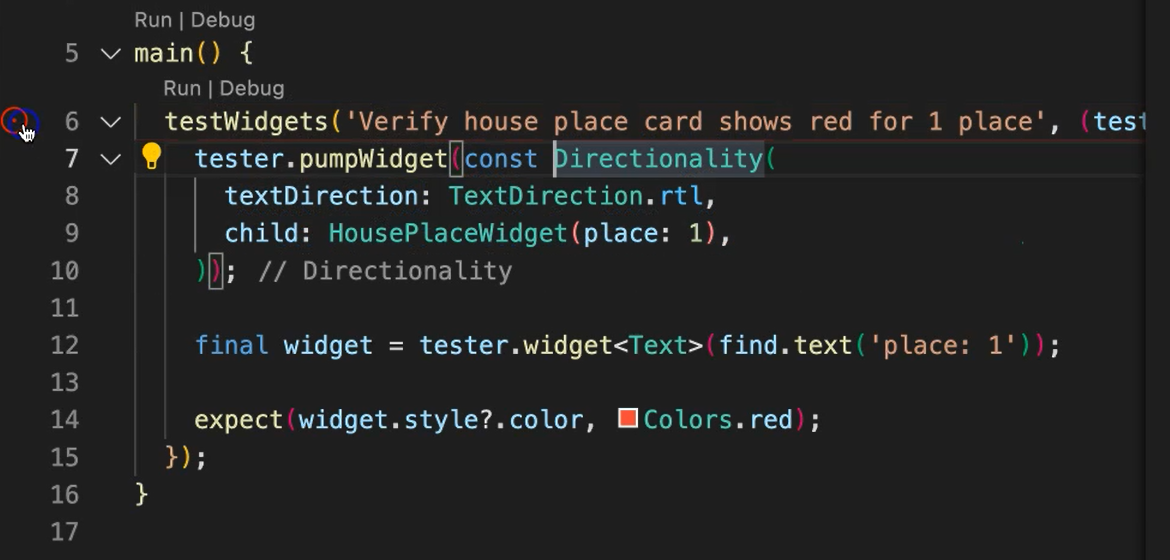
testWidgets('Verify house place card shows red for 1 place', (tester) async {
await tester.pumpWidget(const Directionality(
textDirection: TextDirection.rtl,
child: HousePlaceWidget(place: 1),
));
Let's see, now.
Yeah, it passed. Okay.
What this test is doing is essentially creating this widget in a Directionality wrapper and it is in memory.
We don't actually see it, but it's in the memory.
(Memory means the RAM of the machine on which this test is running as opposed to a simulator where you can see the widget rendered on the screen.)
Now, after that, we find that widget and make sure the color is red. We can do the converse of it, right?
We can do the converse and make sure that the the other widgets do not have this color.
Expect color.
So, let's make it place as any number, like 2.
We can verify it. This is 2.
And for the color…
So, the converse of making sure that the second place shows up not red. We don't actually care about the color.
So, “card not shows red” for second place. Let's verify this one. Yeah. That's it.
# Example Code - house_place_widget_test.dart
import 'package:flutter/material.dart';
import 'package:flutter_test/flutter_test.dart';
import 'package:house_stats/widgets/house_place_widget.dart';

main() {
  testWidgets('Verify house place card shows red for 1 place', (tester) async {
    await tester.pumpWidget(const Directionality(
      textDirection: TextDirection.rtl,
      child: HousePlaceWidget(place: 1),
    ));

    final widget = tester.widget<Text>(find.text('place: 1'));

    expect(widget.style?.color, Colors.red);
  });
  testWidgets('Verify house place card not shows red for 2 place',
      (tester) async {
    await tester.pumpWidget(const Directionality(
      textDirection: TextDirection.rtl,
      child: HousePlaceWidget(place: 2),
    ));

    final widget = tester.widget<Text>(find.text('place: 2'));

    expect(widget.style?.color, isNot(Colors.red));
  });
}
We put a widget in the memory, and then we are using that widget to verify the color of it. And it's hitting the logic that we created here.
So, if the place is 1, we are saying, "Let it be red." And if the place is not 1, "Use the default from the theme."
That's the basics of widget testing.
You can do much, much deeper into the widget tests.
You can add fakes to them and create widgets in memory and then assert various other things.
But as a starting point, you can think of widgets... Widgets are in memory. You're putting them into the memory.
And you're using this testWidgets wrapper, which is an async and await block.
And you can verify various traits of the widgets.
# Asserting Various Widget States
Now, let's add a little bit of a bigger widget test.
So, use the same template, but let's call it “house_card_widget_test.dart”.
In here, instead of invoking the HousePlaceWidget, we will invoke the HouseCardWidget.
But HouseCard needs a house (not a place). And let's give it “house”.
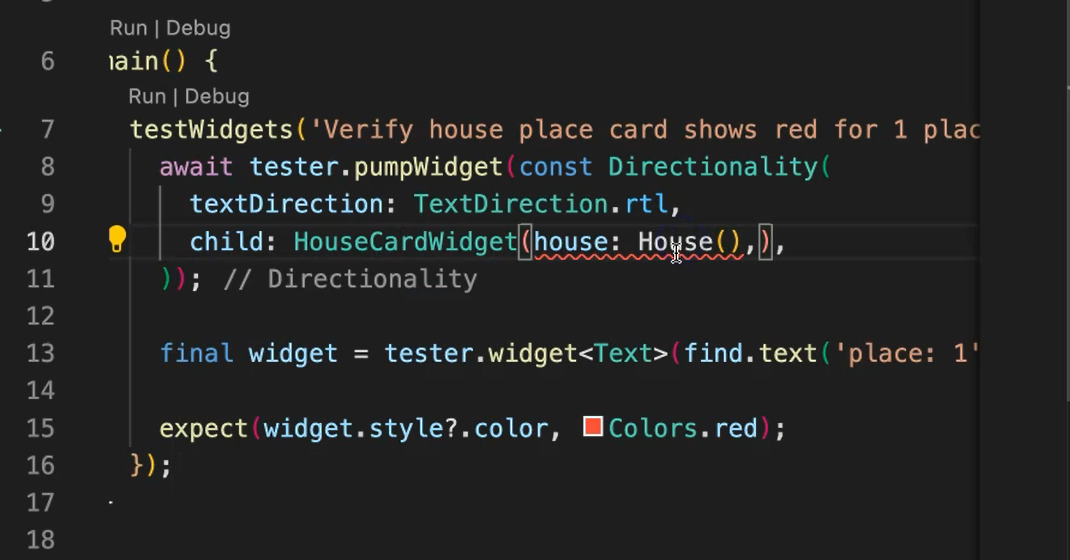
But first let's import it.
So, okay — house: House(houseName: 'house', score: 4)),
Okay, I think that's all we need to do.
I don't think it needs a constant. No. Now let's take off the const.
And let's change the name of the test to “Verify house card shows correct title and score”.
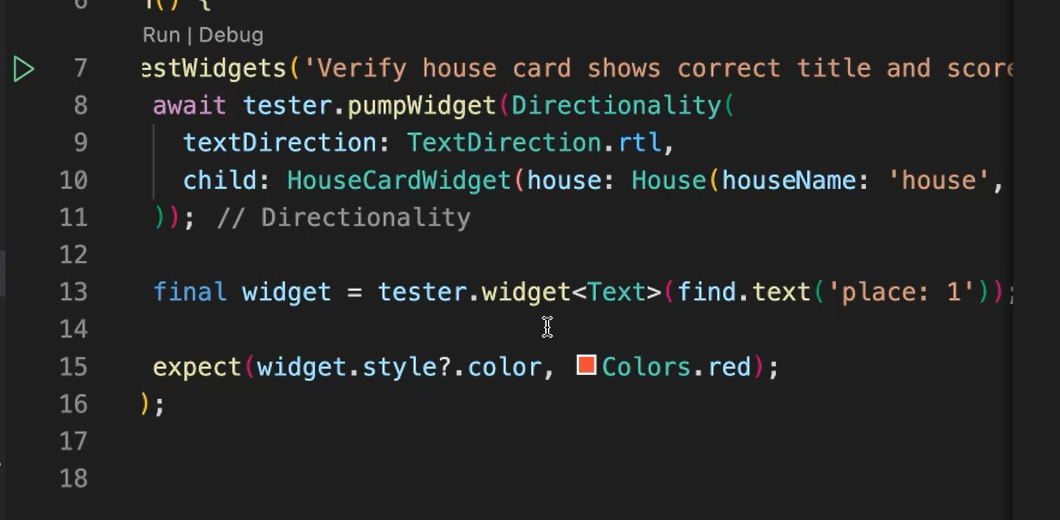
Here, we can do still this assertion, but we replace the “place” with “4”.
Okay, let's wrap this up in the expect to be isNot for the color red.
Another way of finding widgets in the expect is with find.text.
The name that we will give here is "house" — expect(find.text('house').
Yeah, this is the syntax that I want to show you.
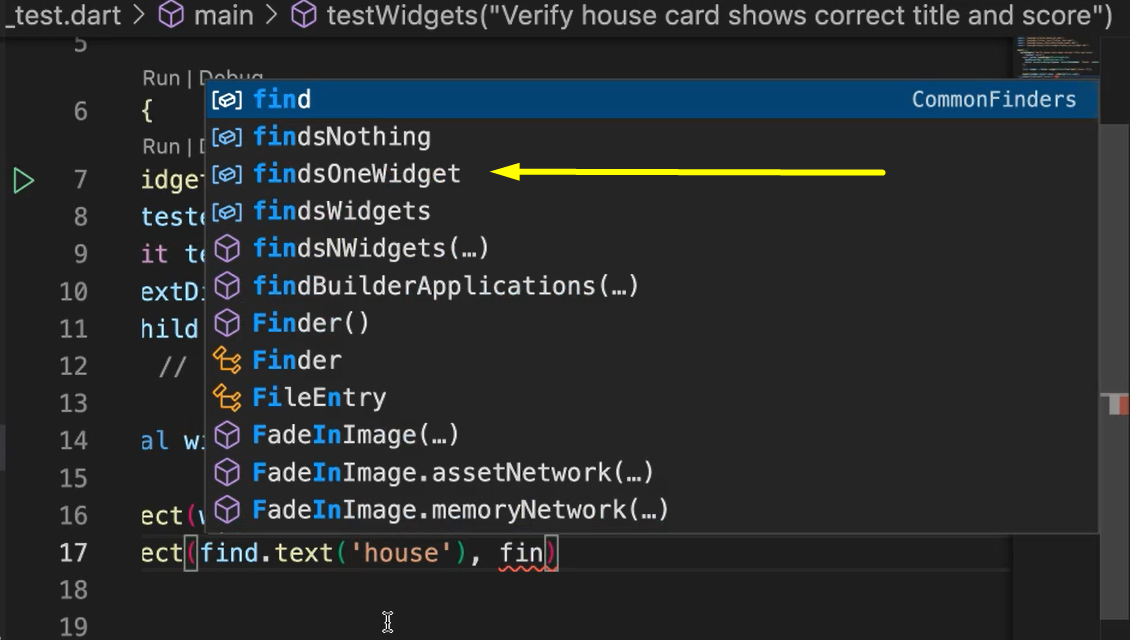
So, just like in Selenium or other frameworks where there is methods and options to find things, this is the Flutter test way of giving you helper functions that will help you find widgets in the widget tree.
So here, we'll say, "Okay, find this one widget" using this is shortcut findsOneWidget.
Let's try run this. And I think we should pass because we give exactly what's needed.
No, I was missing the position argument. So, position is 3, and that's the one that comes to the place.
# Example Code - house_card_widget_test.dart
import 'package:flutter/material.dart';
import 'package:flutter_test/flutter_test.dart';
import 'package:house_stats/data/house_model.dart';
import 'package:house_stats/widgets/house_card_widget.dart';

main() {
  testWidgets('Verify house card shows correct title and score',
      (tester) async {
    await tester.pumpWidget(Directionality(
      textDirection: TextDirection.rtl,
      child: HouseCardWidget(
          house: House(houseName: 'house', score: 4, position: 3)),
    ));

    final widget = tester.widget<Text>(find.text('place: 3'));

    expect(widget.style?.color, isNot(Colors.red));
    expect(find.text('house'), findsOneWidget);
  });
}
Let's run this again. And now it should pass.
With that, let's go to the quiz. And in the next chapter, we'll deal with integration tests.
Resources
- Git Repo for Course Code
- Getting Help – Test Automation U Slack - #course-flutter-testing
- Git Repo: chapter_4_starting_point
- Git Repo: chapter_4_ending_point
