

Transcripted Summary
Welcome to sub-chapter 1.4. So far, we have covered a little bit about Dart, little bit about Flutter and how to install those in your local machines.
Now, we are going to look at the Flutter set up locally and how to understand the code that’s going to be returned.
# Local Setup – Creating Flutter Code
First, let's create the application’s code for this project.
Switching to my terminal, I'm going to create the sample template code for this project.
So, we start with flutter create house_stats.
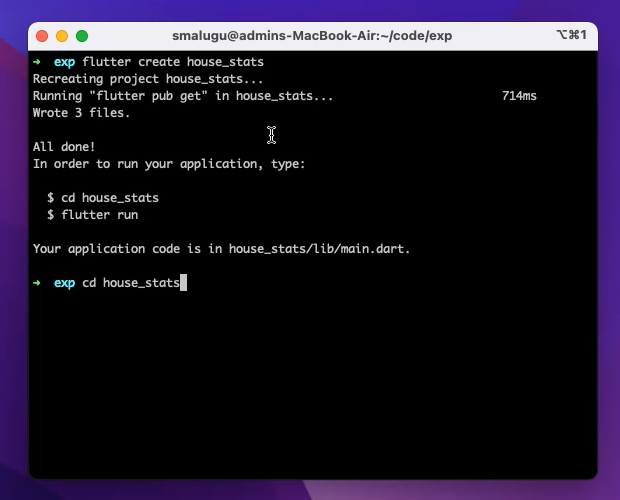
This is the name of the project that we're going to use, and it'll create all the files that are required so that the application can boot up.
And let's go into the folder project structure that is created — cd house_stats. Now let's look at the files using ls.
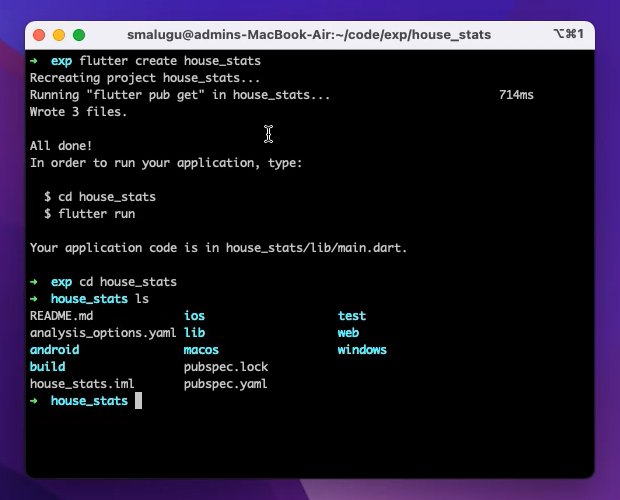
As you can see, there is Android, iOS, Web, Windows, and macOS.
By default, all the client applications that are required for you to render on those platforms is already created. It's like a hello world client application for all of these platforms.
You can configure them to be only for some of the platforms, but that's your choice. By default, everything is given.
And when you do flutter run, the application runs on an available device.
This is to run it from a terminal, but we are going to switch over now to run right from an IDE.
Going to the IDE, I already done a little bit of code, so that we can get started, but you can see this is the IDE is already running the sample application.
A little bit of code, right?
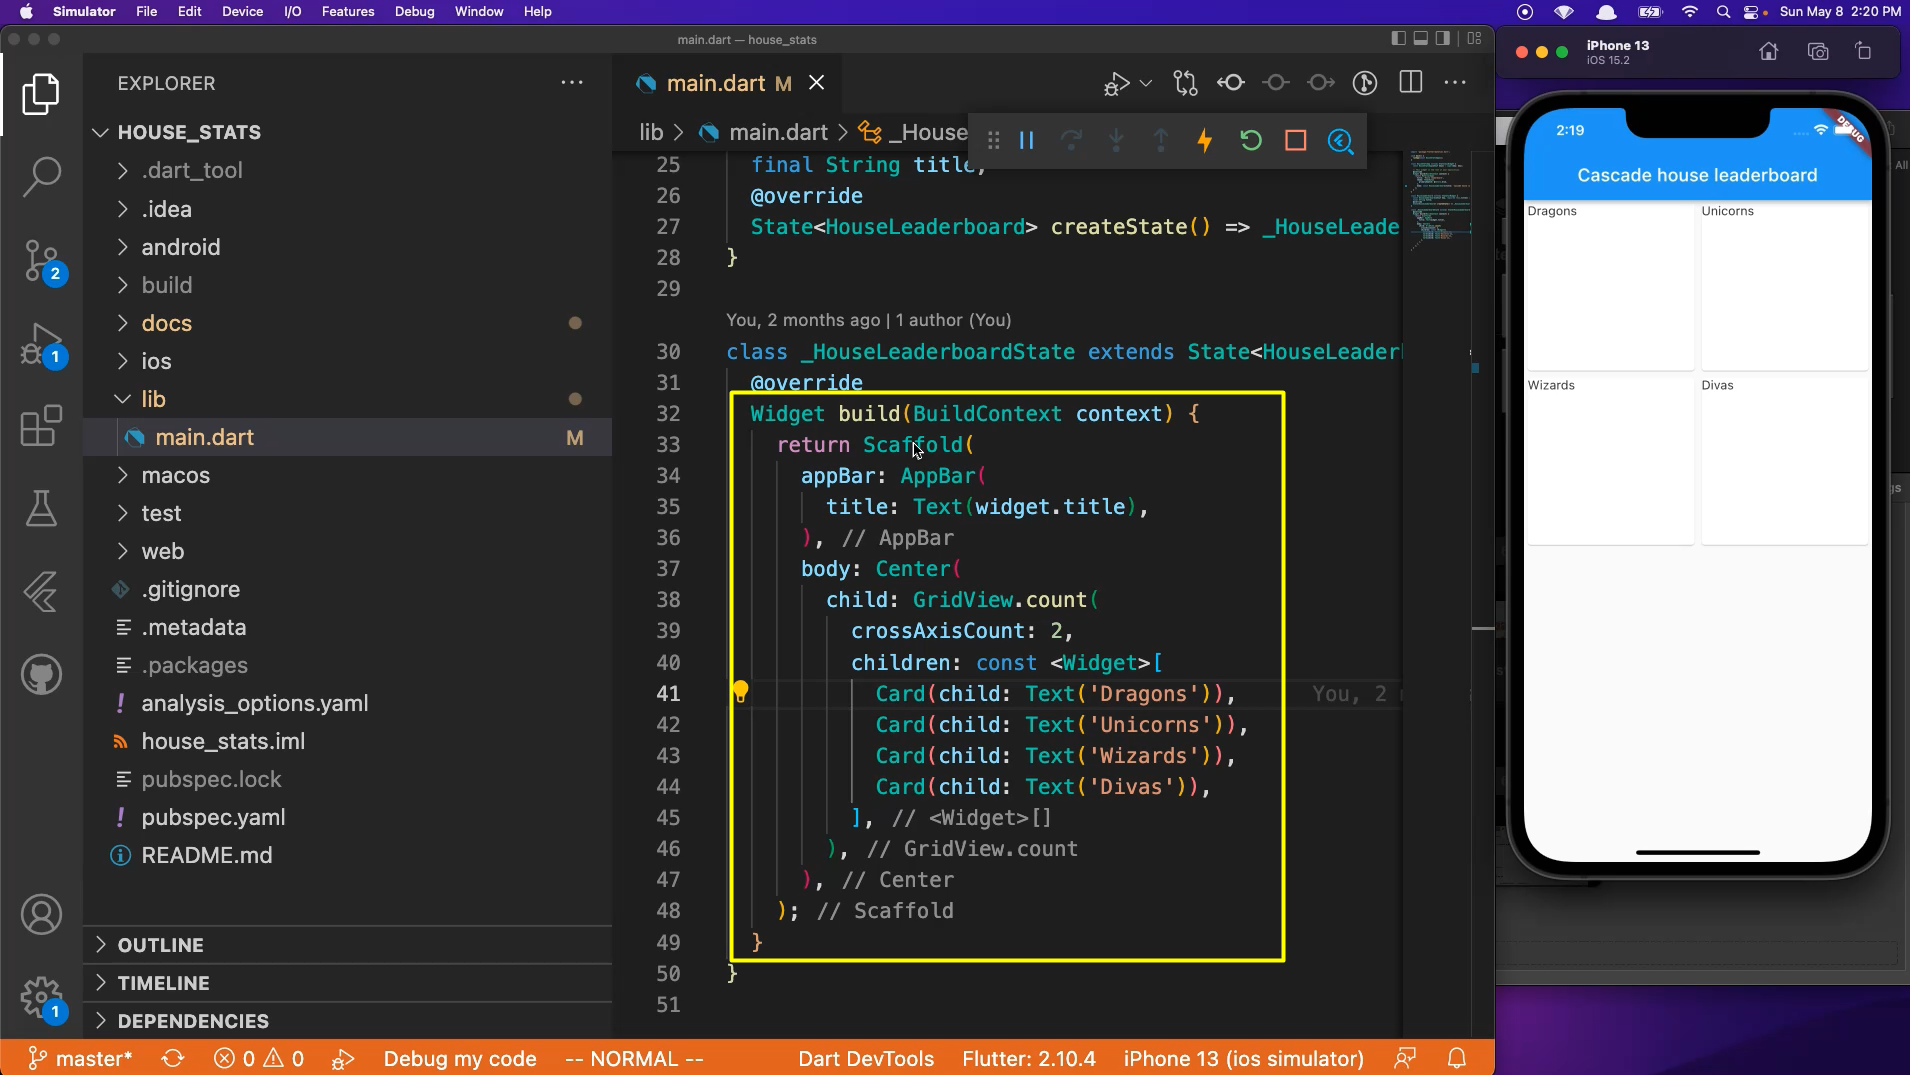
I created 4 cards and there are 4 names here. And there is also an application name for this application (“House leaderboard”).
Don't worry too much about the syntax and the keywords here. We will cover what is needed in the testing chapters, and as we go through.
But at a very high level, right, there is a Scaffold, with Scaffold meaning this is the container for all the app.
And this is a Widget. Remember the saying, "Everything is a widget?" So, Scaffold is a Widget.
And there is this AppBar, which is this “Cascade house leaderboard”, and that's a widget too.
And Center… In other programming languages and other way frameworks, some things like center, padding, and margin are usually properties of the UI elements. But in Flutter, they are themselves widgets.
That's something that we need to get used to — everything is a widget.
So Center — in the body of this Scaffold is a Center, which has a GridView. This GridView has a list of children, and this list of children are these 4 things.
Again, these are all again, widgets.
And this, each of Card has a child widget, which is a Text, for example “Dragons” for the first one.
Now let's make a change. From just “Dragons” to “Dragons rule”. Right? And save it.
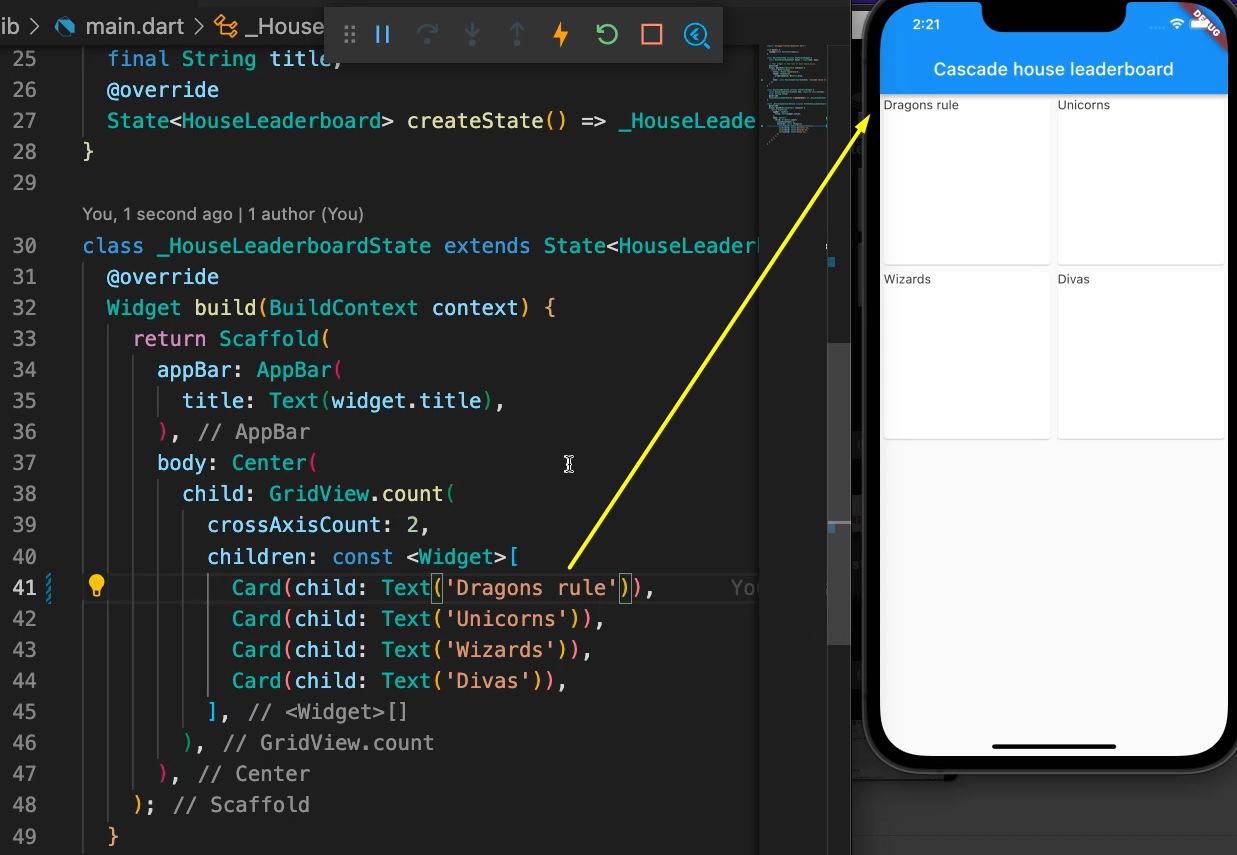
Immediately, you can see that this actually changed on the device. This is powerful, right?
The amount of time it takes to make a change and actually see that reflect in the simulator is amazing in Flutter.
If you compare that with a traditional Android or iOS applications, it is much, much faster. It's in the order of seconds. It's not in order of minutes.
I also want to call out here a few of the VS code things.
First, this is already in a Start Debugging mode, so you can kill it, and then you'll call, it'll terminate the session.
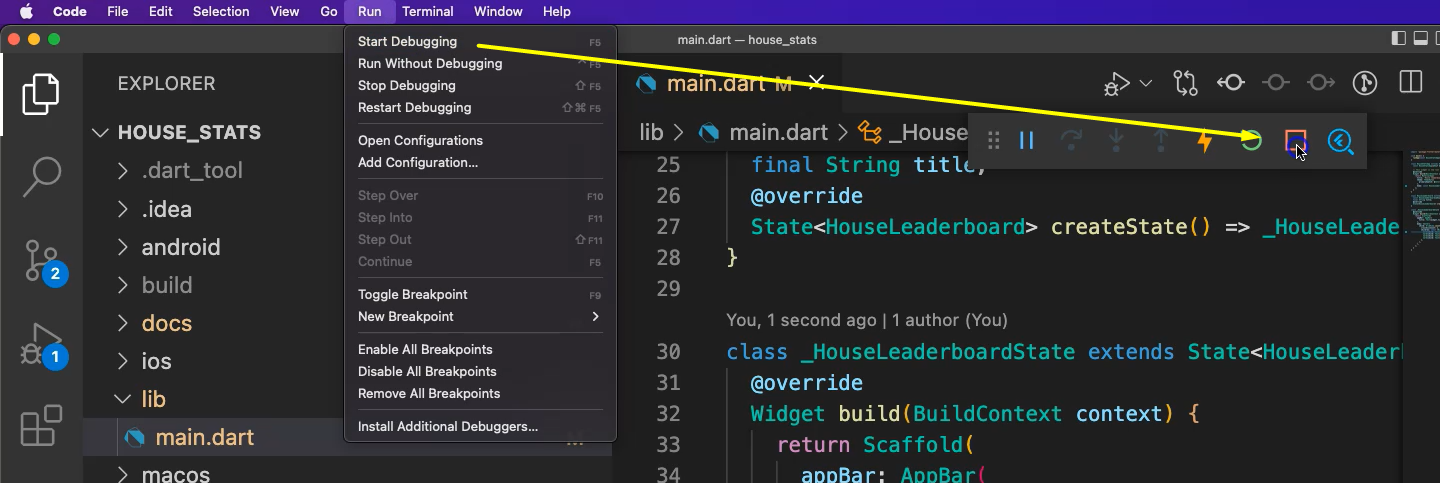
You can again, start it with Start Debugging.
And when you make changes, you can either hit this “lightning bolt” button and it'll make the changes. Or you can also do the Visual Studio “command S”, and then, those will reflect on the IDE and on the device too.
You can also use a Flutter inspector, meaning this is the IDE tools which will let you see the widgets and how you can inspect each of them.
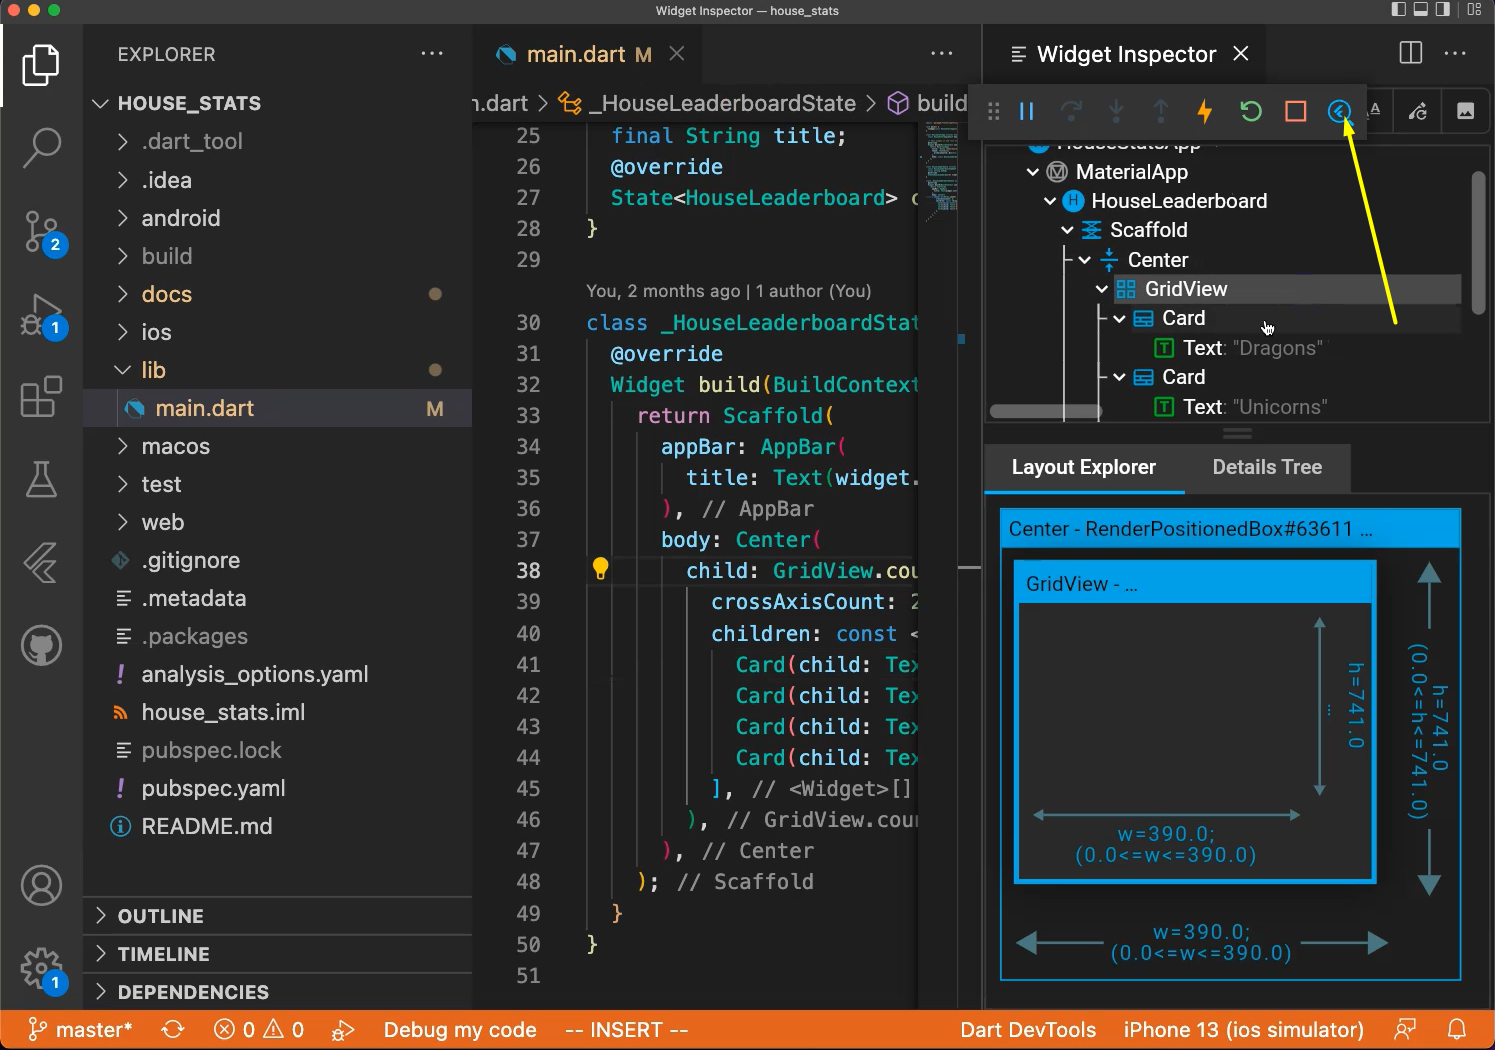
This is a powerful tool when you are trying to layout the widgets and trying to debug any layout issues.
# Local Setup – Folder Structure
Let's also talk a little bit about what's inside these folders.
The main source code for every Flutter folder project is in the “lib” folder.
We right now have only 1 “main.dart” file. It will grow as we do more code, but right now we only have 1 file.
You can see “test” is where we'll spend a lot of time in this course, which has a main level root structure.
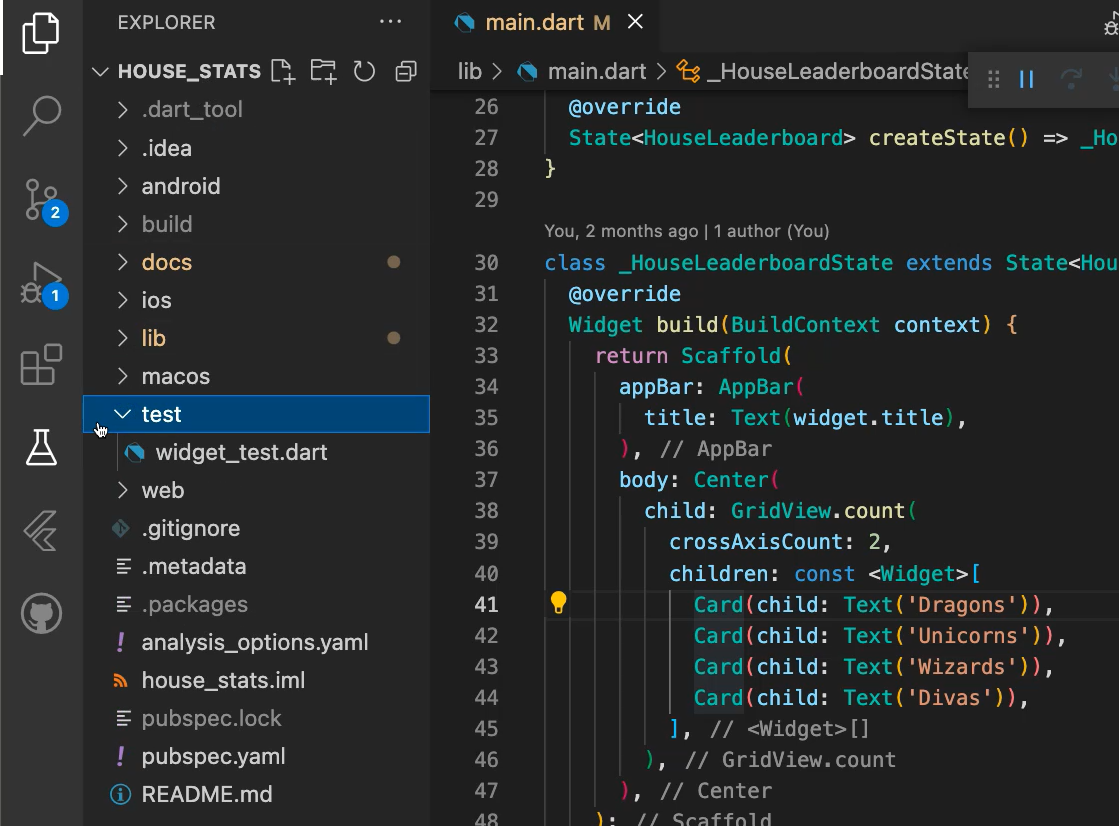
So, all the tests will go under a “test” folder.
There are also the folders for under “ios”, “macros”, and “web”. These ones, you generally don't have to touch, but these will contain the project structures and build configurations that are required for those platforms.
Let's say you want to add a plugin that is specific to the platform. You have to go and make changes into those folders.
Okay, so, we demonstrated and the run and hot reload. We have the project setup and Flutter structure.
Now let's talk about the extensions used.
# VS Code Extensions to Use with Flutter
VS Code has a very good community of extensions. And all of these extensions are free that I'm going to show, and will actually help us with the development quite a bit.
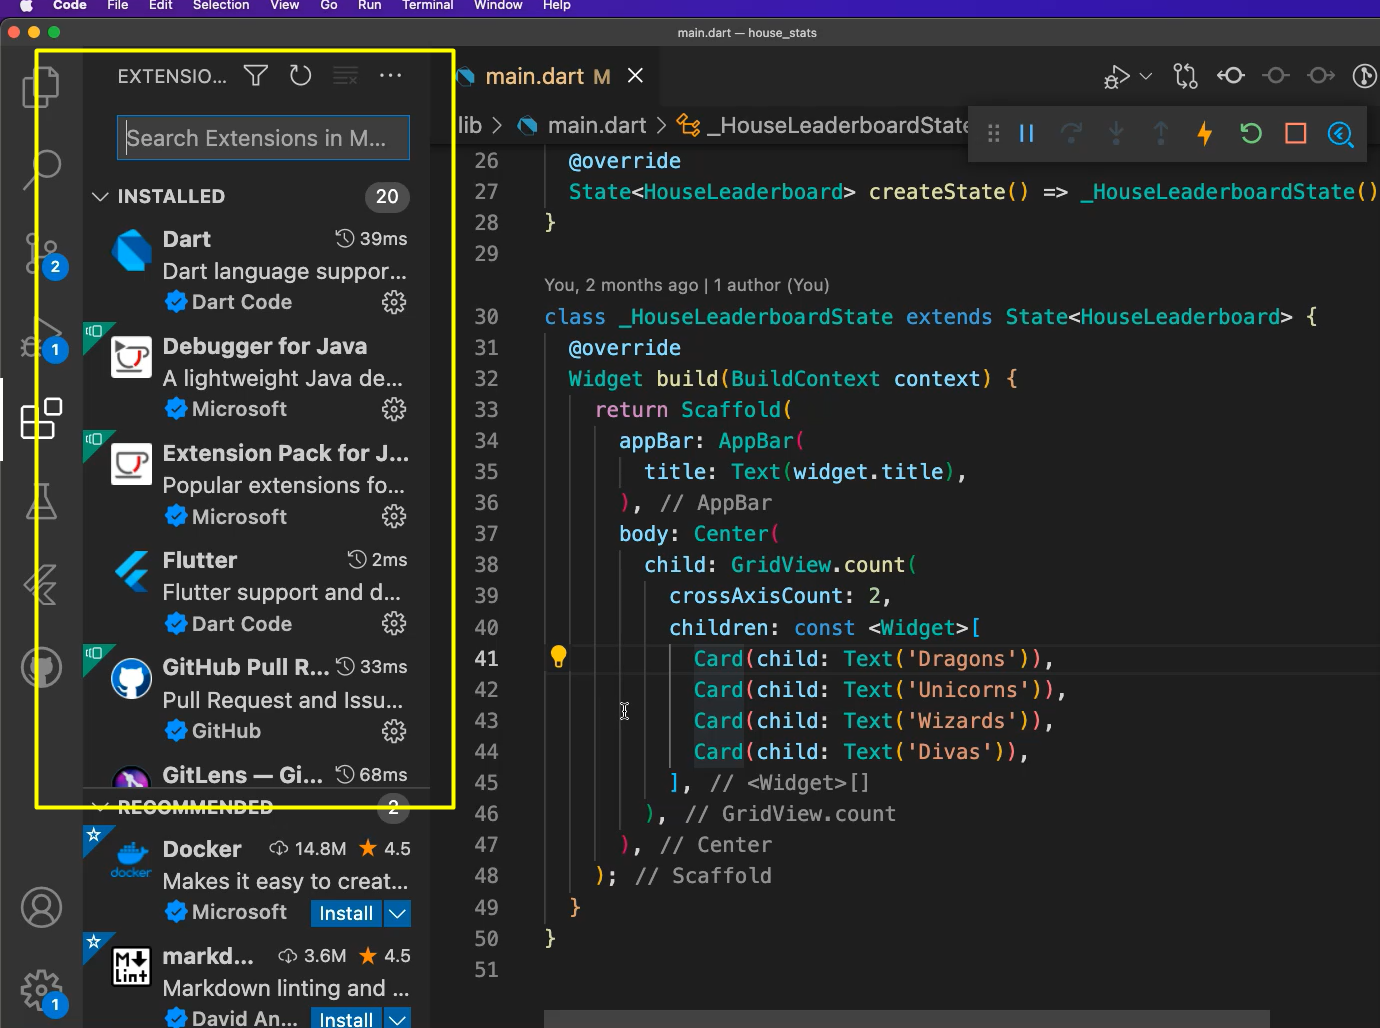
There are extensions for Dart which will give us the syntax highlighting, and any errors, right?
Let's say you do an error like this, and you can immediately see it's an error. And this is coming from the Dart and Flutter framework.
There are also a couple of ones that I like that I'm using.
One is called the Rainbow Brackets.
Because this is a visual tool — everything laid out, the UI is entirely laid out in the code itself — there will be a lot of indentation and brackets.
For us to understand where the bracket starts and where the bracket ends, this extension called Rainbow Brackets is something that I like a lot. And you can see I'm using that. So, this brace has a different color than this brace, and so on…
# Management and Dependency Structure
Every modern framework has a dependency management within the project itself.
For example, in Node, it's called "package.json". You might be familiar with that.
In Flutter, it is pubspec.yaml.
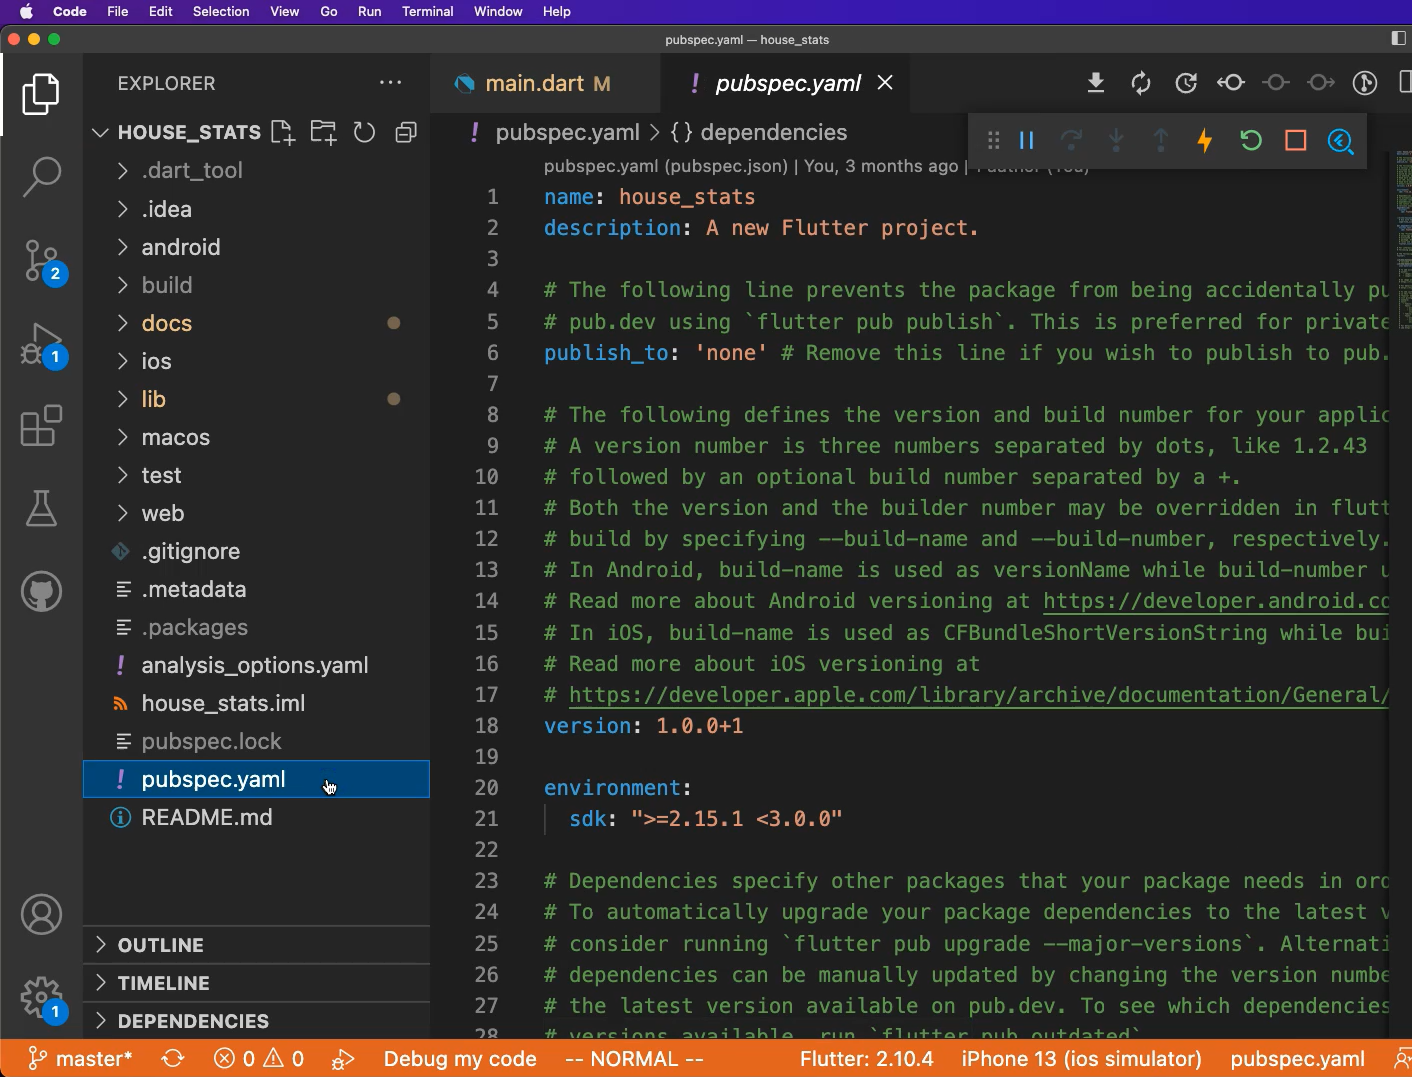
This is the file which has the configuration that is required for this project.
It'll also list down the environment that is being used, and also the dependencies where you can see what are the packages that we depend upon.
What is the package?
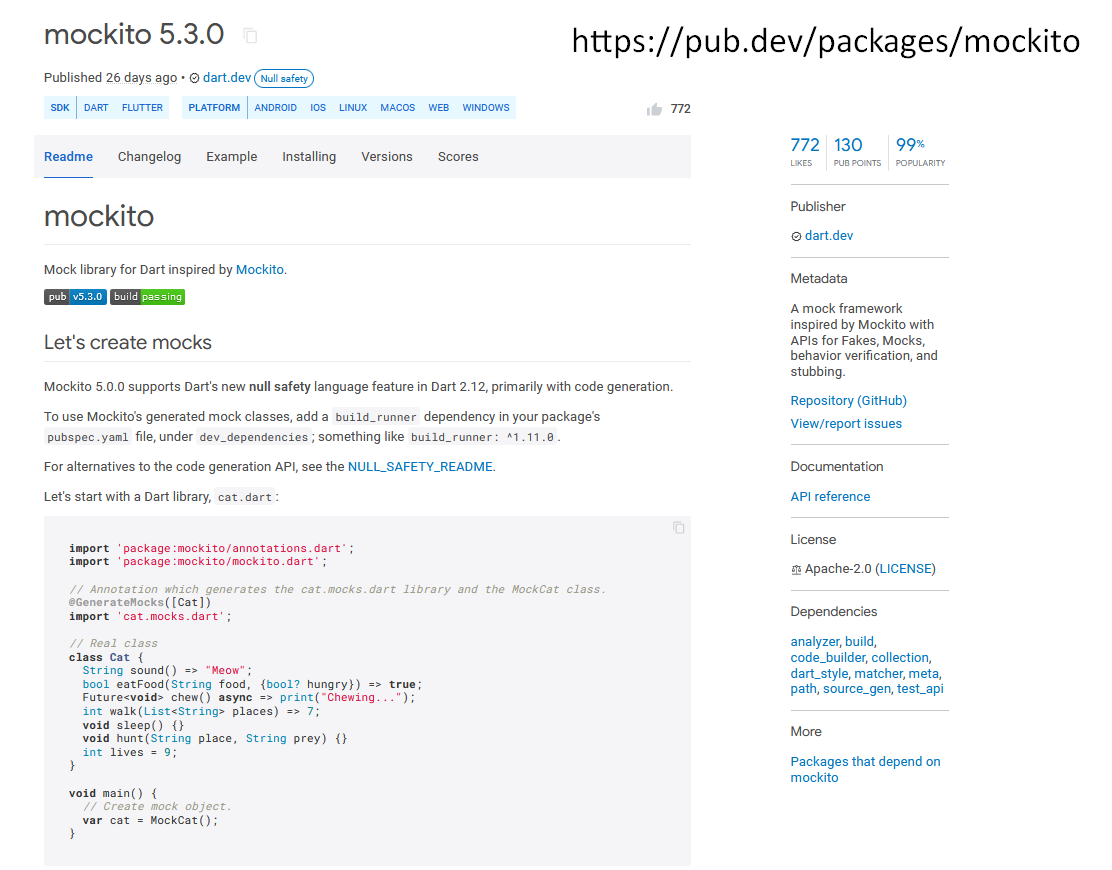
Let's switch gears. Pub.dev is a package place for all the packages that are available in Dart or Flutter for you to use.
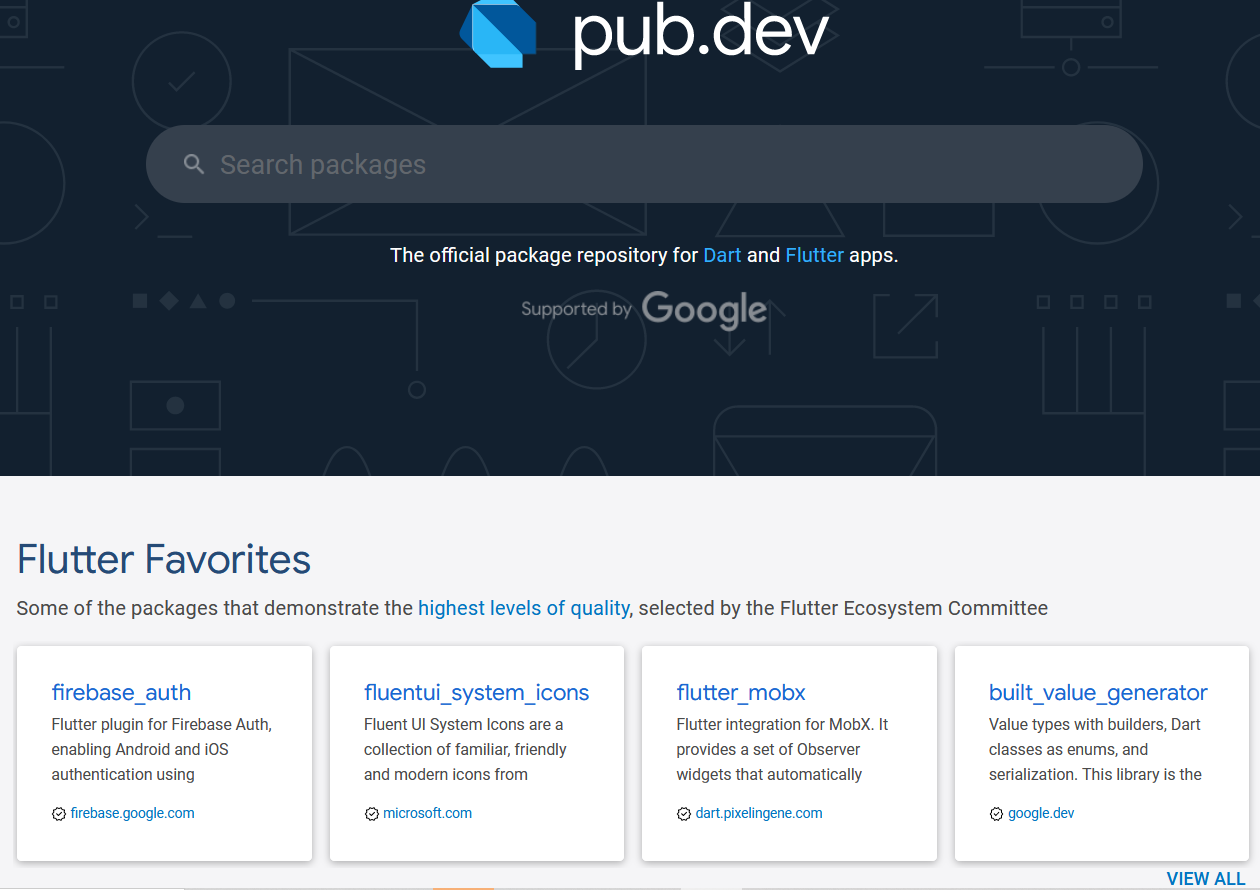
This is similar to other open-source package management systems where somebody will put a repository of all the packages into one place.
So, if you need something, let's say you need to have a custom switch other than what's provided in the library. You go here and type “switch”, like a toggle, “flutter_switch” is something that you can use right away.
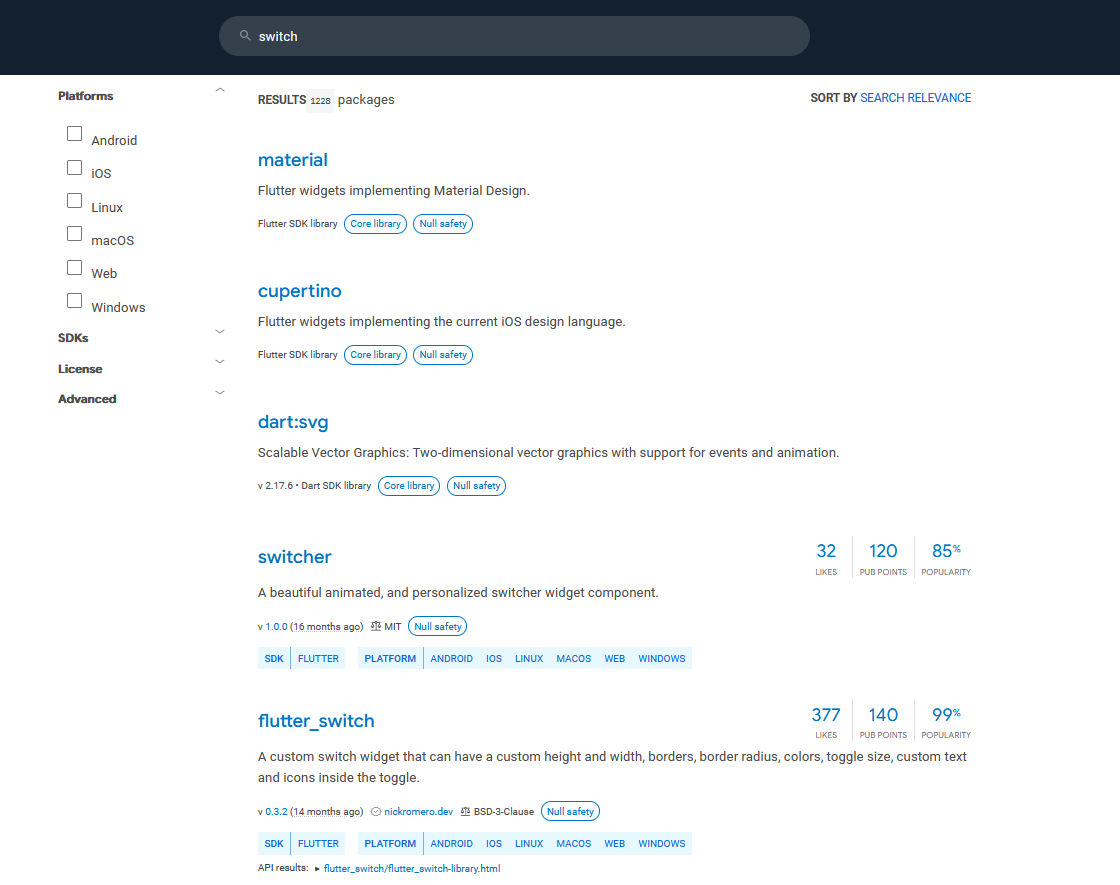
You can open it. You can see the screenshots and the sample usage and how many people are using it and so on so forth.
For us, because we are focusing on testing, we are going to use a framework called “mockito”, which I'll talk about a little bit more.
Let's see how to get this package into our application.
In this file (pubspec.yaml), we can add mockito as a dev dependency.
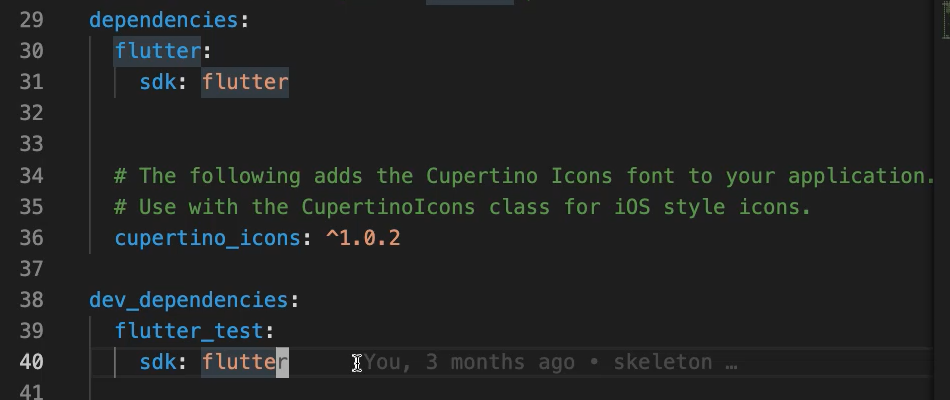
There's 2 kind of dependencies:
- One called dependencies” which are required for the application to run.
- One dependency called “dev_dependencies”, which are required for the application to build and do other actions like testing.
Because what we're doing is a testing tool, we are going to add it to the second one.
You can see, again, there is very good intelligence, and we are going to take advantage of that and then add that version of the mockito tool.
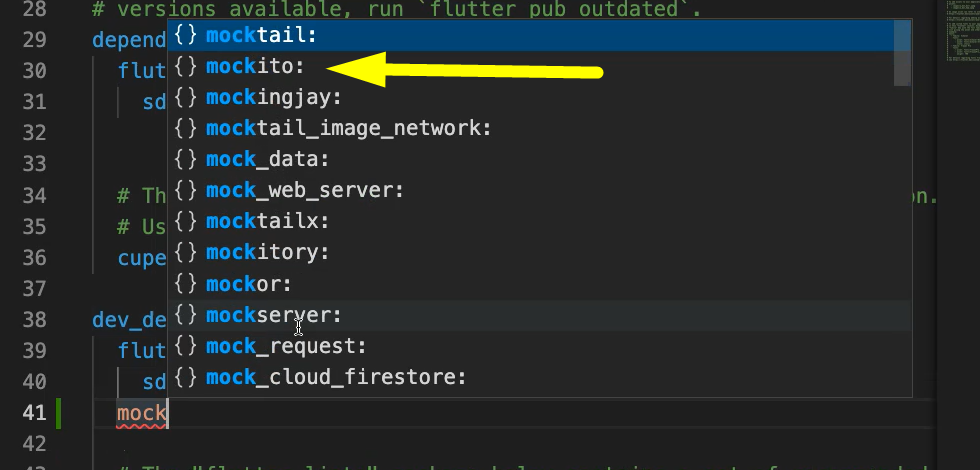
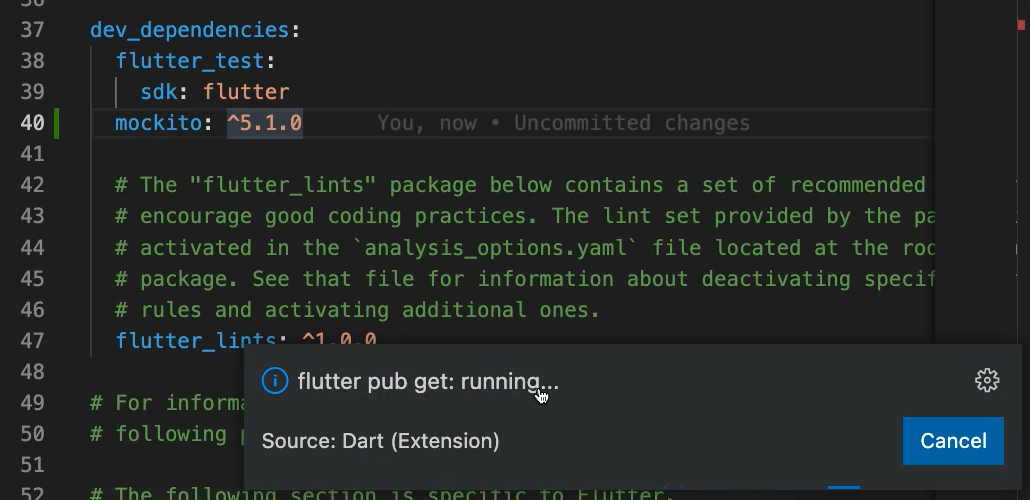
And you can see from here that this is the latest version, and our IDE recommended to add it directly here.
As soon as we do “command S”, flutter pub get will run, meaning that this is a command which will make sure to get the tool into our application.
You can either run it from the command line, or we can also run it from the IDE.
We covered a lot of things in this chapter, and these are all the set-up parts so far. With this foundation we can move on to looking into more depth into the core testing aspects.
Resources
- Git Repo for Course Code
- Getting Help – Test Automation U Slack - #course-flutter-testing
- VSCode Extension – Flutter
- VSCode Extension – Dart
- VSCode Extension – Rainbow Brackets
- Package Management Repository: Dart packages (pub.dev)
- Flutter and the pubspec file
