
Transcripted Summary
Welcome to Chapter 2 of Automating Tests in Flutter Apps.
In this chapter, we are going to talk about various types of Flutter testing, starting with the testing pyramid.
# Flutter Testing Pyramid
First, the testing pyramid is a quintessential test automation guideline which tells you how many tests per each kind of test you want to have.
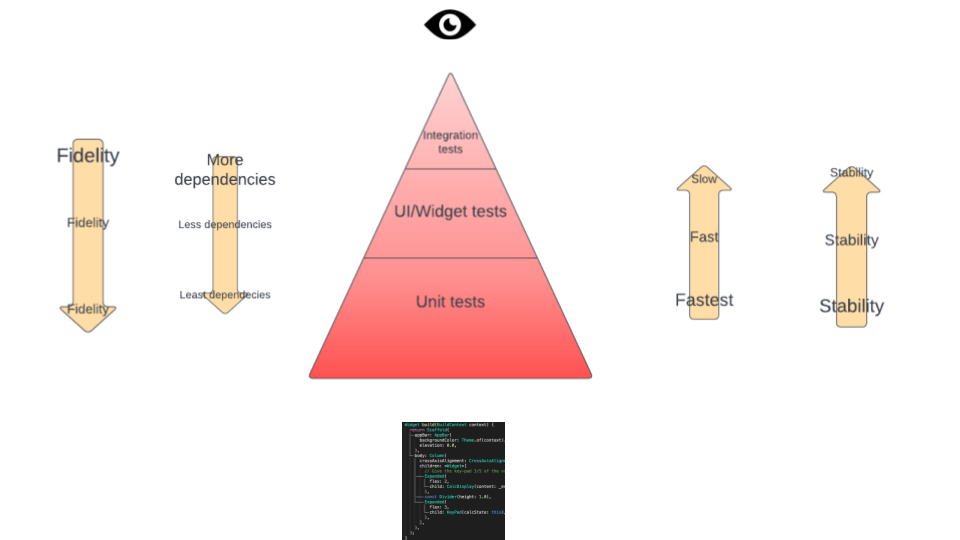
Going a little bit to the basics...
There are unit tests, UI tests, and integration tests.
Each of them covers different aspects of the app. And the testing pyramid tells you how much of each of these tests do you want to ideally have in your app? This is not a rule, but more of a guideline.
Usually, the second layer will be integration tests, but in Flutter the second layer is widget tests.
And usually, the third layer in the test pyramid is end-to-end tests but in Flutter, they are called integration tests. But the idea is the same. You will drive the app as a user would in integration tests.
There are also other ways to look at the testing pyramid and the different types of test cases so that we understand better.
First, like a user. A user that is using the app would feel the integration tests are something that makes much more sense.
Then from the code standpoint. Like when you're writing code, unit tests would seem the most natural to you because you have a small set of a class or a function, and you are testing that in isolation. And your code is very one-on-one with those cases.
To help us understand more into the test cases, let's also talk about different characteristics of the framework and which one would help with unit tests and with integration tests.
First stability.
Stability means how good your tests are once you have written them. If you got the test passing once, how easy is it that you can keep them running in the pipeline for a long time.
End-to-end tests have this problem, even though you don't think that the test shouldn't fail, they still fail.
So that's why end-to-end tests and integration tests have the lowest stability, but unit tests have the highest bit of stability.
Next is fidelity, right?
Fidelity is how much closer the tests are to a real user's usage. Because integration tests actually drive the app, either Android or iOS, you feel like they're very much closer to what you would want to test like a manual test.
So, fidelity is high for the integration tests, but as you go down, they become lower and lower for widget tests and unit tests.
Another aspect of tests that you wanted to keep in mind is how fast these tests are, right?
Whenever you want to run the test cases, let's say you're putting in a pipeline in a CI, you want this test to give you feedback as quickly as you can. Even when you are developing locally and running the test locally.
Unit tests are the fastest because there isn't anything that you need for the unit test to run other than a few of the setup pieces and the class at hand.** **They require very little setup, so that's why you test the fastest.
Widget tests have a little bit of setup to them. That's why they're a little bit slower than unit tests.
But integration tests are slow.
Depending on how much and how deep the integration test is, and how many interactions you are covering with integration tests, they can take even up to 30 seconds for each test. Whereas if you compare with unit tests, they are probably in the order of less than a second or a second.
Another way to think about this test is how many dependencies are there for each kind of test.
For unit tests, because you're only doing one at a time, the number of dependencies is very little.
For widget tests, because you are also dependent on the framework of flutter, there are a little bit more dependencies.
But as soon as you go to the integration test level because you're actually driving the app, you also need to make sure you're mocking everything that you are required for the app to run. That's why it'll have the most dependencies.
# Importance of Testing at Each Layer
Even though we have all of these layers, it is important to test at each of them.
For example, you do not want to just have unit tests, because you want to have the confidence that a user can flow from one screen to the other screen.
But at the same time, you do not want to cover everything in the integration test layer, because that may make all the test cases slower, right? For example, if you have 20 integration tests covering different aspects and different flows of the app that will make the test shoot slow. And also, as we just talked about, it'll make the maintainability of the shoot very high.
So, you want to have that logic in different layers covered in a lower level, like let's say unit test.
But let's say you have a little bit of interactions added into each of the widgets, you cover them with the widget test so that those interactions don't have to be tested at a higher level.
In general, you want to have the logic pushed down that way unit tests will run them faster. That's why the guideline of the pyramid helps you determine how many tests you want to have at each level.
# Flutter Tools for Testing at Each Layer
Now let's talk about the tools that flutter provides for testing at each layer.
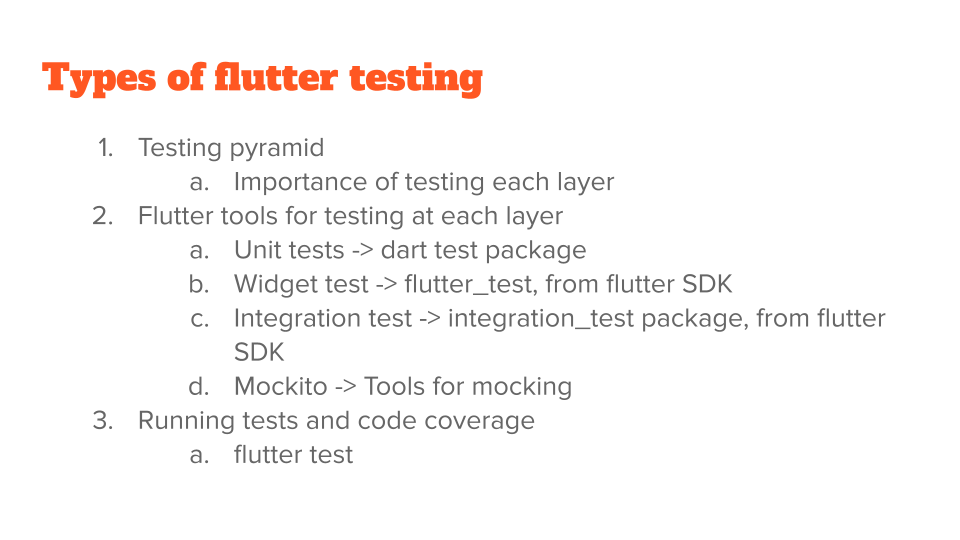
Unit Testing
The basic layer, the unit test, it's pretty simple.
There is a package called “test”.
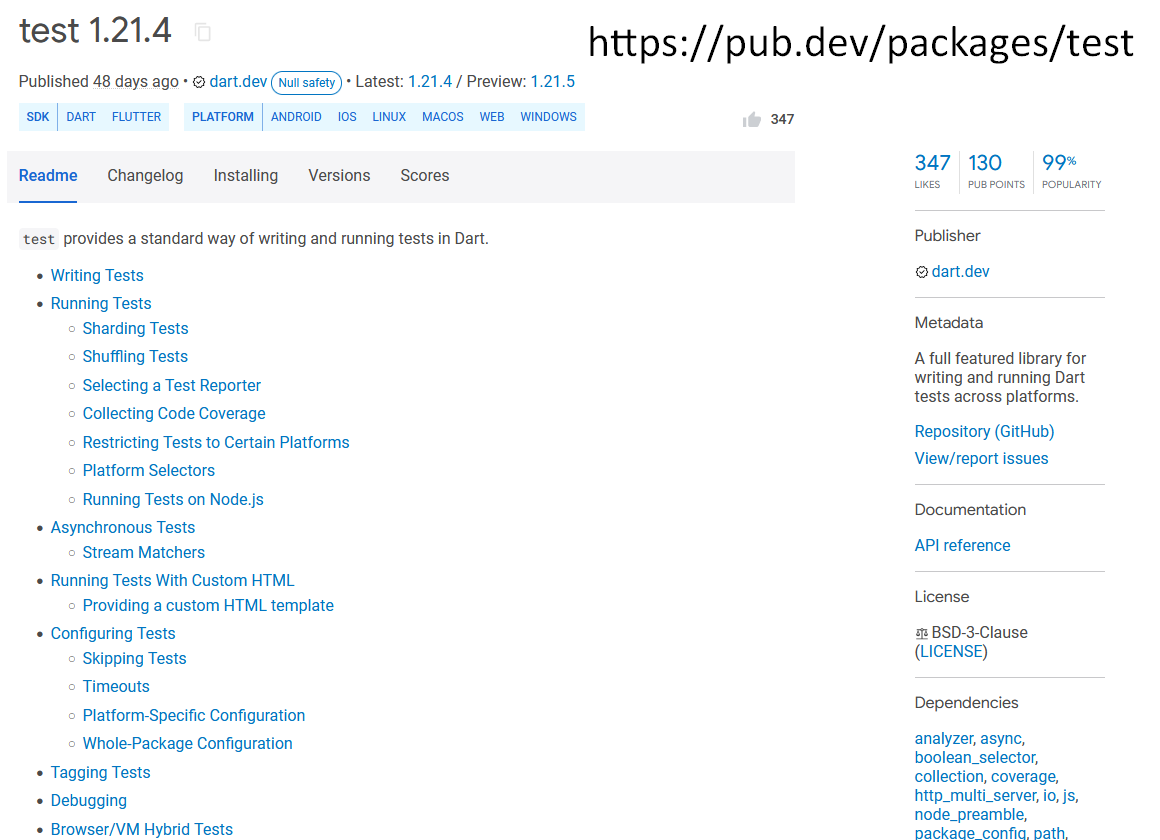
The name sounds pretty intuitive, but it is one of the fundamental packages that you need.
This is a Dart package, so it doesn't matter whether you're using Flutter or Dart, you can still use this package to run the test.
When you're actually running the test cases and adding test cases, you don't have to include this explicitly because the flutter SDK includes it by itself.
This framework helps give the framework around tests — like how to run the test, how to execute some of them, how to debug them, and how to do assertions.
For example, this expect is what you would traditionally think of as an assert.
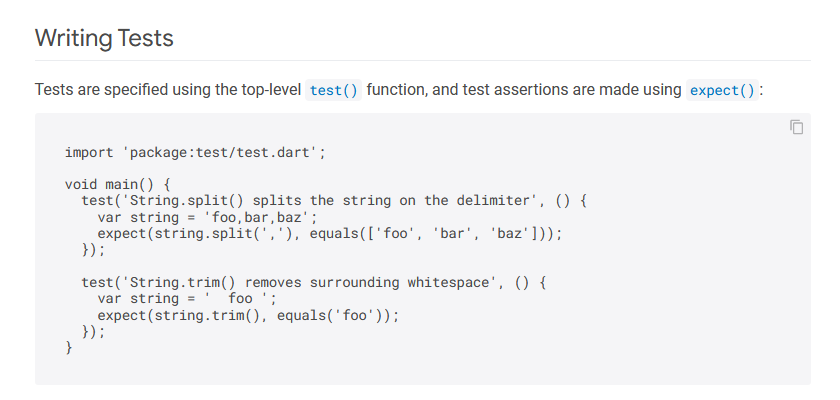
This simulates something like an expect or in JavaScript, there are similar frameworks.
So instead of assert, we call in Dart an expect.
Widget Testing
Next comes the widget test.
Widget tests come from a package called “flutter_test”, which is something that you would explicitly include in your Import statement, but you don't have to add the package because it comes with the Flutter SDK itself.
Integration Testing
The same thing with integration test.
It comes with the “integration_test” package, but you don't have to explicitly import it, the Flutter SDK gives it for you.
Mockito: Tool for Mocking
Also, a very important tool that we need for writing the widget test and integration test is Mockito. Mockito is a tool for doing mocks.
If you haven't heard the term mocks, think of something that you would put in place in the app that will help you write better tests. Because you can control everything on the app, you kind of create a clone of it for the test cases, and then manipulate the clone easily.
Again, this will come from a library called Mockito.
That's it for the tools part. Now let's go on to see how to run these test cases.
# Running Test Cases in Flutter
I'm starting in the command line first because this is simple. You can do it either way.
And I do flutter test — flutter is the tool itself and test is the command and I'm running this in the source project.
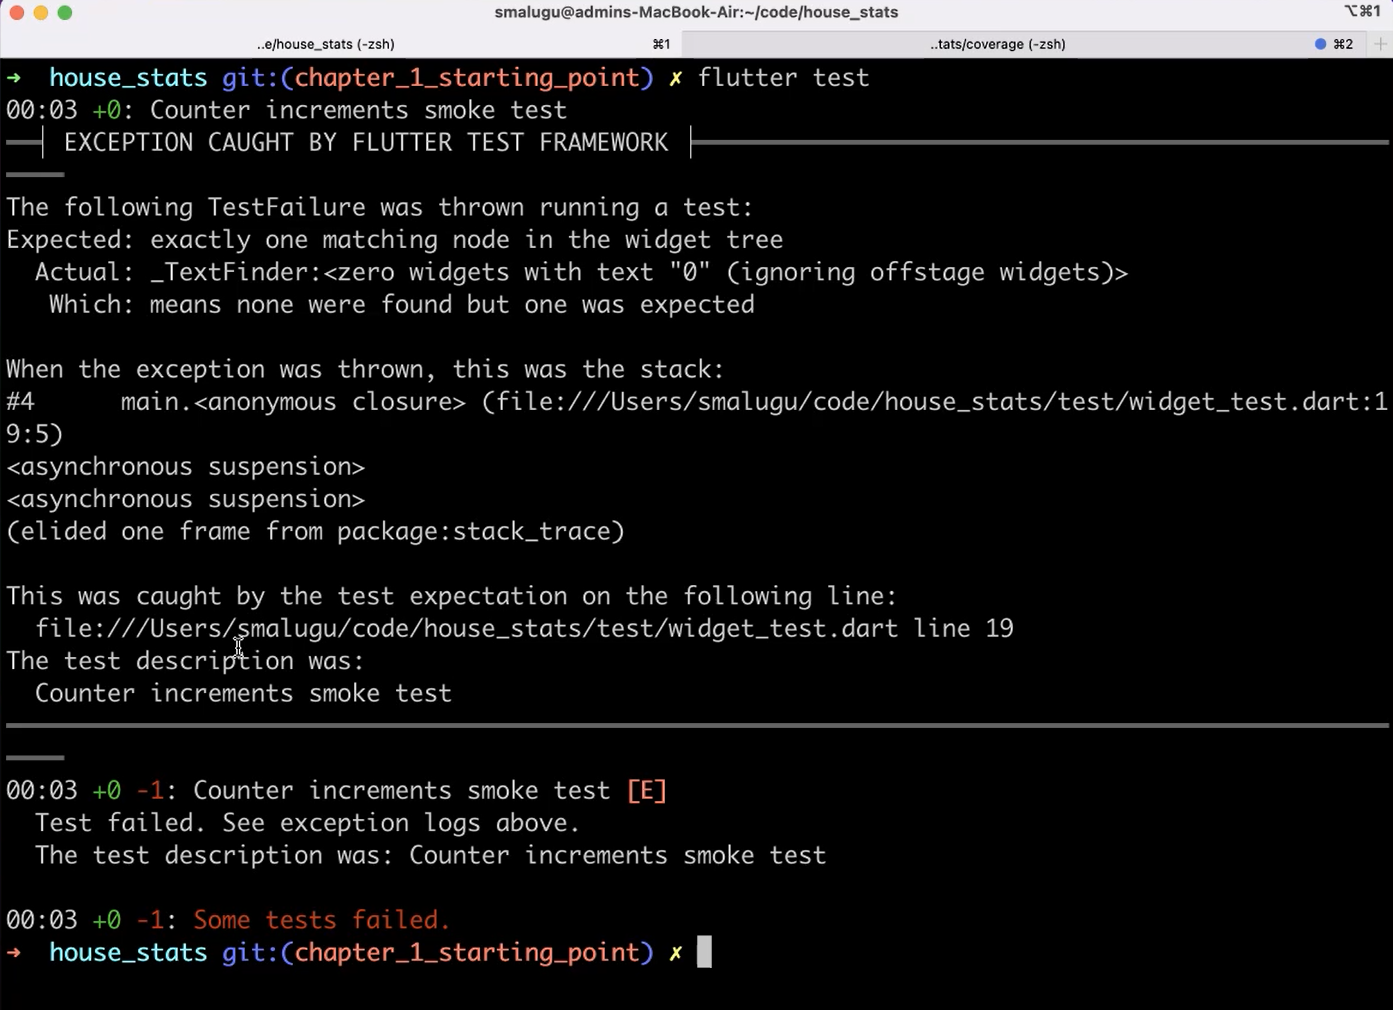
Okay, so this fails because the code for the test case is under this folder.
It's under the “test/widget_test.dart”.
And if you look at this code, this is what is given to us as a template.
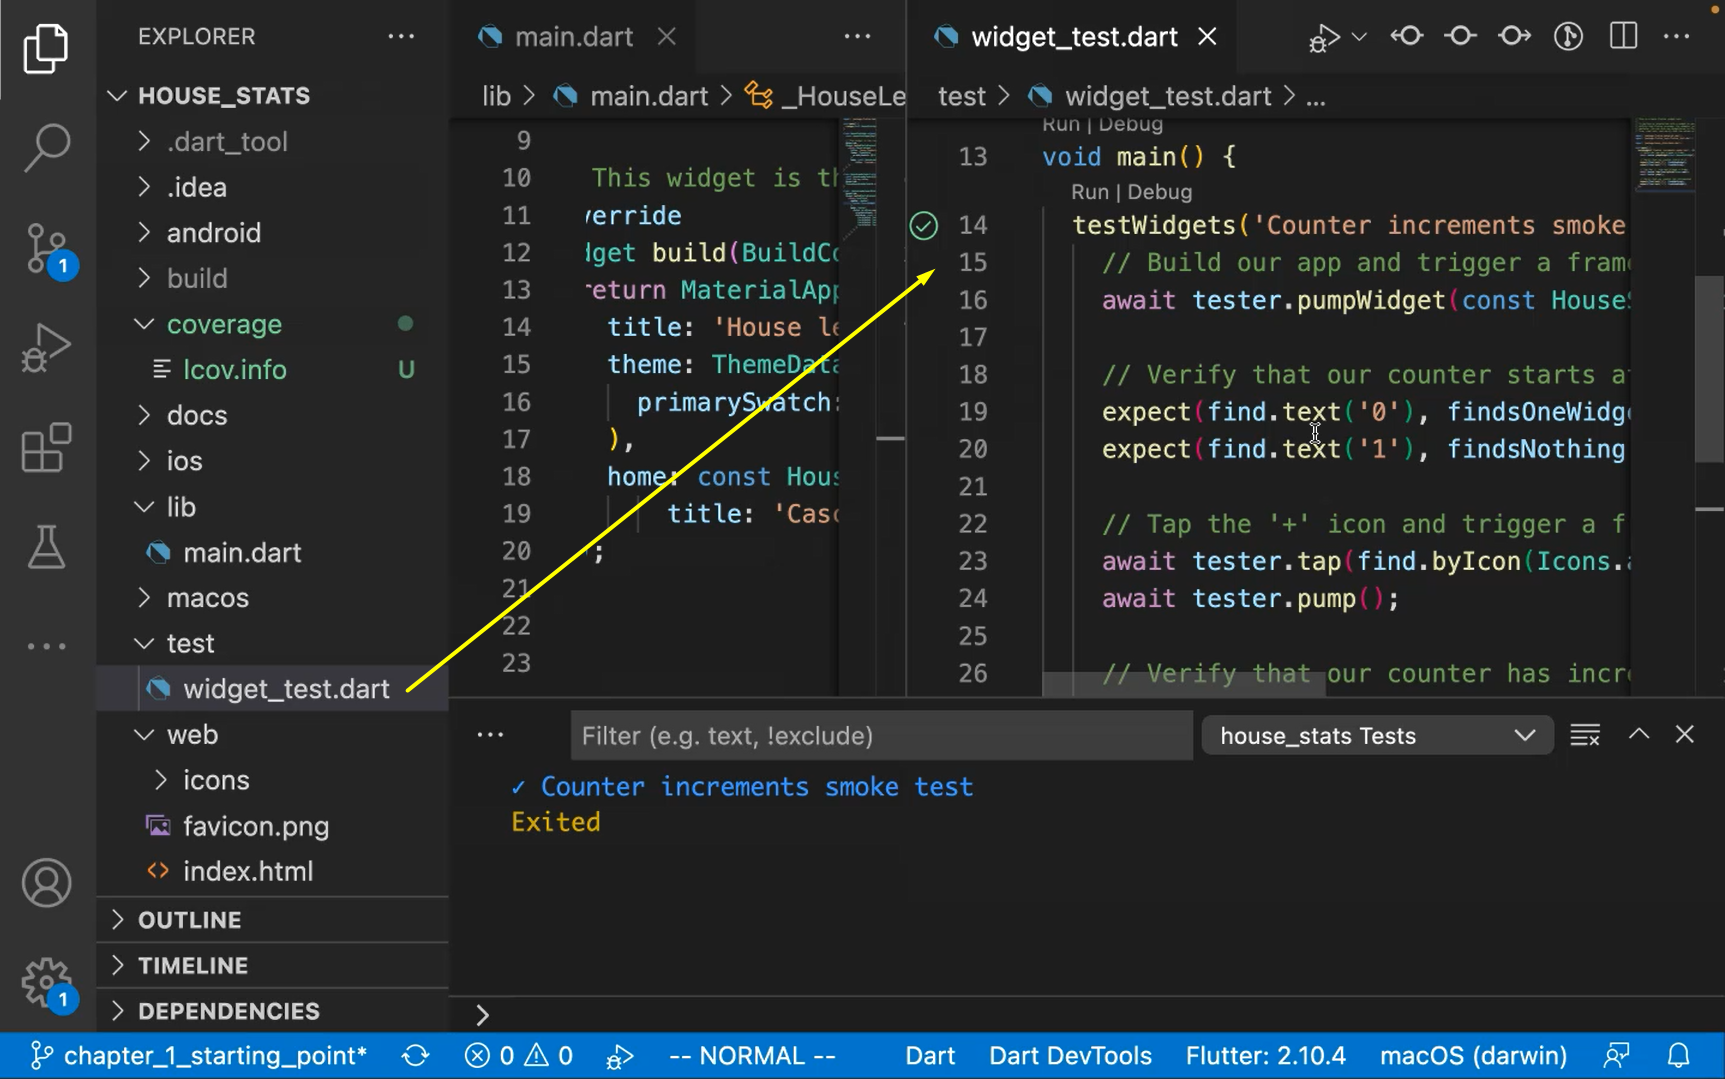
We didn't really write it.
It's given when we are on the generator to create the app, the code is also written for us.
You can see we made changes to the app and added a little bit of code here and added some cards, but we didn't really change the test case.
That's why it failed. So, let's change the test.
The syntax… don't worry about that too much, I will cover that in the coming chapters.
But what you need to know is I'm choosing the text that is available on the UI.
There is this text called “Dragons”. So, I'm going to use that.
Let me close this one. And you can see this a little bit more clearly.
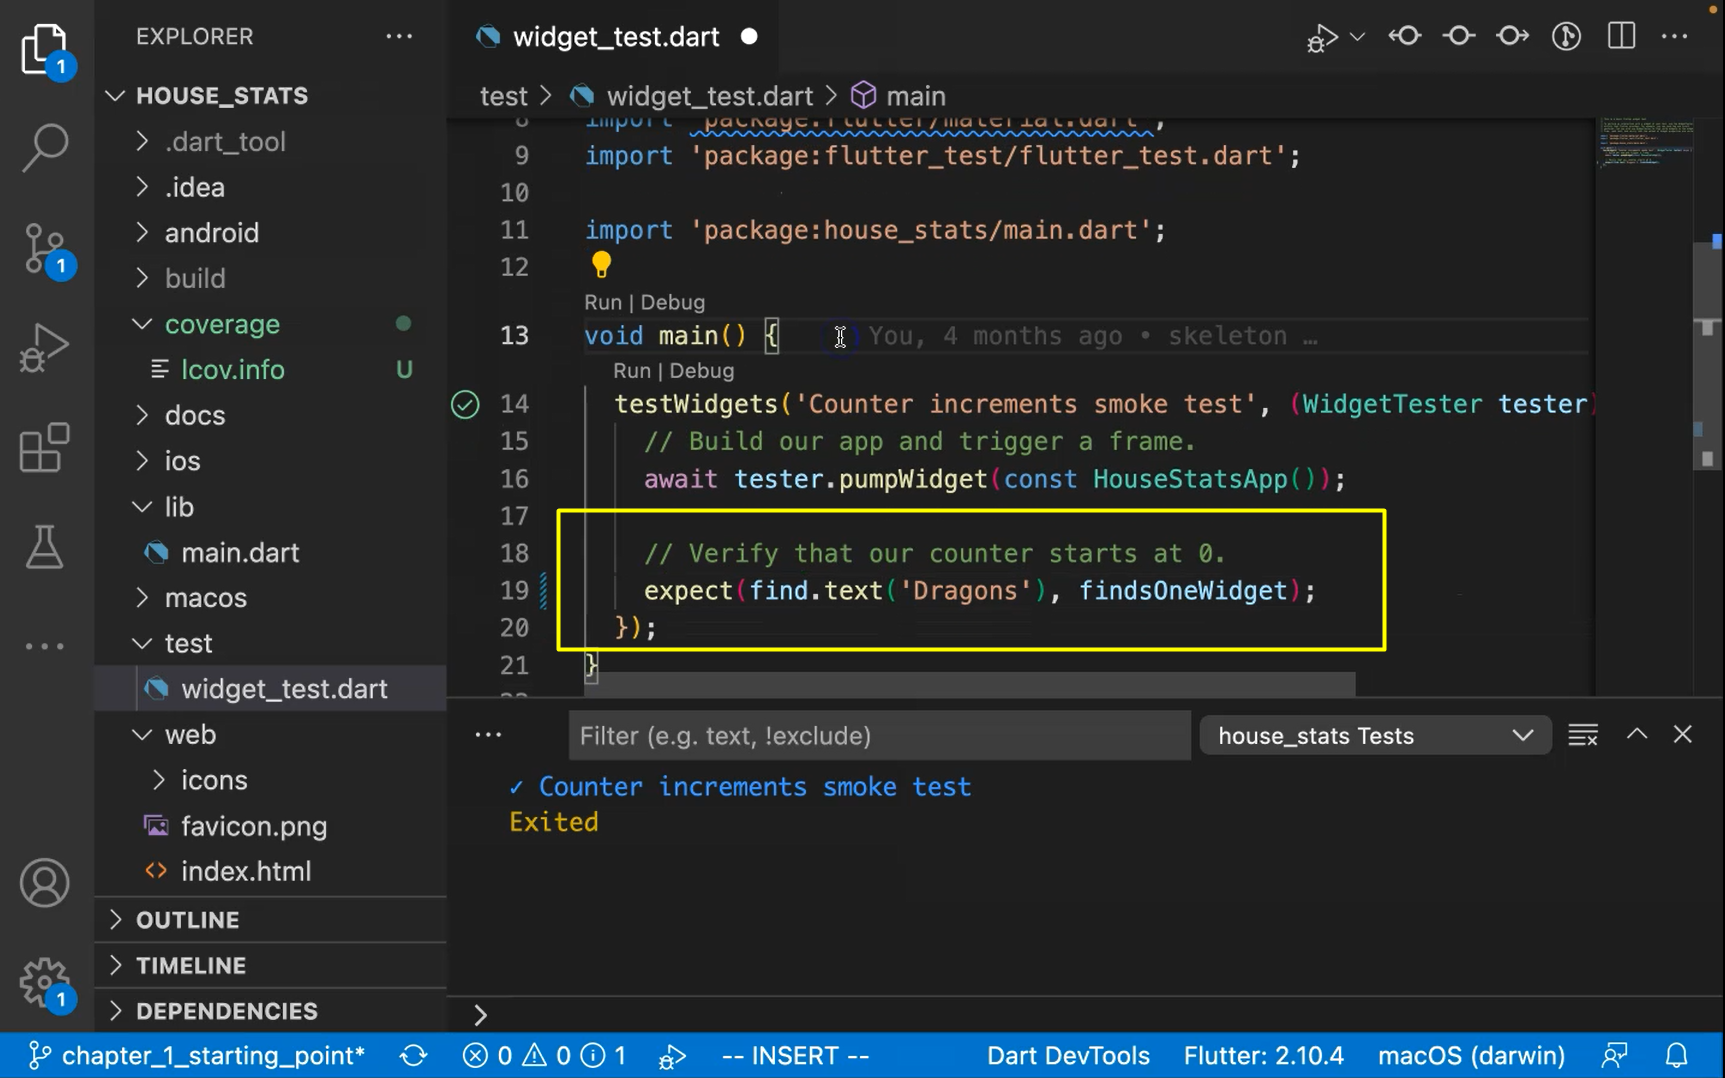
Every Dart test has function.
You can think of this as entry point for Dart code much like C or C++, there is an entry point into Dart.
And each of the test cases are wrapped in something — either a test, or testWidgets, or an integration_test.
This is not a unit test; this is a widget test. So, we have a wrapper a rapid called testWidgets.
void main() {
  testWidgets('Counter increments smoke test', (WidgetTester tester) async {
    // Build our app and trigger a frame.
    await tester.pumpWidget(const HouseStatsApp());

    // Verify that our counter starts at 0.
    expect(find.text('Dragons'), findsOneWidget);
  });
}
This method is async because for the app to be booted, we need async andawait`. Otherwise, the test would just skip this part and just come here straight away without it actually opening up the app.
So now that we have this, we can go back to the terminal and run it using flutter test.
All right. There's only one test and it passed.
Let's also see how to run this from the IDE itself, not the terminal command line.
There are a couple of ways to run this.
So, you can click on the run button here and it'll run the test.
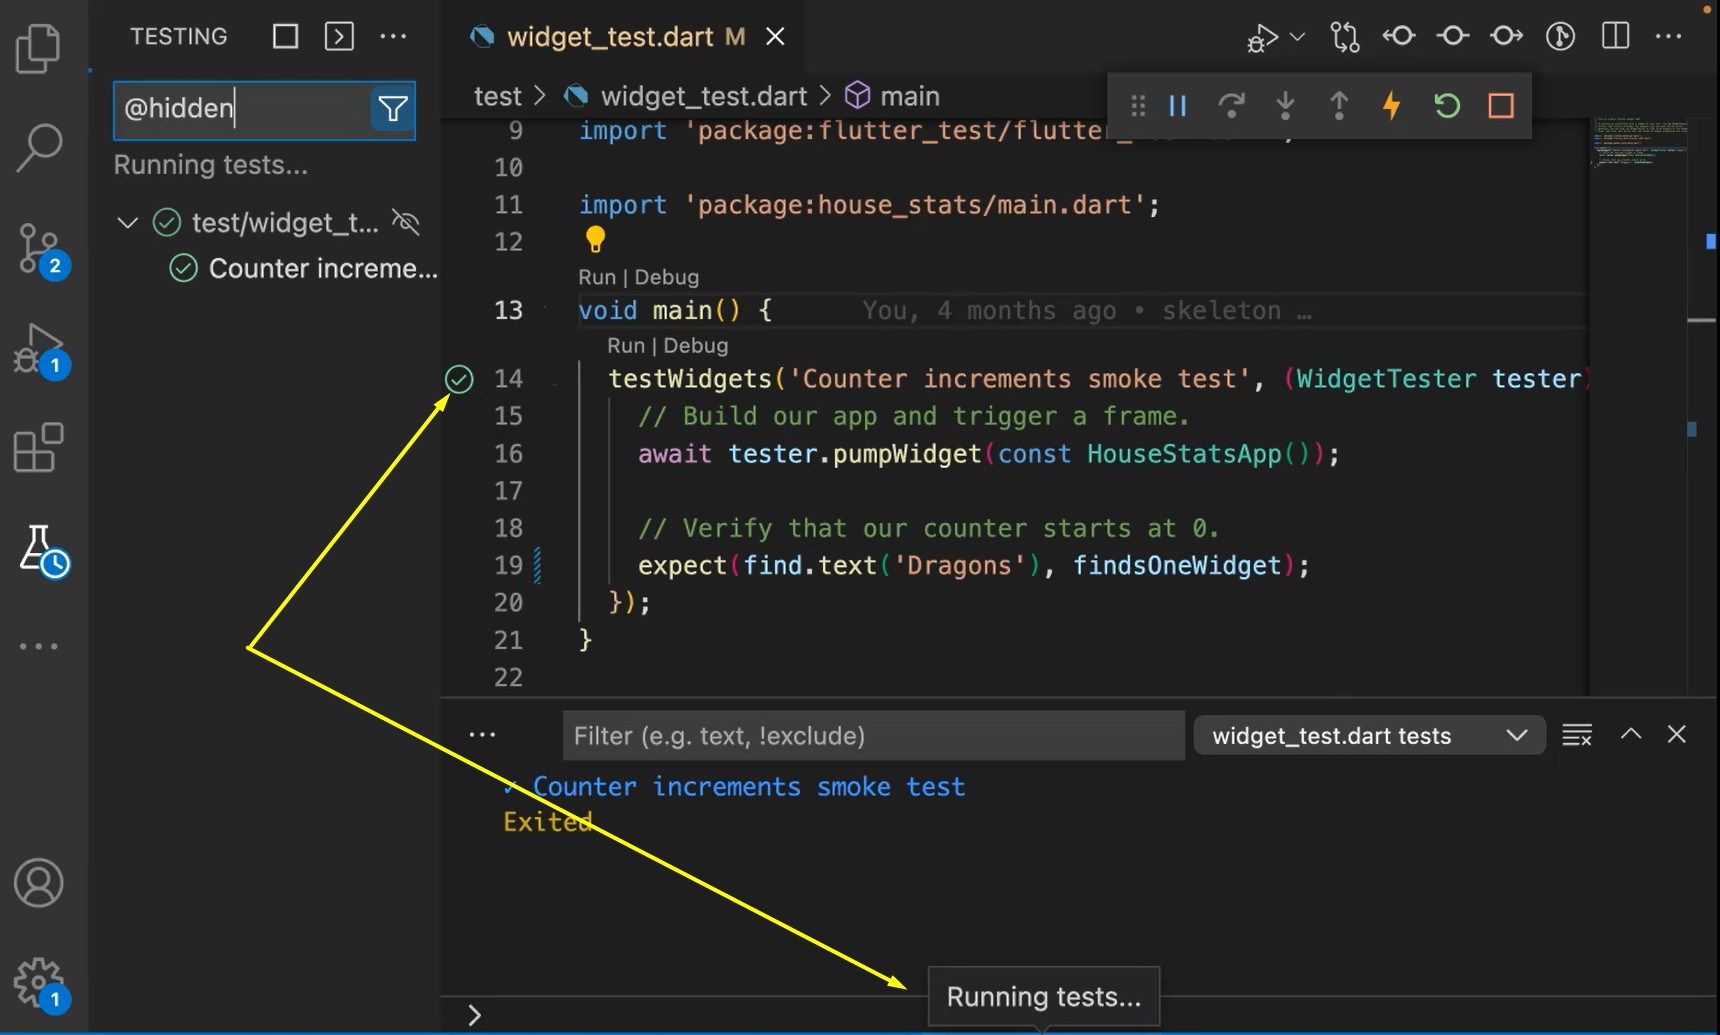
On the IDE, there is a left bar, and it tells you Run and Debug.
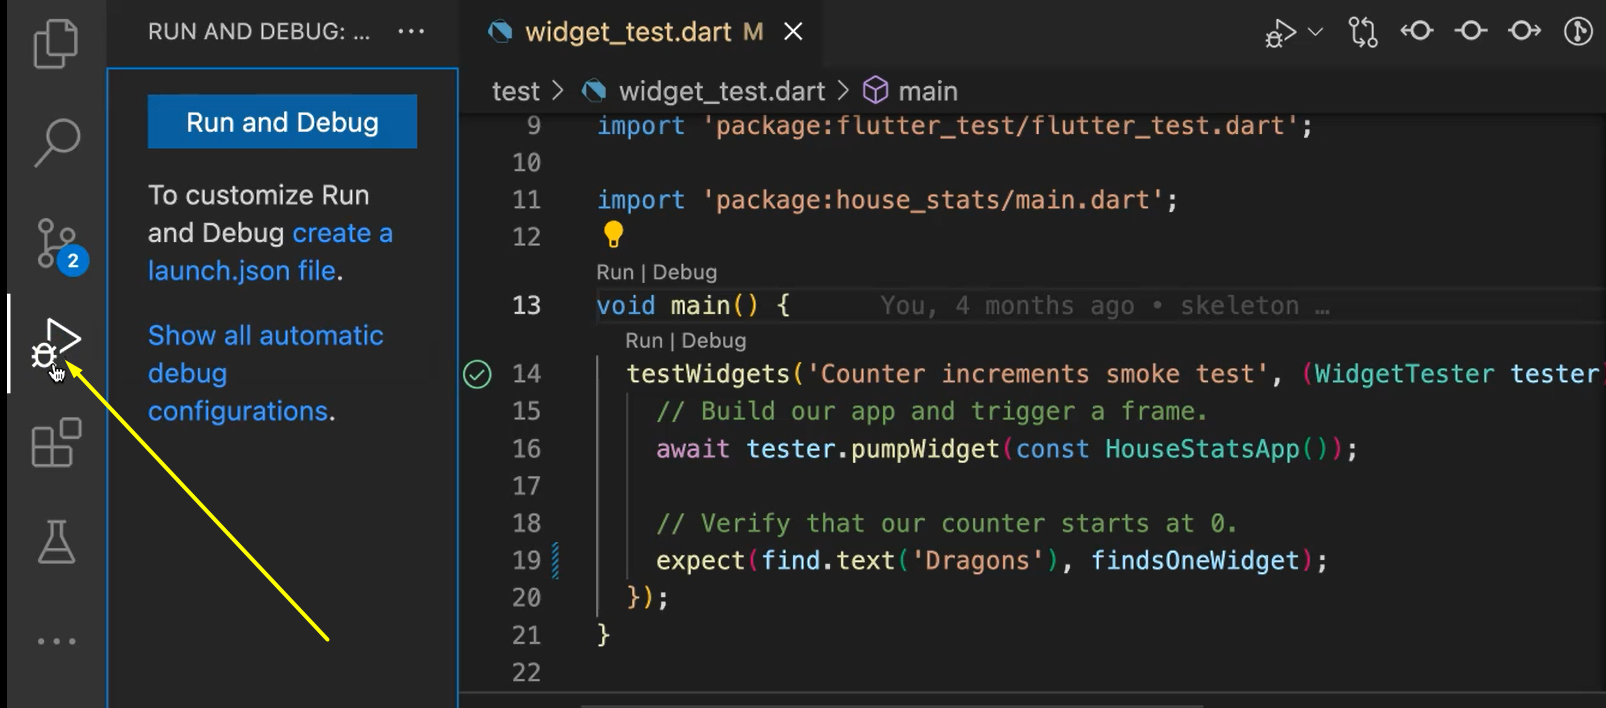
There is this Testing and here you can also click on the Run test.
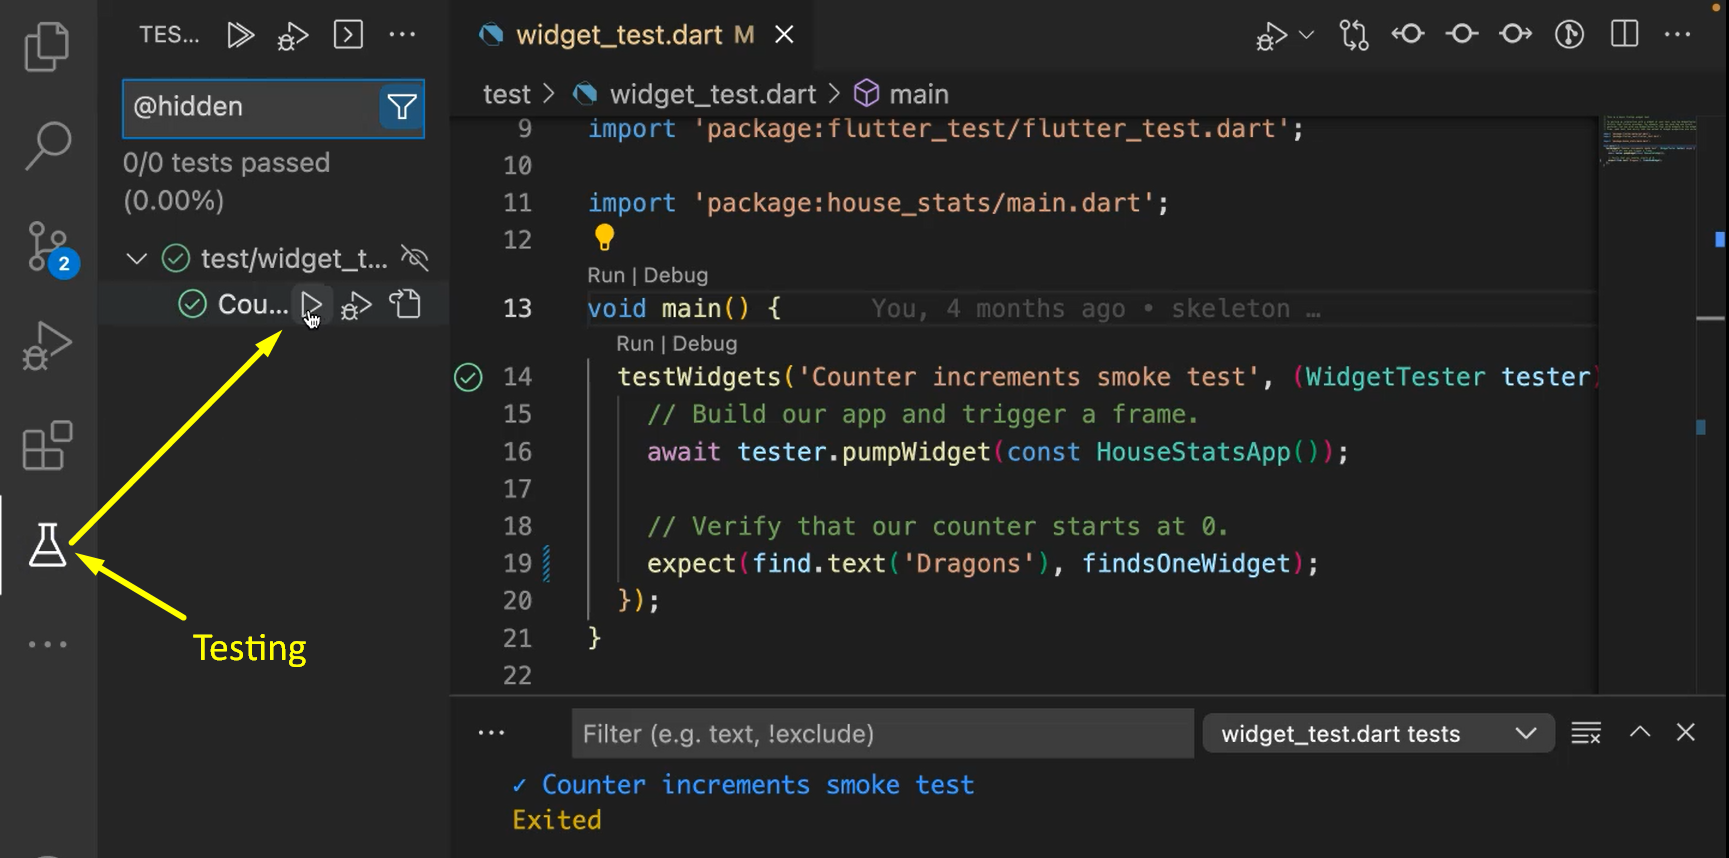
Here you can run it in multiple ways too. Let's say you have separate tests under a folder, you can run them based on that.
You can also have a historical record of all the tests runs that you had so far.
So that's running the test from IDE. Now let's move on to code coverage.
# Flutter Testing — Code Coverage
Code coverage is something that's useful as a guideline, right? To help you know how many lines of code that you created are actually being covered by the test cases.
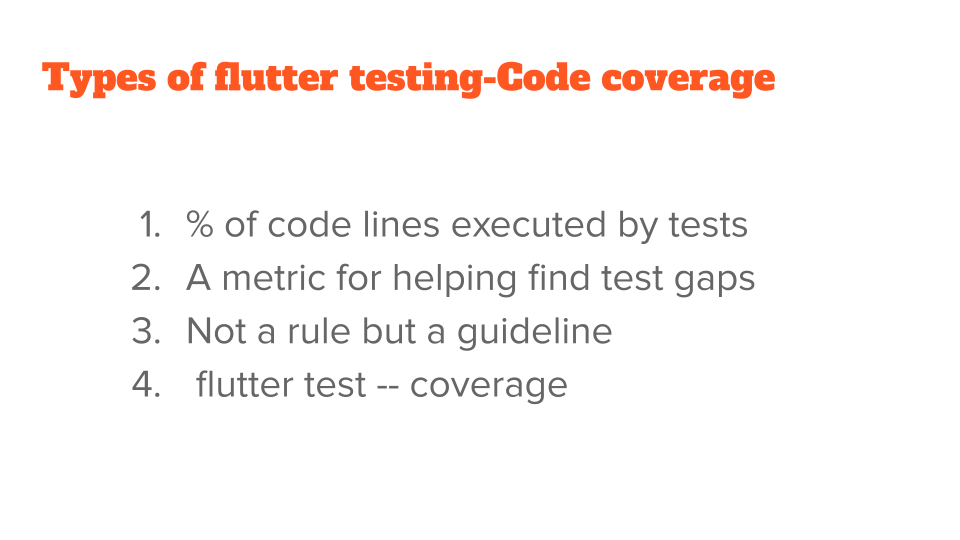
So, it's a measure of the percentage of code lines is executed by test.
It will help you find test gaps. Let's say you think that you covered some parts of the app, but you don't know which parts you didn't cover.
This test coverage is a metric, a mechanism, to help you figure out those gaps.
You don't have to have 100% code coverage. Some teams and some people do it, but it's more of a guideline that's for you to determine based on your maturity in the software development process.
The command for this is test — the same thing, but for coverage, you add the coverage.
So, you do flutter test -- coverage.
This will invoke the test, but also make sure the coverage files are created.
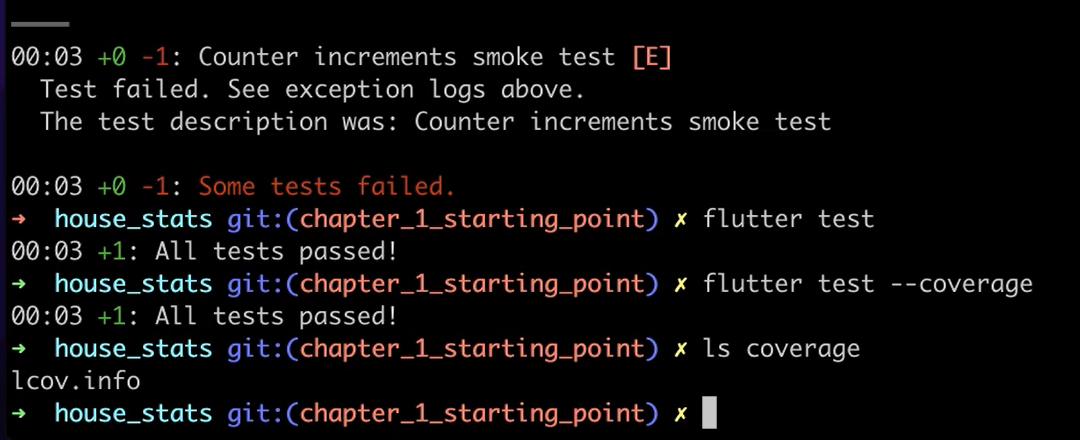
So, you can see there is a coverage folder underneath (“lcov.info”).
This coverage comes built in with flutter, and it uses a tool called LCOV.
LCOV is a standard way of gathering coverage. And we can use this LCOV to create reports in various CI platforms.
We covered quite a few things in this chapter. Let's move on to the quiz now.
Resources
- Git Repo for Course Code
- Getting Help – Test Automation U Slack - #course-flutter-testing
- Git Repo: chapter_1_starting_point/test/widget_test.dart
