

Transcripted Summary
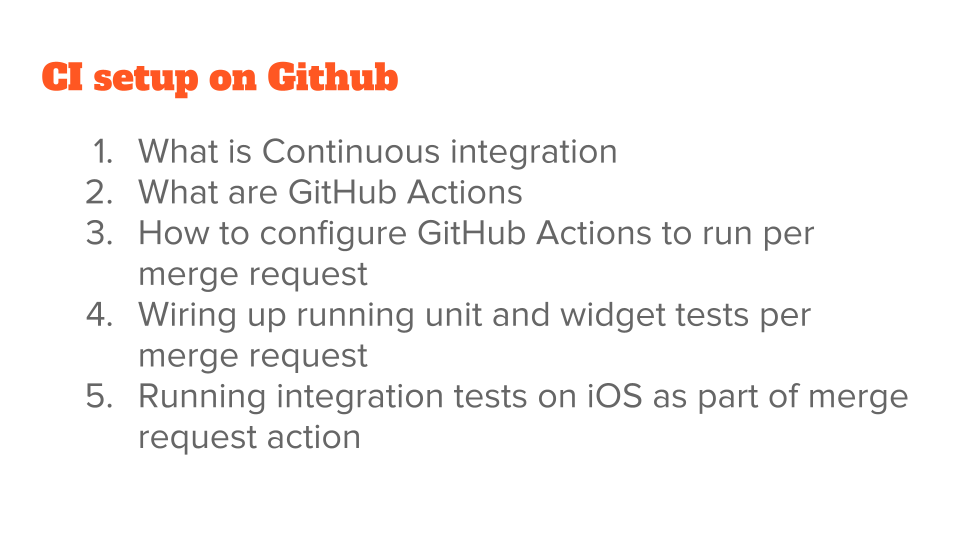
Welcome back to Chapter 6, and the final chapter for Automating Tests in Flutter Apps. In this chapter, we're going to talk about CI setup on GitHub.
Let's start with defining continuous integration.
# What is Continuous Integration?
Continuous integration is a concept of running all your tests continuously. They're giving you continuous feedback of all the changes that are happening.
Any project will have changes keep on coming to it. The job of your test is to continuously provide the feedback that they didn't break, and the app is still functional. Continuous integration is a concept of making sure that your tests are running, and on a pull request.
Whenever there is a change that is coming into your code base, you can make sure that your tests are passing, before approving that change.
There are several ways to do this, and GitHub Actions is one of those.
Because GitHub is a pretty popular, open source hosting solution, we are going to use GitHub for this code and Actions is the way to configure GitHub to run the continuous integration steps for you.
NOTE
What follows is an overview of how to use GitHub Actions, Pull Requests, and Merge Requests for Continuous Integration. If you are new to using GitHub, check out the Test Automation University course, Source Control for Test Automation with Git.
# How to Configure GitHub Actions to Run Per Merge Request
Let me show you how to do GitHub Actions per merge request.
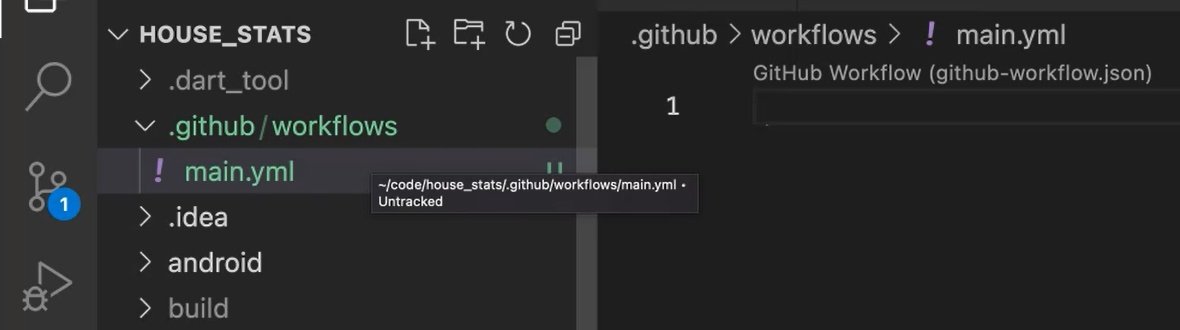
Let's start with creating a folder, call it “.github/workflows” (that’s a “workflows” folder, that’s inside of a folder called “.github/”).
Underneath this, let's create a file. Call it “main.yml”.
IMPORTANT
A point to note is that all GitHub Actions will be in .yml file. It has a specific syntax, and it is indented. The are no curly braces here but indentations are important. I have bindings in VS code, which will help me write proper YAML syntax.
Let's start with this, right?
Let's give it a name — name: Running CI for house app — that's just name of the project.
Now we need to configure it on what to run this test. These are the jobs.
Let's start with saying, we want to run this for pull_request.
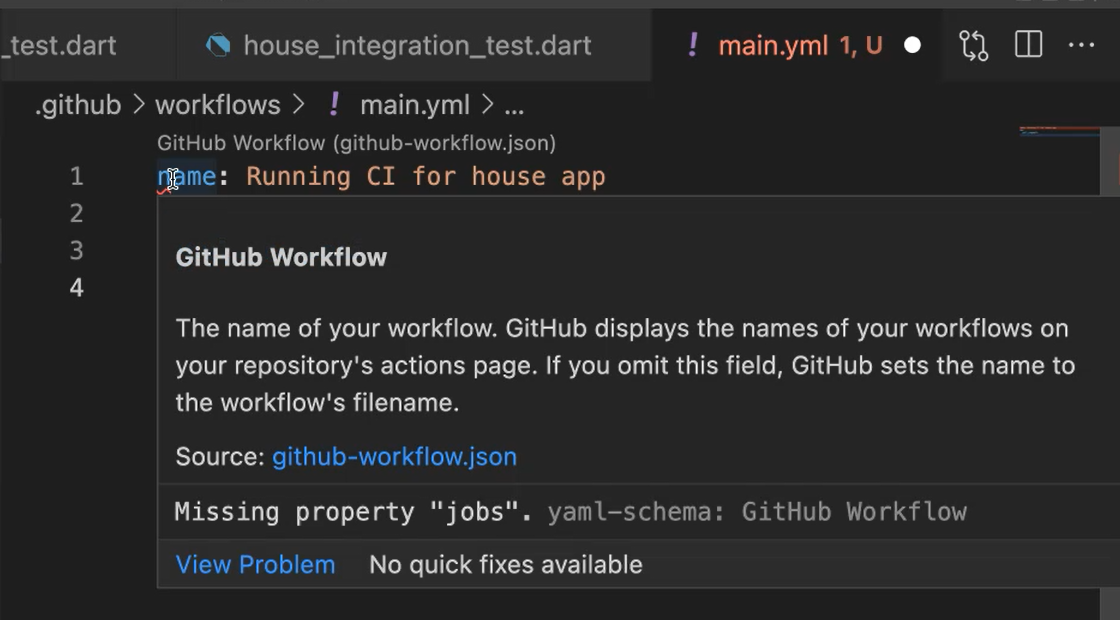
But you can see it has indentations, so it's saying, "Okay, you are missing the property ‘jobs’."
I'm using this plugin called GitHub Actions, and it is helping me with the syntax.
We'll start adding more and more, but you can see that YAML file and using the extensions, it's easier to write it.
For the pull request, we wanted to say this branches, only on master we want run this.
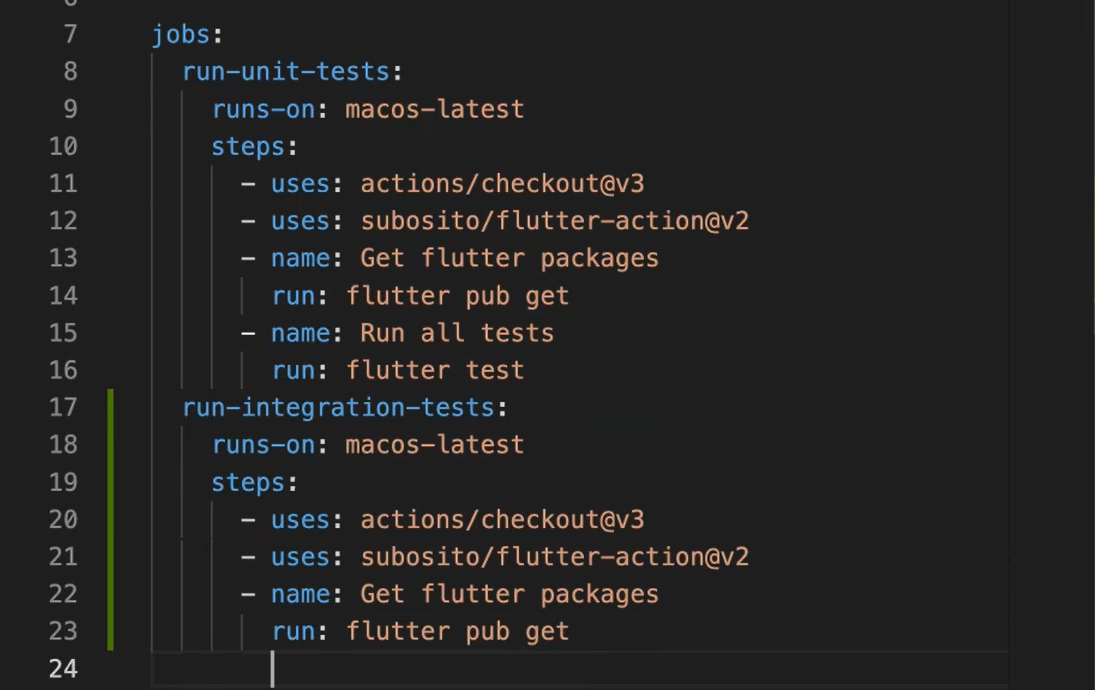
Now let's also give what's needed, right? It's asking for the jobs. And we can name the job “run-unit-tests”.
This is a free form format. We can say whichever one, but we are giving it a name of this.
We need to tell for each job where to run, meaning do you want to run it on a Linux machine? Do you want to run it on a Windows machine? Do you want to run it on a Mac OS machine?
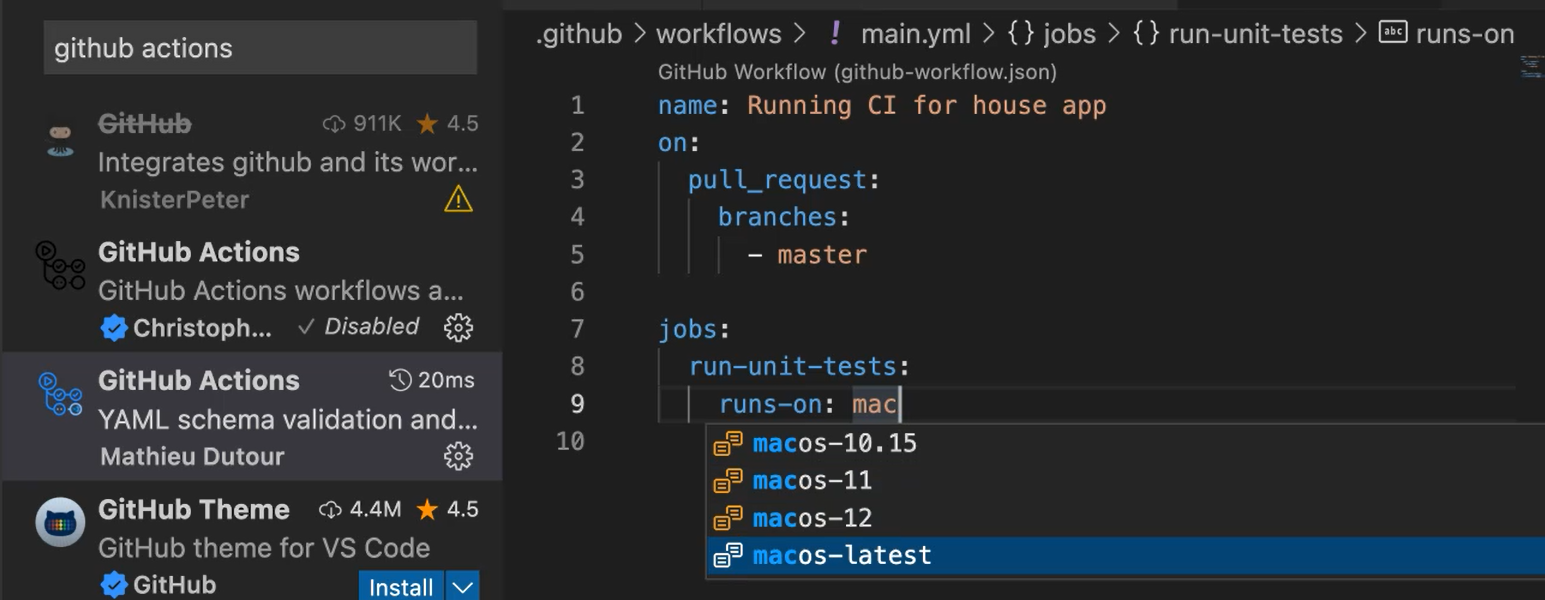
Because we have been developing so far on macOS, let's just use the macOS one — runs-on: macos-latest.
Nice. See the syntax autosuggest first is coming up and it is helping you write the exact syntax.
For all the jobs, we need to set up the steps. Steps meaning these are the sequence of actions that you want to do, for you to say that your CI setup has worked.
Let's give those steps — steps: — and we need to start naming them.
The first step, let's say, checking out the code.
Like that's first thing you had to do. Every time you wanted to run something on your code, you need to check it out. On this a macOS box that is created in GitHub’s cloud.
Let's call it “actions”. This is actions and “checkoutv3”.
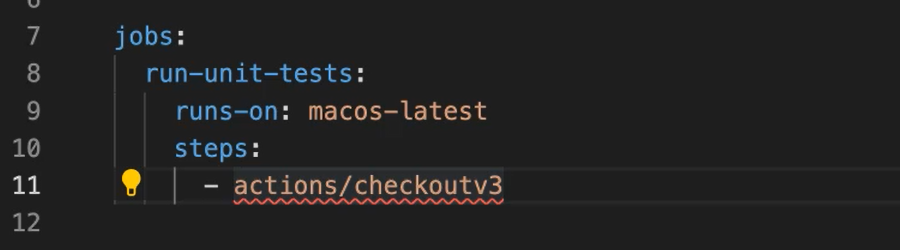
But it is complaining, right?
So, it means that we are missing something. What we are missing is uses.
Uses is a syntax which will tell the open source or the available action from the GitHub marketplace. It's a pretty well known or almost fundamental workflow that you need, and it is available from GitHub marketplace.
We are going to use that.
Let's stop here and see how this works on GitHub.
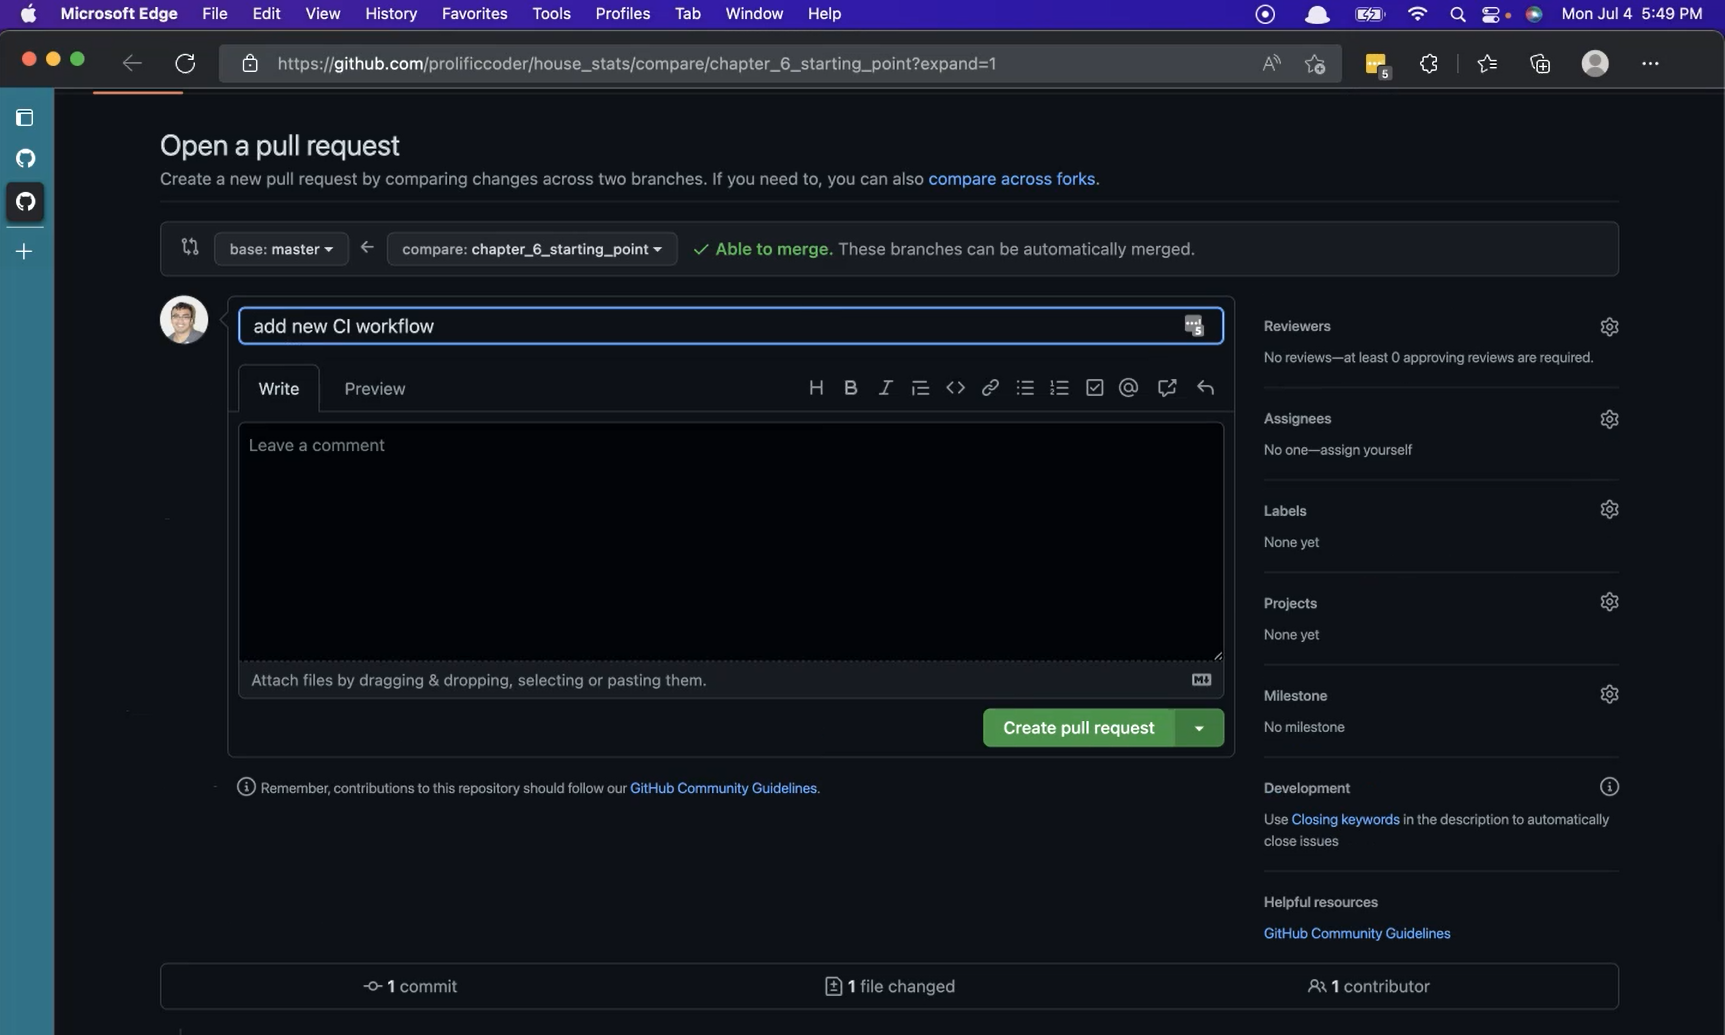
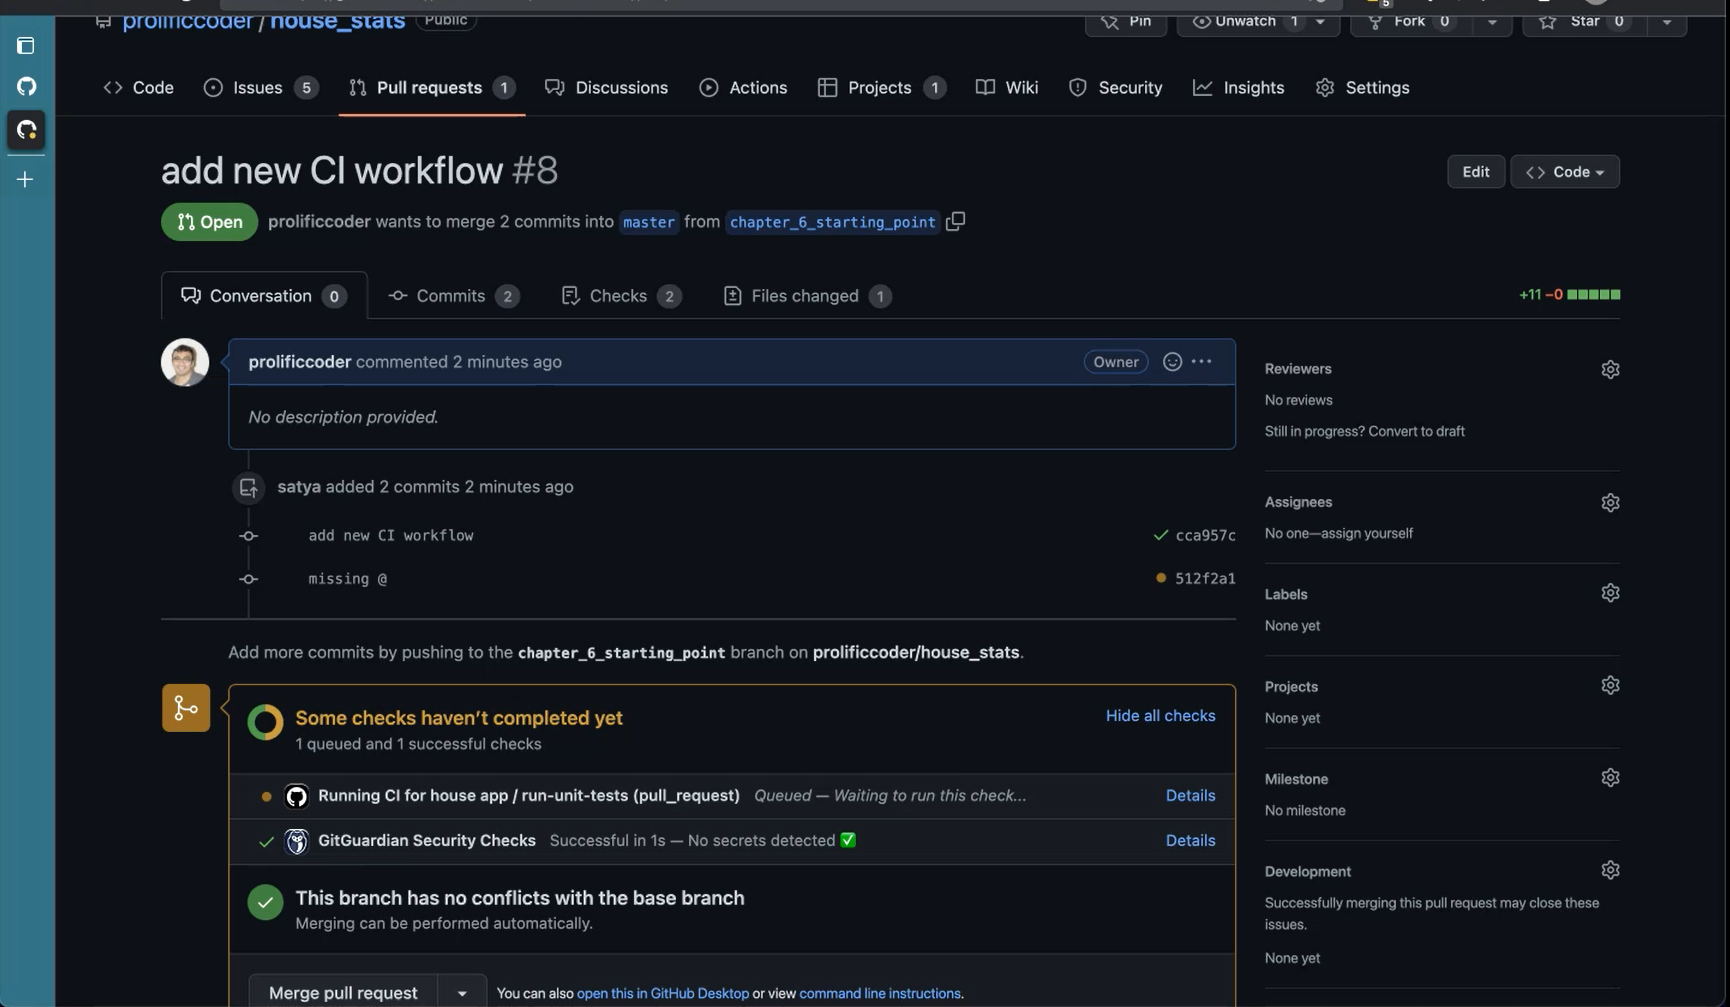
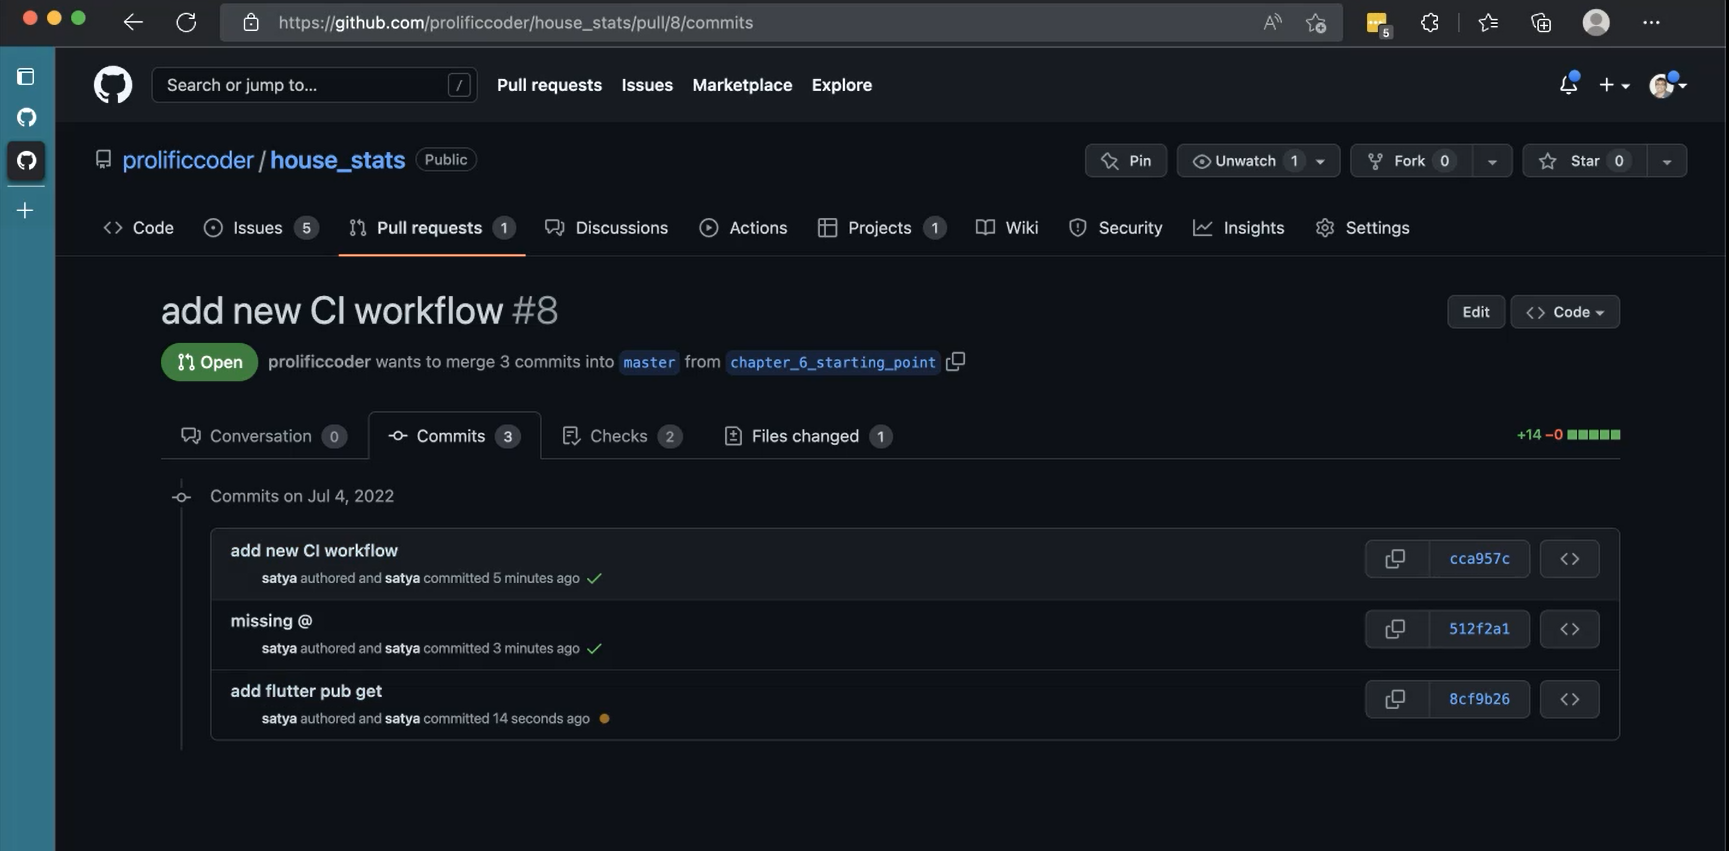
Let's commit the code and create a pull request.
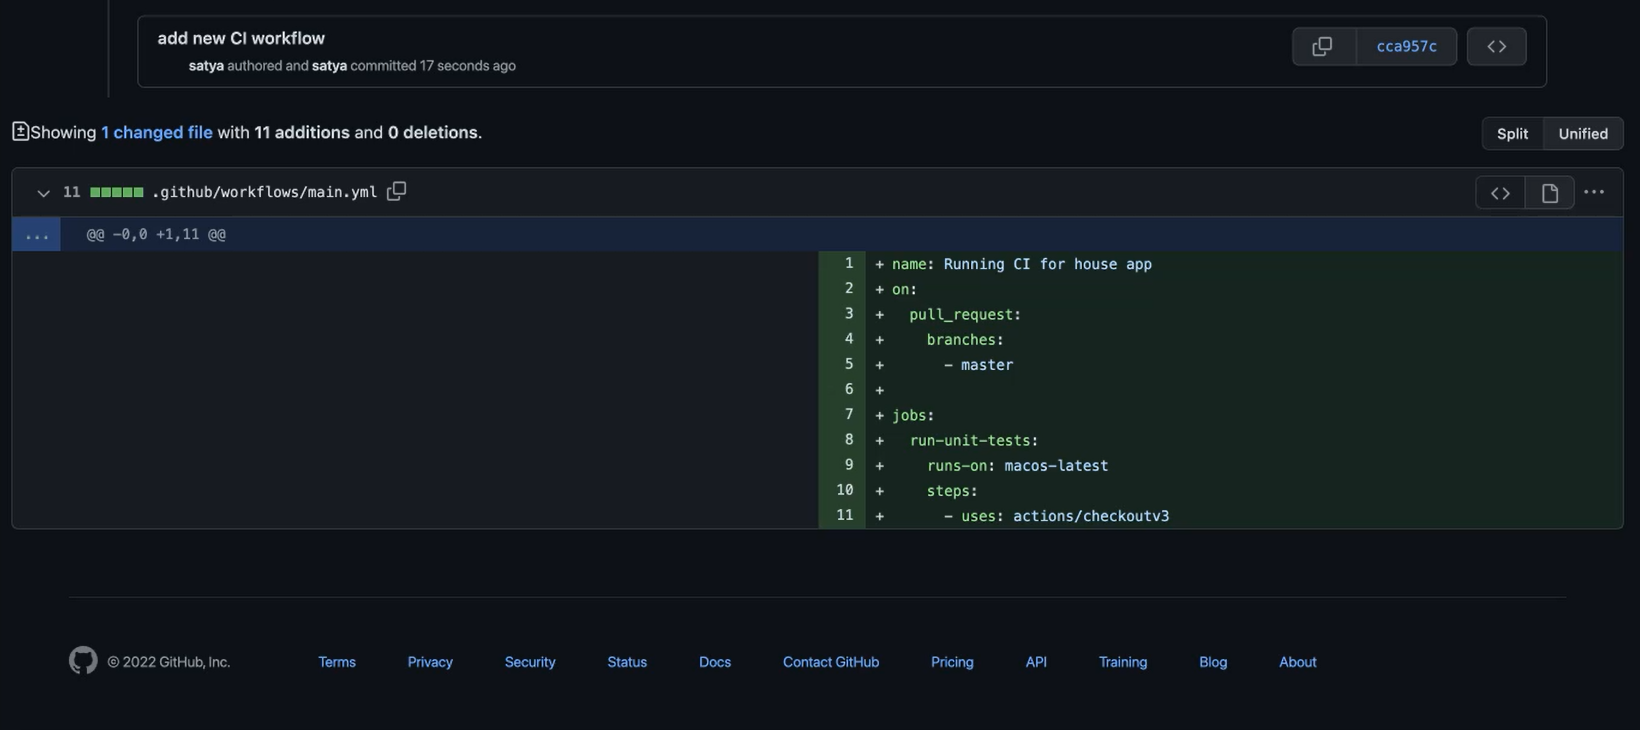
Now, this is the only change that we have so far, let's go ahead and create the Pull Request.
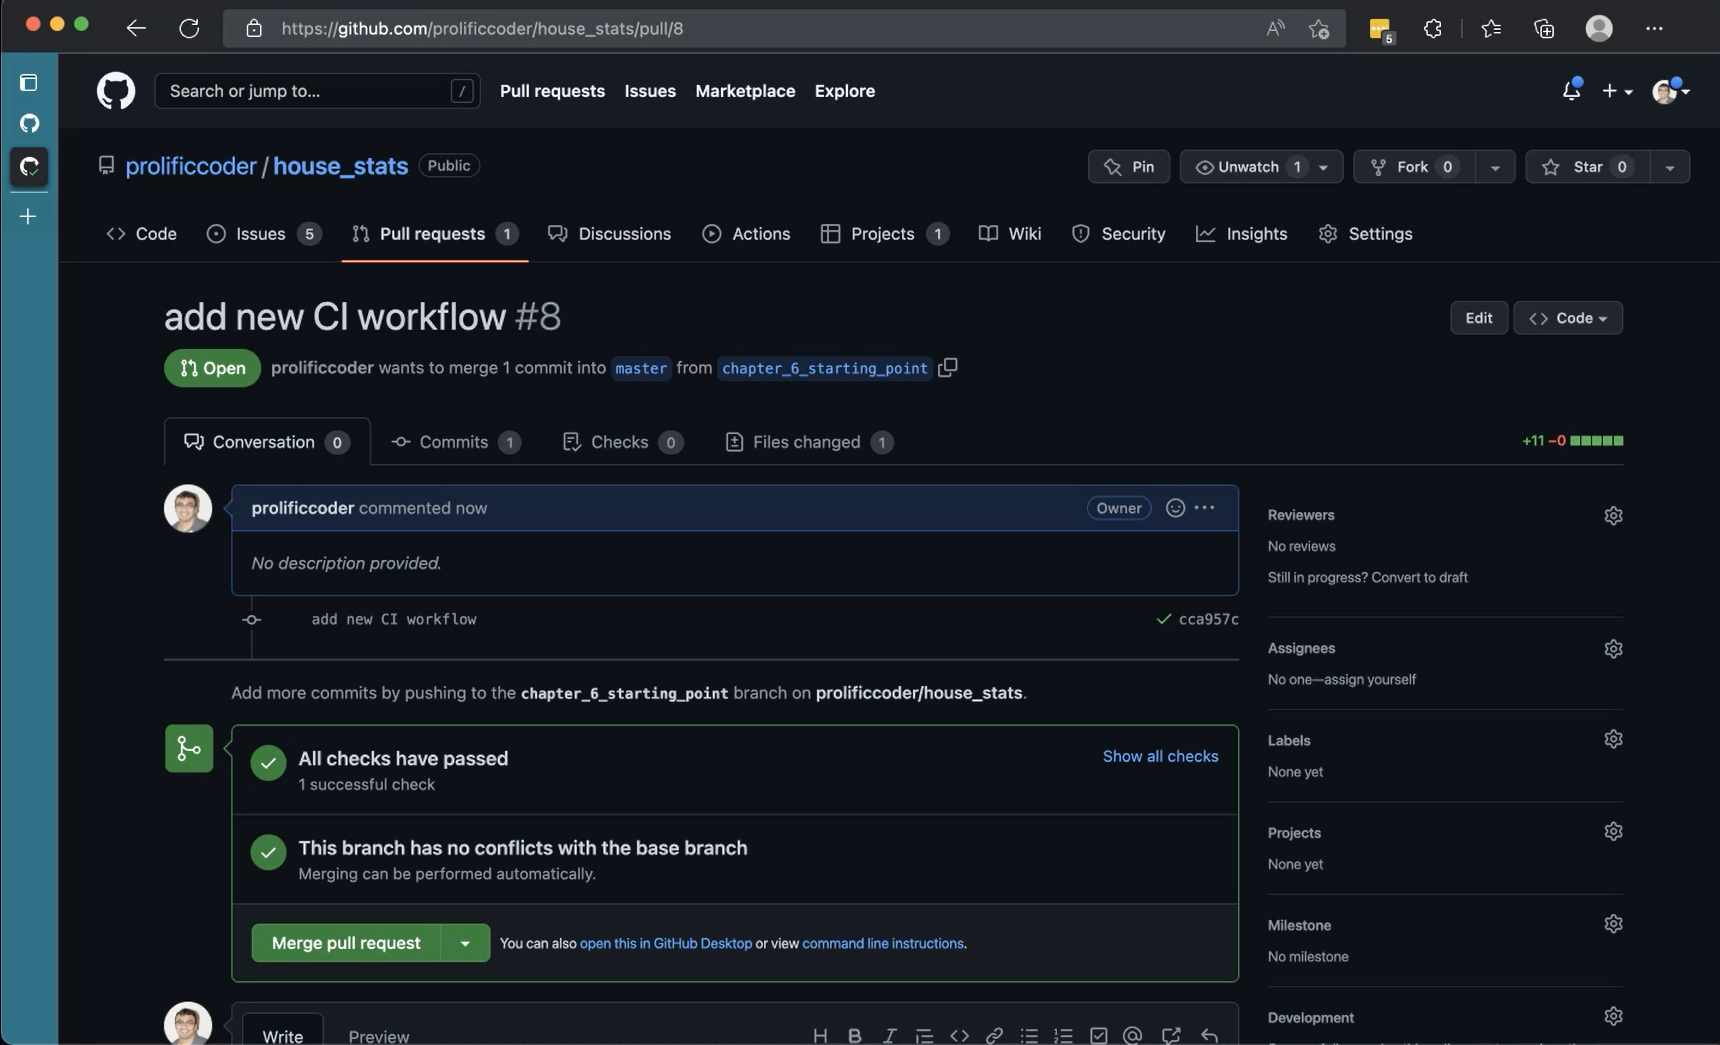
You can see immediately, there are some changes that happen and some jobs that ran.
You can see that eventually it said Merge pull request. You got all these check marks.
This is what we're going to expand on.
Step by step, we are going to add more and more steps so that we get closer to what we need for our CI setup.
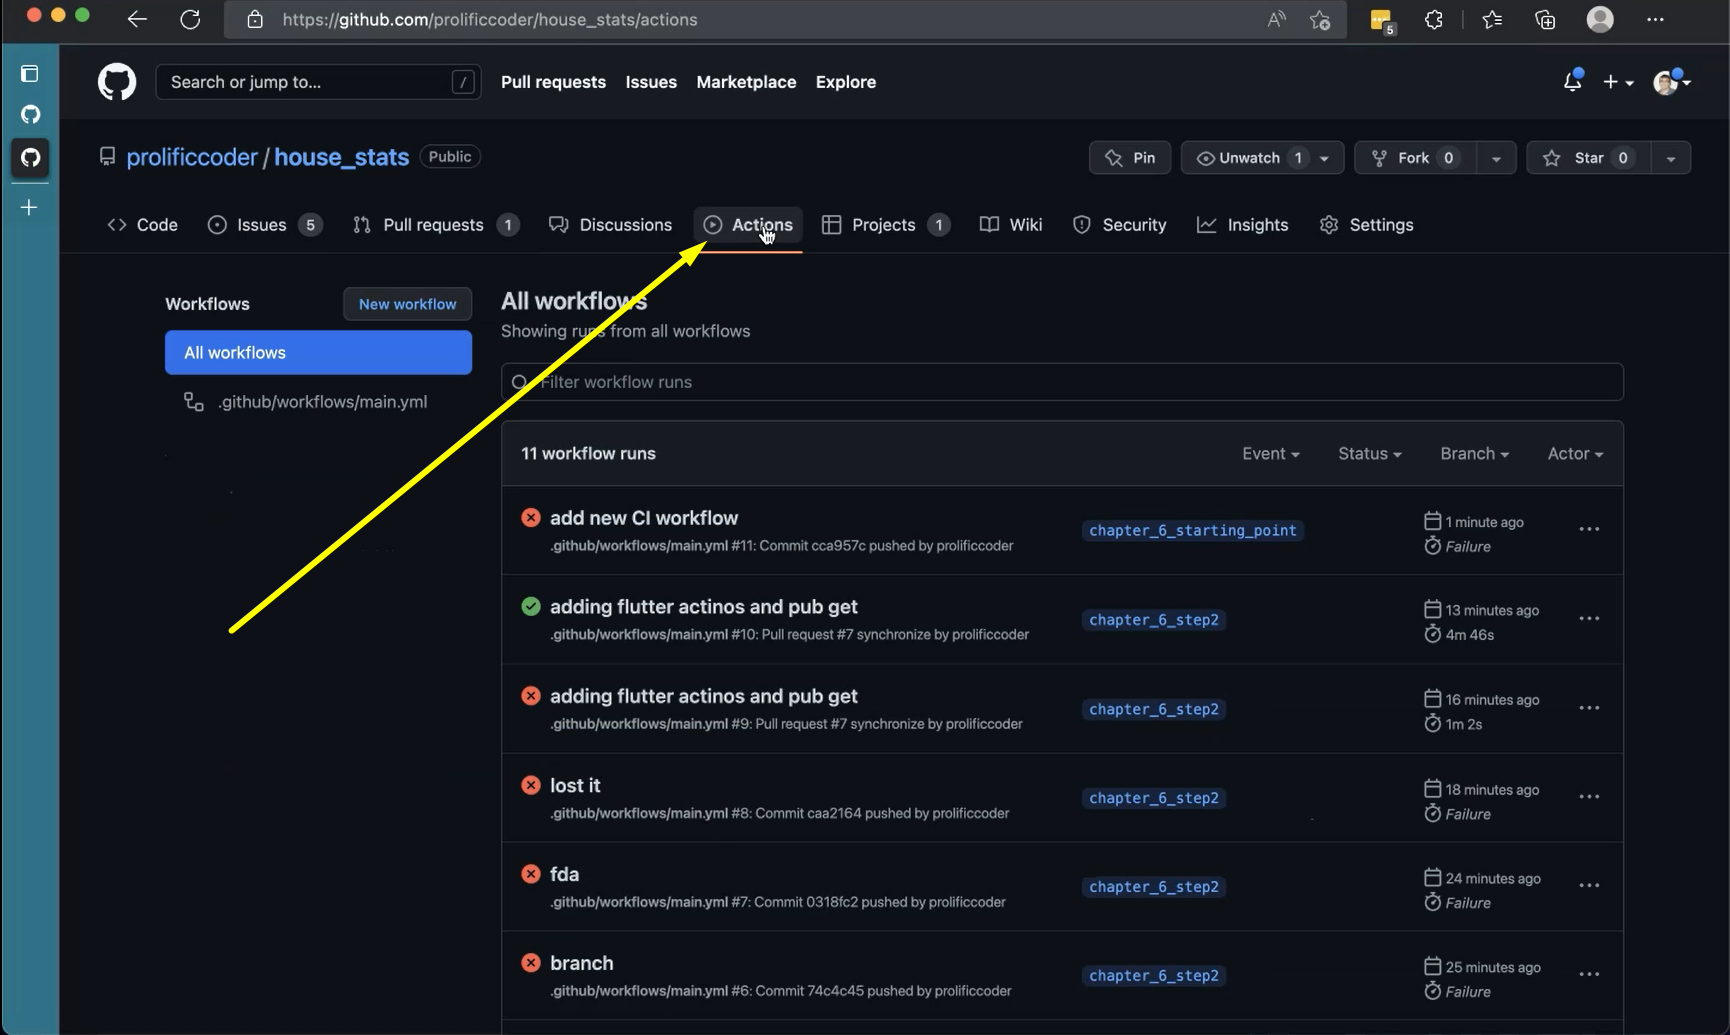
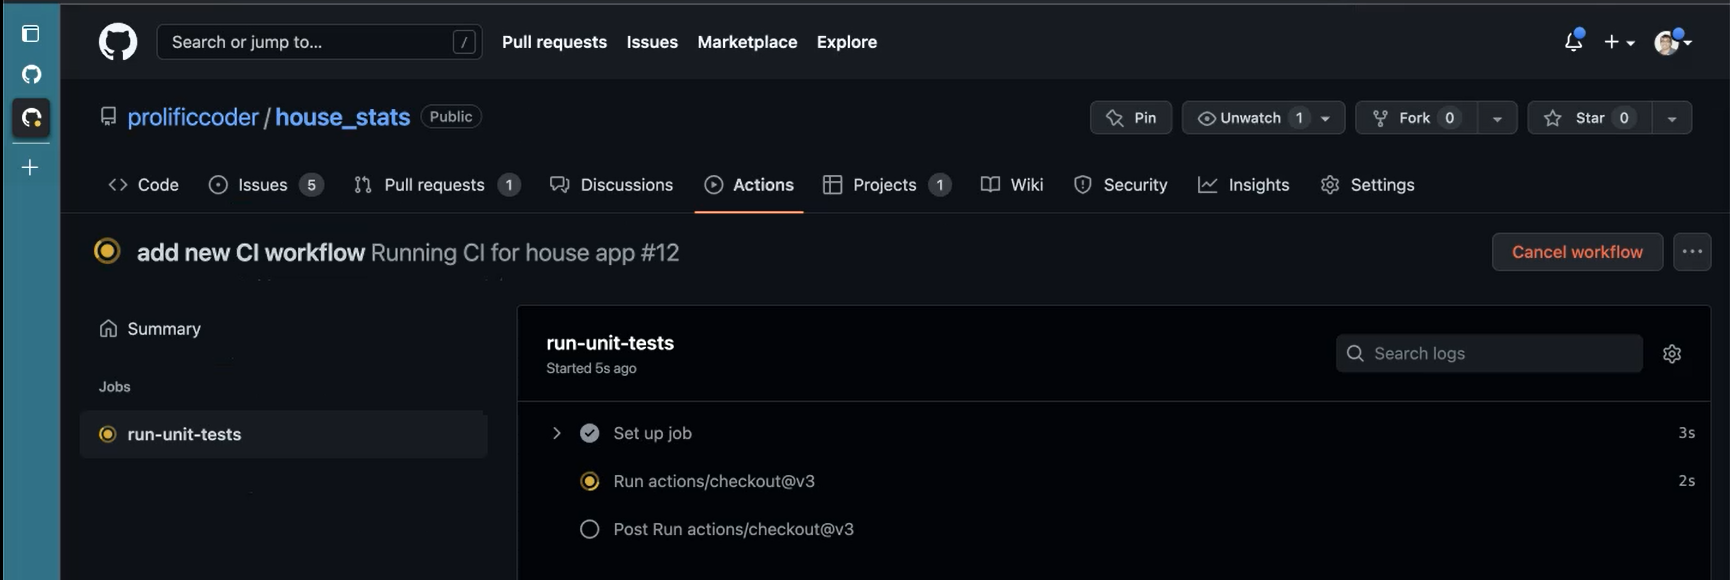
You can also go into Actions and see exactly what happens.
Okay, there is something it didn't like.
I'm missing at “@v3”

It's the version of the checkout that you want to use. I missed at the “@”.
Let's give that — - uses: actions/checkout@v3 — and see if it that works.
In the terminal, on the command line we use git commit -on ‘missing @’ and then we do the git push.
Let's go back to our Pull Requests view and see this is actually running, right?
It shows you where exactly in this setup that GitHub is at and running our actions.
You can actually go into the flow and see the live log of actual things happening.
This is awesome, right?
You don't have to do this on your own machine.
It's running on the Cloud, and it's free for you if you're running an open source project.
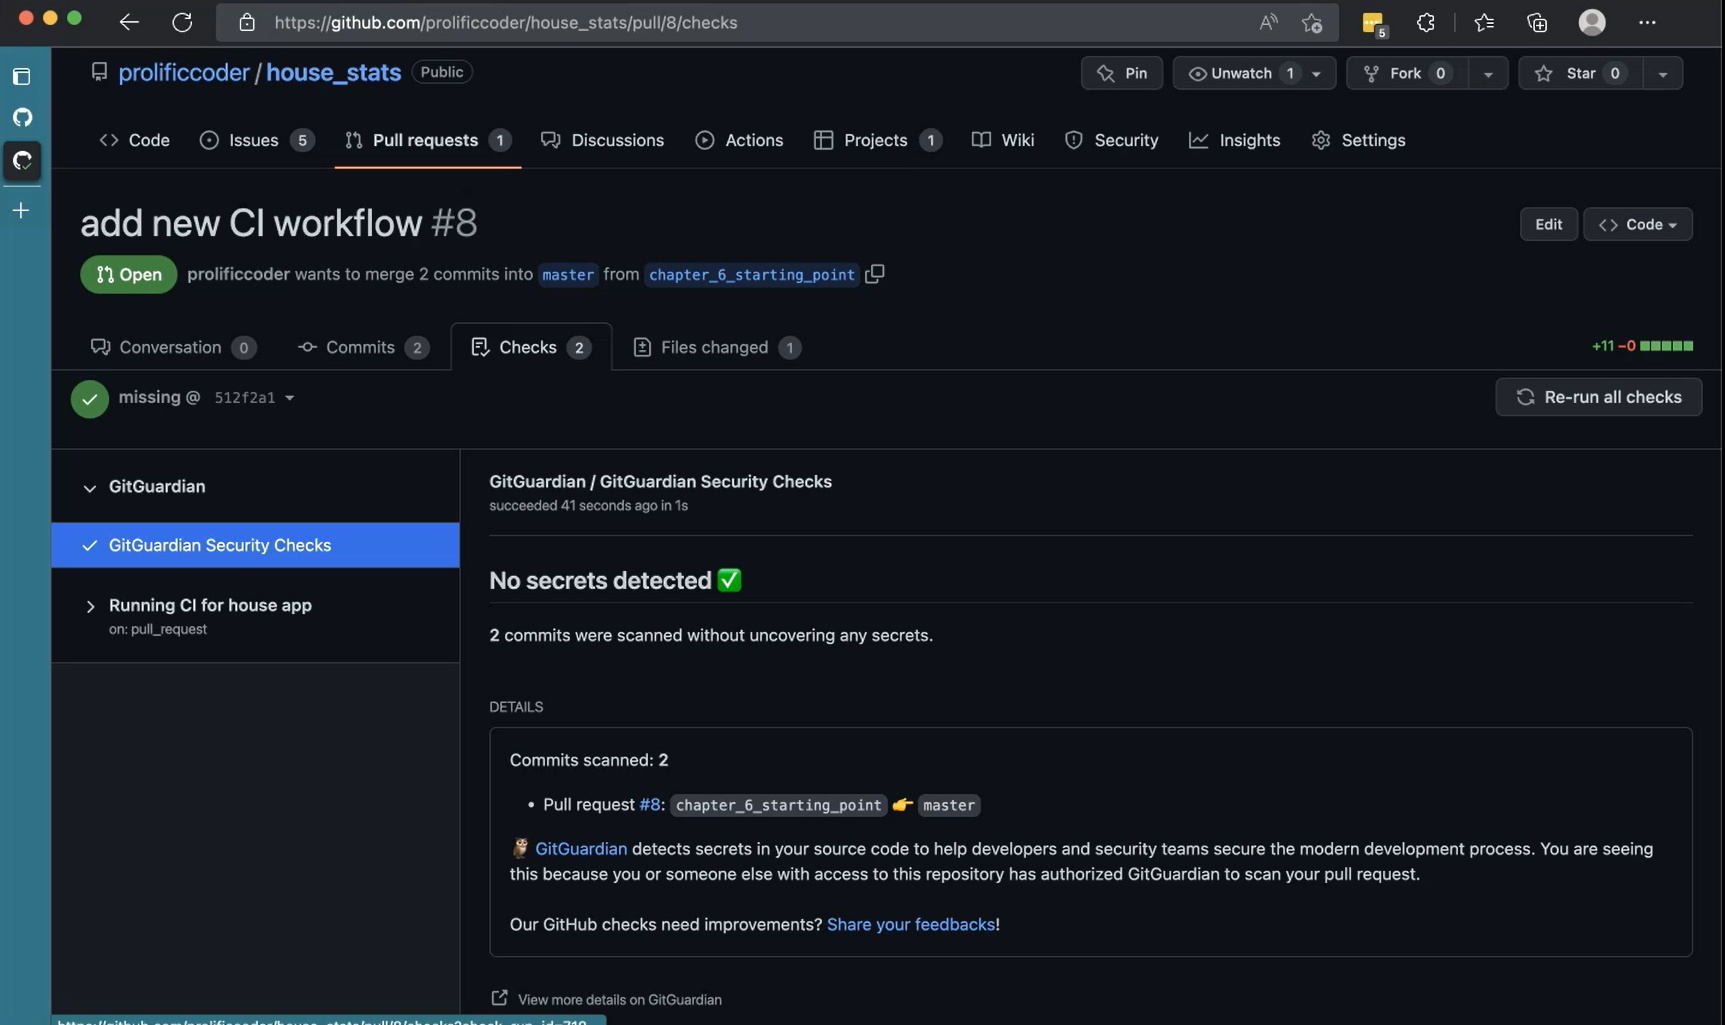
Okay, so yeah. It ran 2 checks.
This is a security thing, the GitGuardian, and it's configured for every project.
The setup that we did is just add this one step, “run-unit-tests”.
It's only job that we have, and it had a simple job of getting the code down. Let's add a little bit more, before merging this.
Because it's a Flutter project and we want to run Flutter actions, so let's use a flutter workflow that will help us — - uses: subosito/flutter-action@v2
Subosito is a very famous Flutter workflow that we are going to use. It is coming from this workflow “subosito/flutter-action”. This is in version 2 right.
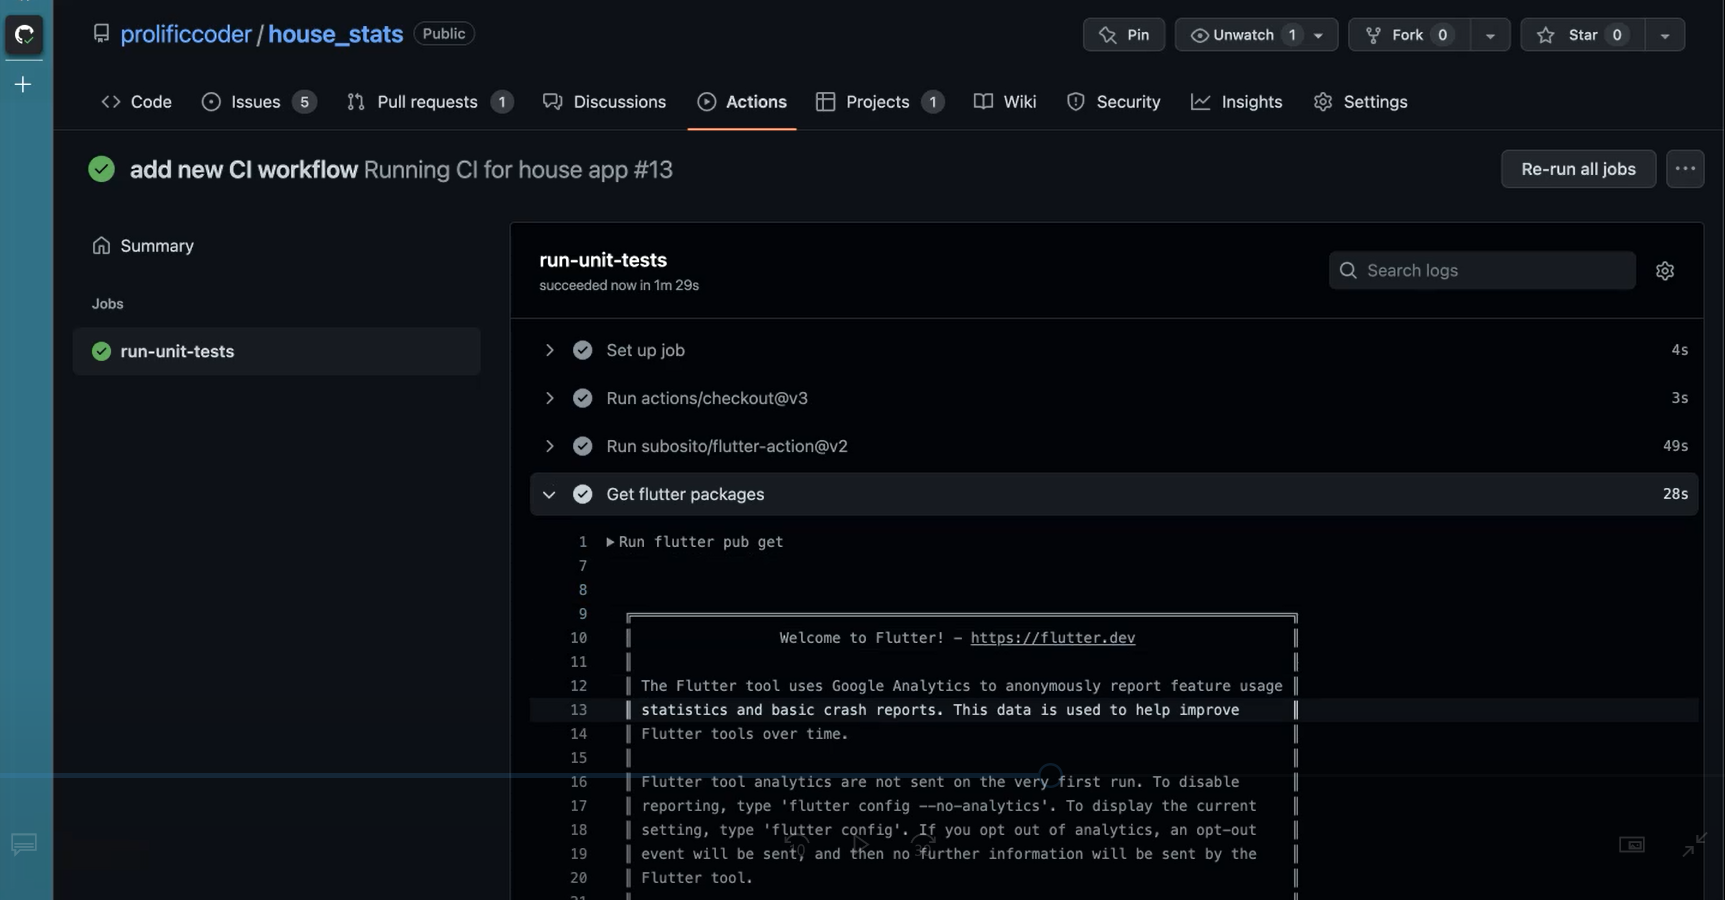
Let's do a flutter pub get.
Let's also give it the name: Get flutter packages and do run: flutter pub get.
name: Running CI for house app
on:
  pull_request:
    branches:
      - master

jobs:
  run-unit-tests:
    runs-on: macos-latest
    steps:
      - uses: actions/checkout@v3
      - uses: subosito/flutter-action@v2
      - name: Get flutter packages
        run: flutter pub get
Immediately after we do git push, on our Pull requests, you can see that there is a new commit on top it, and then the new commit, the one that we just created “add flutter pub get”, and the job is still running.
Now, this is a little bit of a longer job because it's going to get this packages.
So, let's go to our _Actions _view and see what is it doing right now? Yeah.
It's getting first the workflow, and then it'll go to the step. Okay.
It got the code, and it got all the packages, and the job succeeded.
The next step is to run the test themselves.
Name is an optional field here.
We can give it or not, but let's give it a name so that it's clear in the Pull Requests view — - name: Run all tests.
And we'll say run: flutter test.
Now this is the step where we are actually running the test cases.
name: Running CI for house app
on:
  pull_request:
    branches:
      - master

jobs:
  run-unit-tests:
    runs-on: macos-latest
    steps:
      - uses: actions/checkout@v3
      - uses: subosito/flutter-action@v2
      - name: Get flutter packages
        run: flutter pub get
      - name: Run all tests
        run: flutter test
In the command line, git commit -am “run unit and widget tests” and then git push.
Now you can see immediately that our Pull Request status has changed. There is a new change, and the job has been triggered, and it's running.
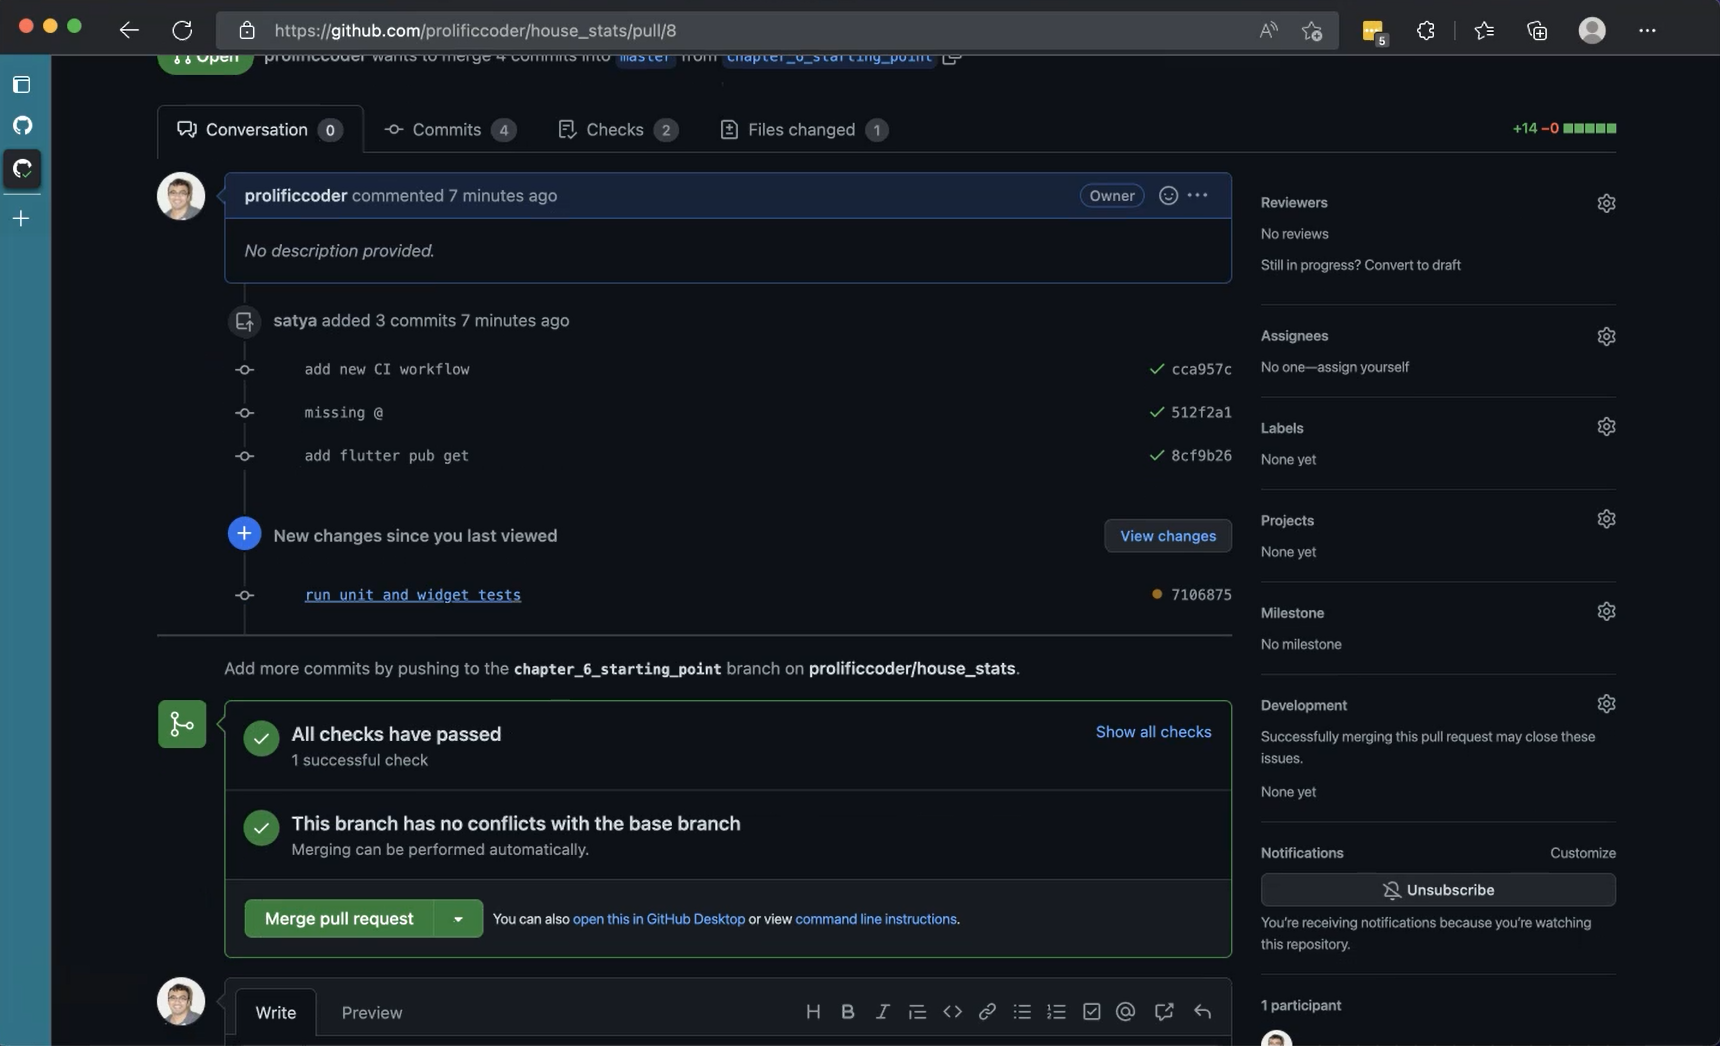
Awesome.
So, the tests ran, and we can see that they passed.
Let's go see actually what happens in the console. So here are the differences.

Let's go to the Checks.
Expand on this (Running CI for house app), click here (run-unit-tests), and let's Run all the tests.
This is all the logs that are coming from, and you can see all our tests are picking up, and they're all passing.
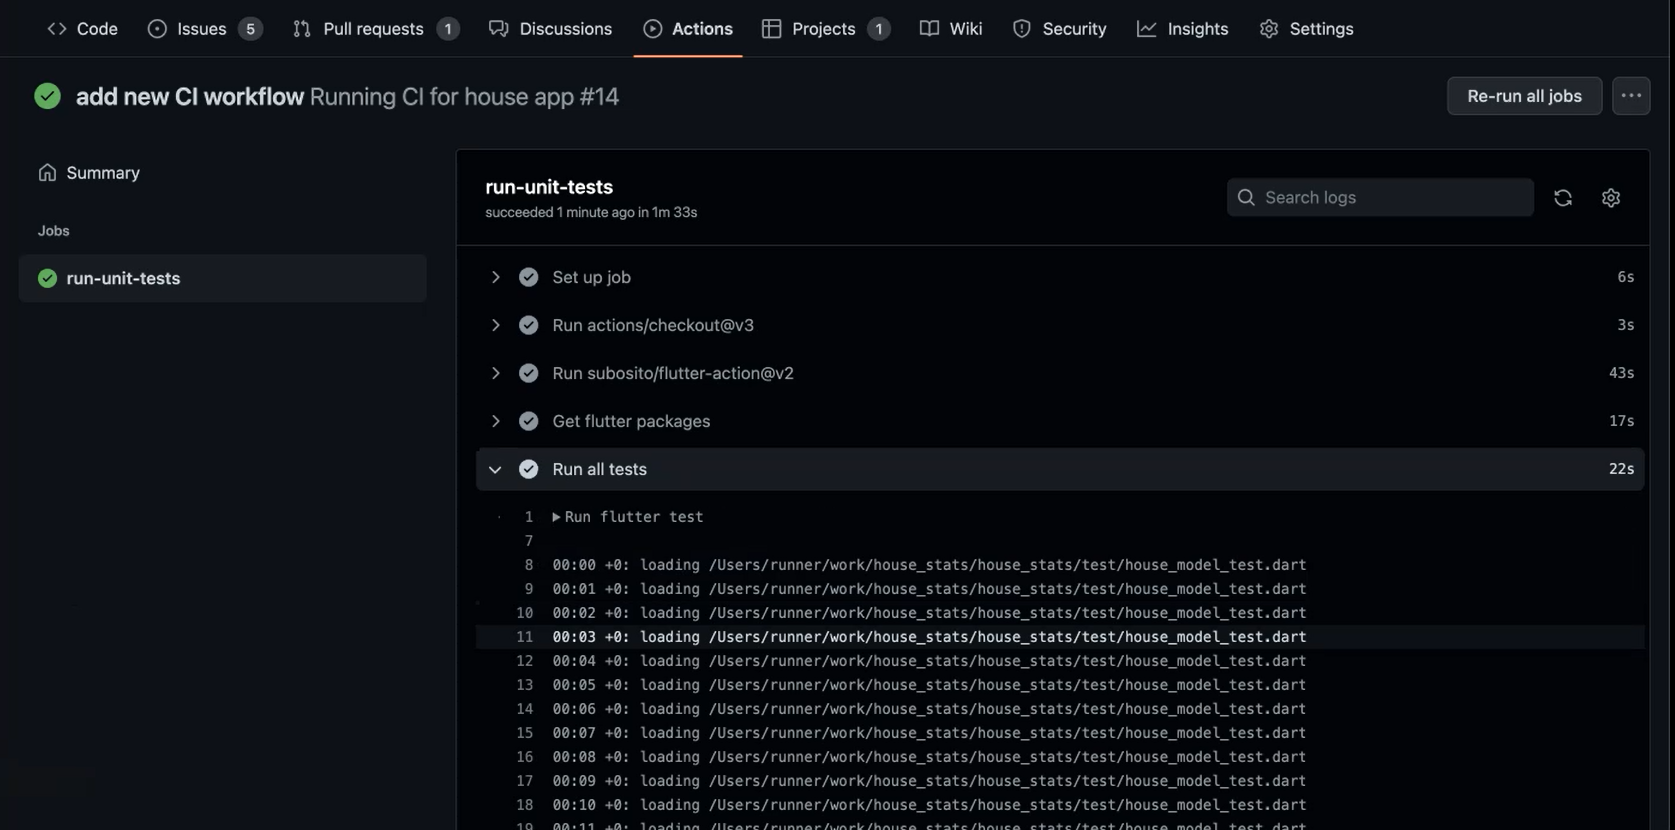
Awesome. So, it looks like all our test cases ran and passed.
So that's it right? We can merge it now, click Merge Pull Request, and that's cool.
Now let's expand this to one more step.
We only ran the unit tests so far, so let's run integration tests as part of this.
Running integration tests require you to have a simulator running. For that, it's not as simple as just running the test, right, so we need to do a bit more setup.
Let's create a new job for this. There may some repetitions here, but that's okay.
“run-integration-tests” is the name of the job, and we run on macOS — runs-on: macos-latest.
And we will copy paste all these 3 steps.
Now we are going to use something additional.
Let's build the app in iOS — name: Build iOS app.
And run this command — run: flutter build ios --debug --no-codesign. We don't need to release this, we just need to run it, create the IPA.
The next step after you build this app, you want a simulator to be booted up.
I'm using a workflow which will help me boot up the simulator. This is called futureware-tech/simulator-action@v1
And we are saying what model we want this with.
So with this syntax from GitHub Actions, we are telling what additional configuration you want to send into the job. Here we wanted to say the model that we wanted to be opened.
Let's call it “iPhone 12”, which we know is available, and it is enough for us to run this test.
After this is running, let's create the tests. If you remember to run the test, all we had to do is just say, flutter test integration_test/house_integration_test.dart with the correct file name.
  run-integration-tests:
    runs-on: macos-latest
    steps:
      - uses: actions/checkout@v3
      - uses: subosito/flutter-action@v2
      - name: Get flutter packages
        run: flutter pub get
      - name: Build iOS app
        run: flutter build ios --debug --no-codesign
      - uses: futureware-tech/simulator-action@v1
        with:
          model: "iPhone 12"
      - run: flutter test integration_test/house_integration_test.dart
To summarize, we create a new job, and then we use the same steps to checkout, use the flutter-action, get the packages, build the iOS app, boot up the simulator, and then trigger the test.
After these changes have been made, I had to make a few more changes on the actual code itself, because there was a bug in the test.
So that's the thing with integration test, that we'll find issues with the code itself.
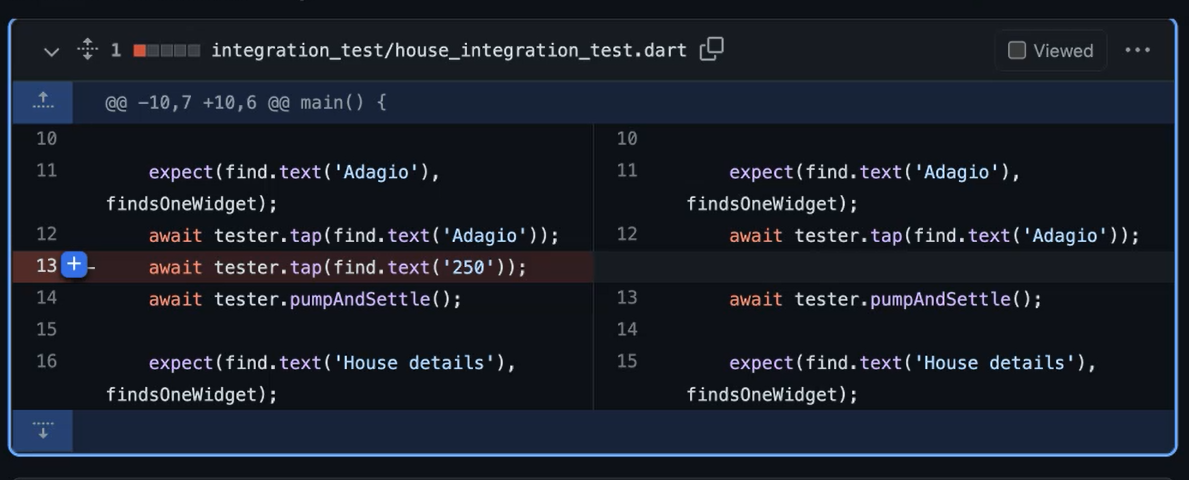
Most notably, I had a double tap. I don't need to tap on the 250 again.
That was found in the issues, and you can see from my Actions that it was failing, but was able to find that issue, and I was able to figure out the root cause and fix that.
Now you can see there are 2 jobs running, not just 1.
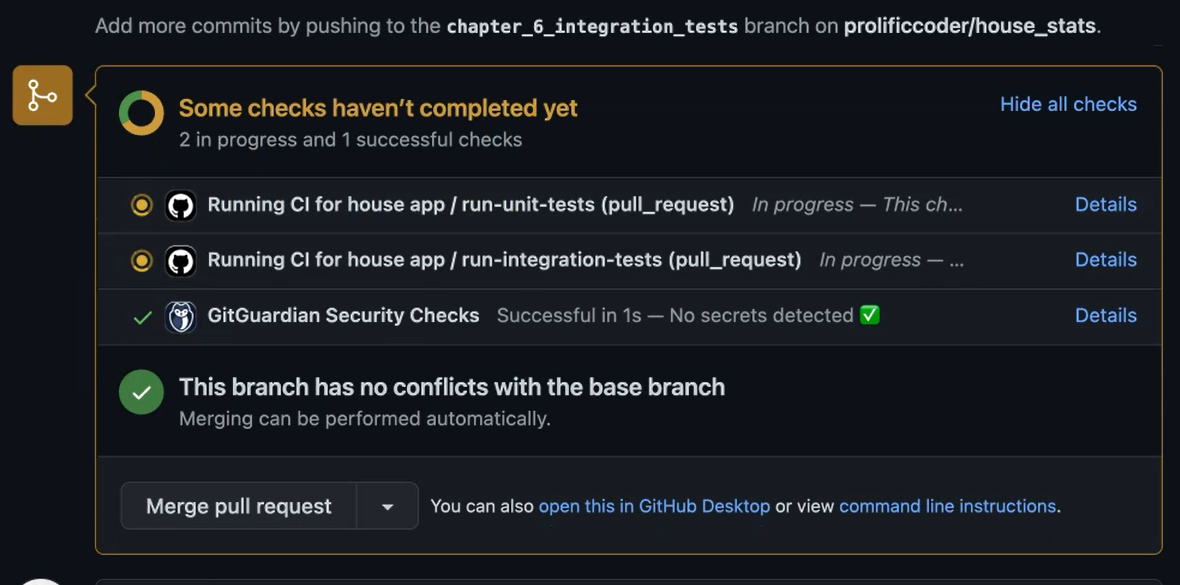
There are 2 jobs running, and both of them are running in parallel. There is a job for unit test, and there's a job for integration tests.
You can configure the jobs in whichever way is comfortable your app, and all these checks need to be passed for you to get the green check marks.
So, we are at the final stages of this pull request running, and we are at the end of the course.
I had a ton of fun putting this course together, and I hope you guys will have the same thing with the learning about Flutter and Dart.
As always feel free to ping me in Slack or on Twitter. I'll try to respond and help you guys with your Flutter journeys.
Right on cue, we got the green Merge pull request. Let's merge this, and then wrap up this course.
All the best to your Flutter journeys. See you all later. Bye.
Resources
- Git Repo: chapter_6_starting_point
- Git Repo: chapter_6_ending
- TAU Course: Source Control for Test Automation with Git
- Getting Help – Test Automation U Slack - #course-flutter-testing
- Git Repo: Pull request for intergration test
- GitHub Actions Documentation - GitHub Docs
- actions/checkout: Action for checking out a repo (GitHub)
- subosito/flutter-action: Flutter environment for use in GitHub Actions
- ChromeDriver WebDriver Download
- GitHub Actions YAML Extension
