

Transcripted Summary
Welcome back to chapter 5 of Automating Test in Flutter Apps.
In this chapter, we are going to talk about integration testing.
Integration testing, if you recall, is the highest level of testing in Flutter — where you are looking at that app as a user would, and you try to interact with the app and the test as a user would and do clicks.
As opposed to like widget and unit tests where these are more code facing tests.
# Integration Testing – First End-to-End (E2E) Test
If you're familiar with other frameworks like Appium or Selenium, you can think of these tests as end-to-end tests.
Let's first start with the code changes that I had to do in the app to give us some way to test integrations, right?
What I did is add some routing mechanism.
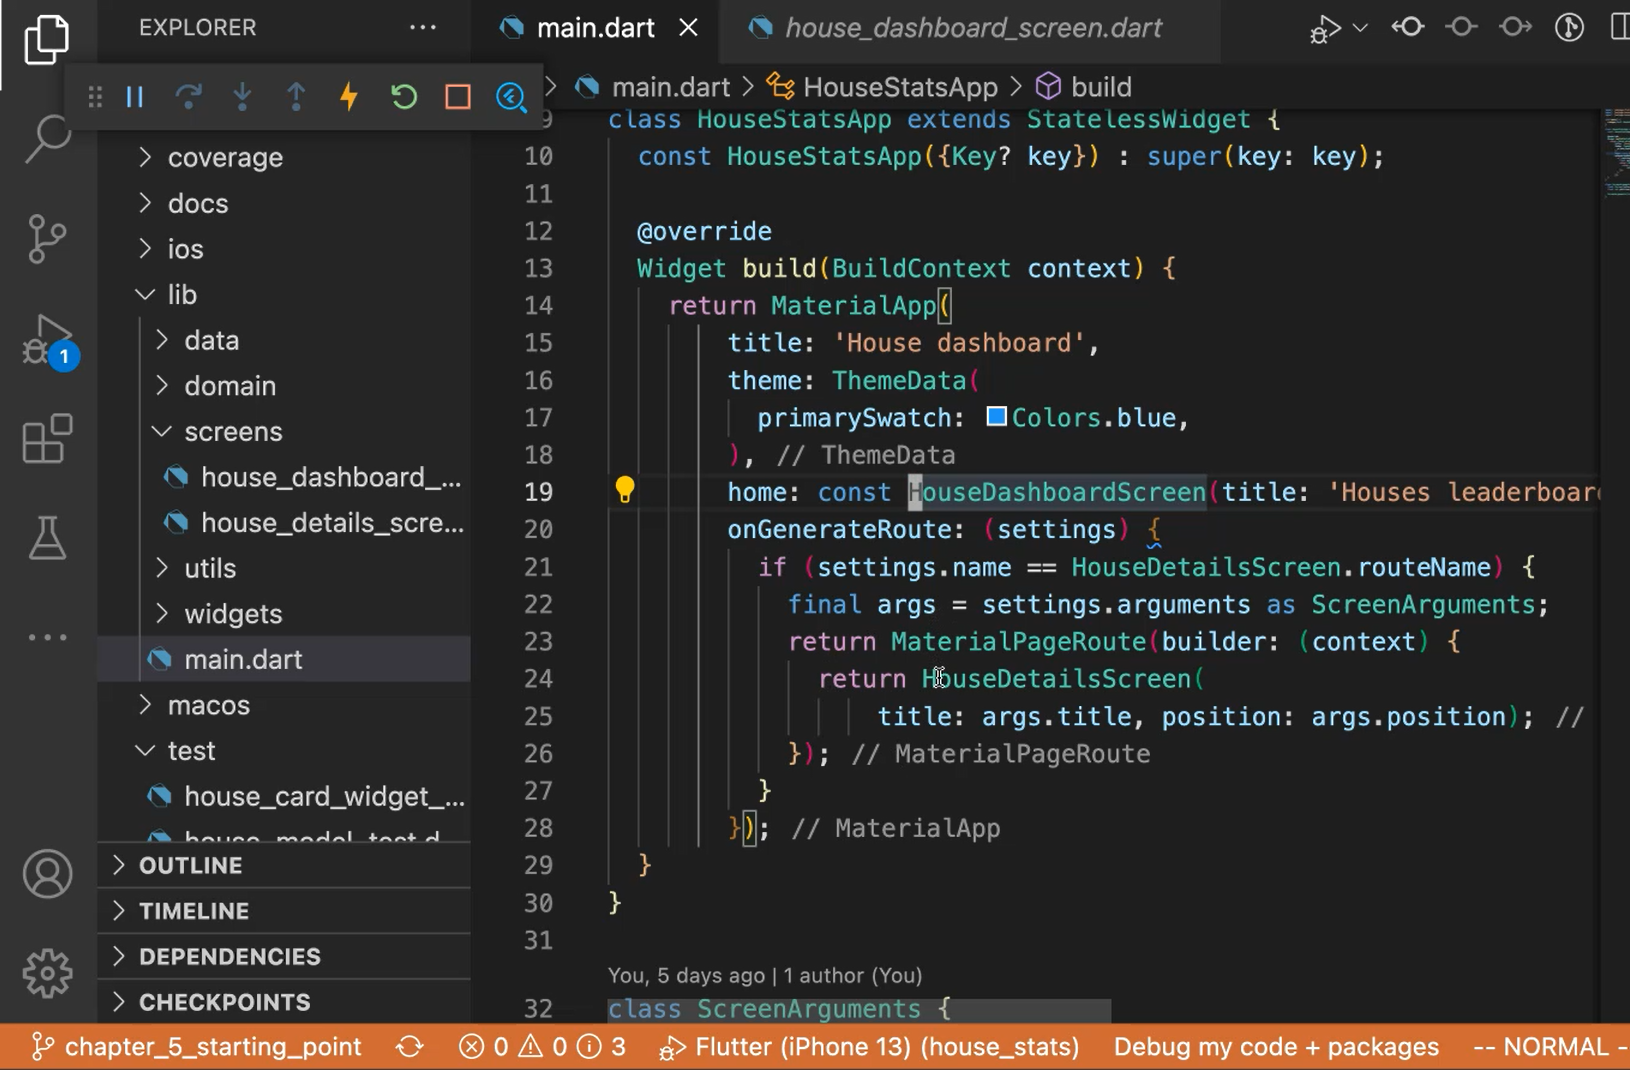
So, I had to add a route (onGenerateRoute).
And also, when I'm pressing on the [HouseCardWidget](https://github.com/prolificcoder/house_stats/blob/chapter_5_starting_point/lib/screens/house_dashboard_screen.dart) we want to go to the specific card details.
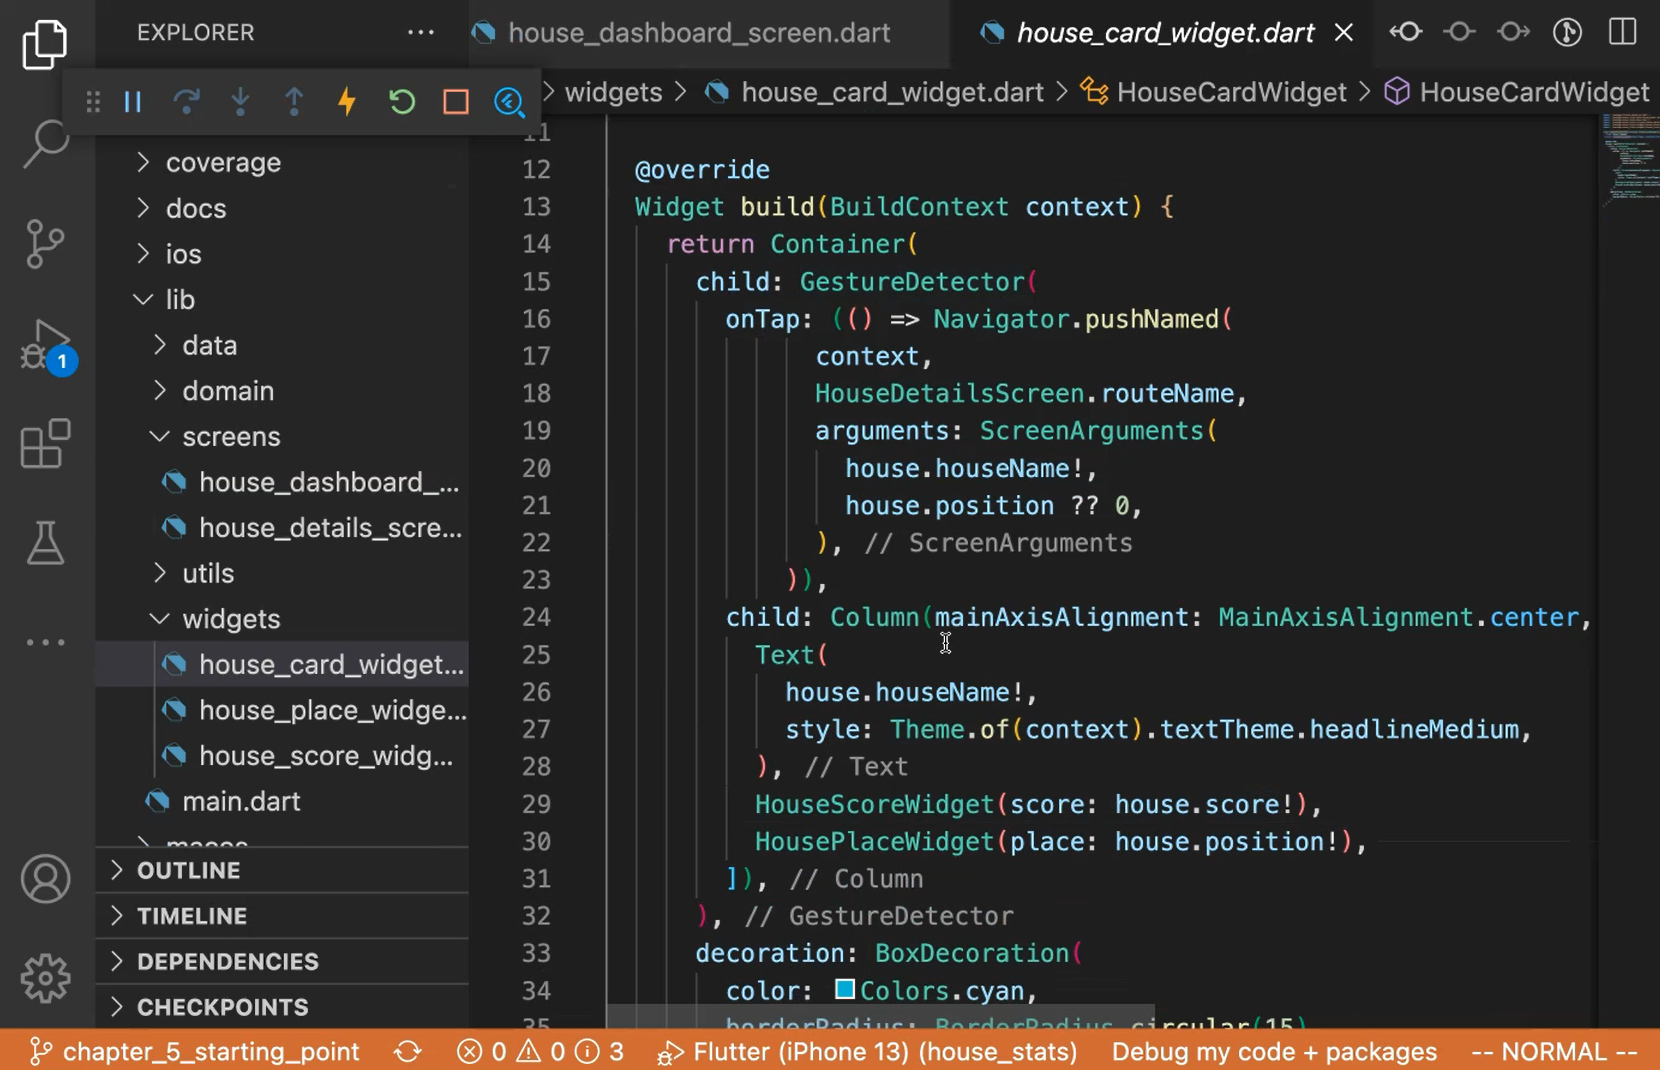
So, if you see this in the app, it would be something like this.
You press on Crescendo; you'll see the Crescendo details in their place.

And same with Adagio, right?
This is the only thing that I had to add. And this is what we are going to use for testing to see that navigation works.
Let's start with adding the dependencies that are needed to start integration testing.
# Integration Testing – Project Set Up and Directory Structure
First let's add the integration_test package.
Unlike other packages like mockito, integration_test is part of Flutter framework itself. So, you don't have to import a new dependency, but you are getting it from the Flutter SDK itself.

Historically it used to be outside as a package, but the Flutter team made a decision to get integration_test into the SDK itself and also duplicate a corollary called flutter_driver and promote integration_test as the framework for end-to-end tests.
So, we added the SDK.
Now, if you remember for unit test and widget tests, we added all of them under the “test” folder, but for integration tests we would add under a different folder.
So, let's name that folder “integration_test”. Now under this we'll, let's create a file for our first test.
# Integration Testing – Writing a Simple Test
We will create a file called “house_integration_test.dart”.
And we do this traditional thing that we've been doing so far to create the main function, which has a test block.
For integration tests, we use the same testWidgets block as we use for widget testing, because we use a similar syntax, but this is at a integration test level.
So, let's write the test name “Integration testing house dashboard”, and give the body (tester) async.
Now we will invoke the widget itself. Just like in your widget test we do pumpWidget().
Let's start with the simplest way, right?
So, let's start with the HouseDashboardScreen. Let's give it a different title than the app. Let's say title: ‘from testing’.
There's also another method that we're going to use to make sure that this widget actually puts up, it's called pumpAndSettle().
main() {
  testWidgets('Integration testing house dashboard', (tester) async {
    await tester.pumpWidget(const HouseDashboardScreen(title: 'from testing'));
    await tester.pumpAndSettle();
  });
}
This is coming again from the framework, which will help us stabilize the app before we do actions on it.
For running these tests, we can run it from the IDE, but I like to run it from the terminal.
# Integration Testing – Invoking Test from Command Line
So, let's start running it from terminal. We'll say flutter test integration_test/house_integration_test.dart.
More than likely this test will fail. Because this is the first time that we are writing it there will be things that we haven't thought about.
But what it's doing is it's building the app for the open SDK, which is iOS simulator. And then using that SDK, using the iOS framework, you can see it's building and booting it up.
It failed on something, let's try to fix that.
It's complaining about not having the MediaQuery widget and all that. But we already gave the MediaQuery, right?
Like we have a MaterialApp in the main.dart file and then everything is actually loading up in the app correctly, but it's still not getting it.
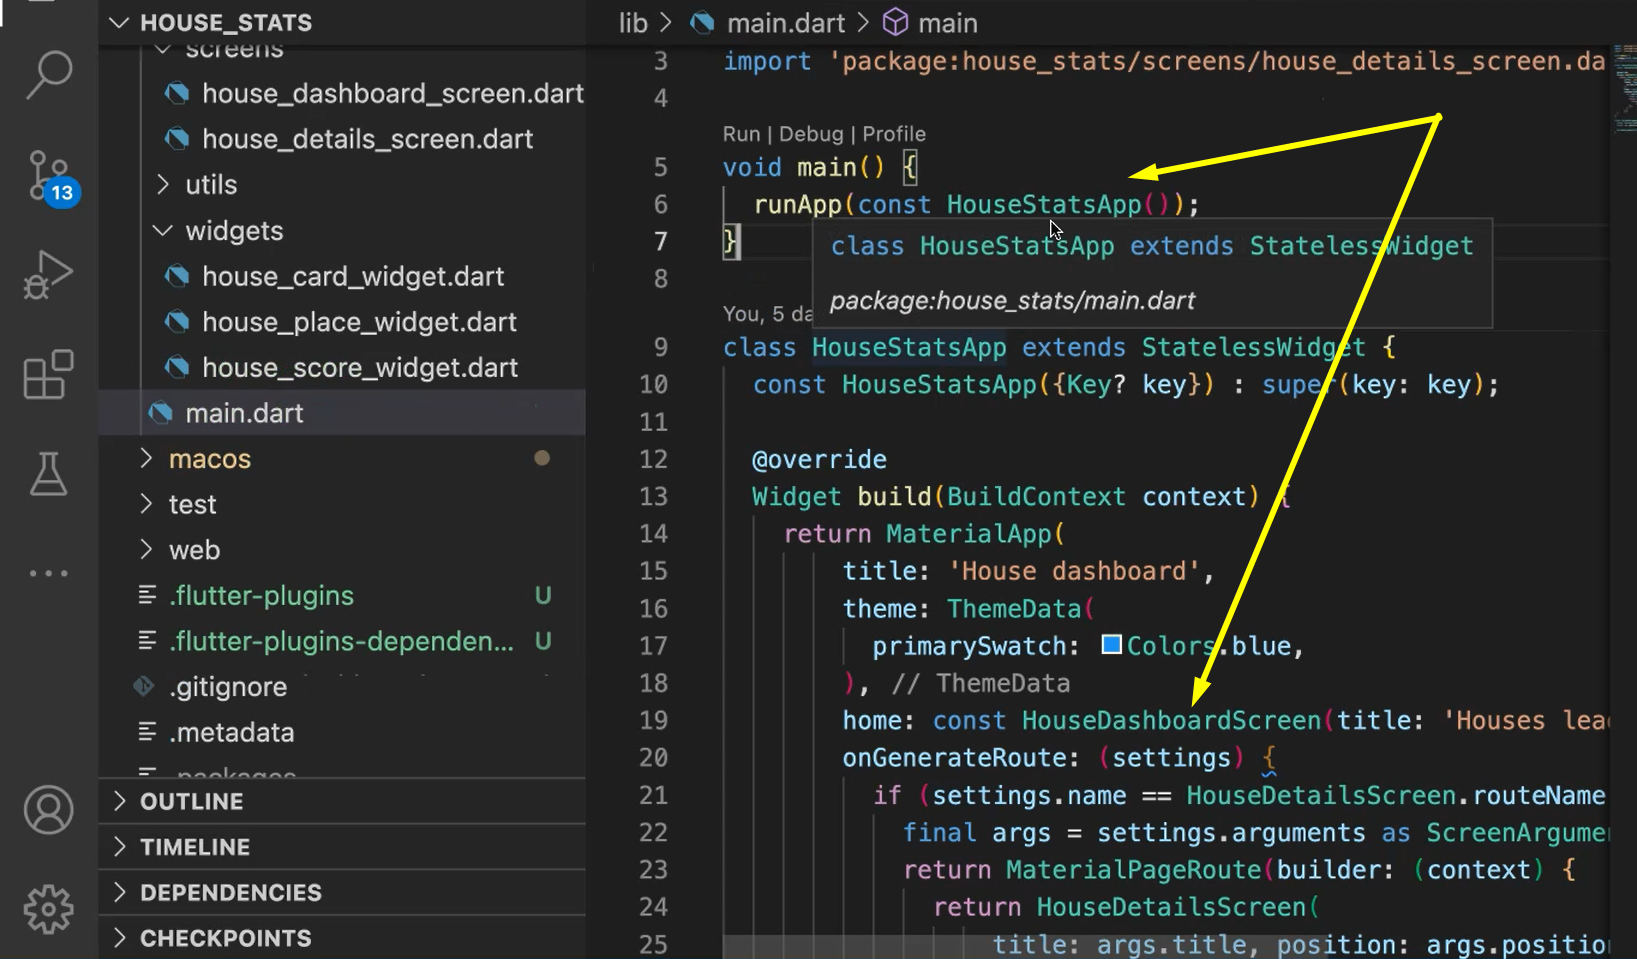
If we look closely in the test, we went directly into the HouseDashboardScreen instead of going from the HouseStatsApp, which is a starting point.
So, let's do that. Let's change to the HouseStatsApp.
main() {
  testWidgets('Integration testing house dashboard', (tester) async {
    await tester.pumpWidget(const HouseStatsApp());
    await tester.pumpAndSettle();
  });
}
And give it the correct import.
Now run right from the terminal. So again, our test is picking up and let's see if it picks up and passes this time.
You can see the app is installed and it ran the test and it passed. I mean, we didn't really do anything in the test. We just booted up the app.
But let's also add something here. Let's make sure that some text exists.
Let's call expect(find.text). We have 4 houses, let's use one of them, let's use Adagio.
expect(find.text('Adagio'), findsOneWidget);
And if you remember the syntax, there is already a helper functions that are coming from the Flutter test library and we are using them directly. So, we'll say findsOneWidget.
Let's run this and see.
These tests are slower than widget tests, you can see that. Right? These tests take a long time because you need to boot up the SDK.
And it booted up and then you can see that it found the text and it closed the app, that's it. But we can do a little bit more, right?
So, we added functionality to this, we could probably do in a widget test too.
But we wanted to do a little bit more.
This is integration testing, so we also want to do click on the object and then make sure that it opens the details.
Let's do that one, so let’s do ‘tap—await tester.tap(find.text('Adagio'))` — to click on Adagio
And let's add a pumpAndSettle. This one will help us with the reliability of the test because it will wait till the next page loads.
Even though there is await, this is something that you have to do to help with the reliability of the test cases.
And let's do expect(find.text('House details'), findsOneWidget);.
    expect(find.text('Adagio'), findsOneWidget);
    await tester.tap(find.text('Adagio'));
    await tester.pumpAndSettle();

    expect(find.text('House details'), findsOneWidget);
  });
}
Okay, let run this now.
Yeah. So, it clicked on the test, and it passed, right? It went and clicked on it and then it was able to see the house details text.
Now let's make one more change here.
Add something here, right? Let's see what the score of Adagio is, and make sure it actually shows up.
Adagio’s place, here in Postman, Adagio's score is 250. So, let's verify that actually that text shows up.
# Example Code - house_integration_test.dart
import 'package:flutter_test/flutter_test.dart';
import 'package:house_stats/main.dart';
import 'package:integration_test/integration_test.dart';

main() {
  testWidgets('Integration testing house dashboard', (tester) async {
    await tester.pumpWidget(const HouseStatsApp());
    await tester.pumpAndSettle();

    expect(find.text('Adagio'), findsOneWidget);
    await tester.tap(find.text('Adagio'));
    await tester.tap(find.text('250'));
    await tester.pumpAndSettle();

    expect(find.text('House details'), findsOneWidget);
  });
}
This might work, right?
I'm not even going to run it, but this might work. This might show up.
But what happens if the score changes?
The test will fail, right? Because it won't find this exact score.
That's the thing that I wanted to show how to fix. Not fix in the sense that you just changed the text, but all you want in this integration test is to make sure that the widget shows up and then the next navigation works.
You're not asserting that the actual values of Adagio and actual values of 250 are showing up. Those are not as important.
I mean, those assertions can be done at a lower level, like widget test, but at an integration test level, you want to verify the navigation between 2 things.
And maybe this text, you want to give it a different house, all the houses changed. Then you wouldn't exactly know what to assert for because the data is changing on the fly.
So that's a drawback of end-to-end test, right?
An end-to-end test assumes that the state of the app is fixed, that you have control over what is showing up in the app, on the test, but which may not be true in all the cases.
# Mock Integration Testing
Let's now look at a mechanism that I call competent test, or a mock integration test, where we are going to control what is being showed on the screen.
There are several ways to do the mock, but the way that I choose is a little bit simplistic. But it'll help illustrate the point.
What I did is add in the HouseRepository a way to retrieve the environment variable.
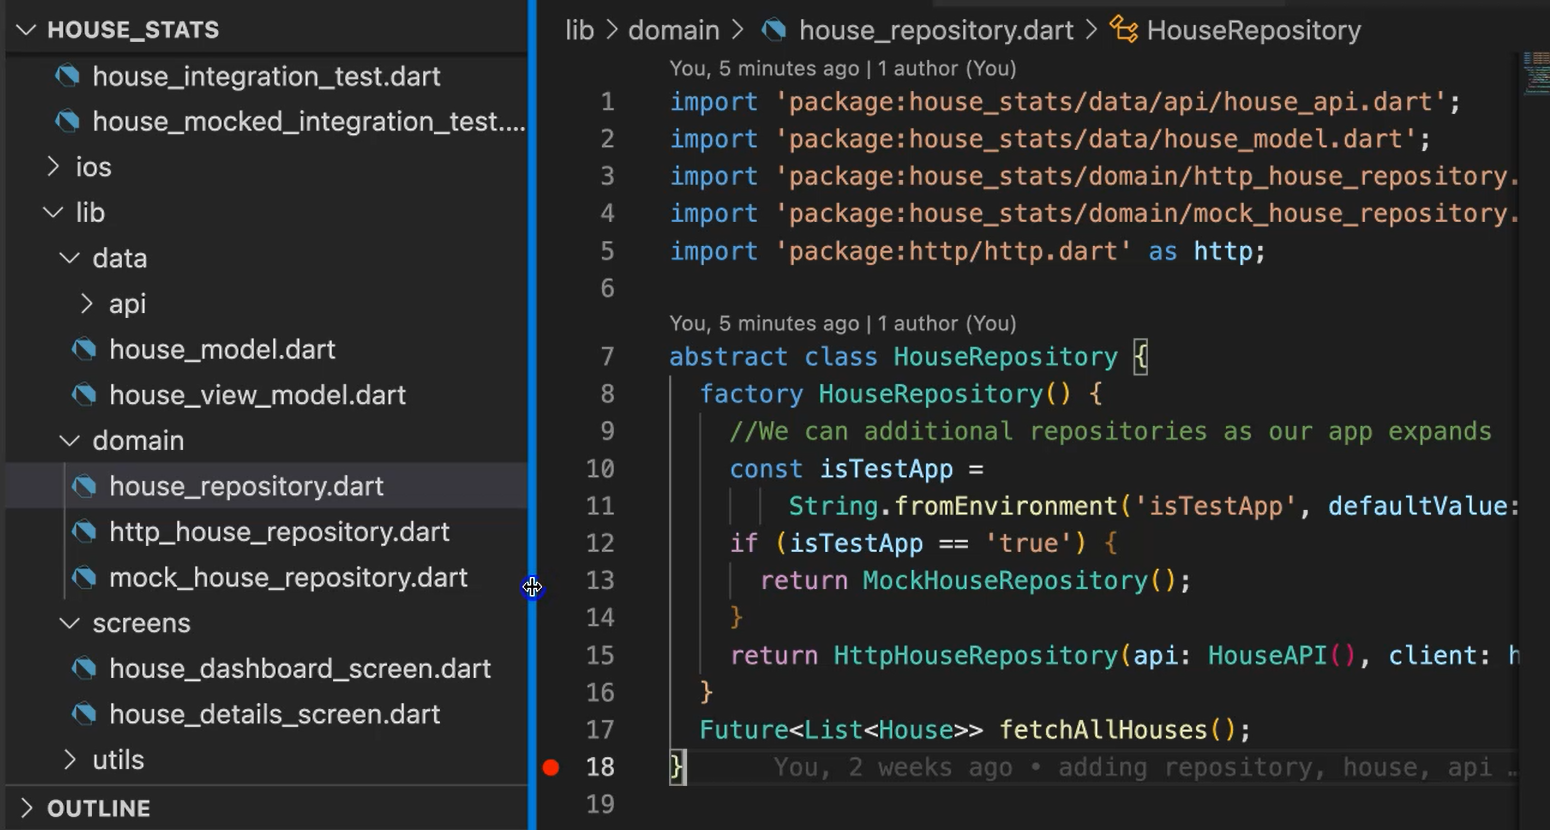
So, Dart has this mechanism where you can choose to get the environment variable and I'm retrieving the value of this isTestApp.
The default value is “false”.
But if it is “true”, it's going to get the data from our MockHouseRepository, instead of here in our regular HttpHouseRepository.
So, if you go in this one (MockHouseRepository), this is very similar to the setup that we did in the unit testing.
import 'package:house_stats/data/house_model.dart';
import 'package:house_stats/domain/house_repository.dart';
import 'package:mockito/mockito.dart';
class MockHouseRepository extends Mock implements HouseRepository {
Future<List<House>> fetchAllHouses() {
final house1 = House(houseName: '1house', score: 10);
final house2 = House(houseName: '2house', score: 5);
final house3 = House(houseName: '3house', score: 1);
final house4 = House(houseName: '4house', score: 3);
List<House> houses =
List<House>.from(<House>[house1, house2, house3, house4]);
return Future.value(houses);
}
}
We are just getting the houses, forming a list, and then wrapping it in the Future, and then sending it back.
We are controlling what should be the data for this screen.
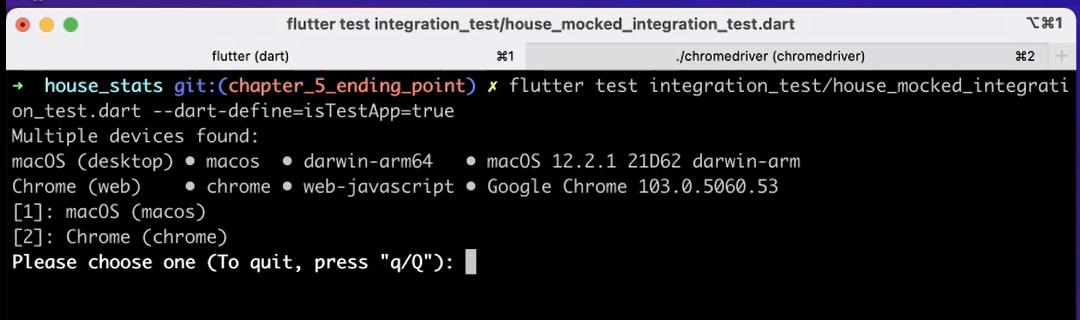
And the way to trigger the test is in addition to the normal integration test and invocation, we also add --dart-define, and here you can pass in the environment variables.
flutter test integration_test/house/mocked/integration/test.dart --dart-define=isTestApp=True
So, I'm, I'm passing in isTestApp=True,
Now the app is in installing and you can see the houses all showed up in the order.
The test itself is not that much different from the integration test that we wrote earlier.
# Example Code - house_mocked_integration_test.dart
import 'package:flutter_test/flutter_test.dart';
import 'package:house_stats/main.dart';
import 'package:integration_test/integration_test.dart';

main() {
  testWidgets('Integration testing house dashboard', (tester) async {
    await tester.pumpWidget(const HouseStatsApp());
    await tester.pumpAndSettle();

    expect(find.text('1house'), findsOneWidget);
    expect(find.text('10'), findsOneWidget);
    await tester.tap(find.text('1house'));
    await tester.pumpAndSettle();

    expect(find.text('House details'), findsOneWidget);
    expect(find.text('1house'), findsOneWidget);
  });
}
Here, we are verifying for the data that's coming from the wire (API).
So, this is Adagio and had score equal to 250, but here we know what exactly we need to verify.
This is never going to change because we know we controlled it from the app itself.
So, “1house” will always be there and it'll always have a score of 10, as long as we see this here in the repository. That gives us a higher level of reliability and you can verify the navigations.
So far, what we have seen is running the tests on the iOS simulator.
But this is Flutter, and the same code can be used to render the code on different clients, meaning Android, iOS, macOS, Chrome.
And at the same token, the tests can be run on different clients too. So, because this is integration test, we use iOS simulator so far, so let's choose different simulator.
# Running Integration Tests on Different Simulators
Let's run this test again and look at our options available.
It says macOS and Chrome.
We enable this on the project configuration. That's why we have this options.
Let's choose macOS first, meaning this is the client that runs as a desktop app on my machine.
You can see it booting up and it's building and eventually it'll boot up and you can see it should be able to run the same test case.
That's it, right?
So, if you think about it, if you have to do this in a different framework, like any other framework, that would be not as simple.
Because this is Flutter, the bindings and the test frameworks are advanced, so we are able to do this with no code changes.
Now let's try to do the same thing for Chrome.
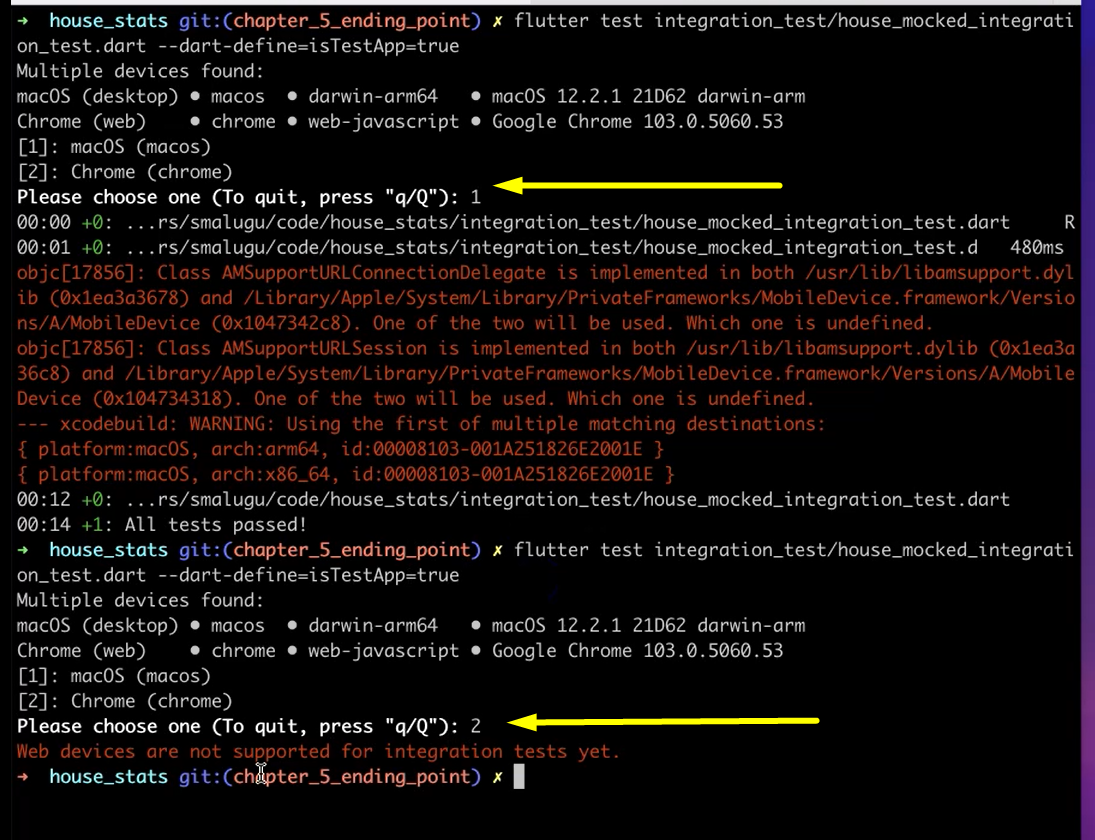
We get this error where it says, “Web devices are not supported for integration tests yet”.
This is obviously a work in progress, so the integration test platform hasn't been made to support Chrome yet.
So, what we are going to do is use a predecessor for integration_test called flutter driver to trigger this test cases in Chrome.
But for that, we need to do some setups.
So, first thing is we need to download a Chrome driver which Chrome driver is available in this URL — chromedriver.chromium.org/downloads. This is the place where you can download the respective Chrome driver.
And after you download it, you need to trigger it with this command — ./chromedriver --port=4444 --verbose. The verbose is optional, but I did it so that I can get some additional data.
We also need to make some code changes for this.
Let's go to the code and make those changes.
So the first thing is we need to create a folder called “test_driver” and add a file “integration_test.dart” where we will add these 2 lines, right?
import 'package:integration_test/integration_test_driver.dart';

Future<void> main() => integrationDriver();
So here we are, we have a main function and it is just triggering the integrationDriver.
And in our test cases, we need to do a little bit of invocation.
After the main function, what you need to do is add this line
IntegrationTestWidgetsFlutterBinding.ensureInitialized();
That's all.
These are the only changes that you need to do for the code:
- Create this file, which has an invocation.
- And then to make sure the app is initialized.
And from the command line, the invocation for the test is different here because we are using not the integration_test, but the driver.
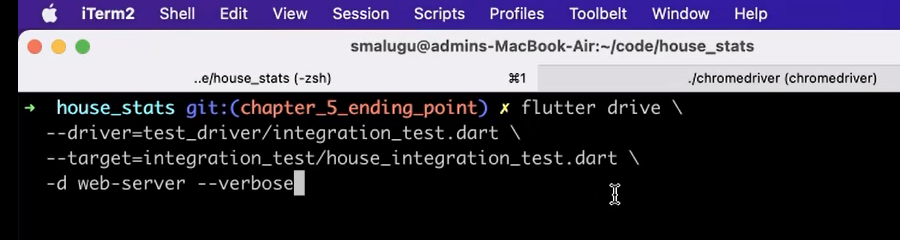
So, it looks like this — flutter drive…
And then we are saying what's the driver. This is the file that we just created, “driver/integration_test.dart”.
And then we are giving the file name for our test.
And it'll also invoke a web server, and “--verbose” so that we get additional information.
flutter drive \ --driver=test_driver/integration_test.dart \ --target=integration_test/house_integration_test.dart \ -d web-server –verbose
Now it'll, again, run Flutter from Git and then ask you where you want to run this, which was Chrome.
And it's running right now. It's the same thing as with iOS or Android, right? So, it's going to build the app and using the Chrome driver, it's going to boot up the browser.
It booted up and it did the same test, essentially clicked it. And then it passed.
That's the end of this chapter. We looked at various ways of creating the integration test and also mocking it up. Let's now move on the quiz.
Resources
- Getting Help – Test Automation U Slack - #course-Flutter-testing
- Git Rep: chapter_5_starting_point
- Git Rep: chapter_5_ending_point
- Flutter – An introduction to integration testing
- Flutter – Integration Testing
- Flutter – String.fromEnvironment constructor
- Chrome Driver Download
