

Transcripted Summary
To start writing automated visual UI test using Eyes, we are going to want to install the Applitools Eyes SDK for WebdriverIO.
If you go to your current WebdriverIO project, bring up the terminal and install the following command using npm.
npm install @applitools/eyes.webdriverio
Once the package has finished installing, we can then proceed to writing some code.
The first thing that you’ll want to do is import the package.
I’ll require both the Eyes and Target objects using a require statement. Next we need to initialize a new Eyes instance and store it to a constant.
// Initialize the eyes SDK
const { Eyes, Target } = require('@applitools/eyes.webdriverio')
const eyes = new Eyes()
Now for Applitools to know which account to use we’ll need to tell it your API Key. As mentioned in the previous video you can get the API Key from the Test Manager.
// Set your private API key.
eyes.setApiKey(process.env.APPLITOOLS_API_KEY)
Now we will add our describe and it blocks. Next we want to create a try-finally block in the test — the reasoning for this is due to the network calls required when running our Applitools commands.
Because we can’t guarantee that the network calls will always succeed, we need to handle cases where they don’t.
Inside our finally block we need to call eyes.abortIfNotClosed() which will mark our test as aborted if something goes wrong or if eyes does not close.
finally {
    // If the test was aborted before eyes.close was called ends the test as aborted.
    await eyes.abortIfNotClosed();
}
Now because this command runs a network request, it’s going to be an asynchronous call. We are going to convert it to be a synchronous command by using the await keyword.
To do this we are going to need to make this function an asynchronous one.
Above our try block we are going to want to call browser.url and set the site that we want WebdriverIO to redirect our test to.
For this example, I will be using the HELLO WORLD page that Applitools provides.

// Navigate the browser to the "hello world example" web-site.
browser.url('https://applitools.com/helloworld')
In our try block were going to want to call browser.windowHandleFullScreen() — this command will go ahead and maximize the viewport of the screen.
// Set browser to fullscreen
browser.windowHandleFullscreen();
The next thing that will want to get is the viewport size and store it.
// Get the current size of the screen
const viewportSize = browser.getViewportSize()
We will then open a new Eyes test case by using eyes.open() command.
Inside the call we’ll pass the following values: the browser instance that we are using, the title of our application, the name we want to use for our test and the viewport size of the browser window.
// Start the test and set the browser's viewport size to
await eyes.open(browser, 'Hello World Example', 'New Visual UI Test', viewportSize);
Now that our test is open in Applitools were going to use the eyes.check() command to capture a visual snapshot of the page. This command accepts the name we want to give the screenshot, plus the target window as reference.
// Visual checkpoint #1.
await eyes.check('Main Page', Target.window());
Next will click the "Click me!" button on the page
// Click the "Click me!" button.
await browser.click('button');
Following that will we use the eyes.check command to capture another screenshot of the page in its current state.
// Visual checkpoint #2.
await eyes.check('Click!', Target.window());
We can now end our test using the eyes.close command.
// End the test.
await eyes.close();
Now that everything is ready, we can run our test and view the results in the Test Manager.
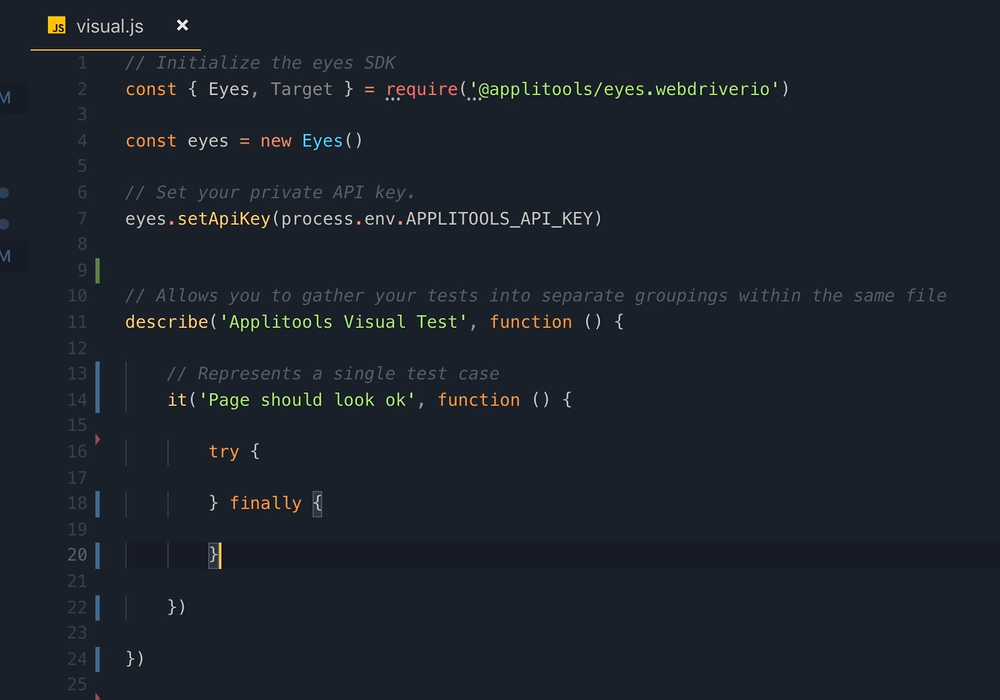
# visual.js
// Initialize the eyes SDK
const { Eyes, Target } = require('@applitools/eyes.webdriverio')
const eyes = new Eyes()

// Set your private API key.
eyes.setApiKey(process.env.APPLITOOLS_API_KEY)

// Allows you to gather your tests into separate groupings within the same file
describe('Applitools Visual Test', function () {

    // represents a single test case
    it('Page should look ok', async function () {
        // Navigate the browser to the "hello world example" web-site.
        browser.url('https://applitools.com/helloworld')

        try {
            // Set browser to fullscreen
            browser.windowHandleFullscreen();

            // Get the current size of the screen
            const viewportSize = browser.getViewportSize()

            // Start the test and set the browser's viewport size to
            await eyes.open(browser, 'Hello World Example', 'New Visual UI Test', viewportSize);

            // Visual checkpoint #1.
            await eyes.check('Main Page', Target.window());

            // Click the "Click me!" button.
            await browser.click('button');

            // Visual checkpoint #2.
            await eyes.check('Click!', Target.window());

            // End the test.
            await eyes.close();

        } finally {
            // If the test was aborted before eyes.close was called ends the test as aborted.
            await eyes.abortIfNotClosed();
        }
    })
})
The test run will look similar to every other test run that you do with WebdriverIO, however behind the scenes Applitools is creating our test and uploaded our screenshots to the test manager for your Applitools account.
Once the test has finished running, we can see that it passed.
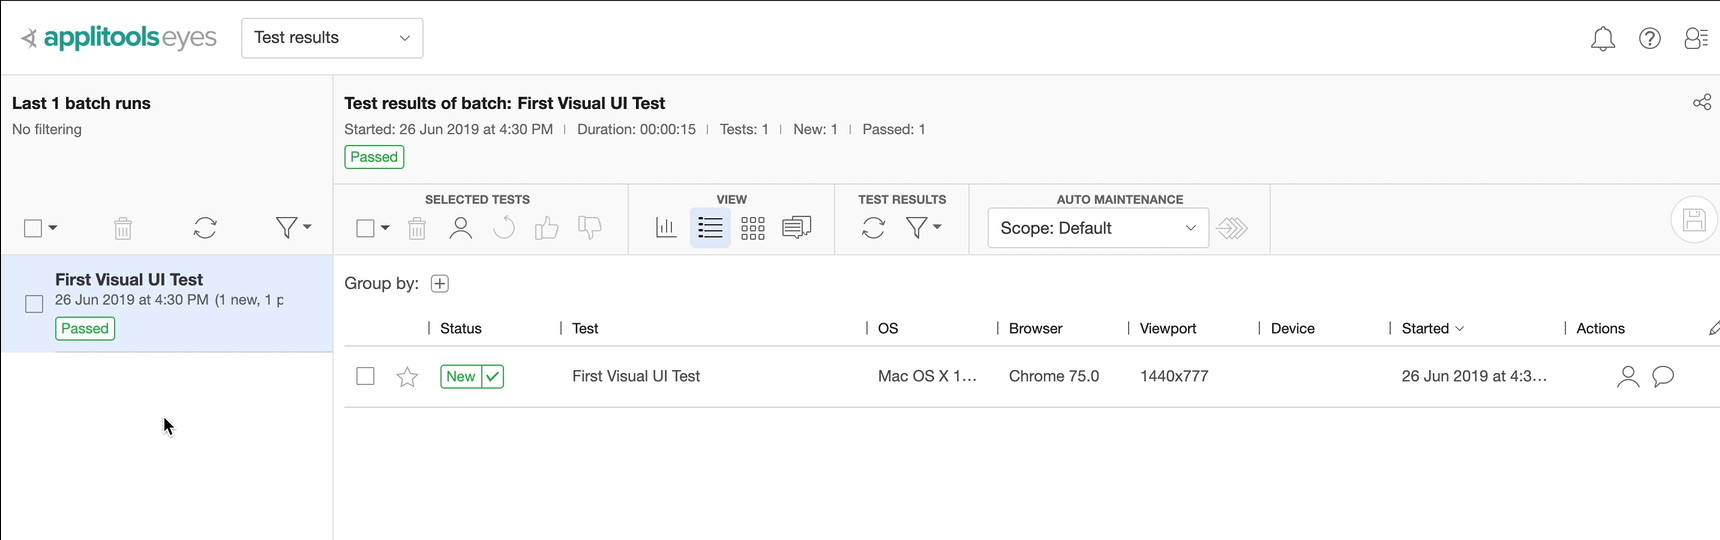
Now if we go to the Test Manager, we should see your test in the left side bar (if you’re not seeing it you can go ahead and refresh the list).
If we open the test, we should see our 2 screenshots.
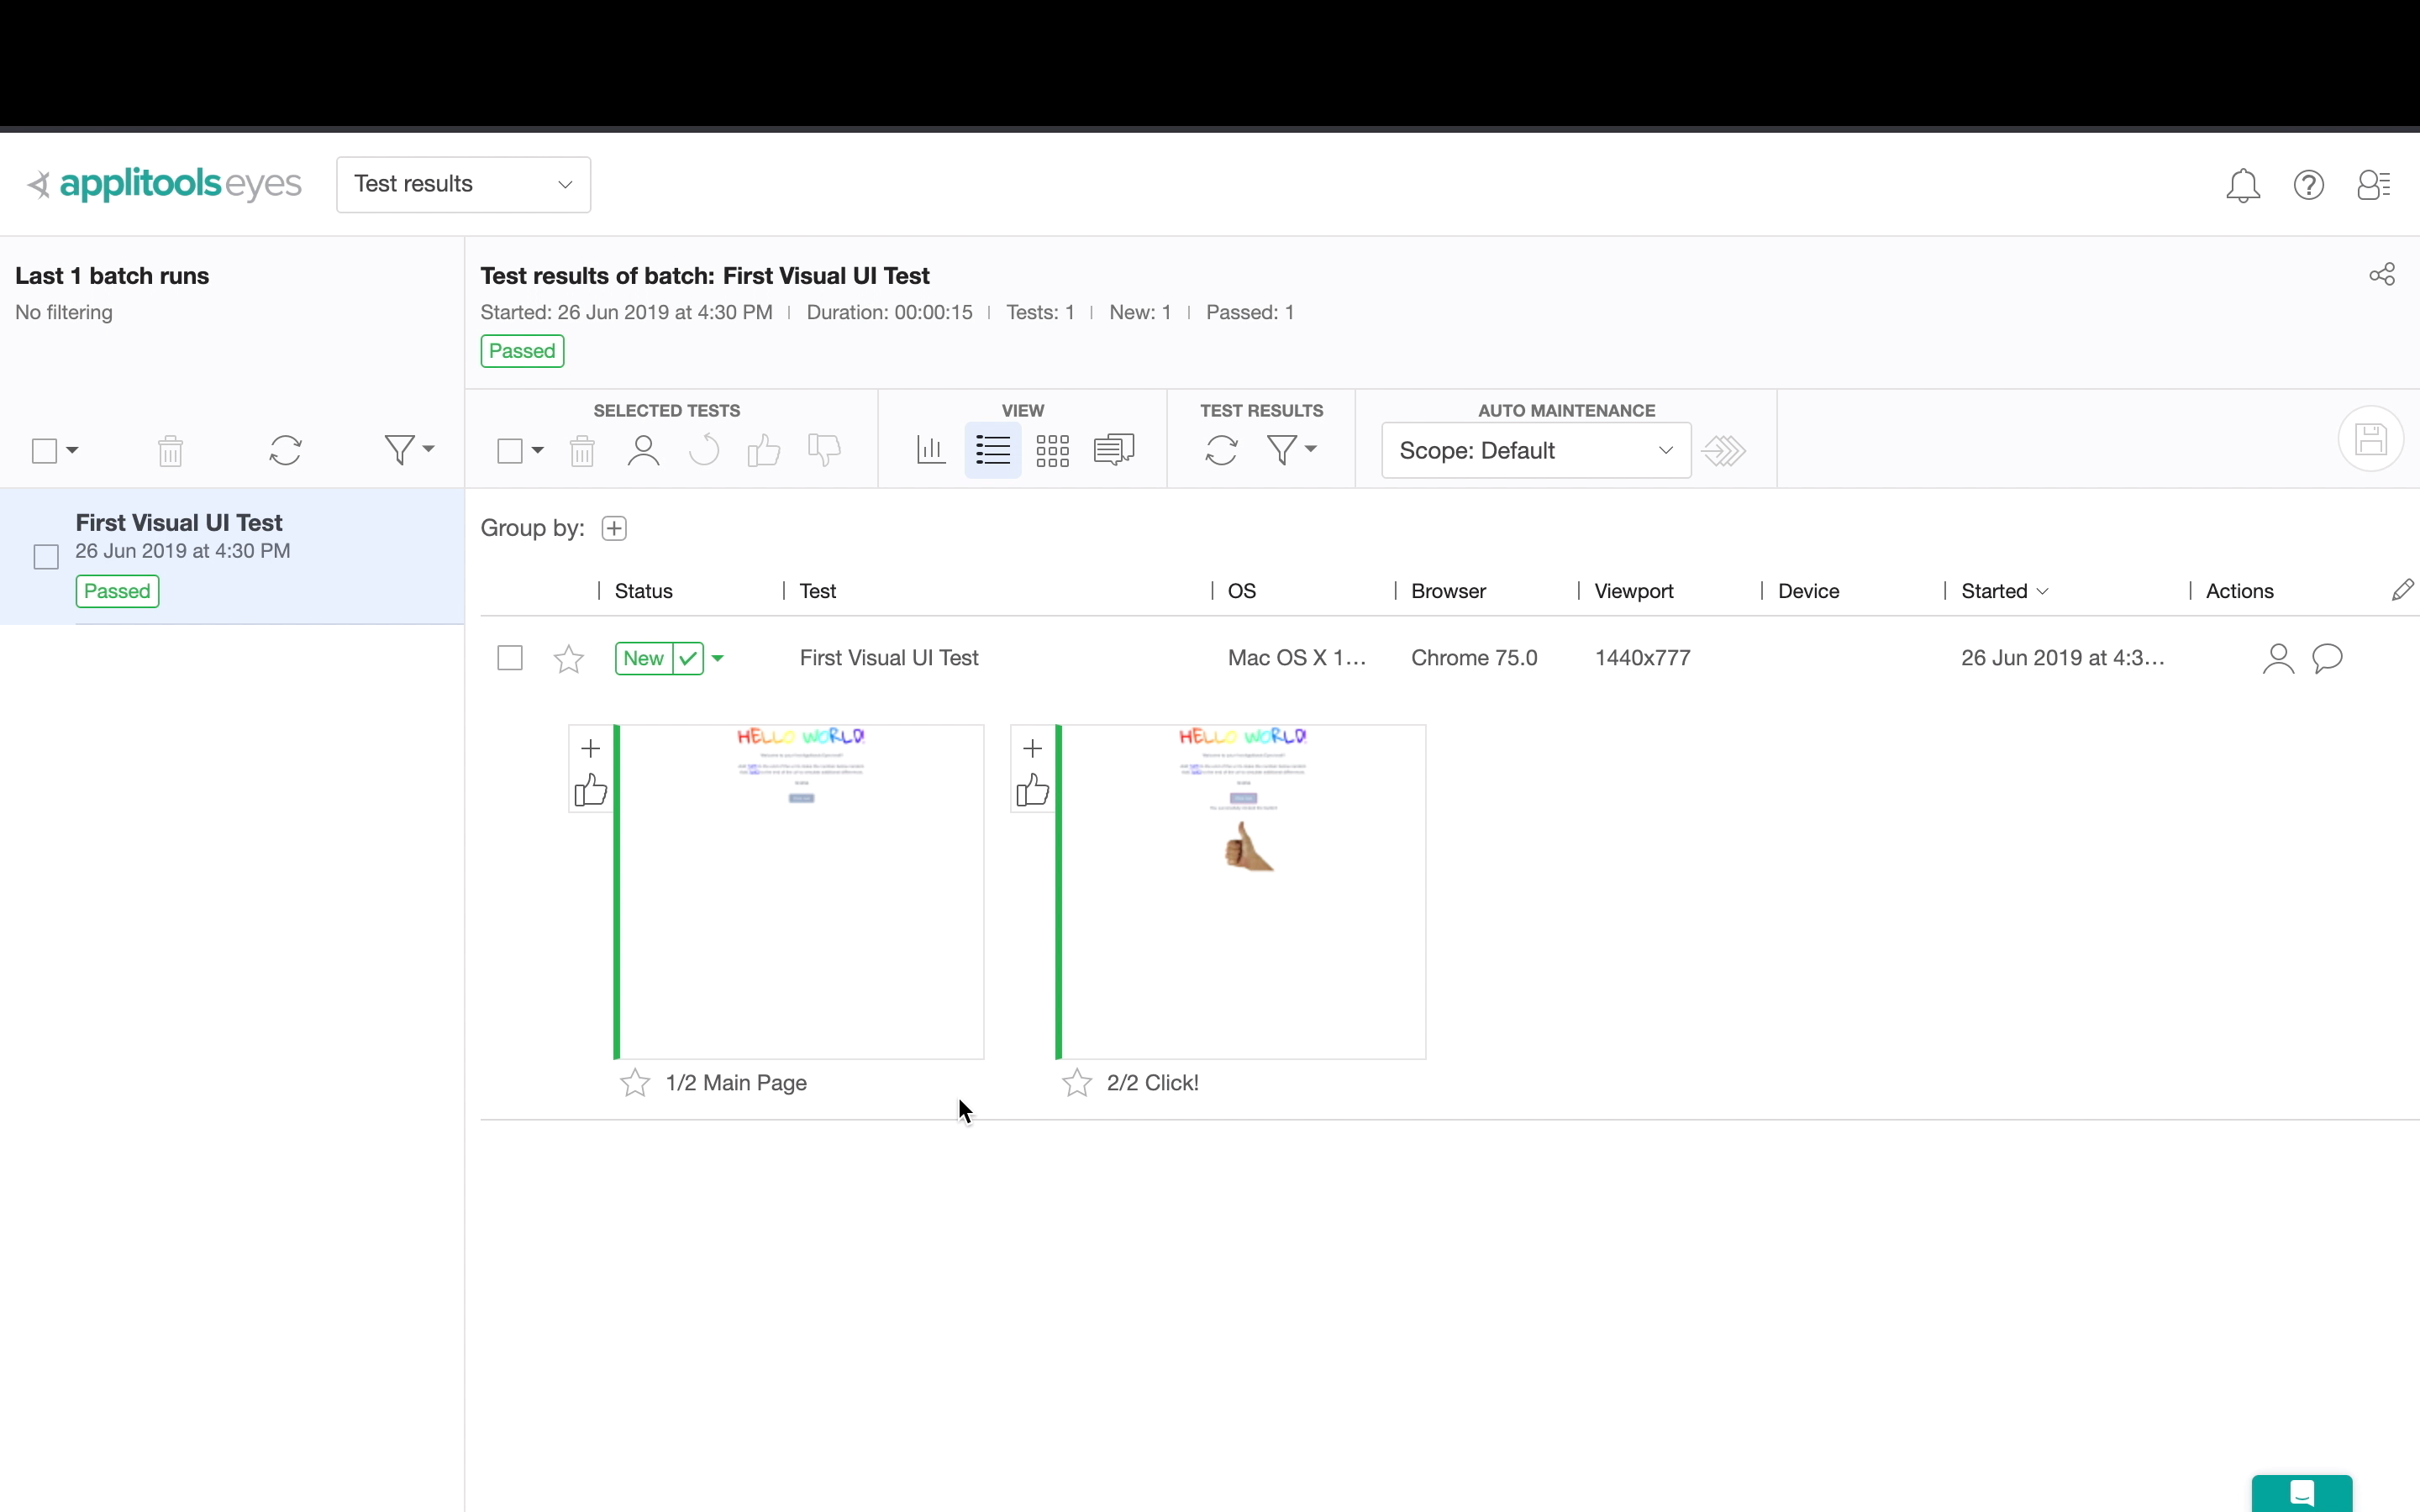
At this point in time everything is configured.
The next time we run our test it will compare the new screen shot with what’s currently in Applitools and detect any visual issues that are found.
To validate this, let’s make a change to our test.
We will update the browser.url command to go to a different version of the HELLO WORLD example simulating a visual bug.
// Navigate the browser to the "hello world!" web-site.
browser.url('https://applitools.com/helloworld?diff2')
If we rerun the test, we should see that it has failed due to various differences between the screenshots and baseline image.
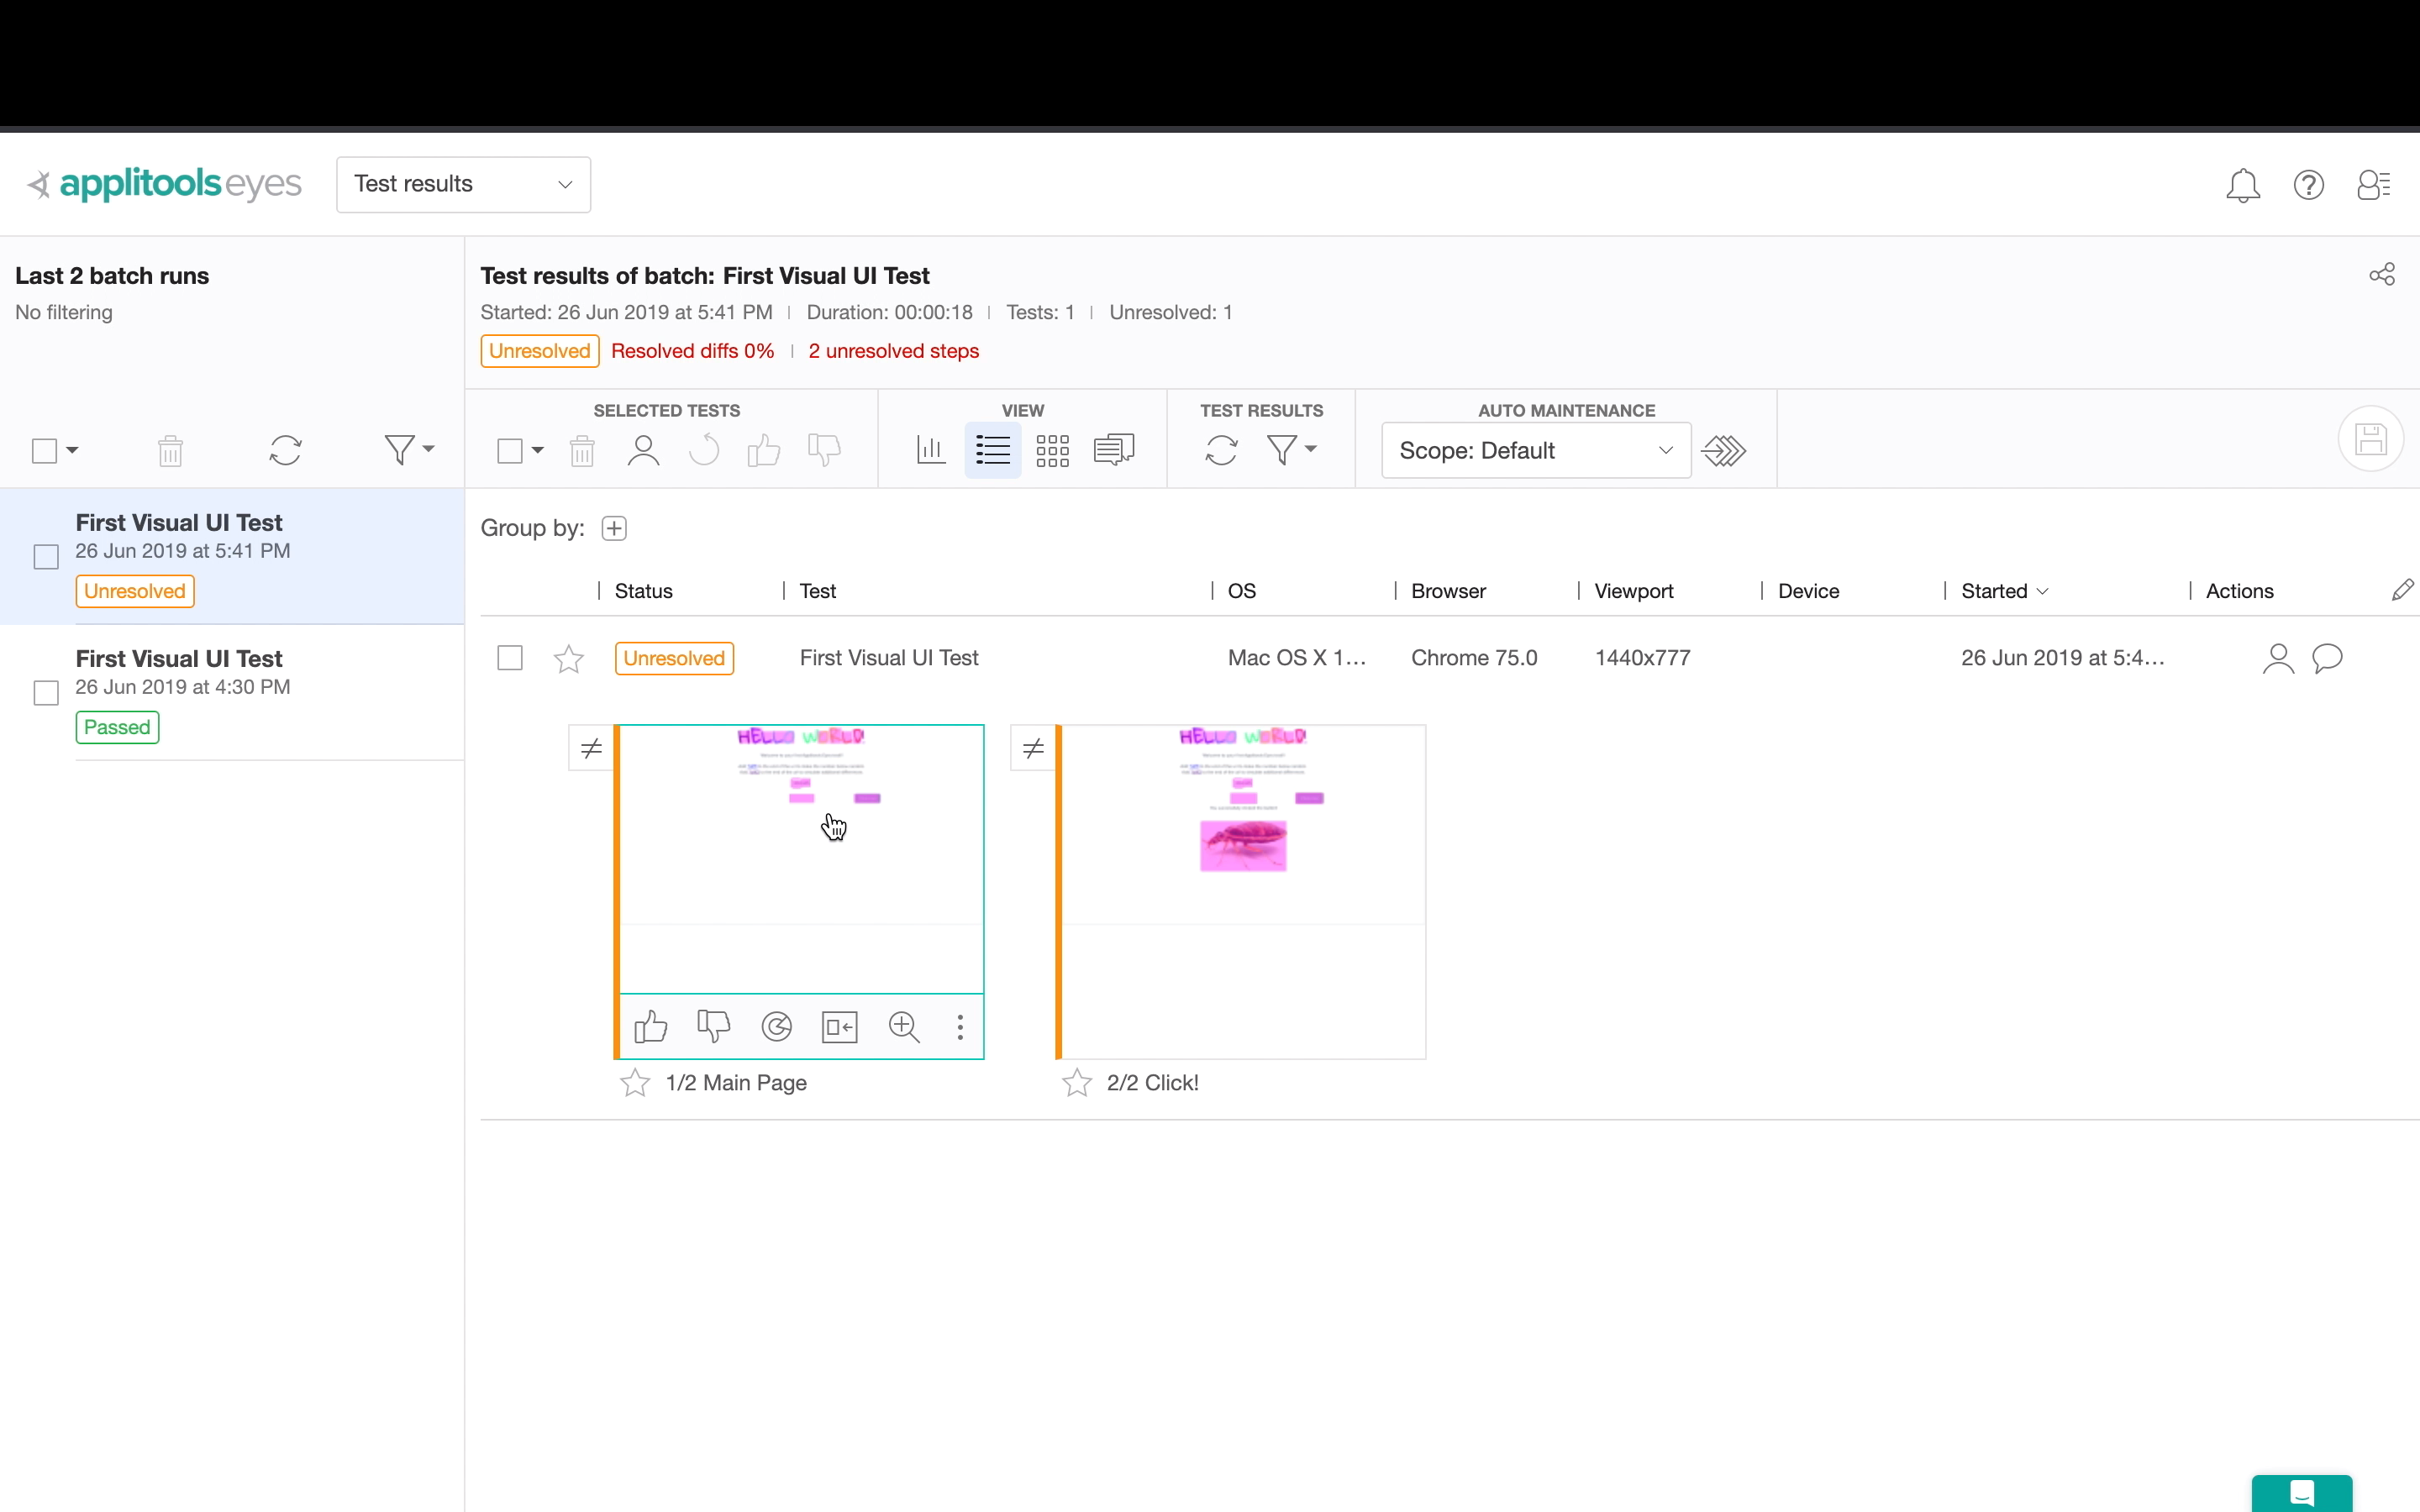
Whenever a test fails Applitools will give you an error in the terminal with a link to the failed test in Applitools within the Test Manager.
The test will then have a status of unresolved.
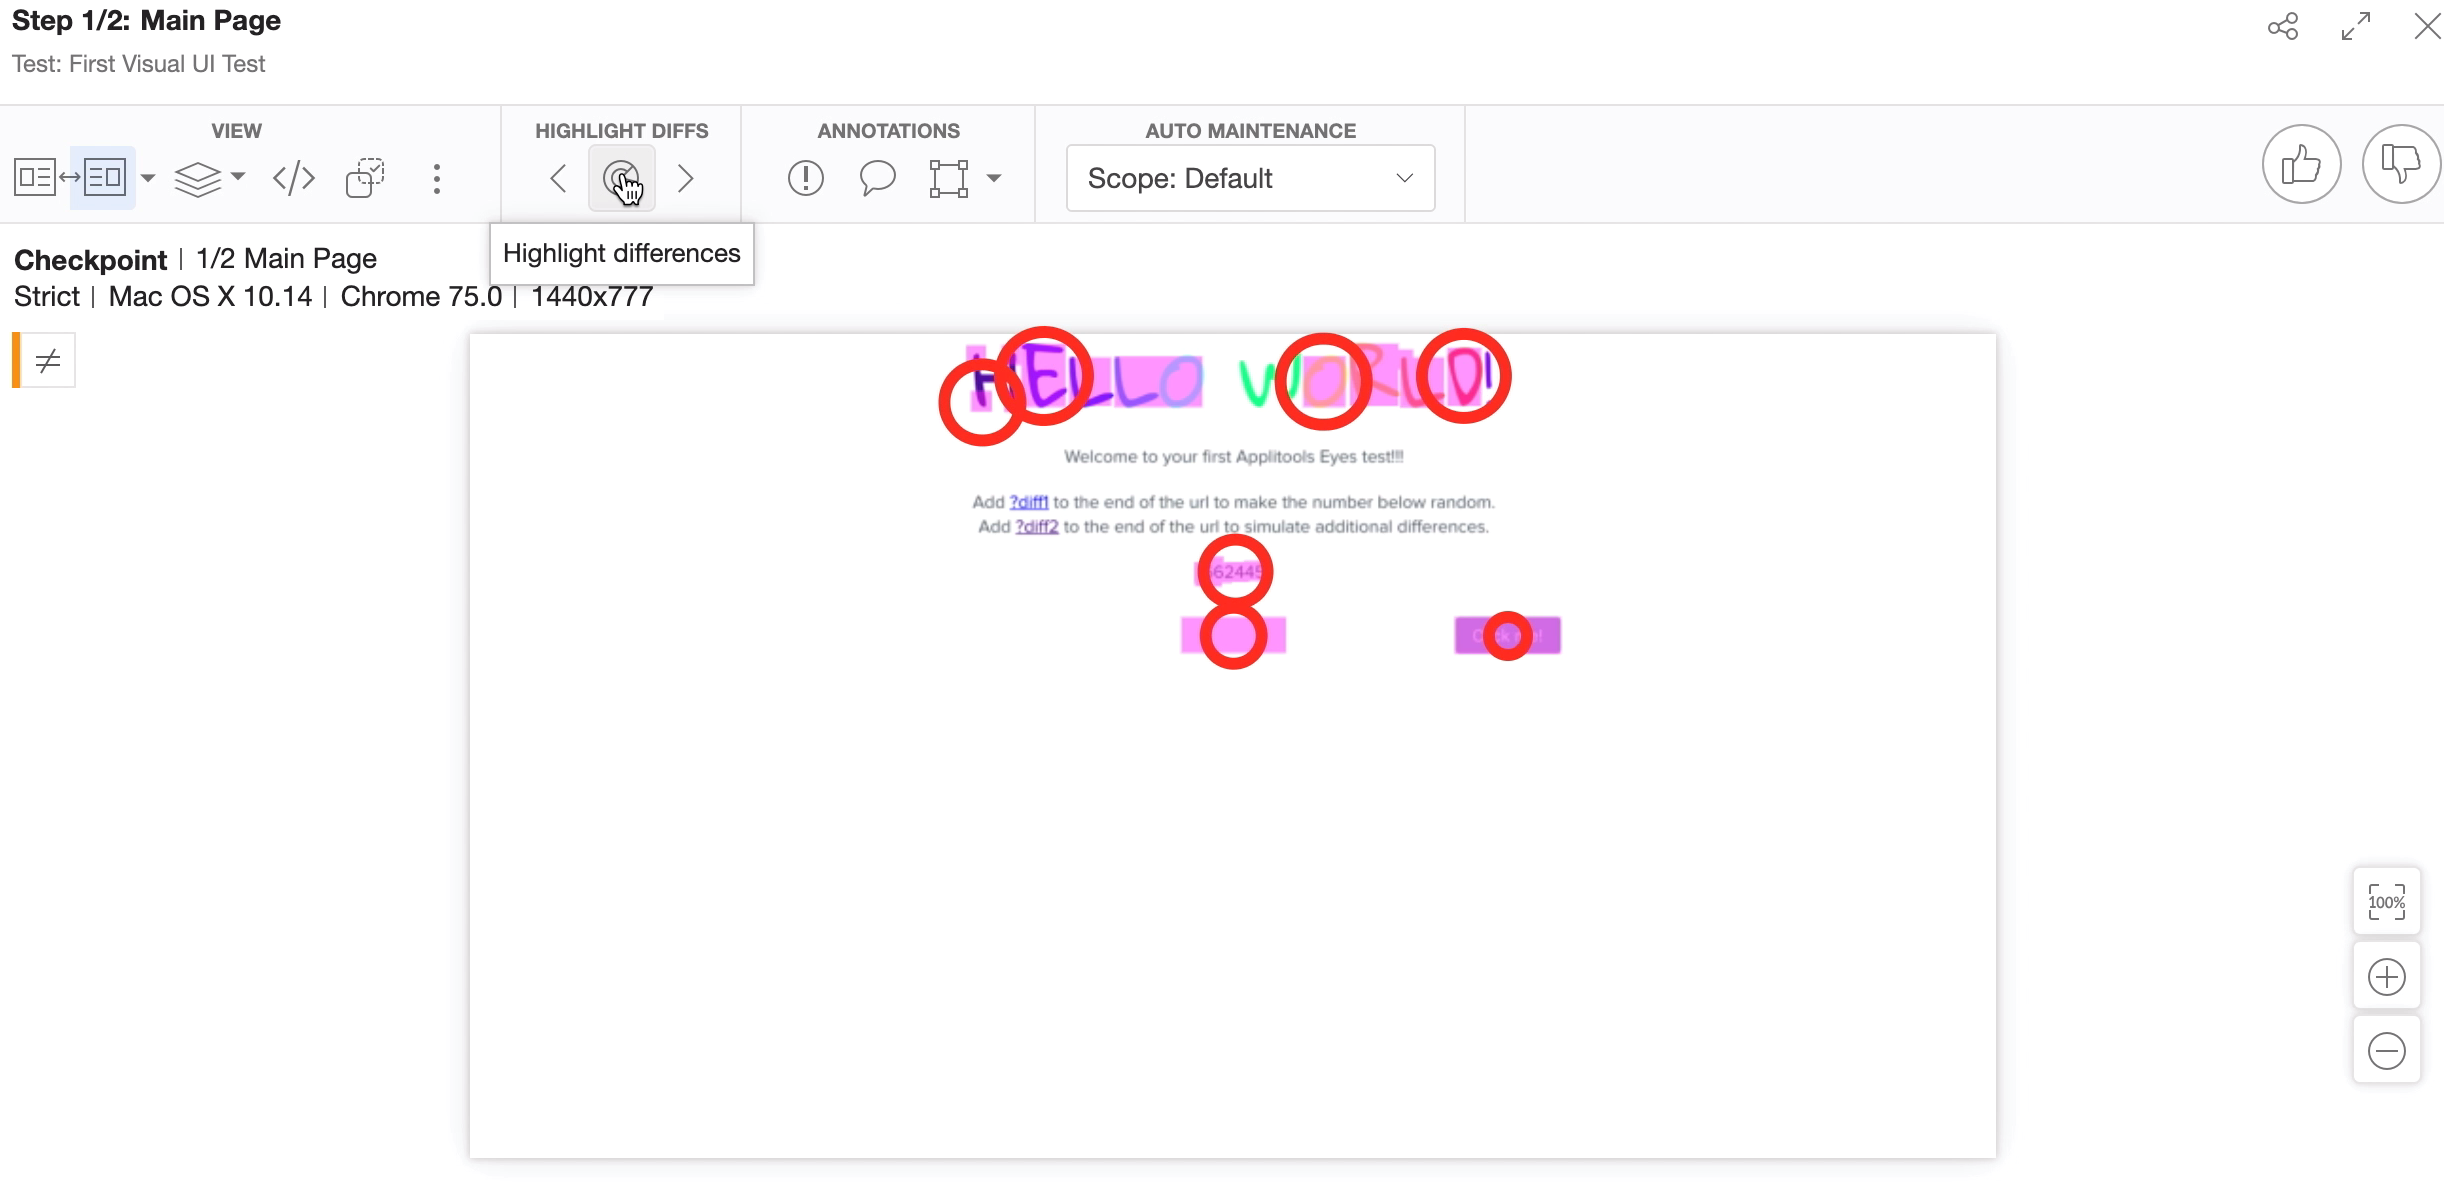
If we open the test, we can see that some sections of the screenshot are highlighted.
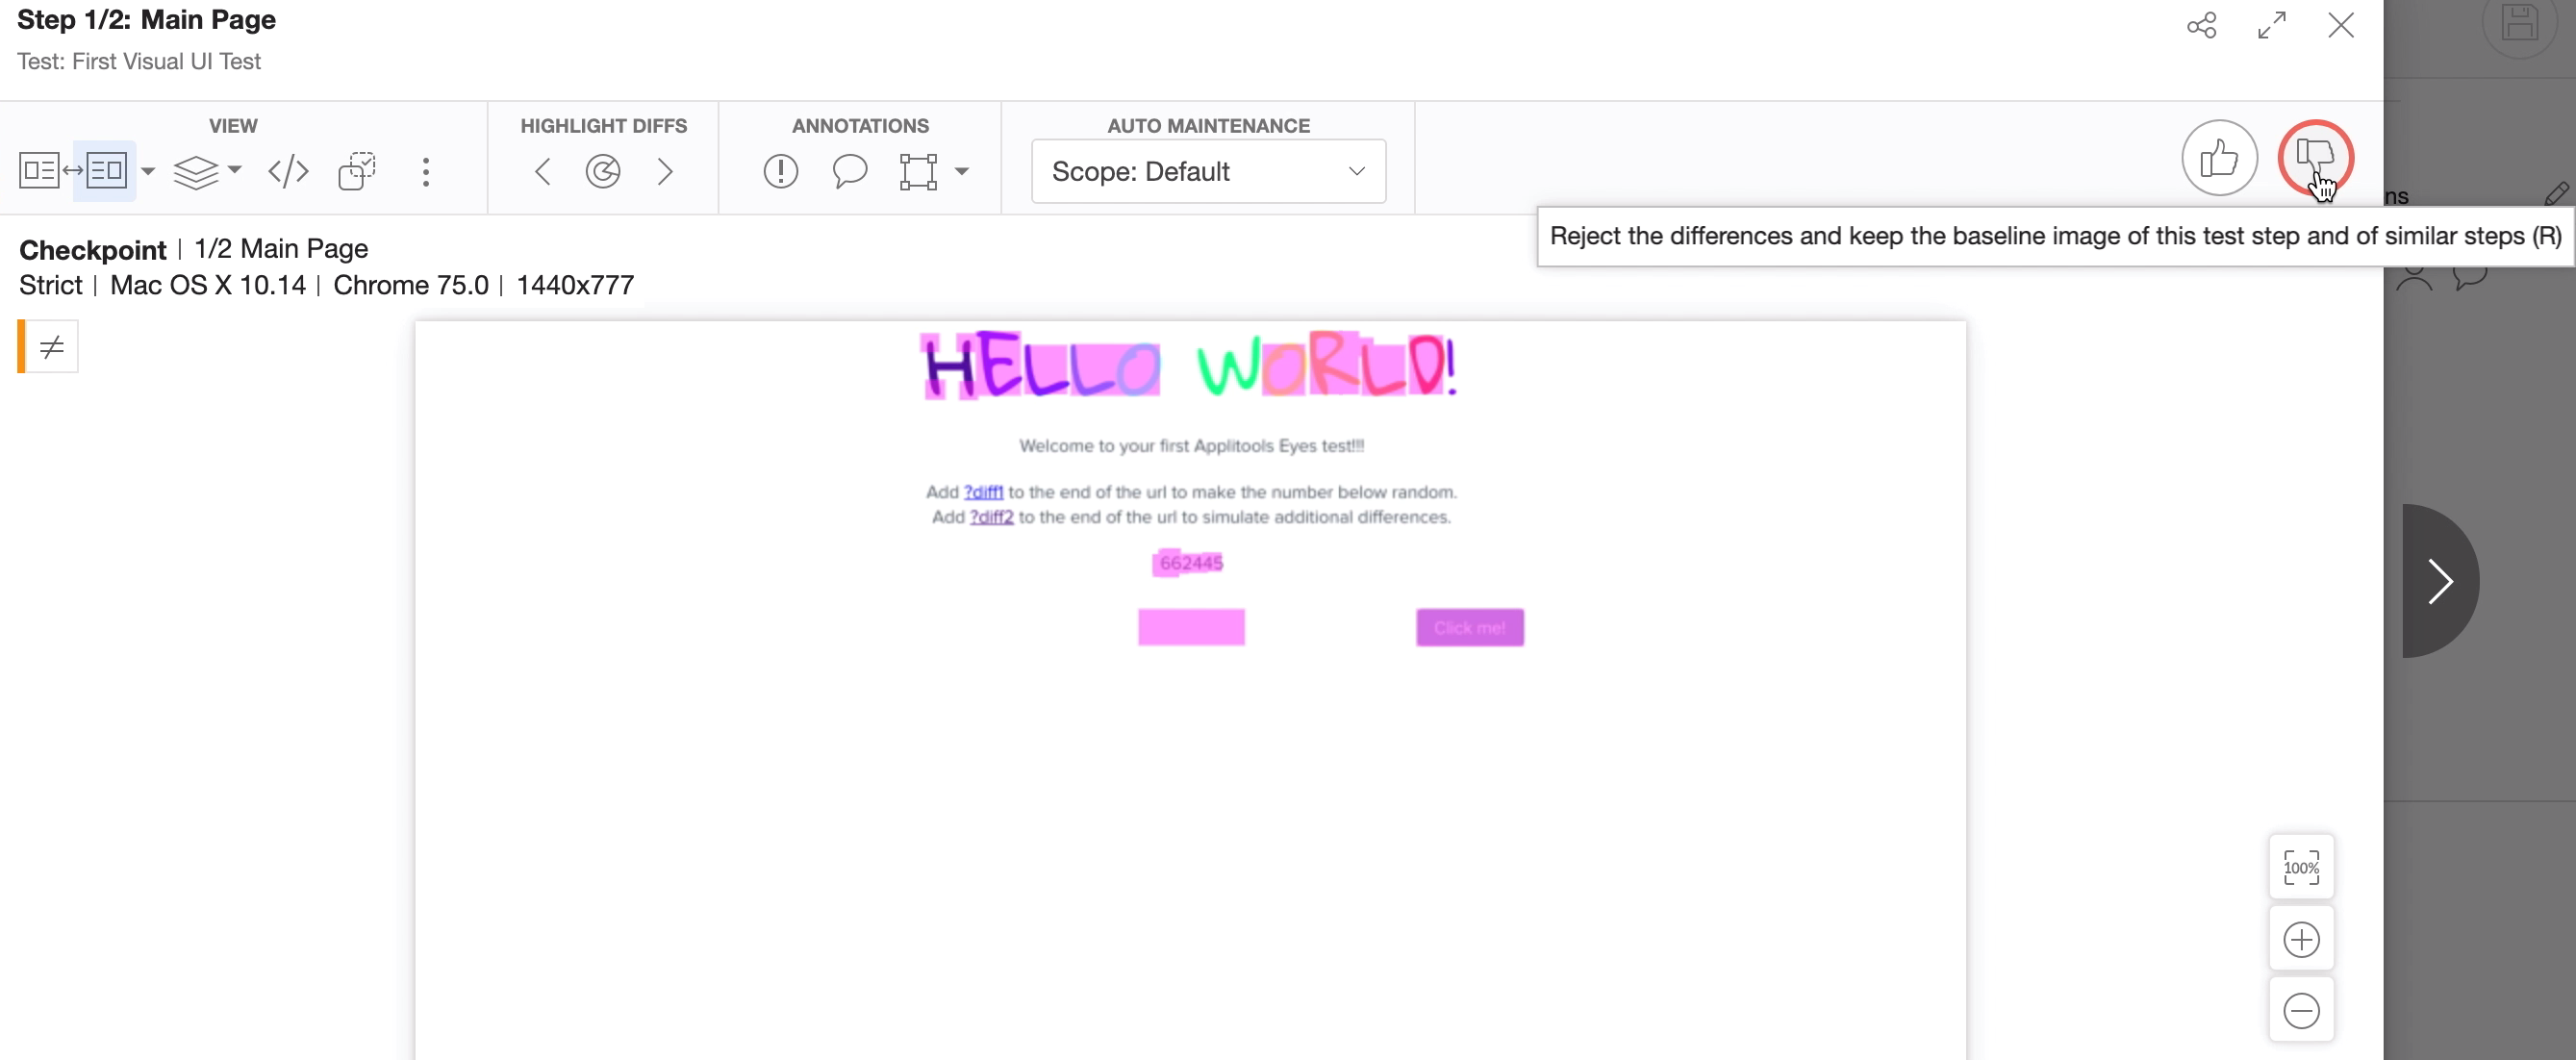
We can then use the Highlight differences tool to uniquely identify each difference between the baseline and the latest test ran.
At this point we can then choose to accept the new screenshot as our baseline image or reject it and keep the original image.
If we reject it, the status will then get changed to Failed and Applitools will keep the original version of the screenshots as our baseline.
Now there is a lot more we can do with Applitools, especially with the Test Manager. We will cover all the features as we progress though the course more.
