

Transcripted Summary
In this chapter, we'll learn how to work with failing tests.
Let's go ahead and make some changes to our application, so that we have a failing test.
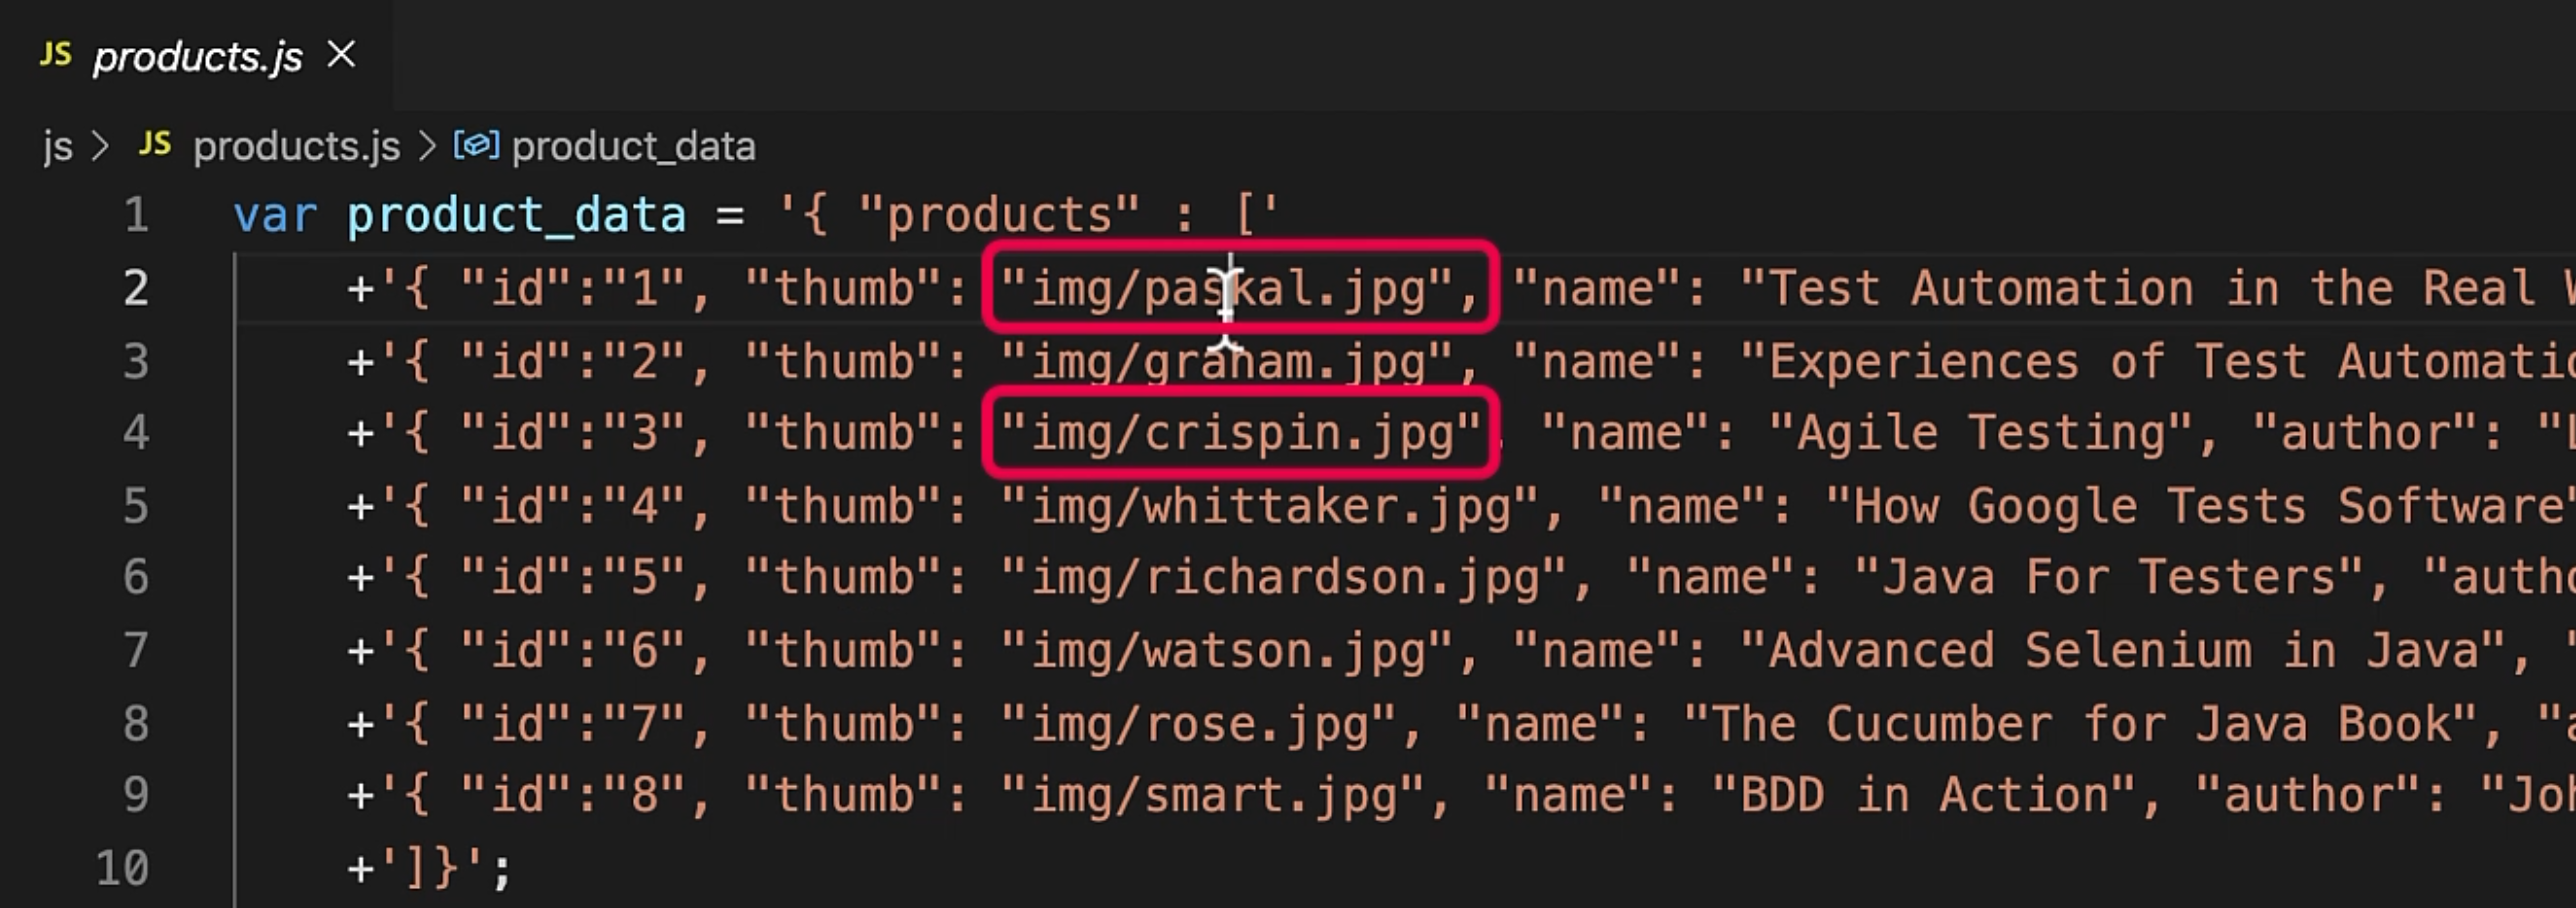
I'll just swap the book images for the first and the third book.
Let's see it on the live server.
Good, so the images are swapped.

I expect our visual test to capture this issue.
Let's push the code to GitHub, so our pipeline will trigger.
All right, so out of 8 tests in total, 6 passed, and 2 failed.
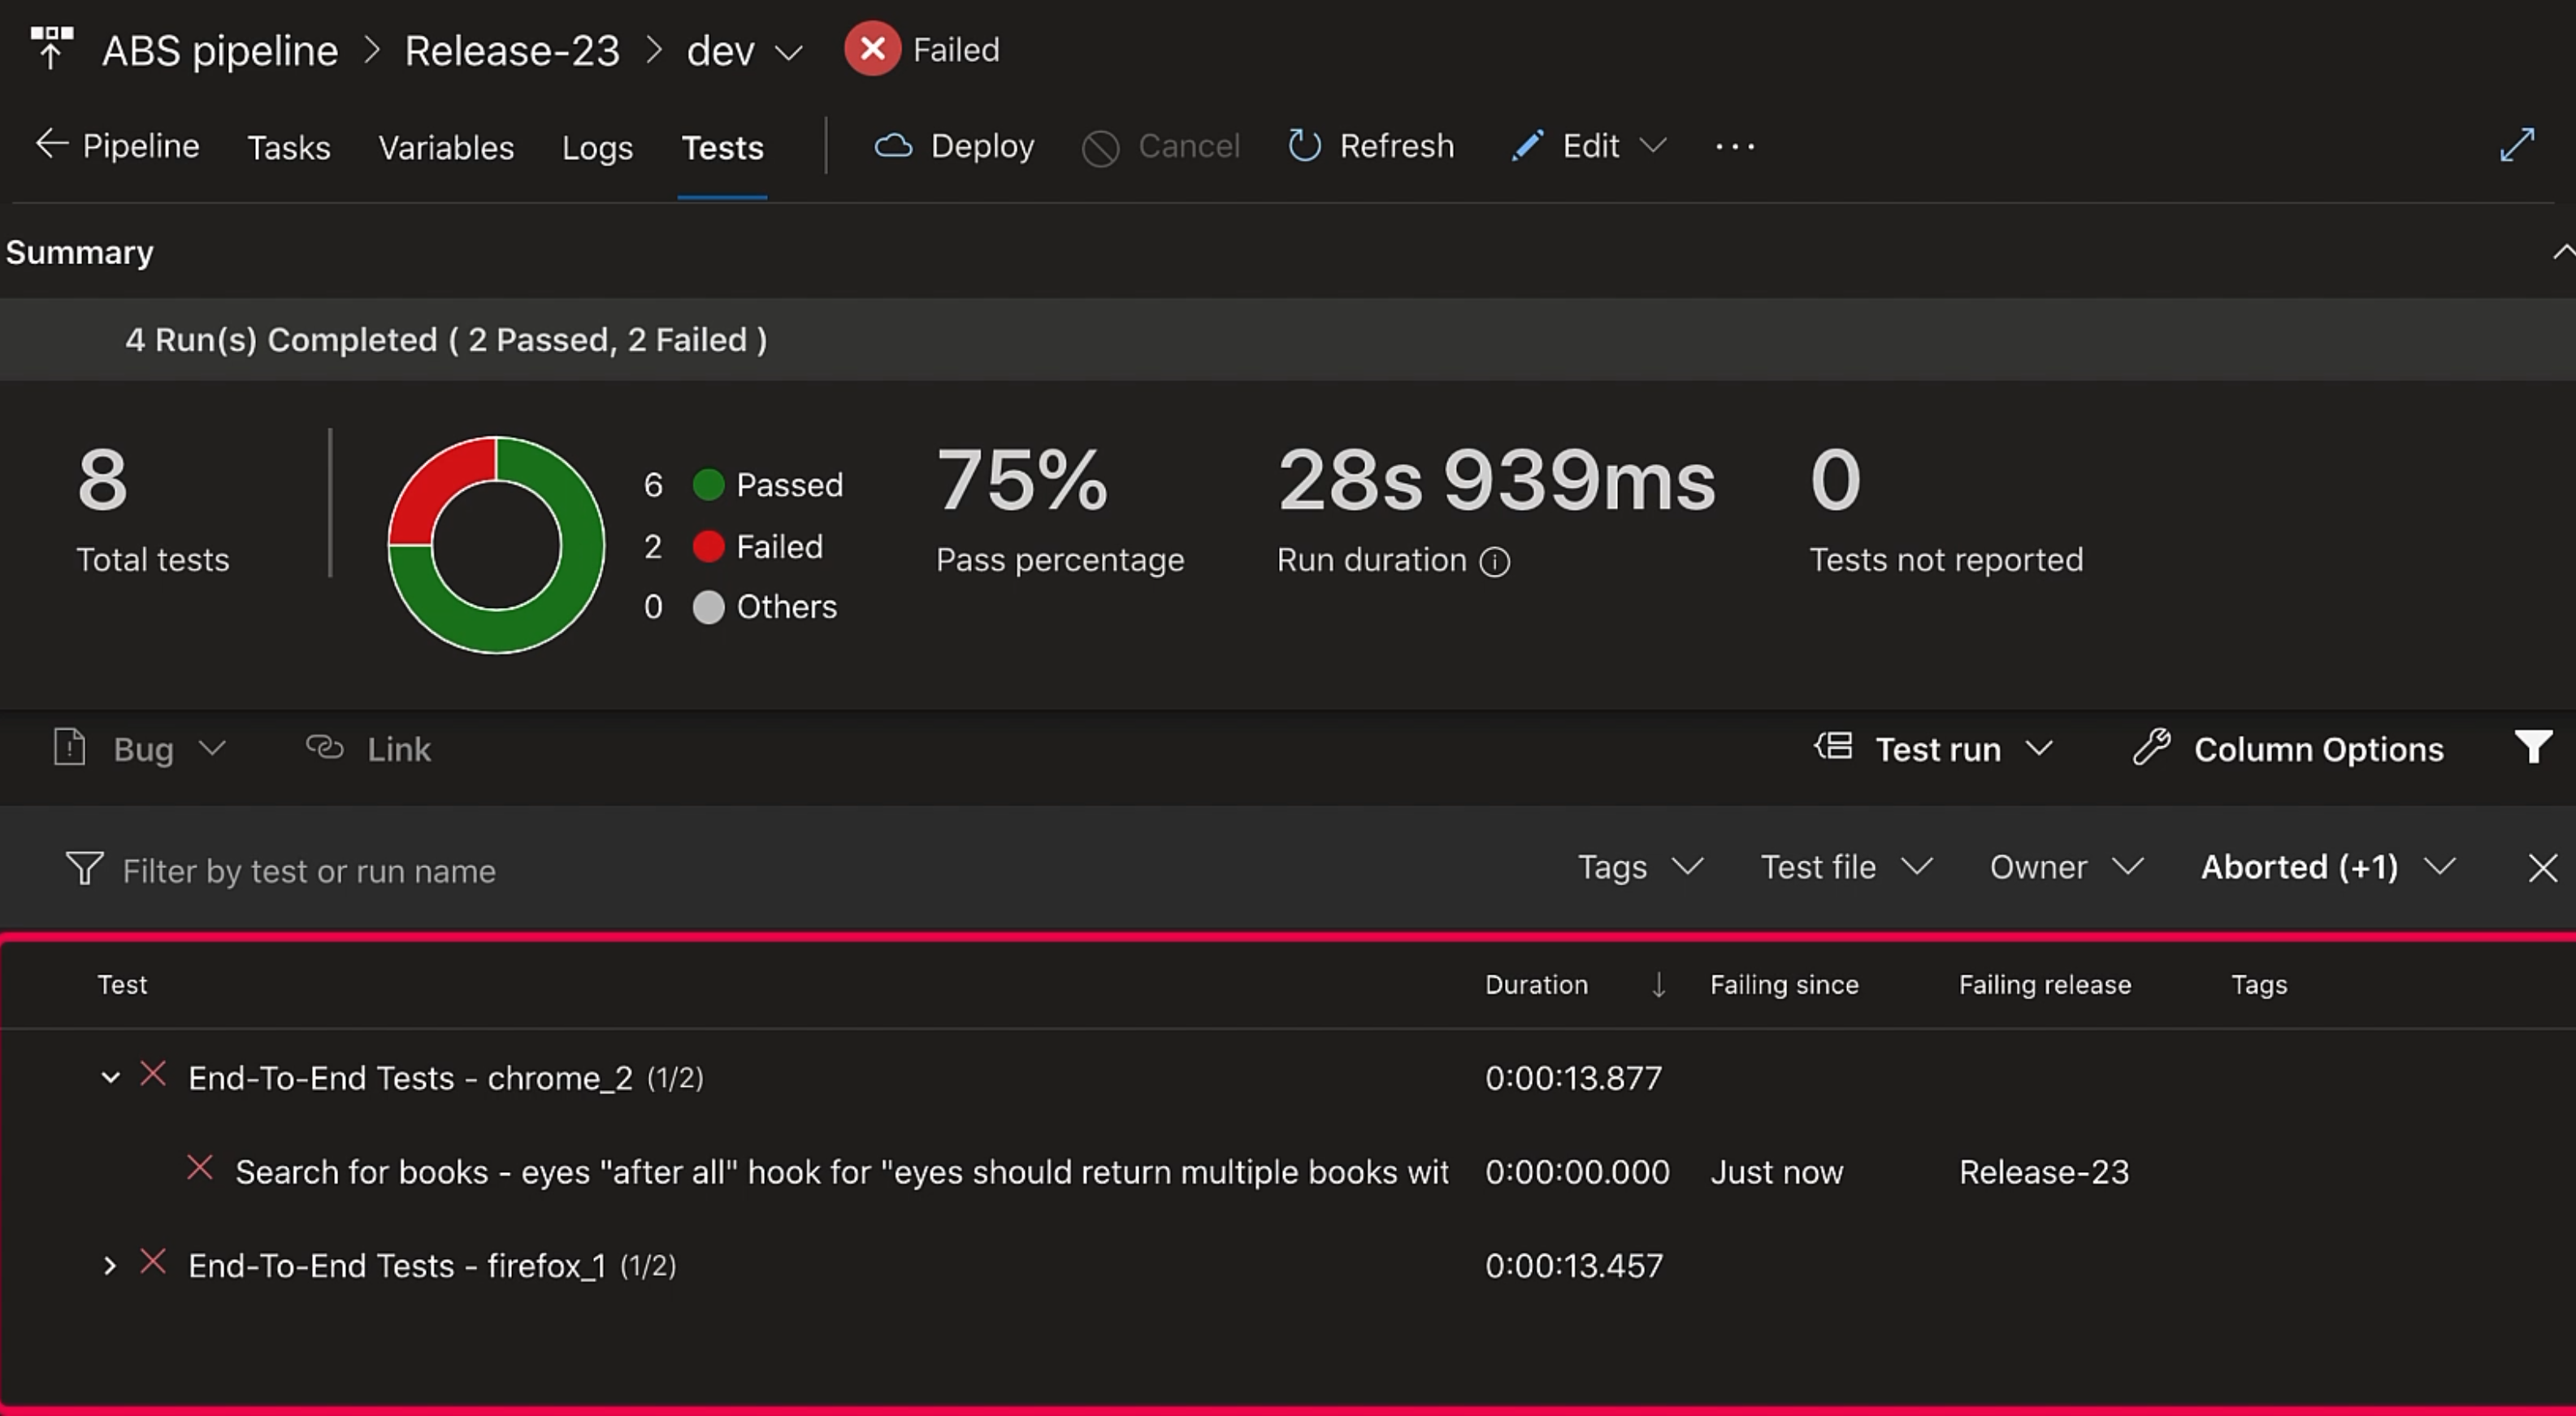
So, our pass percentage is 75%, and the failed tests show up here in red.
If we click on it for details, it shows "Failing since" - ours is failing since just now.
Then, here we have the "Error message" and the "Stack trace".

These would greatly help in investigating the cause.
Now, failing tests usually call for retries.
There are a few ways we can retry or rerun our failed test.
If we figured out that there is a code change needed, either in our test project or in the application code, then we can update the code, and the build and release pipeline would auto trigger, and our test would rerun.
But, if we believe that there was an issue with the system or the third party service and our code needs no change, then we can simply run our pipeline again.
Here, we can either rerun an existing build release or create a new build release.
Then, if after all the retries, we are sure that it's a bug, we can create a bug right from here using this "Bug" option.
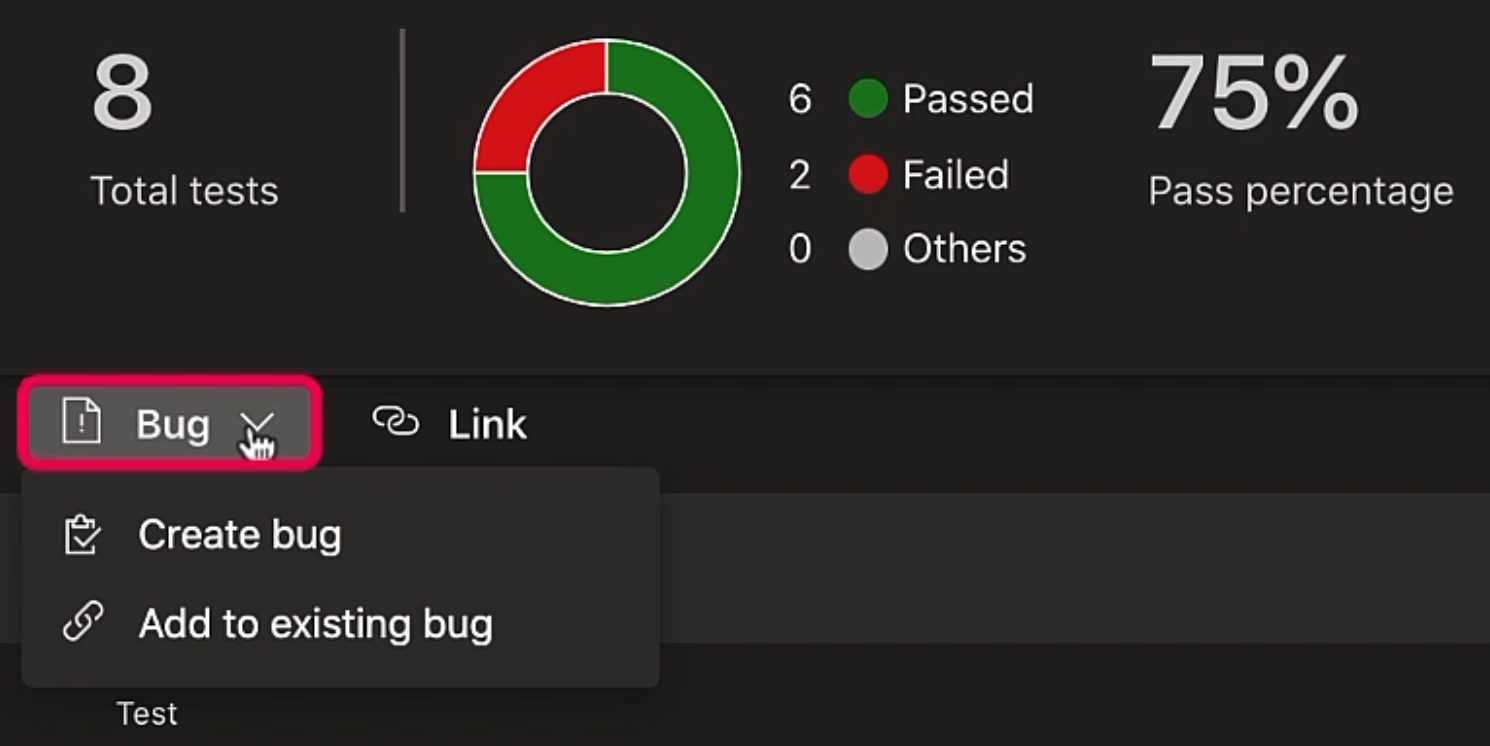
We can choose either "Create bug" or "Add to existing bug".
We'll go ahead and create a new bug.
The basic details have been added here for us.
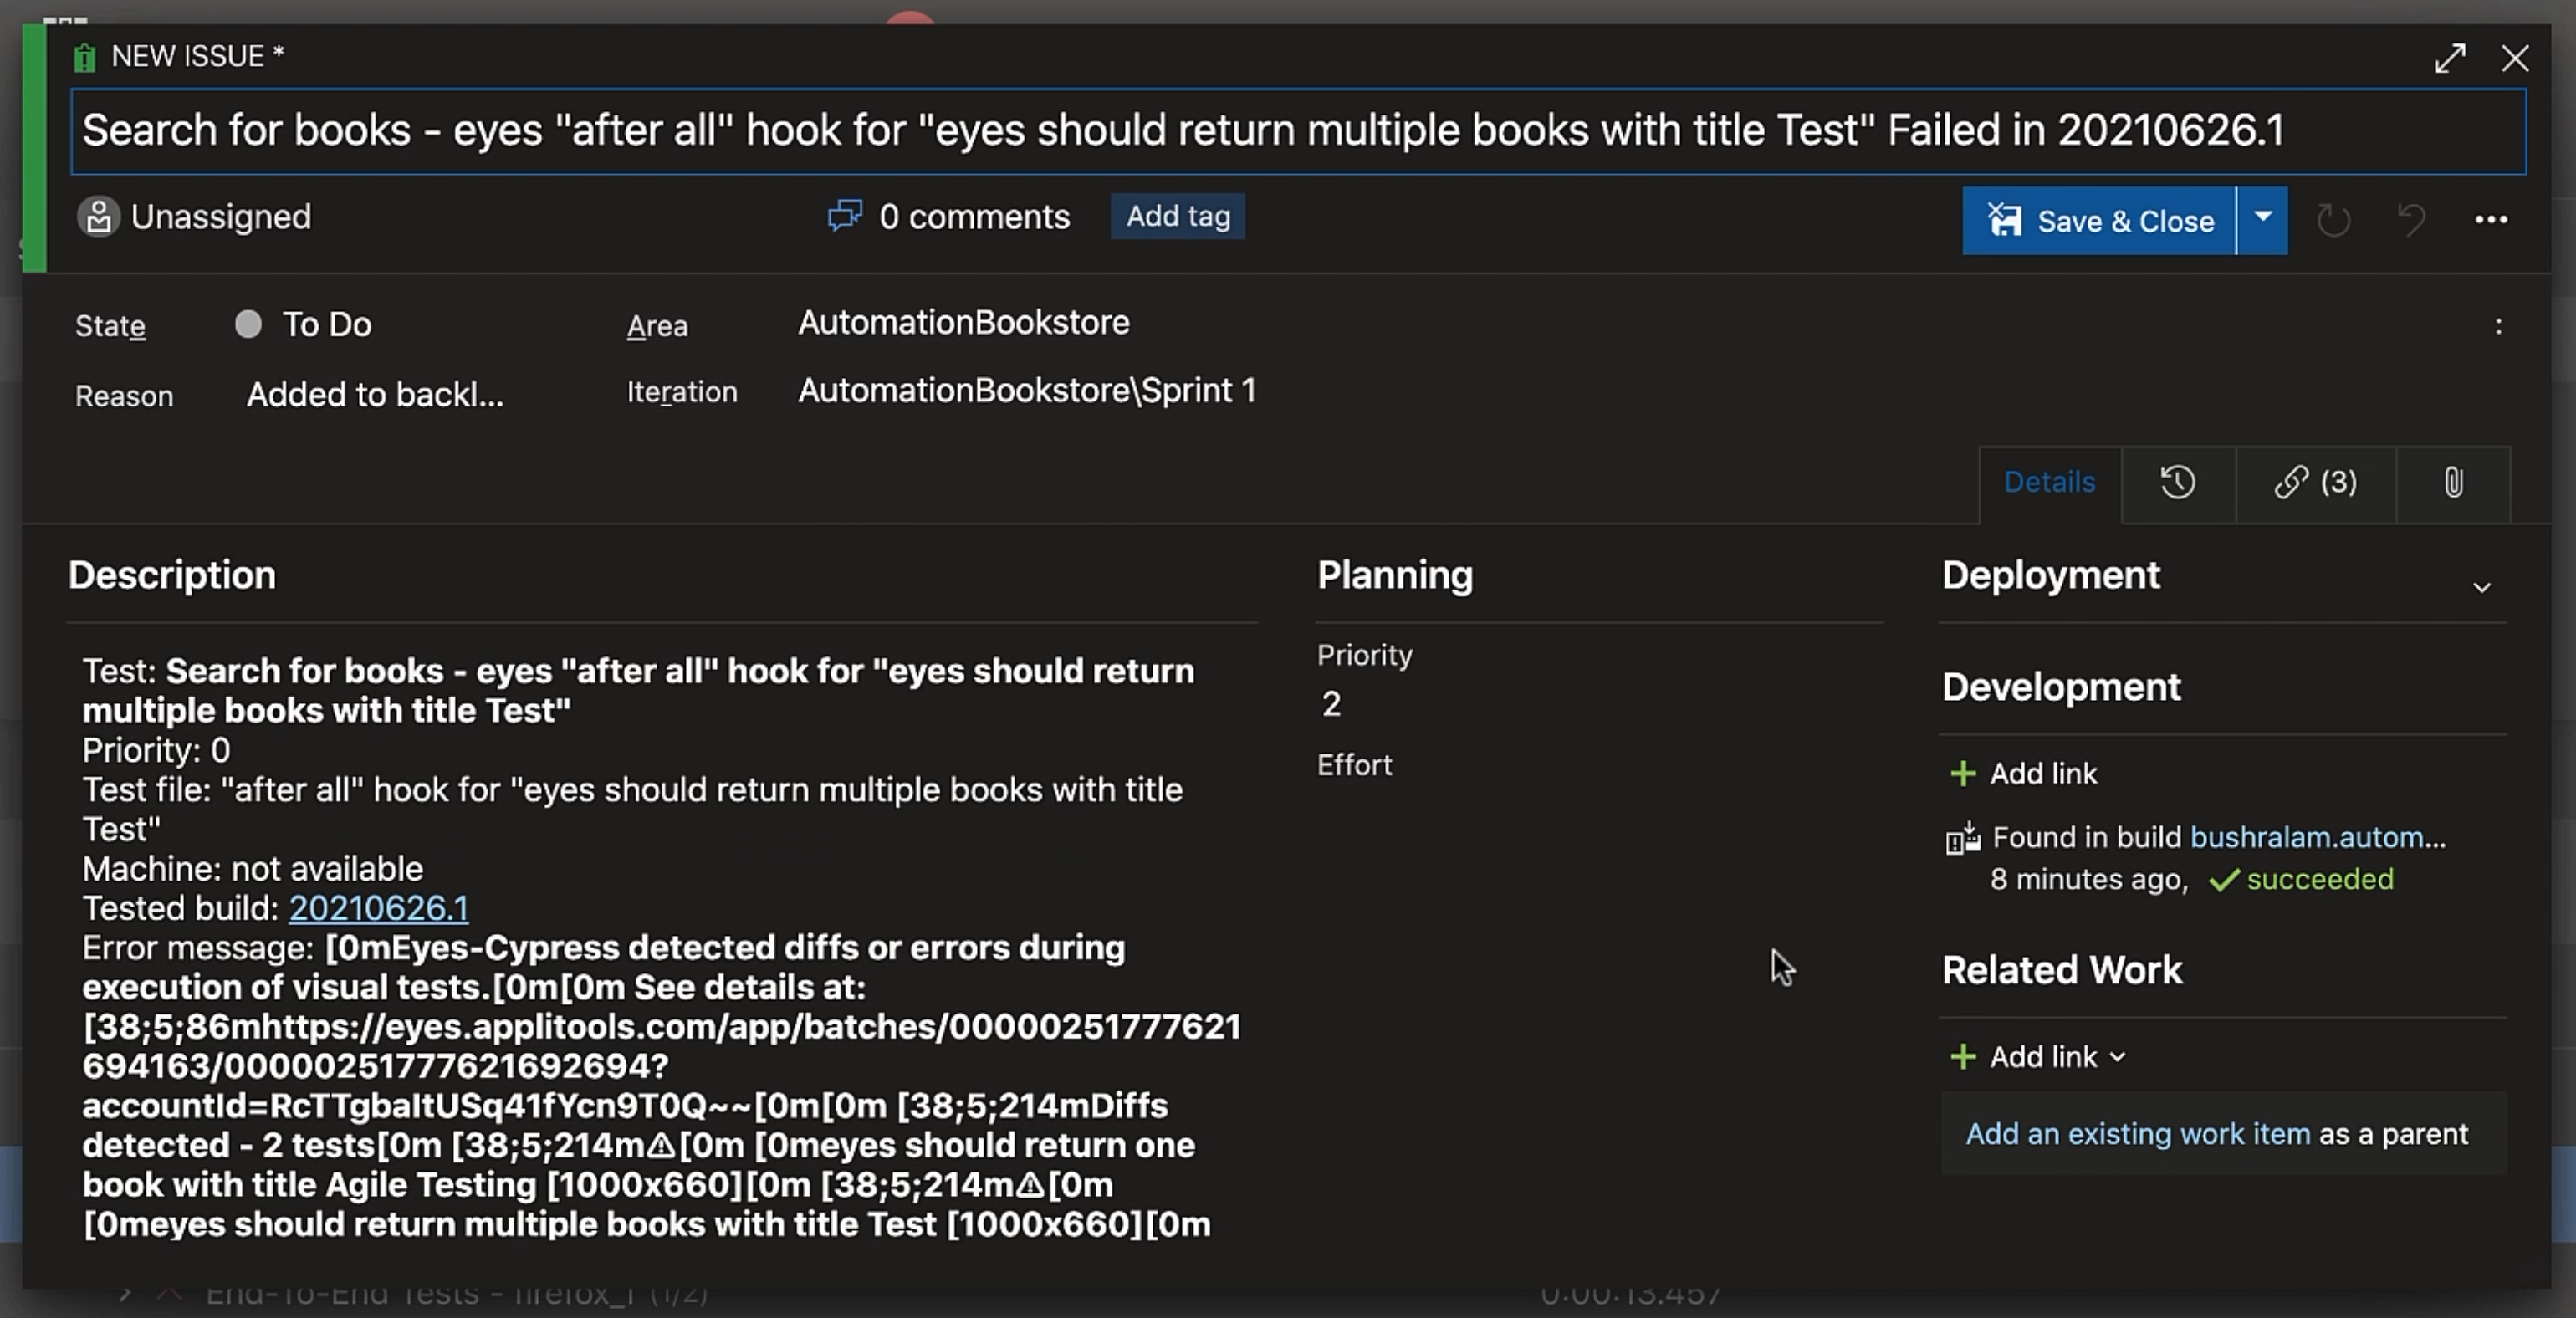
We can update or add more "Details", and the link to test results file is also available.
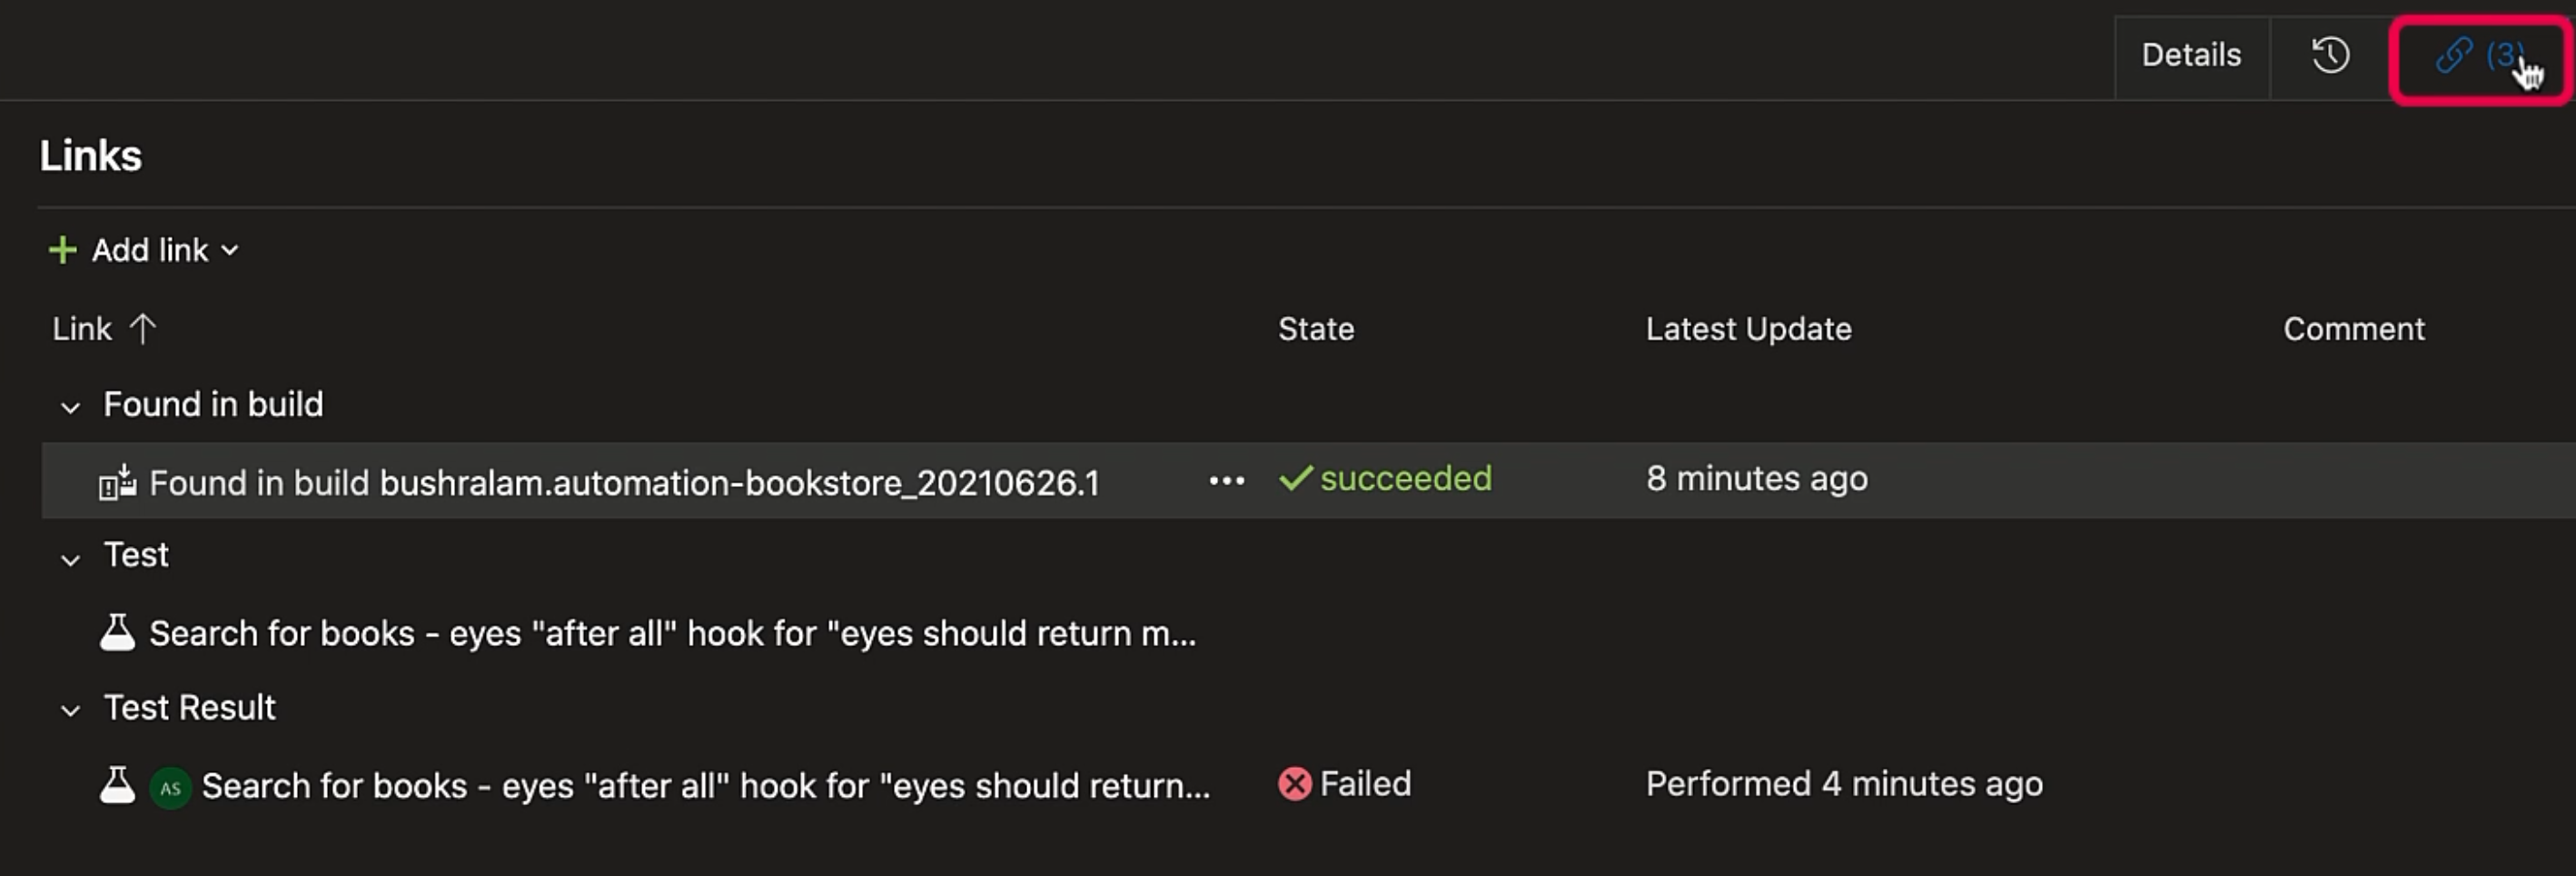
We can also add "Attachments", so like we were downloading our videos, we can attach them here.
We could also assign it to someone in our team, add tags, and all that stuff.
For now, we'll go ahead and save and close it.
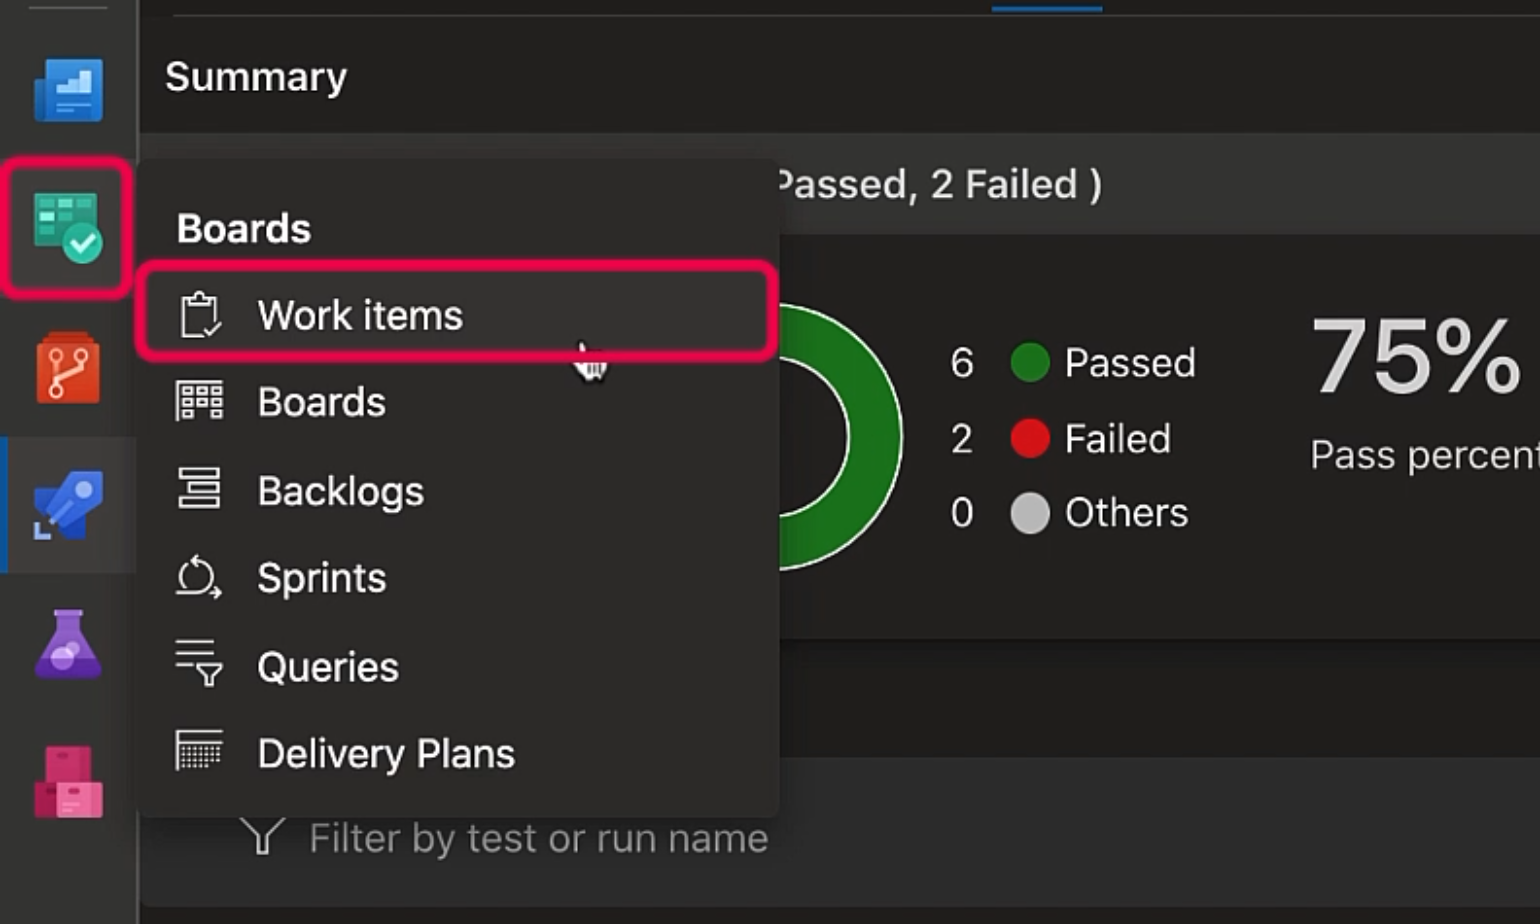
So, a bug has been created and we can go have a look at it in "Work items" under "Boards".
Now, there could be a case when after all the retries we find that our failing test is flaky.
What would we do then?
Well, thankfully, Azure DevOps has a mechanism to handle flaky tests.
If you go to our "Project Settings", then "Test management" under "Pipelines", "Flaky test detection" is enabled.

We can either use Azure Pipelines detection for flaky tests or integrate our own detection system.
Down here - "Flaky tests included in test pass percentage" - we can uncheck it to prevent pipeline failures due to flaky tests.
We can also "Allow users to manually mark/unmark flaky test" - let's enable this option.
We'll go back to our test results, and here, let's refresh it.
Now, we see a "Flaky" option here.
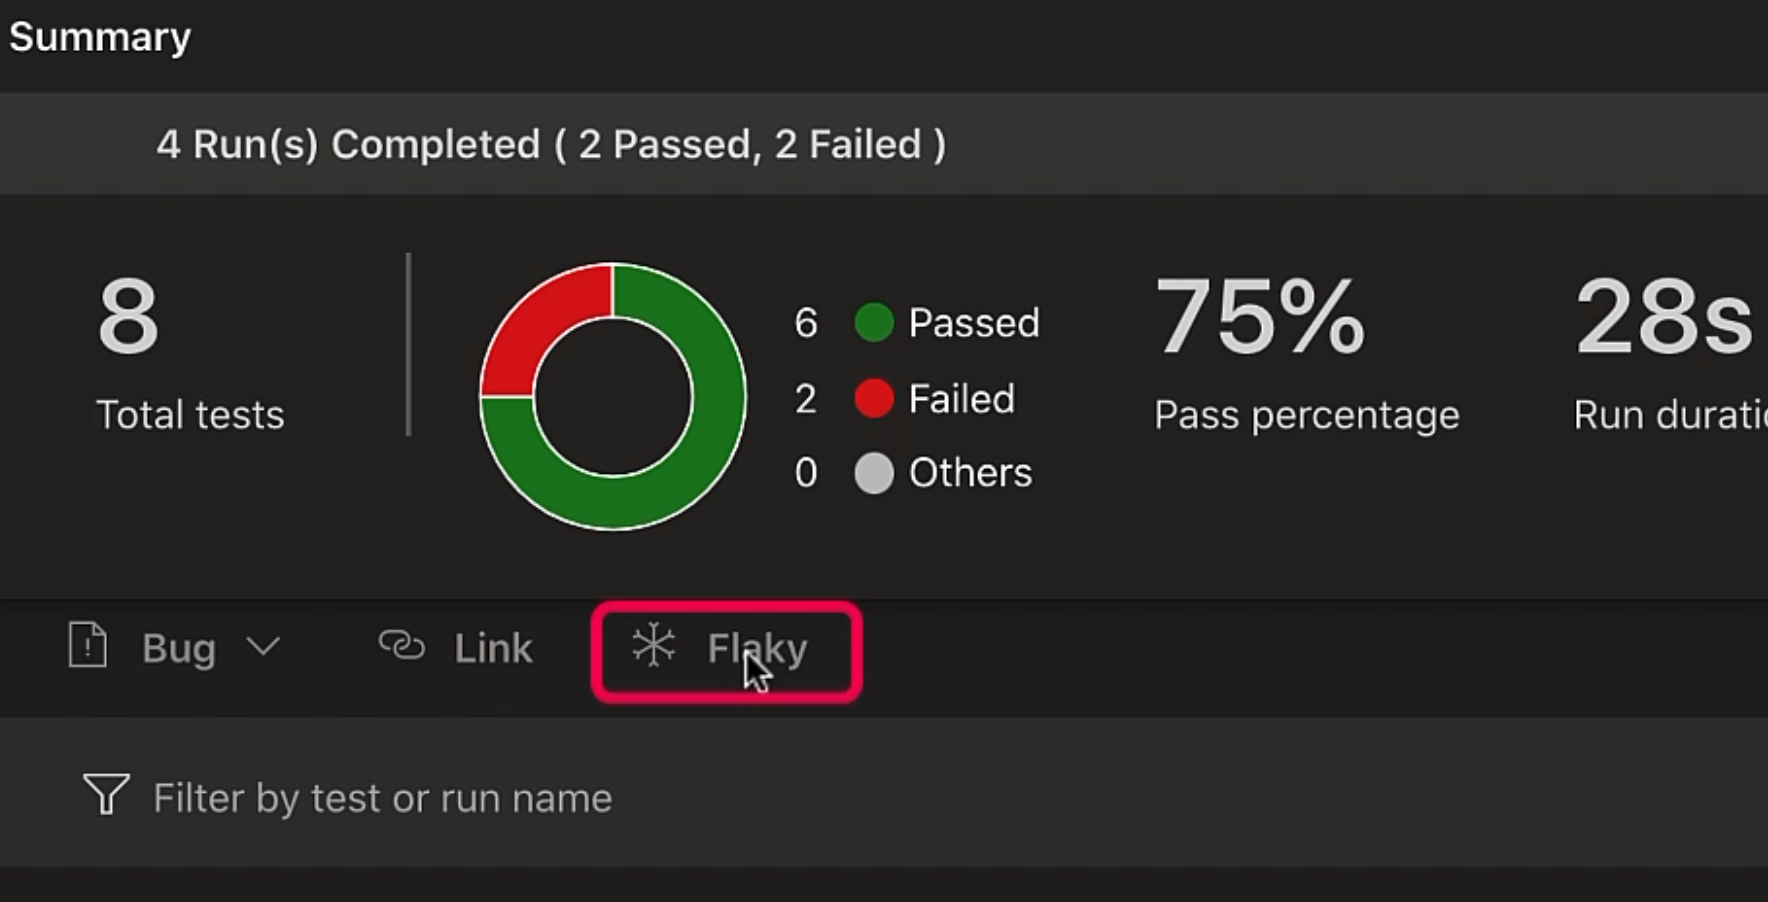
We can select our test, and mark it as "Flaky".
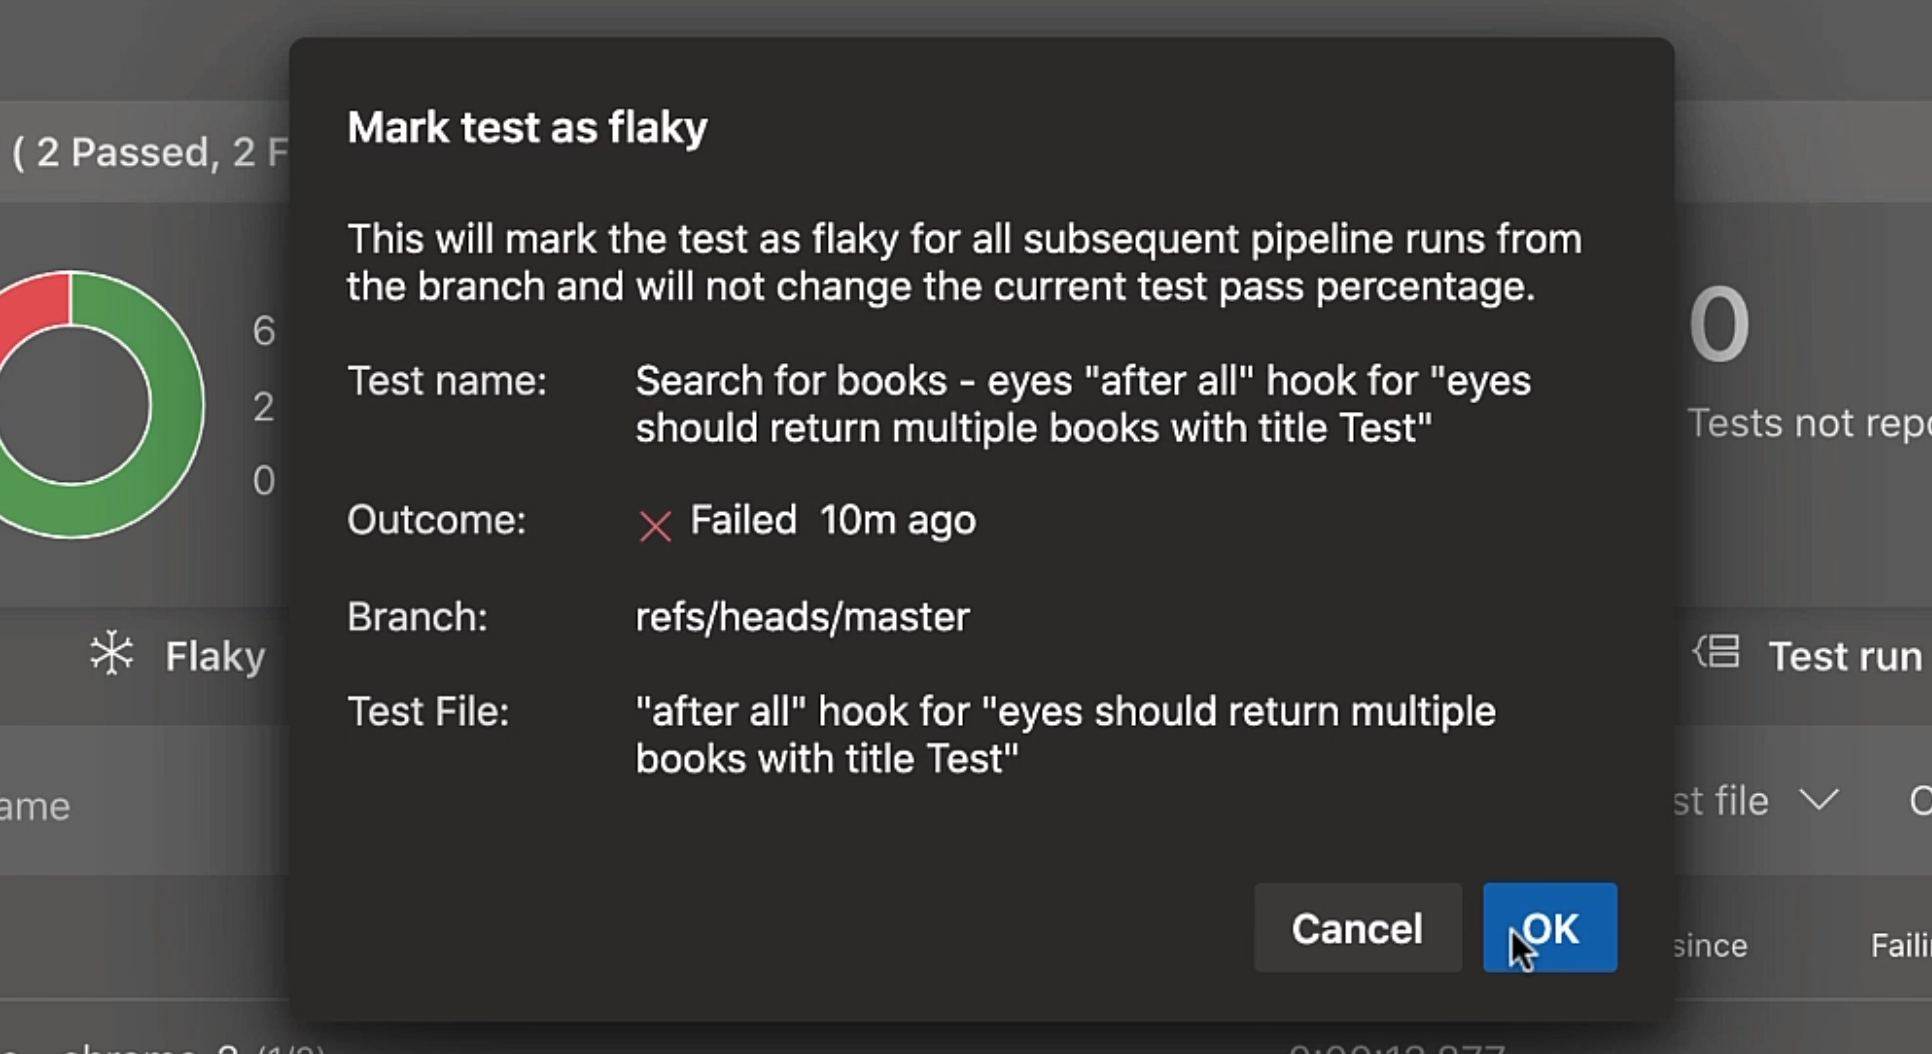
Now, in the future runs, flaky settings will be evaluated.
Tests marked as flaky have a marked flaky tag.
All right, so I hope this chapter helps you in managing failing tests better.
