

Transcripted Summary
In this chapter, we'll explore how to share steps.
So, we have added and configured all of these steps for having our tests run in the pipeline, but we have done this for a single pipeline, within a single stage.
Our pipeline may have multiple stages for dev, QA, and so on, so we'll have to repeat adding and configuring all of these steps again.
Then we can have multiple projects and multiple pipelines and we'll have to do this over and over again.
It's such a waste of time and effort.
The solution is to use task groups if you are using the classic editor or templates if you are working with YAML.
In this chapter, we'll be learning about task groups.
If we have a sequence of tasks that we have already defined in the build or release pipeline, then we can group them together into a task group, which is nothing but a single reusable task.
Now, this single reusable task, which is called a task group, can be added to build or release pipeline, just like any other task.
We can also extract the parameters from the task as configuration variables.
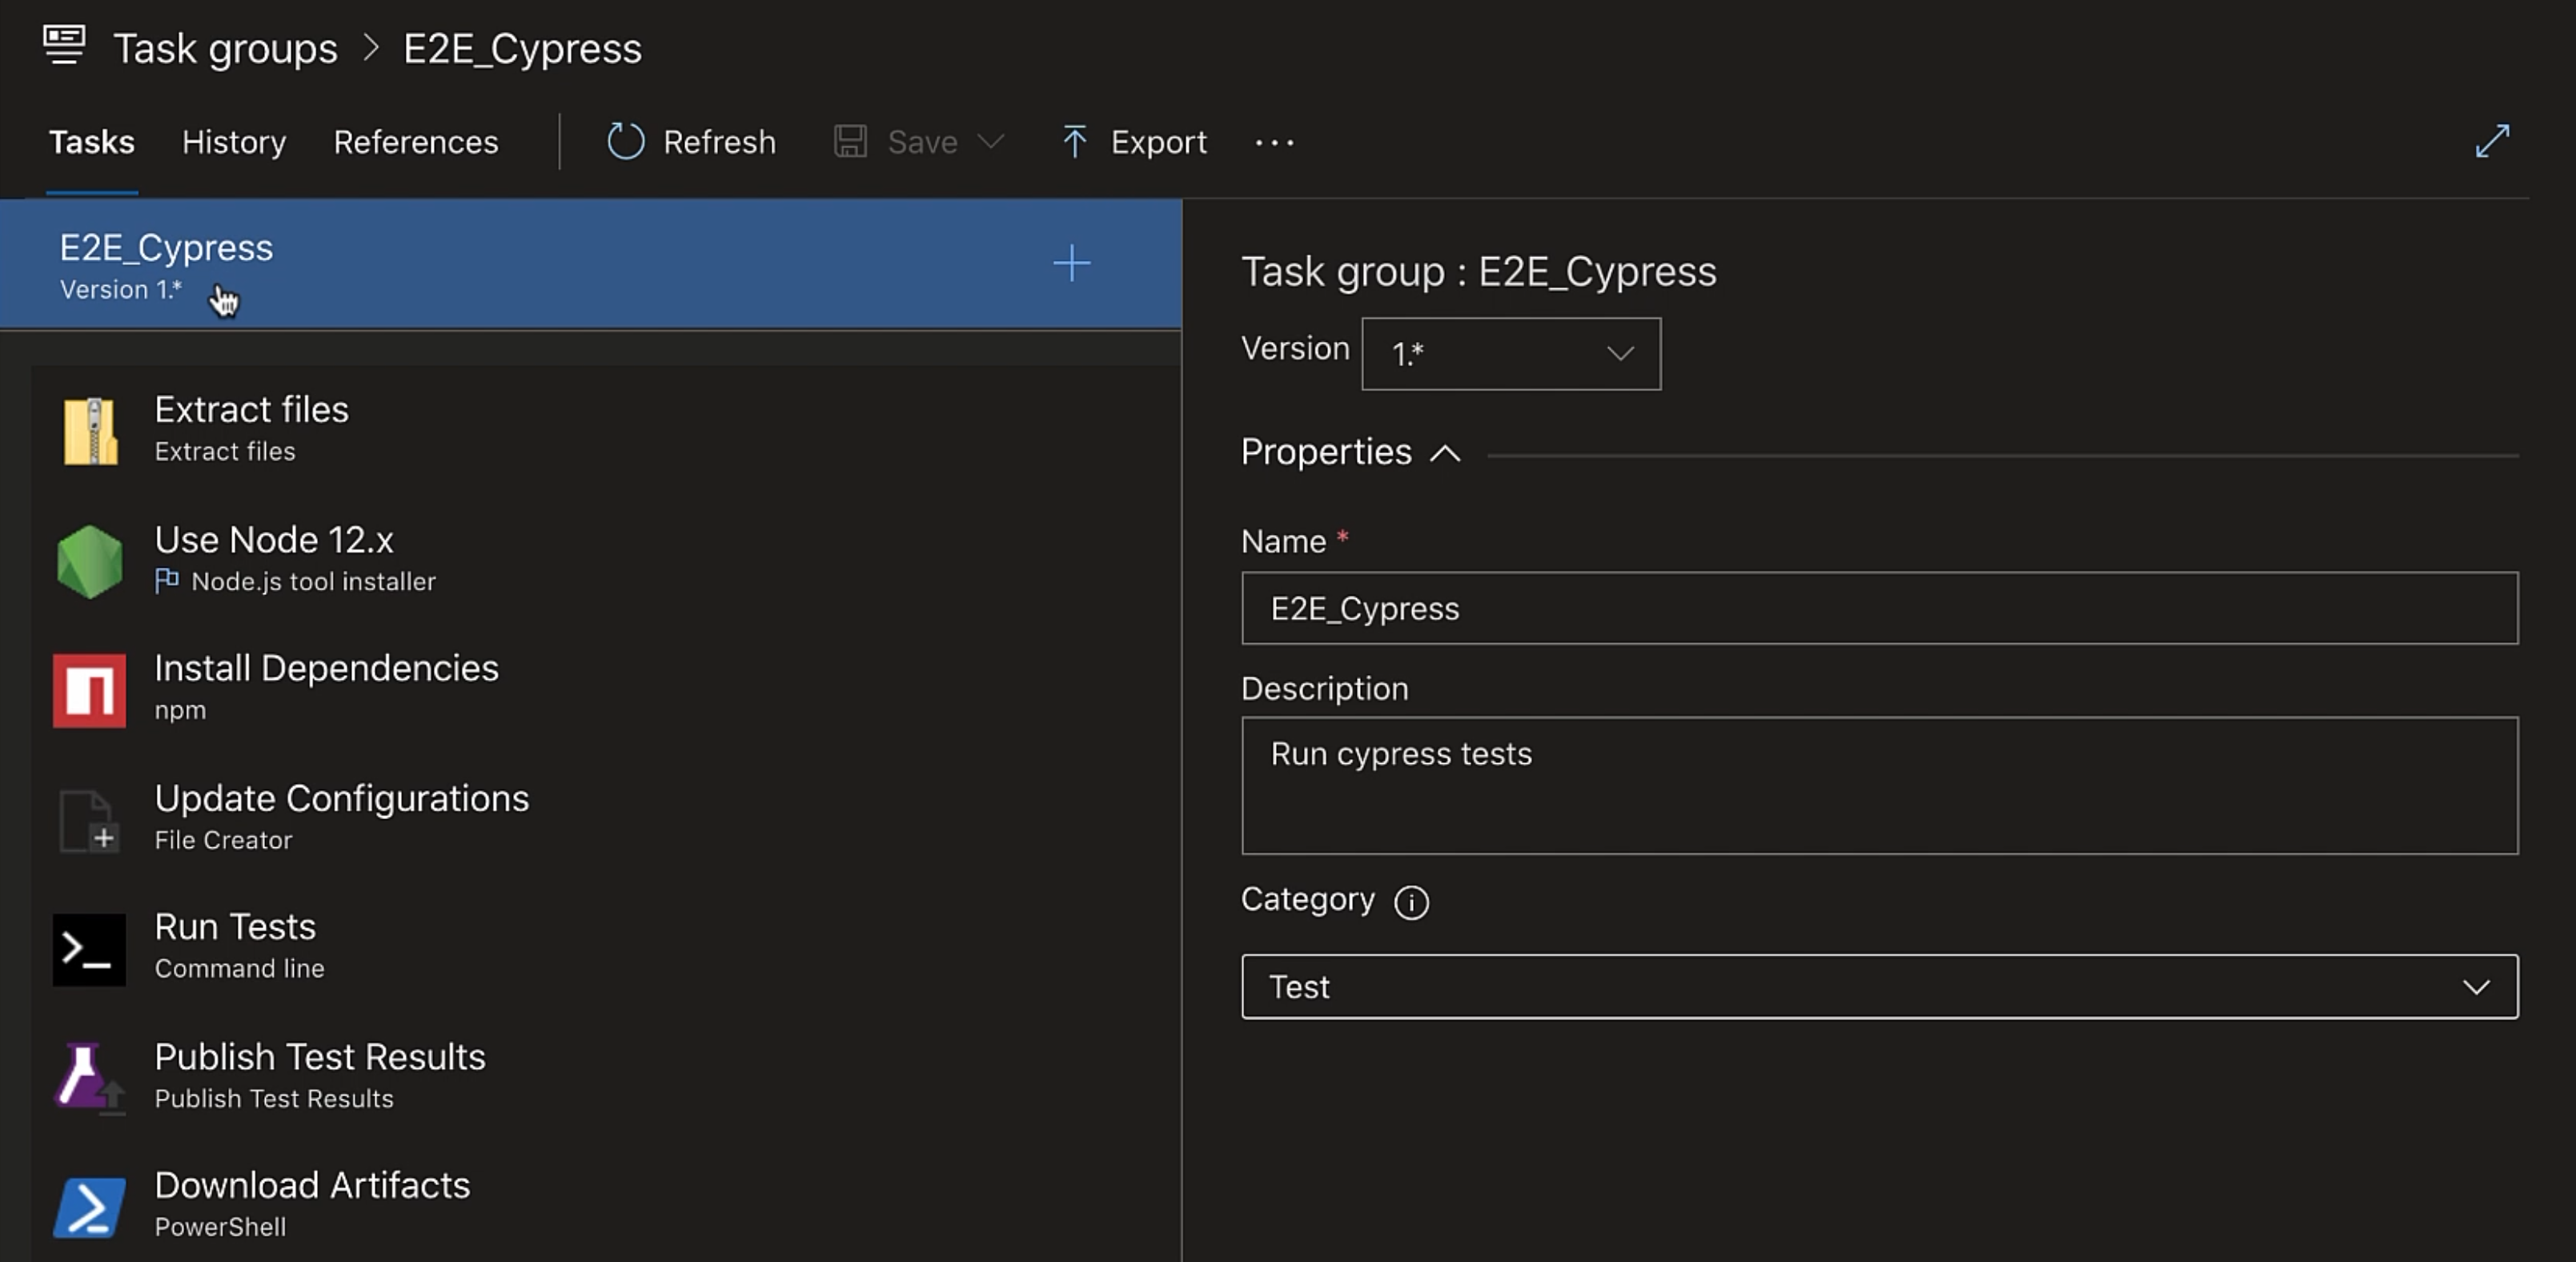
Let's create the task group containing all the tasks for running end-to-end tests in the pipeline.
I'll clone my stage so as not to disturb this one.
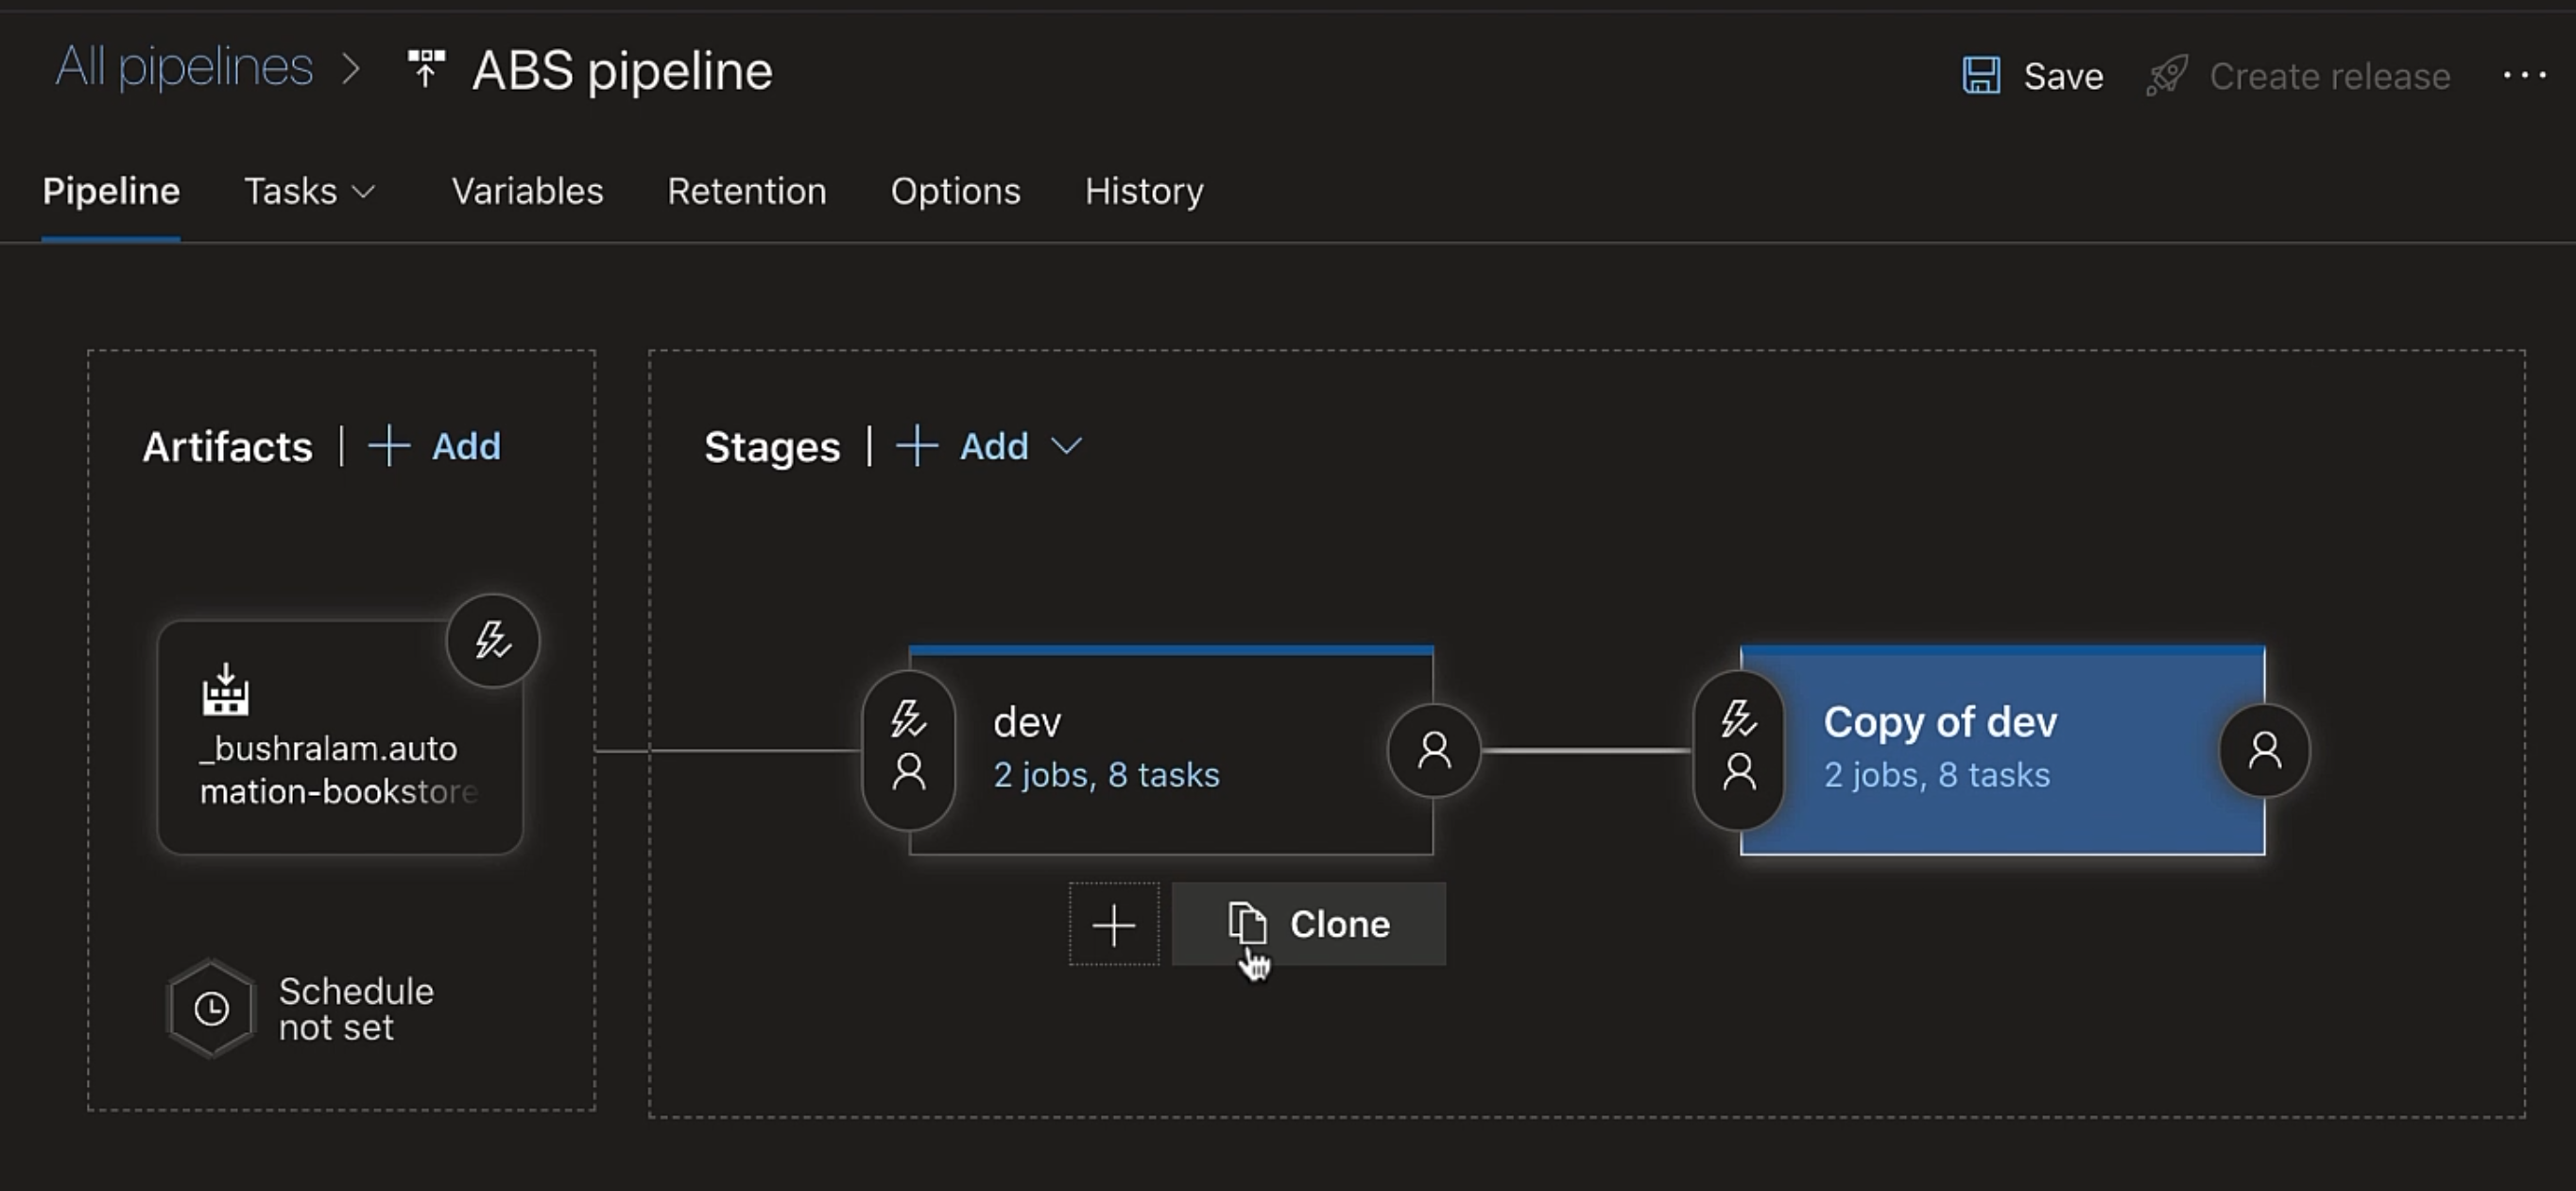
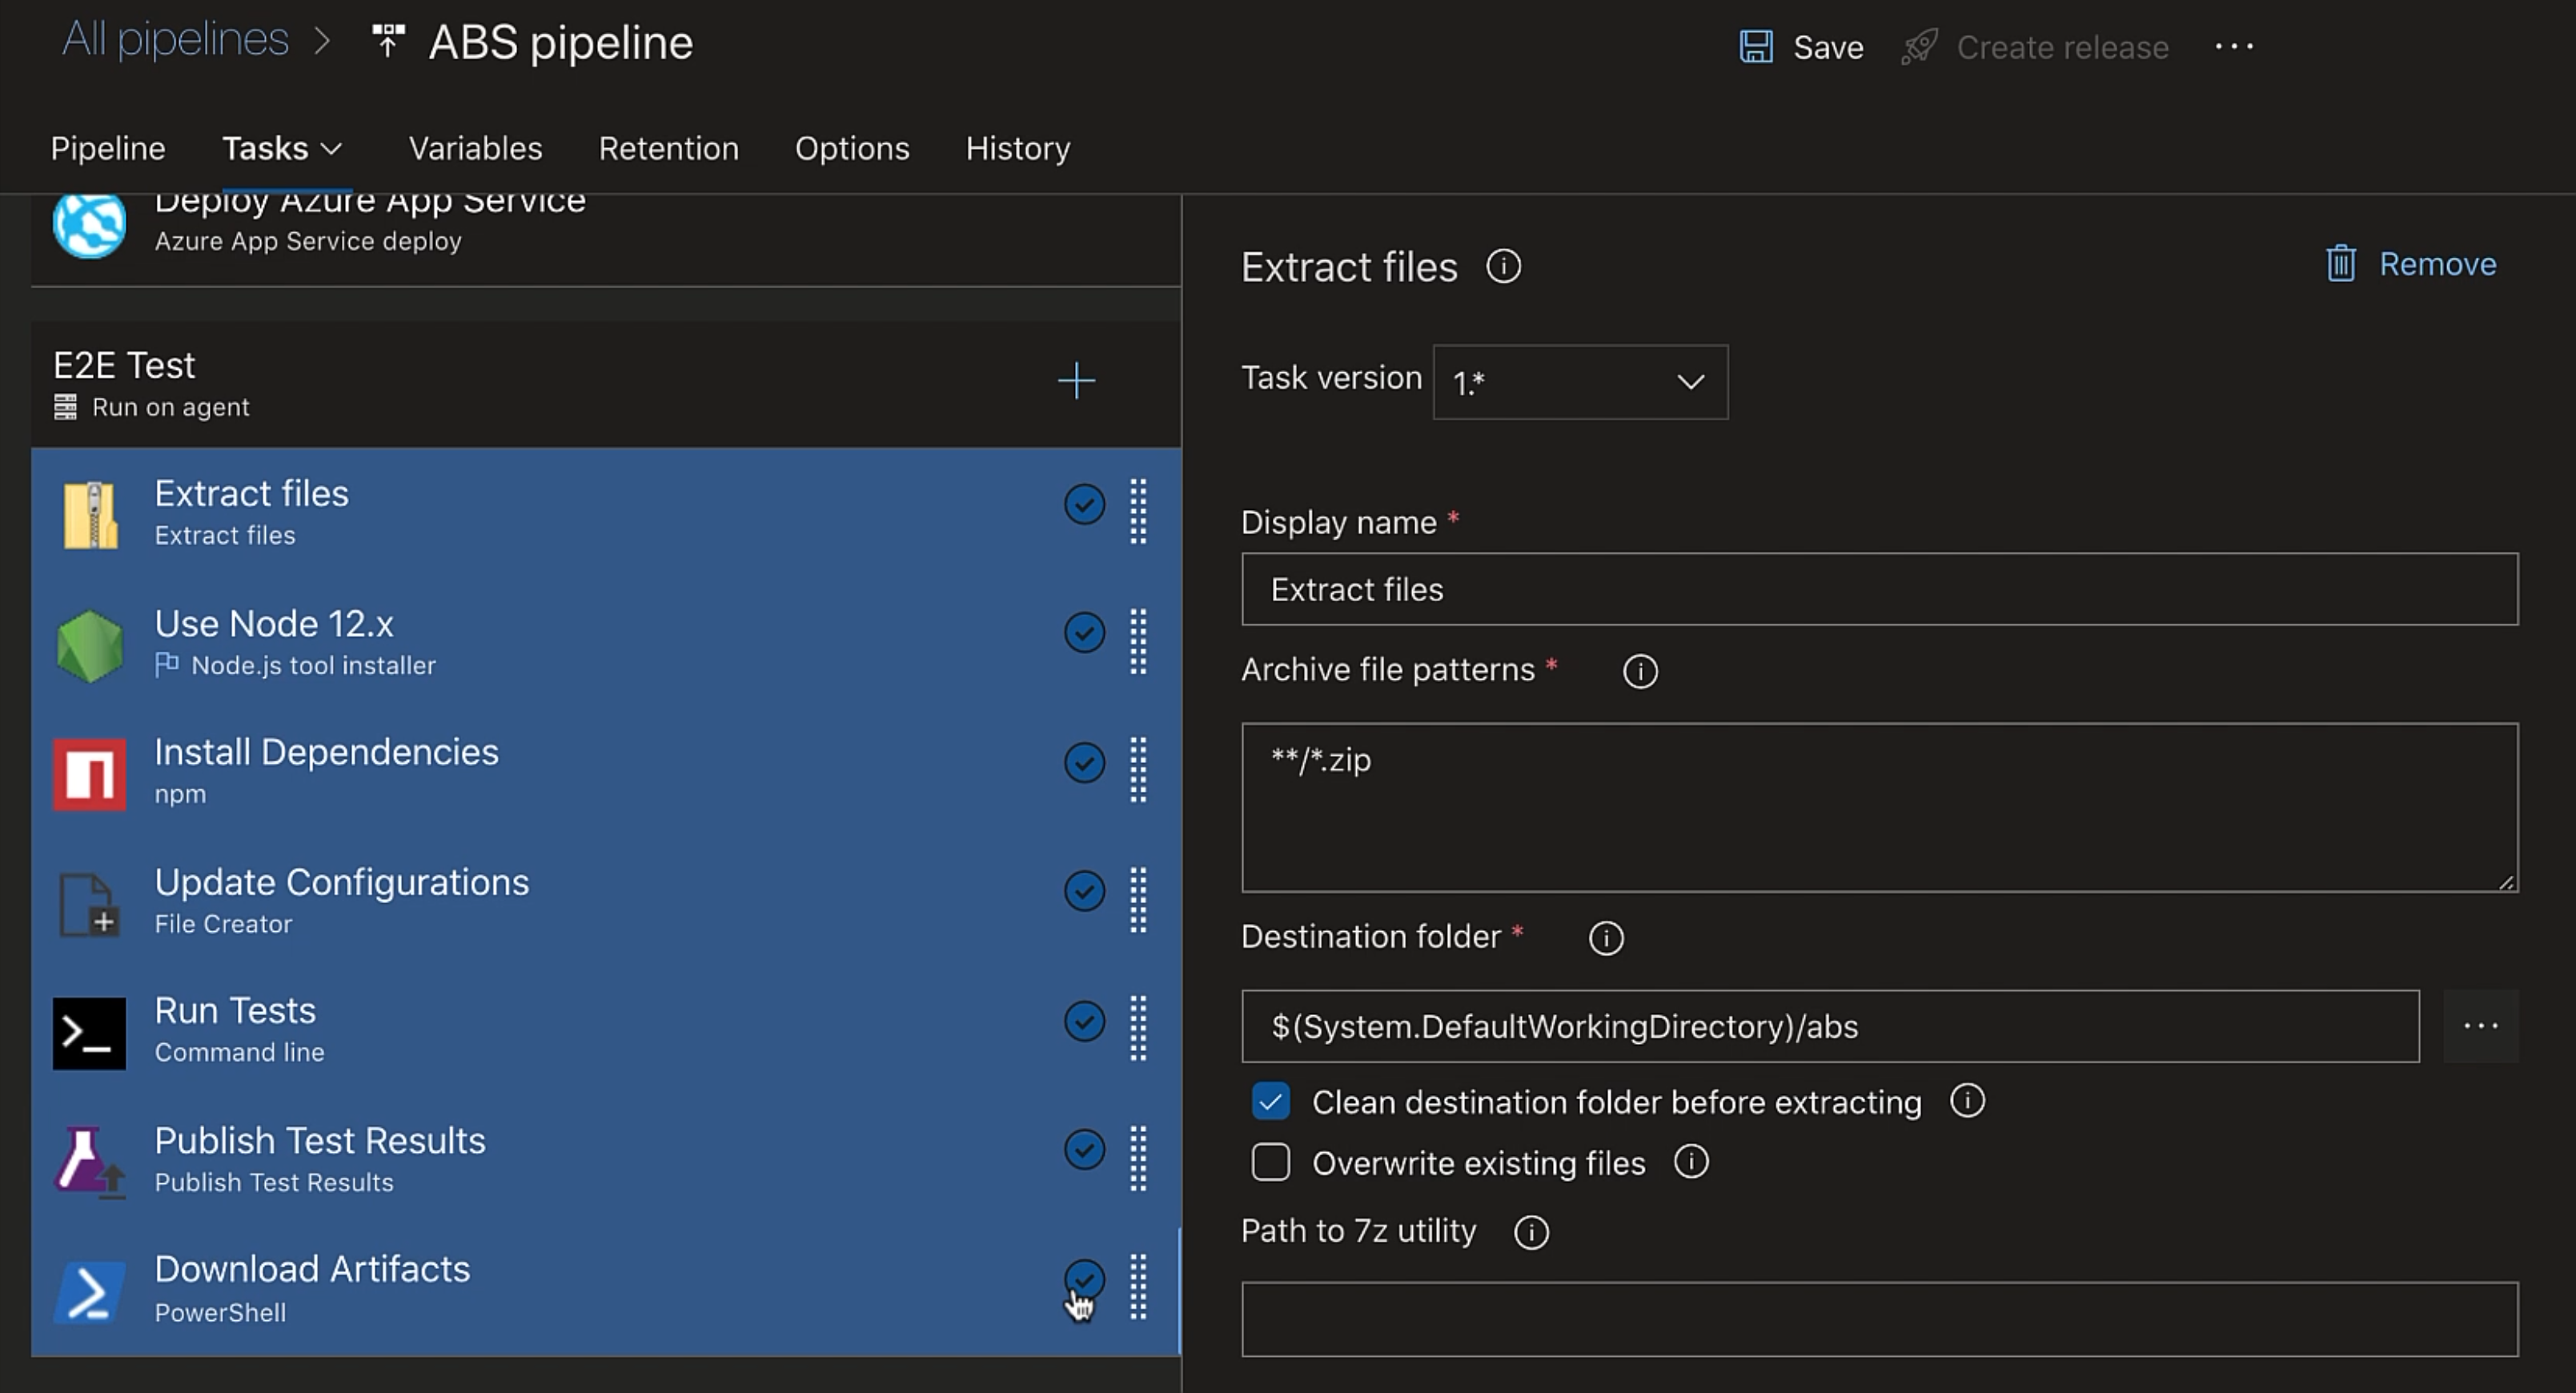
Now, we'll select all the tasks that we want to be part of our task group.
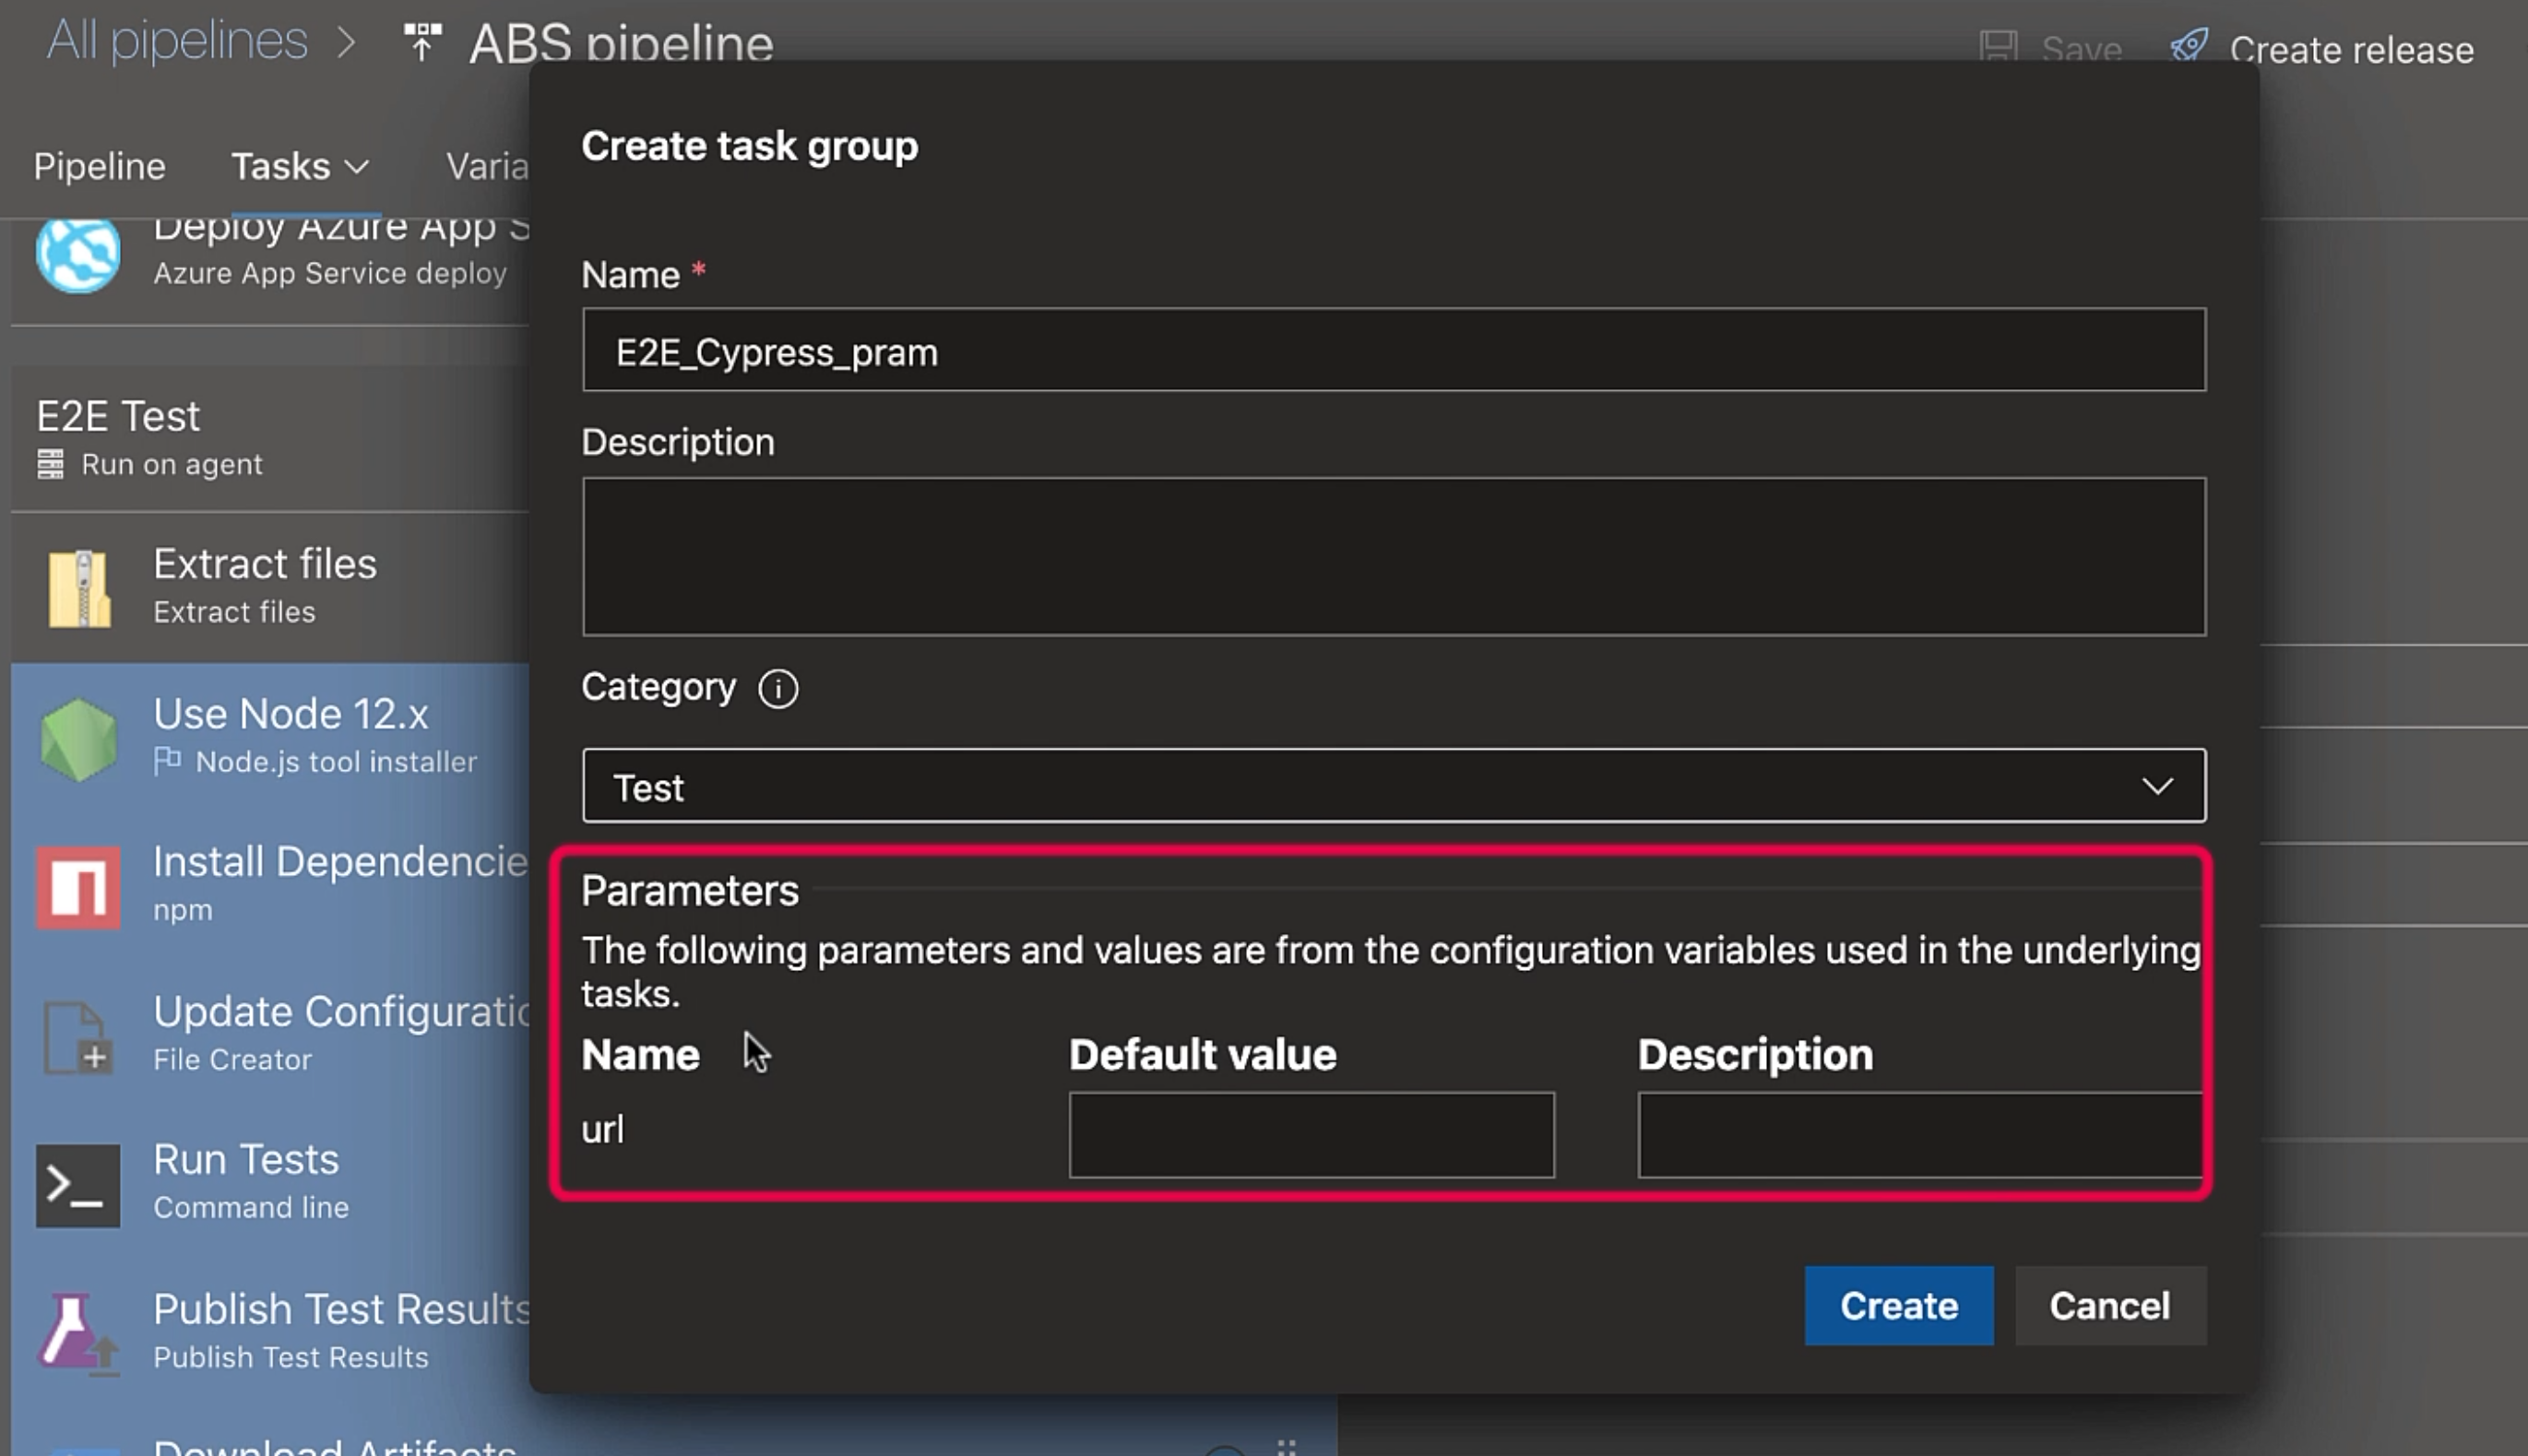
Now, we'll right-click and select "Create task group" and we'll give our task group a name.
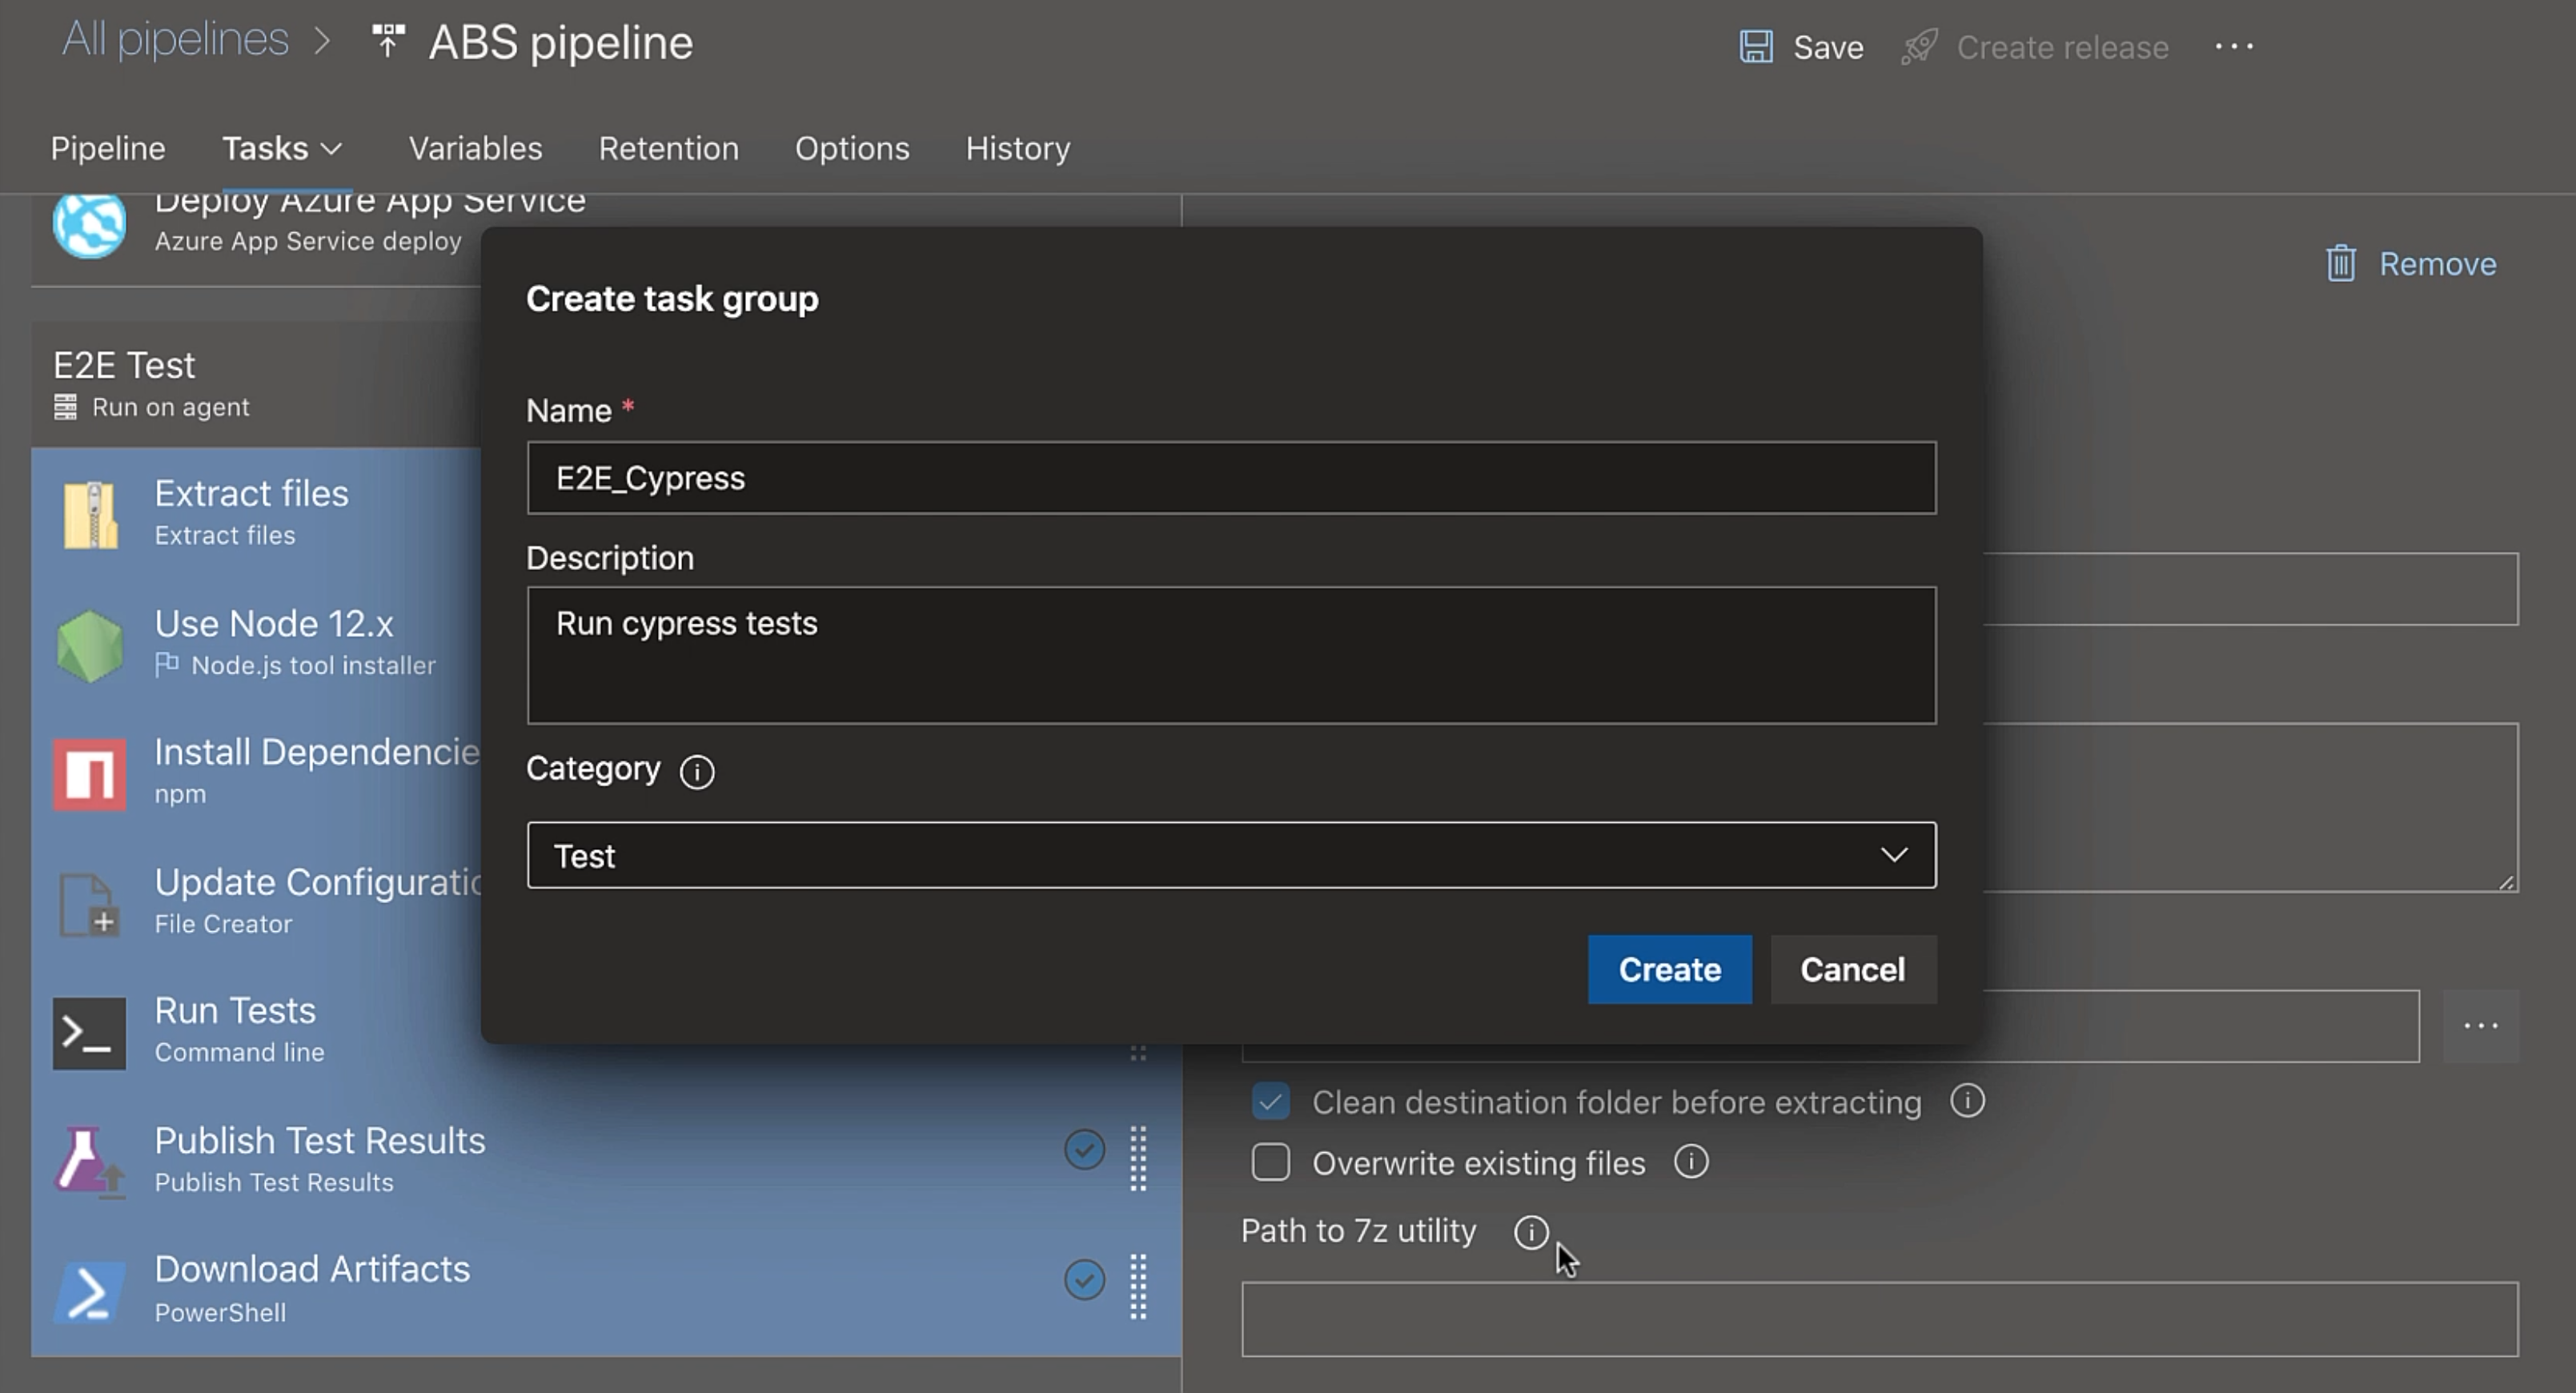
We can add a "Description", and we'll set the "Category" to "Test".
Then we'll hit "Create" to create a task group.
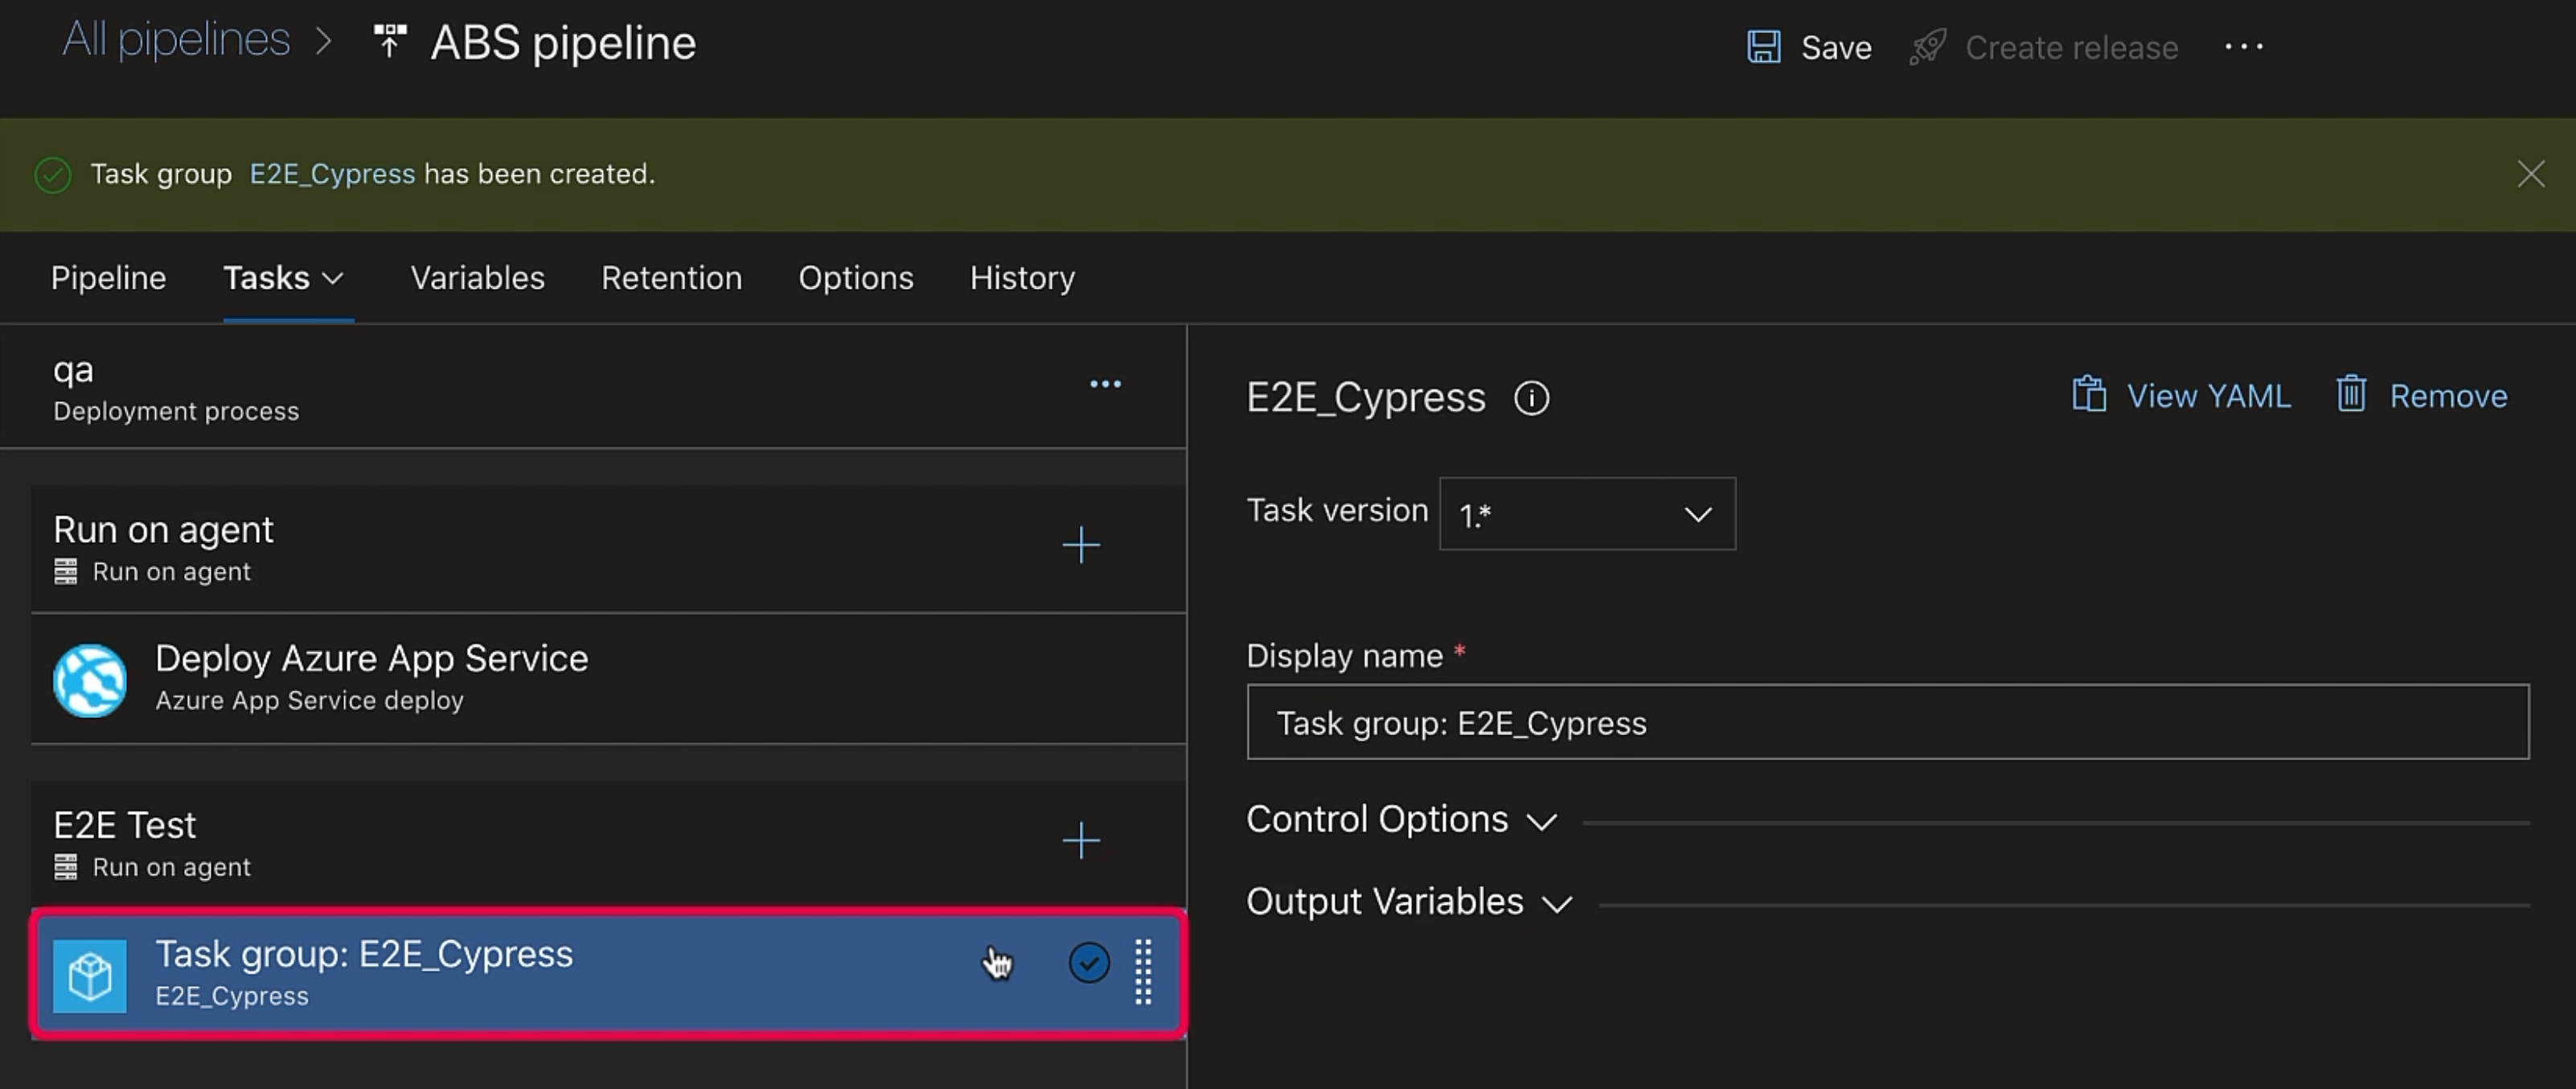
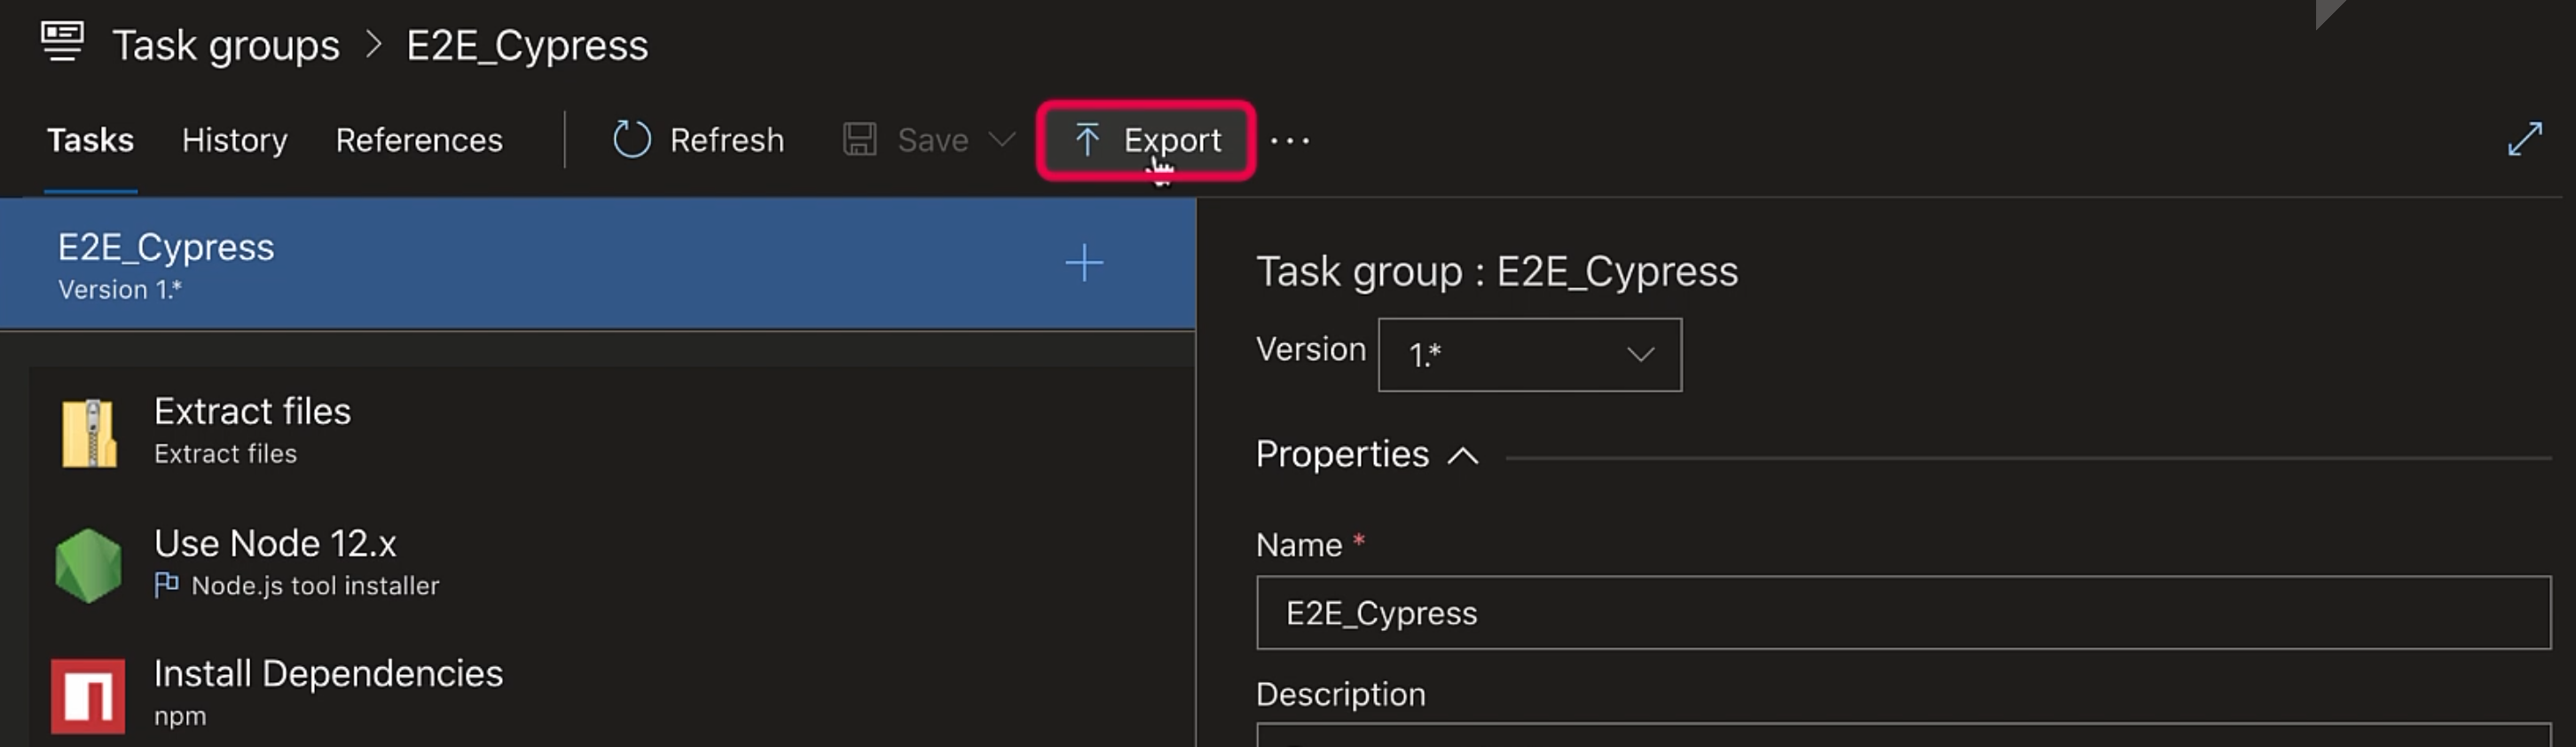
Our task group has been created, and here, all our tasks have been replaced by one single task - actually, the task group.
We'll save our stage, and now we'll go to our task group.
Under "Pipelines", we have "Task groups".
Here, we have our newly created task group.

We can click on it, and these are the tasks that are part of our task group.
We can make changes here as well and save it.
Now, we'll go back to our release pipeline, and we'll create a new stage.
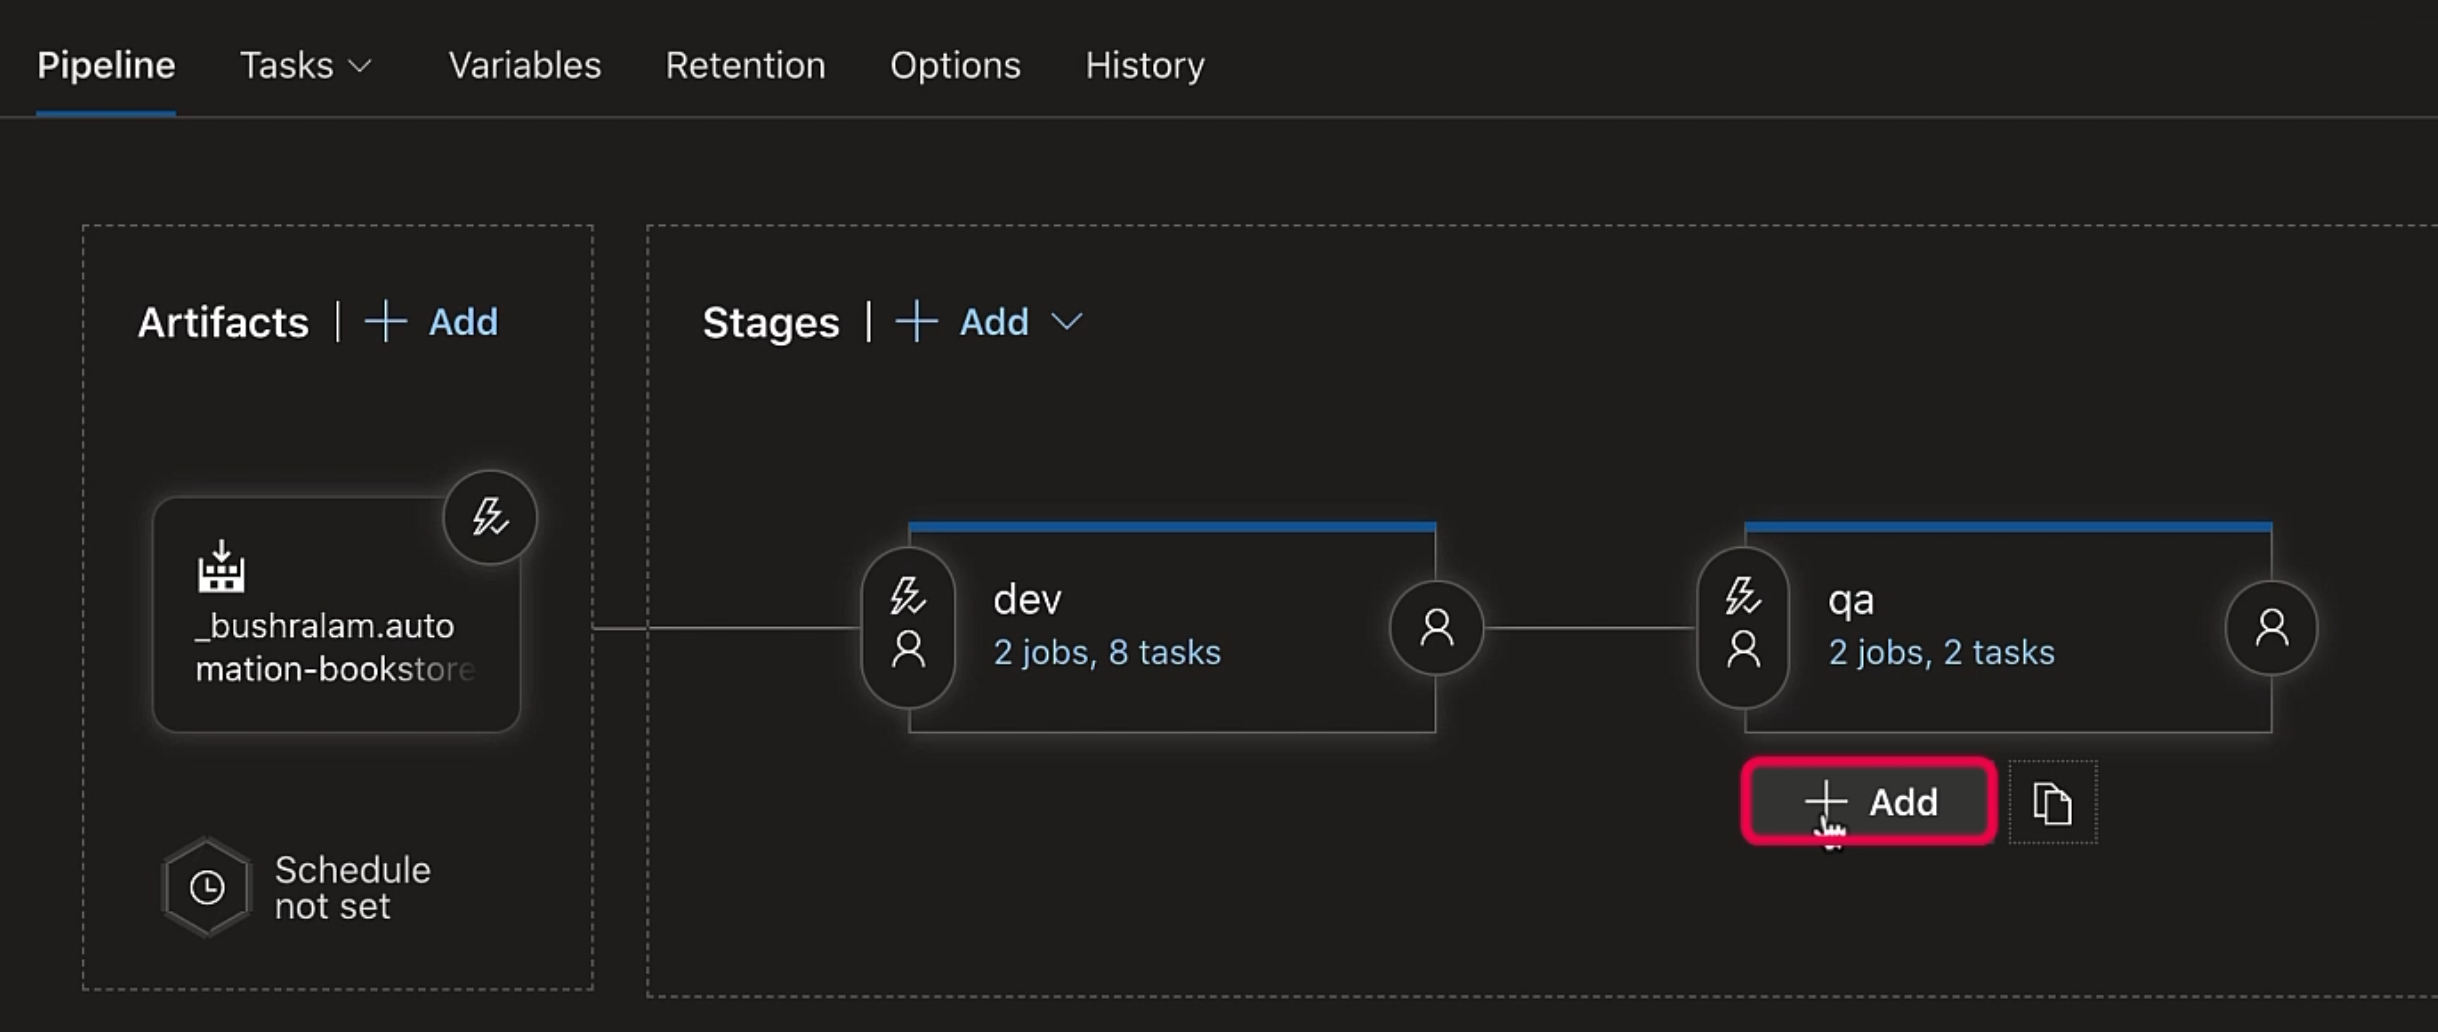
In this stage, we would like to add our task group.
We'll click on this "+" button, and we'll search for our task group.
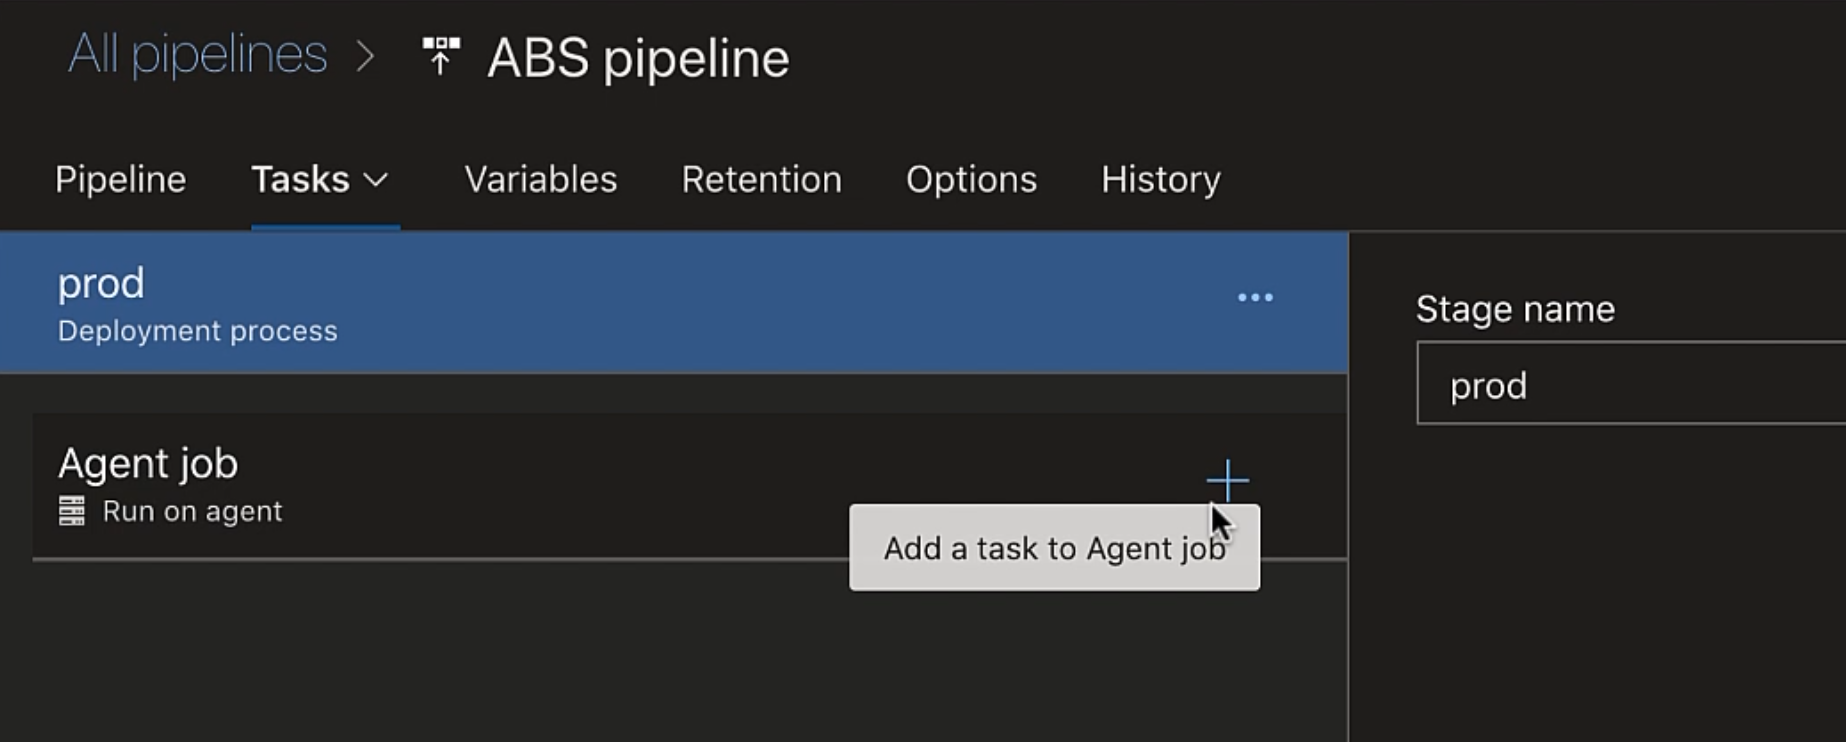
Here, our task group is listed just like any other task.
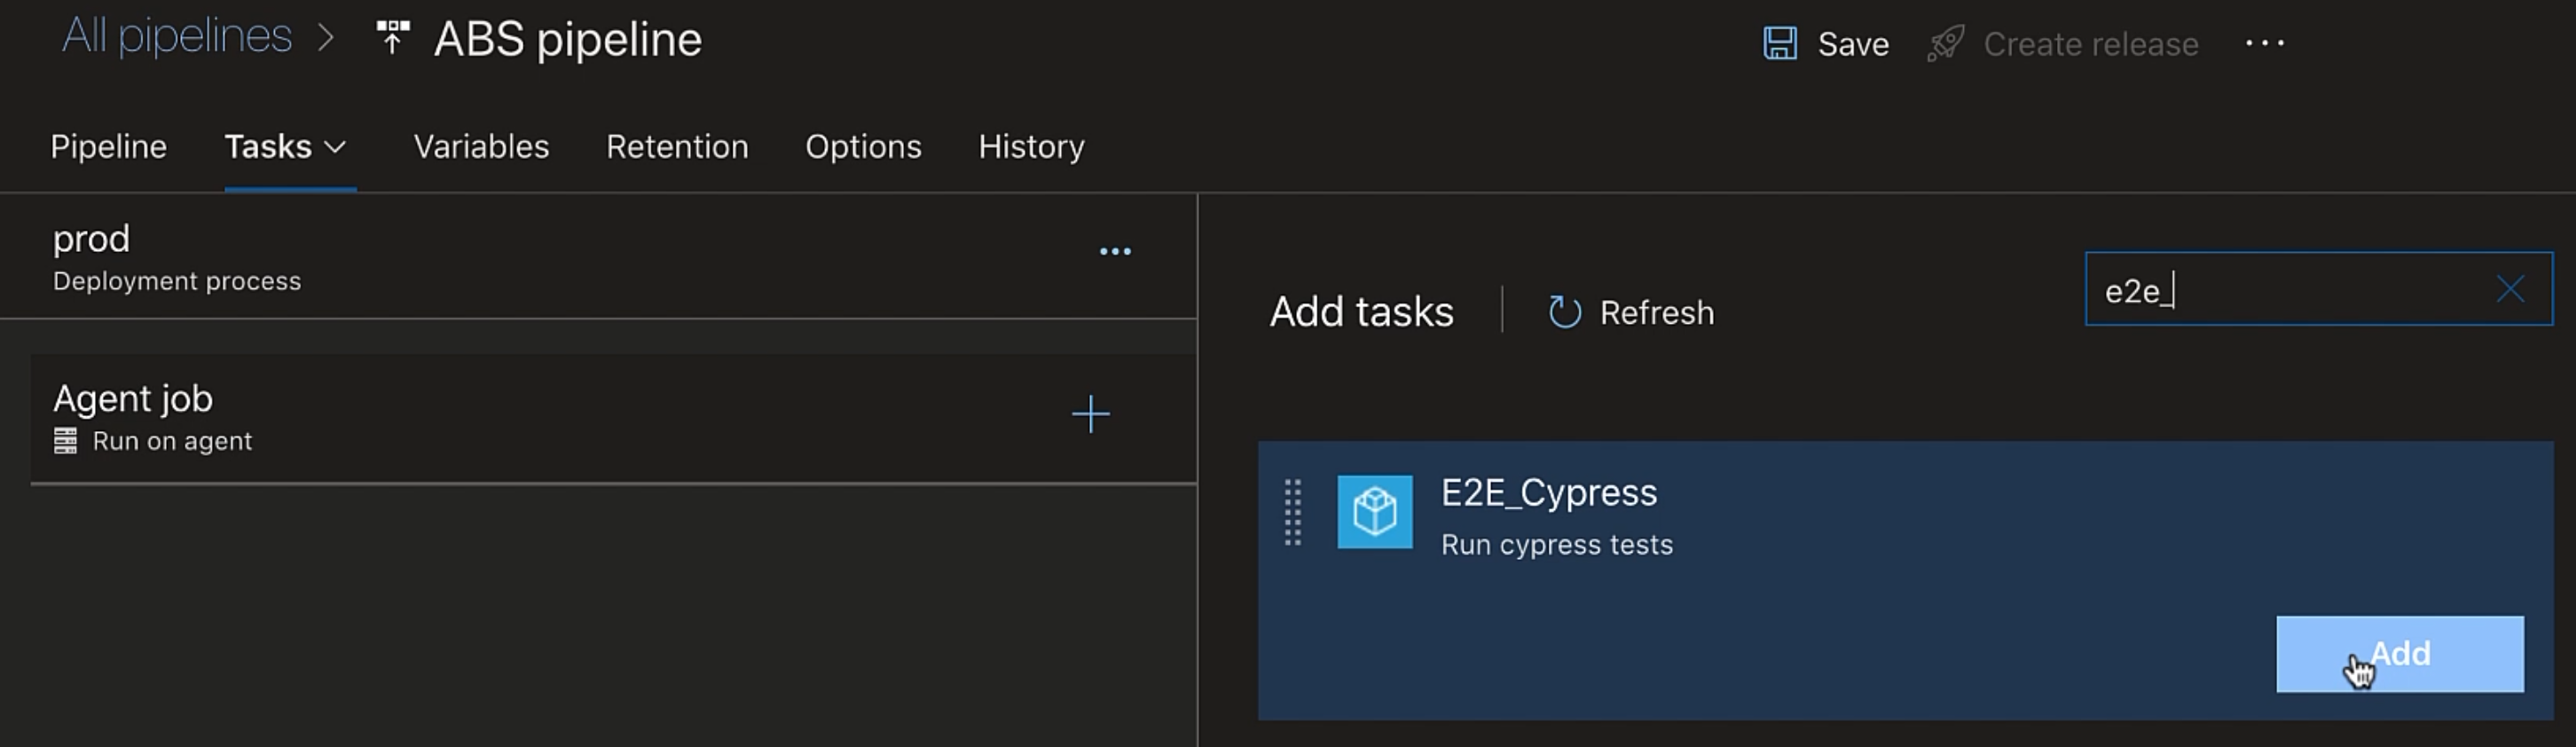
We can click on it, and there we go.
In just a single click, we have all these steps to run our end-to-end Cypress test.
Isn't that cool?
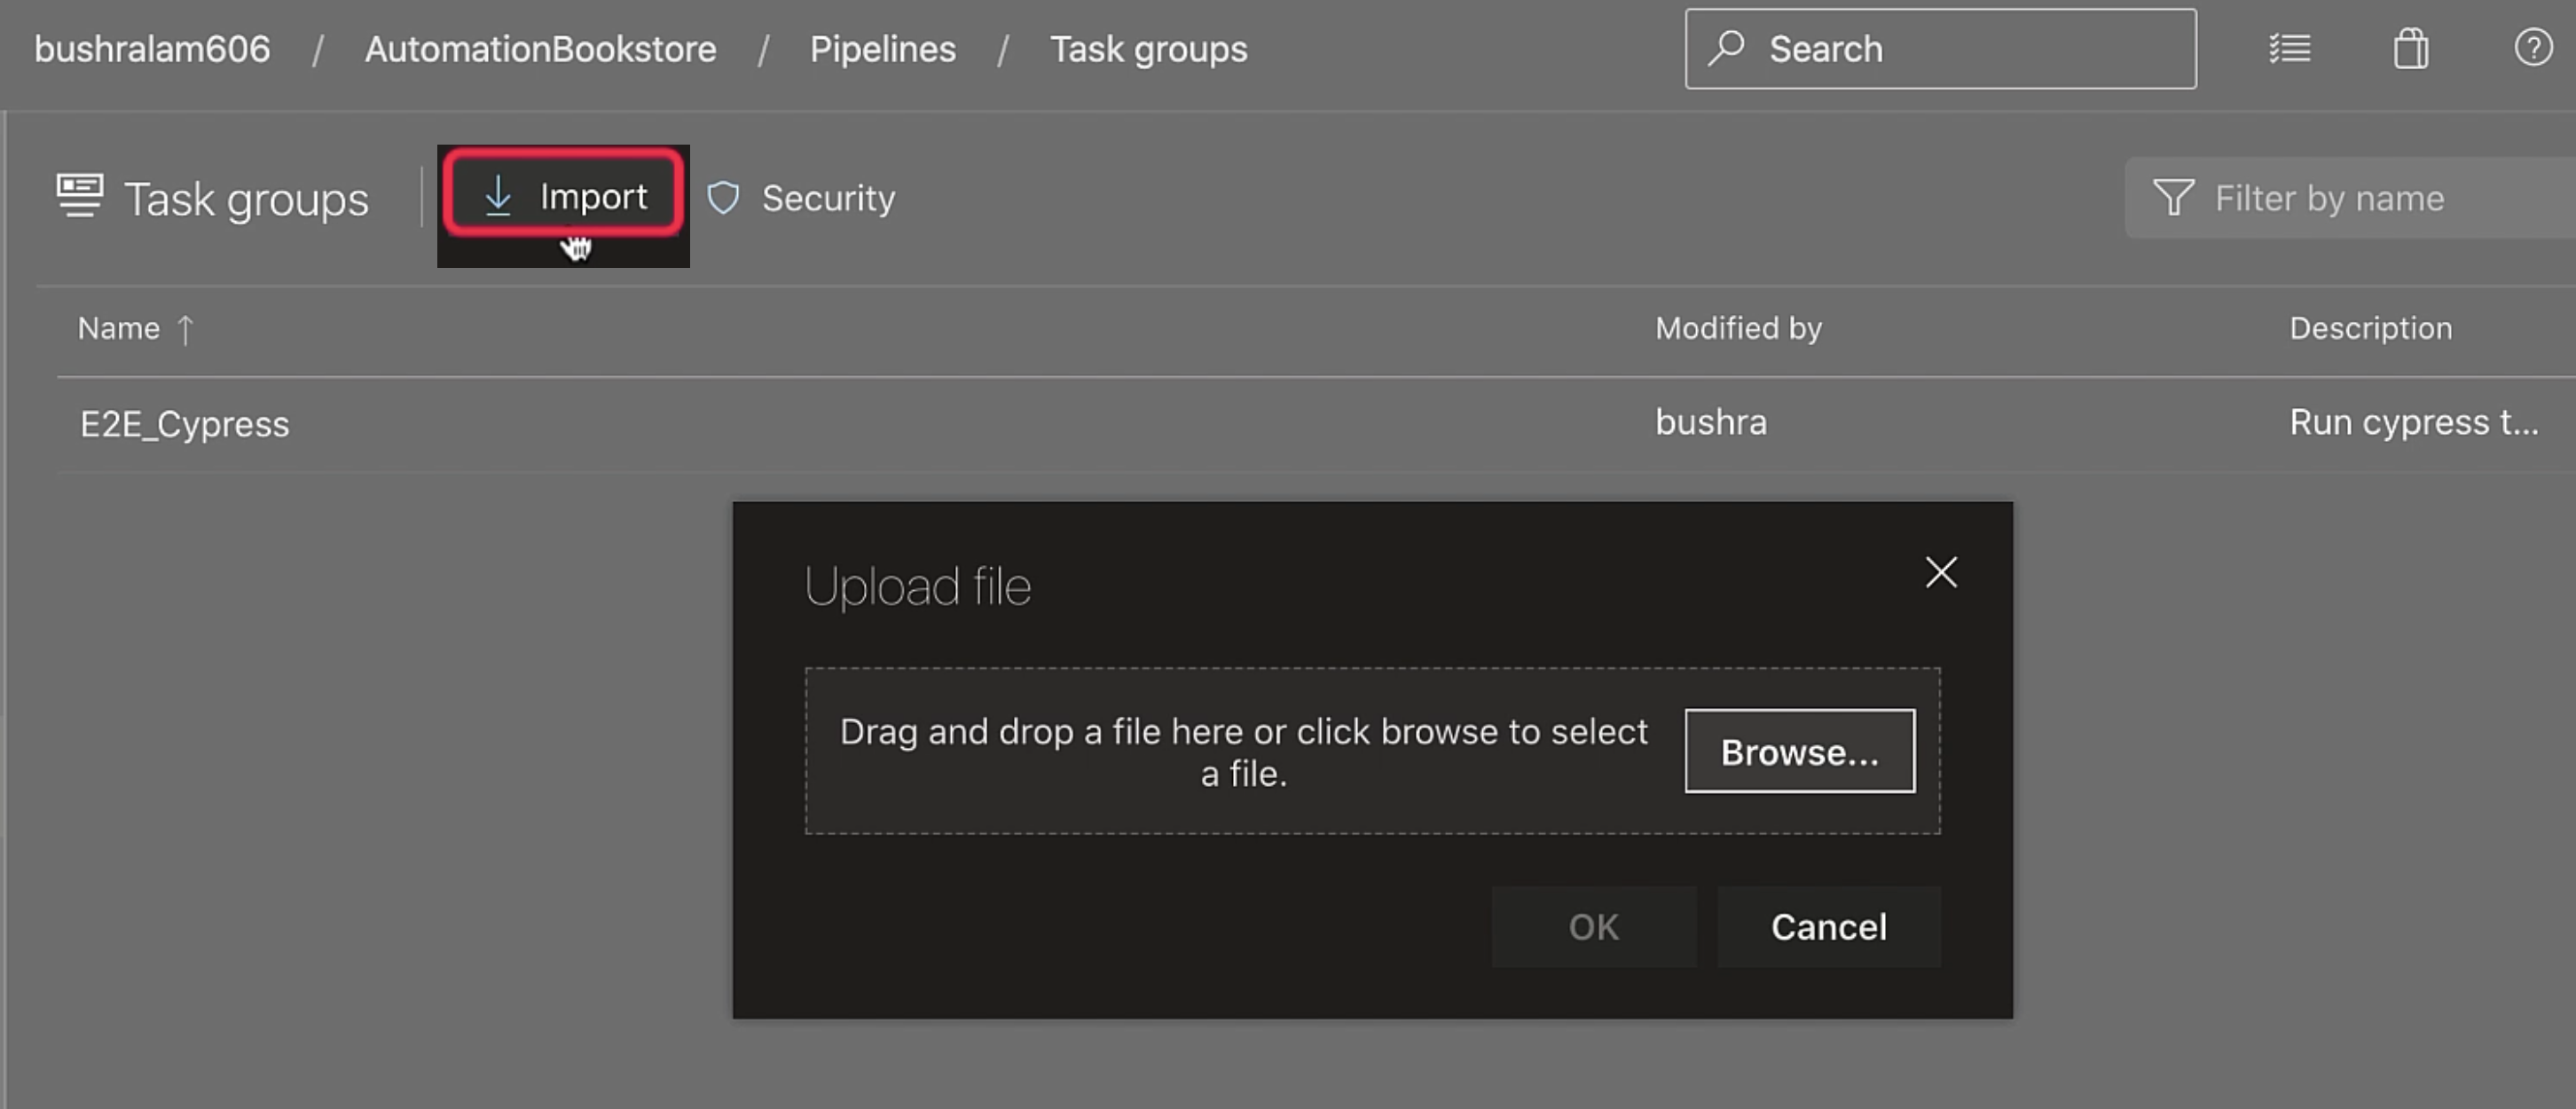
So here we added our task group to a different stage, but say if you would like to add a task group to a different project.
Then, we can "Export" our task group.
In our new project, we can go to "Task groups" under "Pipelines" and click on "Import" to import the task group.
Now, if there are values that we think might get updated, we can create variables for them.
So let me go back.
I'll delete this stage, and I'll clone dev again.
Our baseUrl is something that we need to update in each stage based on the environment, so we can create a variable for that.
Instead of creating a pipeline variable, we'll create a variable group so that it can be controlled and made available across multiple pipelines.
Variable groups are defined and managed in the "Library" page under "Pipelines".
Click on "Create variable group".

We'll give our "Variable group name", you can provide the "Description", and we'll add our "Variables".
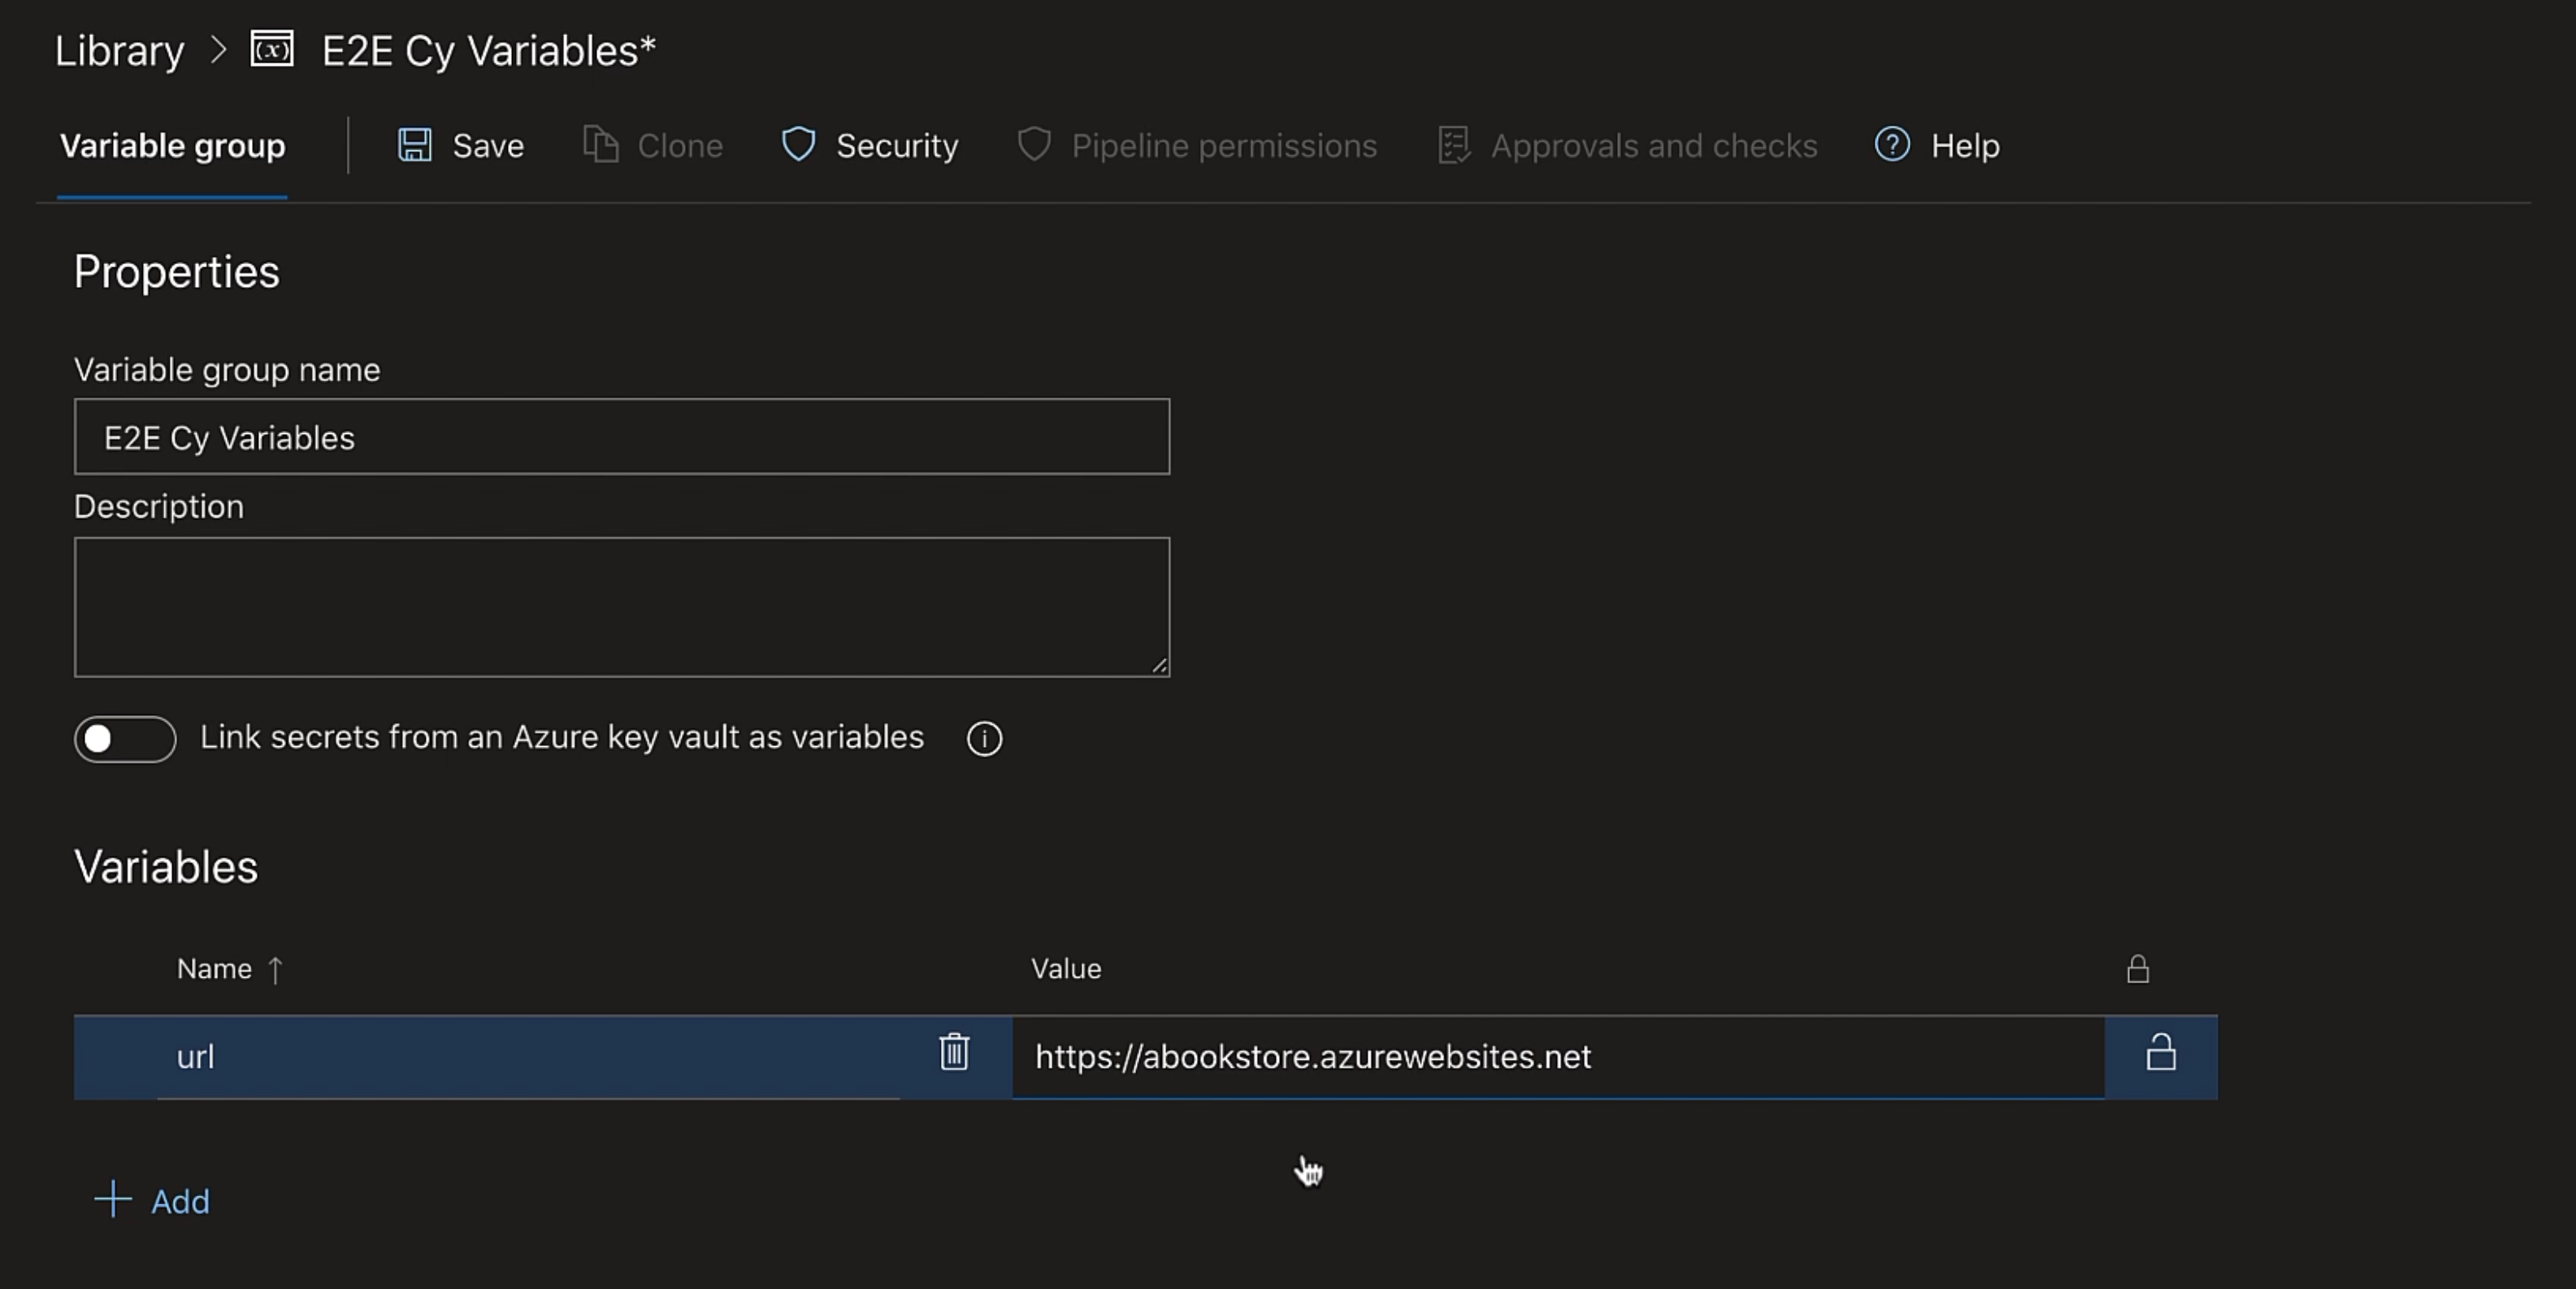
We'll save it.
In our pipeline now, here we'll replace the baseUrl value with our newly created variable $(url).
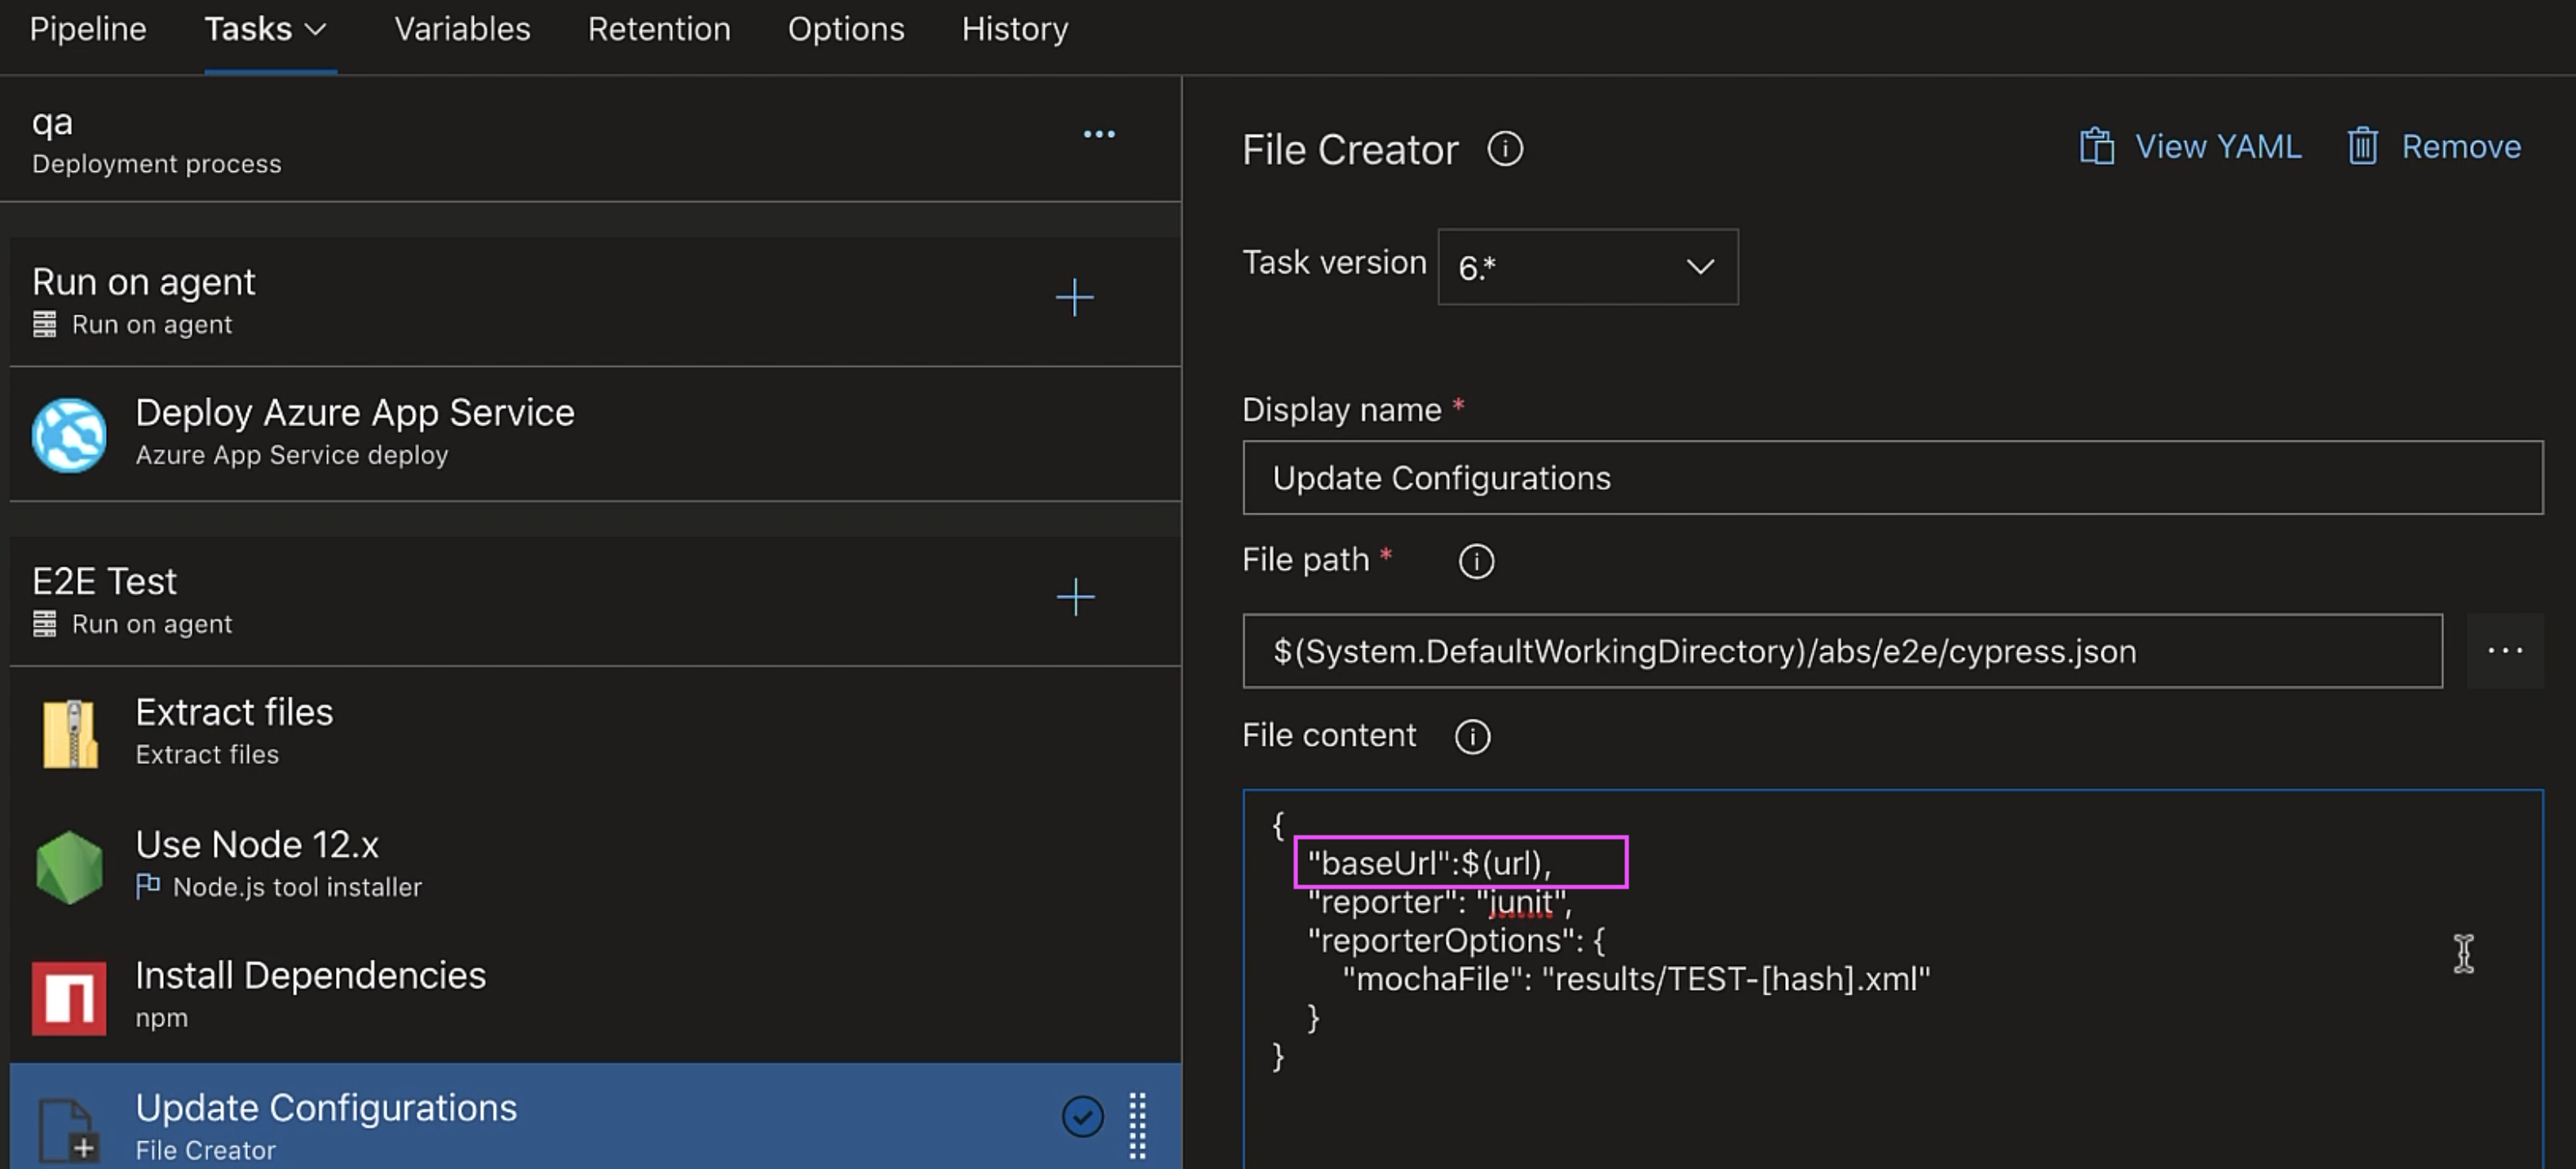
Let's save it.
Now, if you create a task group again, here it lists url as a parameter, and we can provide "Default value" and some "Description" for it.
So, this is our task group being used, and here, it specifies the url value that is being used.
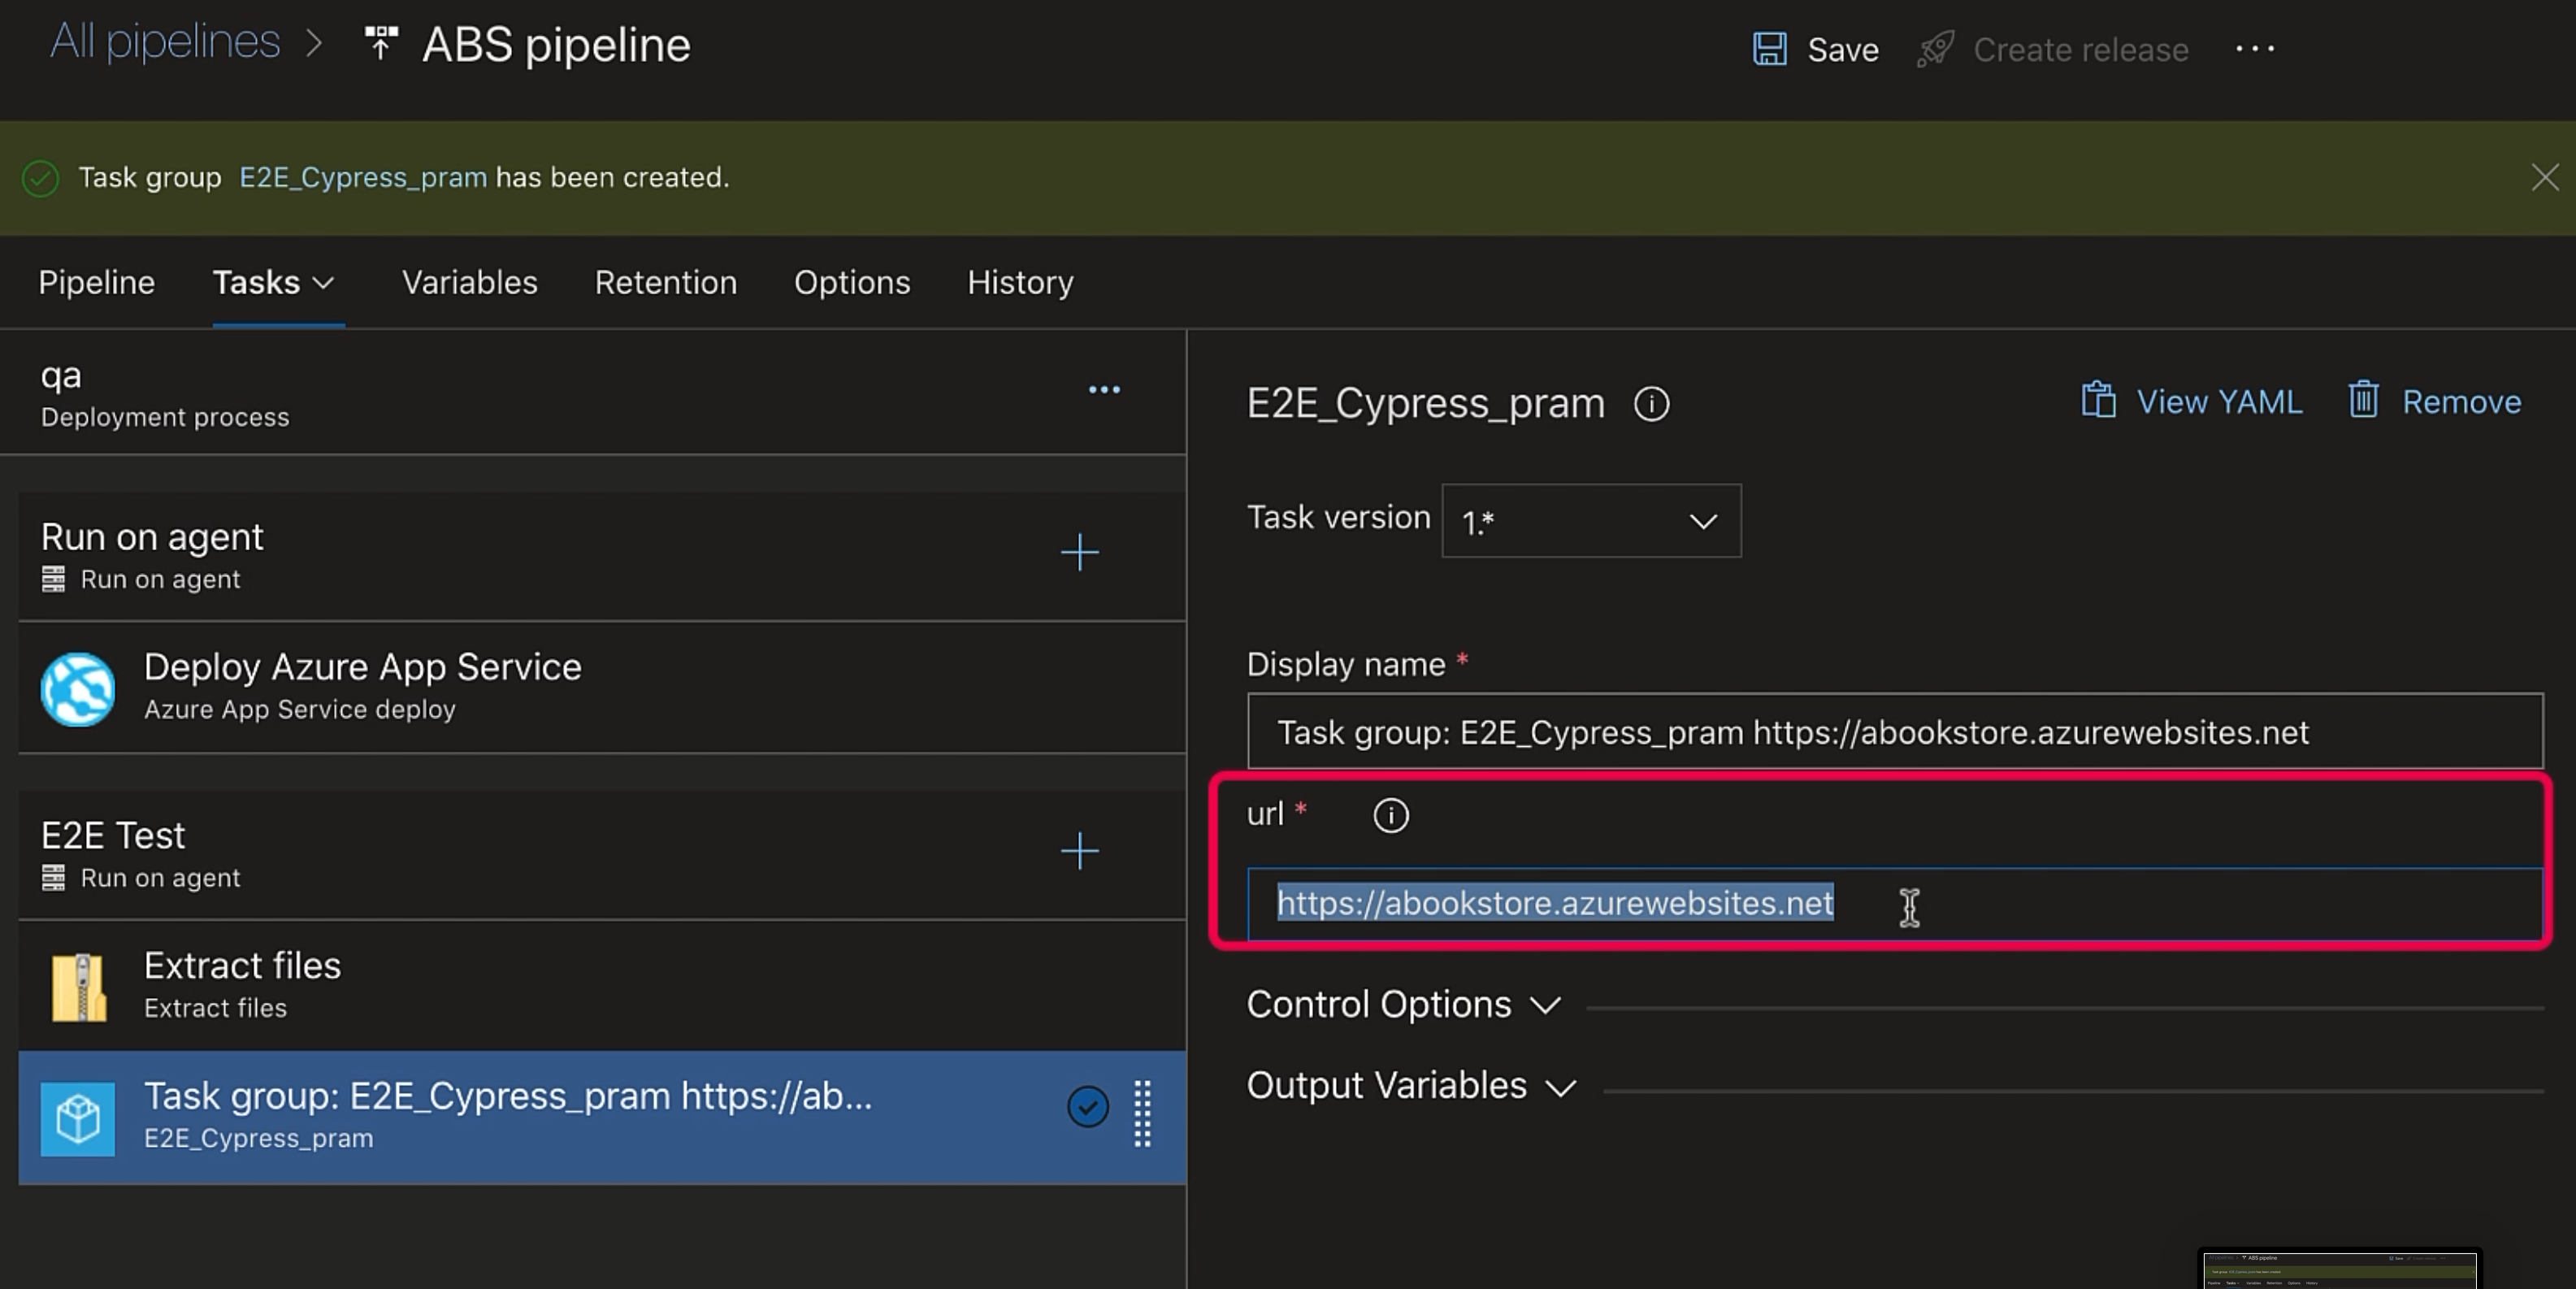
We can update it right here.
All right, that's all for this chapter.
I hope you get to use task groups and appreciate the ease they provide.
