
Transcripted Summary
In this chapter, we'll see how to publish test results in the pipeline.
Having an easy to understand report is an essential part of testing.
Publishing test results is quite straightforward in Azure DevOps because of course, we have a task available for it.
We can add the "Publish Test Results" task.
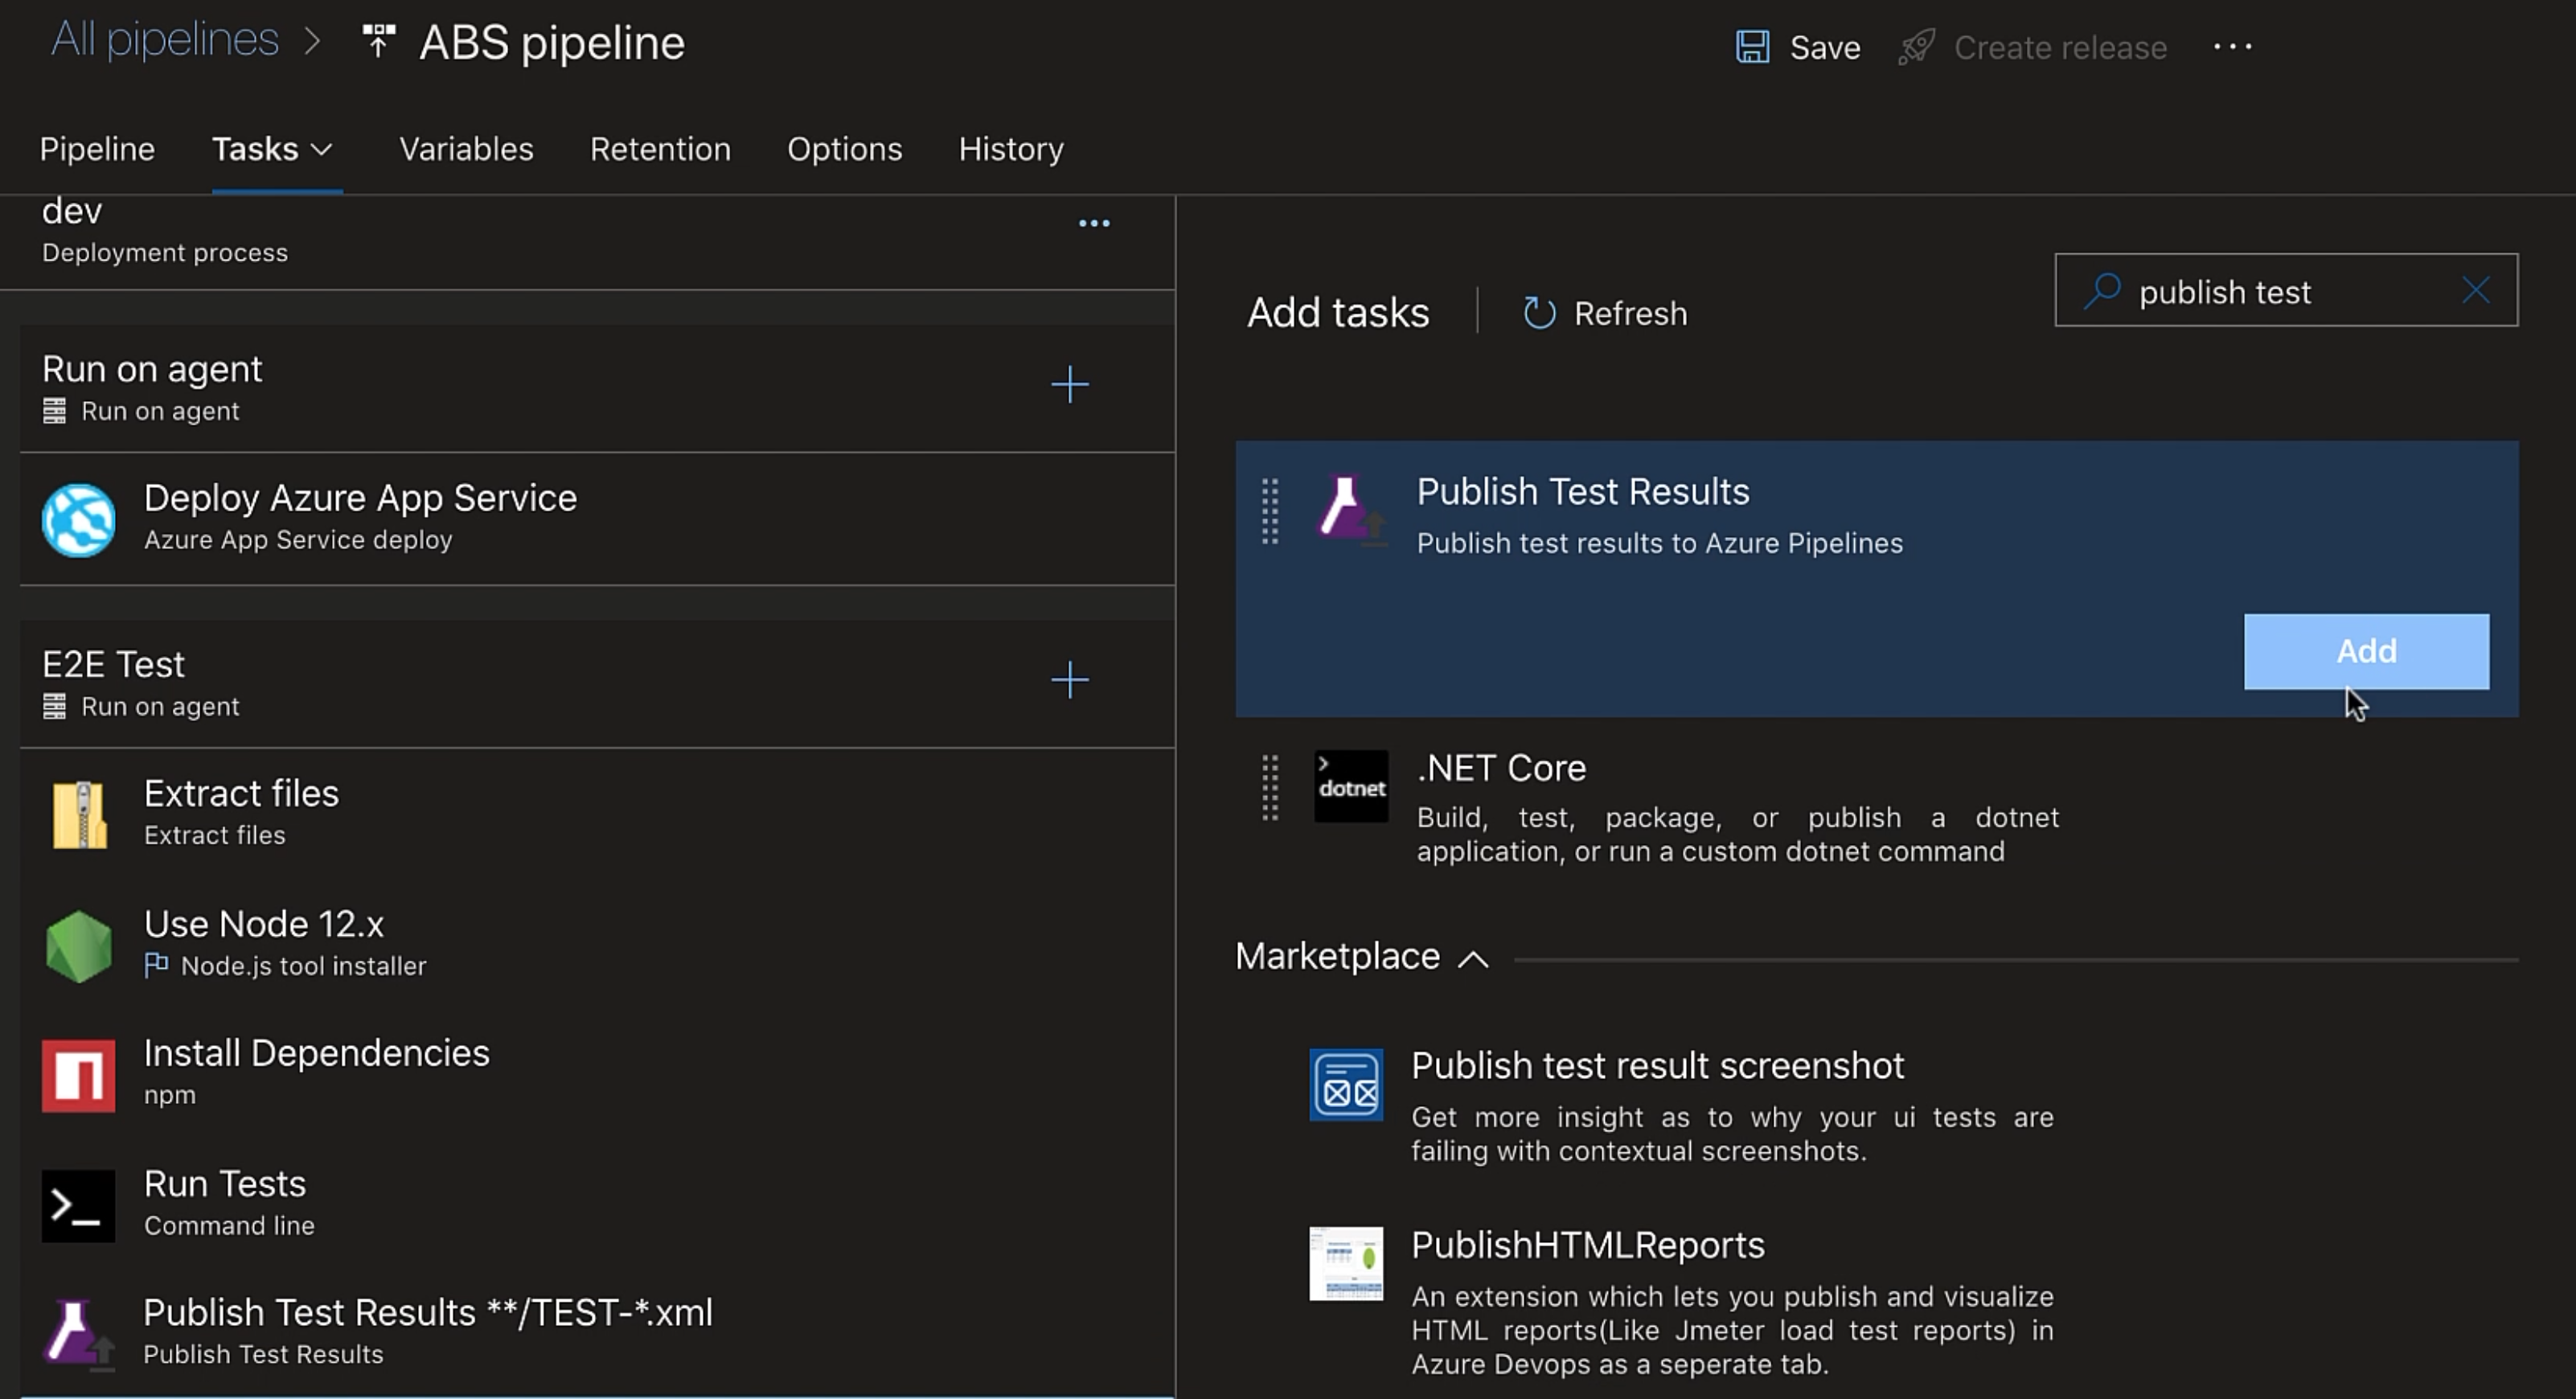
Let's drop **/TEST-*.xml from the "Display name" and these are the available "Test result formats".
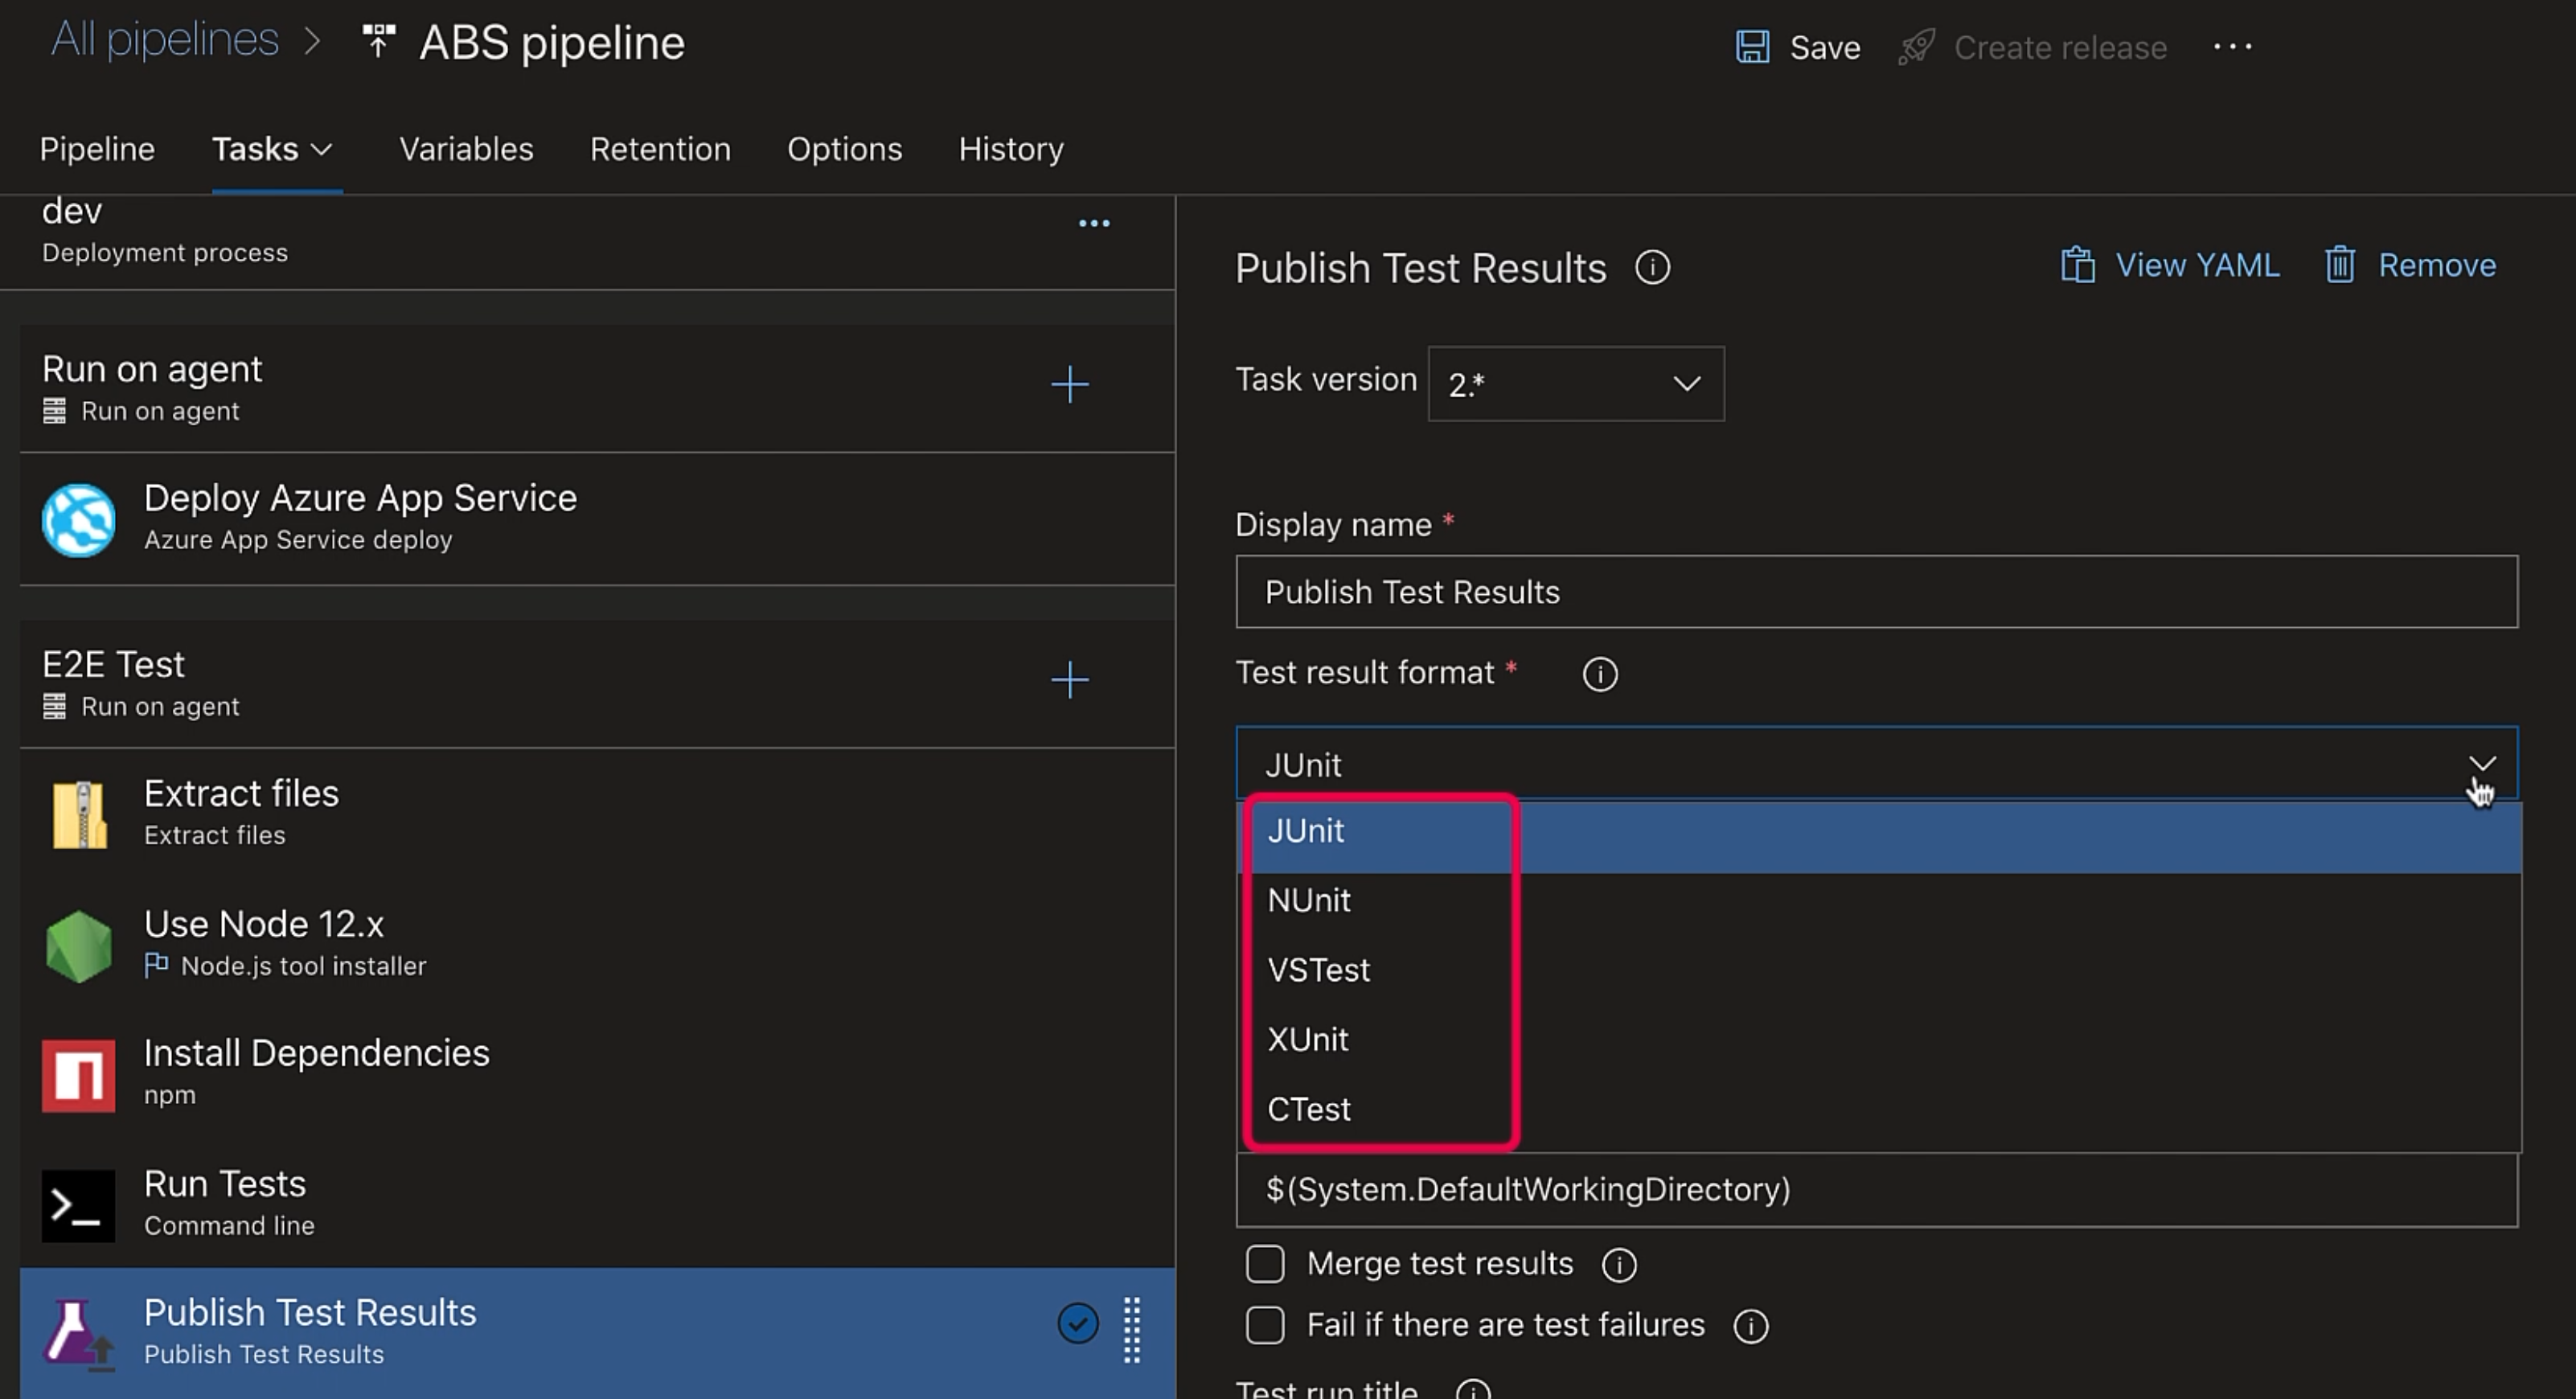
Sadly, it doesn't have HTML support yet, so we'll go ahead with JUnit instead.
Now, we need to set JUnit as our reporter in our Cypress project as well.
So, let's jump over to Visual Studio Code and in cypress.json, we'll add:
{
    "reporter": "junit",
    "reporterOptions": {
        "mochaFile": "results/TEST-[hash].xml"
    }
}
We have set the reporter to junit.
It will use Mocha JUnit reporter, which is a JUnit reporter for Mocha.
It produces JUnit style XML test results.
We don't need to install Mocha JUnit reporter because it is built into Cypress.
And, in the reporterOptions, we have mentioned that the test output will be stored in the results folder with this name TEST-[hash].xml.
Let's push it to GitHub.
All right, back to our pipeline.
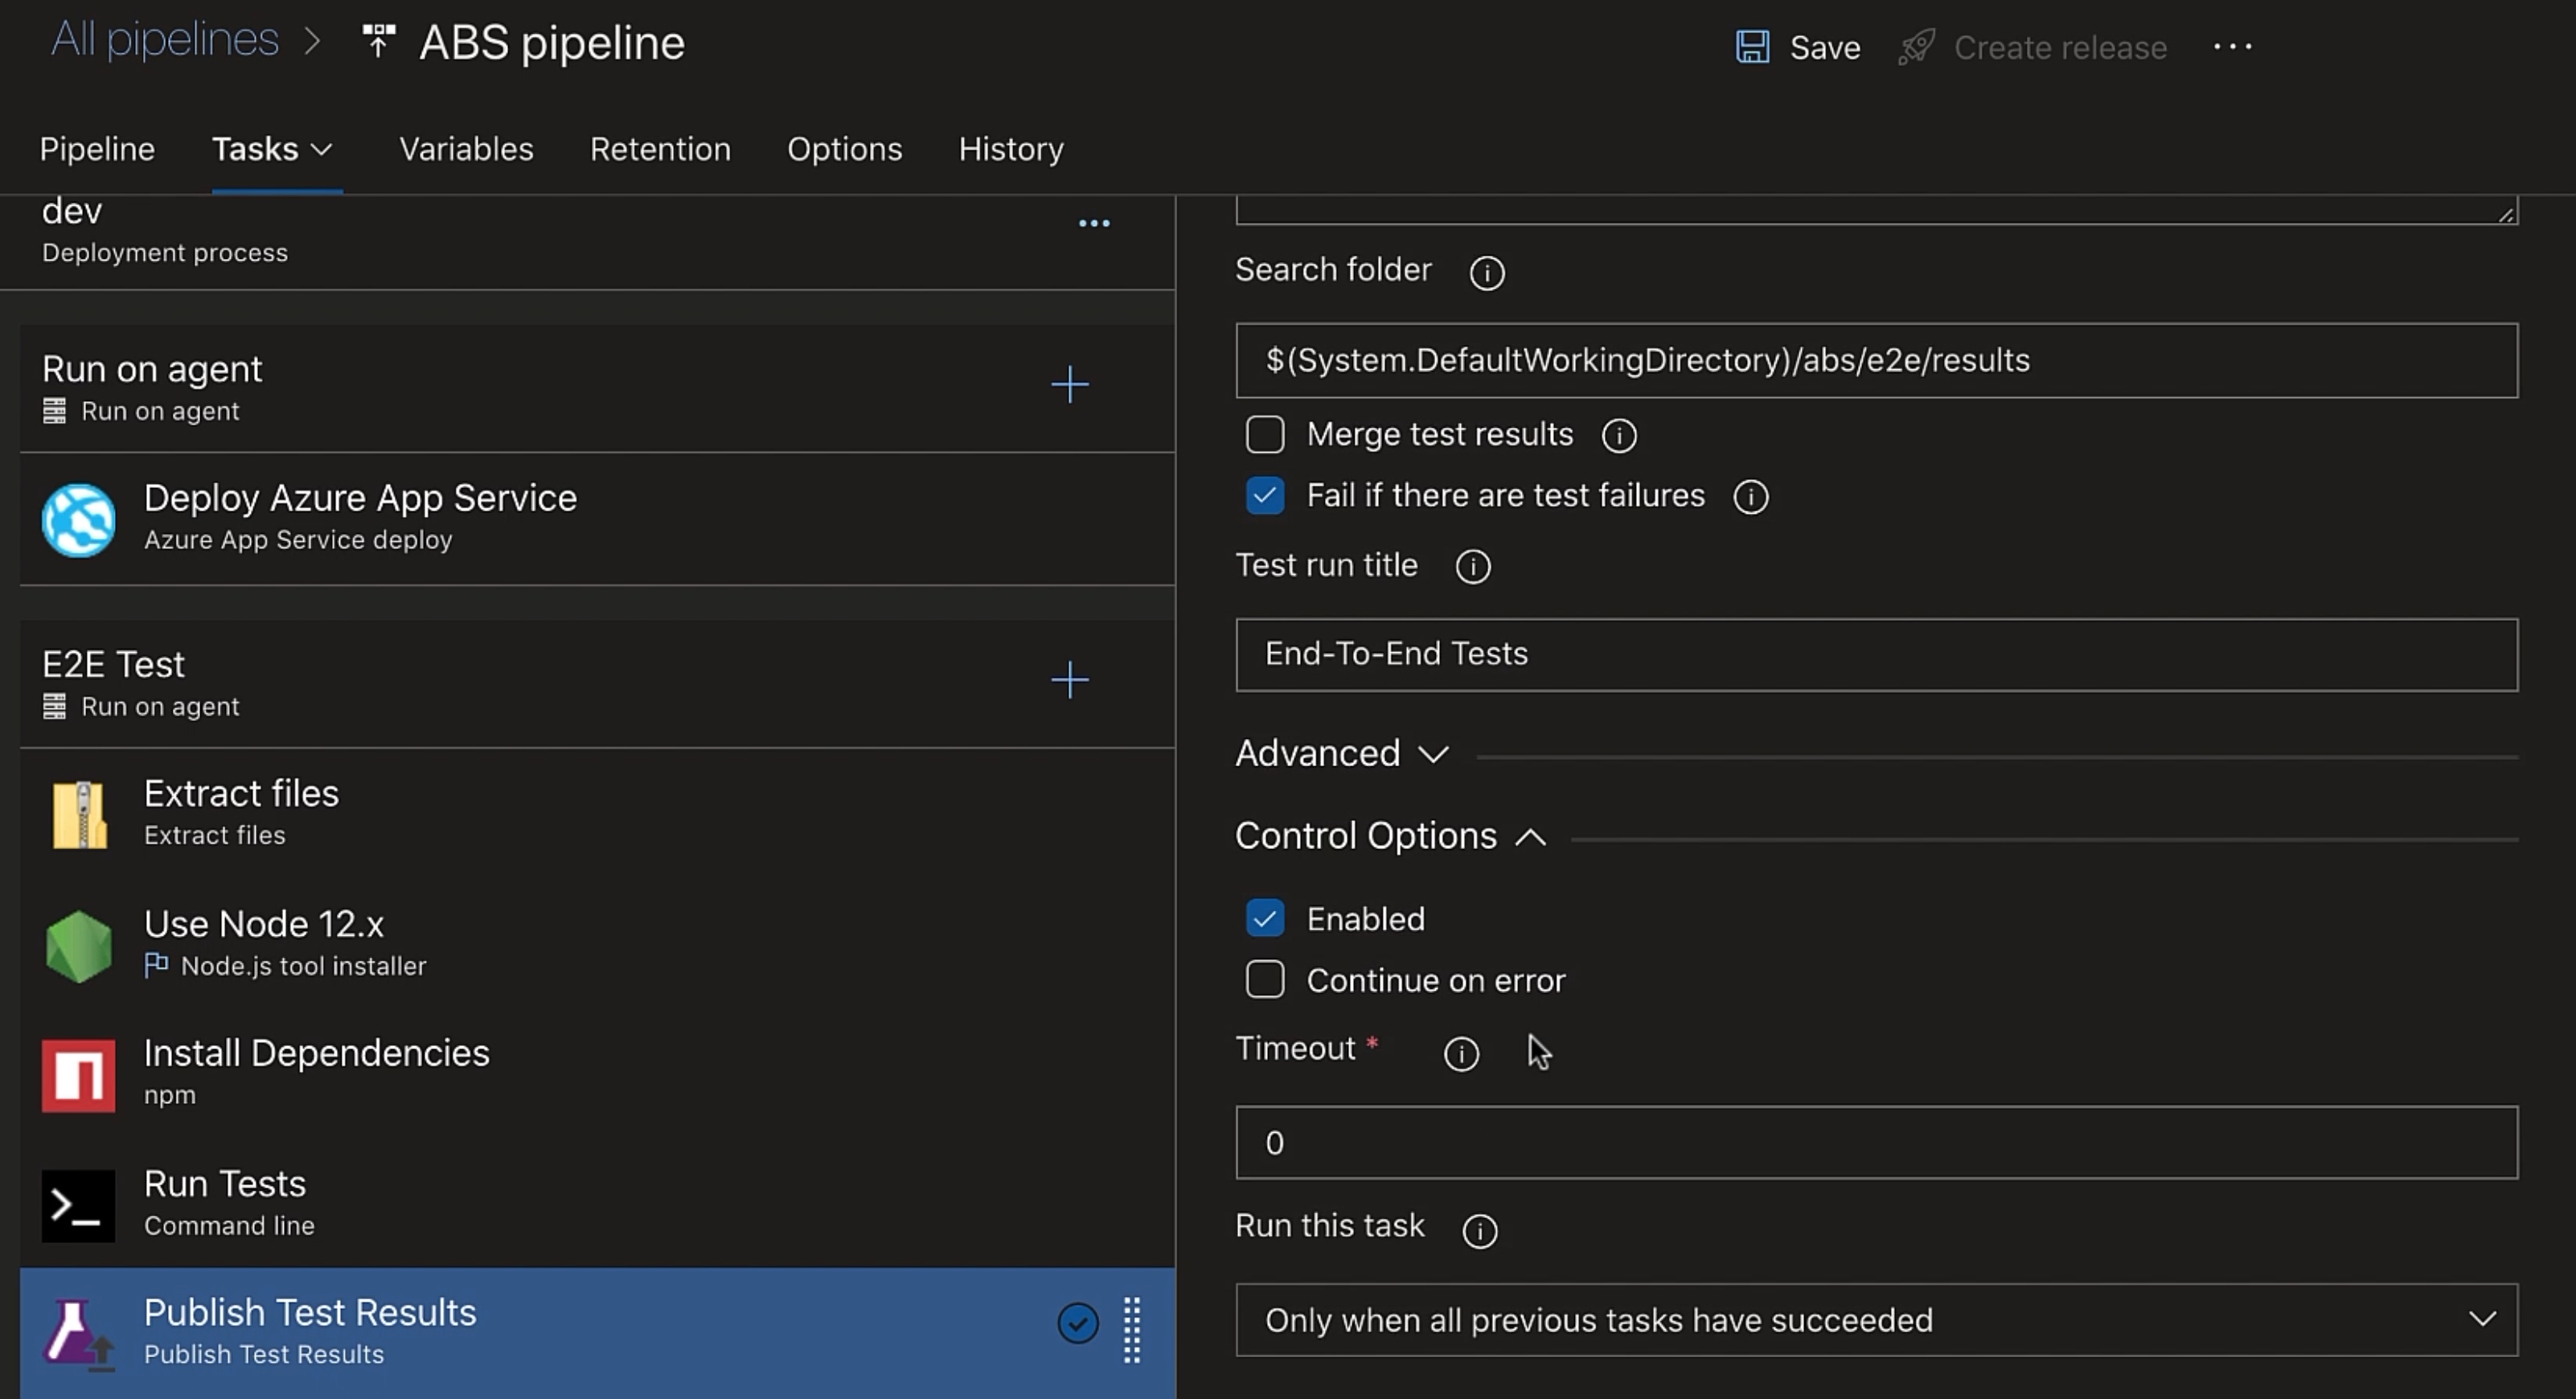
So, the "Test results files" name is correct, but we'll update the "Search folder" to $(System.DefaultWorkingDirectory)/abs/e2e/results.
Let's check "Fail if there are test failures", so that this task fails if you have failing tests.
This would fail this stage and we could have conditions based on the failure of this stage - say, if this stage fails, do not push the code to the next stage or something similar.
And we'll add a "Test run title" as "End-To-End Tests".
In the "Control Options", it specifies the condition when the task should run.
Currently, it is set to "Only when all previous tasks have succeeded".
But we would like to generate a test report even when our tests are failing, right?
So instead, we'll set it to run this task "Even if a previous task has failed, unless the deployment was canceled".
Now we'll get a report whether or not our tests are failing.
Okay, so let's save this, and we'll create a release.
The test results are published in the "Tests" tab.
This is the test run summary.
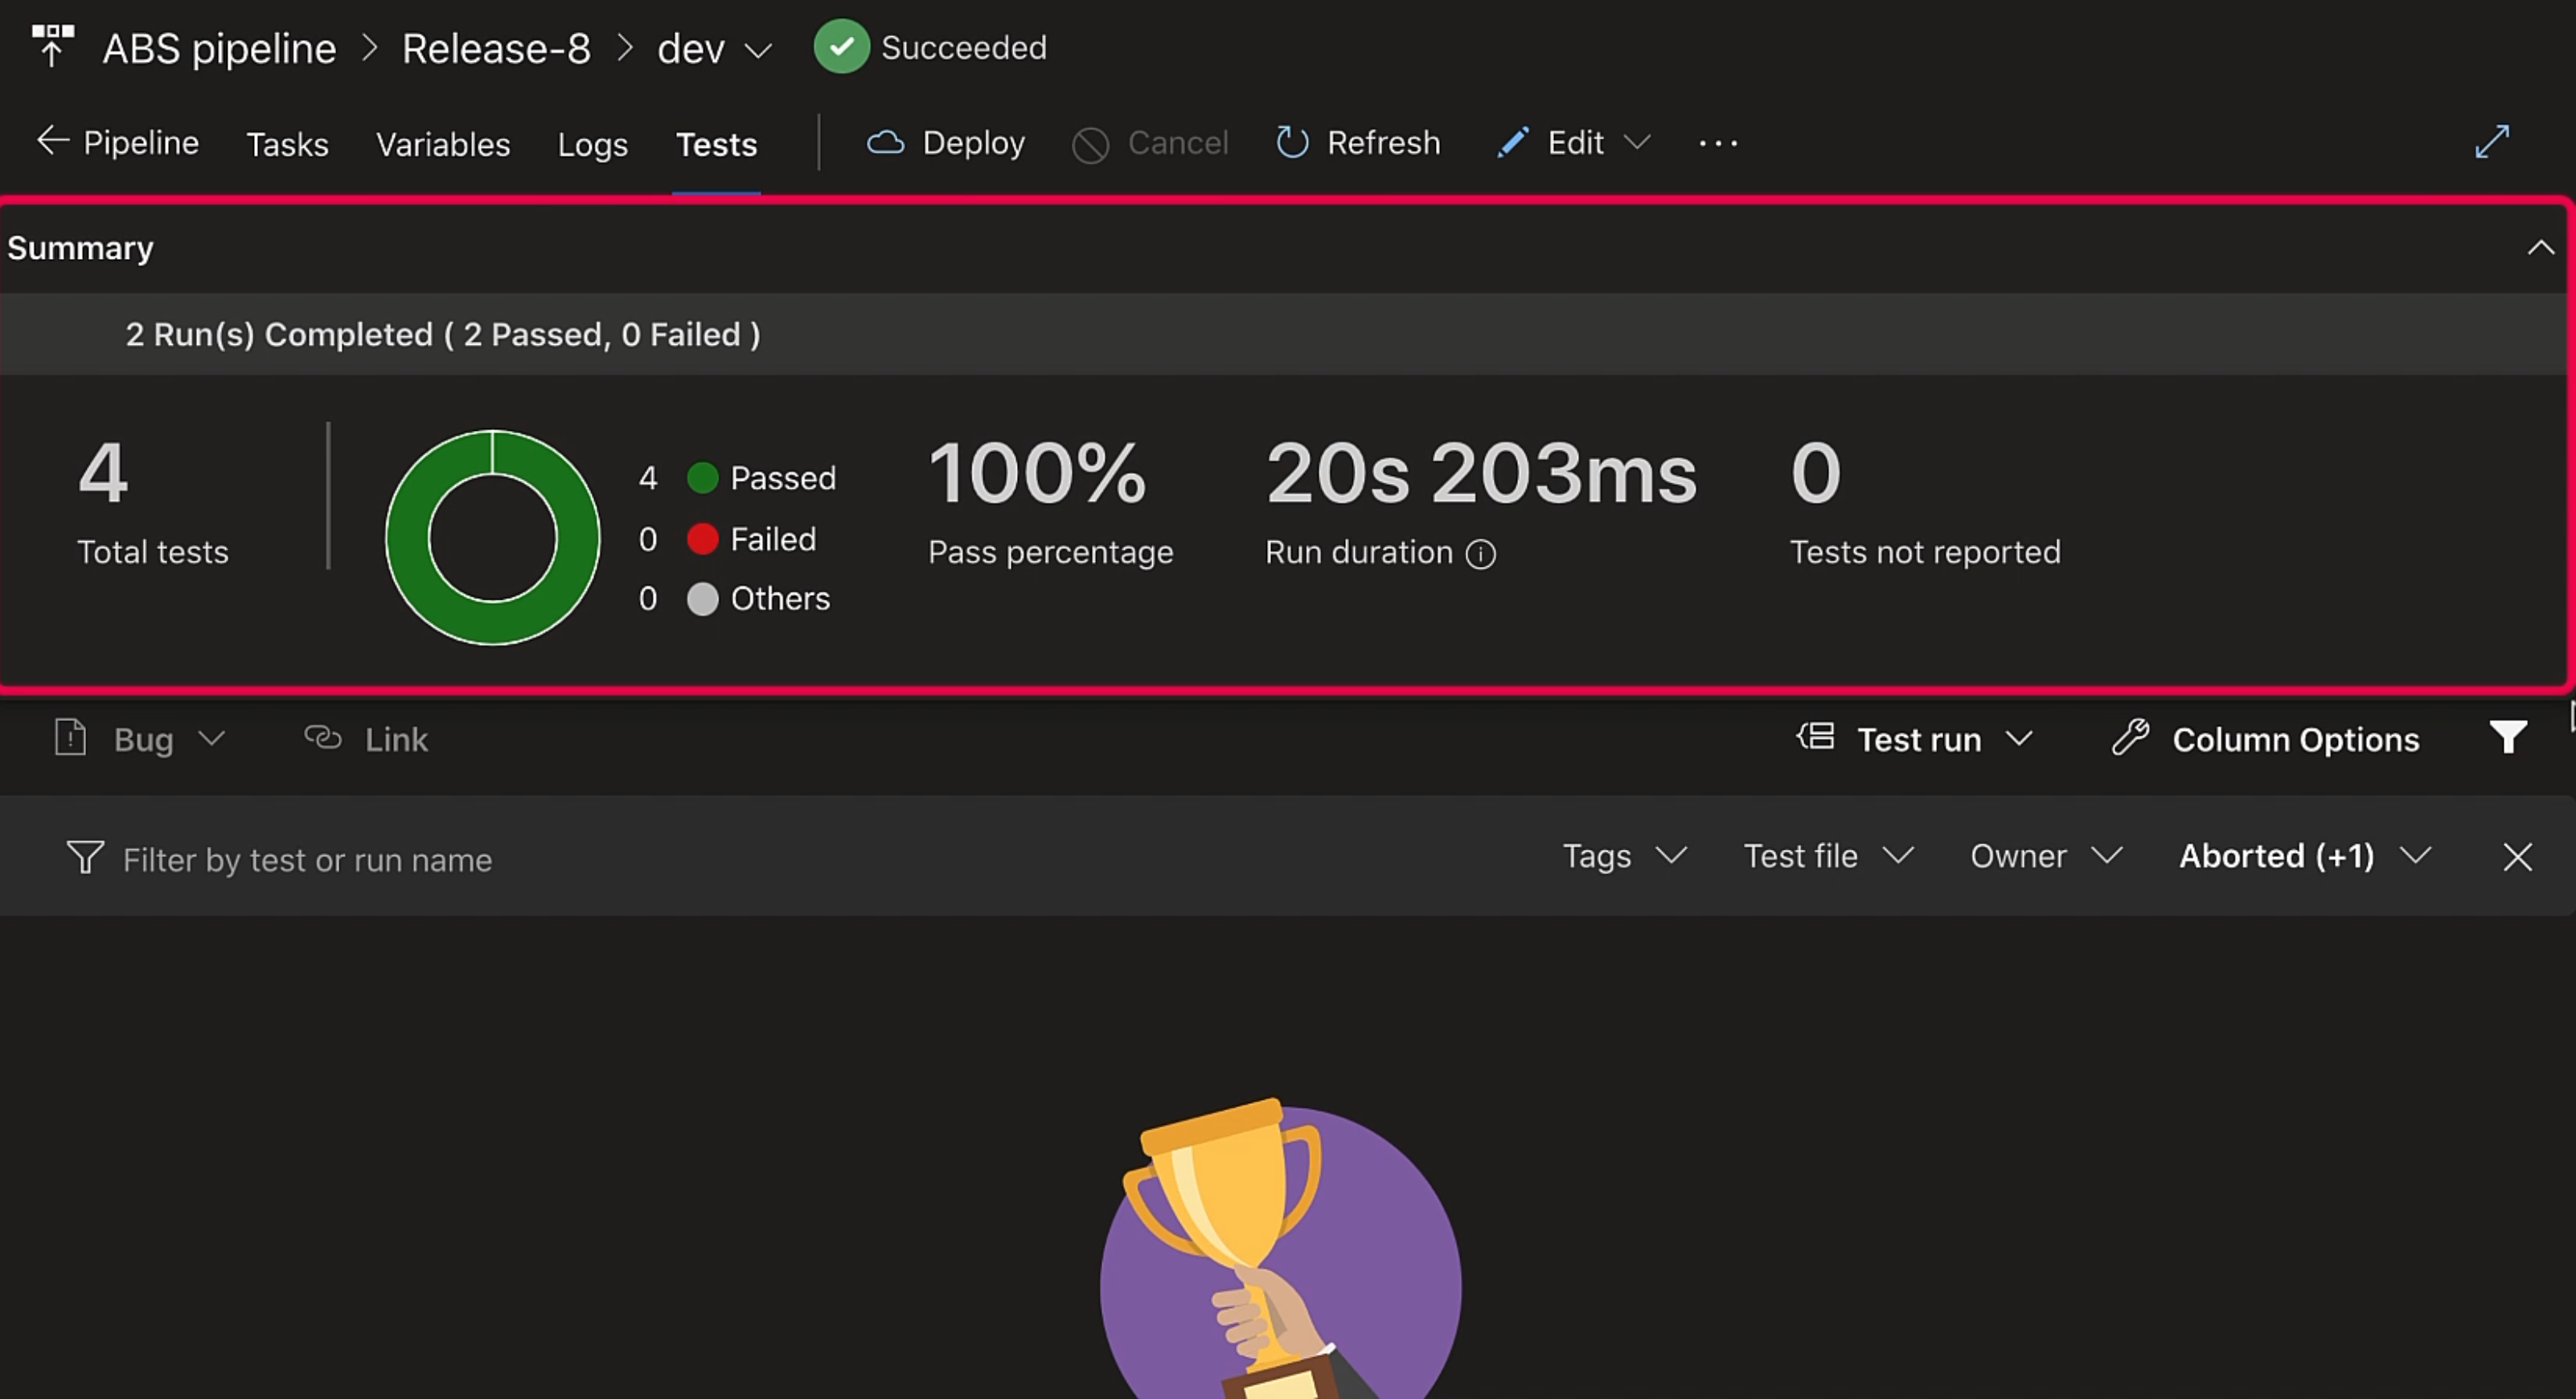
There were 2 runs - that is, we ran 2 spec files.
There were four tests in total and all four tests passed, so the pass percentage is 100%.
It also shows the time it took to run the test, and there were no tests that were not reported.
Then in this section, let's clear the filters.
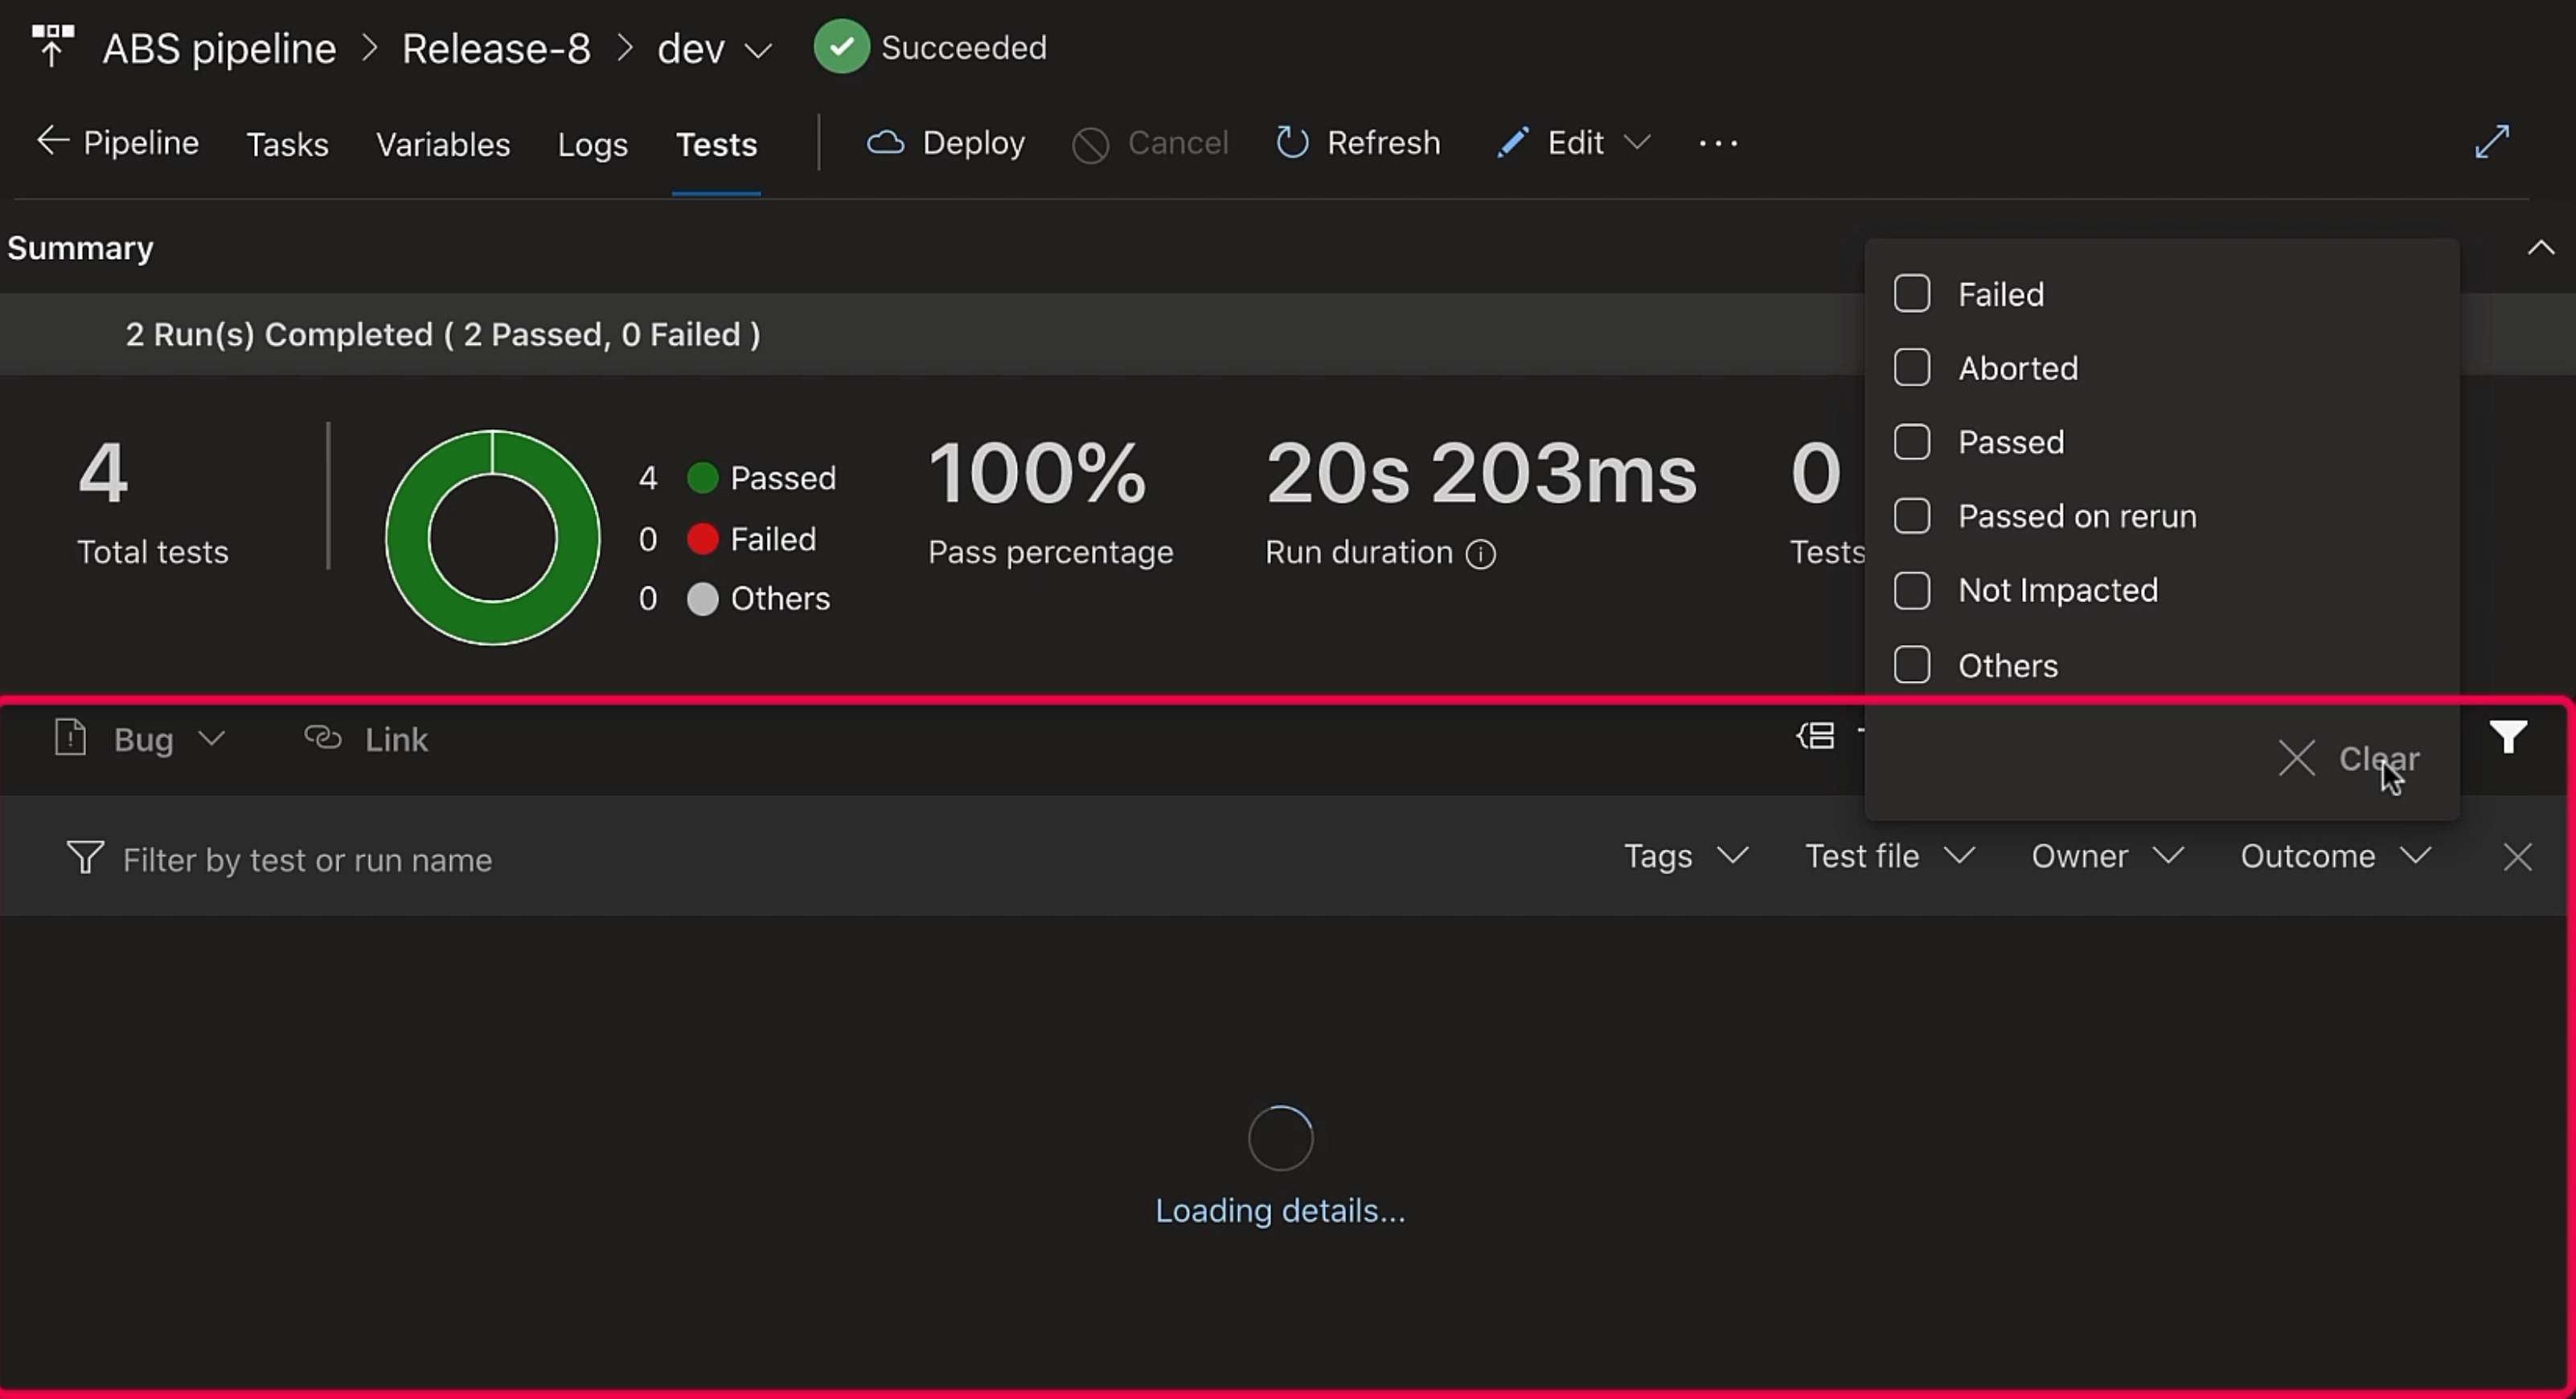
These are the two test runs, and within them, the tests.
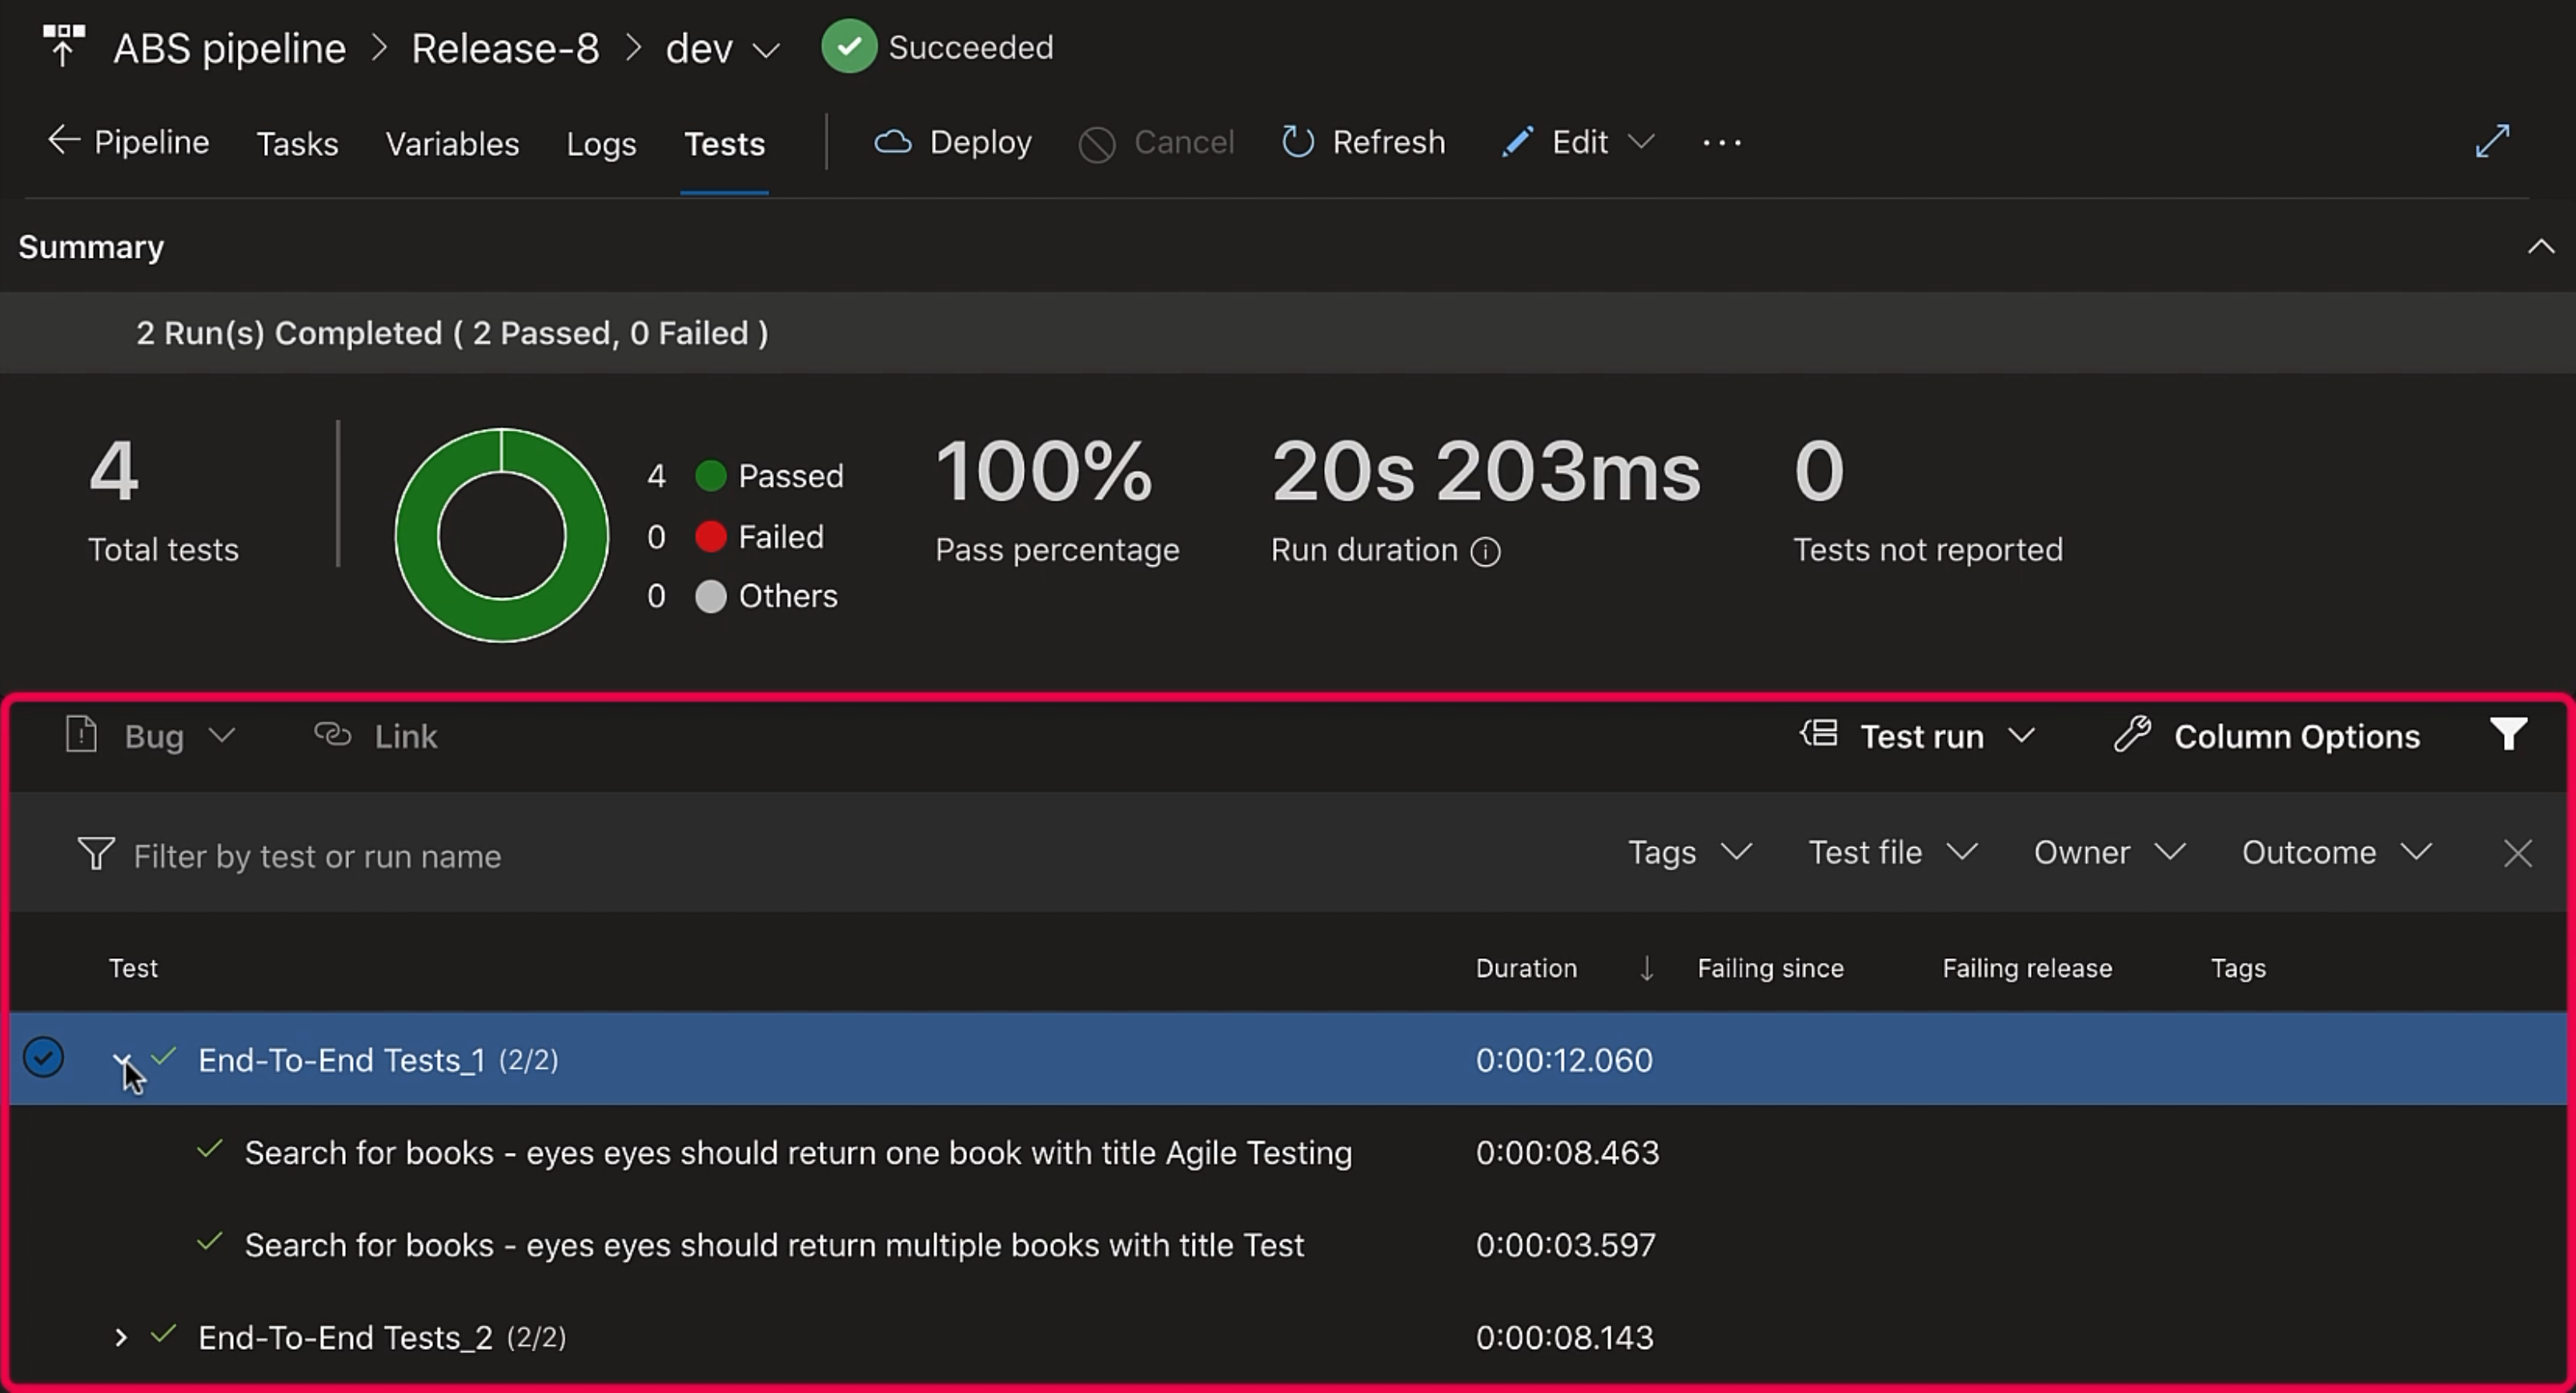
If you click on any test, it will give the details of that particular test.
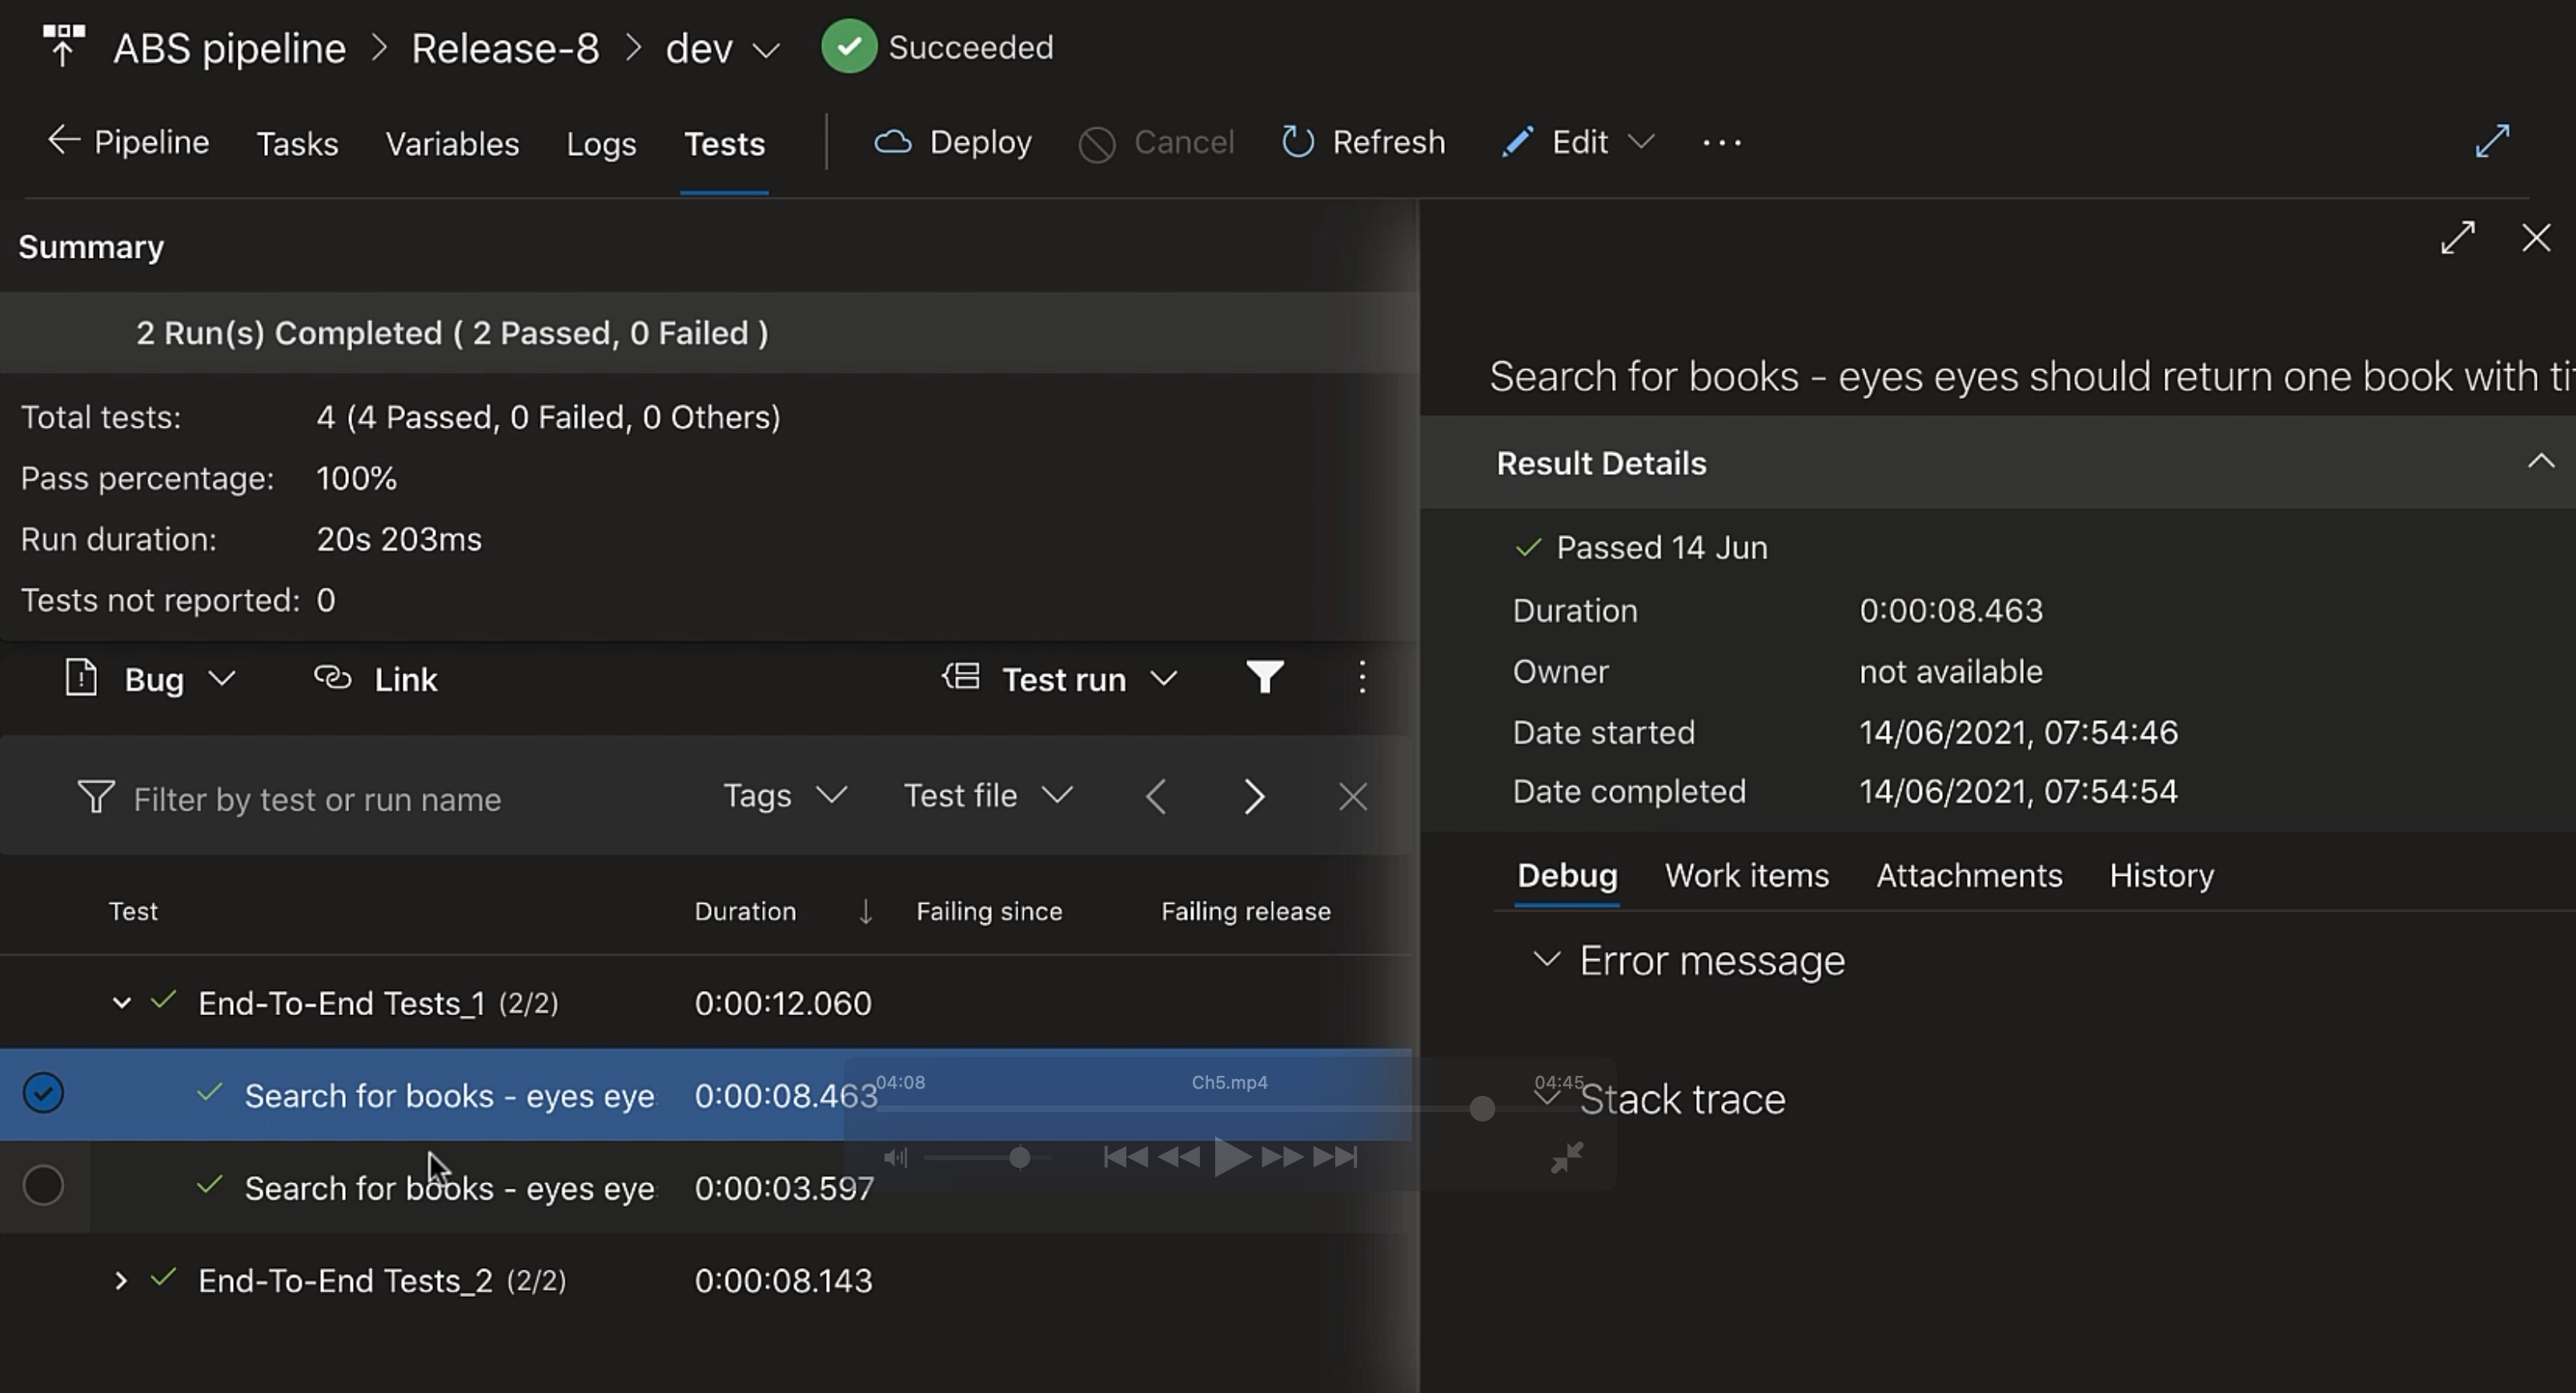
Like if the test fails, it will give the "Error message" and the "Stack trace".
If you have a "Work item" related to this test available in the Azure Boards, it would give the details of that work item.
"Attachments" aren’t available for JUnit, but if you're using other test result formats like Visual Studio Test or NUnit, then you can attach screenshots or test result files here.
"History" shows the previous test run status, so that you know if the test was previously failing or passing.
