

Transcripted Summary
In this chapter, we'll be learning about Azure Pipelines.
Azure Pipelines, as we have previously discussed, is one of the services of Azure DevOps and they provide build and release services to support continuous integration and continuous delivery of the applications.
Before we dive into Azure Pipelines, let's first understand what is continuous integration and continuous delivery, or more commonly known as CI/CD.
# What is CI/CD?
Developers and operations teams write code. This could be application code, automation test scripts, DBA scripts, infrastructure configurations, which can now be written as code.
All of this code is then pushed to a source code management tool, like GitHub, Bitbucket, Azure Repos, or any other SCM tool.
Whenever there is code pushed to SCM, a build is triggered - this is continuous integration, or CI.
During the build phase, we download the code from the SCM tool, the code is then compiled, we can run some static code analysis to check the code quality and then unit tests are executed.
Finally, when all is satisfactory, a build artifact is generated and passed to the release phase.
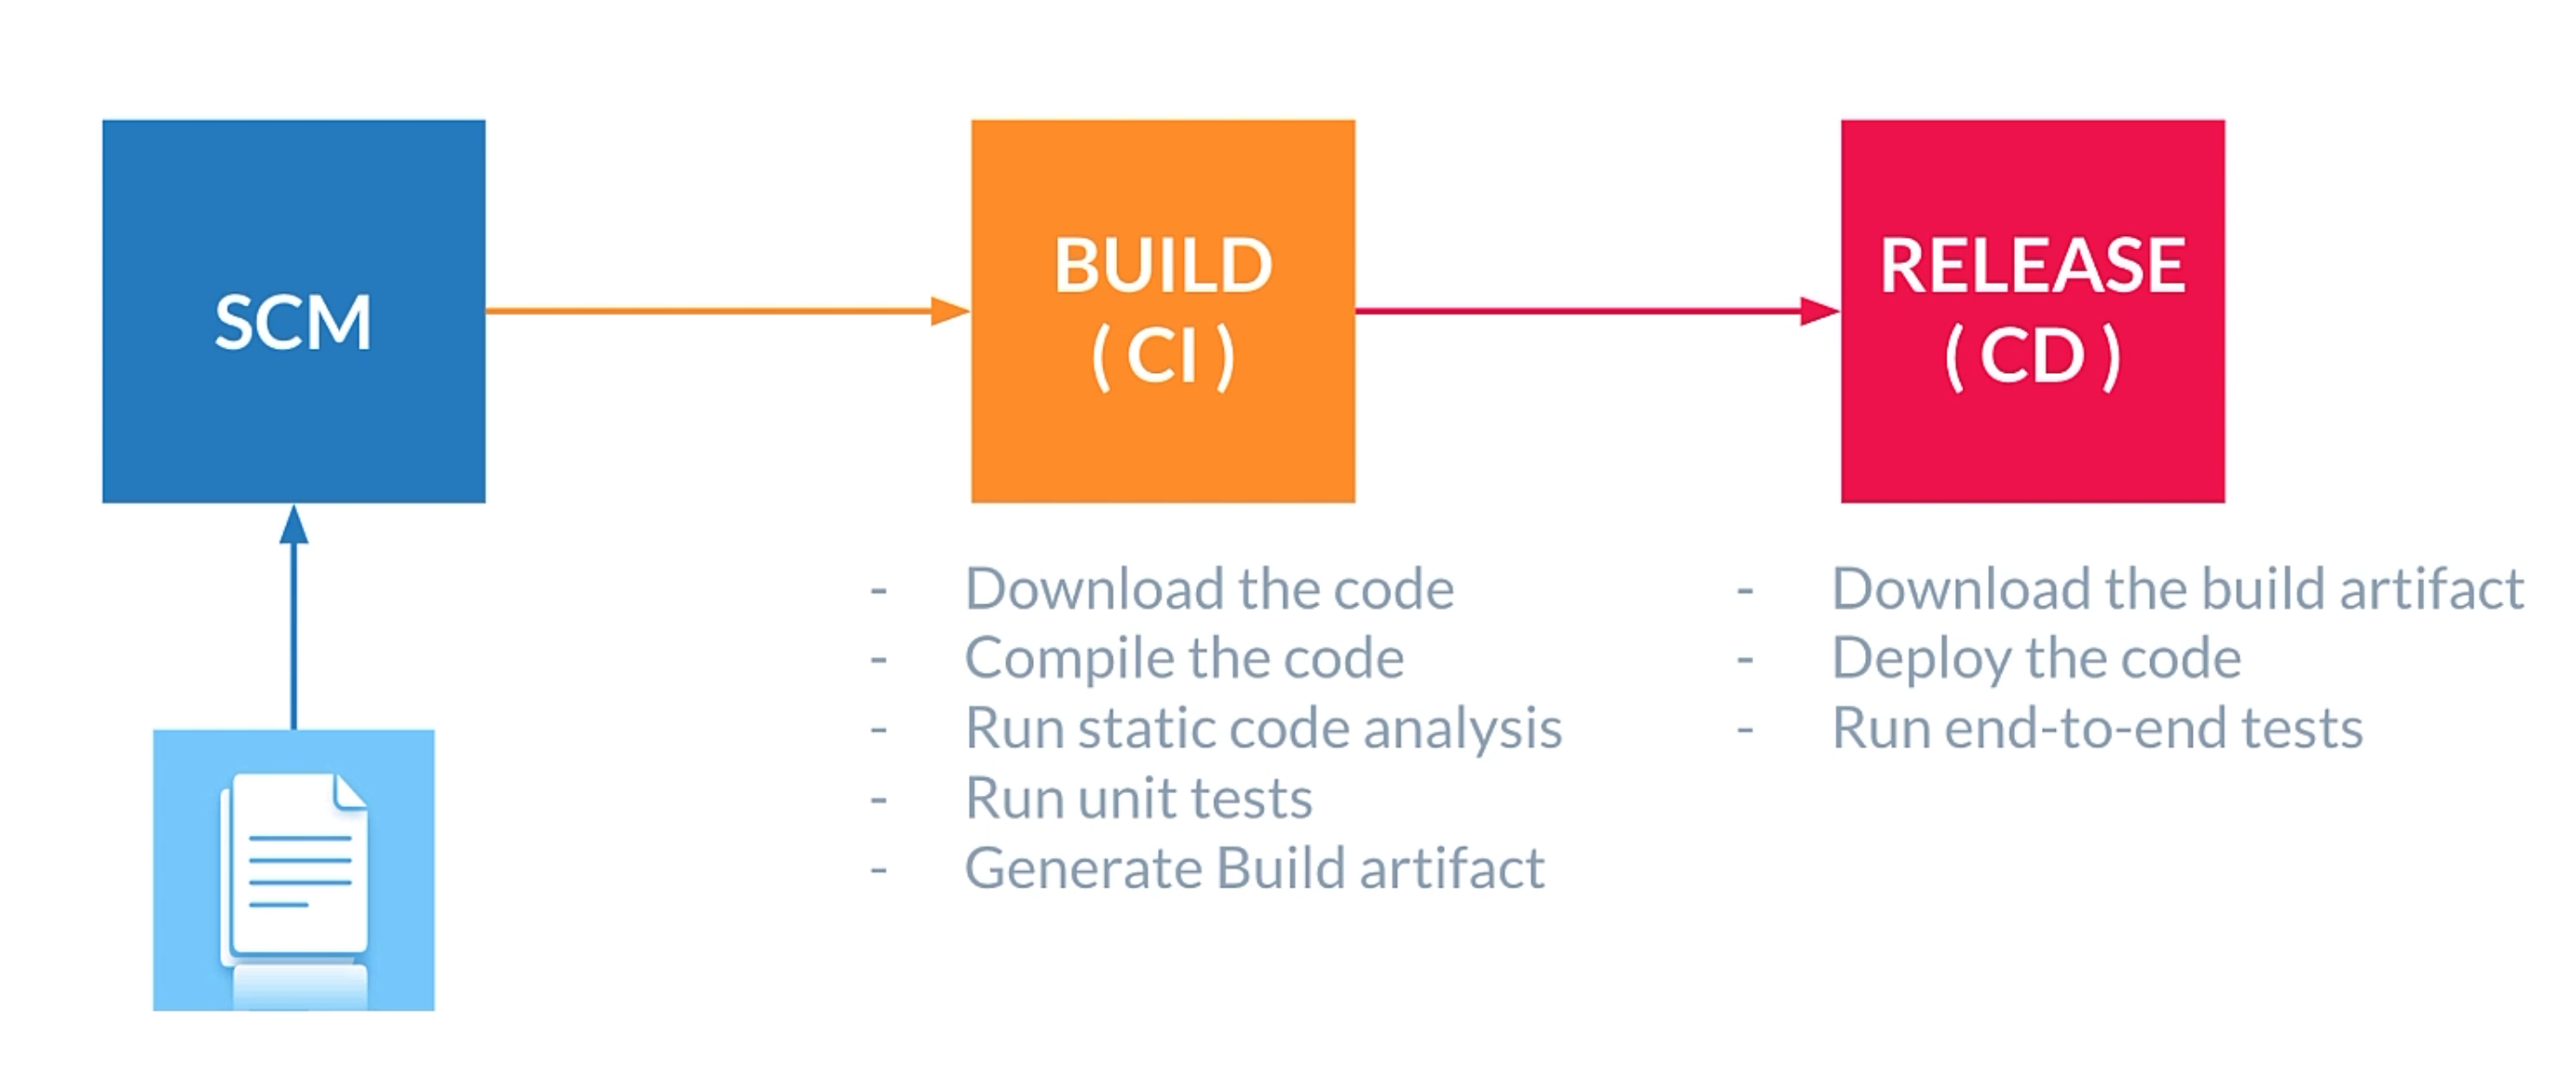
Release is the CD phase - CD is continuous delivery or continuous deployment.
The two terms aren't the same, and so we'll be discussing them in a bit.
During the release phase, we download the build artifact, deploy the application to various environments like dev, QA and so on, and then, we run end-to-end tests on the application - that's continuous testing.
Let's now see the difference between continuous delivery and continuous deployment.
During the CD phase, we deploy our application to various environments - such as dev, test, staging and production.
When deploying to production, we need to be absolutely sure that the code is of high quality, so usually deployment to production is done manually, and that's continuous delivery - that is, when the deployment to the production environment is done manually.
So, there are people who need to give approvals - whether or not to push the code changes to production.
But, when we have sufficient confidence in our CI/CD pipeline and the code quality, then we can also set automatic deployment to production, and that's continuous deployment.
In continuous deployment, if the conditions that we have defined are passing - let's say that we have a condition like, if all the end-to-end tests pass - the pipeline automatically pushes the code to production.
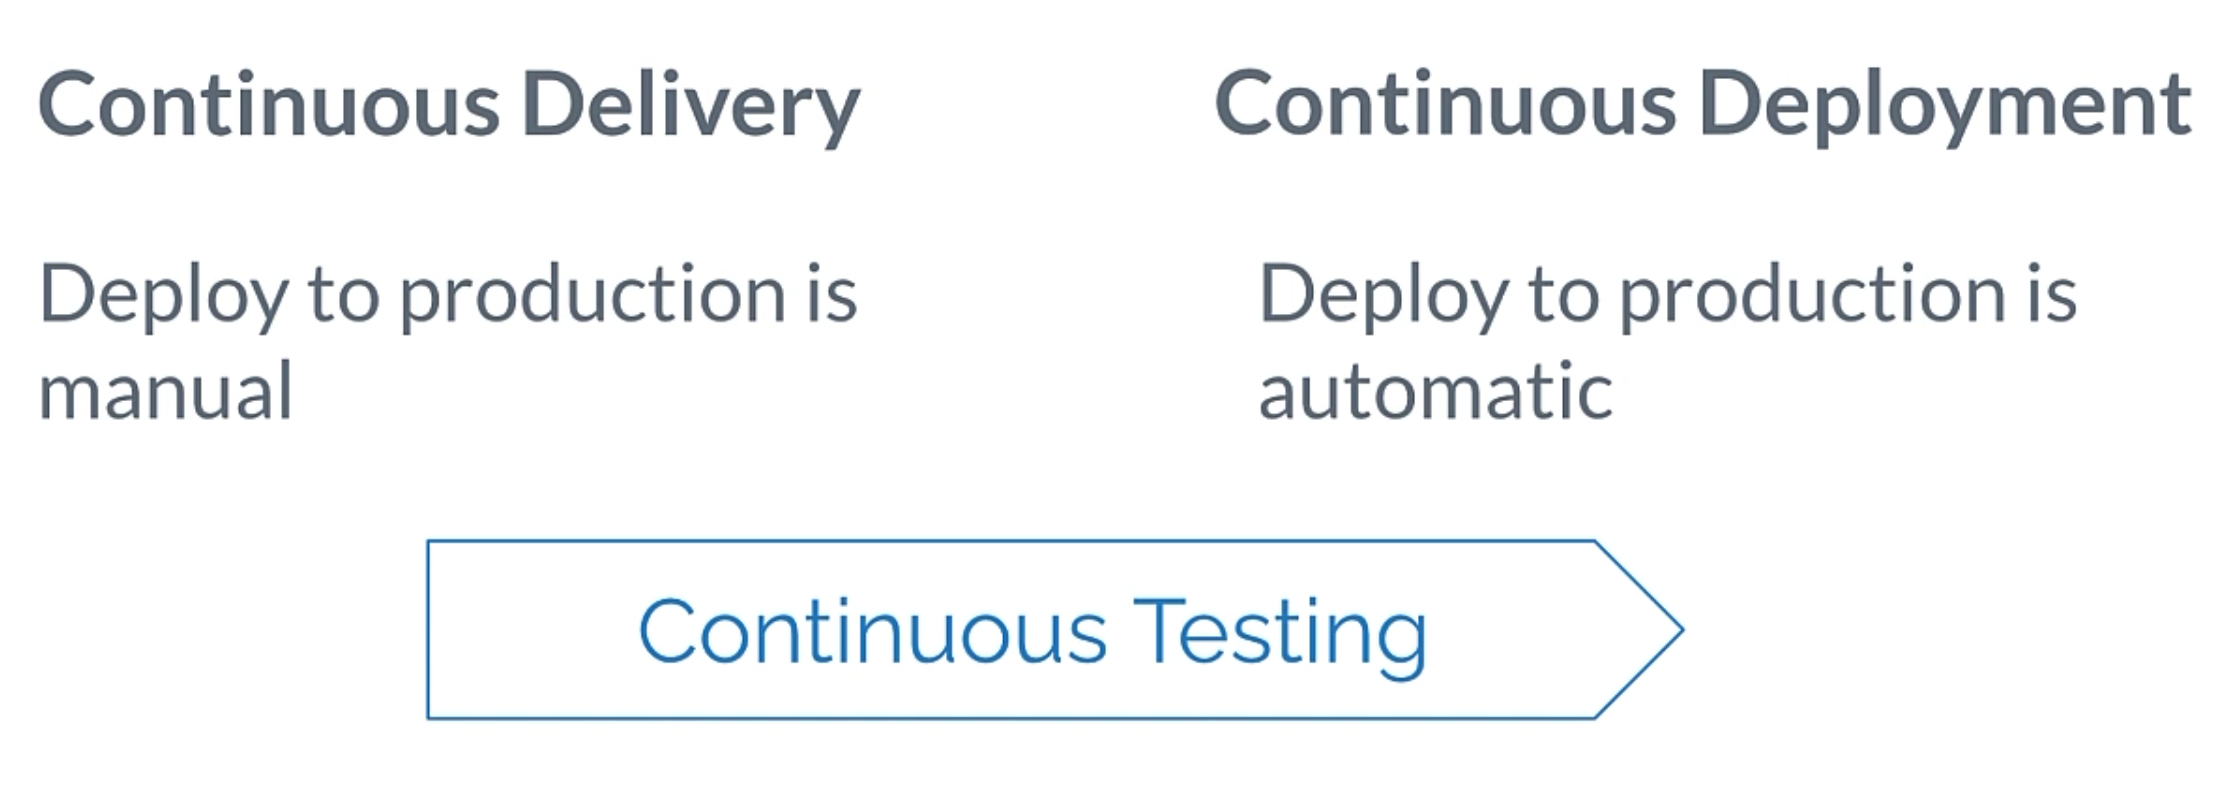
Continuous testing helps you move from continuous delivery to continuous deployment.
# Azure Pipelines
All right, with that understanding, let's start with Azure Pipelines.
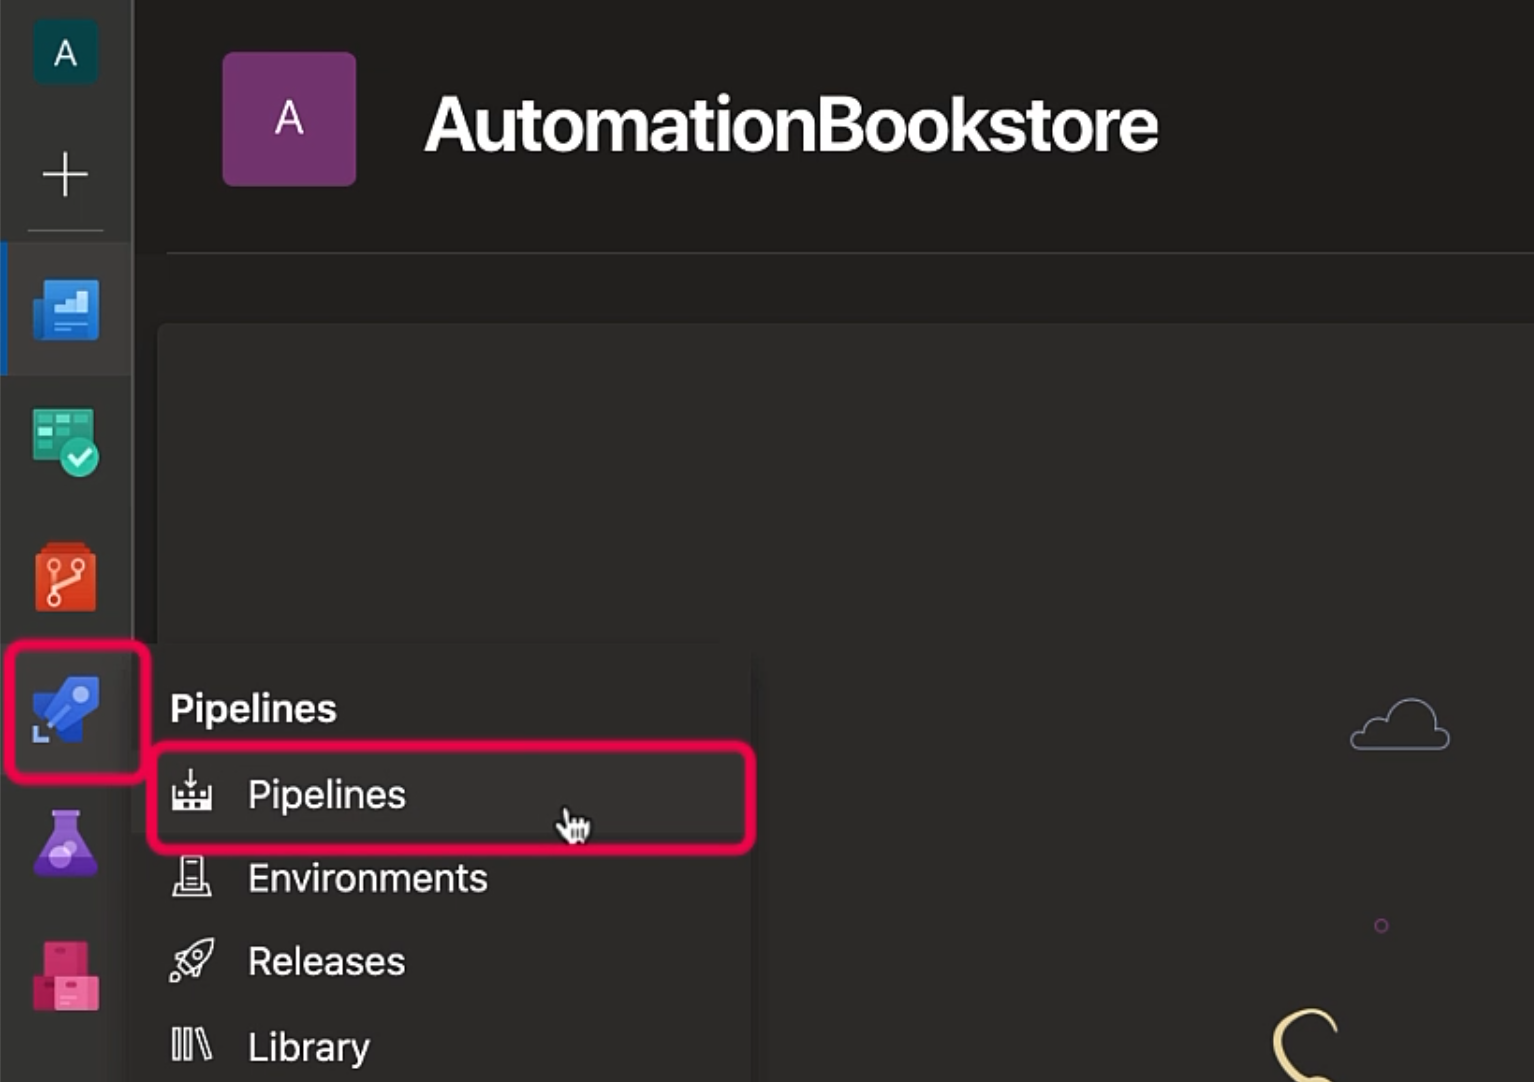
So, I'm in the project that we created earlier.
For this project, we'll be creating a pipeline.
Let me just show you the project first - this is an HTML/CSS application that we'll be working with - I forked it from one of Angie Jones' GitHub repos - it is deployed here.

This is a single page, static HTML app.

The way this works is, you can filter down the books by title, author, or price.
Before proceeding further, I wanted to make it clear that the steps I'm going to be showing will build and deploy this code on Azure - you may or may not want to follow them.
You can either deploy your application on Azure or use the currently deployed application for running the test.
I wanted to give you a birdseye view of Azure Pipelines, and so I'm going to build and deploy the application.
Okay, so let's go ahead with the build and release pipeline for building and releasing the code.
We'll start with build pipeline - go to "Pipelines" and select "Pipelines".
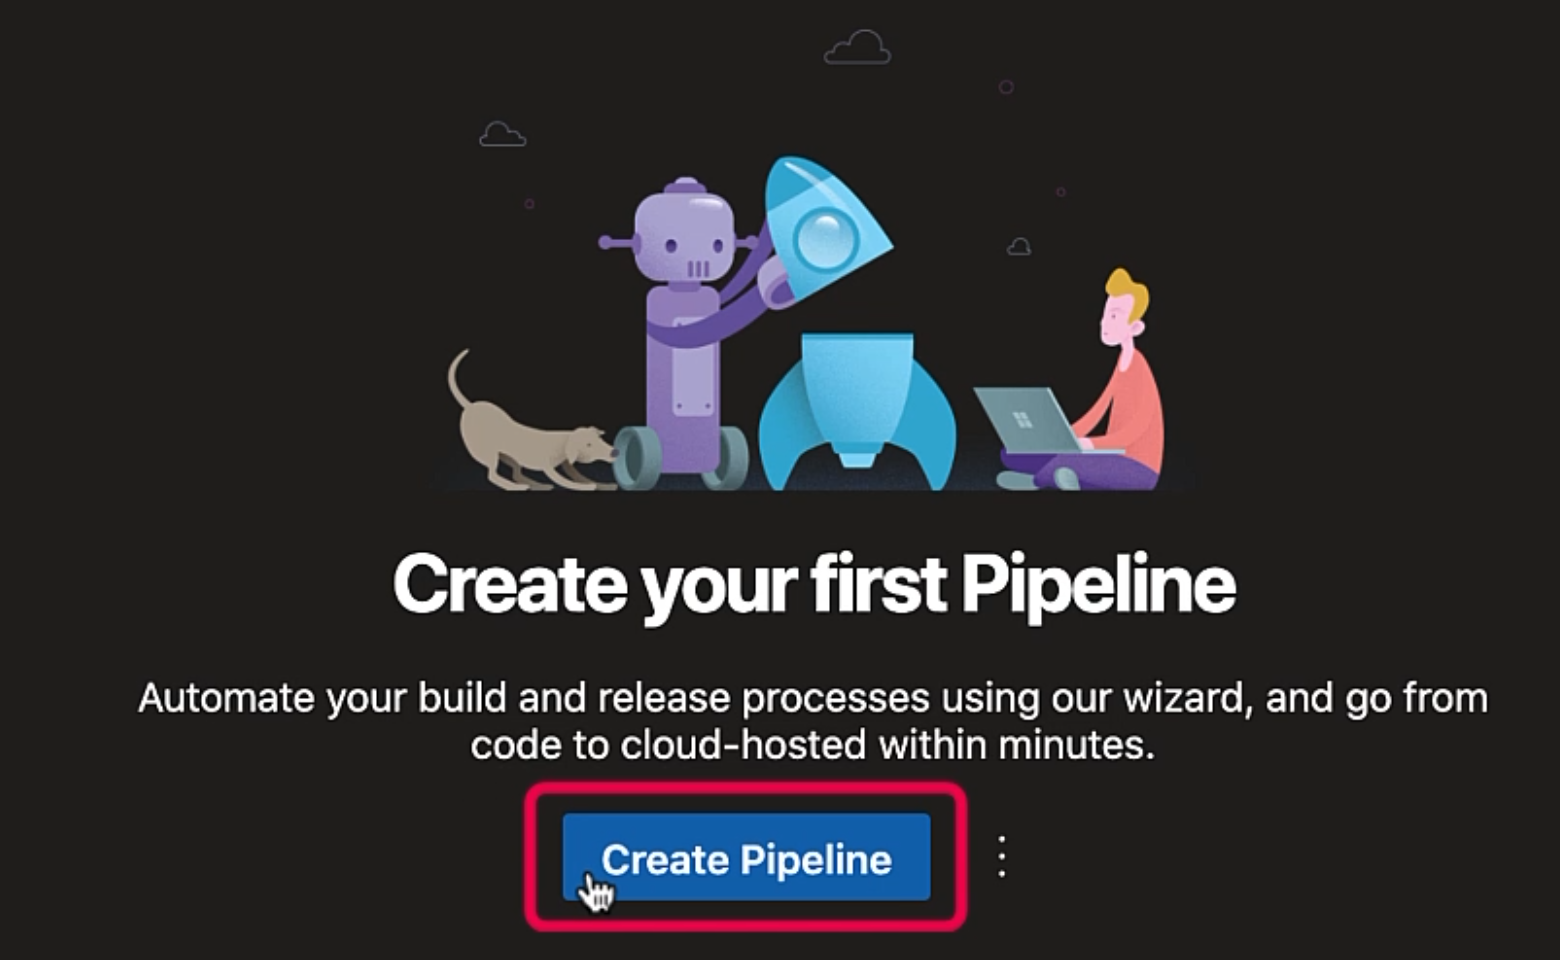
Click on the "Create Pipeline" button.
Now, there are two ways to create a pipeline.
We can either create a pipeline using code that is YAML, or we can create a pipeline using the classic editor that is visual.
To explore both of these, we are going to create a build pipeline using YAML, and a release pipeline using classic editor.
# Create a build pipeline
The first thing we need to do is select the source for our code.
Our code is in GitHub, and if you look closely, it has a YAML tag.
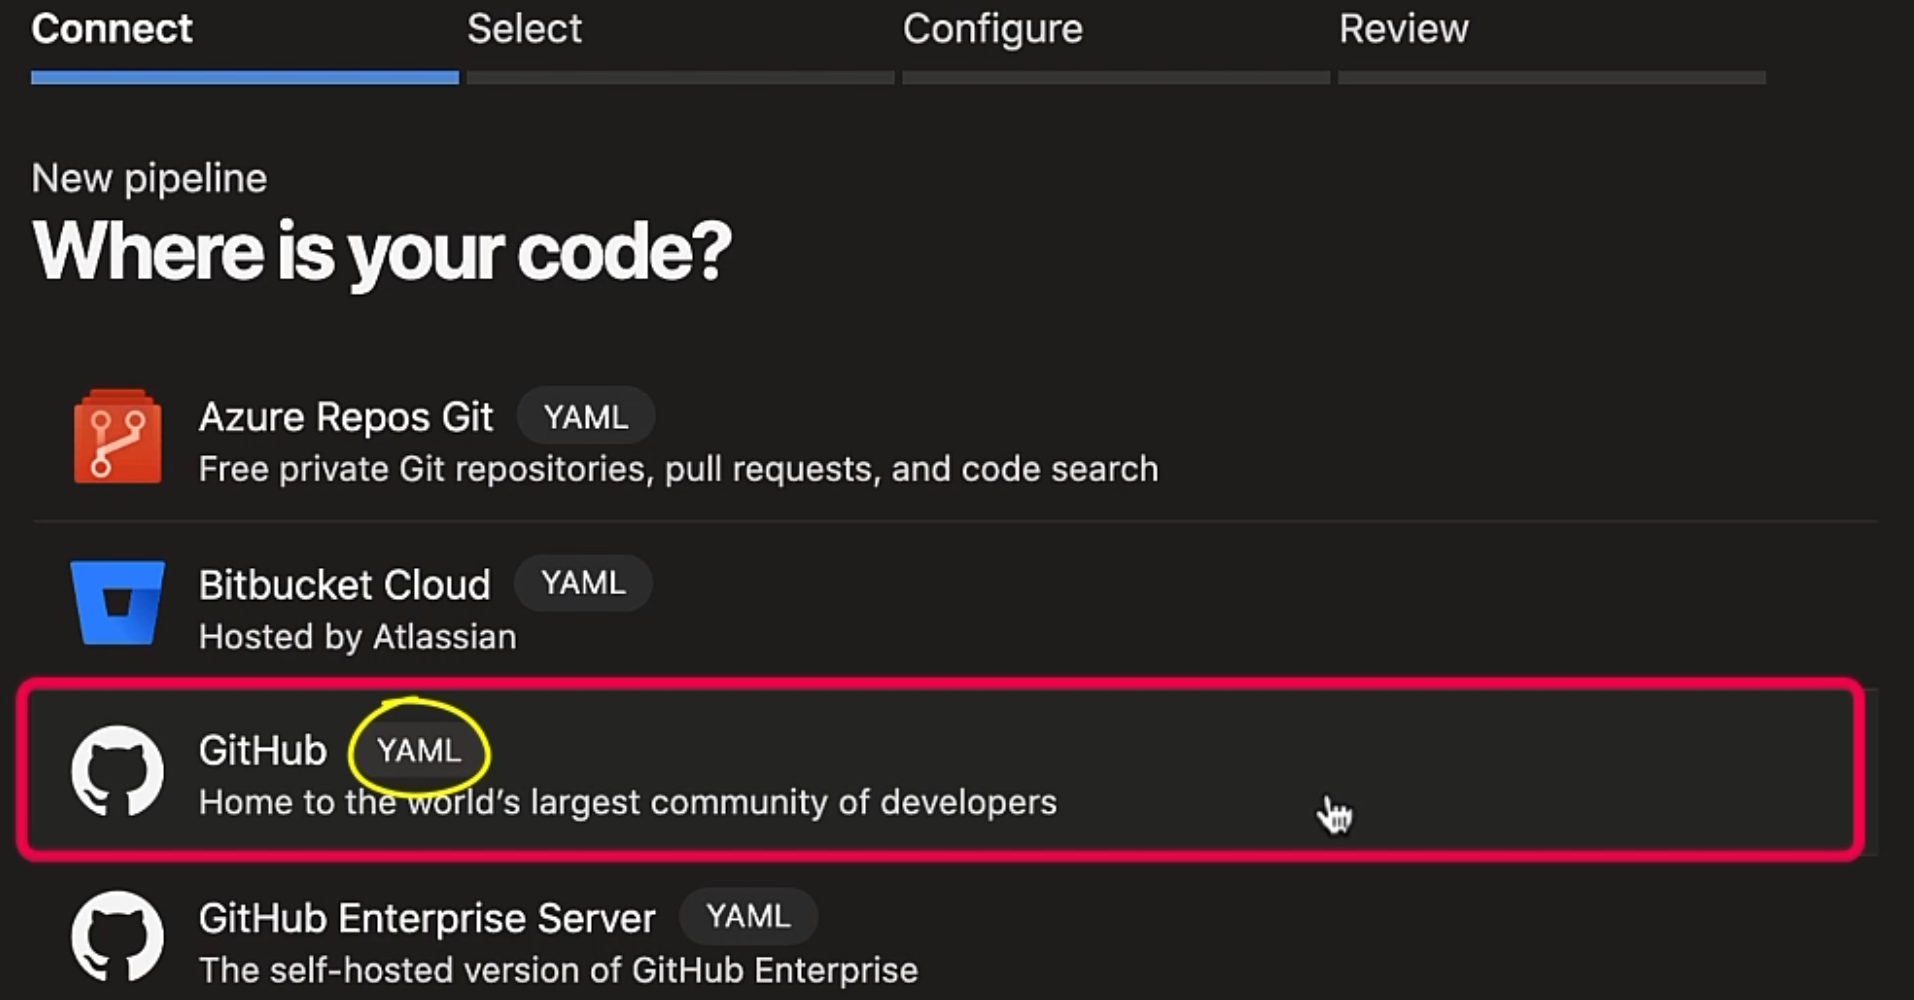
That means it can be used when creating pipelines using YAML, so we can use the code from Azure Repos, Bitbucket, GitHub and GitHub Enterprise Server when creating a pipeline using YAML.
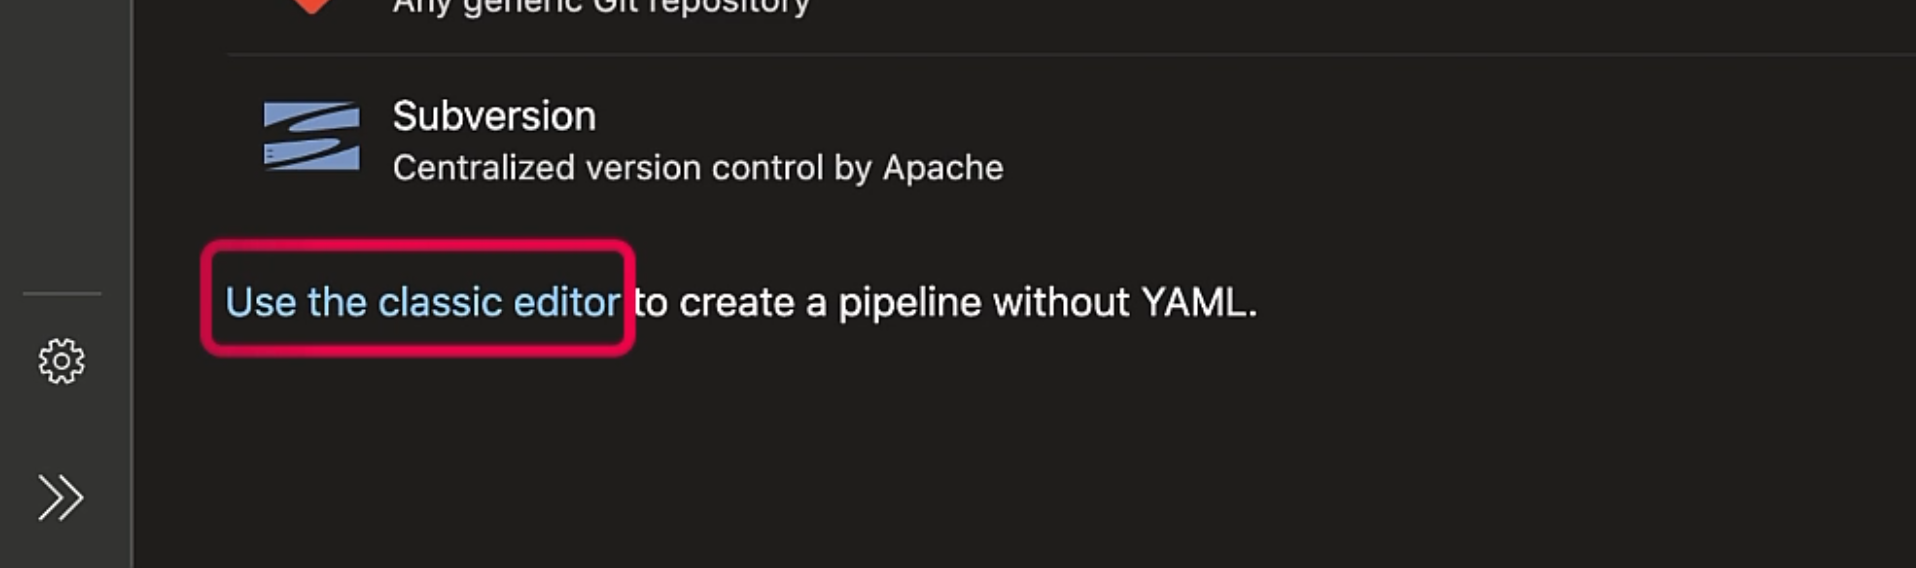
But if we have our code elsewhere, like in Subversion or a general Git repository, then we'll have to go with the classic editor to create the pipeline.
To create the pipeline using the classic editor, use this link.
Let's go ahead and select "GitHub" because our code is in GitHub.
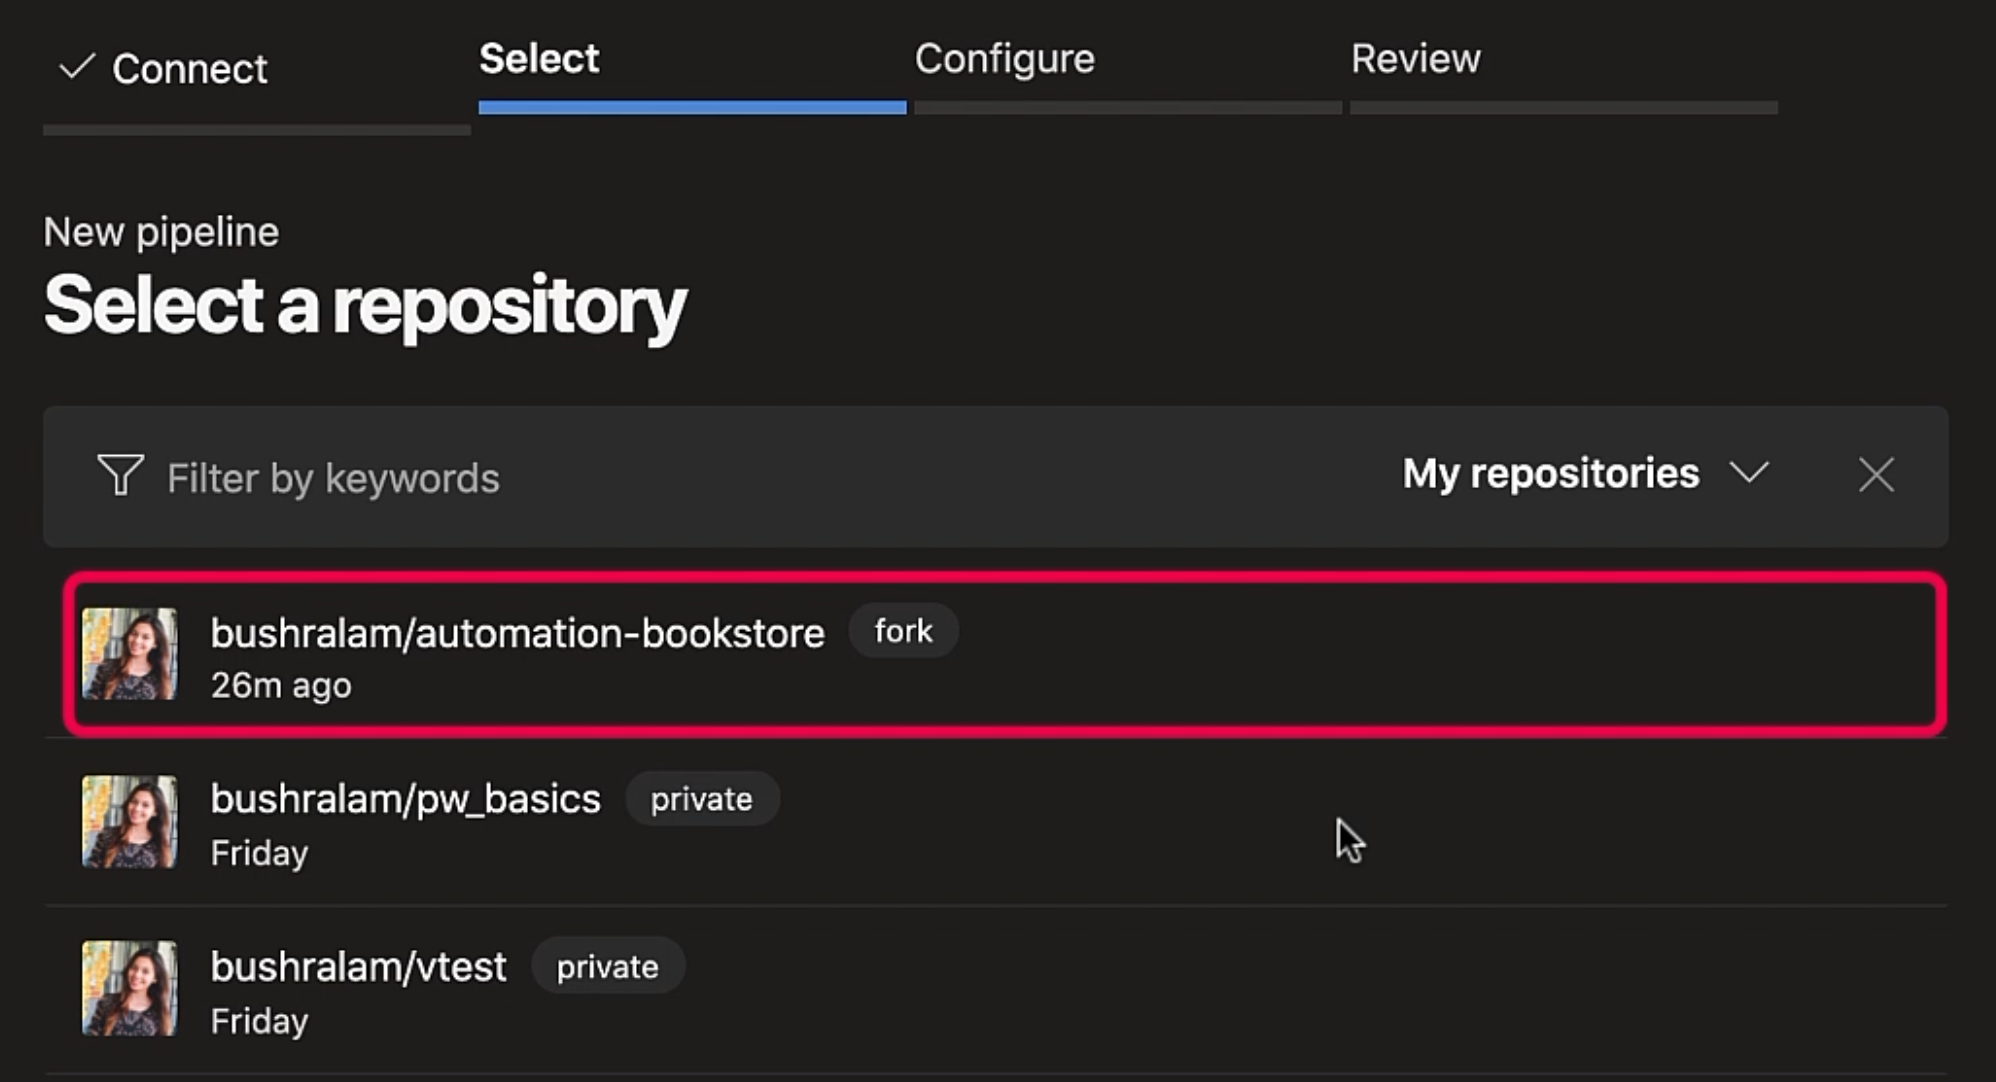
Now it's asking to select the GitHub repository.
If you're doing this for the first time, it will ask you to authorize, and once you authorize, you will be able to see the list of GitHub repositories.
So I'll select a repository that holds my project, which is this one.
Then, I will scroll down and "Approve and install".
Now these are the templates that we can choose from.
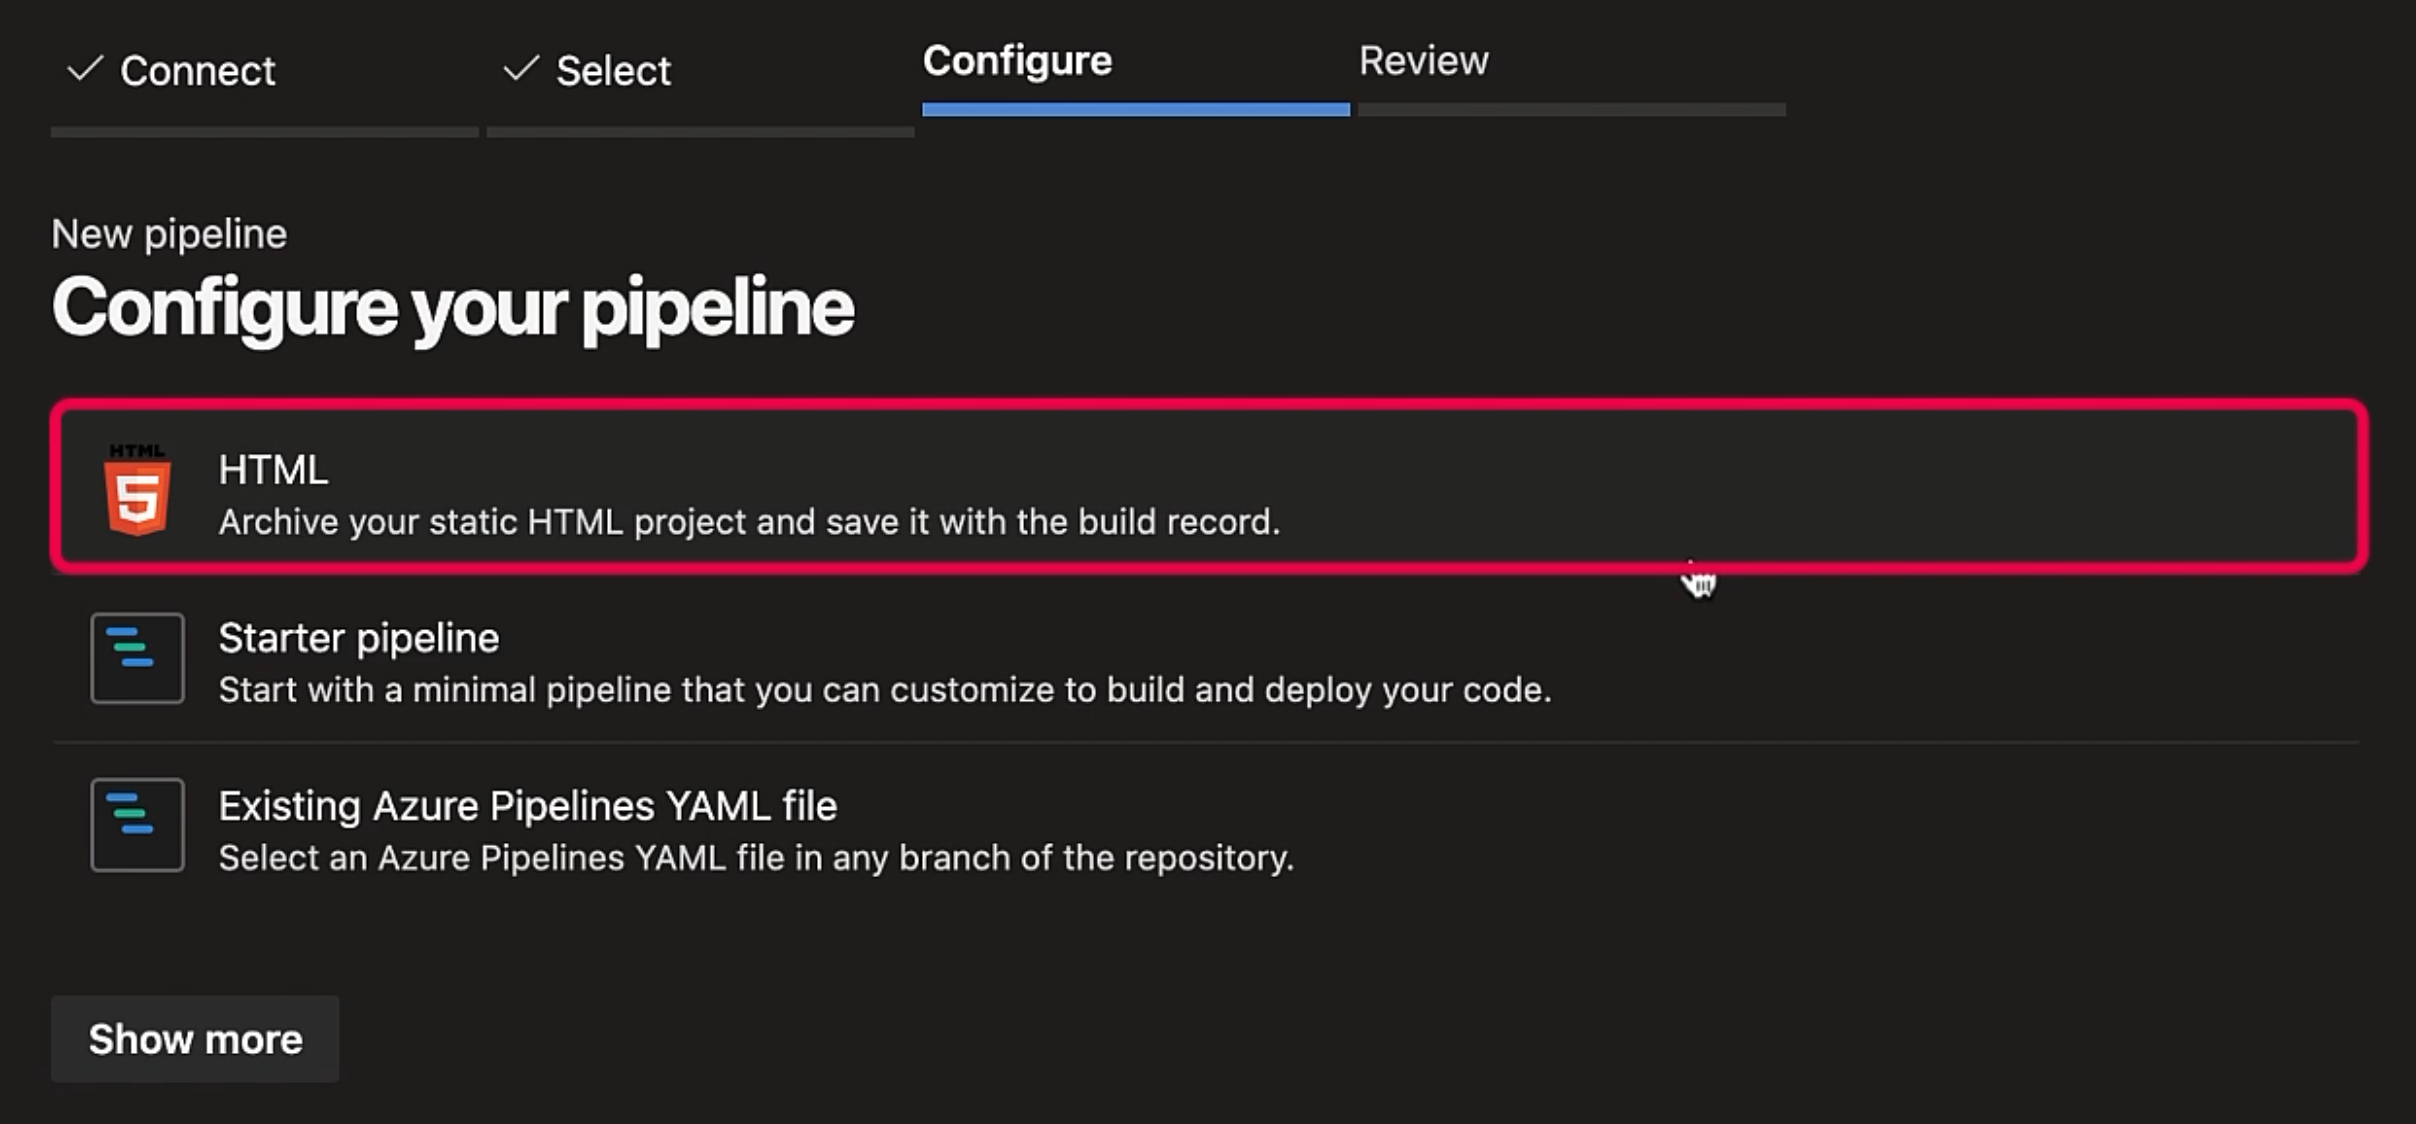
Our application is a static HTML project, and so that is what it is suggesting here.
We can also start with the "Starter pipeline", which would generate a very basic YAML file that we can customize.
Or, if you have an existing Azure pipeline YAML file, we can select that.
If we click on "Show more", these are the other templates that we can work with based on our project needs.
Let's select HTML. This is the YAML file it has generated for us.
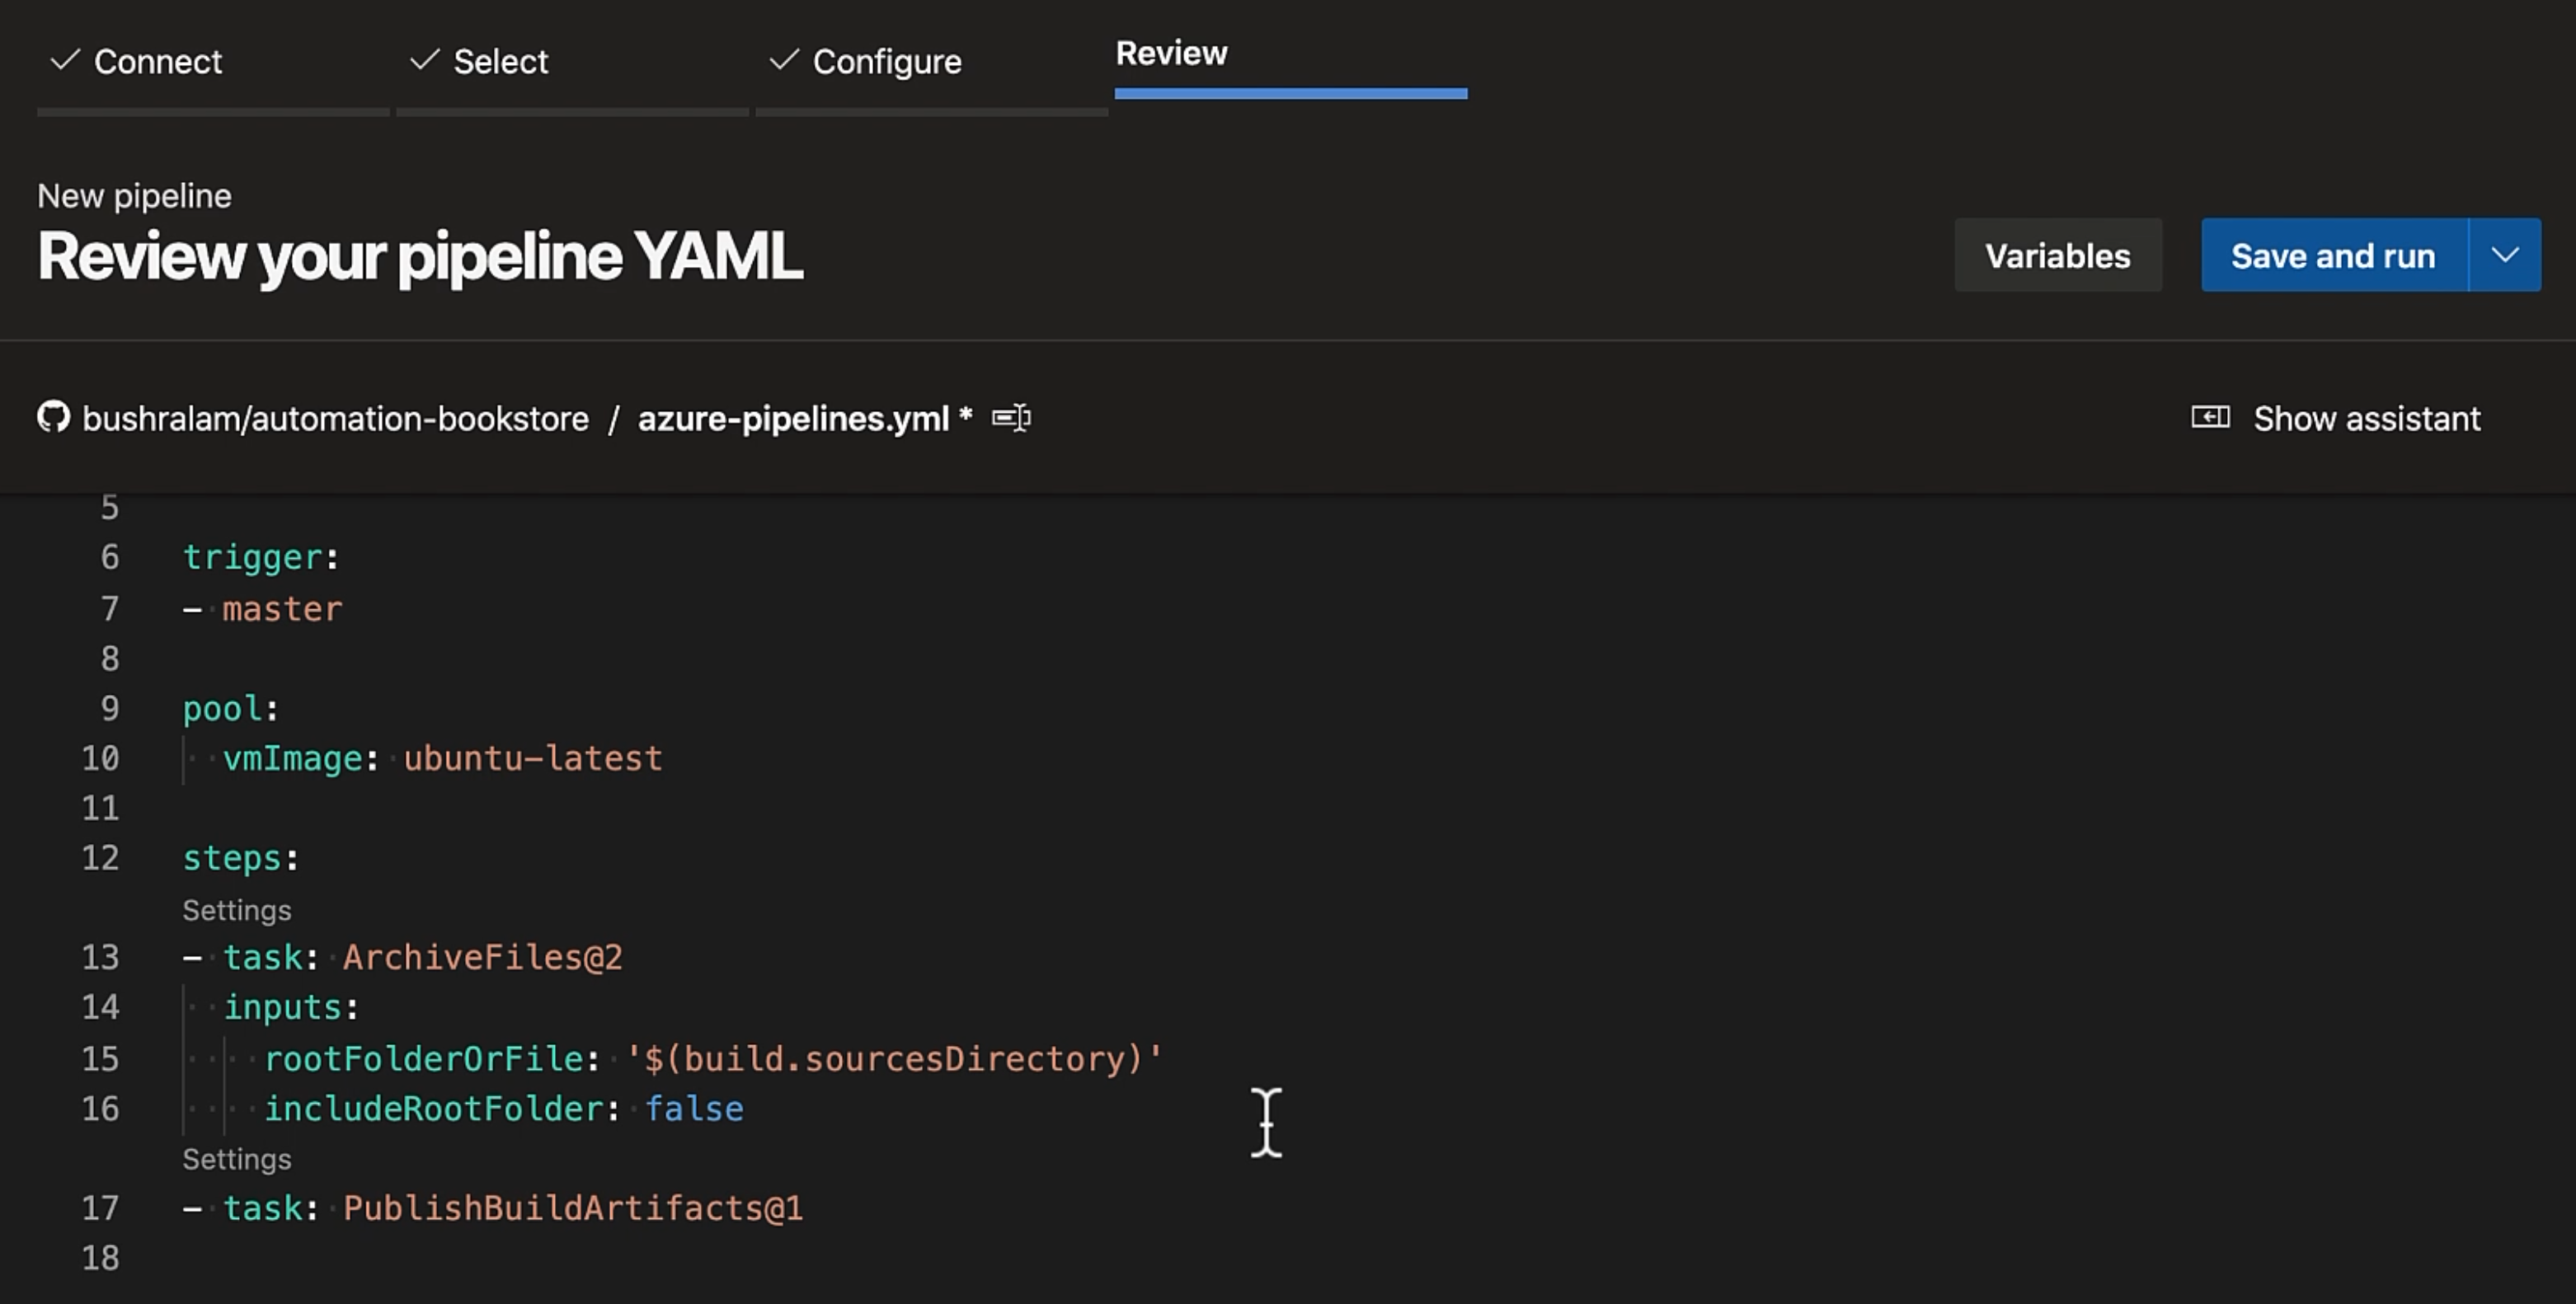
This contains the build configuration.
YAML is a data serialization language, like JSON and XML.
YAML is highly human readable and intuitive, and so it is becoming a popular choice for writing configuration files.
In fact, YAML is a superset of JSON - any valid JSON file is also a valid YAML file.
If you would like to understand YAML in more detail, there's a resource attached - you may want to go through it.
Let's understand what the file says.
The trigger has been set on the master branch - meaning, if there's any code push in the master branch, the build pipeline will trigger.
We can also have multiple branches here.
We can also have a more complex case, where we need to include some branches and exclude some.
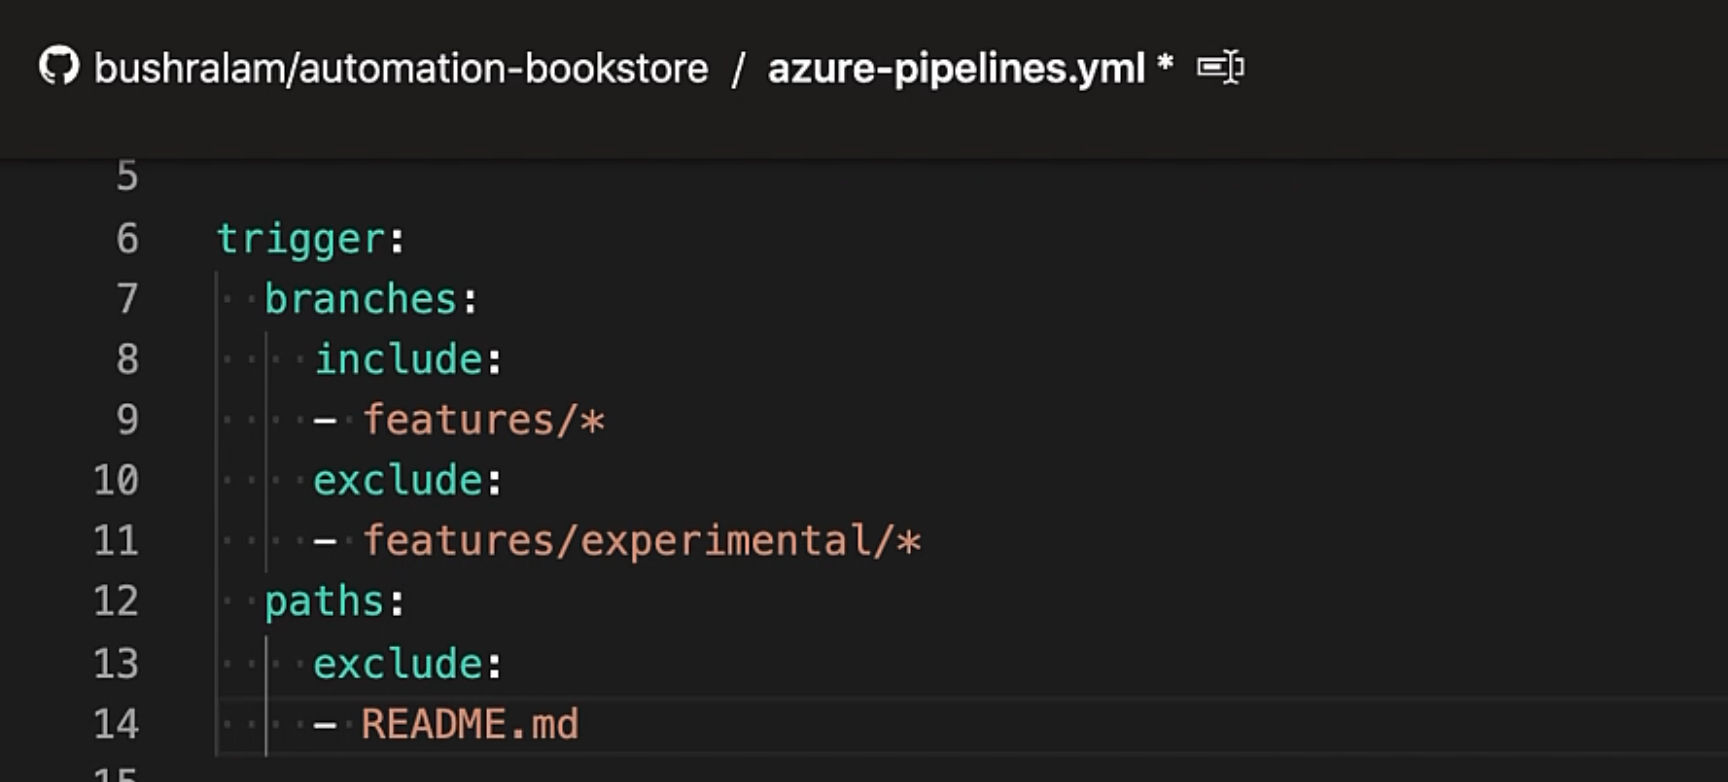
Here, we have excluded the README file, so any changes done to this file will not trigger the build.
And, if you would like to disable the CI builds entirely, then we can specify none.
Let's reset.
Then, we have pool.
pool specifies the details of the agent pool that we would like to work with.
An agent is a machine that will run our jobs.
Agents aren't managed individually, but rather, in groups.
So, that's an agent pool - a group of agents.
An agent could be a Microsoft hosted agent, or a self hosted agent.
If it's a self hosted agent, then we need to specify the private pool name.
If it's a Microsoft hosted agent, then we don't need to specify any name, but we need to specify the virtual machine image we want to use.
So here we have specified the vmImage to be used as ubuntu-latest.
Instead of Ubuntu, we could also specify macOS-latest or windows-latest.
Then, we have steps.
A step is a linear sequence of operations that make up a job.
A step can either be a task or a script or a reference to an external template.
Here, we have two tasks.
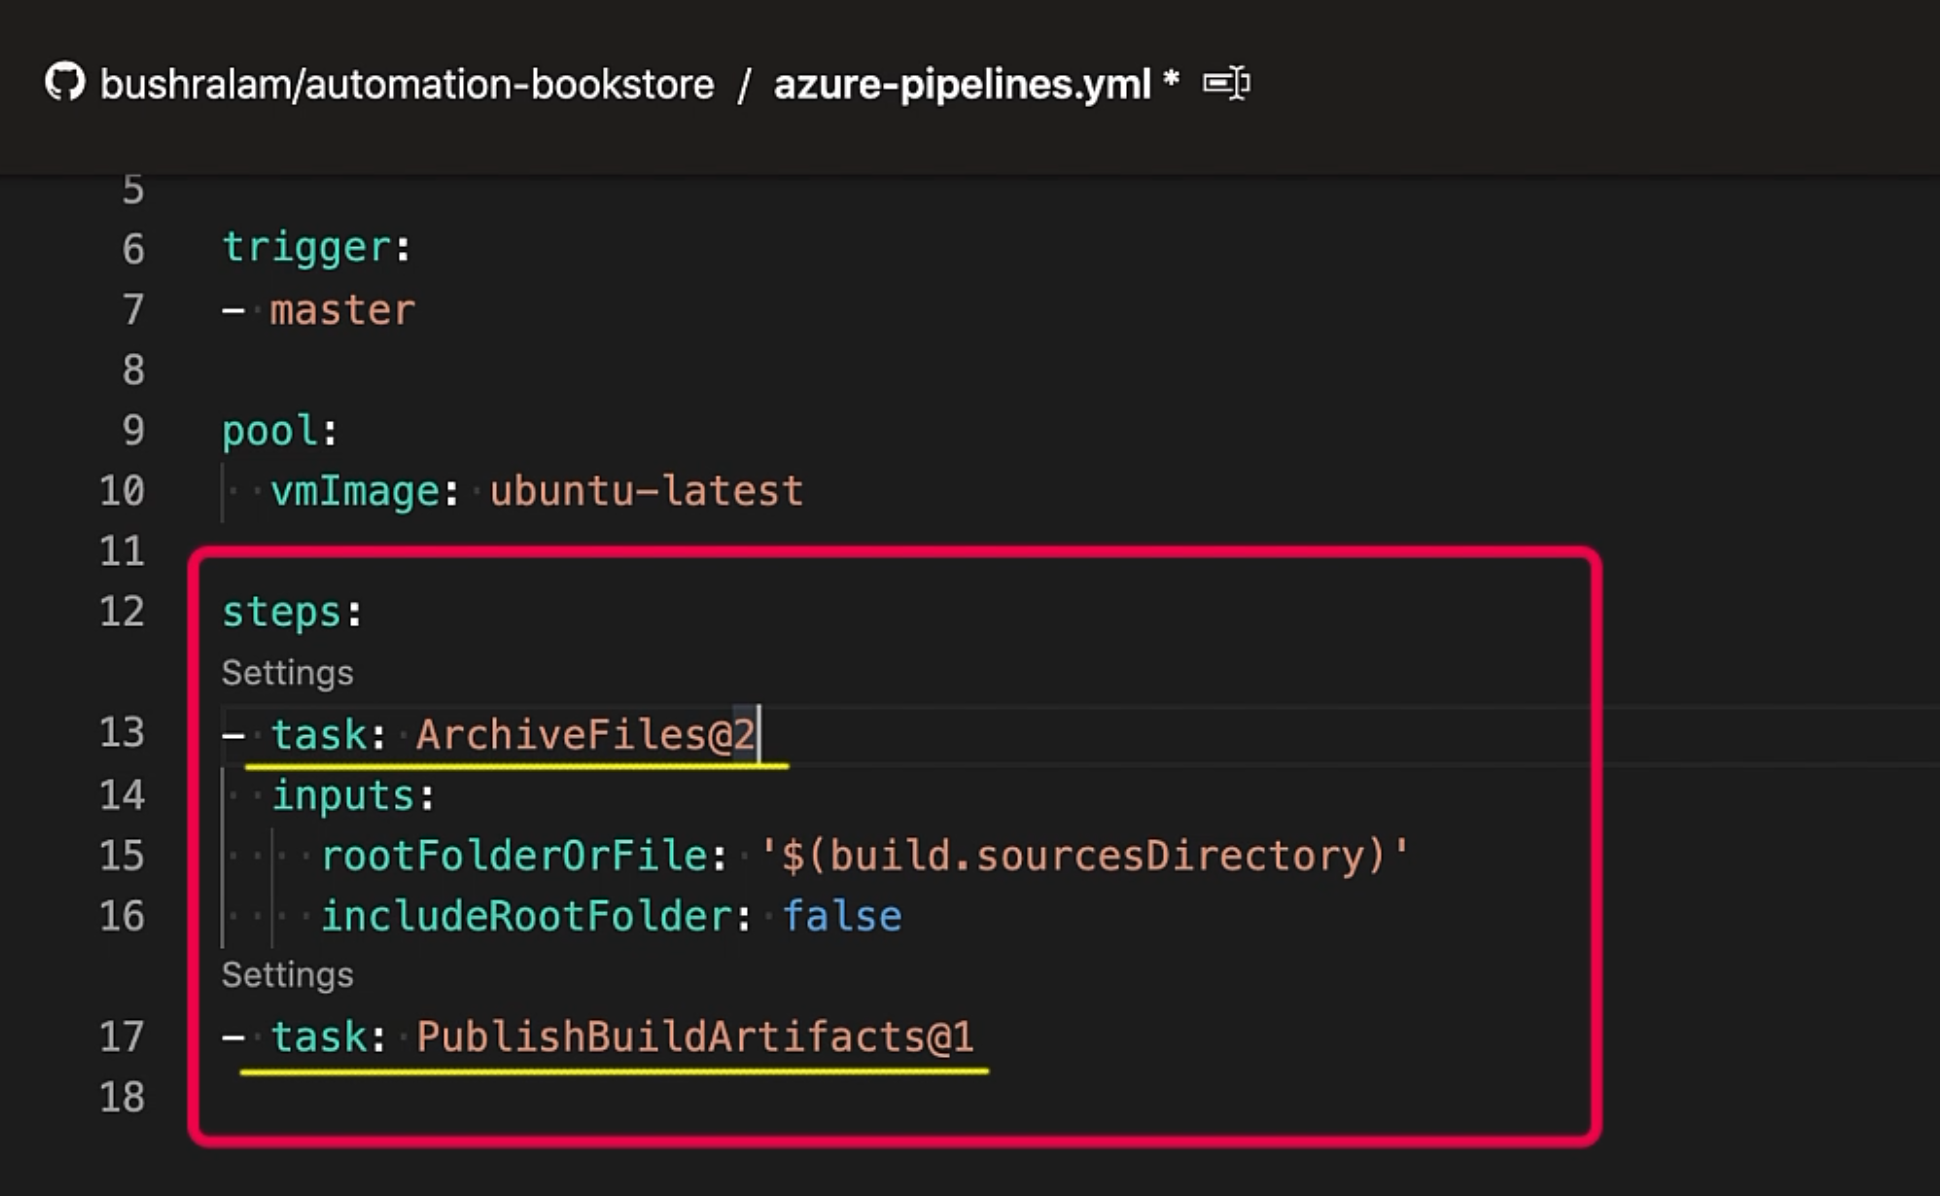
A task is simply a packaged script that has been abstracted with a set of inputs.
The first task is ArchiveFiles@2 - this will archive our project, so that we have a zip file available.
The second one is PublishBuildArtifacts@1 - this will publish the build artifact that is the zip of a project, so that we have it available for the release pipeline.
Here, we have some inputs for this task.
We can update the task settings using the "Settings" link.
If you would like to add a new task, click on "Show assistant" and search for your task (ex. "copy files"), provide the inputs, and click on "Add".
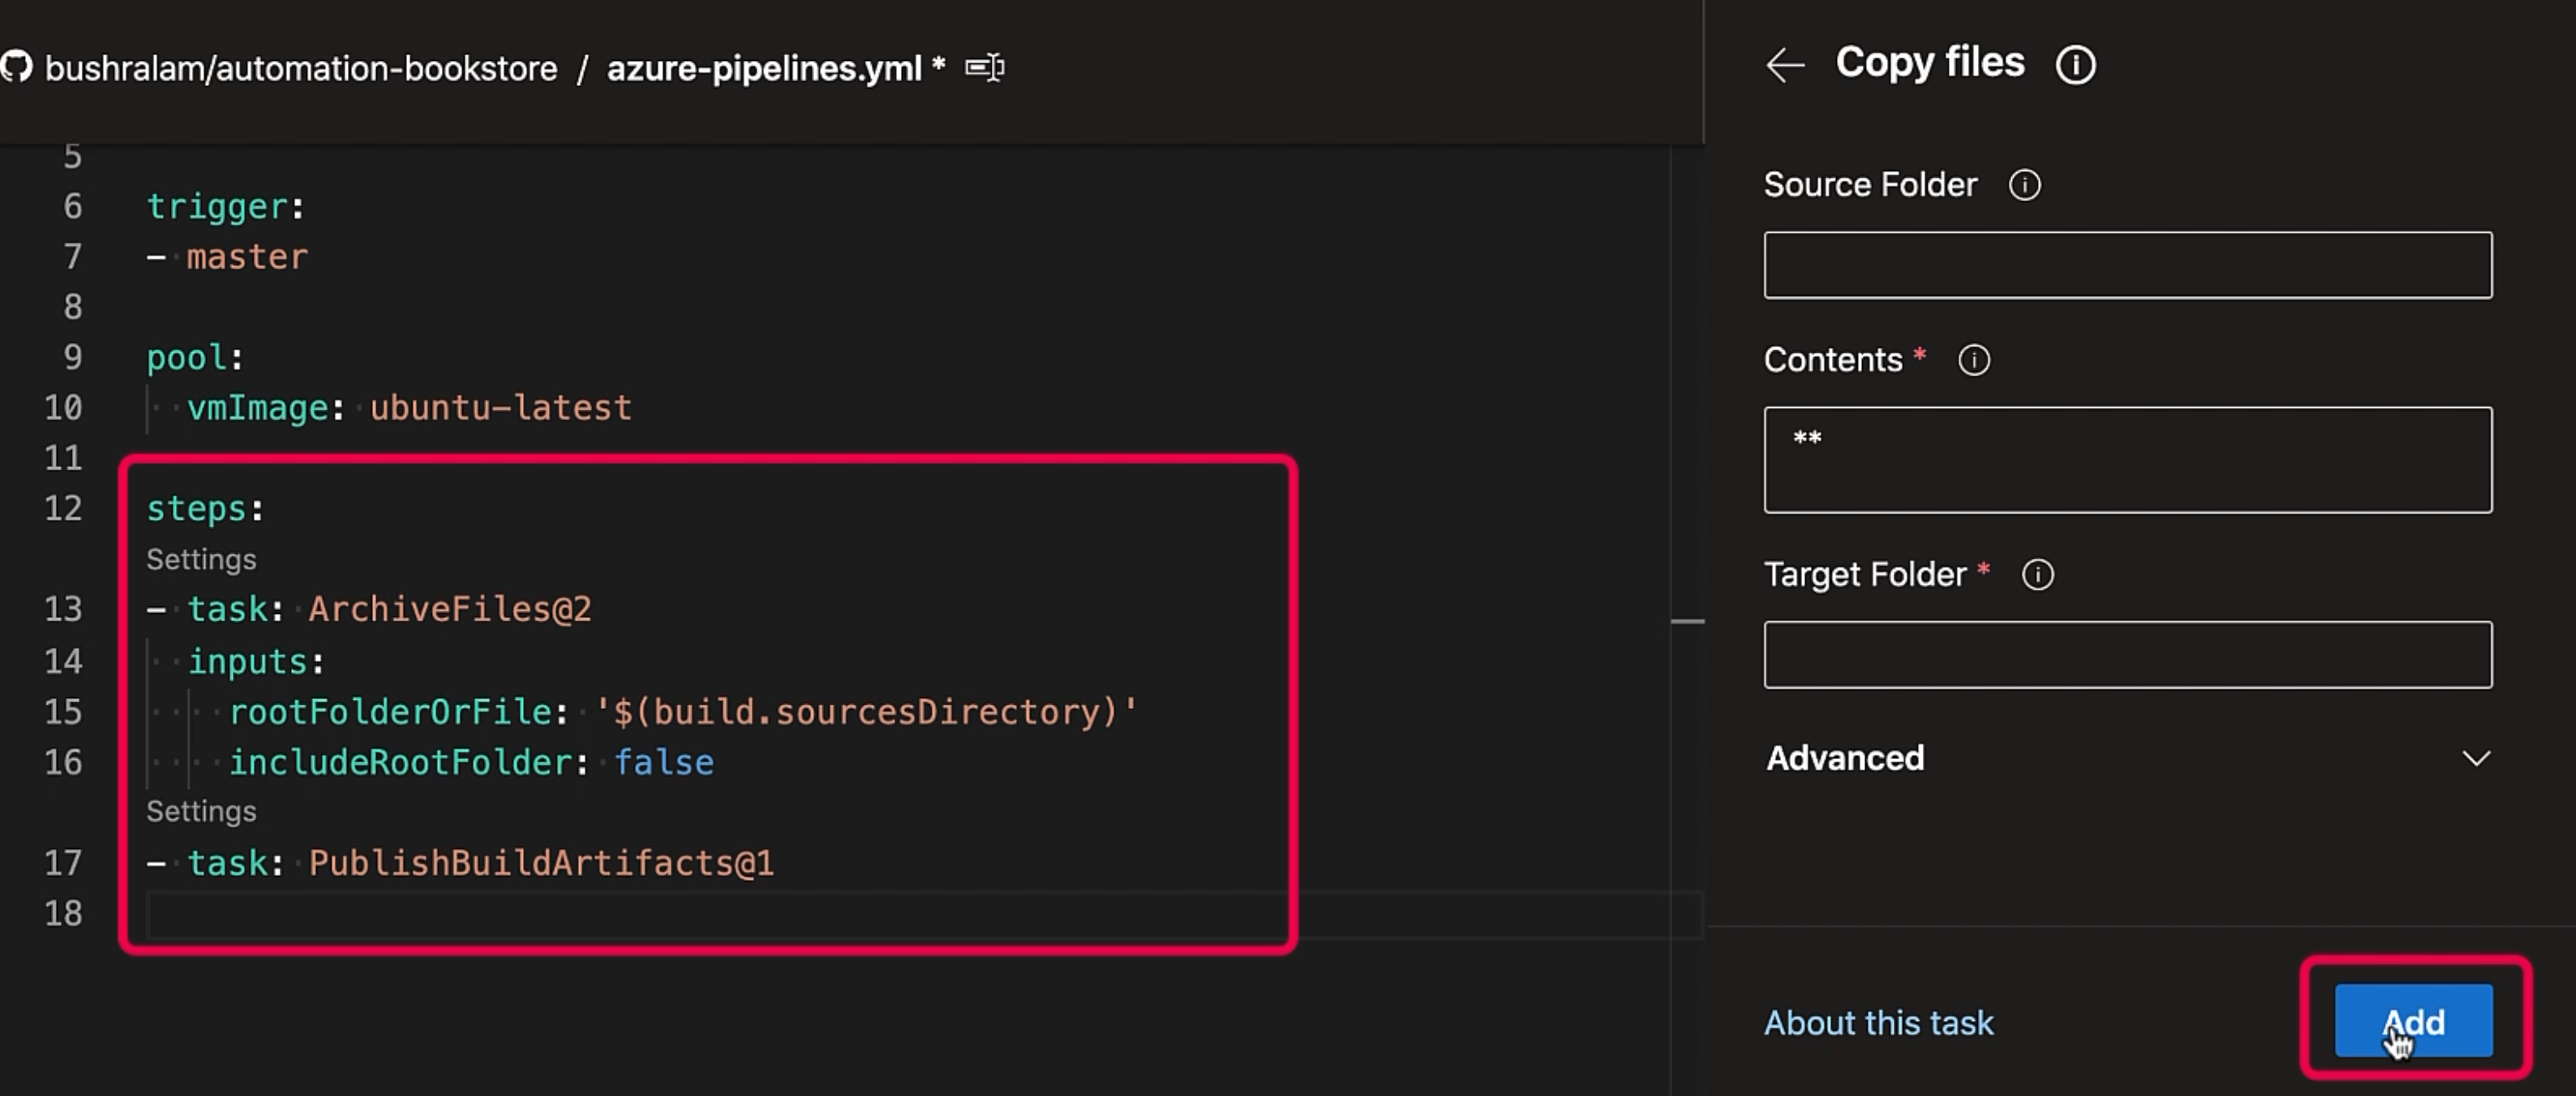
So, our task has been added here.
I've attached a document as a resource, which is a detailed reference guide to Azure Pipeline's YAML schema.
For now, we are satisfied with this YAML file, and so we'll hit "Save and run".
This will save our YAML file in the code repository and will run a build.
Our build has been triggered; our job is currently queued.

We can click on "Job" for more details.
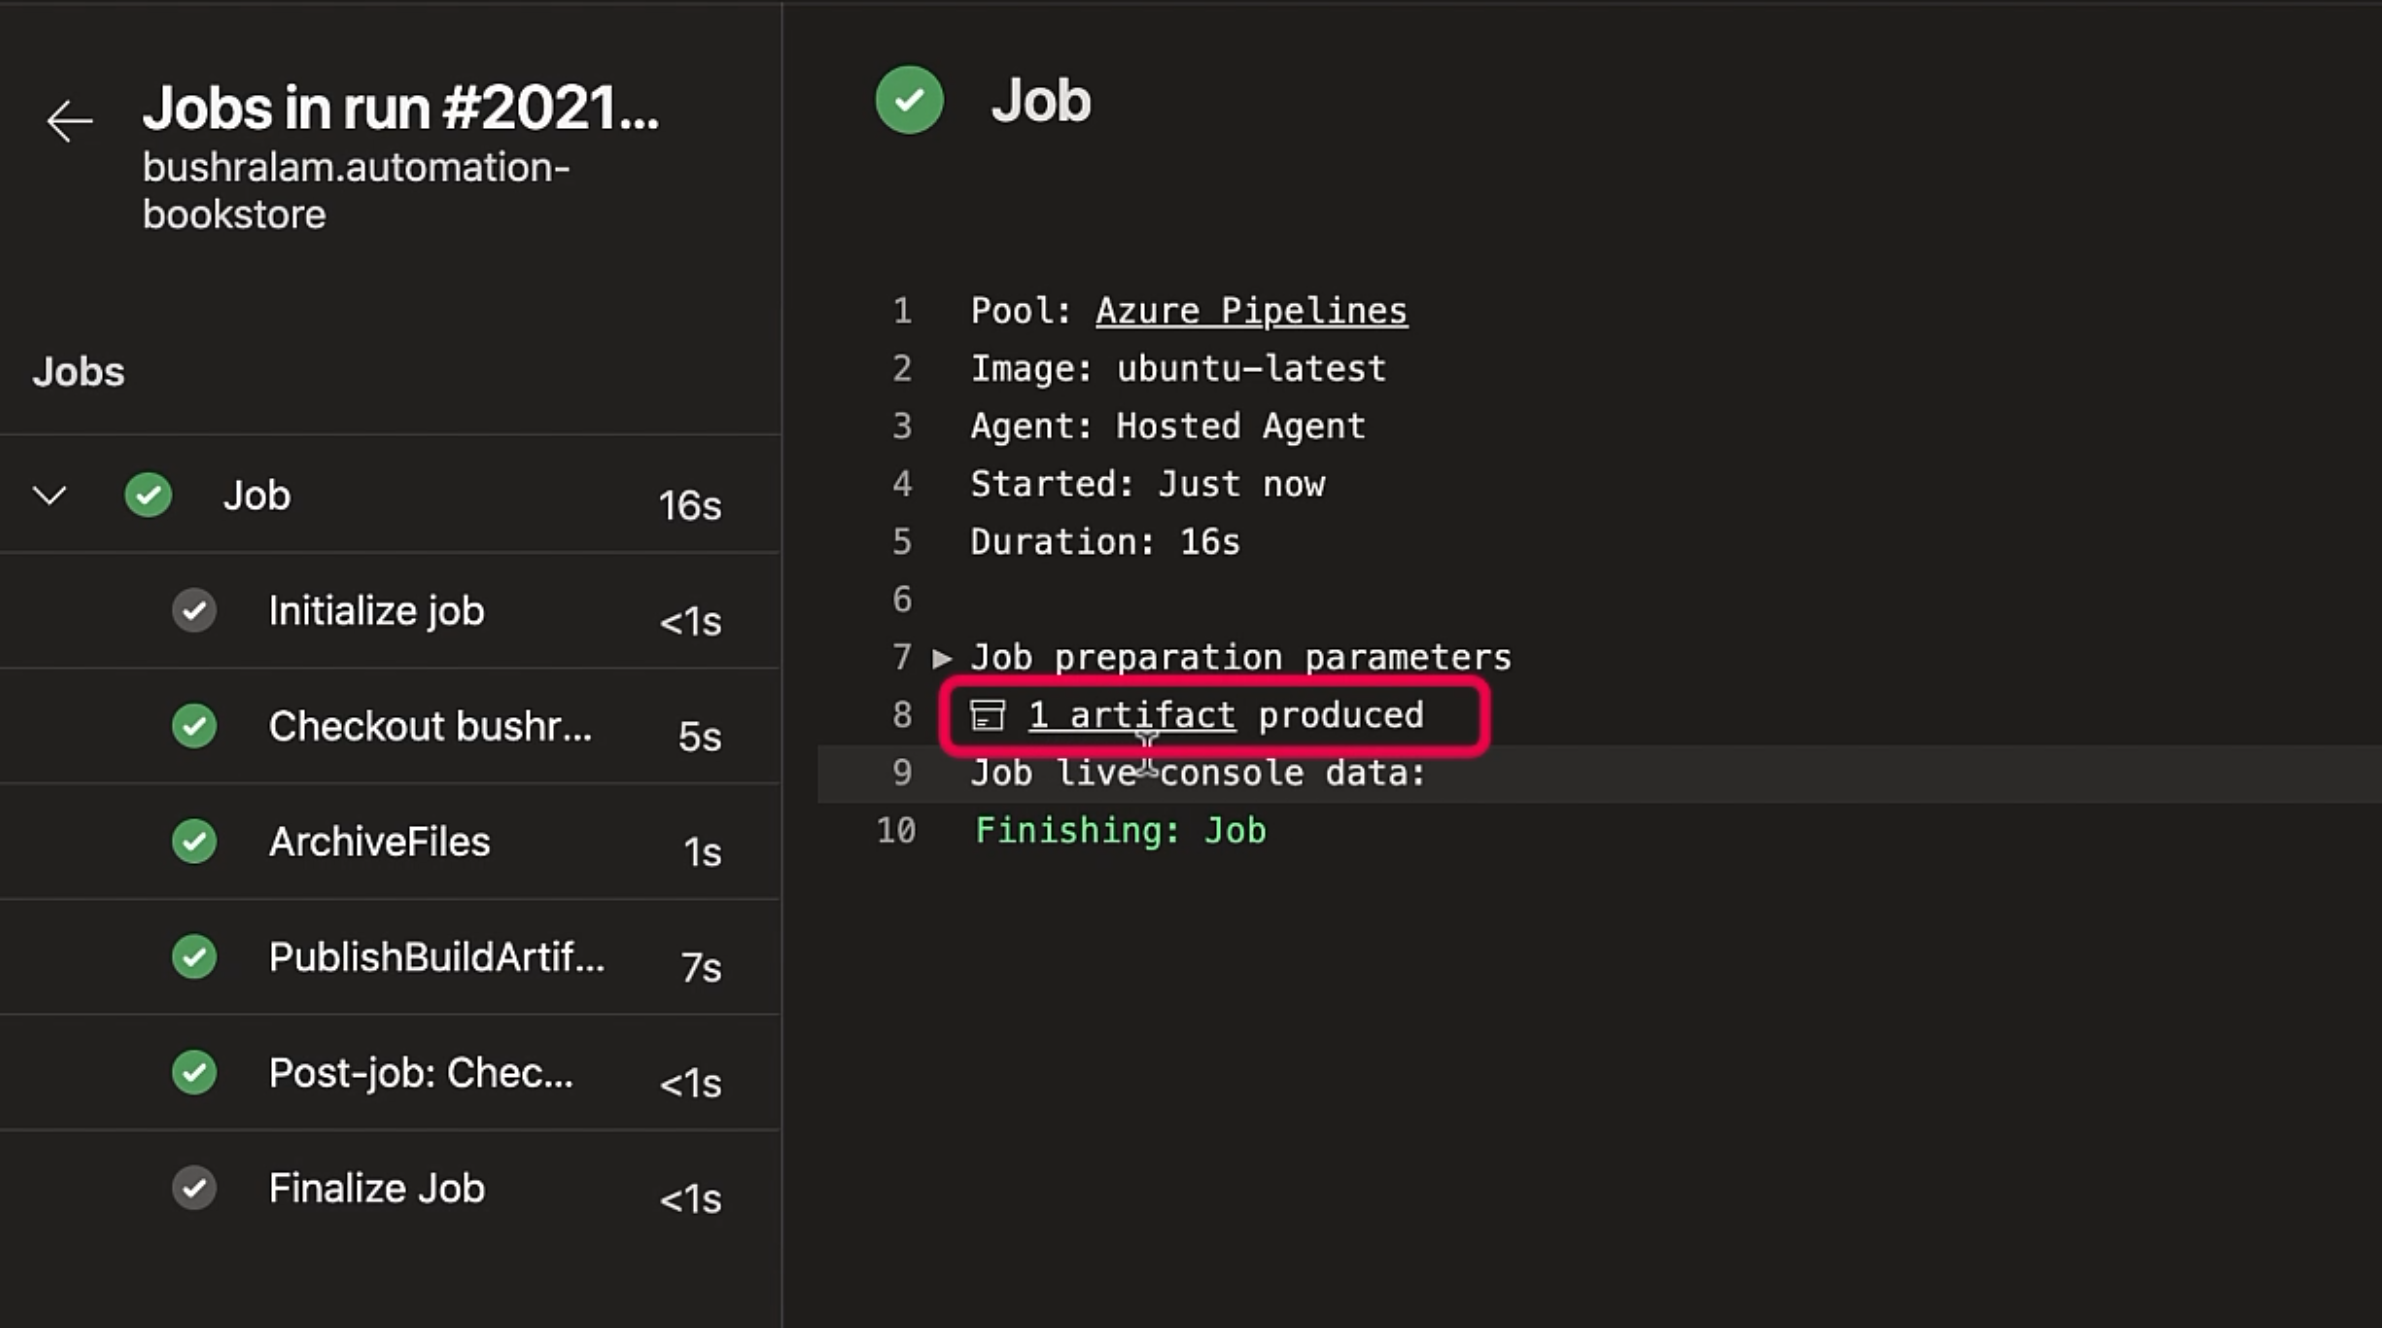
So, our job has finished - both the tasks completed successfully. That's good.
So one of our tasks was to publish the build artifact - let's see where that is.
Here, we have one artifact, and that's a link.
You can either click on that to access your artifact or go back.
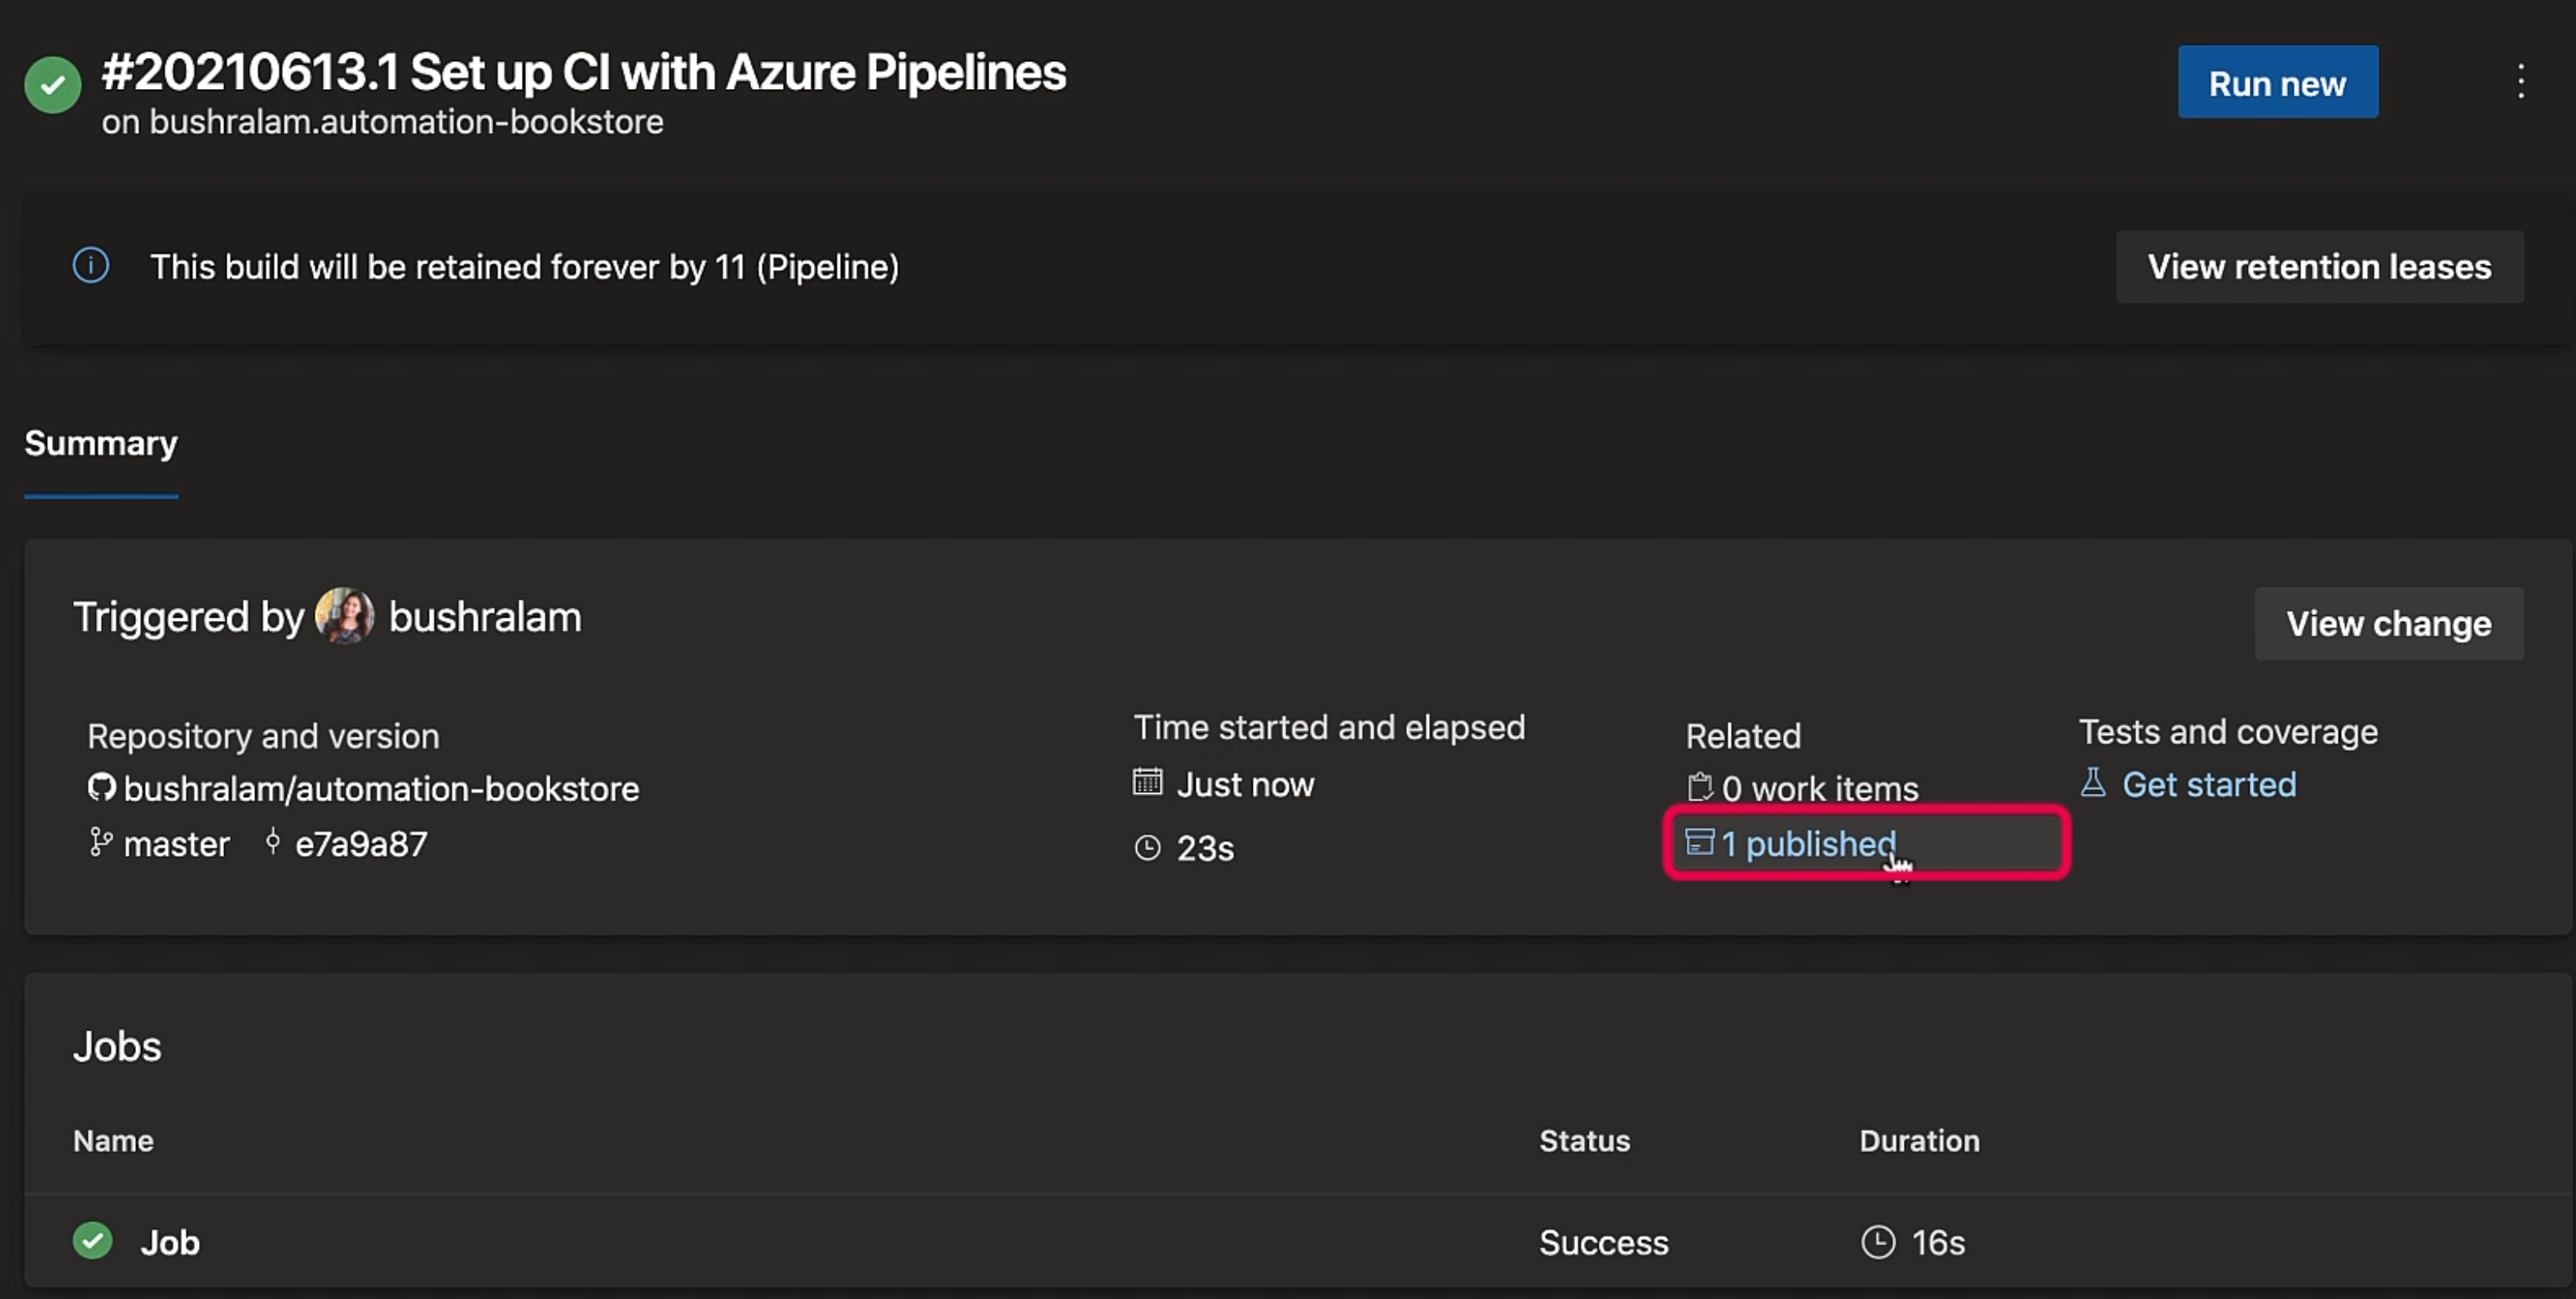
Here, we have one published - so that is one artifact published - click on it, and we have a drop folder.
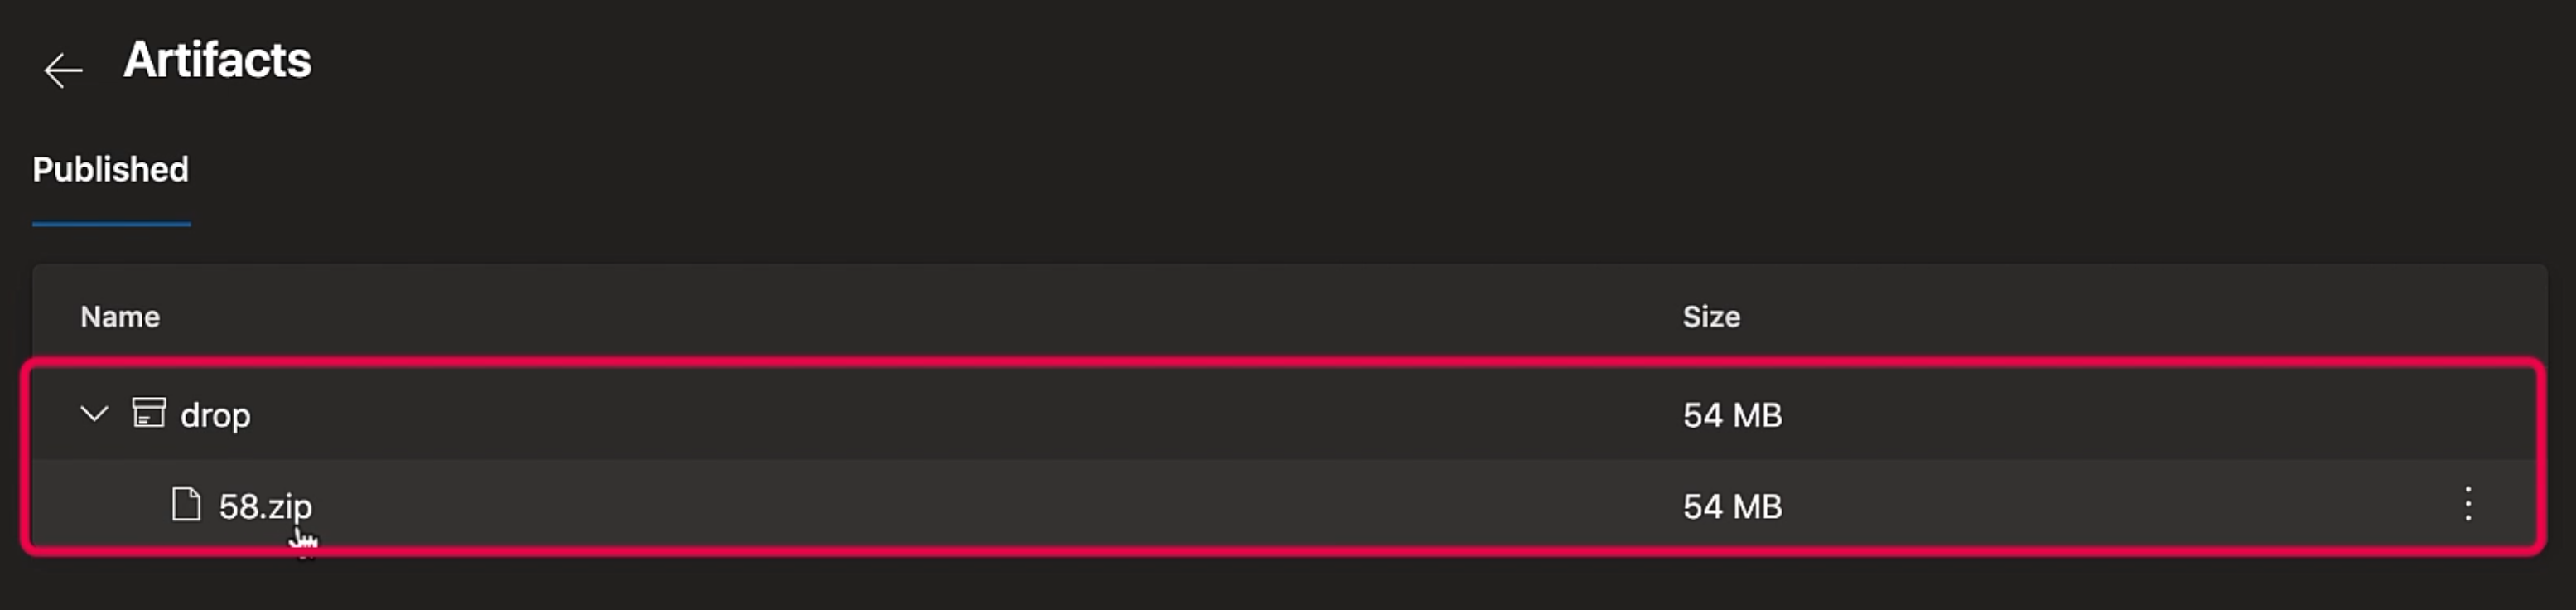
Under it, we have our artifact available - that is the zip of our project.
If we go to our GitHub repo, let's refresh it, and our YAML file is available here.
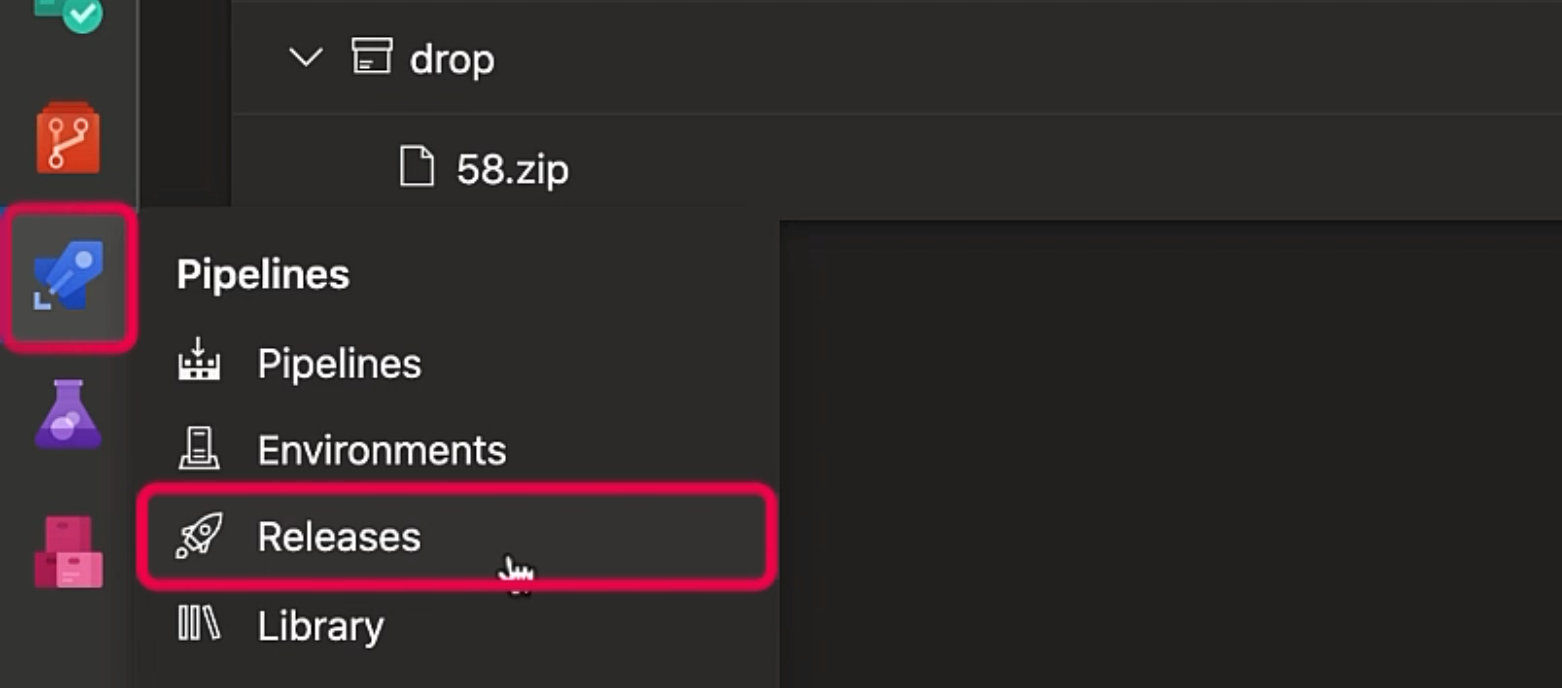
# Create a release pipeline
All right, let's go back, and we'll create a release pipeline.
If you would like to create a release pipeline as YAML, then you can go ahead and update the same YAML file with the task you would like to add for the release pipeline.
But, we will be creating a release pipeline using the classic editor.
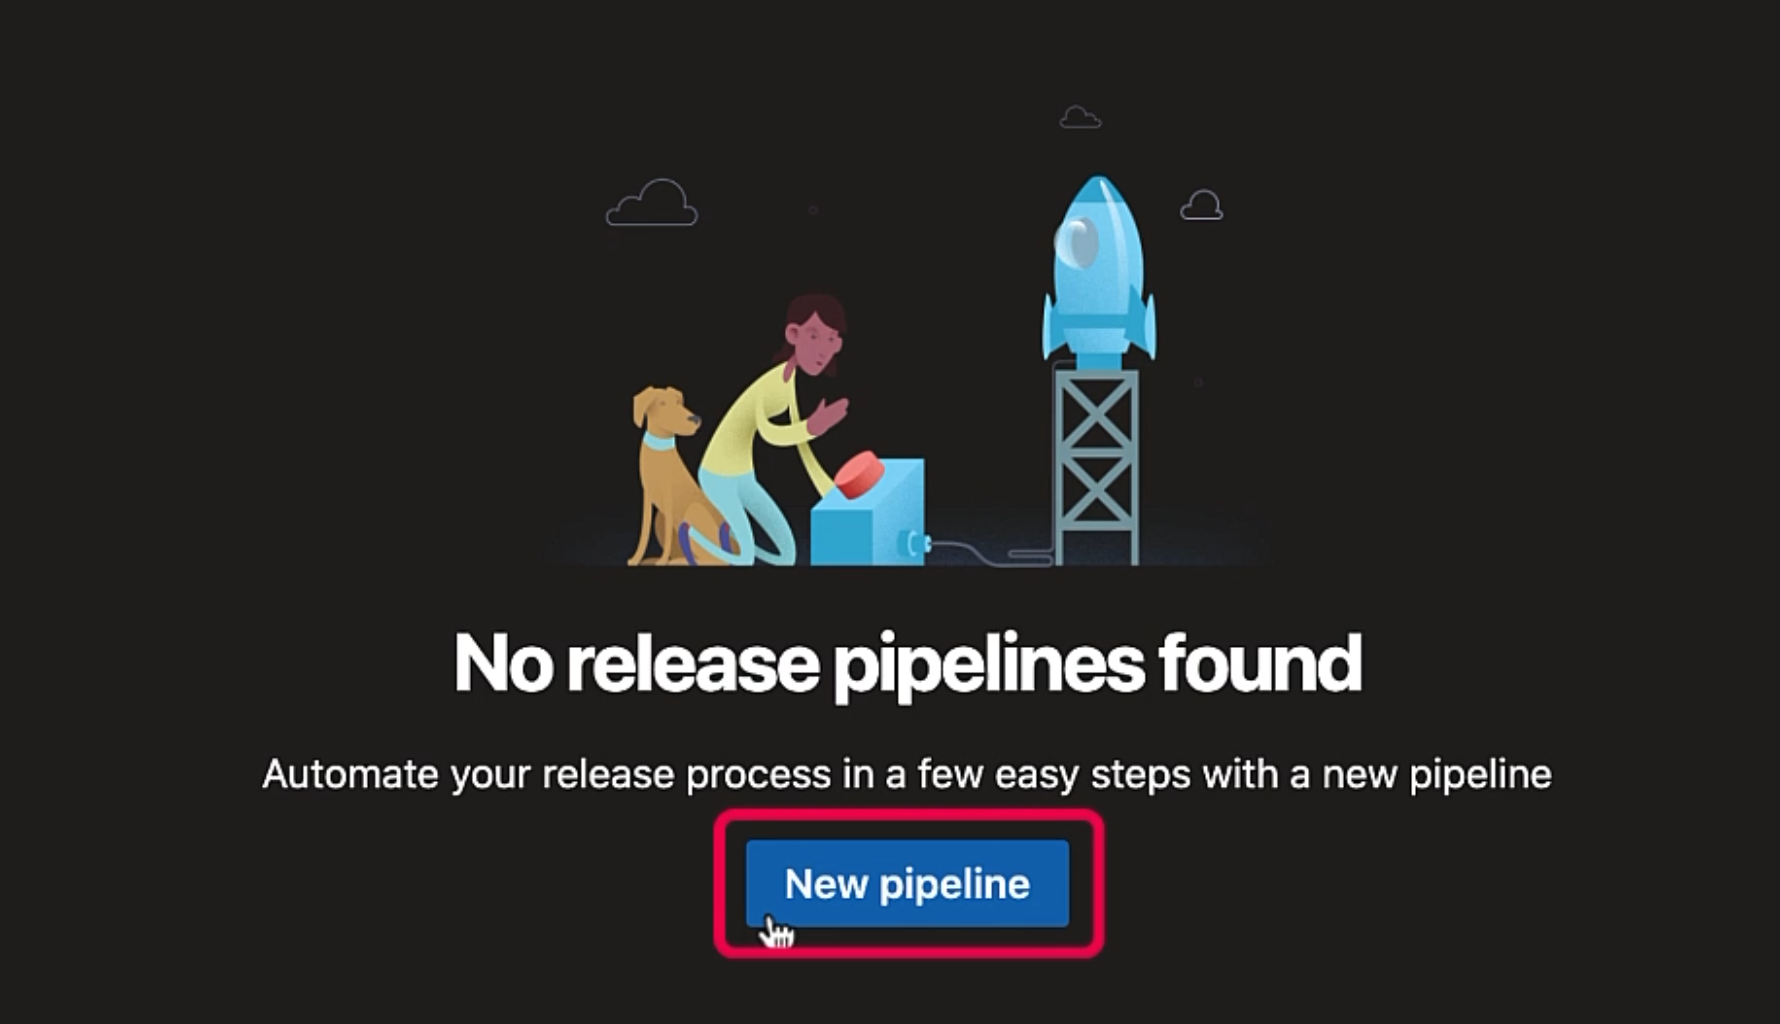
For that, go to "Pipelines" and select "Releases".
Click on "New pipeline".
We'll start with the Artifact.
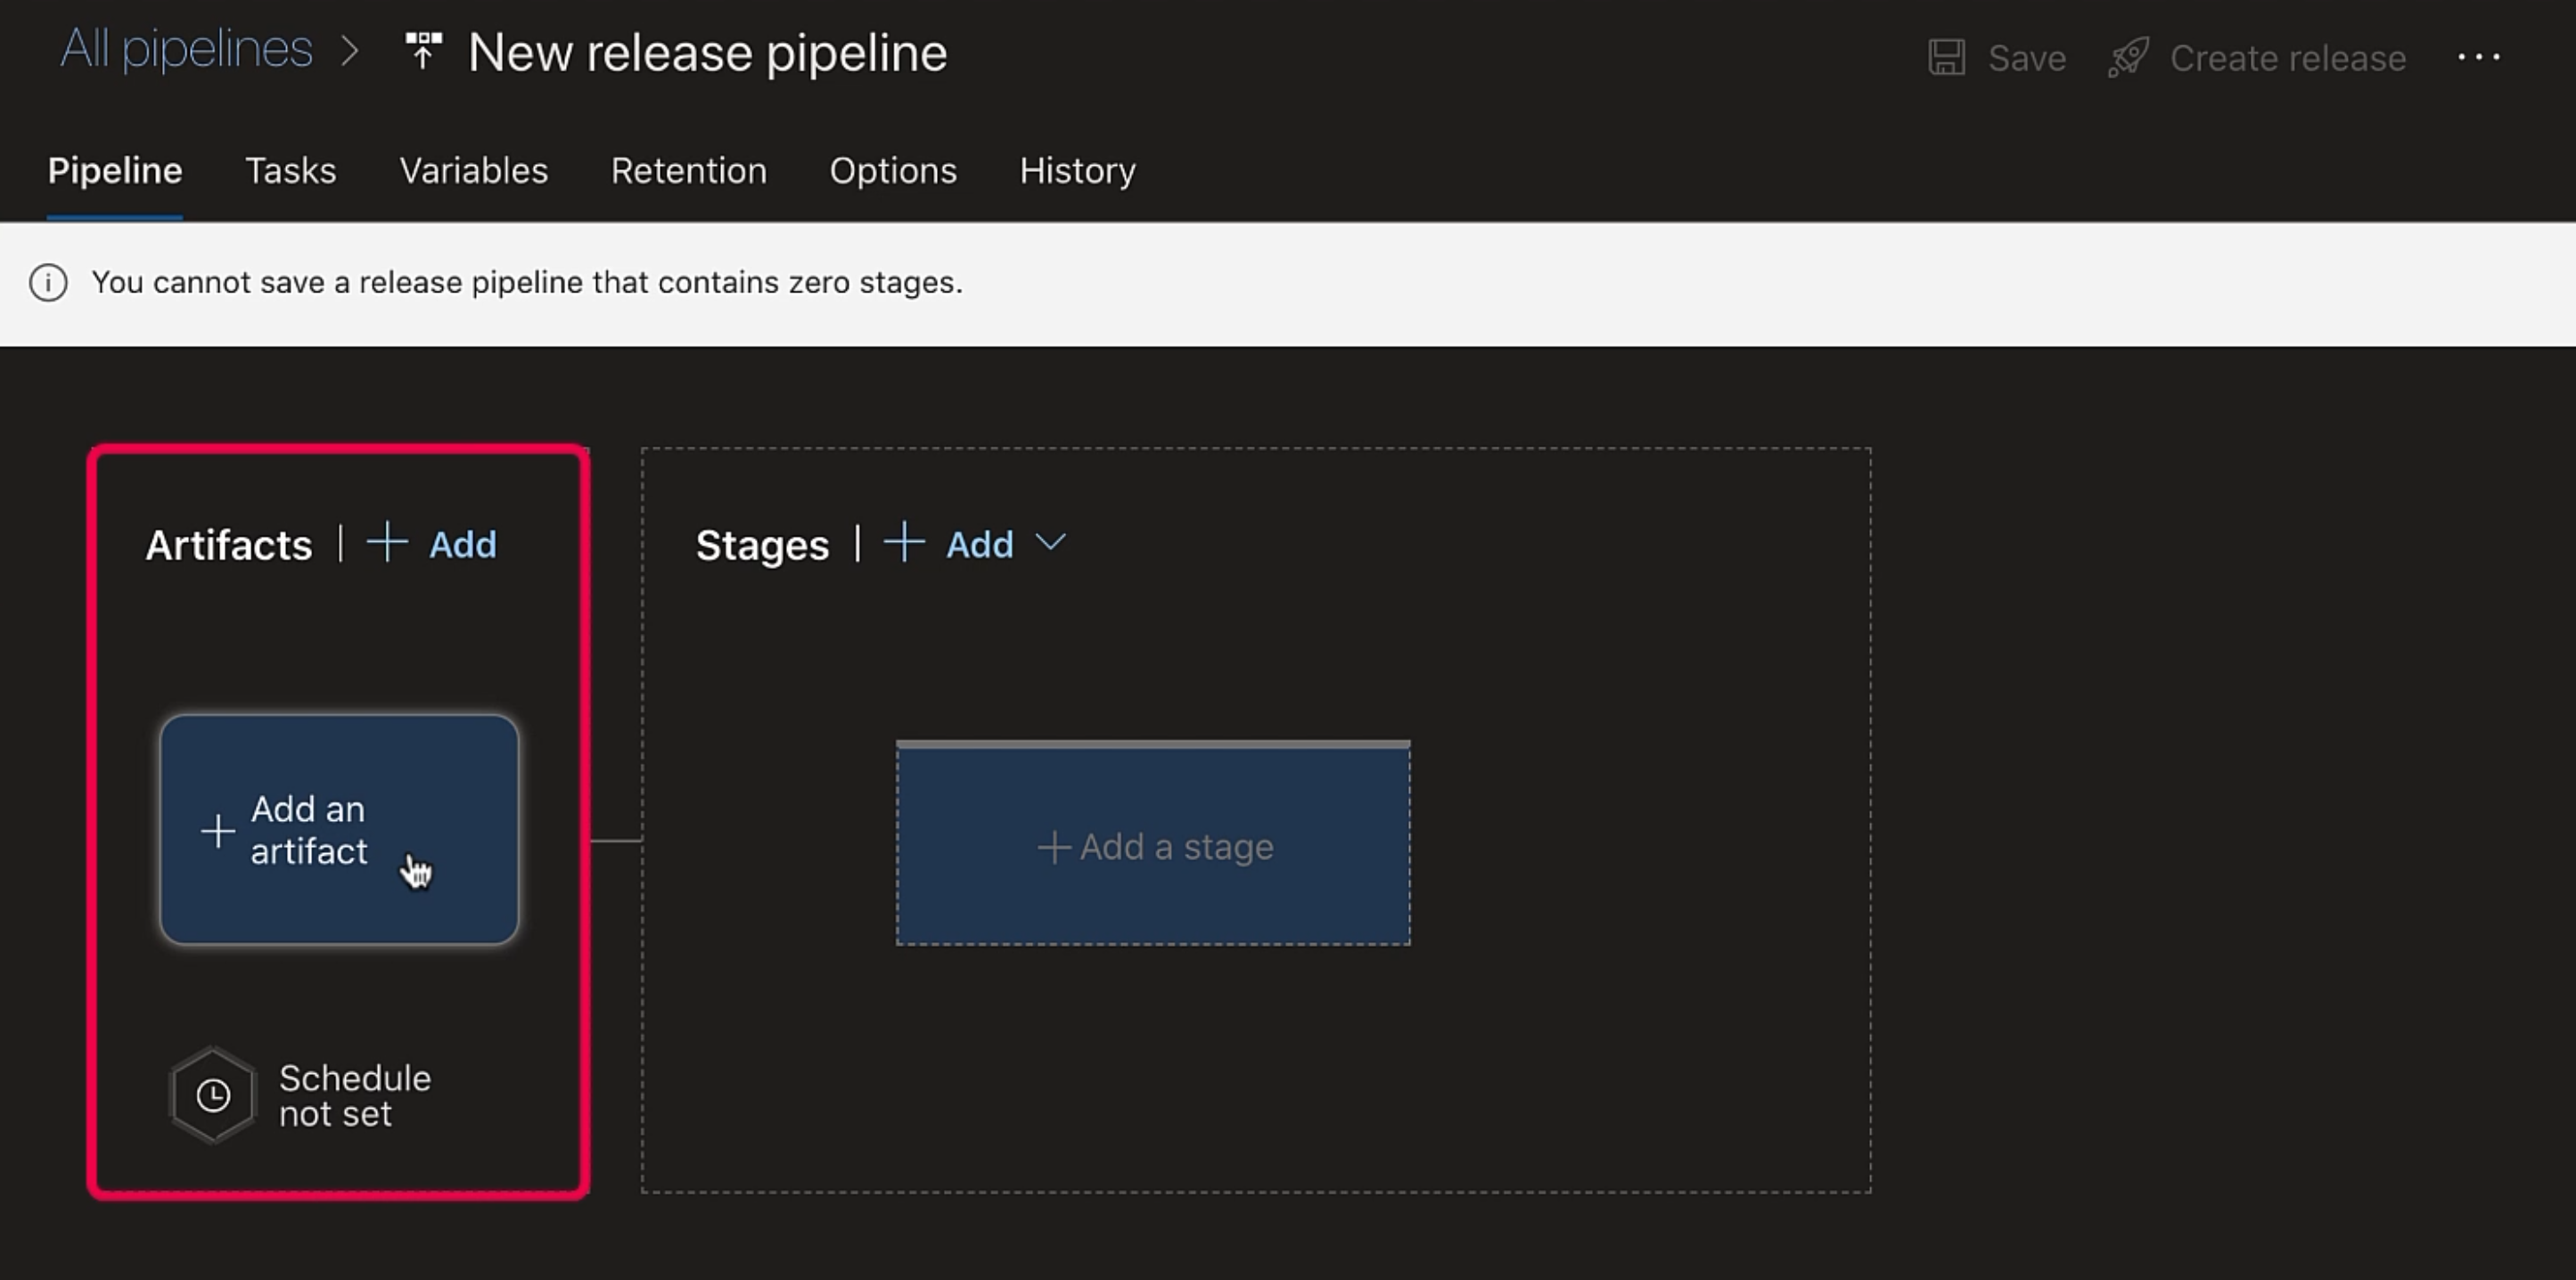
Let's go ahead and "Add an artifact".
We can pull an artifact from one of these sources.
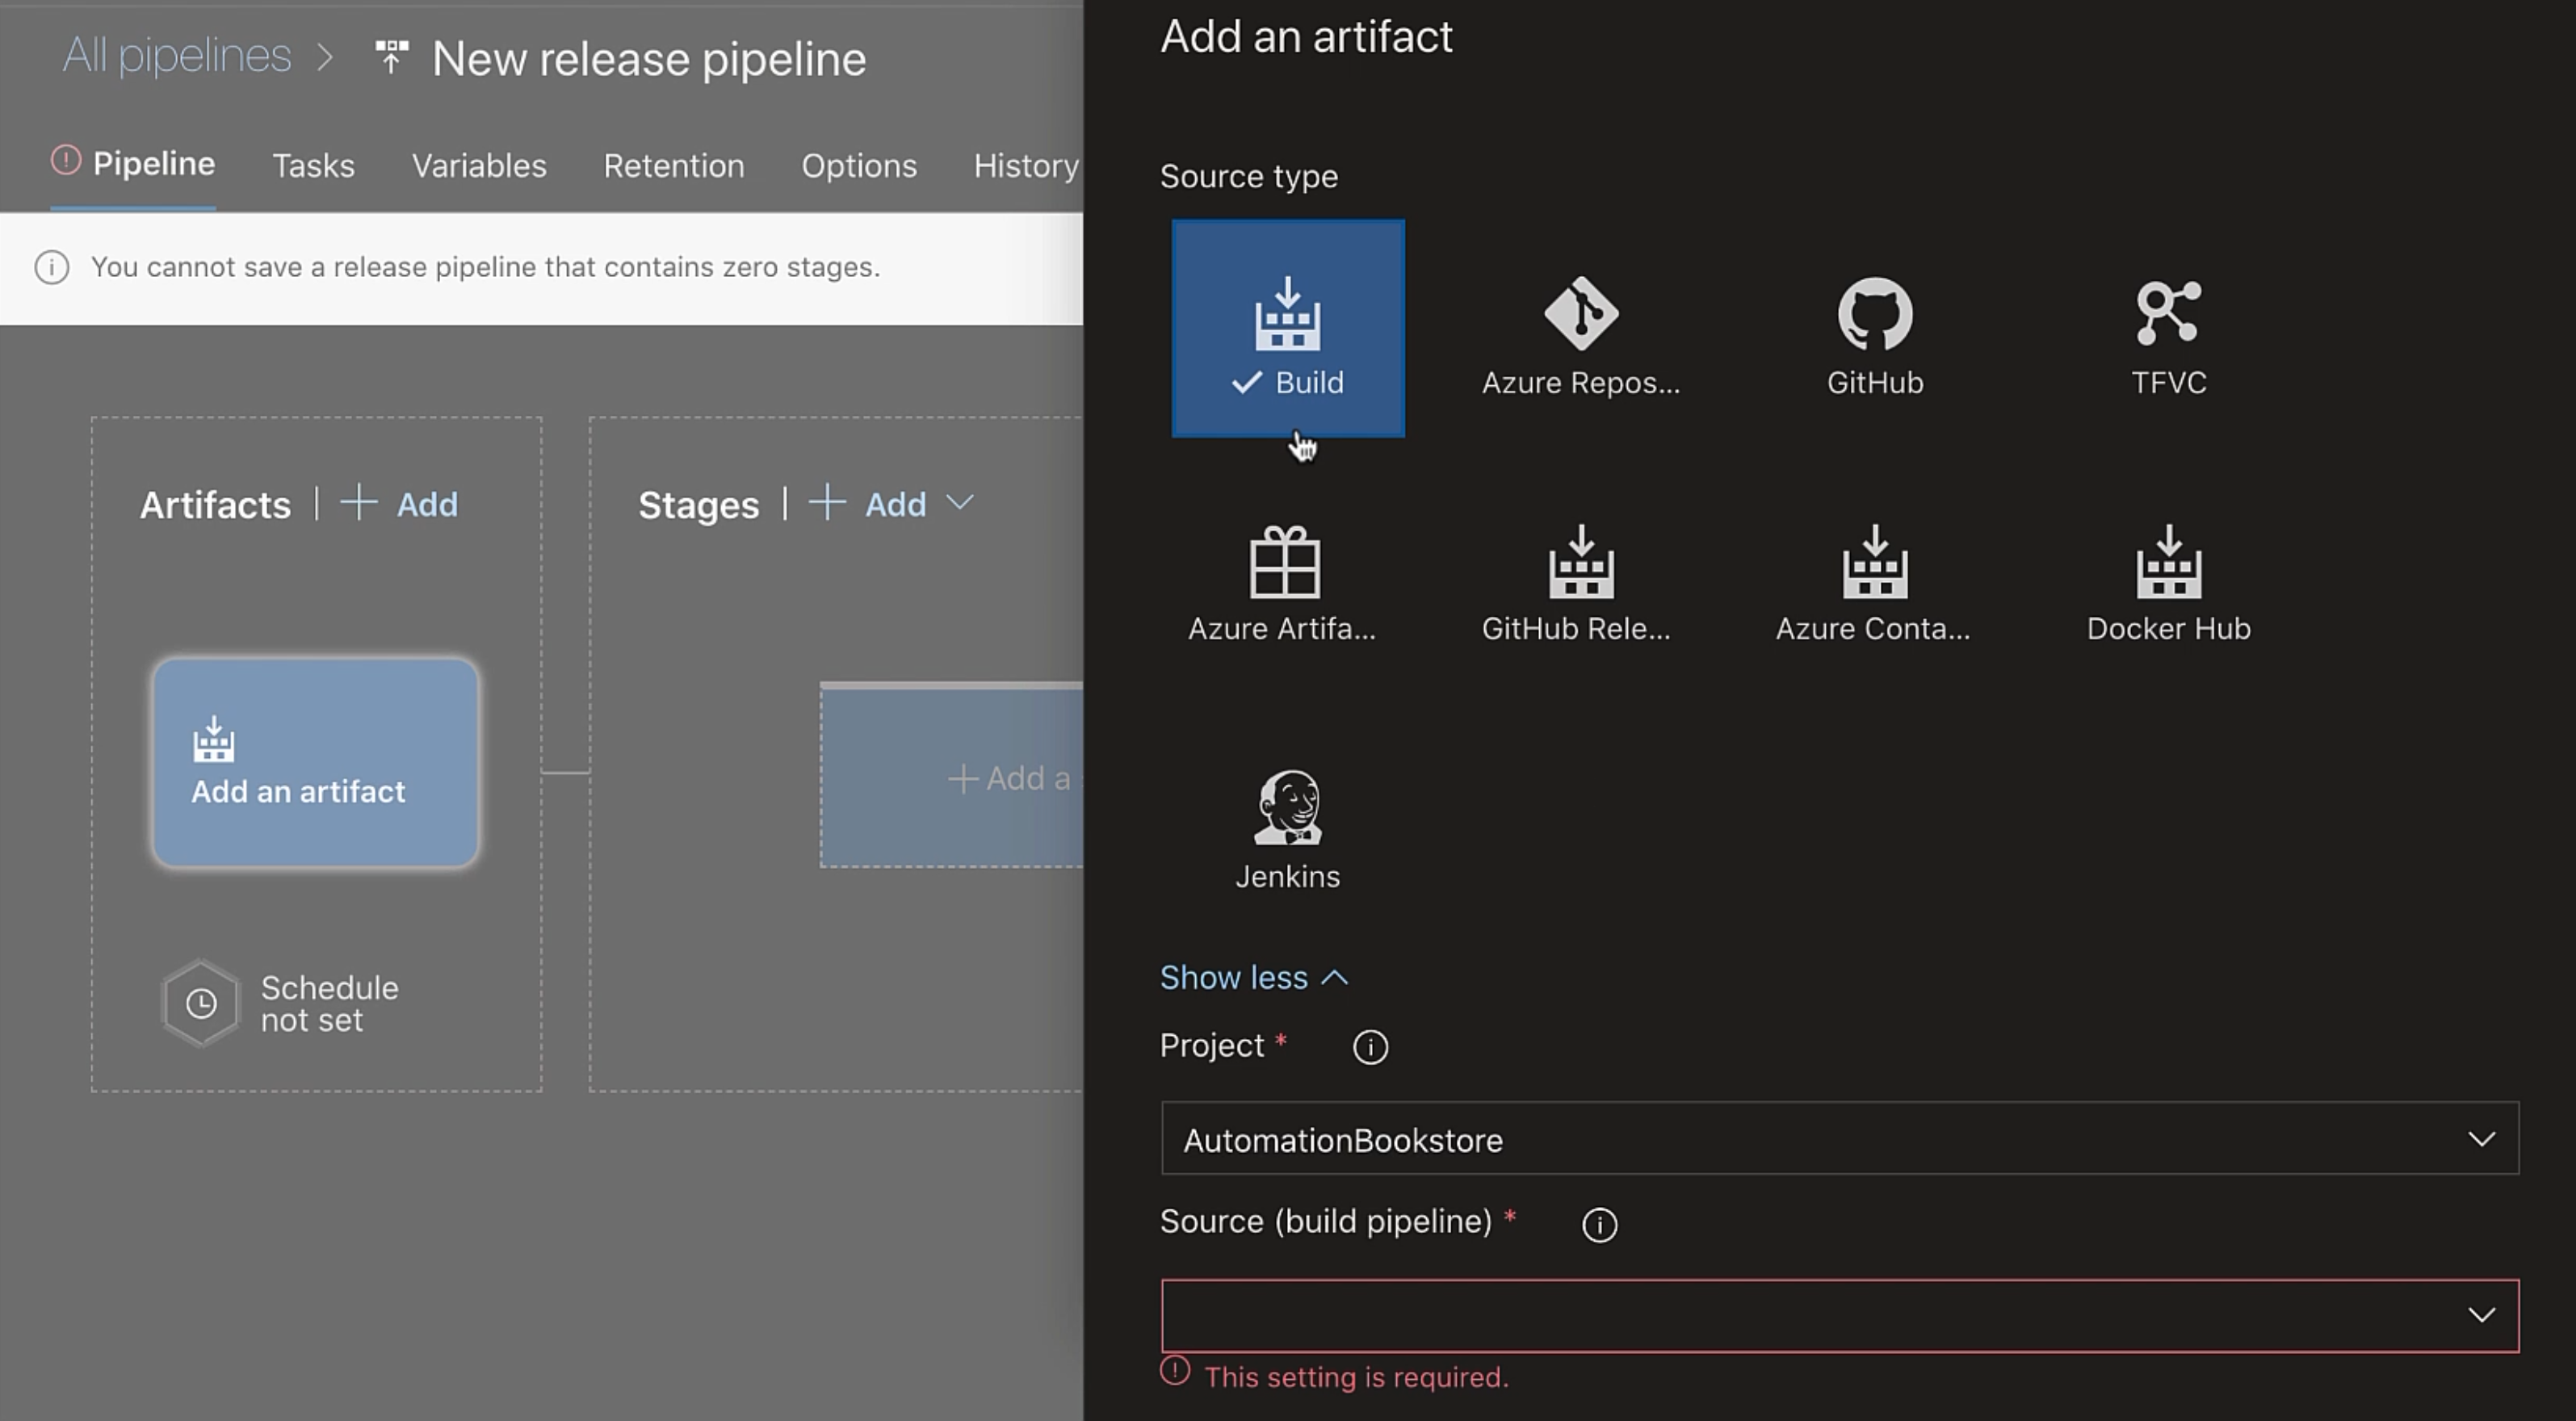
We'll be taking our "Build" artifact.
That will be the source for our build pipeline and we'll hit "Add".
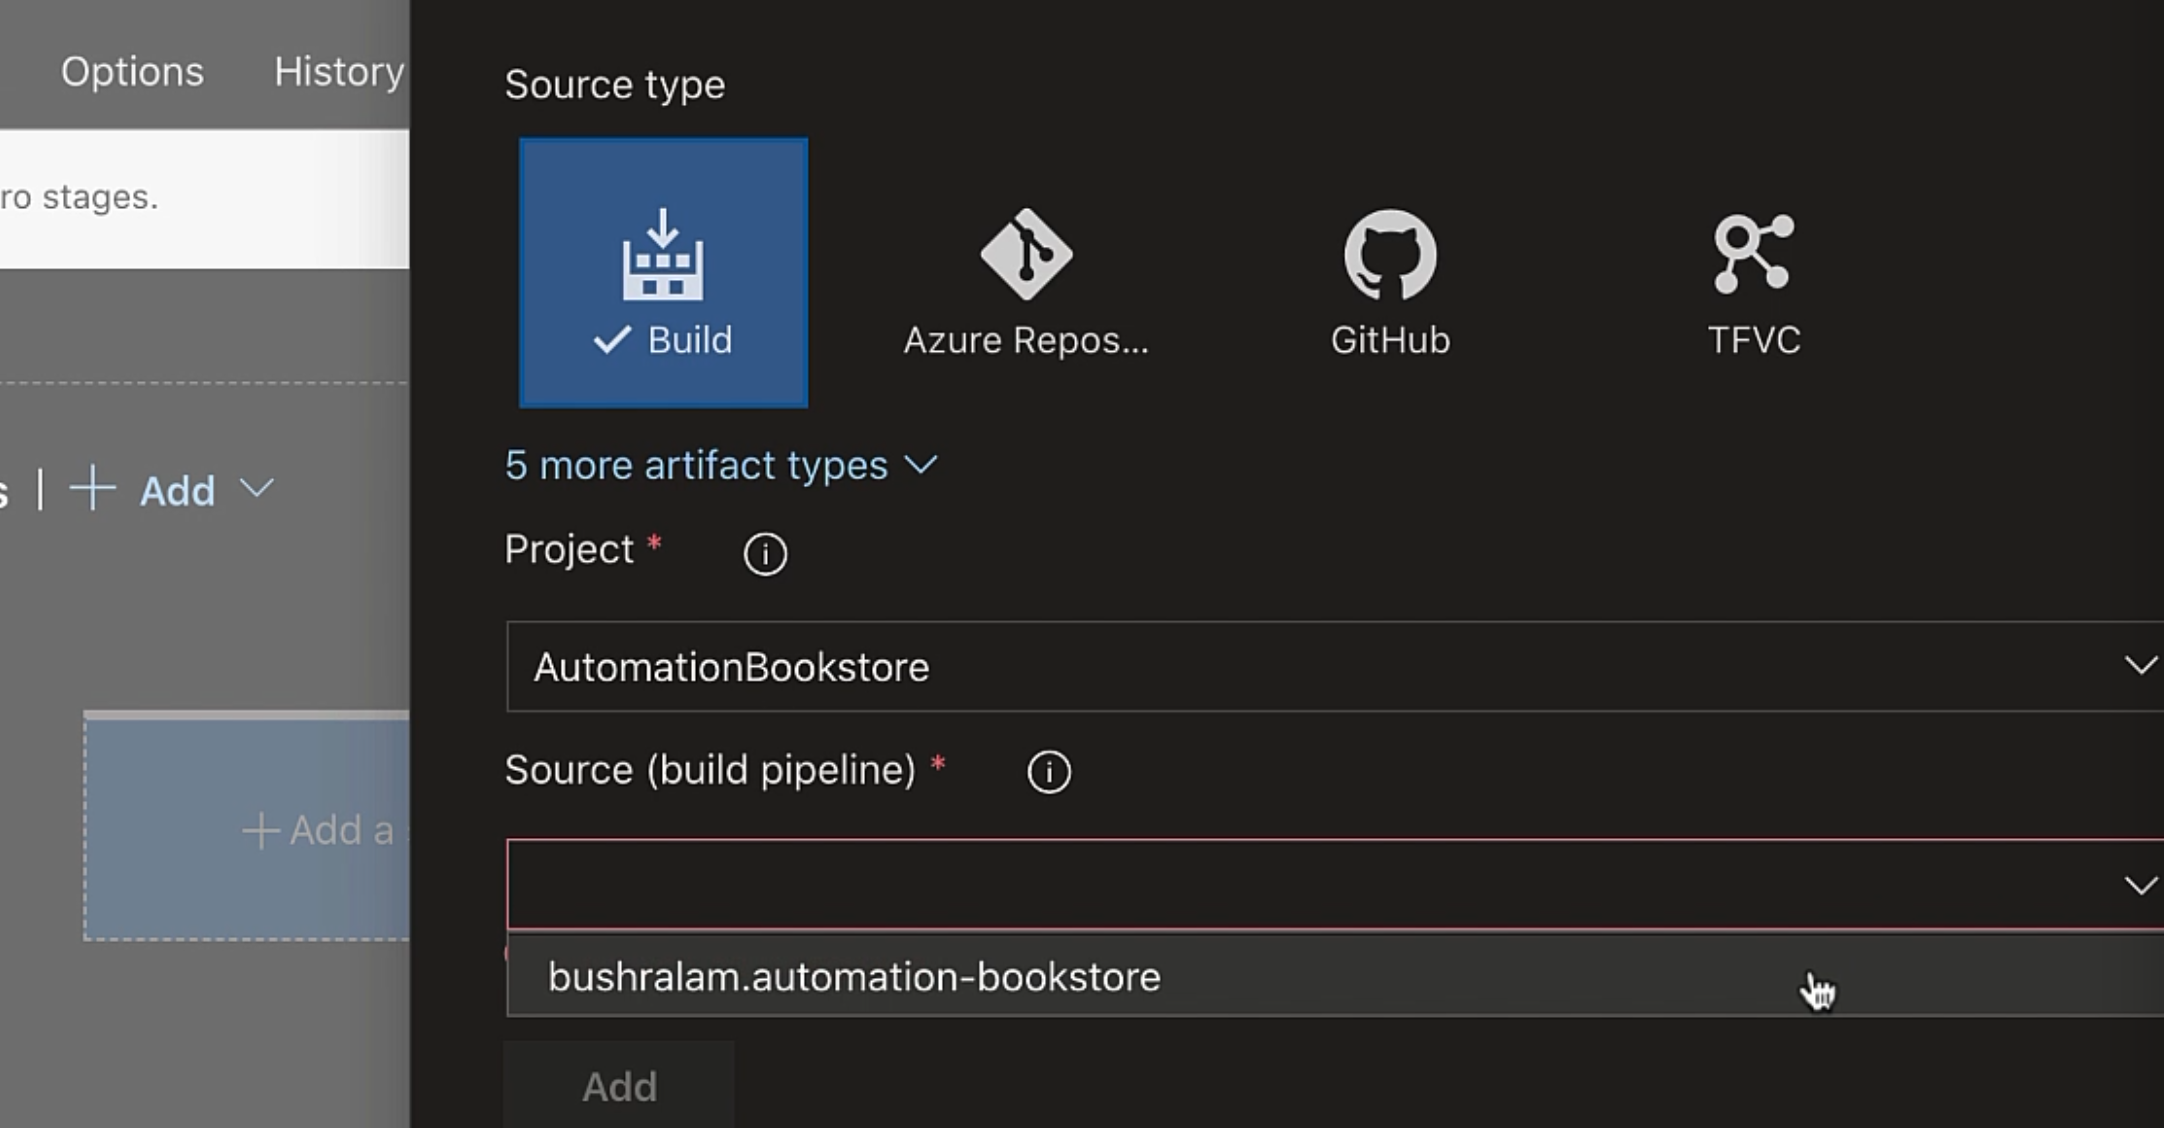
So, our artifact has been added.
Now let's go ahead and create a stage.
A stage is used to organize deployment jobs.
A release pipeline can have one or more stages, and a stage can have one or more jobs.
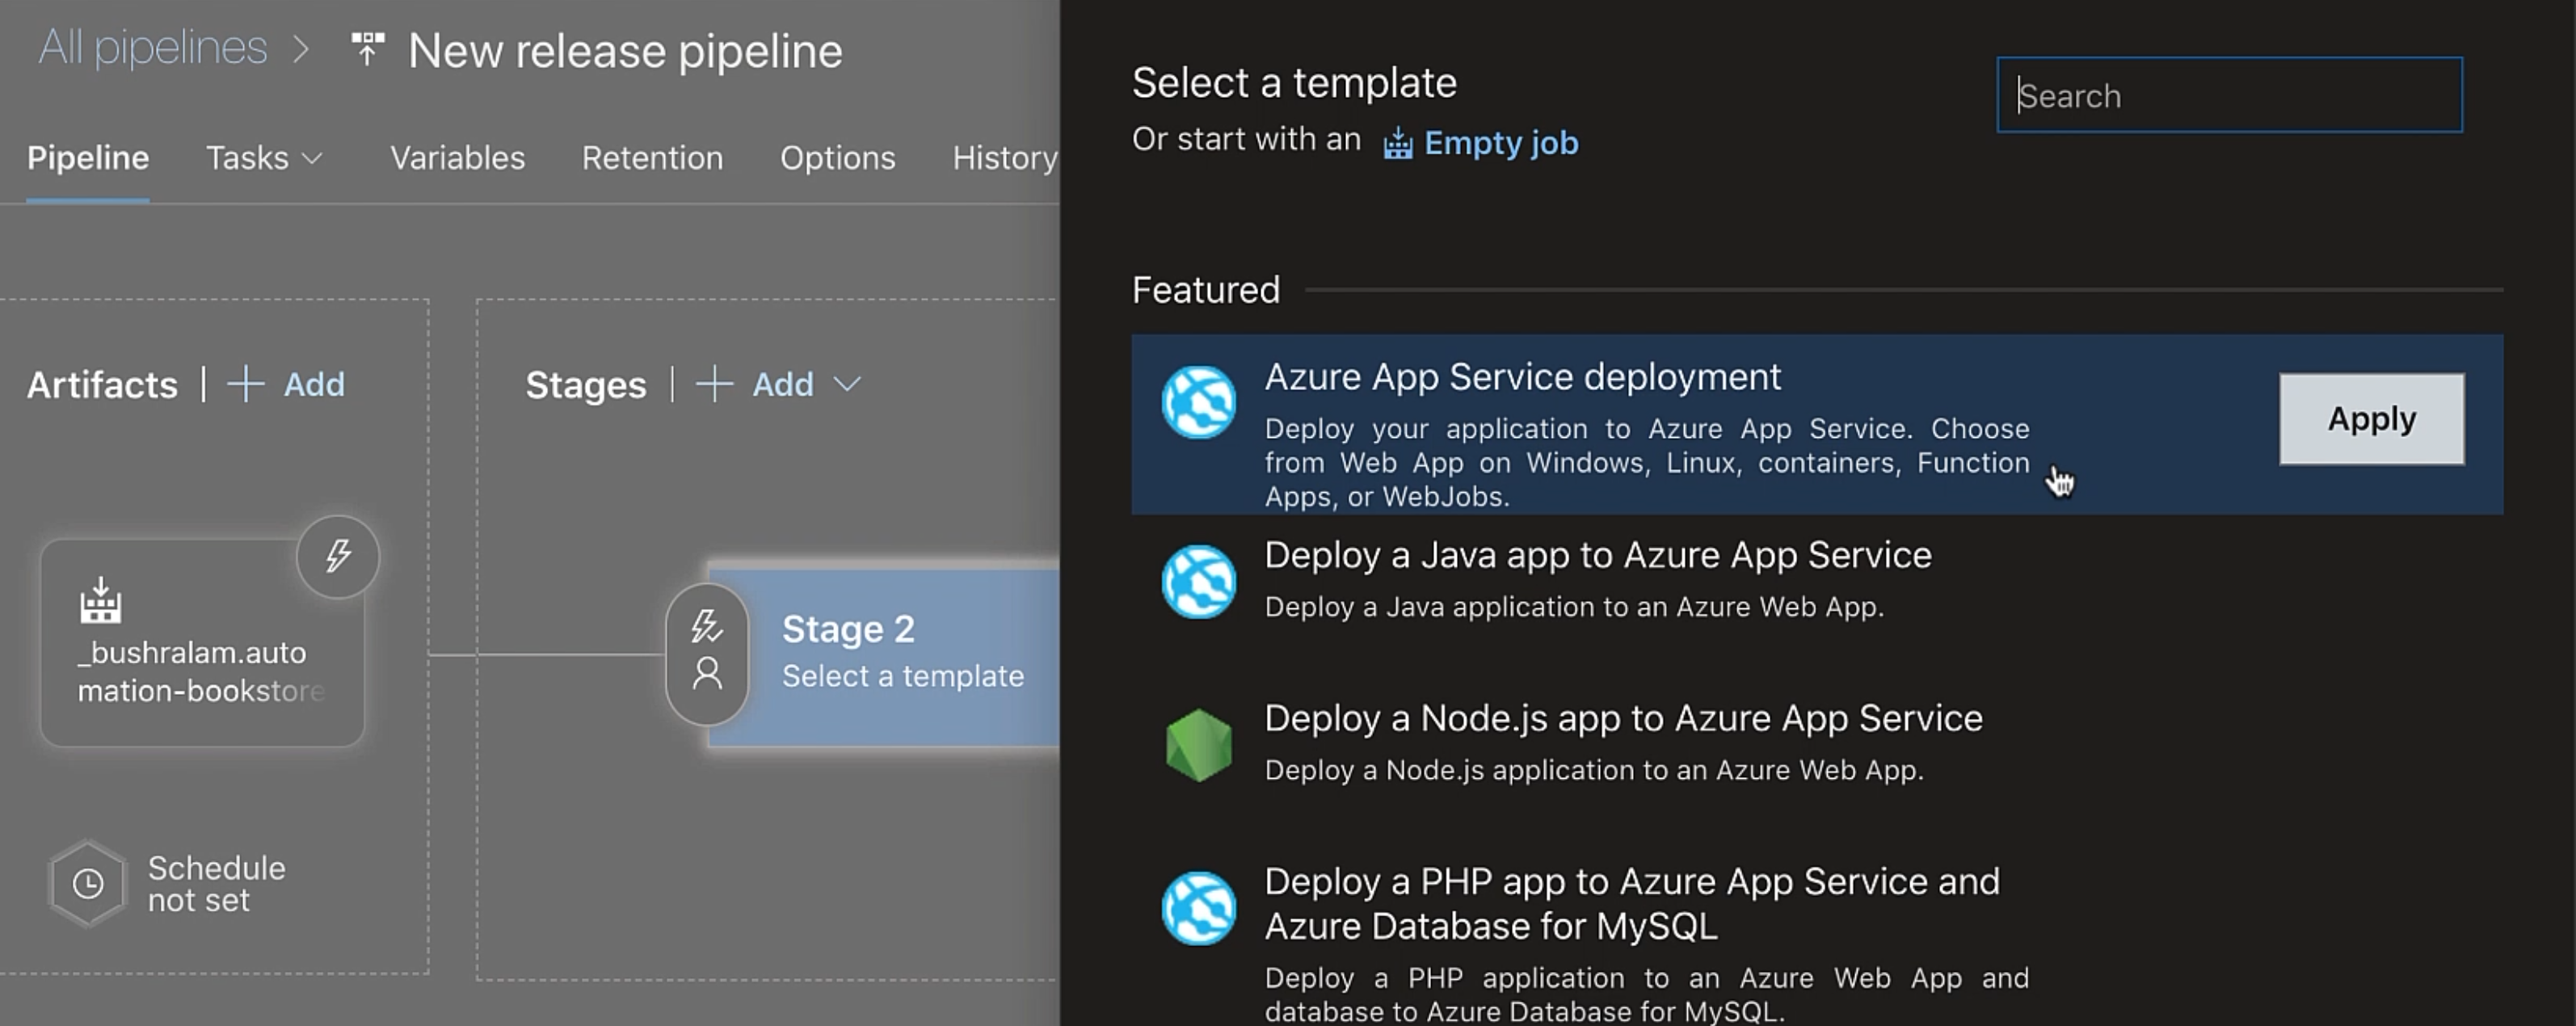
We can either start with an "Empty job" or use one of these.
Ours is an HTML project that we want to host.
I've already created a web app that is hosted in Azure App Service, which is a fully managed web hosting service.
So, this is our application.
I won't go into the details of creating and hosting a web app.
There's a resource attached that you can have a look at if you're interested.
Okay so back here, we'll pick "Azure App Service deployment".
Let's rename our stage, and we'll go into the stage.

It says "Some settings need attention".
It needs our Azure subscription.
It doesn't list any, so we'll have to set it.
Let's go back, and now it's available.
Our app service name is abookstore.
And with that, we're done - let's save it.
We'll create a release, and when we are creating a release from here, this is manual.
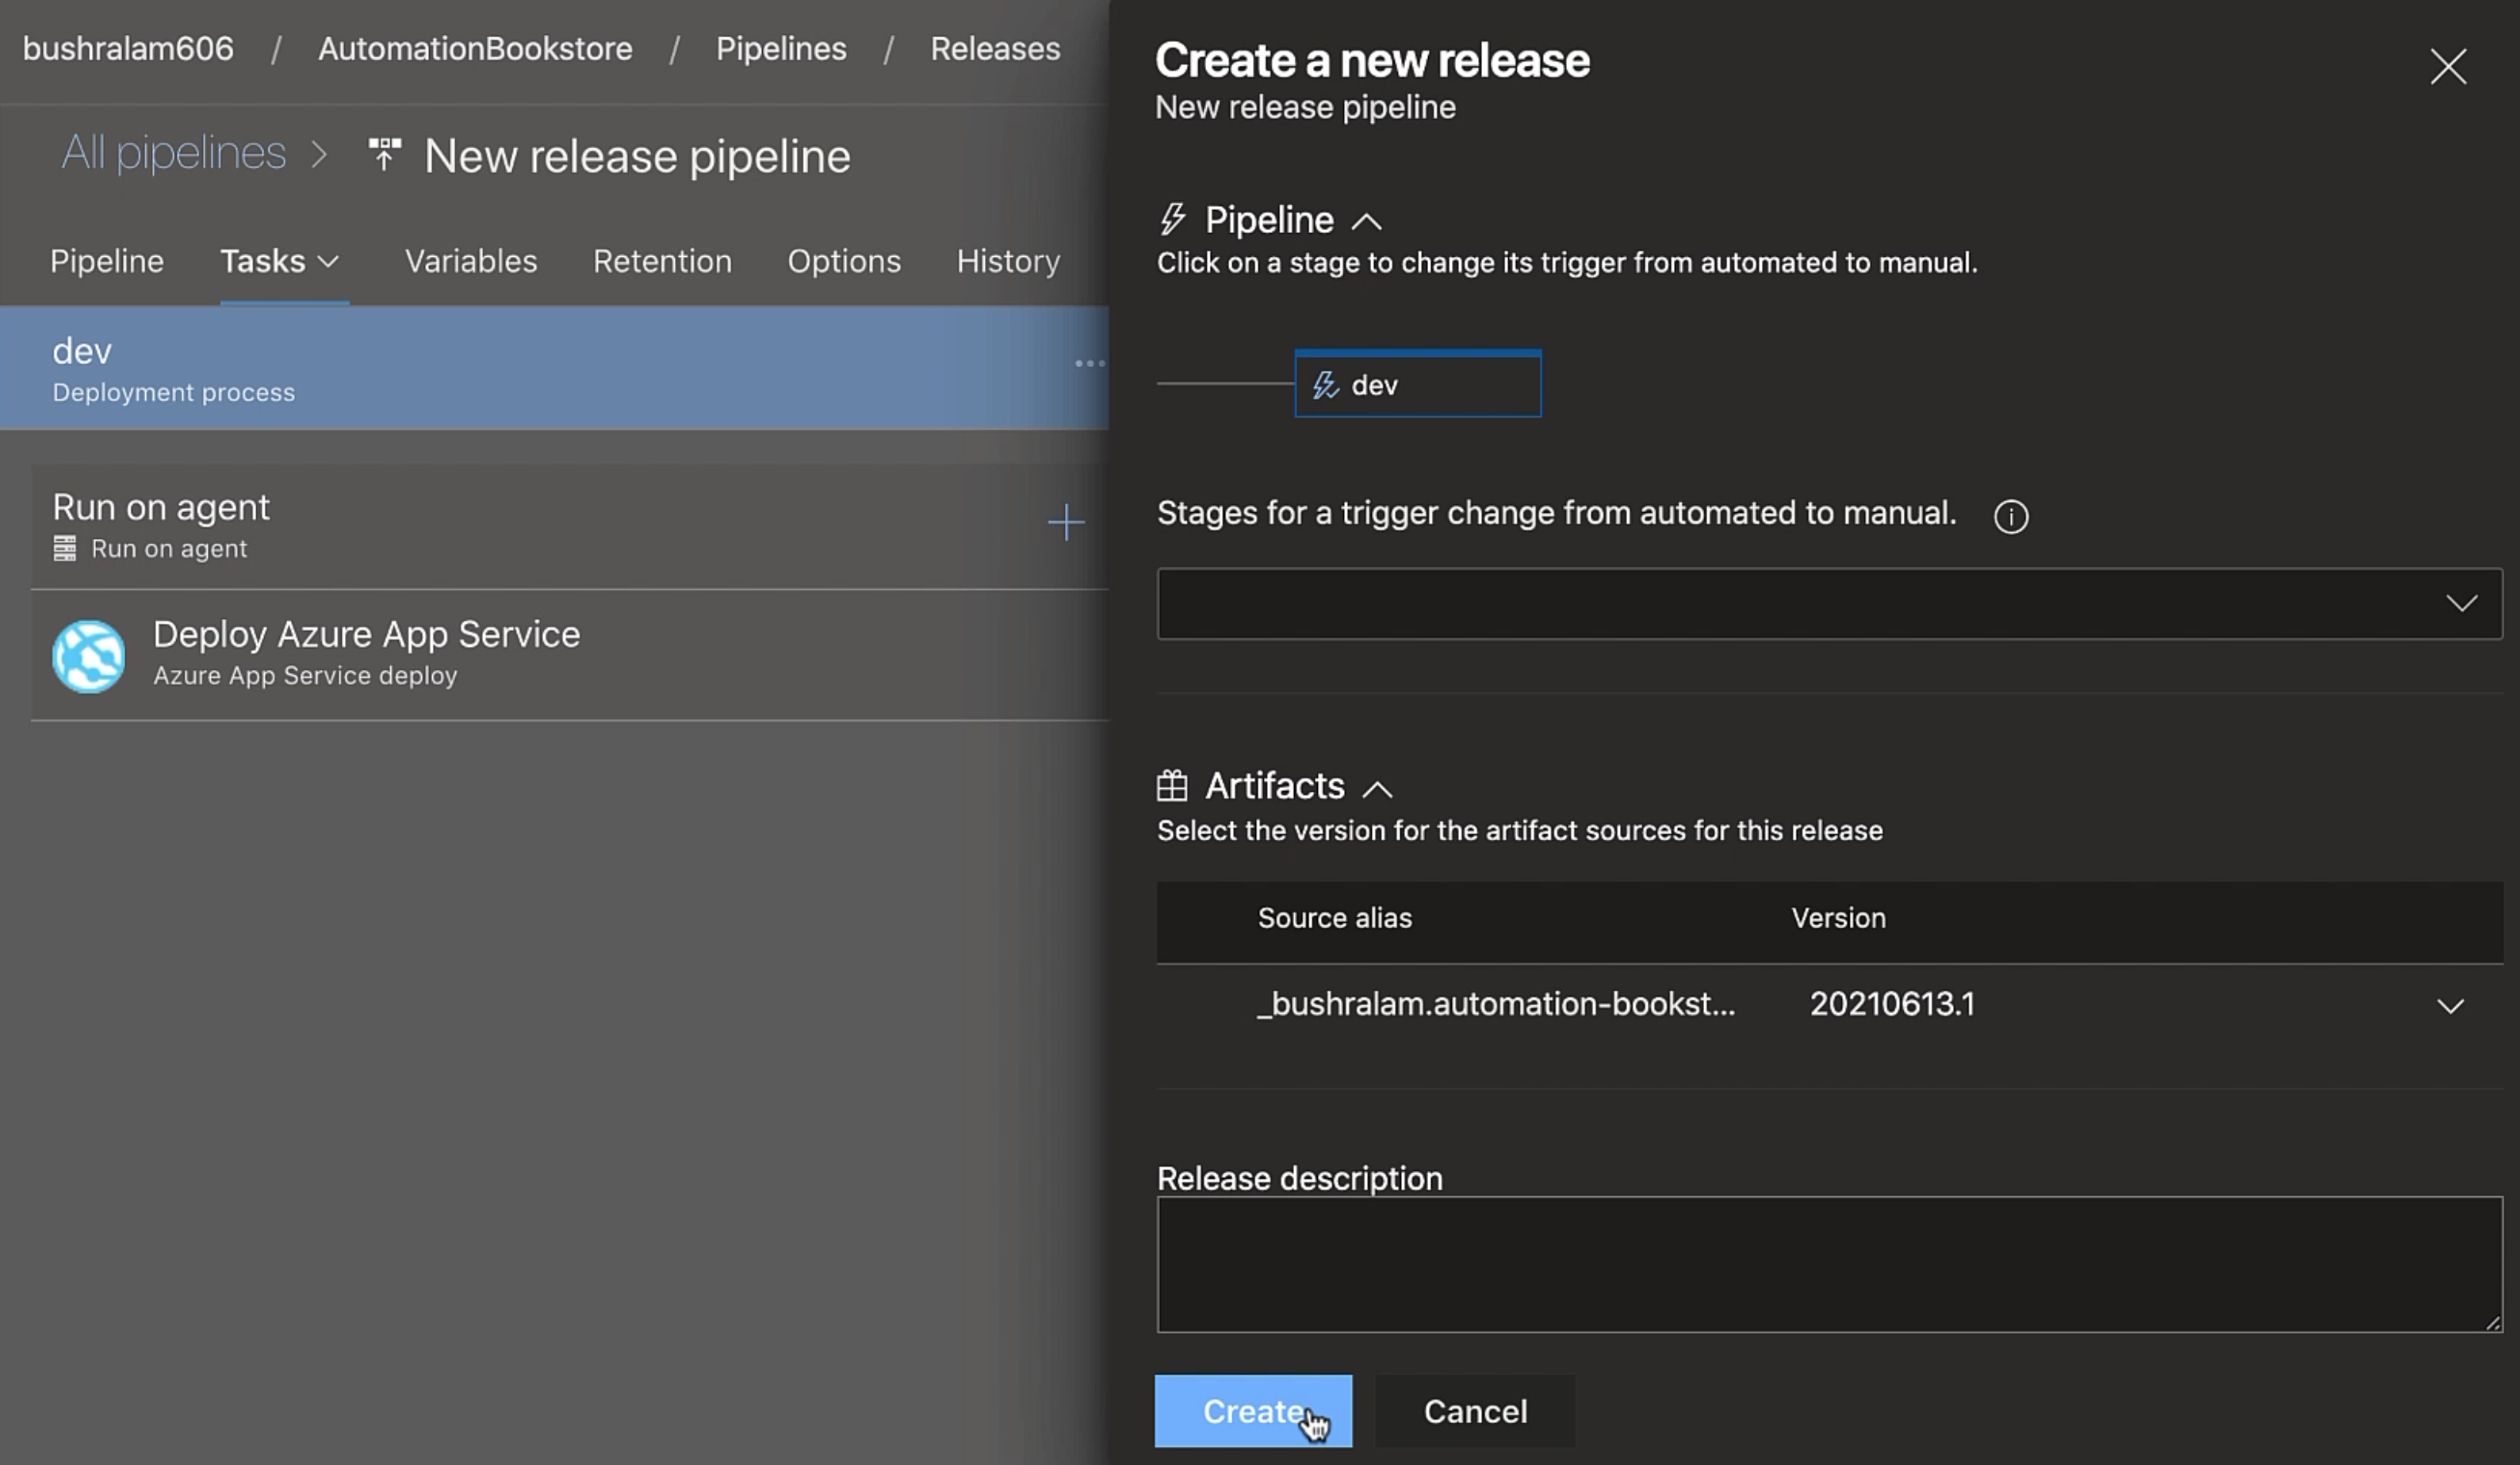
We'll hit "Create" and our release has been created.
Let's go to our release and we'll go to "Logs".
It is preparing an agent to run our job, and our job has started.
It is downloading the artifact, and now it is deploying our app.
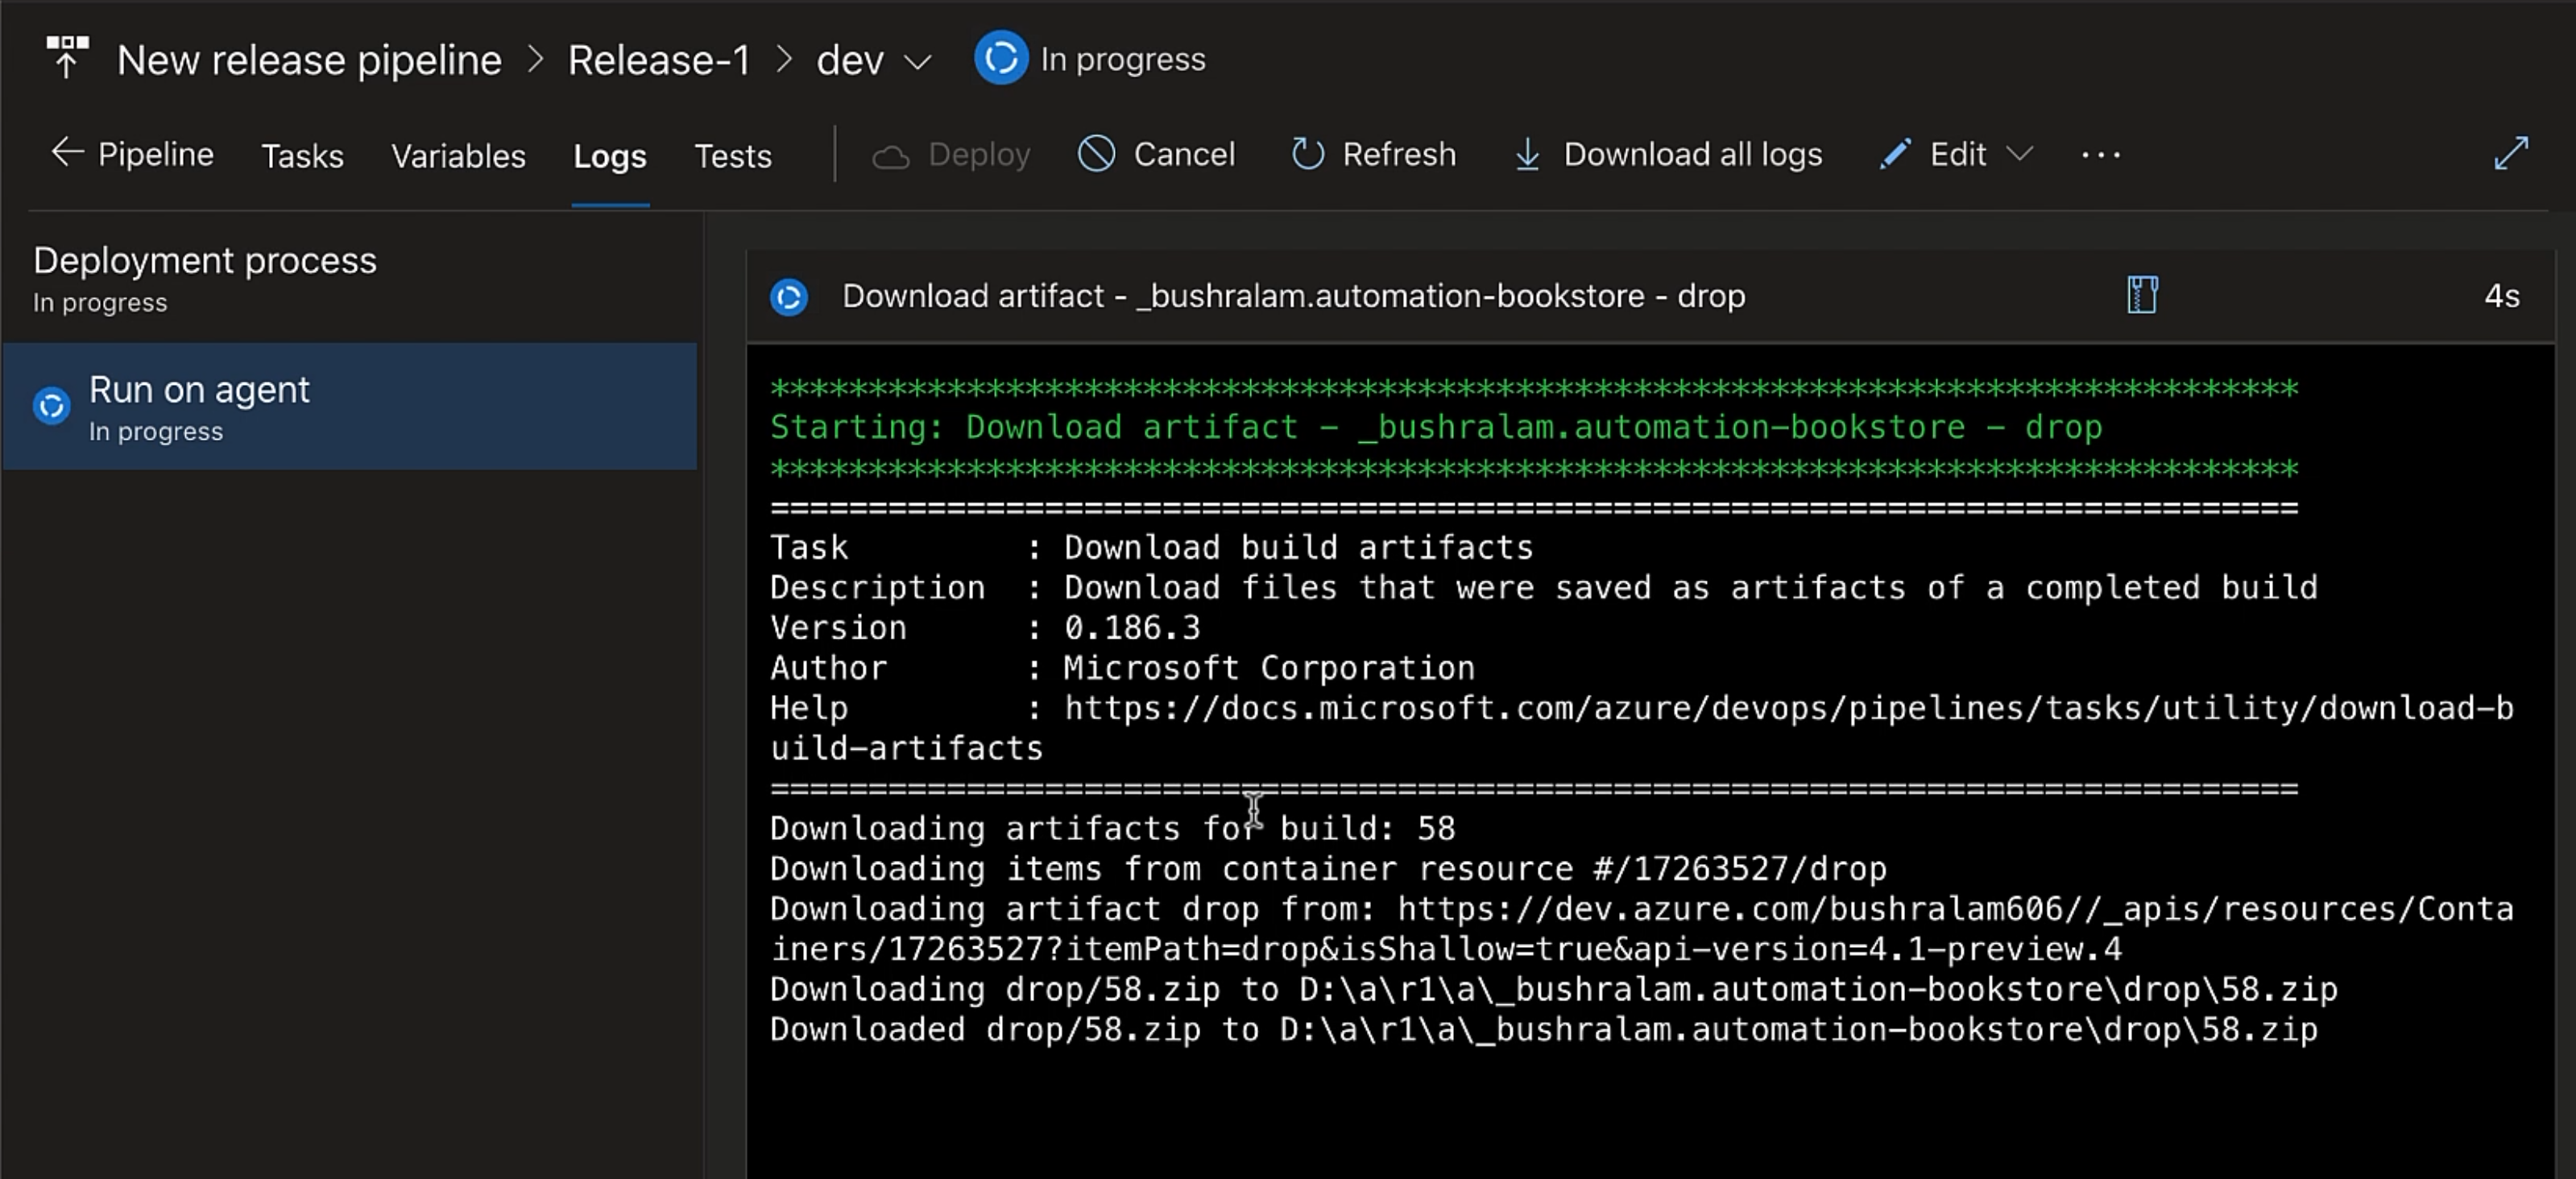
And done.
Let's check our website. Everything is in place? Good.
So we ran our release pipeline manually.
Let's create a continuous deployment trigger.
We'll go back to our pipeline, click on "Edit".
With the artifact, we have a "Continuous deployment trigger".
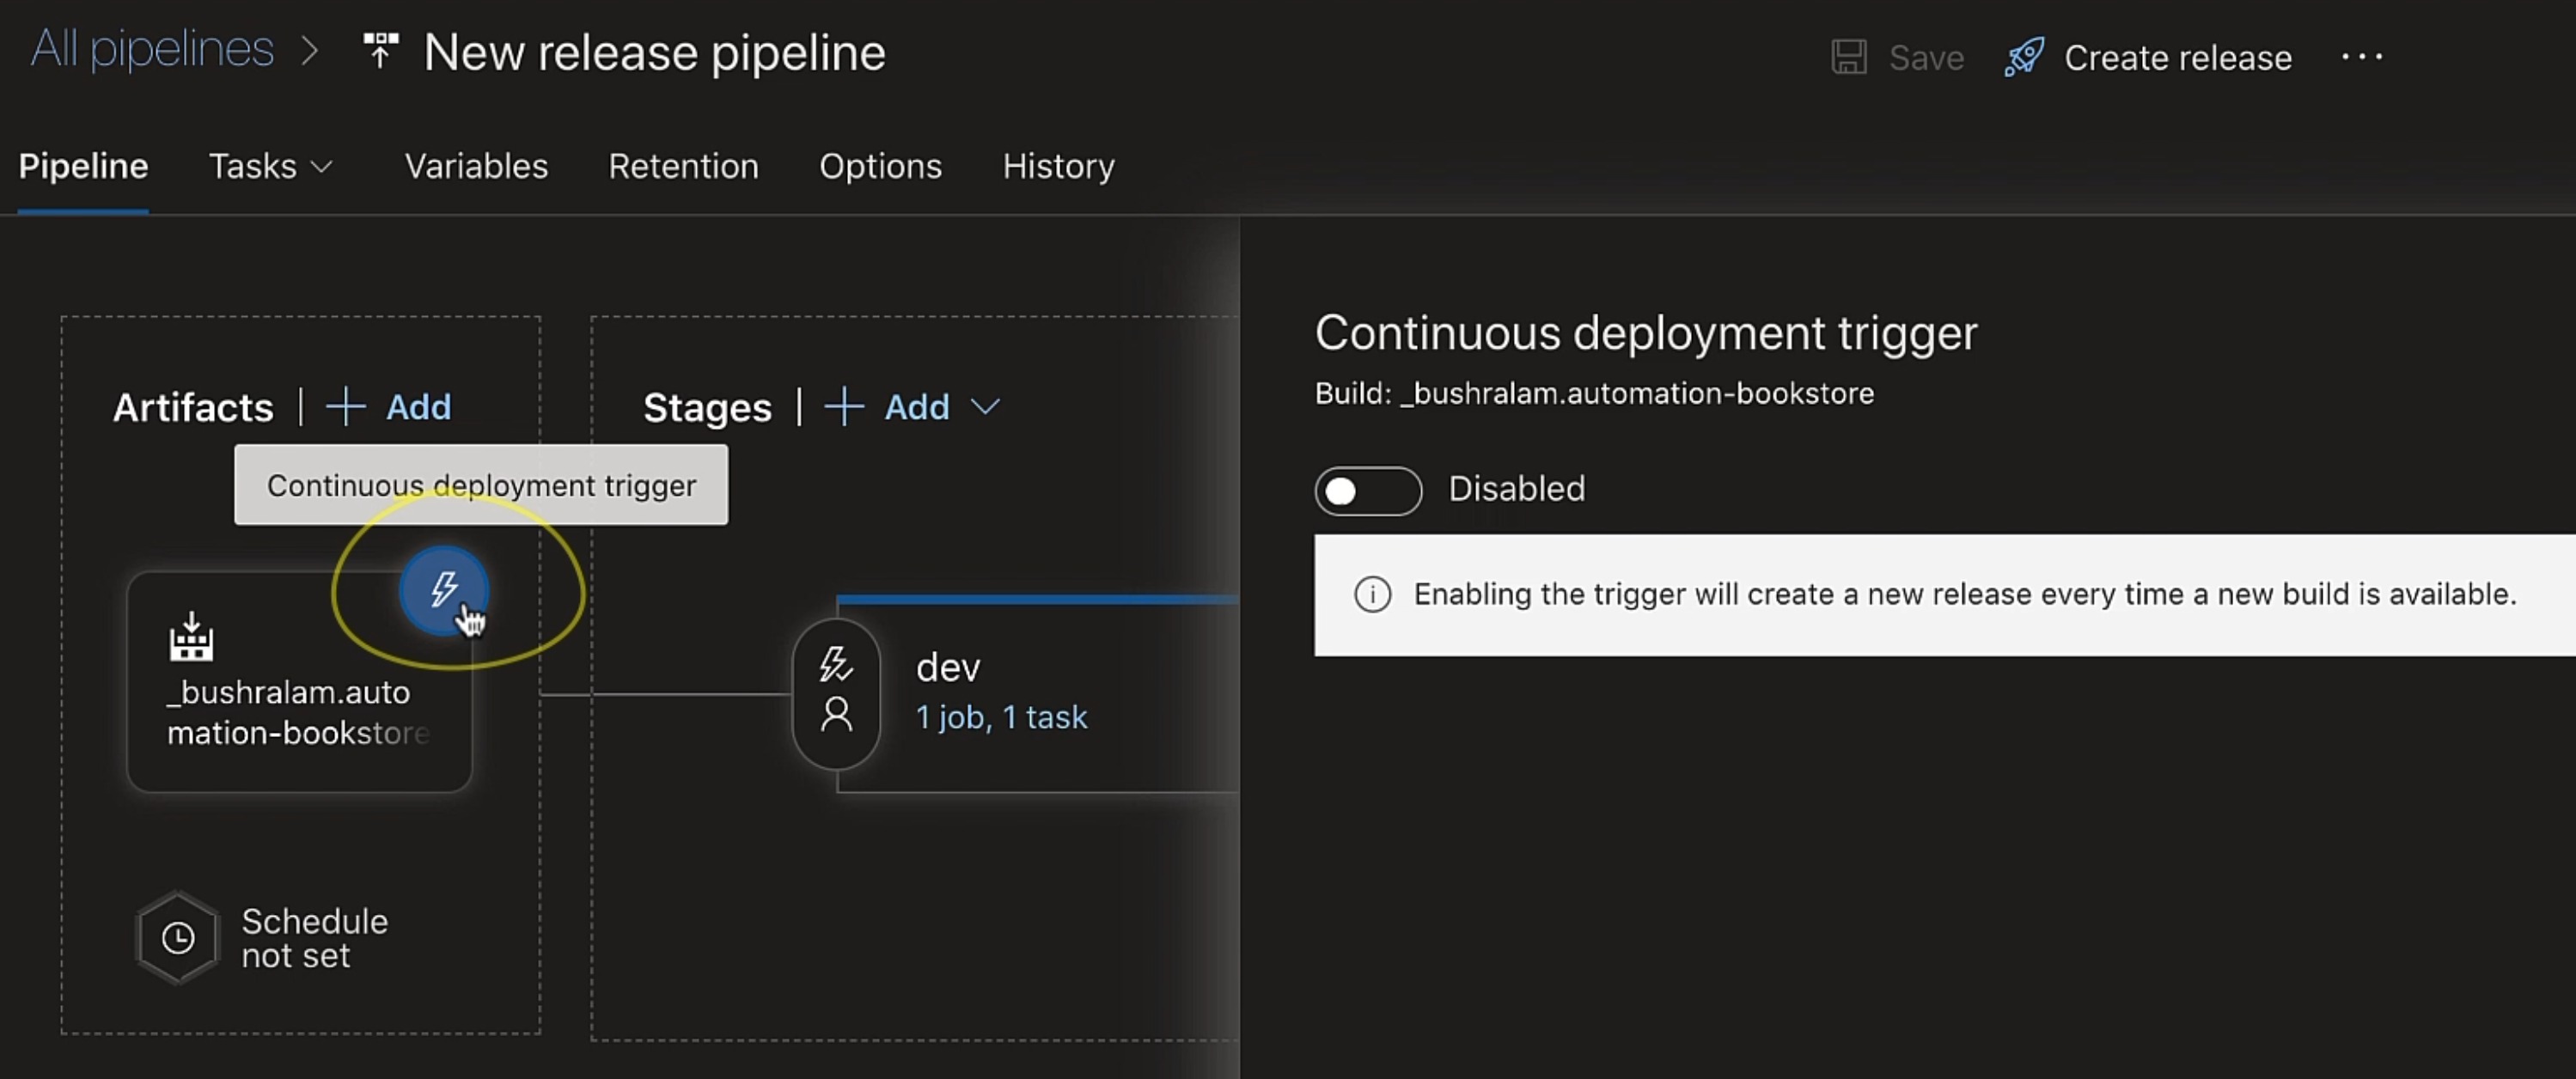
We'll enable it.
So, our continuous deployment trigger has been enabled.
Now, whenever a new build artifact is generated, the release pipeline will get triggered.
Let's also rename the pipeline.
Okay, now let's make some changes in our code and see if the build and release pipelines get triggered automatically and our changes get deployed.
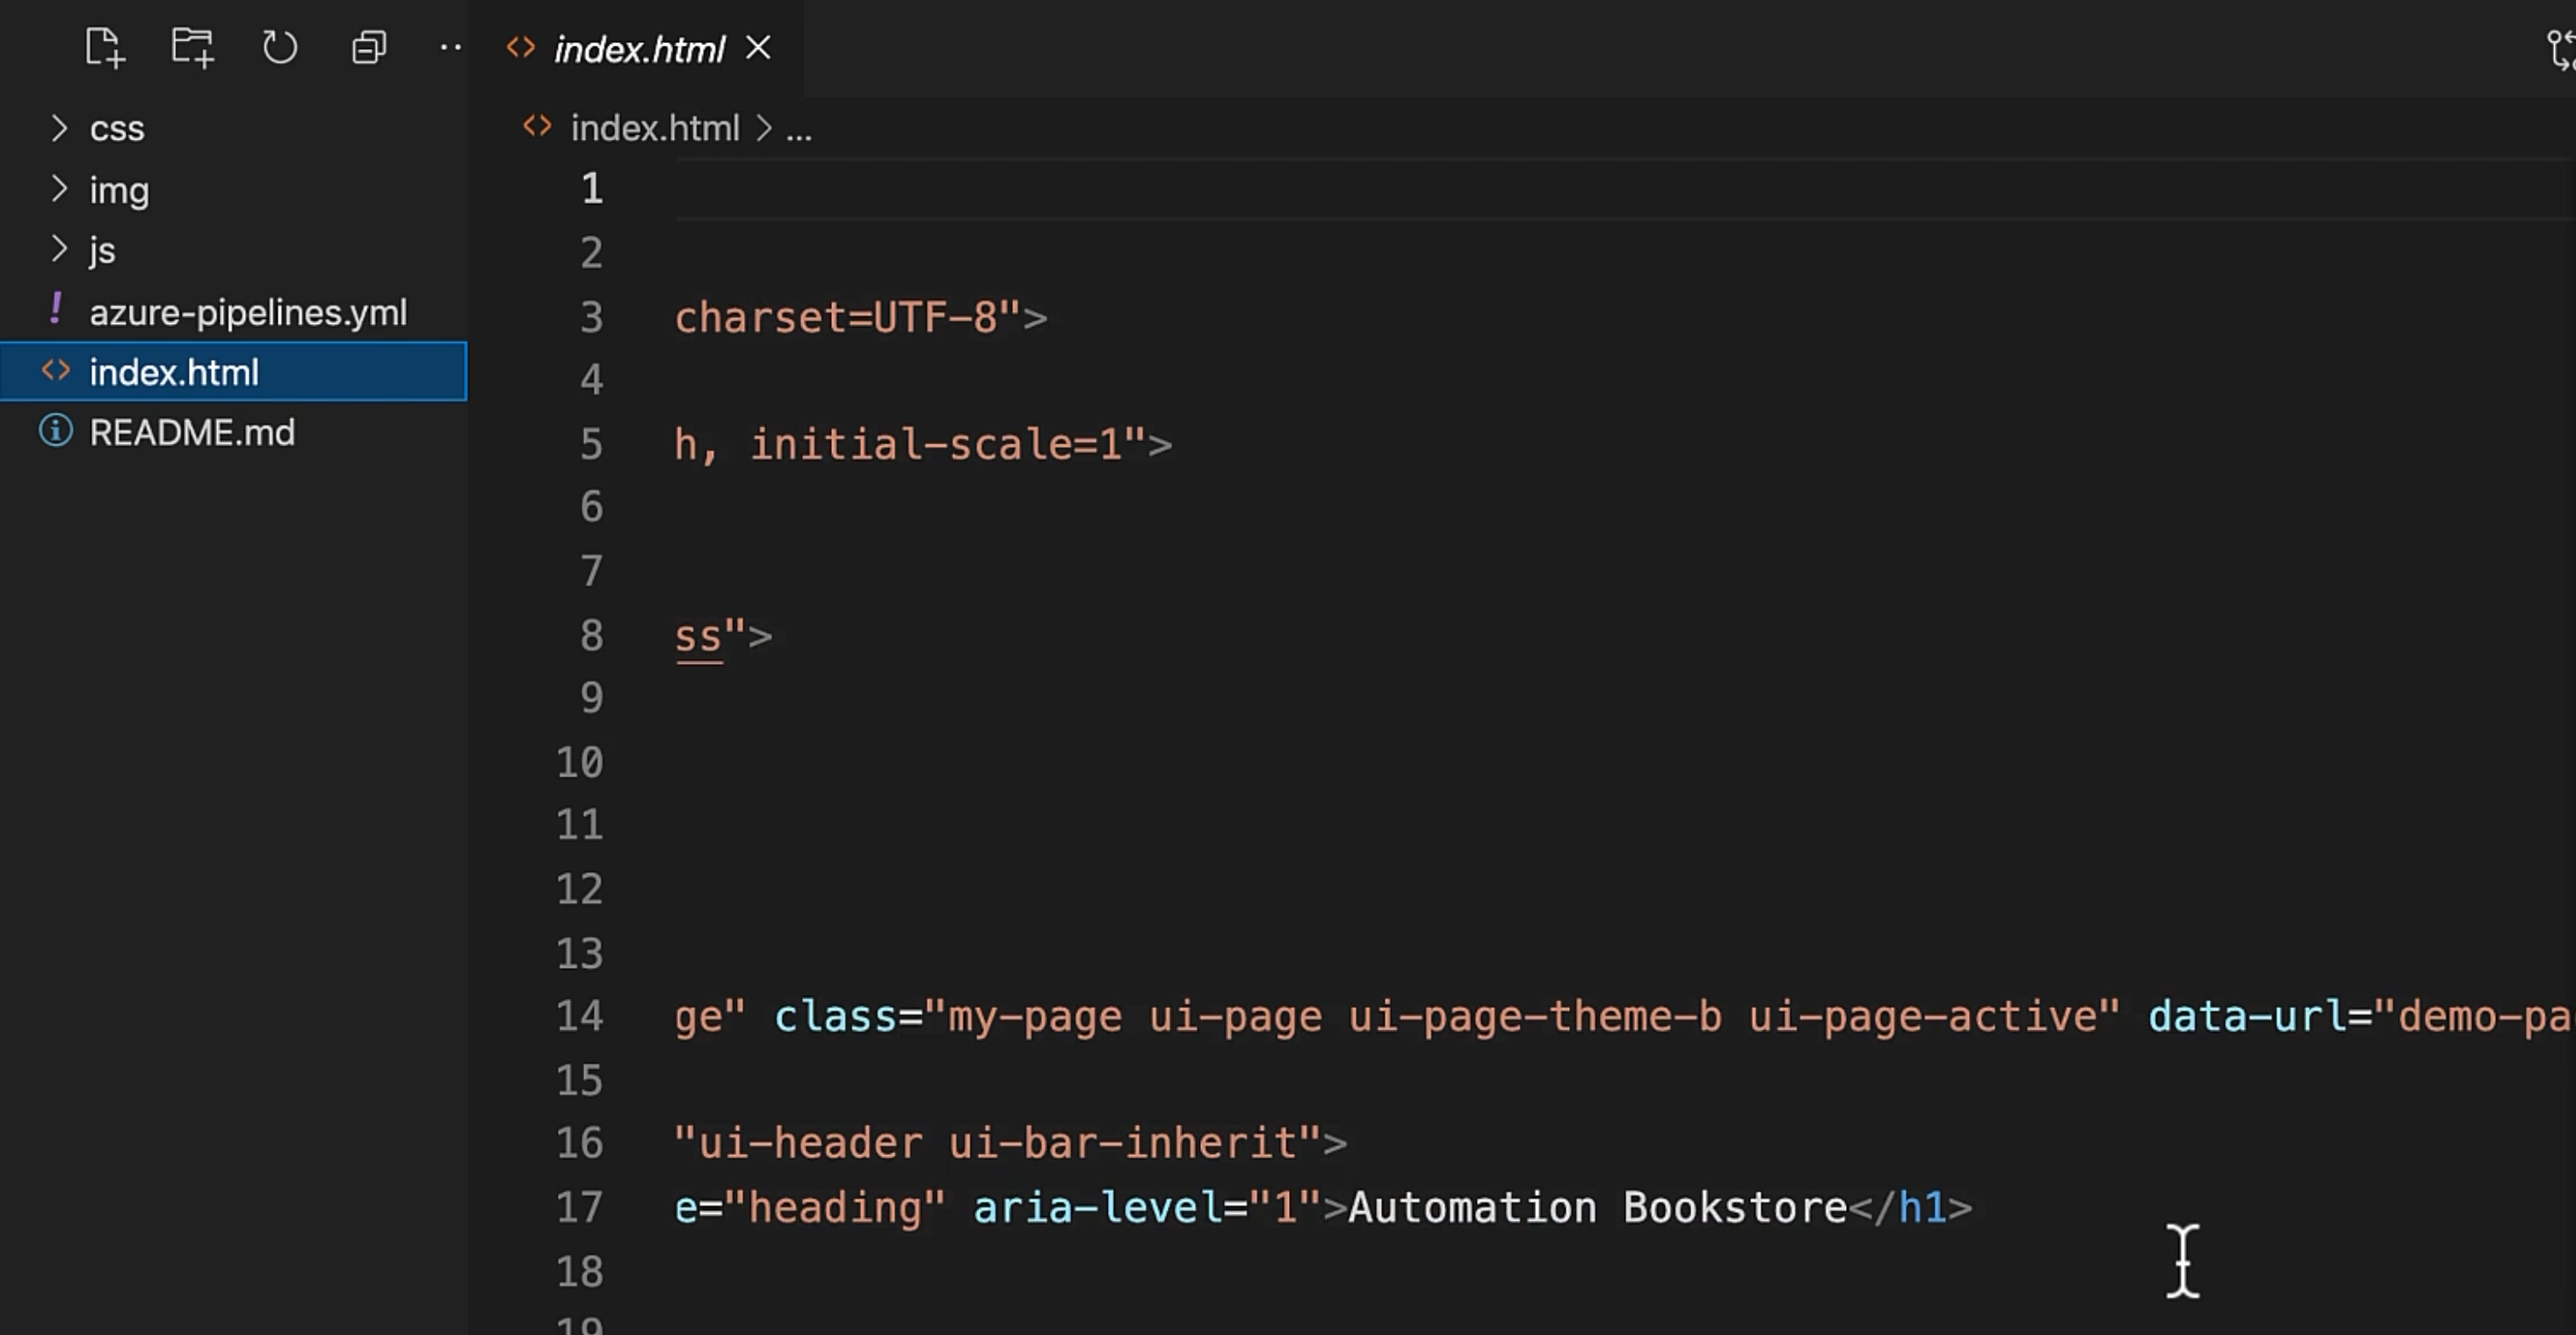
Let me go ahead and update the title of the page from "Automation Bookstore" to "Automation Bookstore Demo".
Let's save it and push it to Git.
So, our build pipeline has been executed.
Let's go to our release - and yes, our release pipeline has also been triggered.
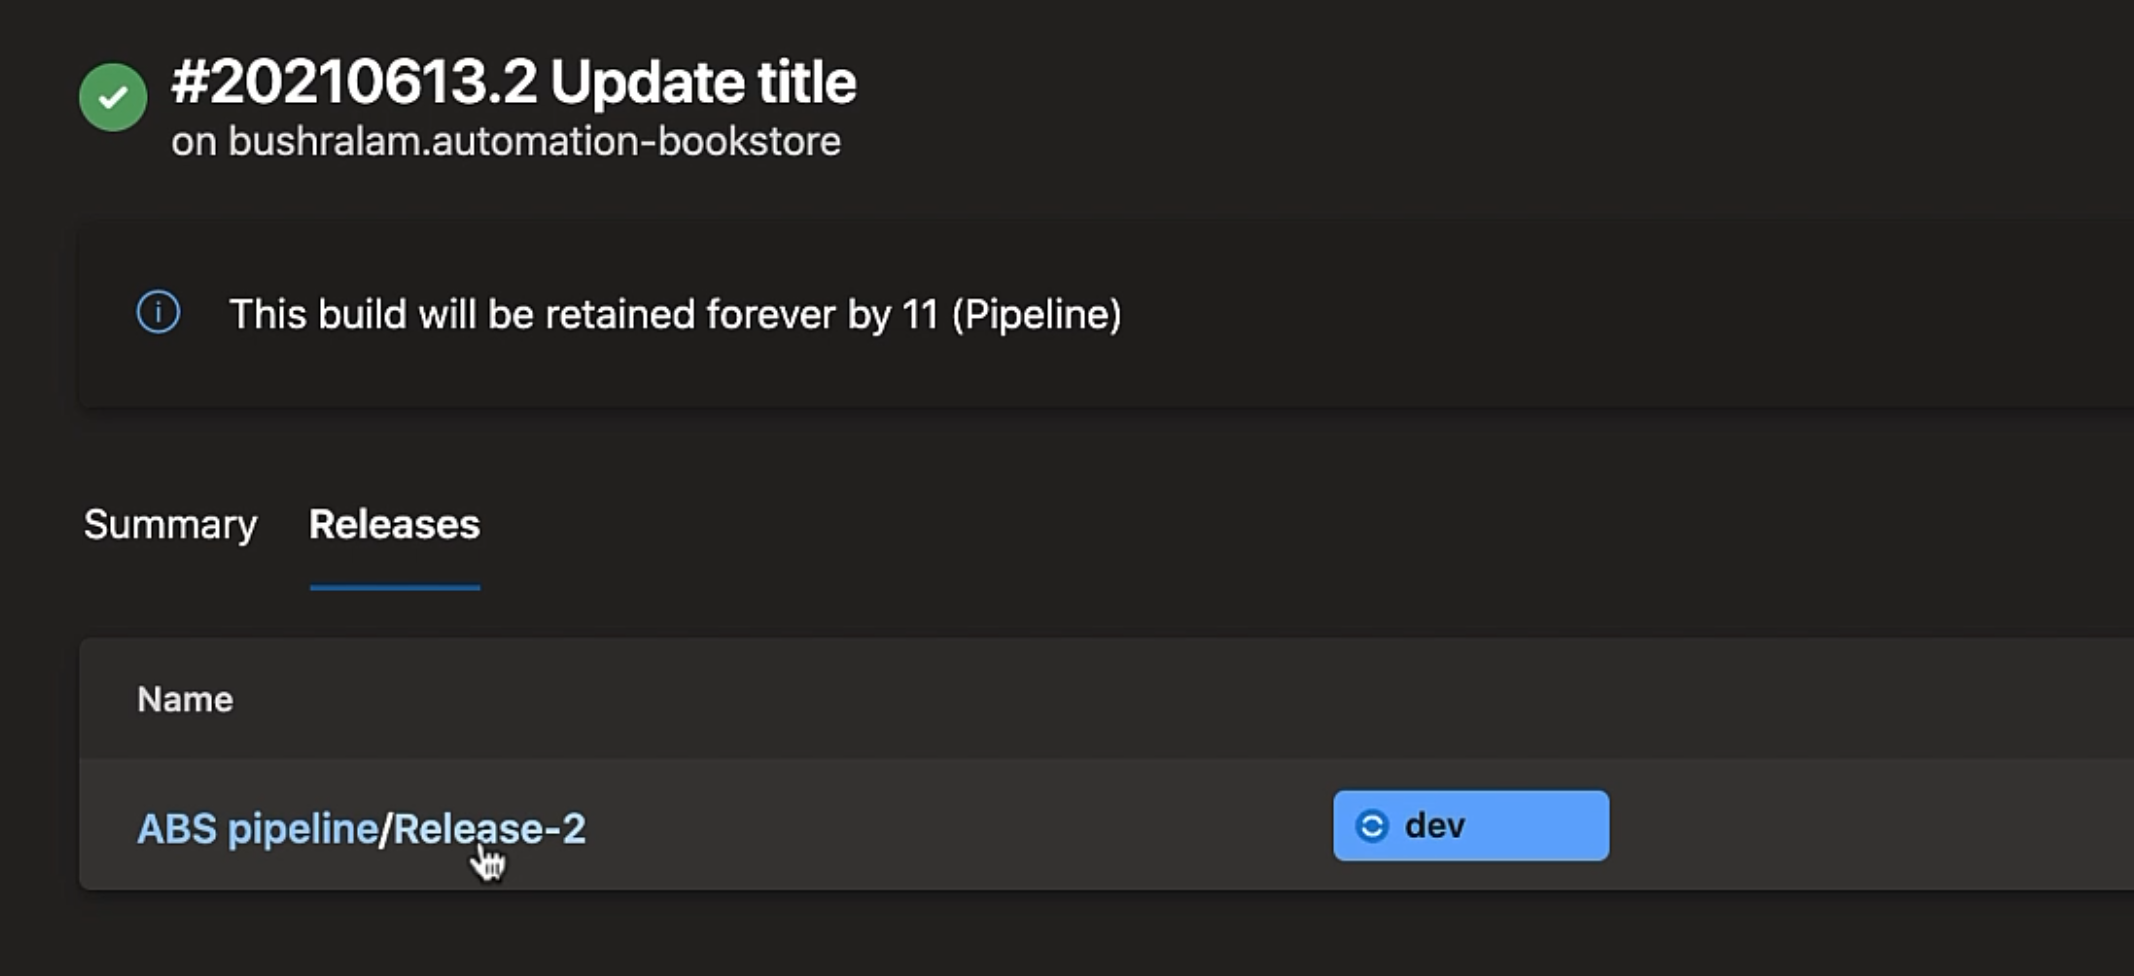
If you would like to see the details, you can go to this link.
We'll go to "Logs", and it's done.
Let's check our website now.
And yes, the title has been updated from "Automation Bookstore" to "Automation Bookstore Demo". Excellent.

We were successfully able to build and release our pipeline through Azure DevOps.
Also, I wanted to mention, as of the time of recording this video, Microsoft has temporarily disabled the free grants of parallel jobs.
What that means is, you won't be able to run your pipeline.
If you go to "Organization settings" > "Pipelines" > "Parallel jobs", you might see zero parallel jobs for public and private projects that you want to run on Microsoft hosted pools.

If that's the case, you can fill out this form and submit.

You can find the link to this form in the Resources section of this chapter.
I hope you enjoyed building and releasing the project using Azure DevOps.
