

Transcripted Summary
Let's kick off this tutorial with the first chapter.
In this chapter, we will deal with the setup required for creating and running our tests.
What will we need?
First of all, we will need an IDE where we will write the test code.
My preferred IDE is again, IntelliJ. If you're not very familiar with this tool, please take a look at my other course, which is IntelliJ specific, and it's also available on the Test Automation University platform.
The second item we will need will be an installed Java JDK, and we will need to have at least Java JDK version 8 in order to use JUnit 5.
Of course, preferably, we should always use the latest JDK available.
Next, we will have to create a brand-new Maven project, but that is going to be easy because we are going to use IntelliJ to create the project based on an existing template.
I want to create a brand new project so that we can focus specifically on the JUnit 5 items and so we don't get distracted by any other code that we might have in another project.
Last but not least, we will need to import JUnit 5 into our newly created Maven project.
In order to do that, we will go to the Maven repository website and we will download the JUnit Jupiter library from that location.
So, let's get started.
I'm on the Maven Repository website and I will now look for JUnit 5.
In order to do so, I actually need to look for the "JUnit Jupiter" dependency.
I will search for it and I will take a look at the results.
Now, we have several entries here.
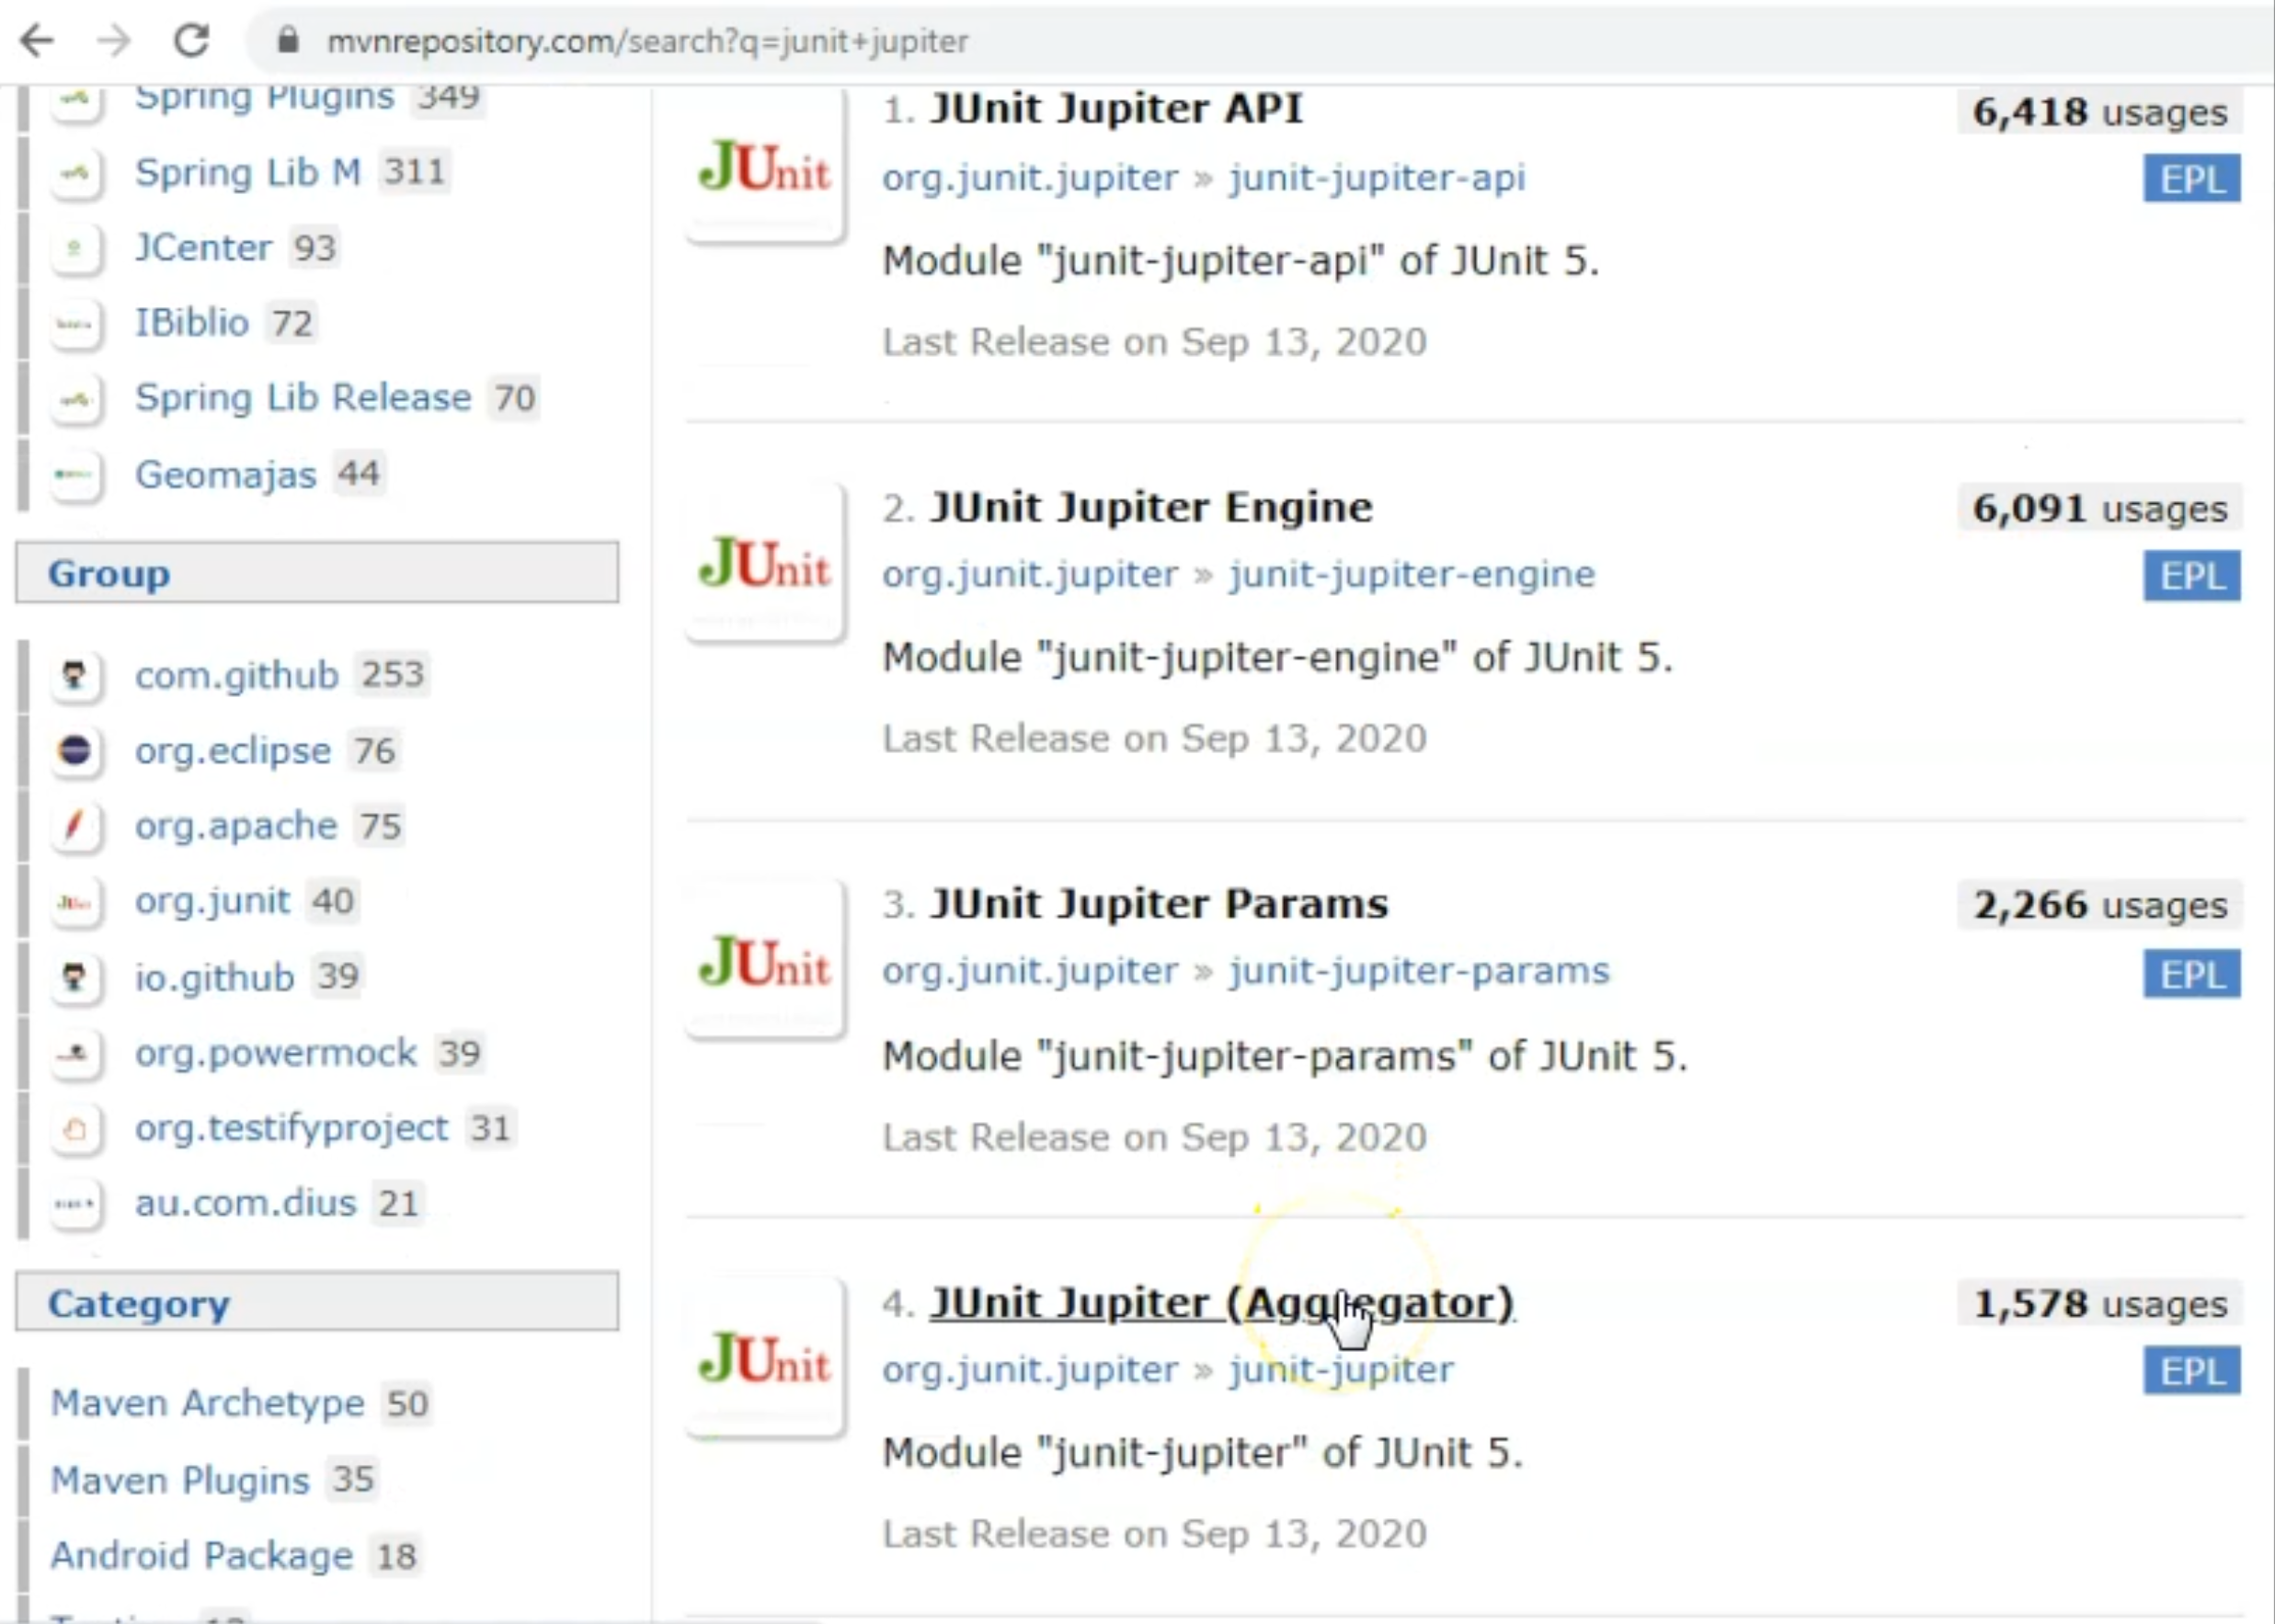
However, the one we are really interested in is the JUnit Jupiter (Aggregator) one.
This is because this is the most complete dependency we can add to our project.
This one will automatically download all the other dependencies there are in the JUnit 5 libraries.
So for example, if we would need to work with parameters, we would need to download JUnit Jupiter 5 Params.
However, the Aggregator will download the params dependency also for us.
So, as I said, the most complete one, and the one you should go for is the JUnit Jupiter (Aggregator) dependency.
I will click on it here and we will have to see what the latest release version is.
As you can see here, there are quite a few, but the latest released one - namely the latest one that is not a release candidate - is 5.7.0.
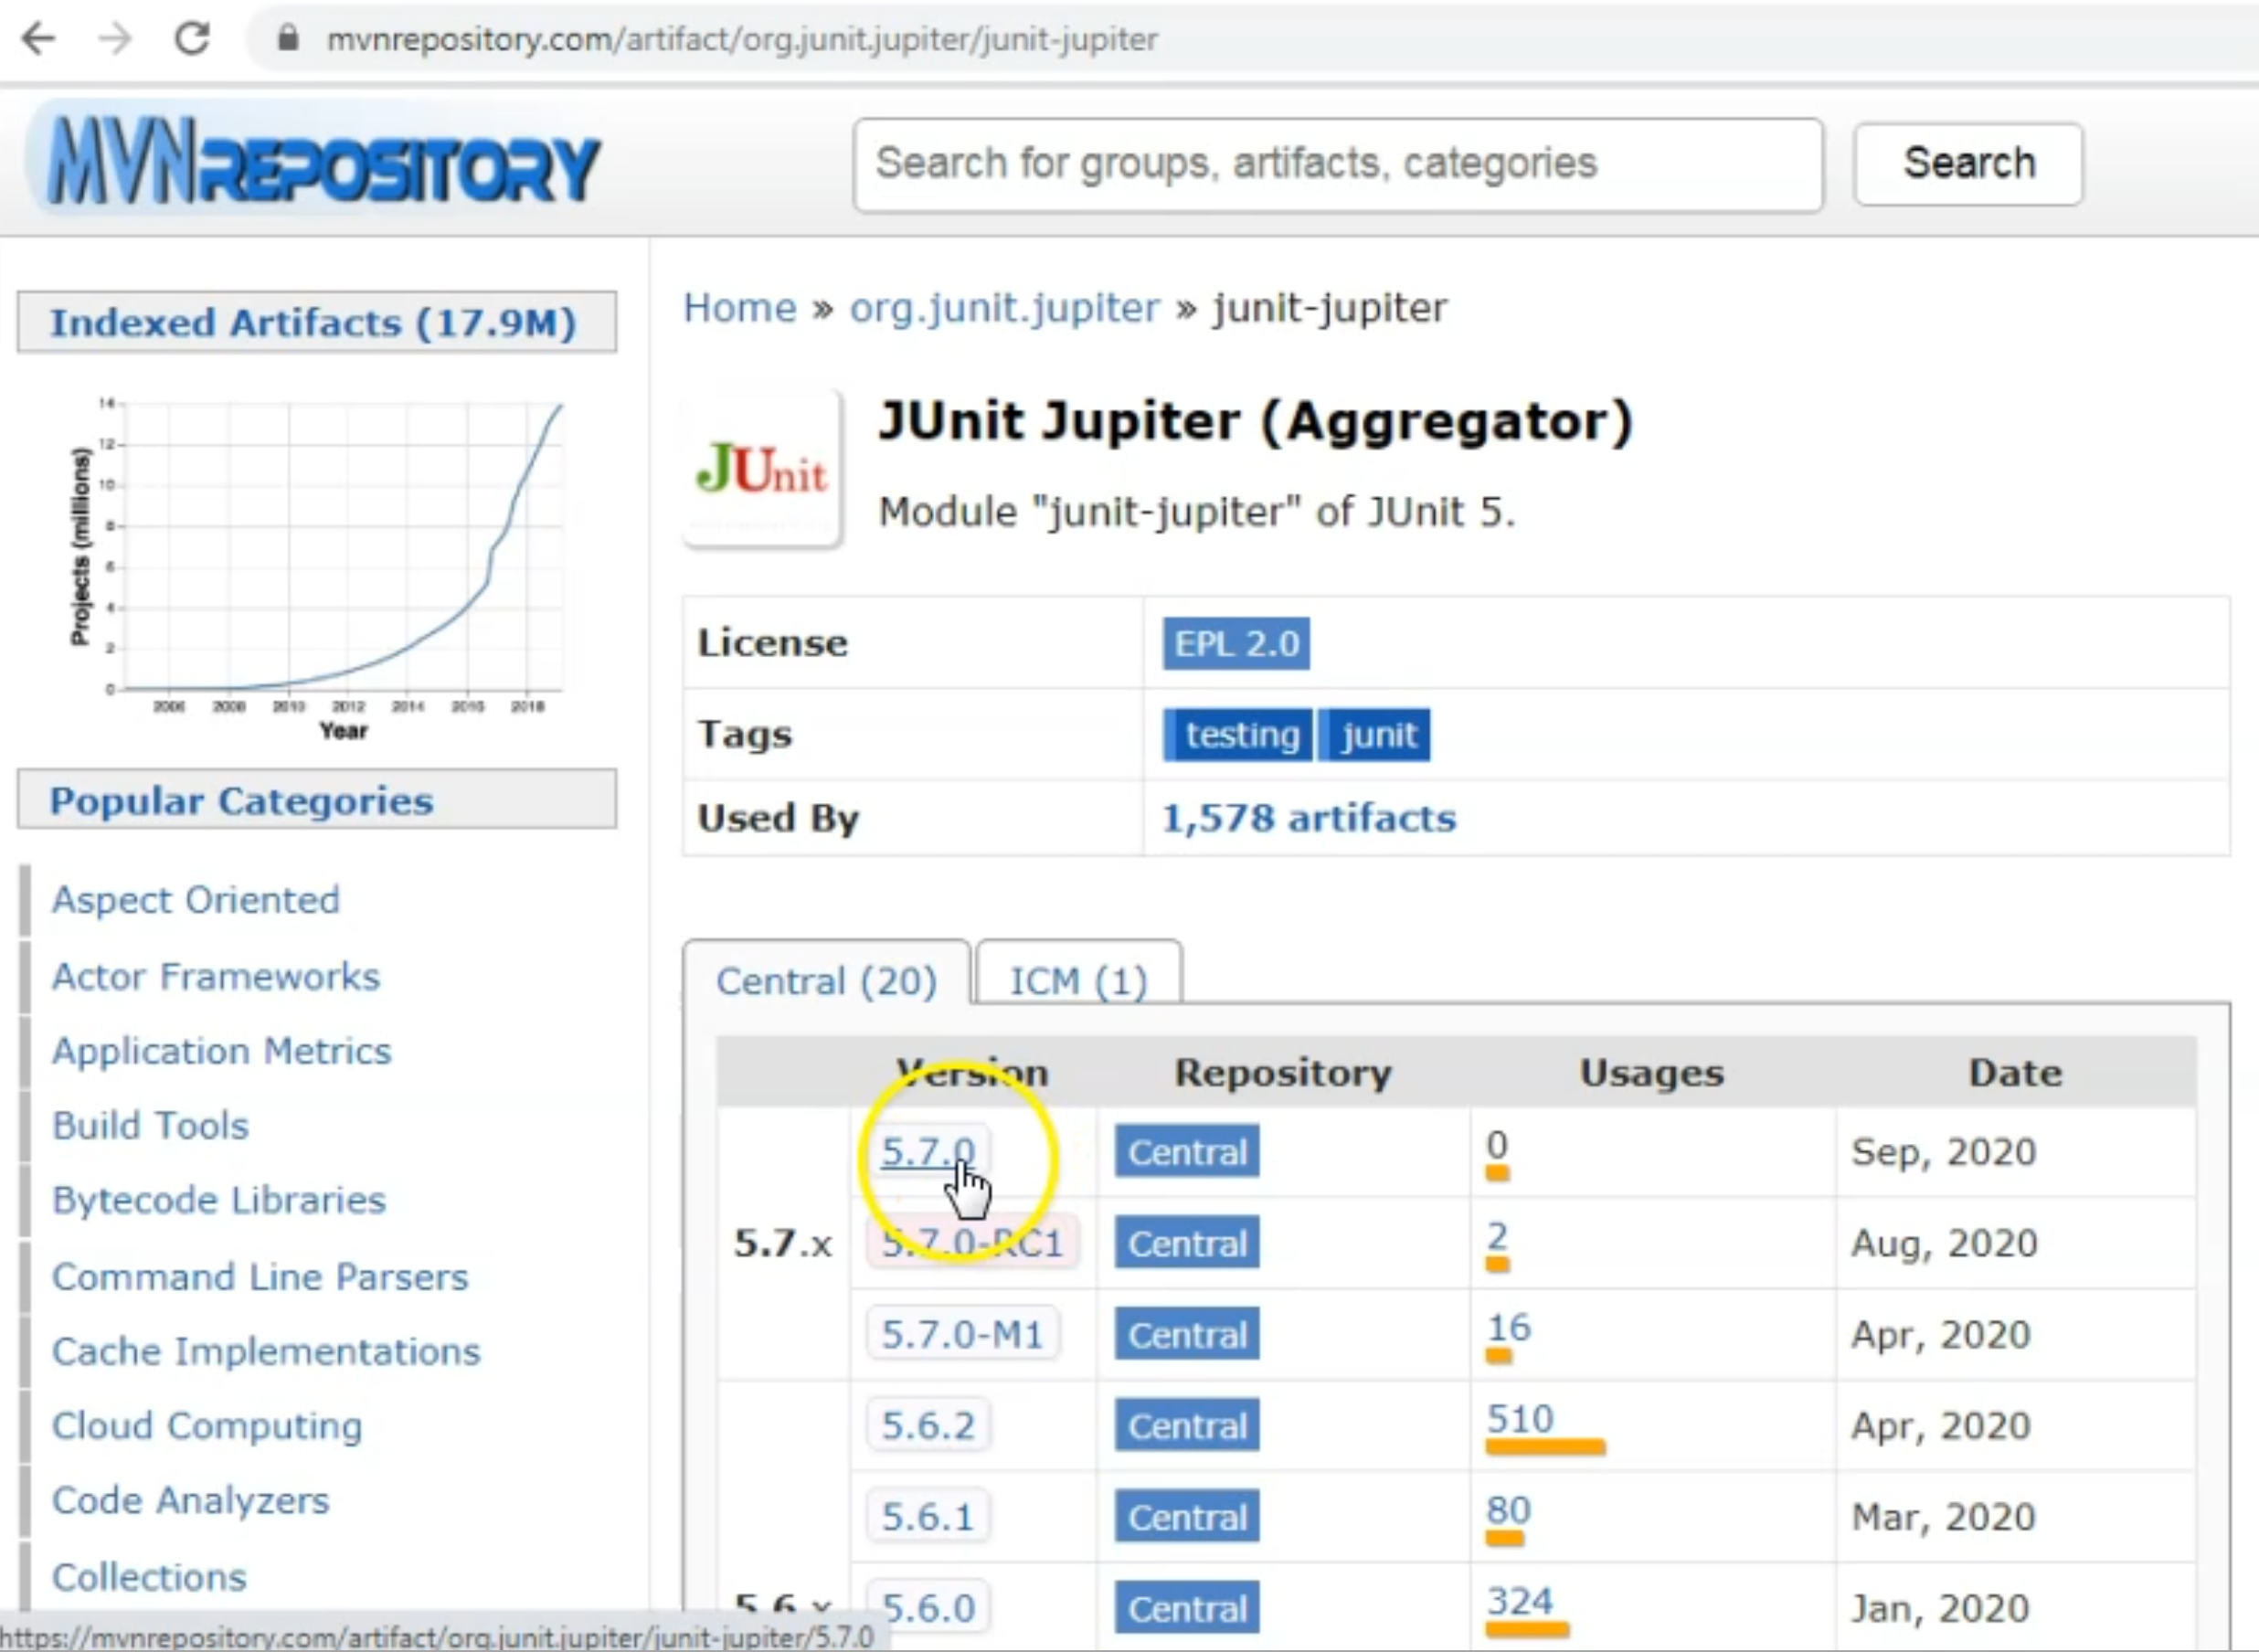
This is the one I'm interested in.
I always want to have only officially released versions of a library when I add it to my project.
I will click on the version number and I will just copy the dependency section.
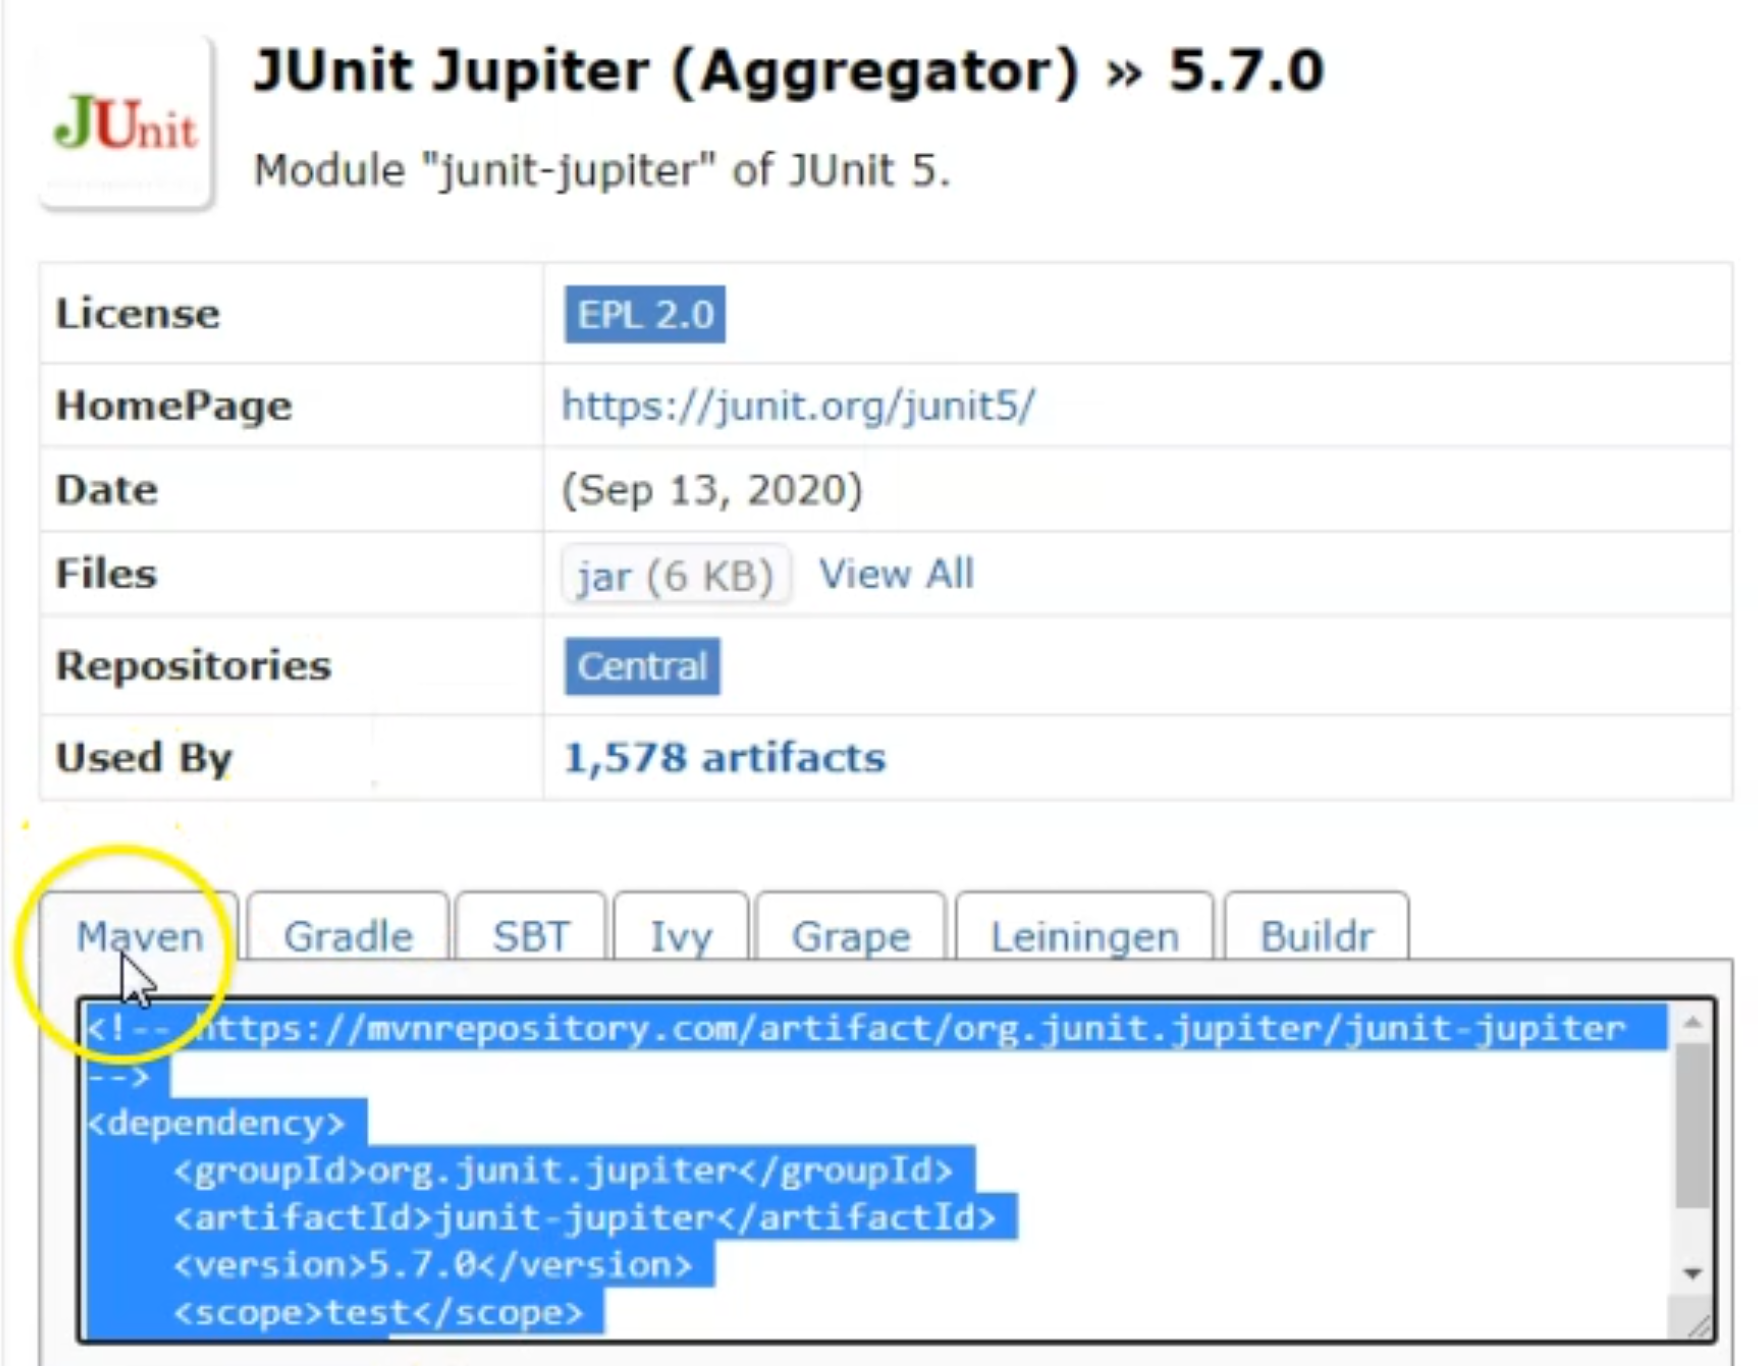
Because we are using Maven, of course, we will be copying what is in the "Maven" tab here.
Okay, so we found the dependency.
Now we just need to add it to our project, but for that, we will first need to create the project.
We will now create the new Maven project where we will store our tests.
In order to do that from IntelliJ, we will go to "New Project" and I will select the option to create the project based on an existing Maven template called an archetype.
I will just select "Maven", "Create from archetype", and then I will have to search for the
archetype I'm interested in - namely, the "maven-archetype-quickstart".
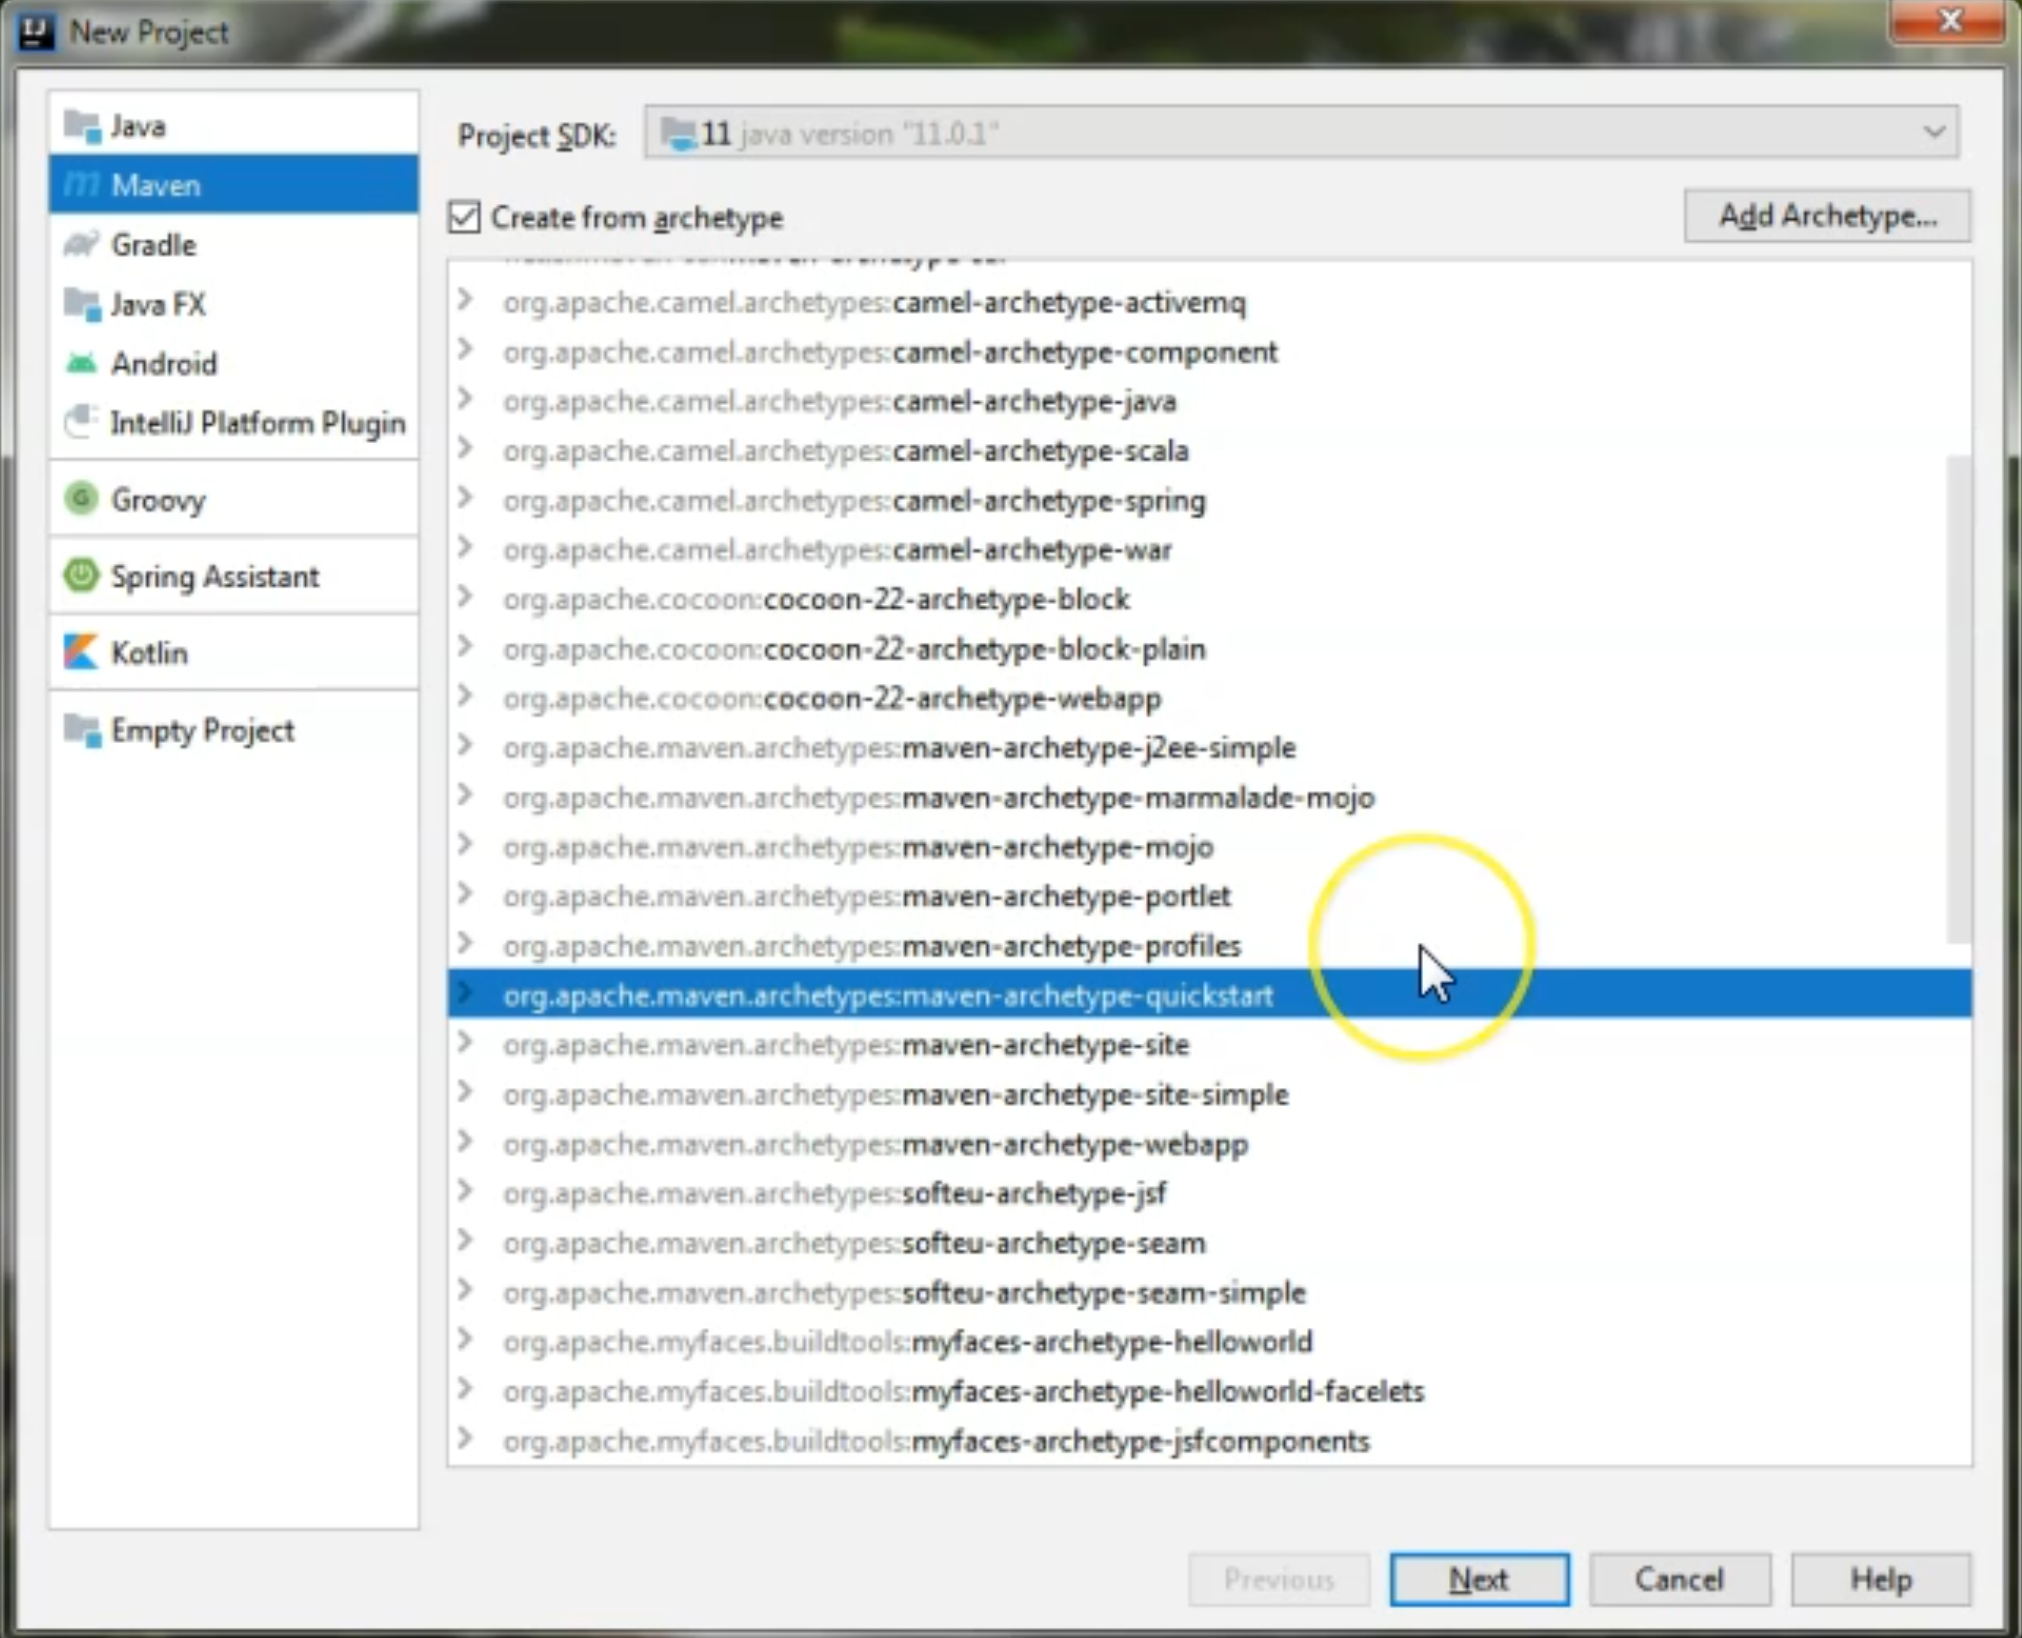
This is the most suitable template for us to use for creating our new project.
I will click "Next" here and I will give the project a name - namely, junit5-tutorial for this example.
I will say "Next", I will leave all the other settings as they are, and I will just hit "Finish" and wait for the project to be created and imported into my IntelliJ IDE.
Then, I will have to wait for the project to compile and once it has done so successfully, I will go over a bit of cleanup that I need to do here and we will add the Maven dependency.

As you can see, my build has finished successfully building, and I will first go to the cleanup part.
I will expand the src folder here on the left-hand side, and then I will expand the main and the test folders.
As you can see, I have a few packages and classes here created by default because we used the template.
So, we will just have to delete org.example from both of the java folders we have here - we don't need these classes - these were only created as an example.
I will just right-click and "Delete" both of the packages that we have in the java folders.
Once we are done with this, we will go to the pom.xml file and we will take a look at what we have there.
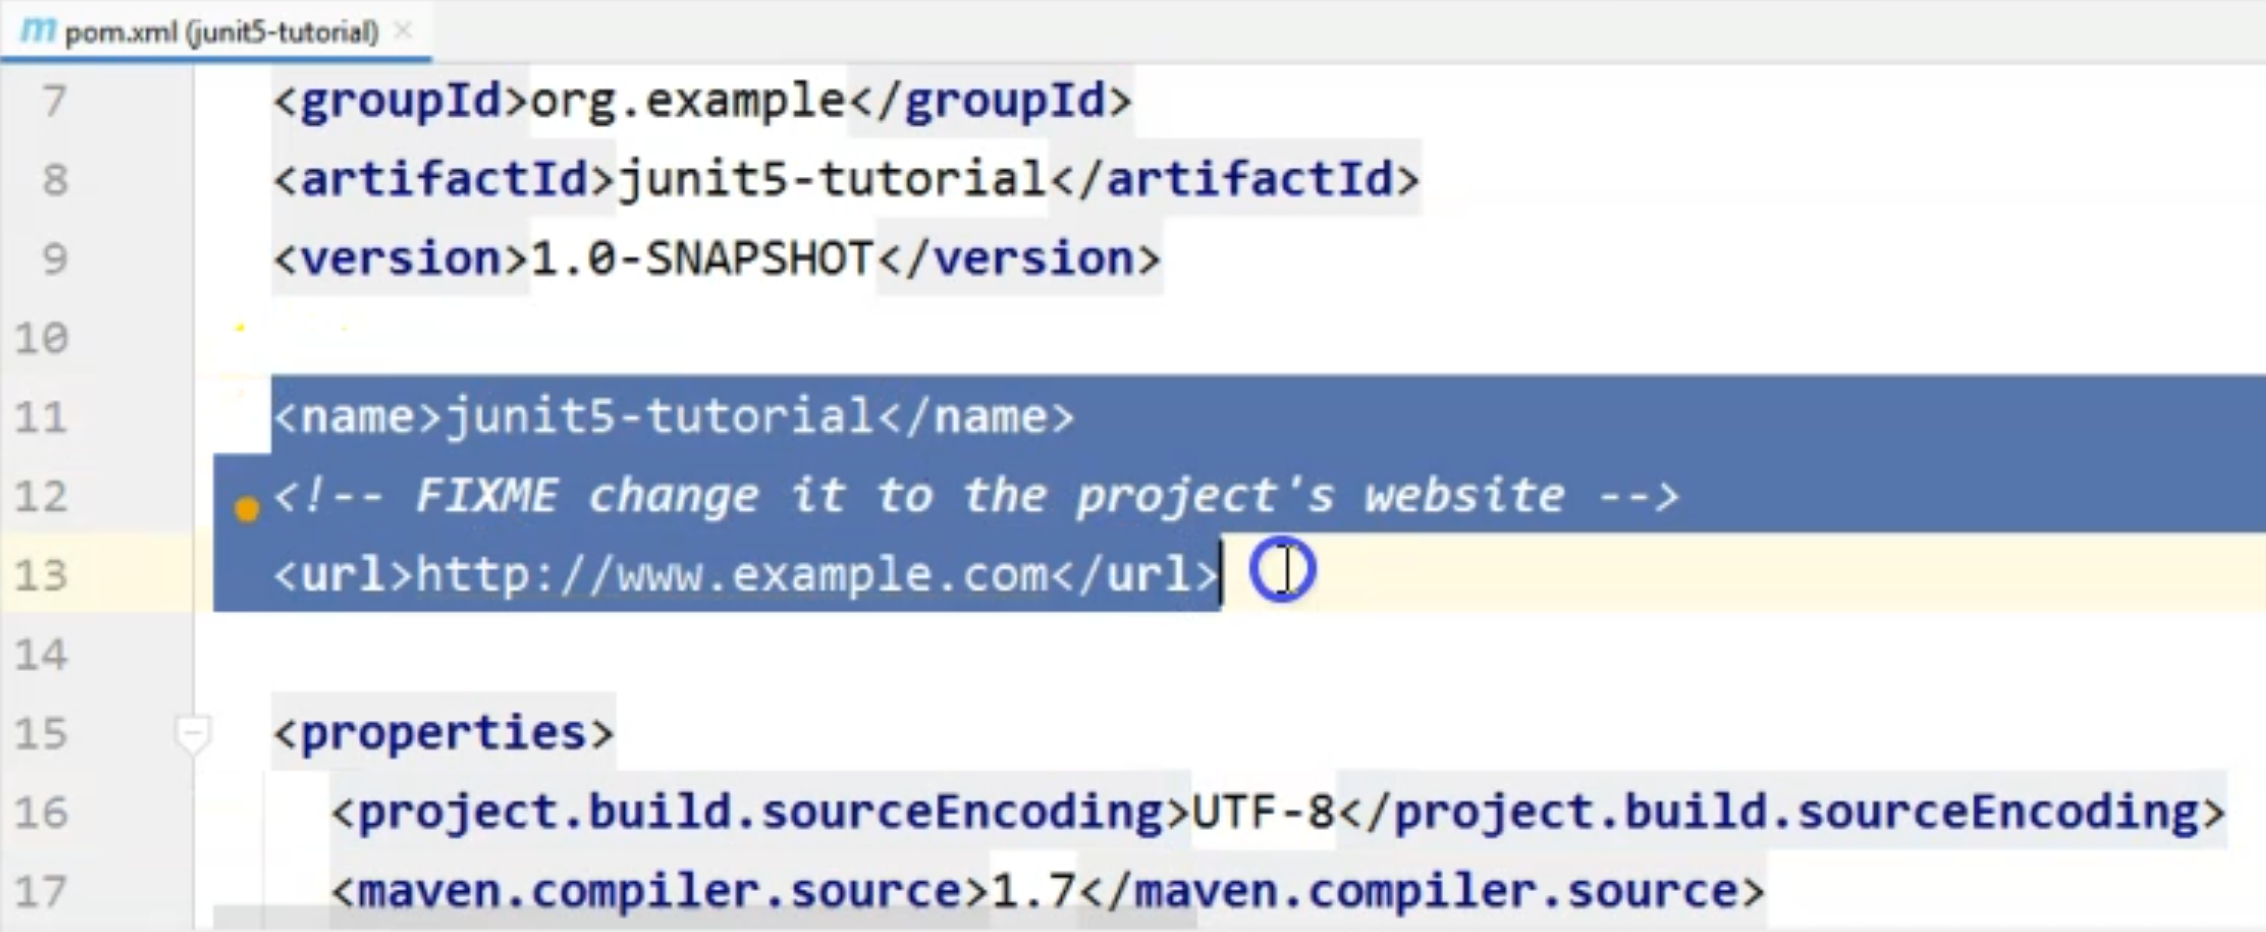
Namely, we will have to get rid of the name and url tag and the comment that is here, because we don't really need them for the purpose of this tutorial.
Then, I will go to the dependencies section and as you can see, we already have a dependency added here by default - this is a JUnit 4 dependency.
However, for the purpose of our tutorial, we will be using JUnit 5.
I will cover some aspects regarding JUnit 4 in the last chapter of this course - therefore I will just remove this dependency for now and I will replace it with what we copied from the Maven repository website.
I will just have to perform a clean install on the project so that we download the latest version of the JUnit Jupiter library.
I will go to "Maven" on the right hand side, you can see the Maven icon, and then I will expand junit5-tutorial, and then I will also expand the Lifecycle option.
Then, I will simultaneously select clean and install.
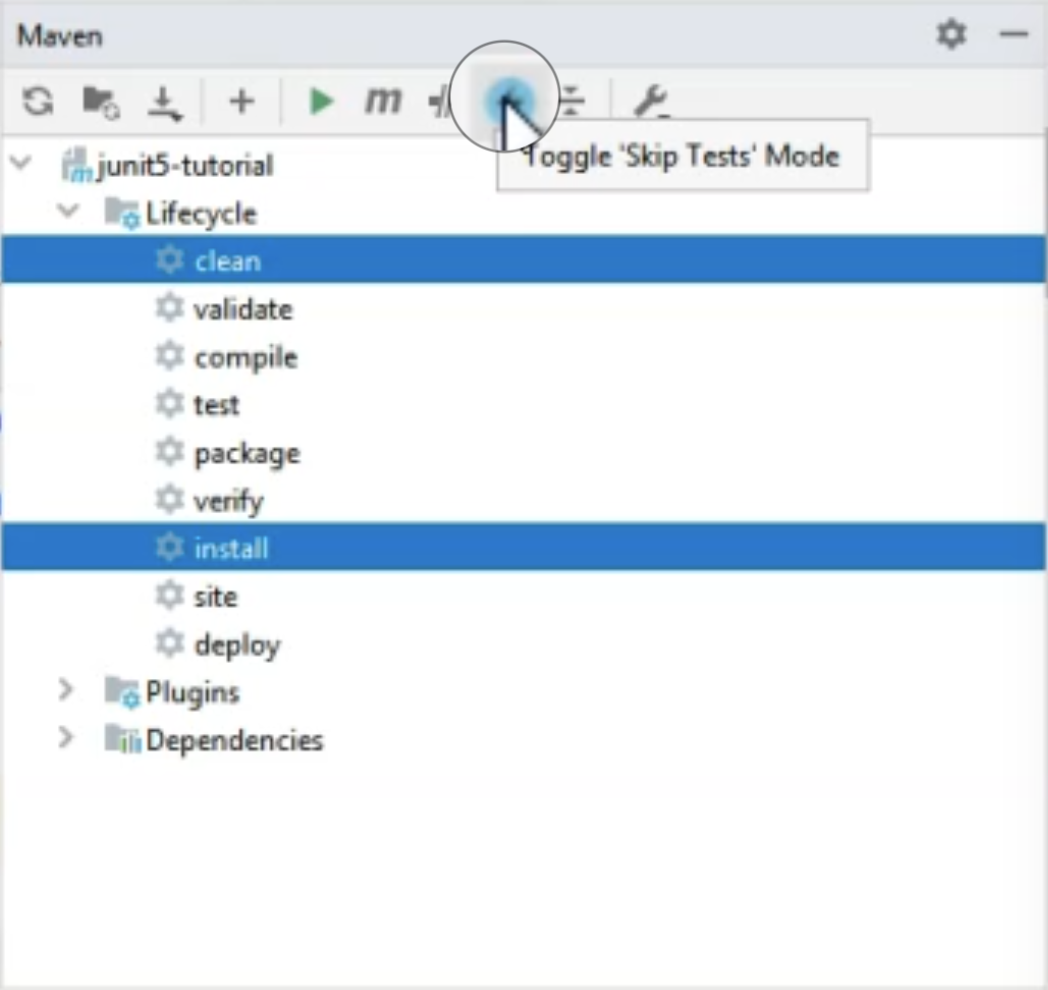
I will click the icon that says "Toggle 'Skip Tests' Mode", which means I don't want to run the tests when I am compiling the project and I will "Run Maven Build".
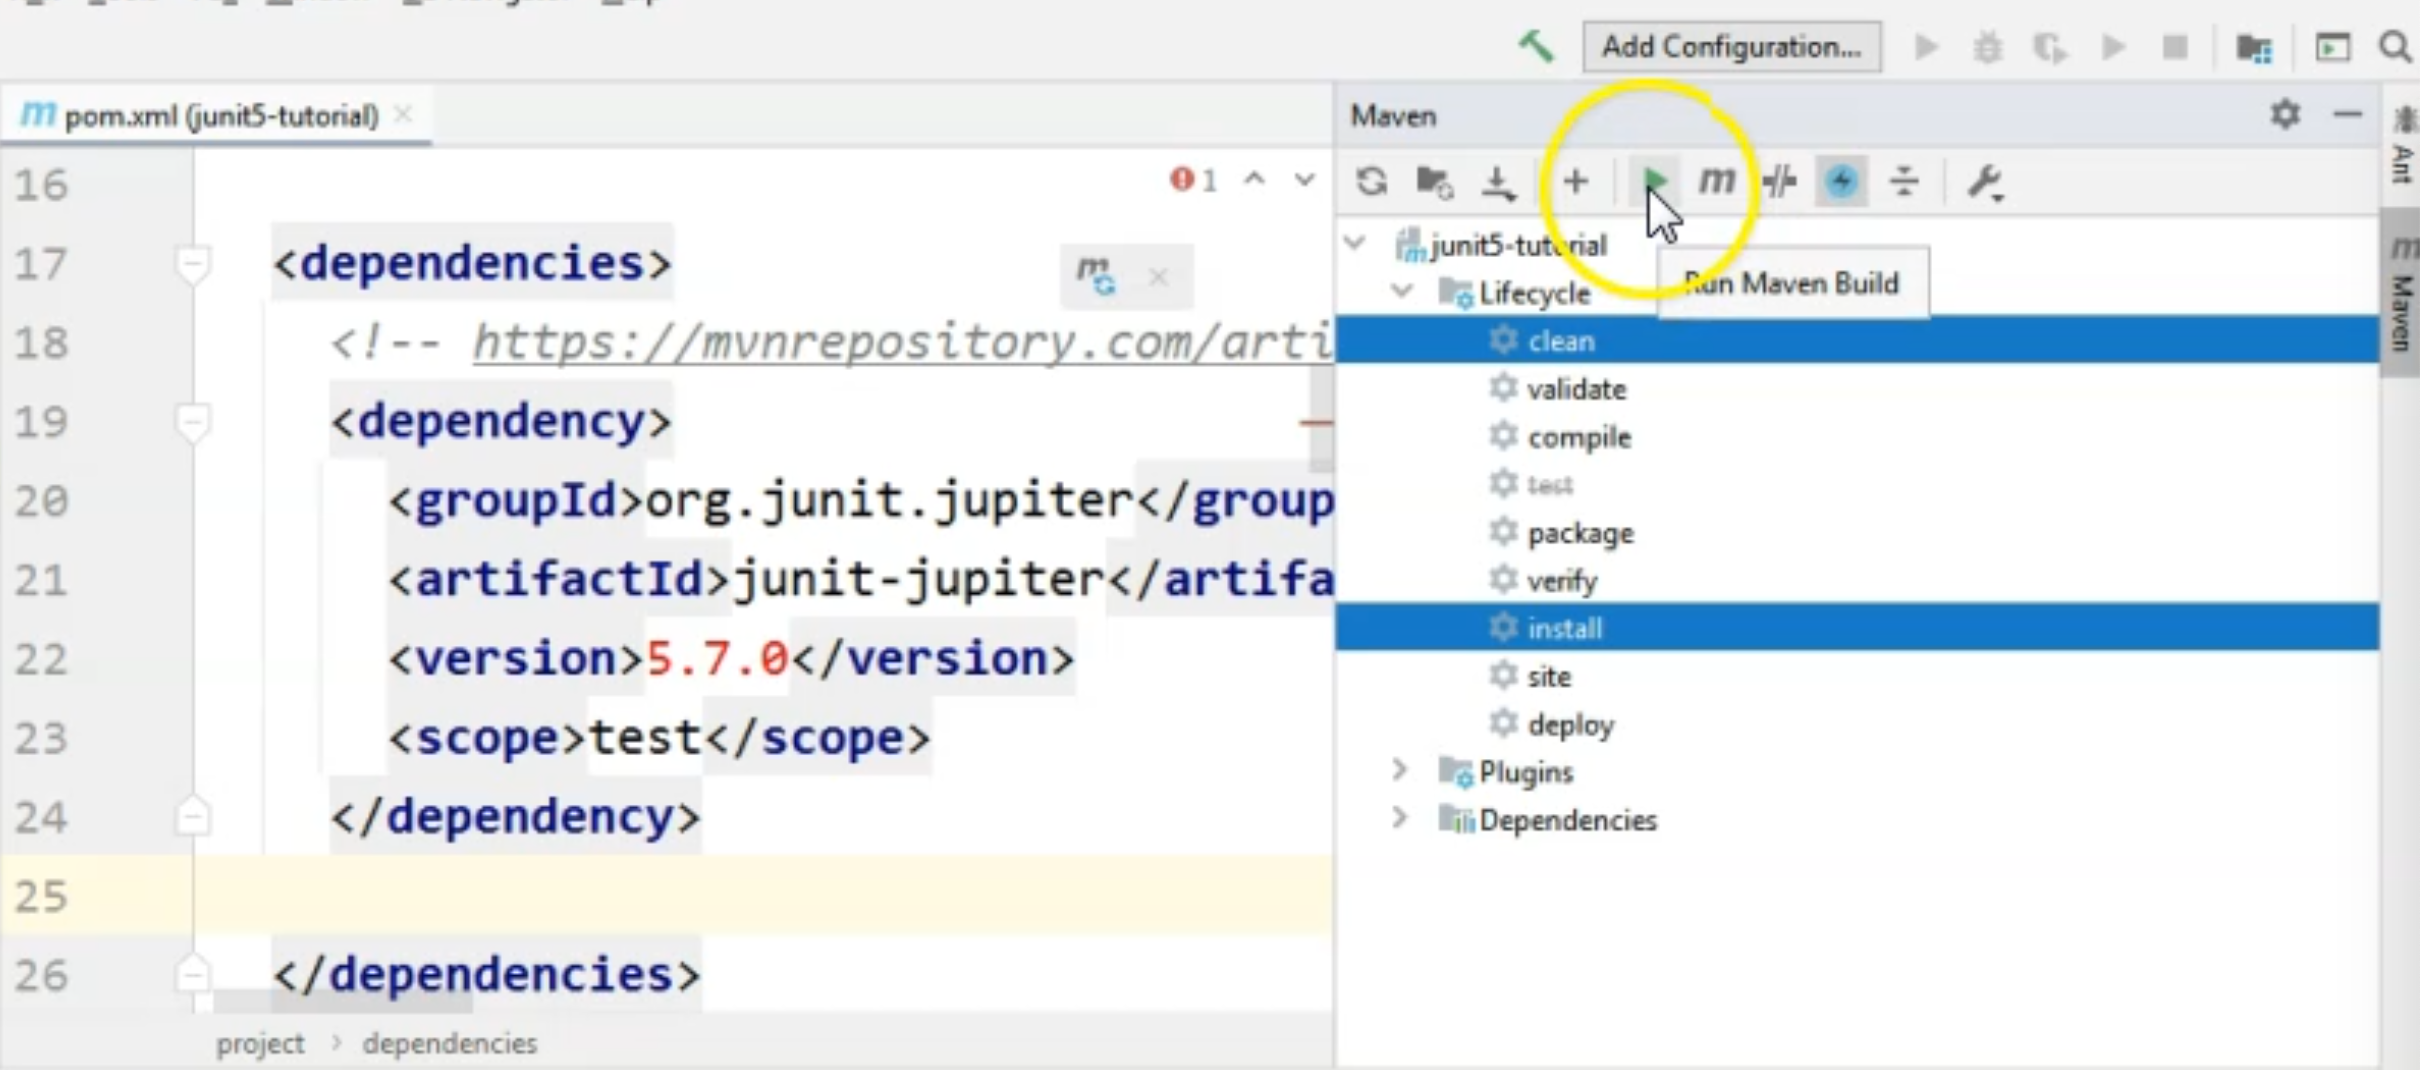
So, I want to compile everything so that I can get the JUnit Jupiter library into the project.
Once this is done, we will be interested in seeing that the build was successful, and you can see that it is.
Even though we have warnings on the left-hand side, don't worry, the build was successful.

In order to make sure that our library was successfully downloaded, we will just go to the "Reload All Maven Projects" icon, and wait for the reload to happen.
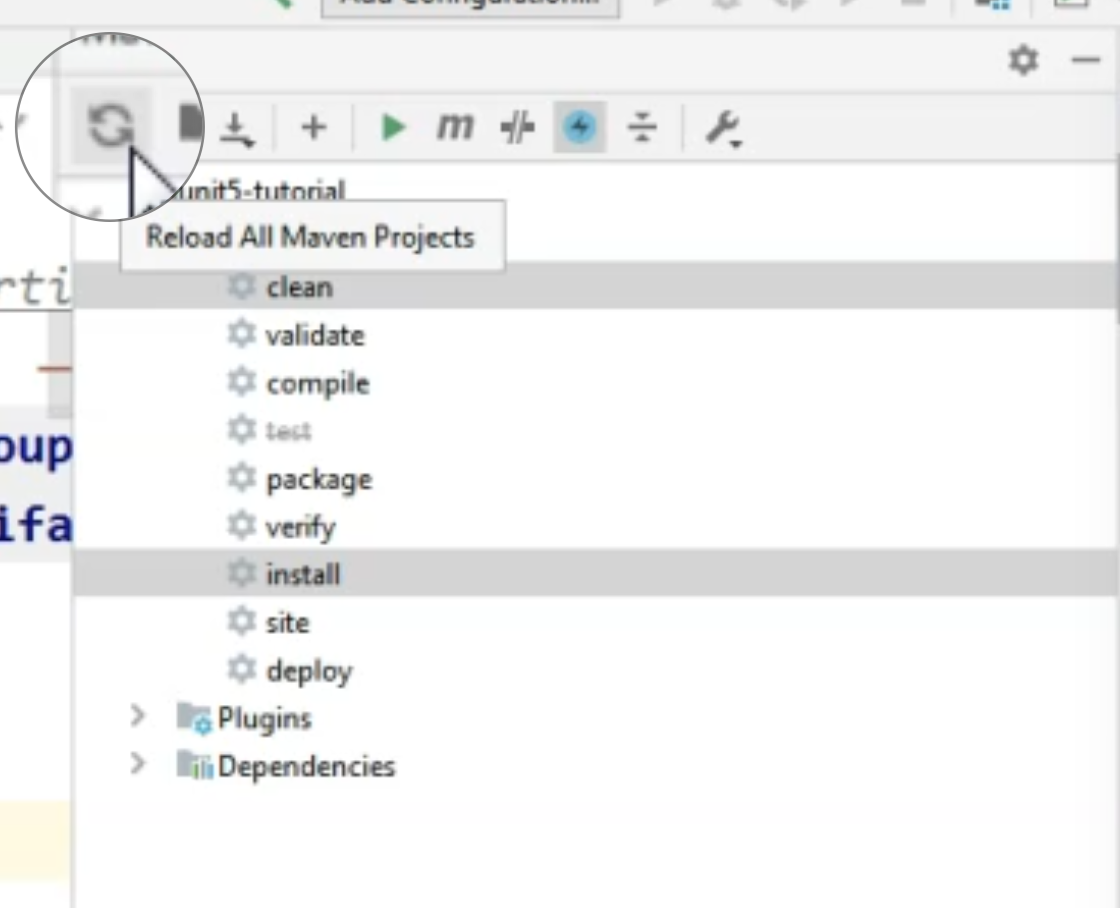
Now you can see that the version is not red anymore, so we did download the latest version of JUnit Jupiter.
In order to check that that is actually the case, we can go to the left-hand side and expand the "External Libraries" section.
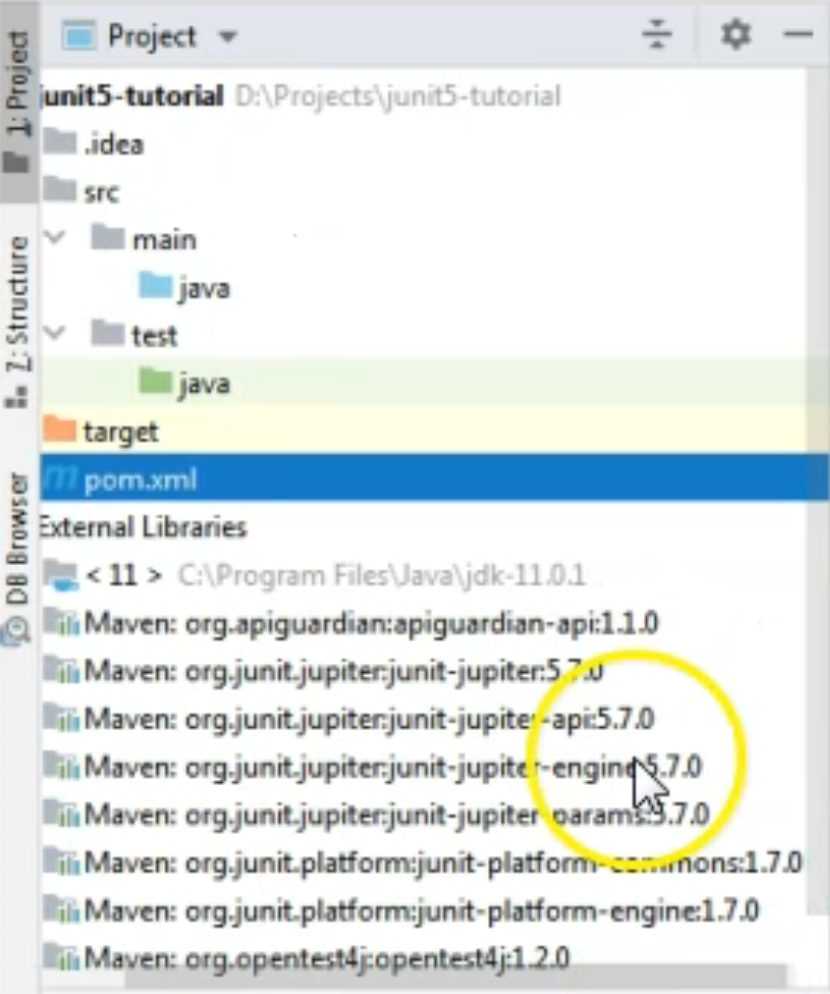
Here, you can see that we have all the junit-jupiter-* dependencies, namely the junit-jupiter-params for example, or the junit-jupiter-api one.
These will be something we will use in further chapters to create our tests.
One additional and last setting we need to make is in the last plugin that we have in our pom.xml file, namely in the maven-compiler-plugin.
We need to add a configuration tag and inside this tag, we need to specify the source to be 8 and then the target to also be 8.
<plugins>
    <plugin>
        <groupId>org.apache.maven.plugins</groupId>
        <artifactId>maven-compiler-plugin</artifactId>
        <configuration>
            <source>8</source>
            <target>8</target>
        </configuration>
    </plugin>
</plugins>
This is for the Java JDK language version settings.
So, we just need to add these and then rebuild the project and everything needs to again be successful.
This concludes our setup chapter, so let's get started with creating some tests.
