

Transcripted Summary
We've made it to chapter 15, and up to this point, we ran our tests from IntelliJ.
There are several other options that we can use for running the tests and we can actually run them from the command line, simulating what you would do when you are running your tests from a pipeline like Jenkins.
In this chapter, we will go over more options and possibilities of running the tests, including running the test that we assigned tags to in the previous chapter.
# How to run tests with IntelliJ
We will start with running tests from IntelliJ.
Until now we have run each test individually, so we have opened a test and we either ran the test from the class level, by clicking the icon next to the class name, or we ran individual tests.
As you remember, when we ran an entire class, in case we had any disabled tests, those would not run.
Another option to run tests, is to actually run an entire package.
In order to do that, for example, with our junit5tests package, we can just select it from the left-hand menu navigation, right-click on the name, and then just say, "Run 'Tests in 'junit5tests''".
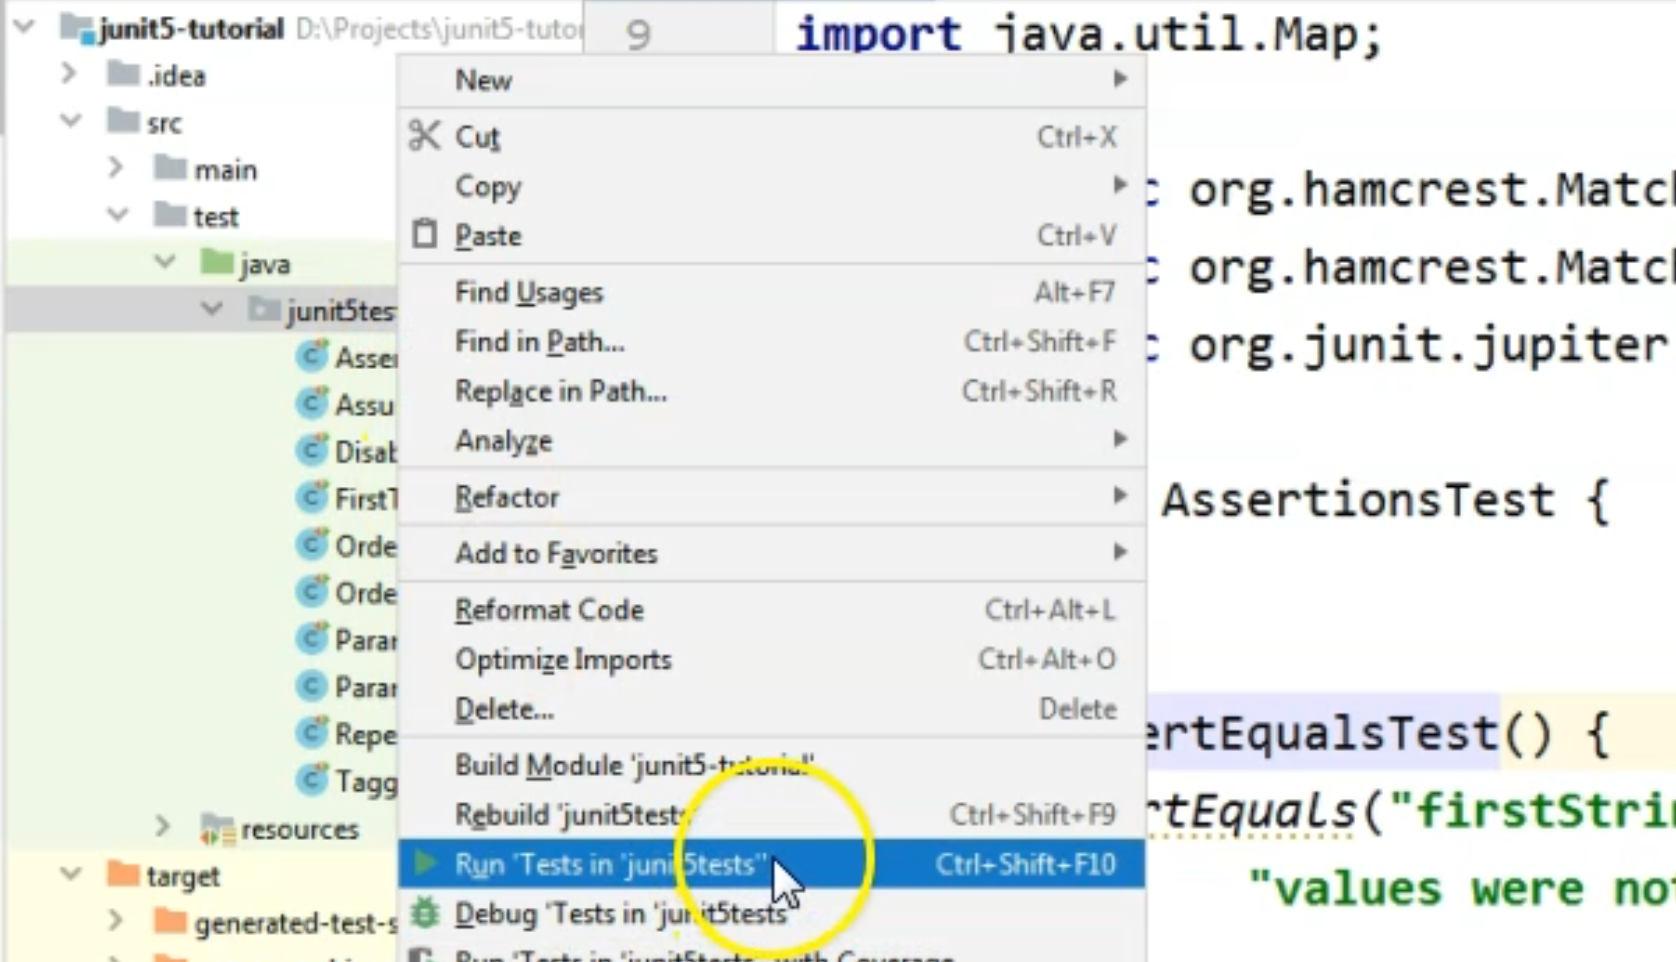
So run tests in the package that we're interested in, and in the console we will see the result.
So we have run the entire package, and in this package we had quite a few classes.
As you can see the classes in the navigation on the left-hand side in the "Project" pane are the same ones that we have in the "Run" pane.

On the right-hand side of this pane, we will see the output of these tests.
Right now, because I am on the package level, I will actually see all the output of all the tests that ran, in the order that they ran.
So this is the entire output and results of the test.
You know we have a few failures here because we did have some tests where the assertions were failing.
So that's why right now, out of the total of 89 tests, we had 7 failures and 77 passed tests.
We also have 5 ignored ones because we disabled them using the disable functionality, or by adding an assumption to these tests, and of course, the assumptions having failed, the tests will be skipped.
We've seen how to run a method, a class and a package.
If we want to run only those tests where we have a certain tag attached to them, we can still do these from IntelliJ.
You might remember the TaggedTestClass - here we added a tag "sanity" to a few tests and a tag "acceptance" to a few tests.
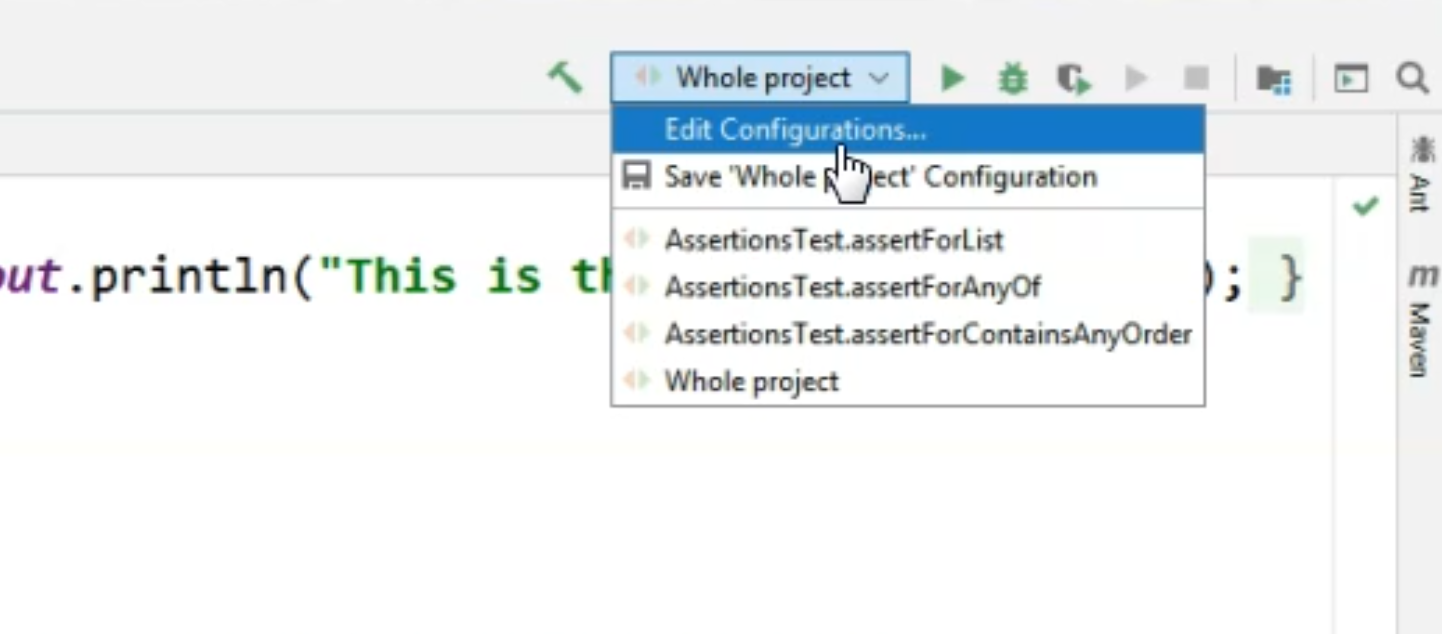
In order to run only tests tagged with a certain tag from IntelliJ, we will need to go to the "Edit Configurations" menu.
Here, first of all, I will delete all of the entries that we have under "JUnit".
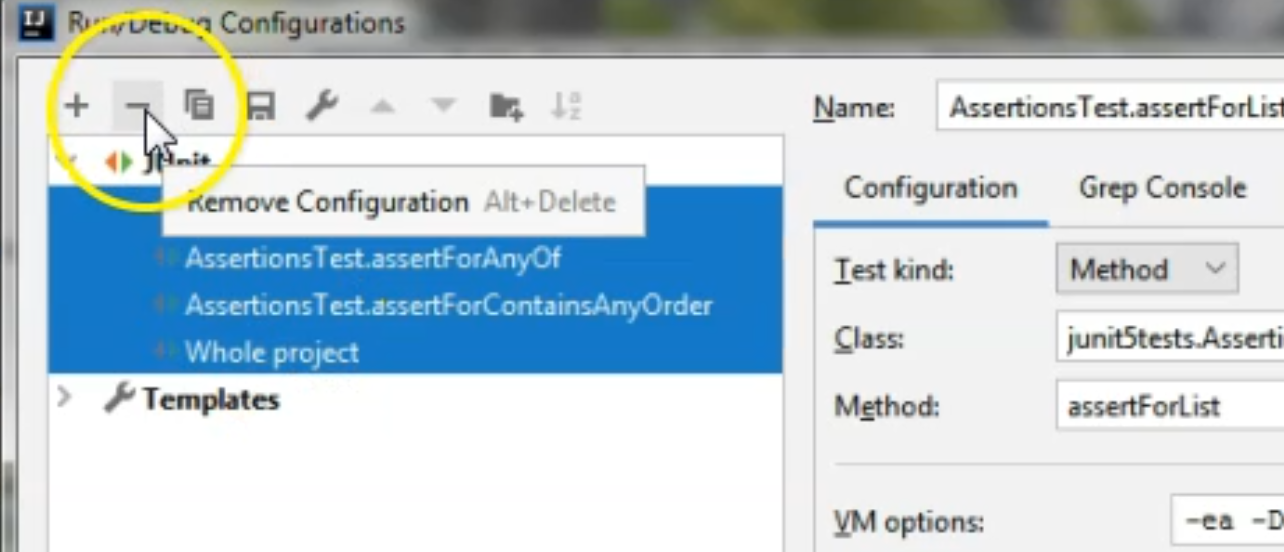
Usually when you change the configuration to a new one, you should delete all of the entries that you already have in the run configurations for JUnit so that you will not by accident run another configuration, when you want to run a certain test class.
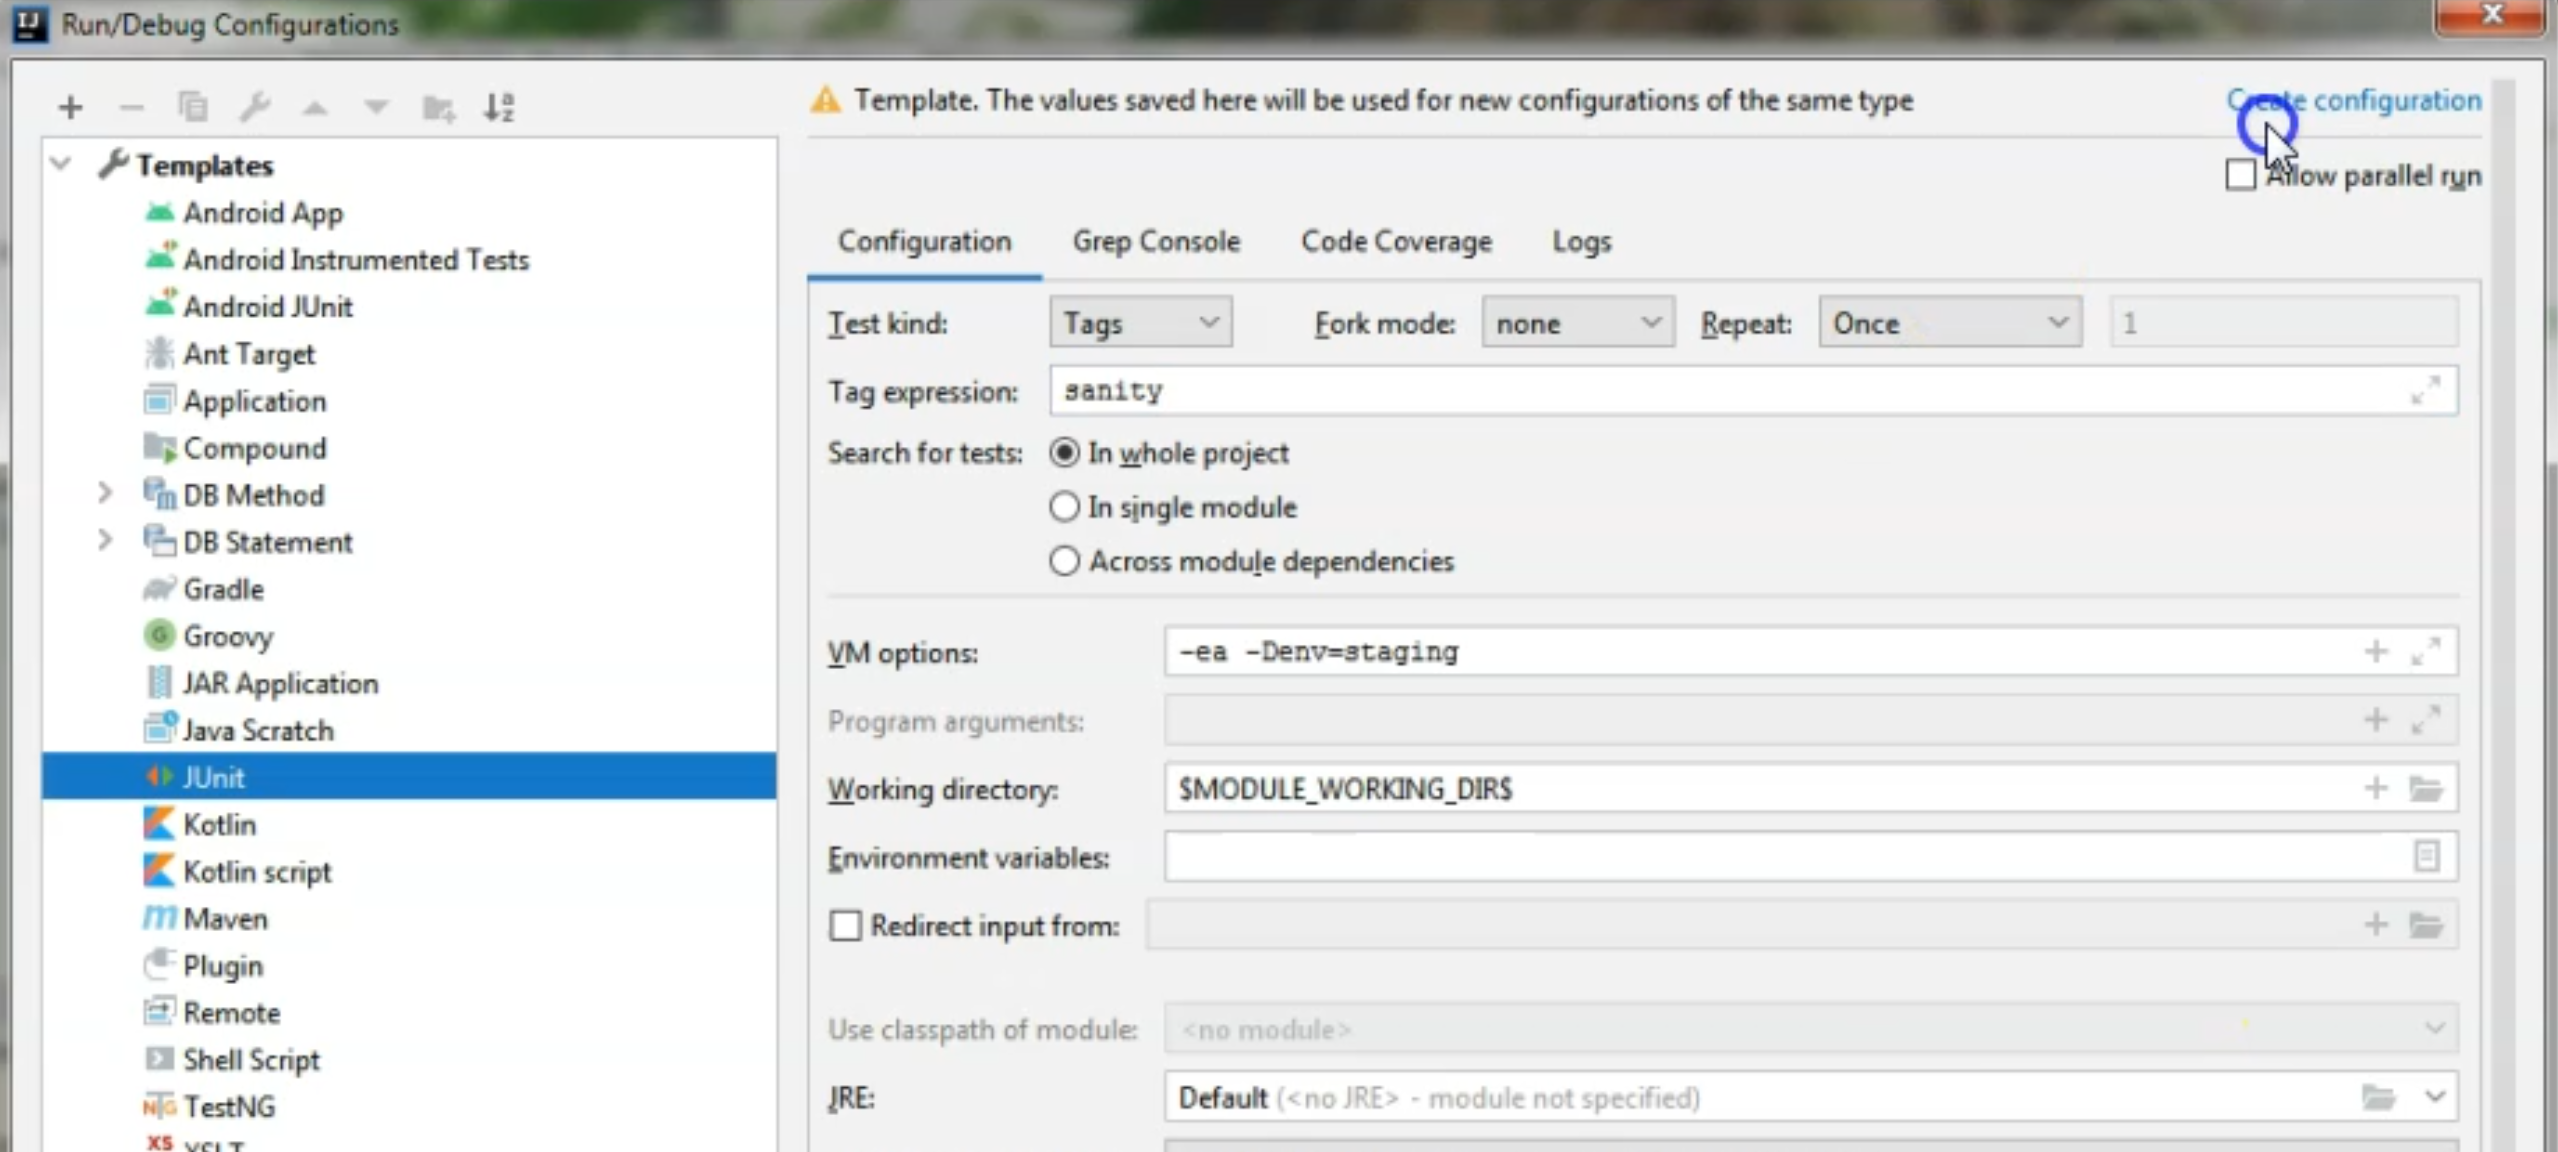
Now going to the JUnit configuration, you can see that we have the "Test Kind" option here with a dropdown.
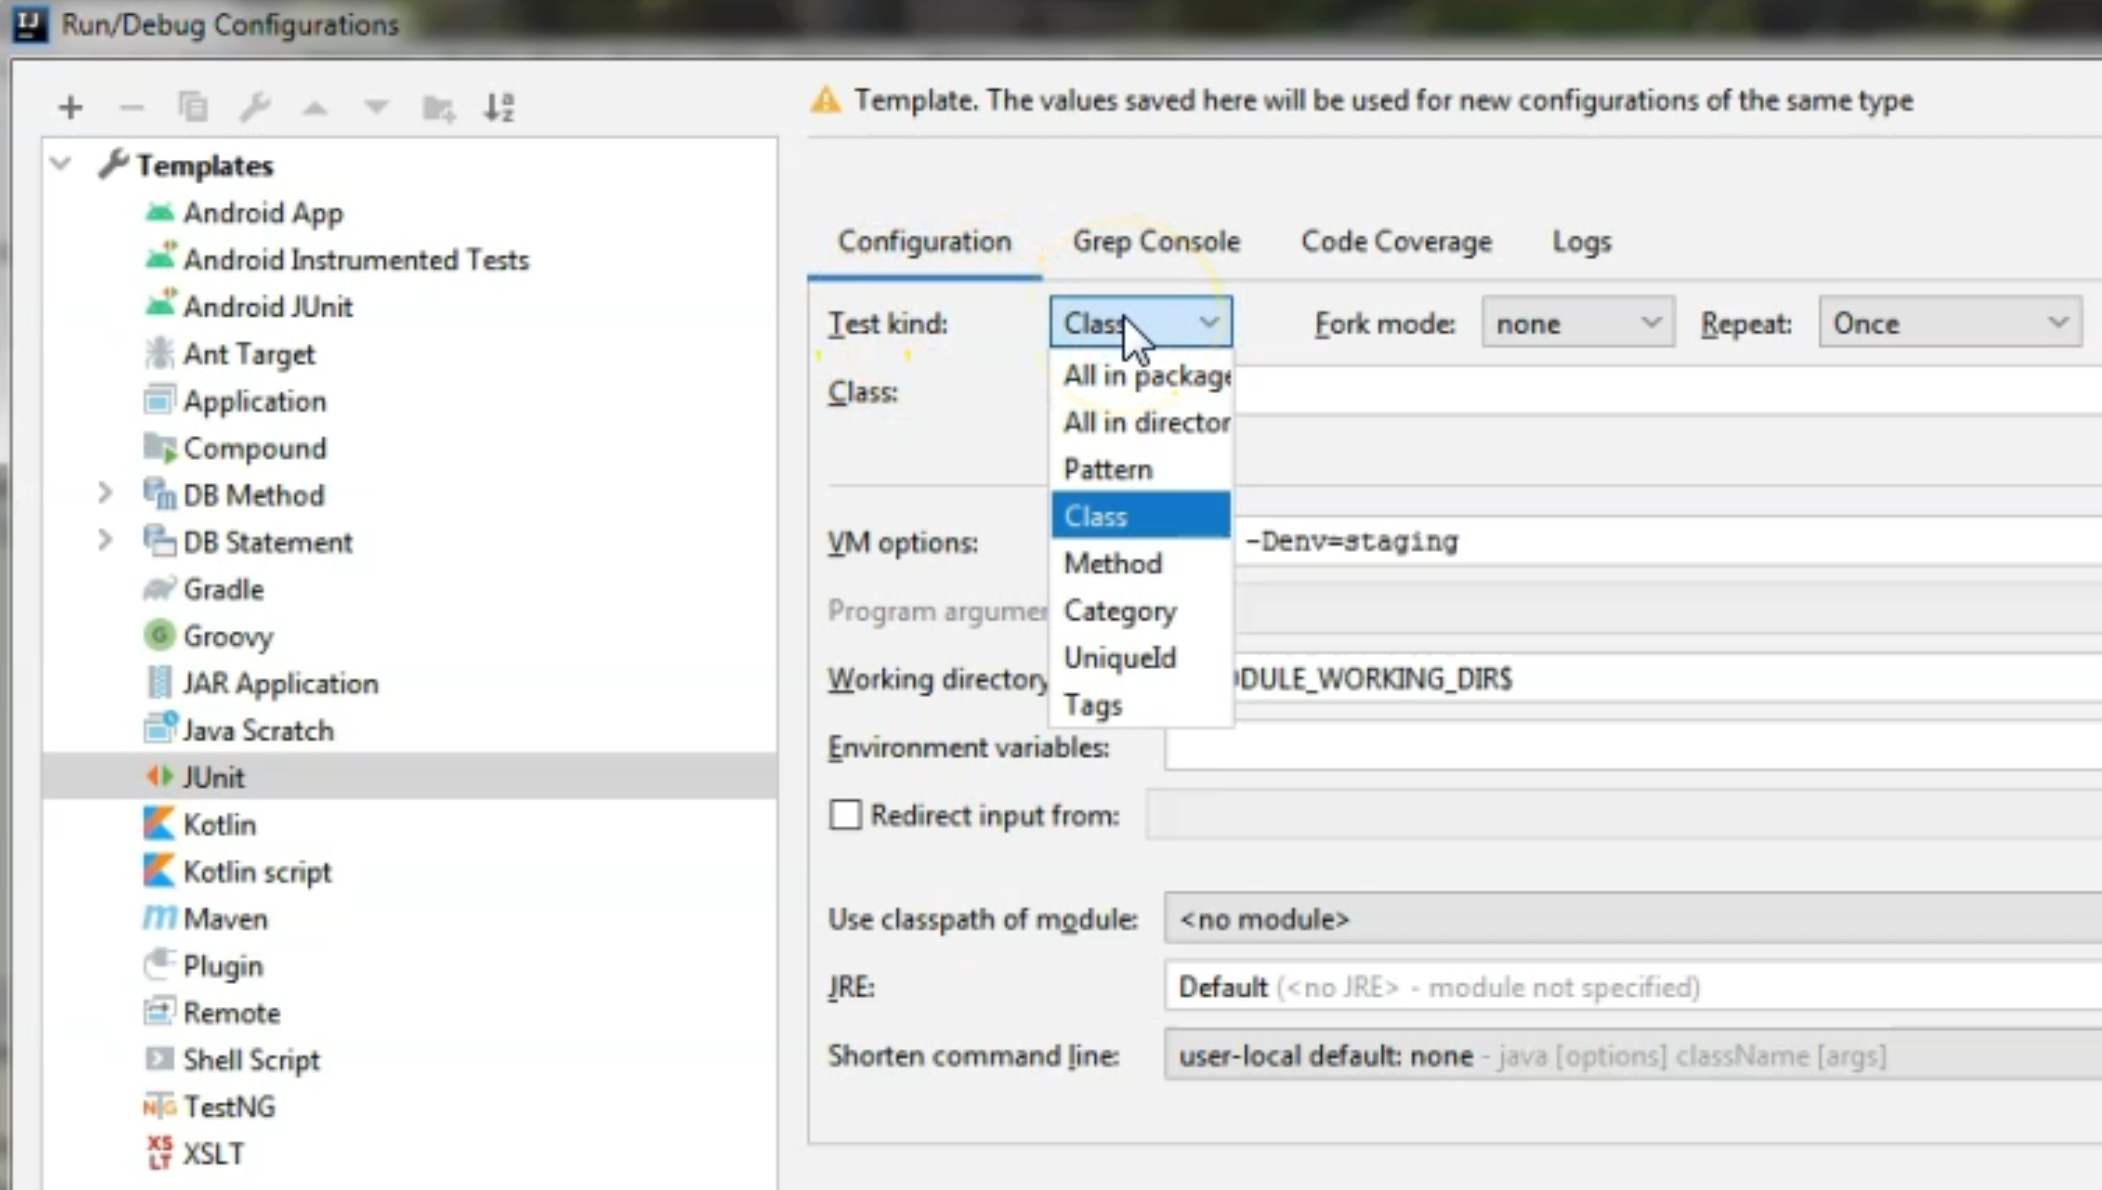
The last value in the dropdown is the "Tags" option.
Now, when we switch to the "Tags" option here, we will specify what we want to run.
Either we want to only run tests that were tagged with a certain tag, for example, "sanity" or we might want the several tags, or maybe we want everything that doesn't have a certain tag.
So let's say we want to run all of the tests that have the tag "sanity" from the entire package.
Now, in order to actually run the tests, we will need to hit the "Create Configuration" option.
We will just say "Apply", and "OK".
Now in the "Edit Configuration" section, we have a "Tags" entry.
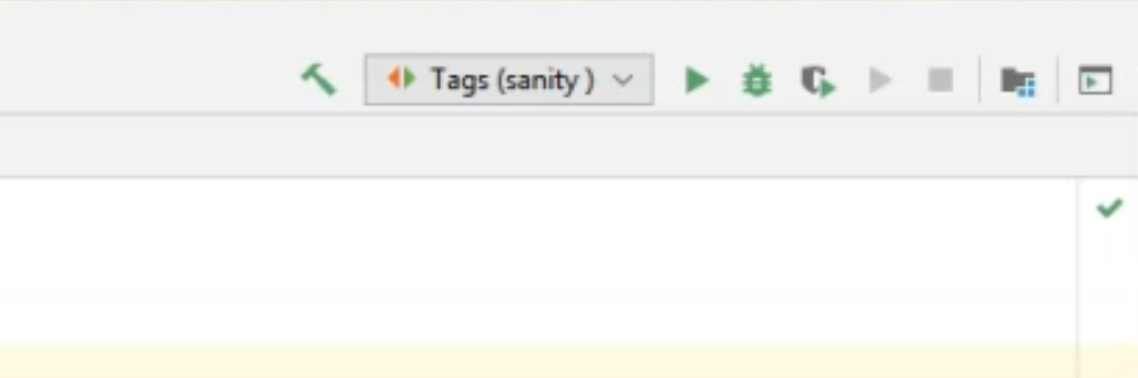
If we run this configuration directly right next to the configurations dropdown, we will run only those tests that have the "sanity" tag attached to them.
In our case, we only have two such tests, and both of these tests are in the TaggedTestClass.
As you can see on the right-hand side, we also have the output of the before and after methods because this class does have beforeAll, beforeEach, afterAll and afterEach method.
So because of this, when we ran the tags, we also ran the corresponding before and after methods, because without them, our tests wouldn't have run.
The prerequisite for our tests is to execute the befores, and a post-requisite of course, is to run the afters.
So when we are selecting the tagged methods, we are also running the befores and afters.
If we want to run all of the tests that don't have this tag attached to them, we will just say !sanity.
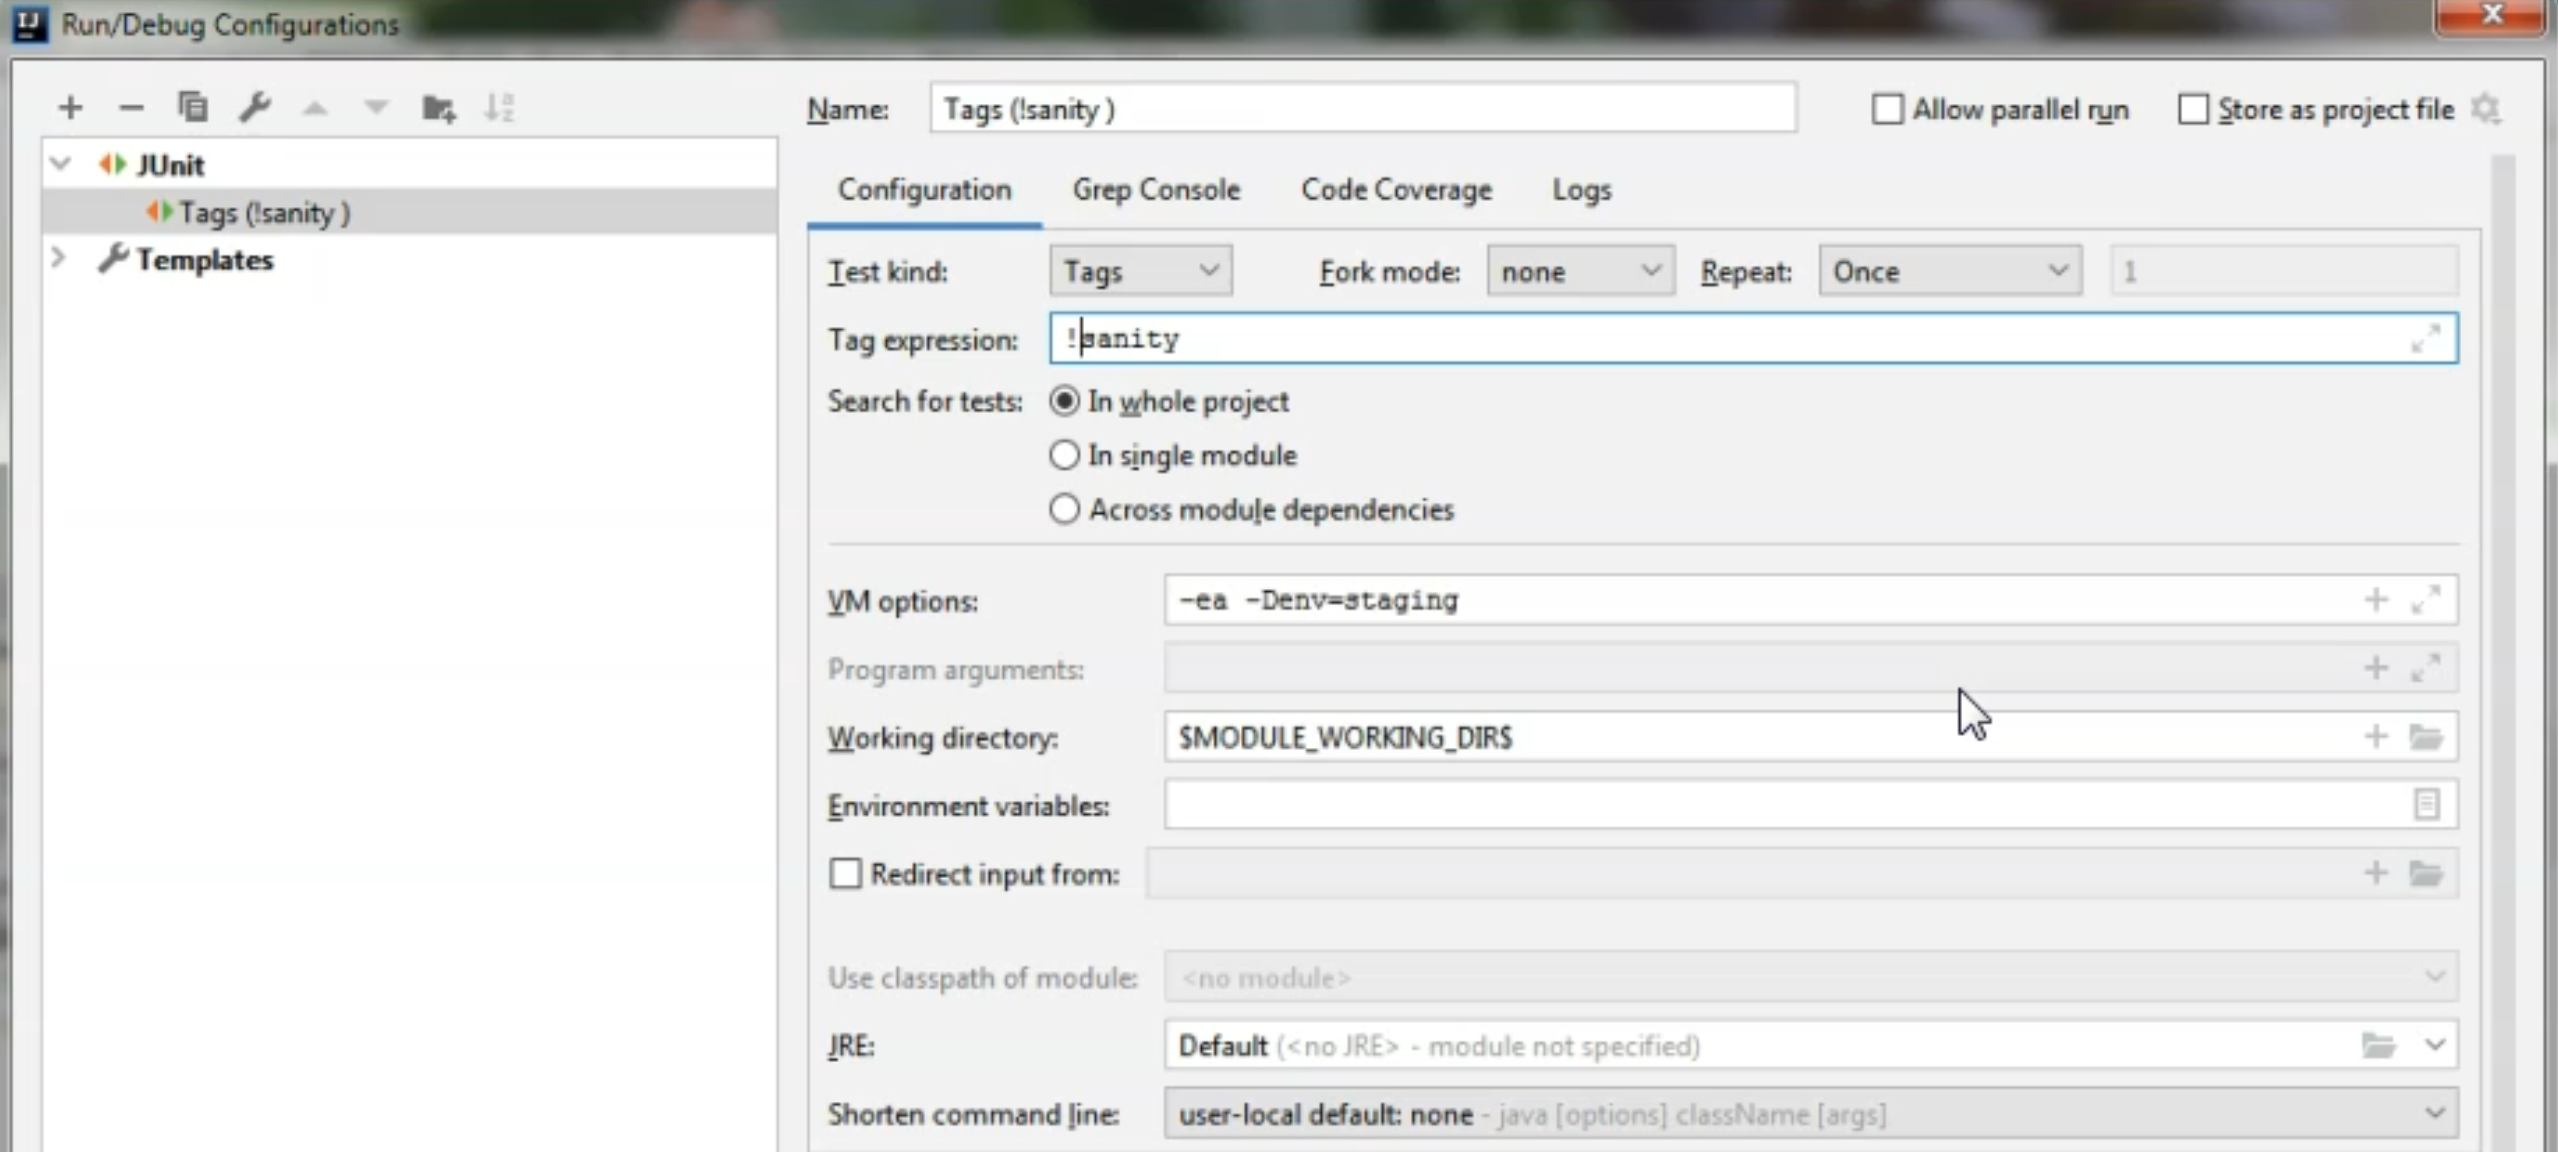
If you remember, certain characters are not allowed in tag names, and this is why - because we are going to use them to select the tests based on the existence or the lack of a tag.
We're going to hit "Apply" and "OK" here and if I run this configuration again, this time we will run all of the tests that did not have the "sanity" tag attached to them.
As you can see, we have 87 ran tests out of 89 because the two with the "sanity" tag were skipped.
This is how you run tests based on a tag.
We can also choose to run tests that have several tags attached to them.
For example, we only want to run the "sanity" and "acceptance" tagged tests.
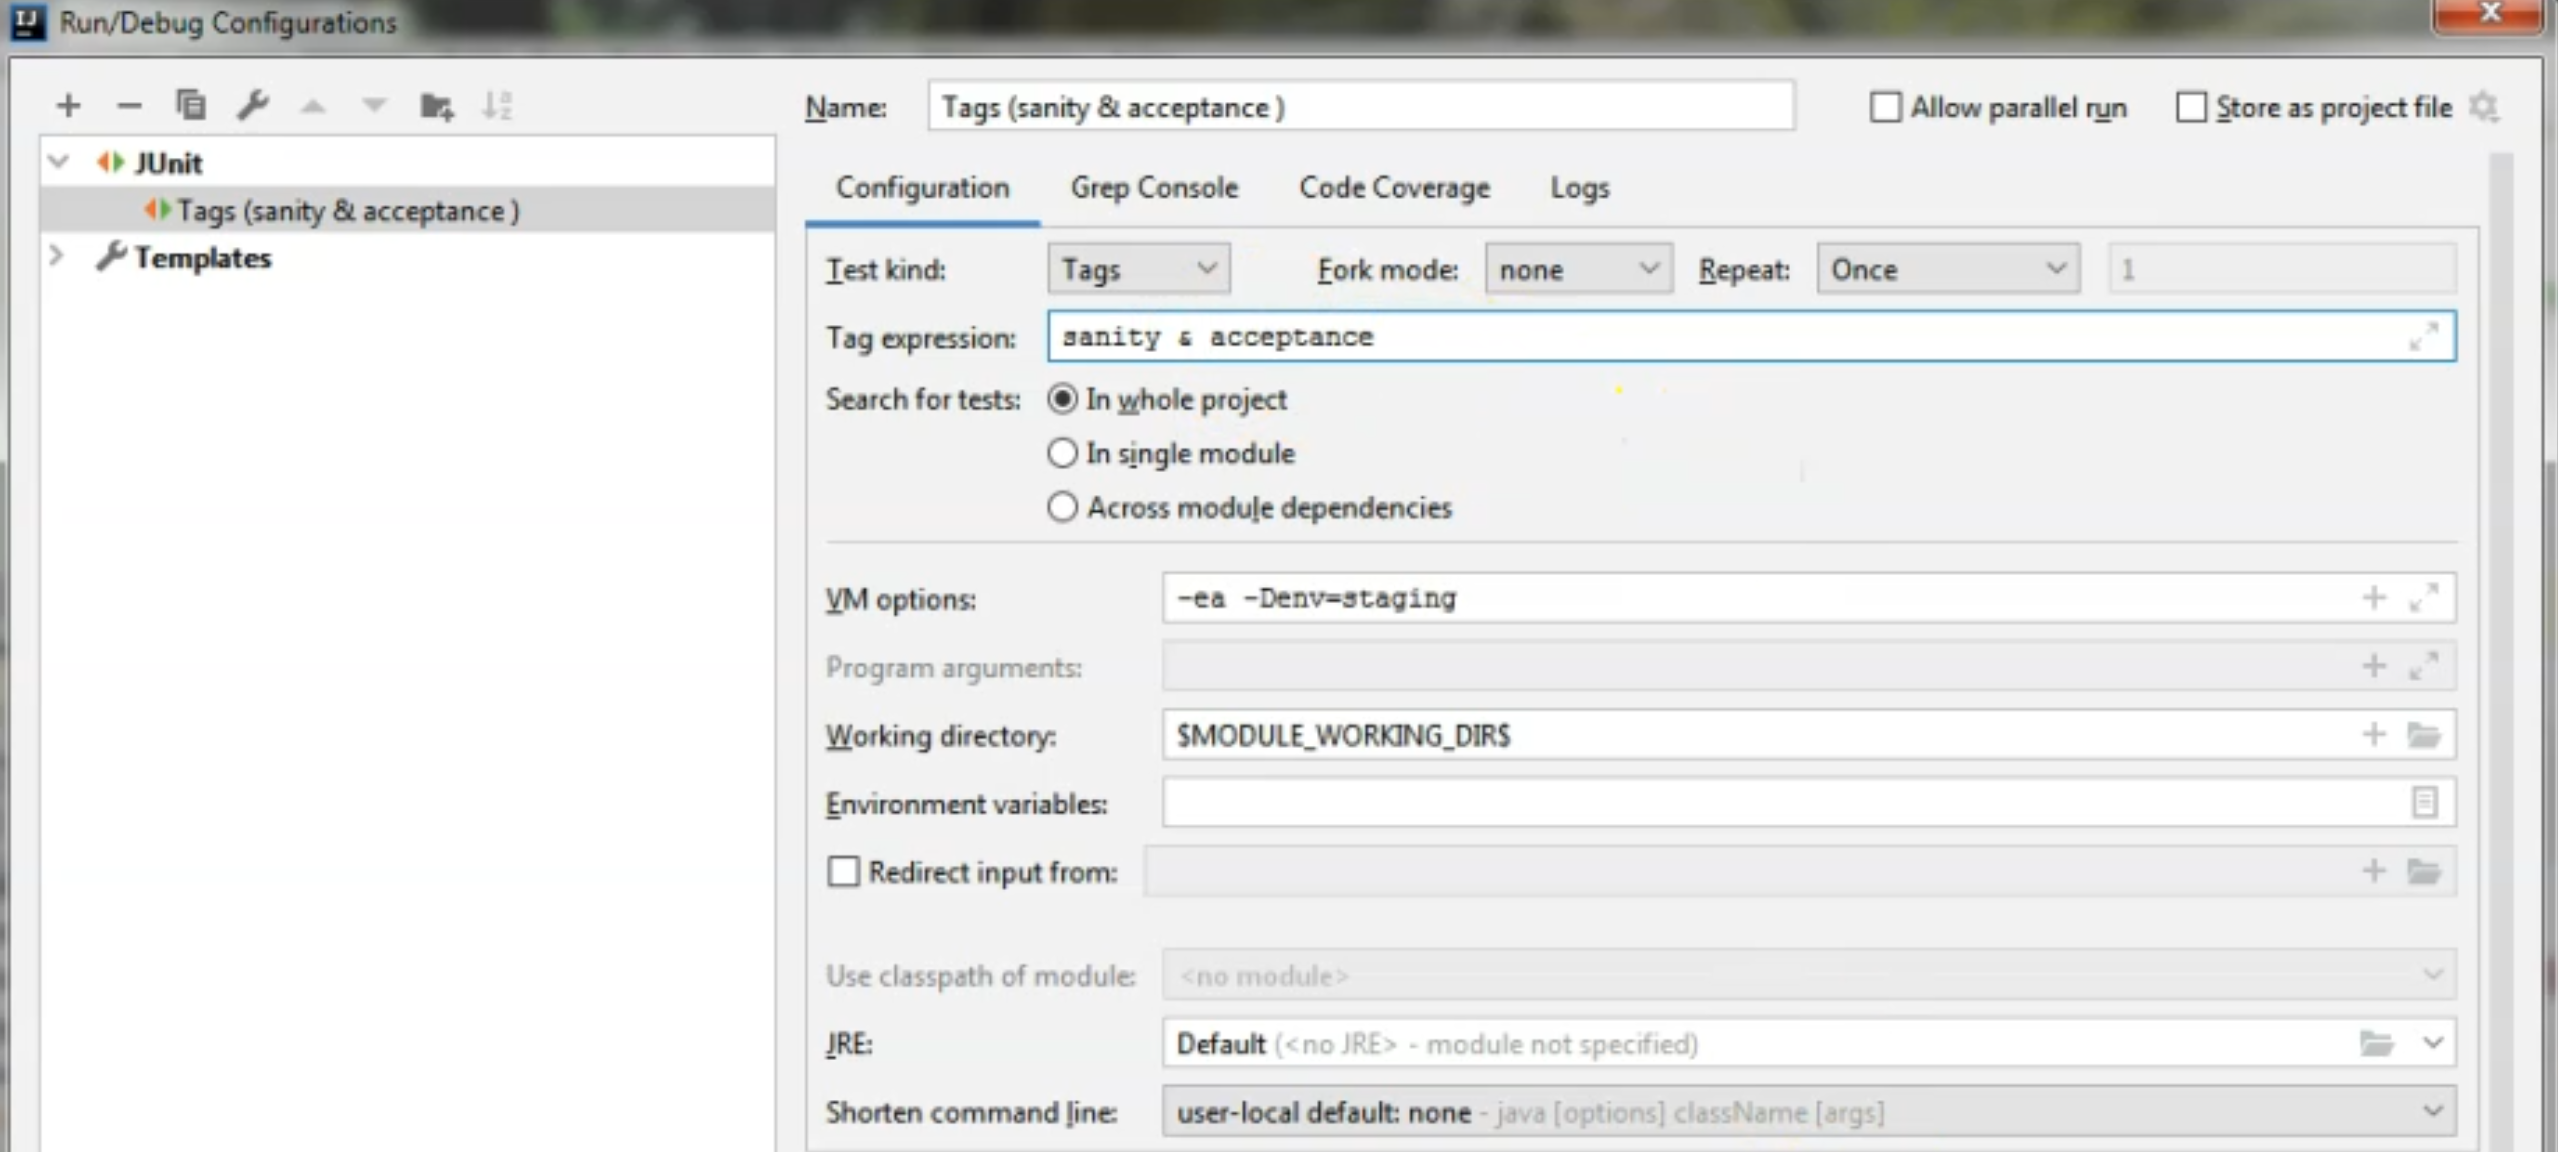
This is the expression we will use, so sanity & acceptance, we will hit "Apply", and then we will run the configuration again.
This time we only have one test that runs because the only one which fits the criteria is the secondMethod test.
So you can go ahead and play with these configurations and see which tests run.
Now, I will delete this configuration because now we will move to something else, and I will change "Test kind" back to the class option and I will say "Apply" and "OK".
# How to run tests with Maven
Now we will take a look at how to run the tests with Maven.
In our pom.xml file, we have the maven-surefire-plugin, which allows us to run Maven tests.
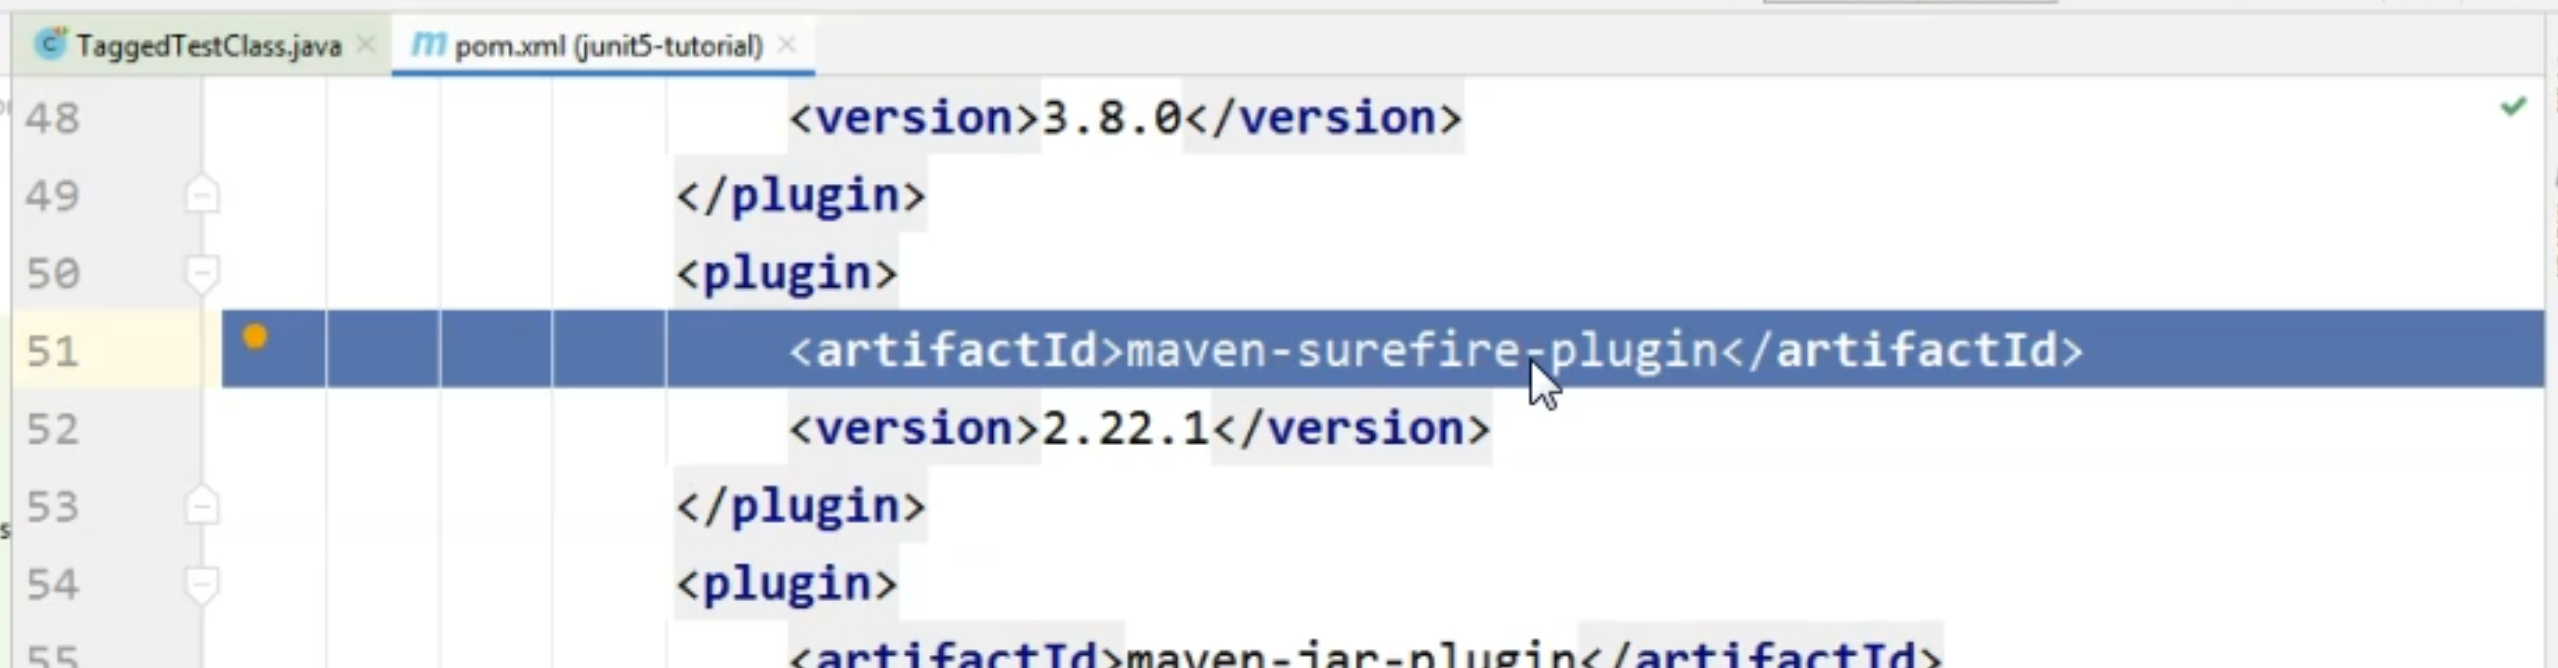
There is just one problem with this - namely, it is configured by default to only run those tests that either have a name starting with "test" or a name ending with "test" or "tests".
In our case, some of the tests that we created do not follow this pattern, so we have two options here - either to rename all of our tests or to add a configuration in the plugin.
Ideally, we will go with the second option because we don't really want to be constrained by how to name our classes.
We just want to have the word "test" in the classes.
In order to do that in the pom.xml file, I will just add a configuration section in Maven Surefire Plugin and I will say includes, and here I will just specify a pattern which says that I want to run all of the tests that have the word "test" inside their name and that they are Java files.
<plugin>
    <artifactId>maven-surefire-plugin</artifactId>
    <version>2.22.1</version>
    <configuration>
        <includes>**/*Test*.java</includes>
    </configuration>
</plugin>
This way we don't need to have names that end with "test" or start with "test" for our test classes, but we do need to have the word "test" inside the name of the class.
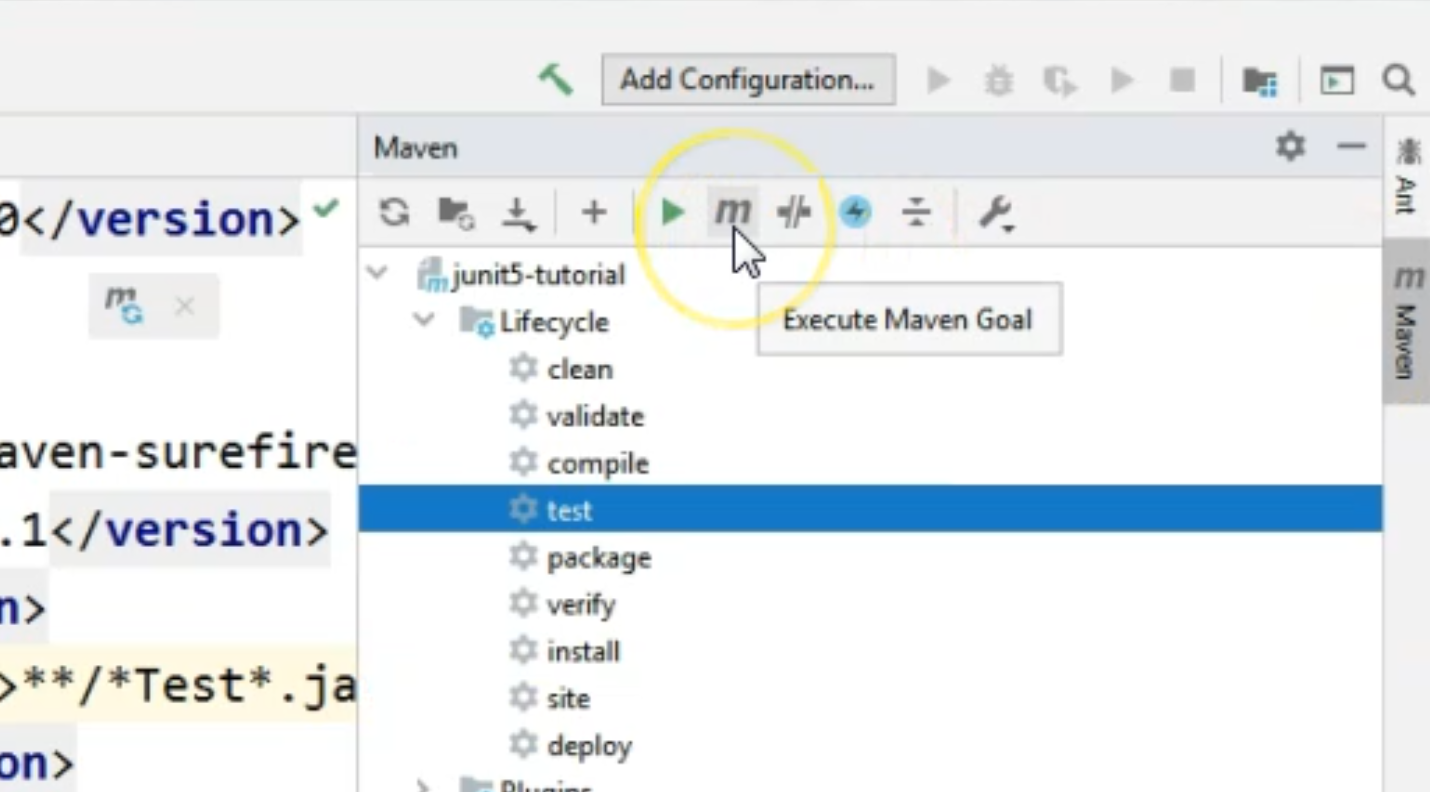
In order to run the Maven tests from the command line, we could either use the terminal to write the commands, or we can go to the "Maven" pane on the right hand side and pick the "Execute Maven Goal" option from here.
In order to run a test, we will say
mvn test -Dtest=FirstTestClass
Here, we provide the name of the test.
In case we have several tests with the same name, we will need to provide the entire path to that test as package names.
So, for example, com.junit.... so this is the pattern we need to follow until the name of the class.
In this case, we only have one test with each name so we can just say FirstTestClass and this will run our test class automatically.
As you've seen, the test already started after I hit "Enter", and in this class, we had two tests that ran and those two tests we can confirm are the ones that actually exist here.
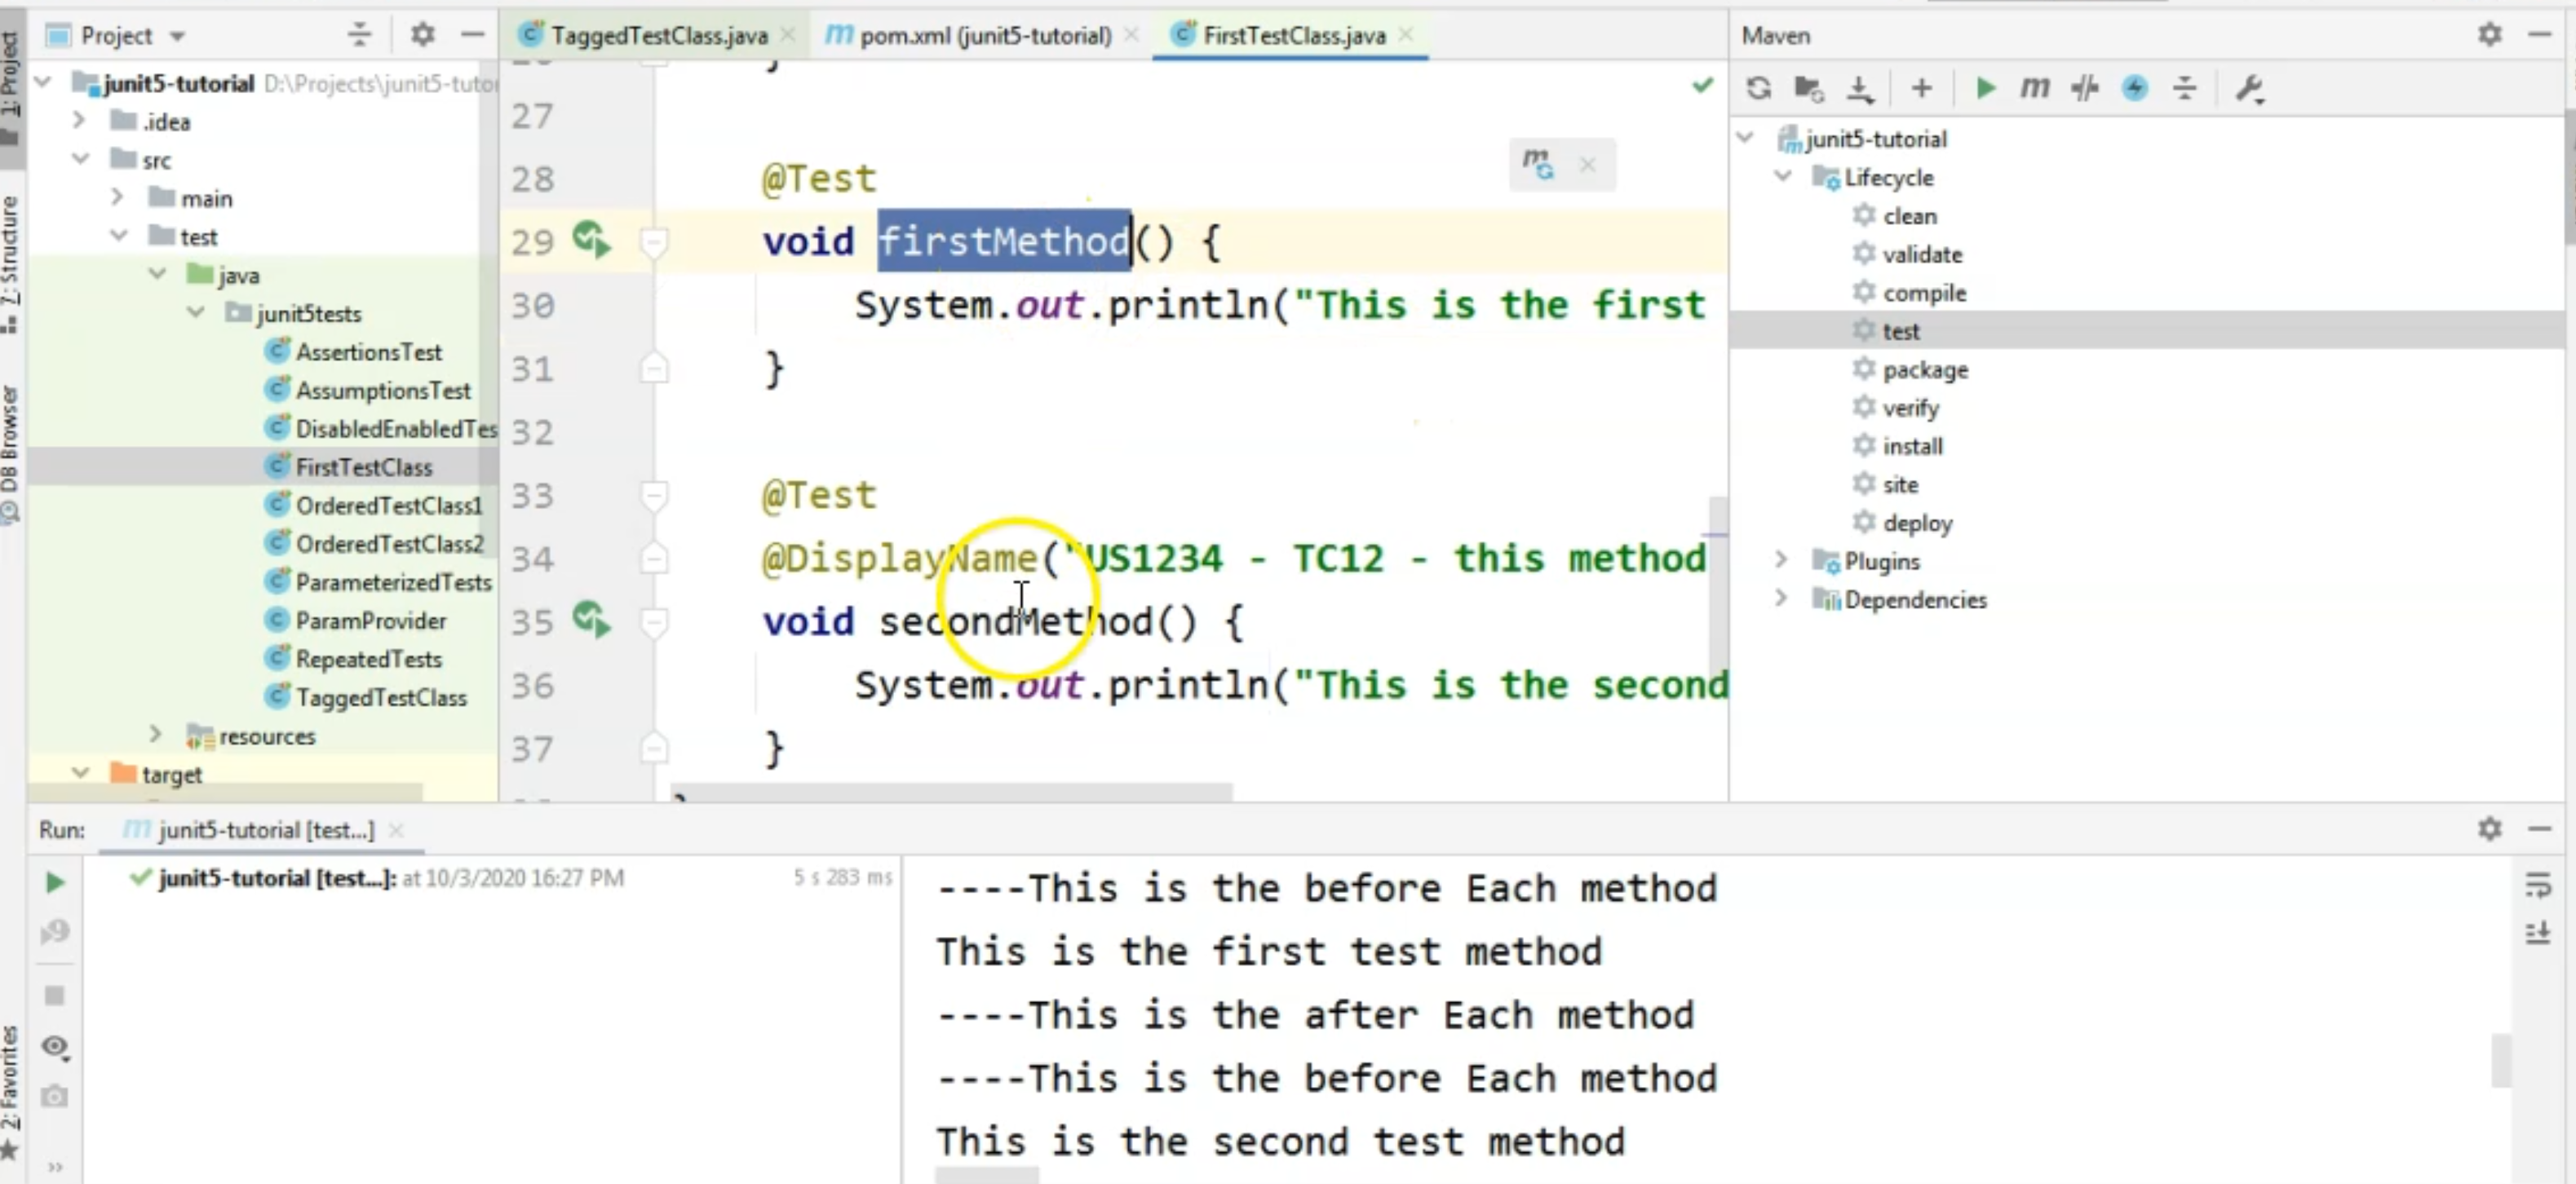
So we have firstMethod and secondMethod, and these are the tests that ran.
In case we want to run several test classes, we can specify them in -Dtest and we can say FirstTestClass, RepeatedTests, so now we are going to run two classes.
As you can see in the console, this time we ran 13 tests and you can see the output of each of these tests.
However, if let's say, we want to only run one test method.
We are going to say
mvn test -Dtest=FirstTestClass#firstMethod
where FirstTestClass is where we can find the test method and firstMethod is one of the methods I have in my FirstTestClass.
As you can see, the test has finished running and only one test was executed here.
So if we want to run the entire package, we can say
mvn test -DtestPackage=junit5tests
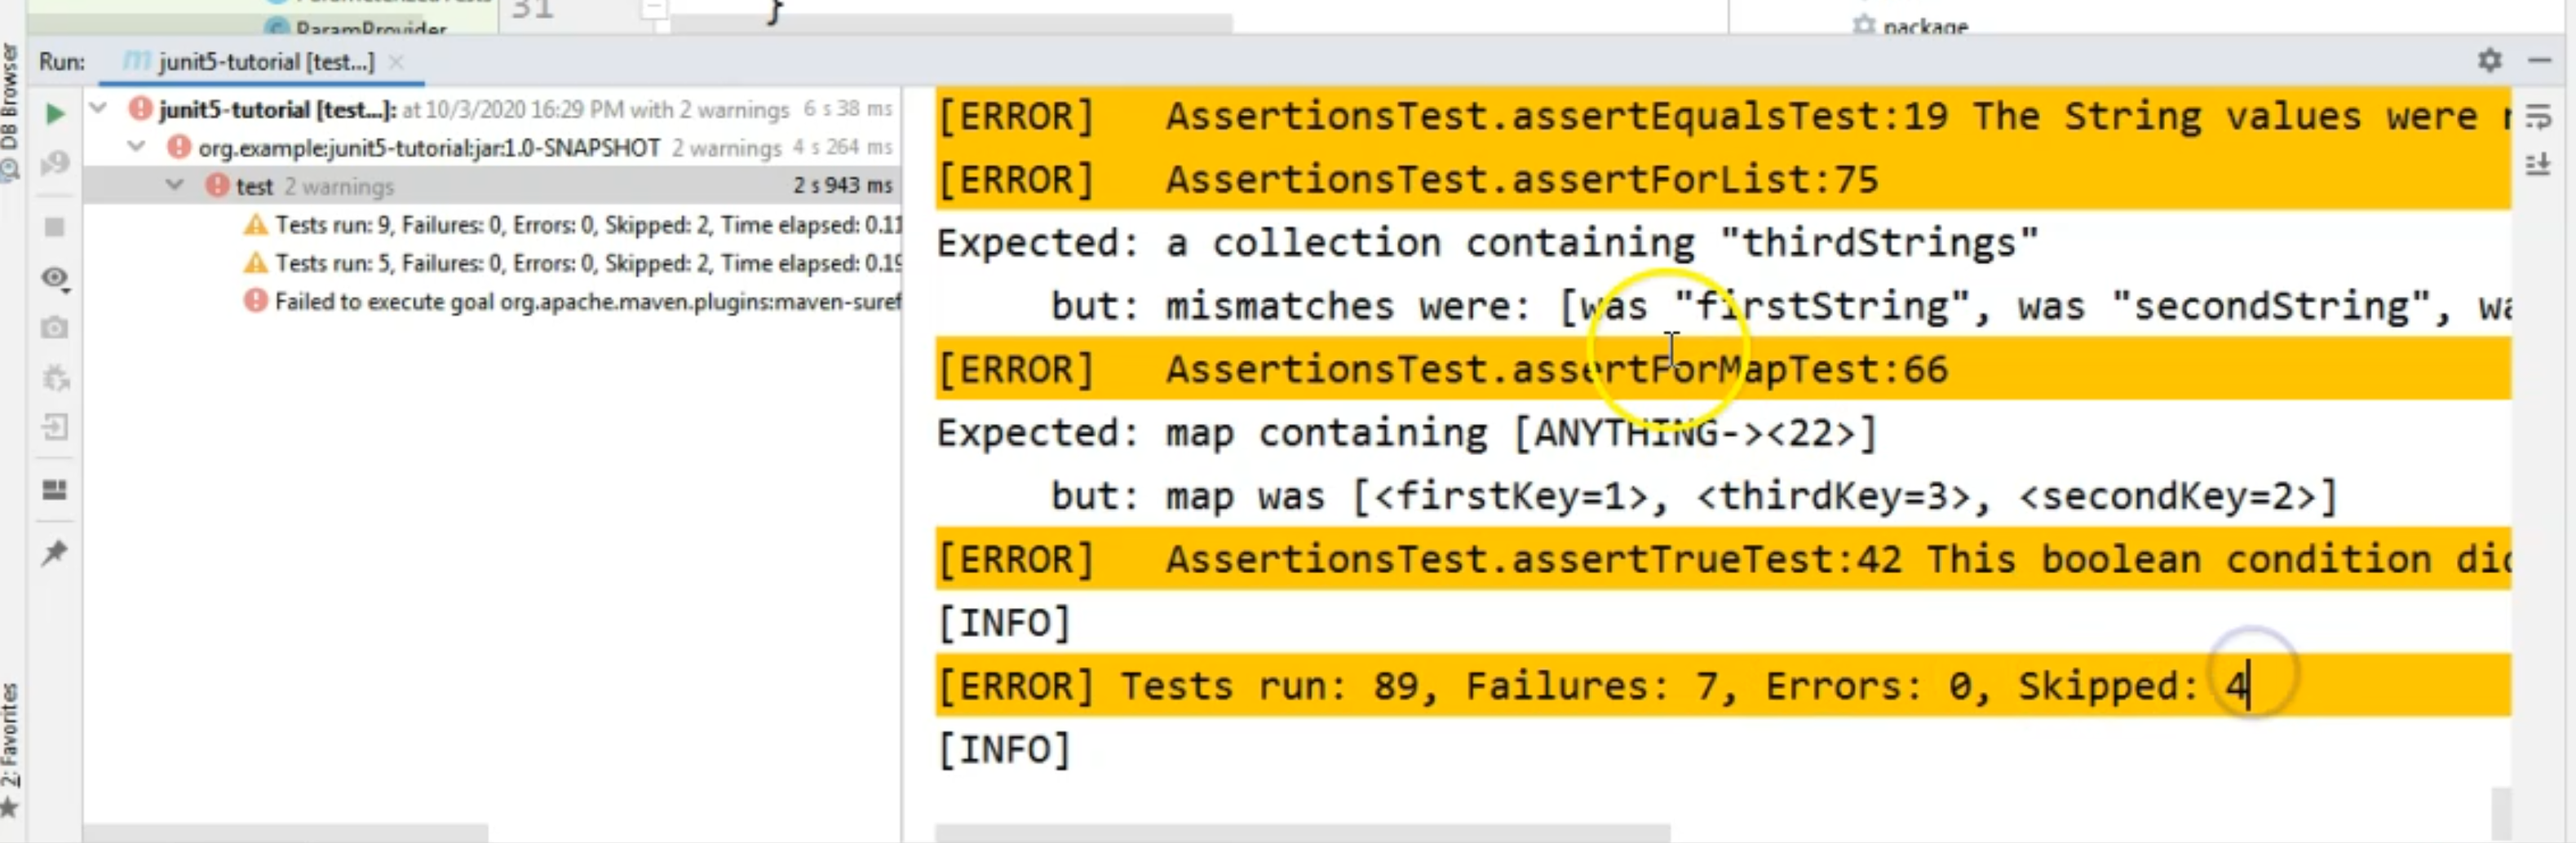
By hitting "Enter", you will now see in the console that we will run 89 tests.
The goal will fail to execute because we had test failures.
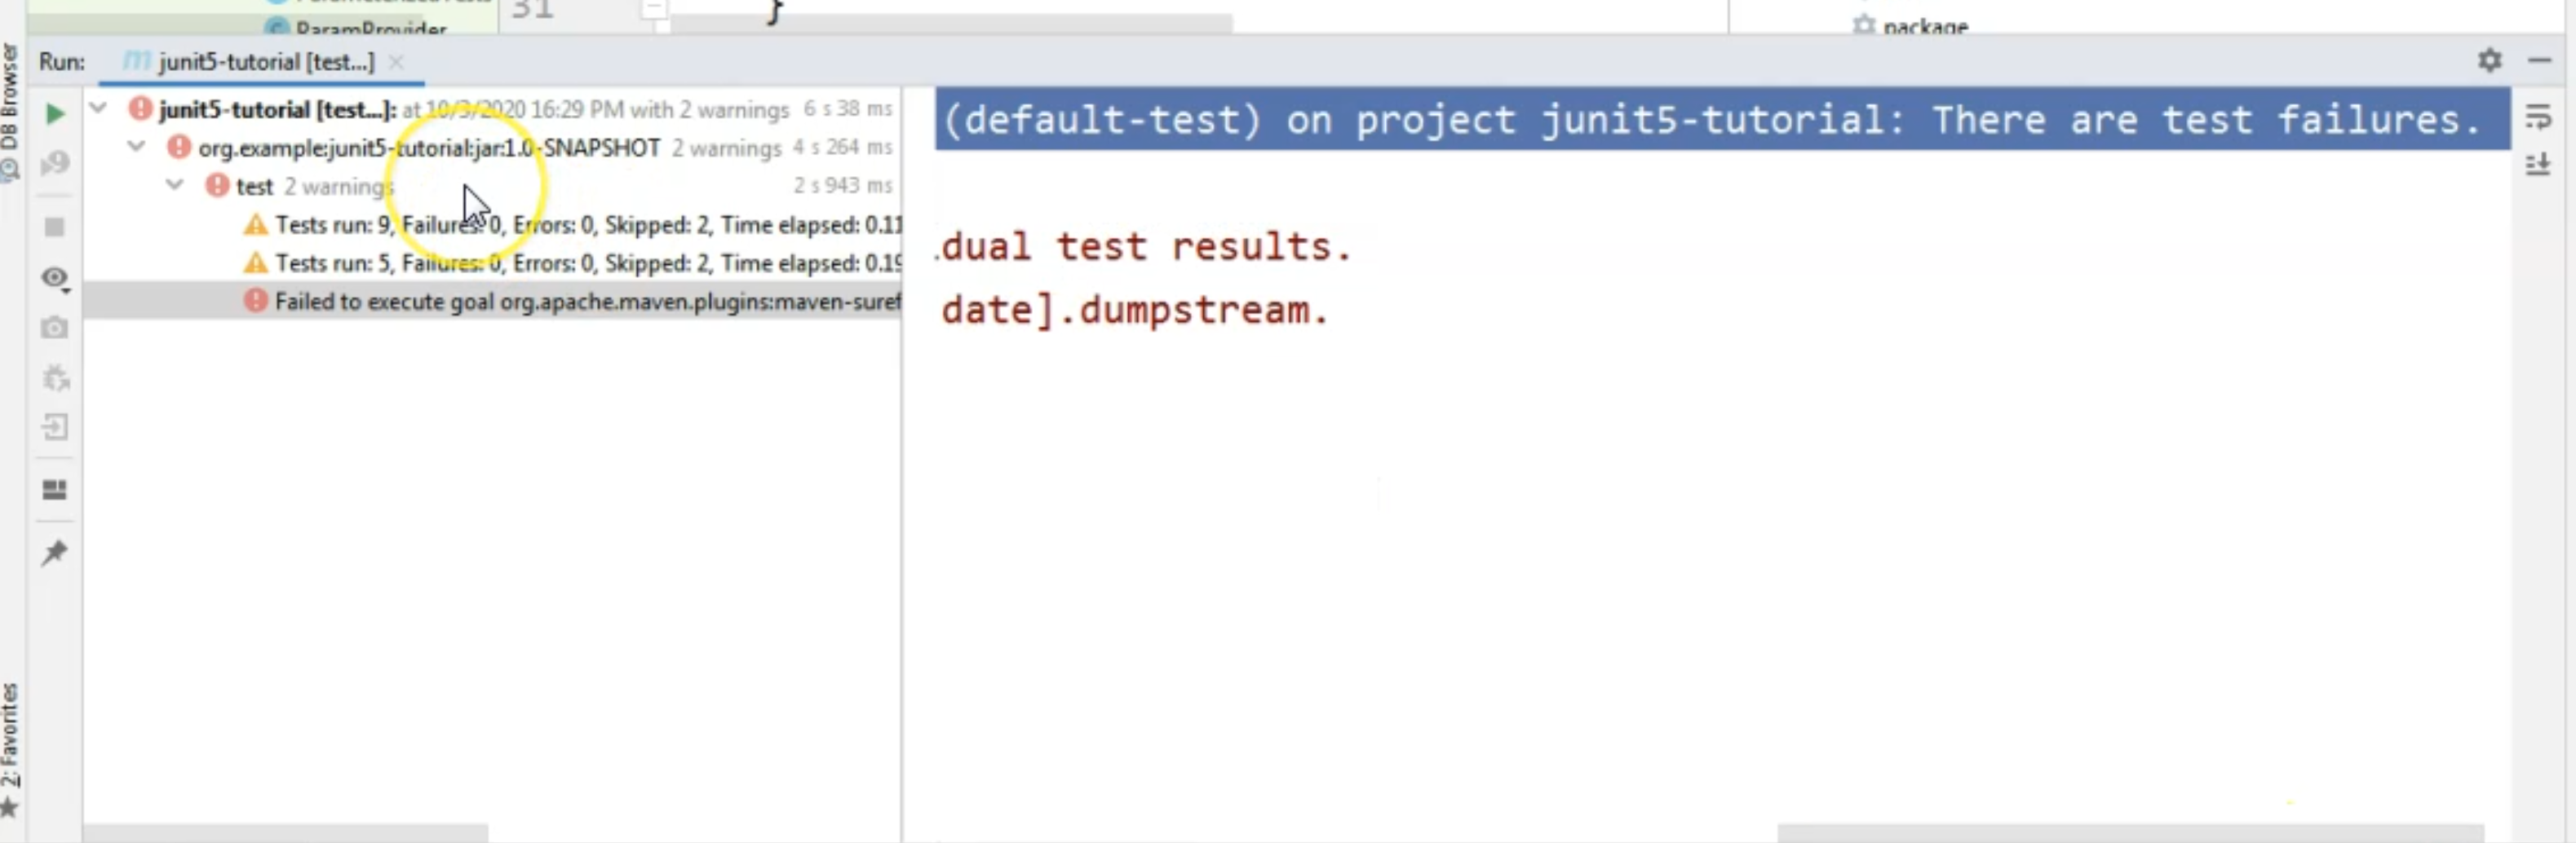
If we want to see what these failures are, we can click here on "test" and we will see that we have 89 tests, out of which 7 failed and 4 were skipped.
By scrolling up in the console, you will see the results of each of these test classes and methods that ran.
Running those tests that have a tag assigned to them from Maven can be done by saying
mvn test -Dgroups=sanity
For example, we want to only run those tests with the "sanity" tag.
By hitting "Enter", we will start the execution and we will see that we only had 2 tests that ran.
Of course, these were those tests that had the "sanity" tag allocated to them.
If we want to play around with the groups, here, again we can say
mvn test -Dgroups=sanity&acceptance
if we want to only run those tests, which have both of these tags assigned to them.
So as you can see, yes, we only ran 1 test here out of the tagged test class.
This is how you run the tests from Maven and from IntelliJ.
