

Transcripted Summary
In this chapter, I will introduce the concept of parameterized tests.
Sometimes we have a test method that we want to run several times but we also want to have the possibility to pass in some values for the parameters that this method has, while still having it as a test method.
In order to perform such a task we could use the options available in JUnit 5.
There are several ones and in this tutorial I will go over four of them.
# Passing literal or constant values
We will start with the easiest one - namely, with passing literal values, which means passing constant values by using the @ValueSource annotation.
I will start by creating a new test class where we will only store parameterized test methods.
So I will go to the package where I have the first test and I will say, ParameterizedTests as the name of the second class I'm creating.
Here in this class, I will start by showing how to pass in very simple values to our test methods.
So, if we want to annotate a method to specify that we want to pass in a parameter, instead of using the @Test annotation, we will have to use the @ParameterizedTest annotation.
As you can see, this one comes from the junit.jupiter.params dependency, which was downloaded for us because we downloaded the aggregator dependency, which in turn downloaded params.
The next thing that we will need to specify is how we want to pass in values.
We have several options but we will start with the one where we pass in literal values or constant values.
For that purpose, we will use the @ValueSource annotation.
This annotation will take some attributes and in order to pass in the parameters, we will need to specify the type of those parameters.
As you can see, the options that we have available are int, long, double and string, to name a few.
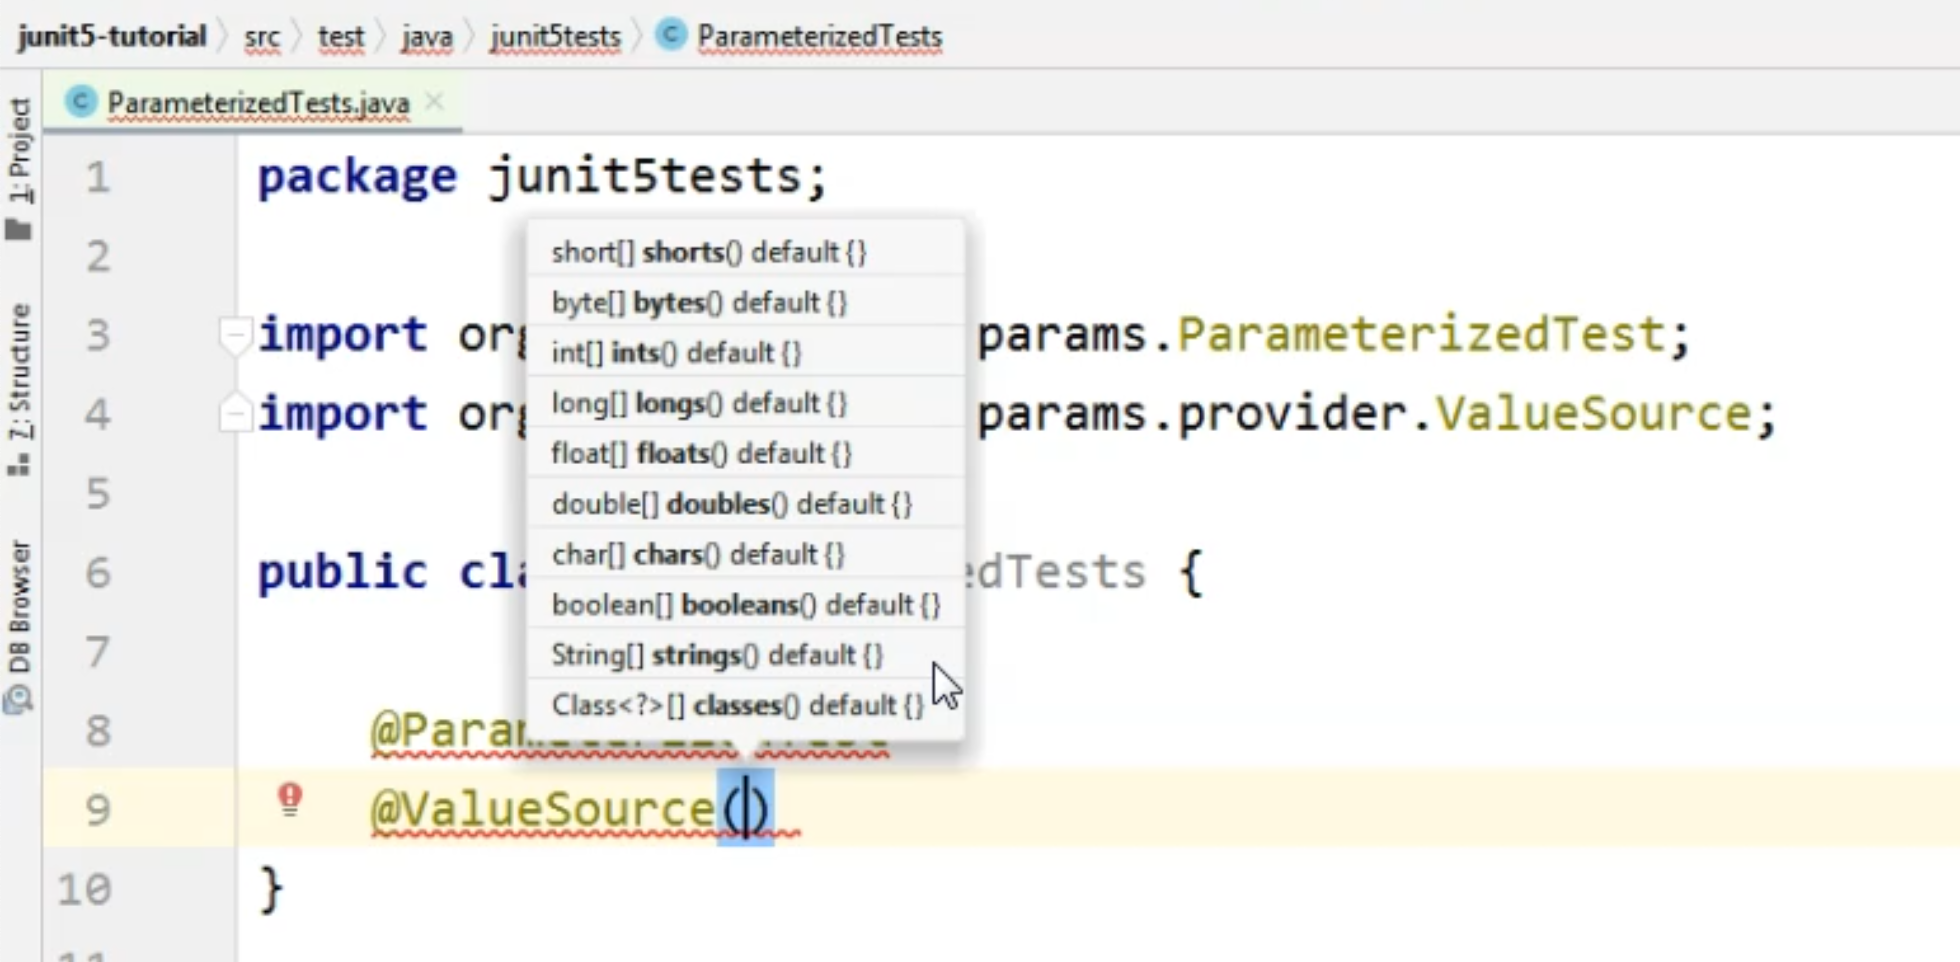
In order to specify these values, we will need to do that as an array of values - so we will specify the array of ints, for example.
In the first method that I will create here, I would want to pass in some int values to my test method and these values will be {1, 5, 6}.
I'm done with the annotations for now, and I will go ahead and create the actual method.
So I will say void intValues because this method refers only to ints, and of course, I will need to define the parameter.
I will say, int theParam, because this is where I will pass in the values that are coming from the @ValueSource.
In my test, I will need to do something with theParam I'm sending to the method.
For our example, I will simply write the values to the console by using a shortcut called soutp and hitting "Enter" here.
This will automatically generate the System.out for me that will write the values of the parameters to the console.
At this point, we have a complete parameterized method definition here.
package junit5tests;

import org.junit.jupiter.params.ParameterizedTest;
import org.junit.jupiter.params.provider.ValueSource;

public class ParameterizedTests {
    @ParameterizedTest
    @ValueSource(ints = {1,5,6})
    void intValues (int theParam) {
        System.out.println("theParam = " + theParam);
    }
}
We have the method itself, which takes a parameter of type int.
We have specified that the test is parameterized and we've also specified the way we want to pass the value to this parameter.
Keep in mind that when we're using @ValueSource, we can only pass one parameter.
This is why we have an array of values, so each of these values will correspond to the parameter that we're sending.
The type of the array values is the same as the type of the parameter.
Let's run this test and see the console output.

In the "Run" pane on the left-hand side, we will see the name of the test class that ran, we will see the name of the method and we will also see the runs for this test.

Now the current display shows us the index, meaning this was the first test method run.
This was the second test method run because you see the "2" between the brackets and the last one, of course, is "3".
In this case, the index started with "1".
Next to the bracket, to the right, you will see the actual values that were passed in to the method.
So in our case, these were "1", "5" and "6".
Of course, on the right-hand side, we will see the values that were output by the test, and this is basically the test output.
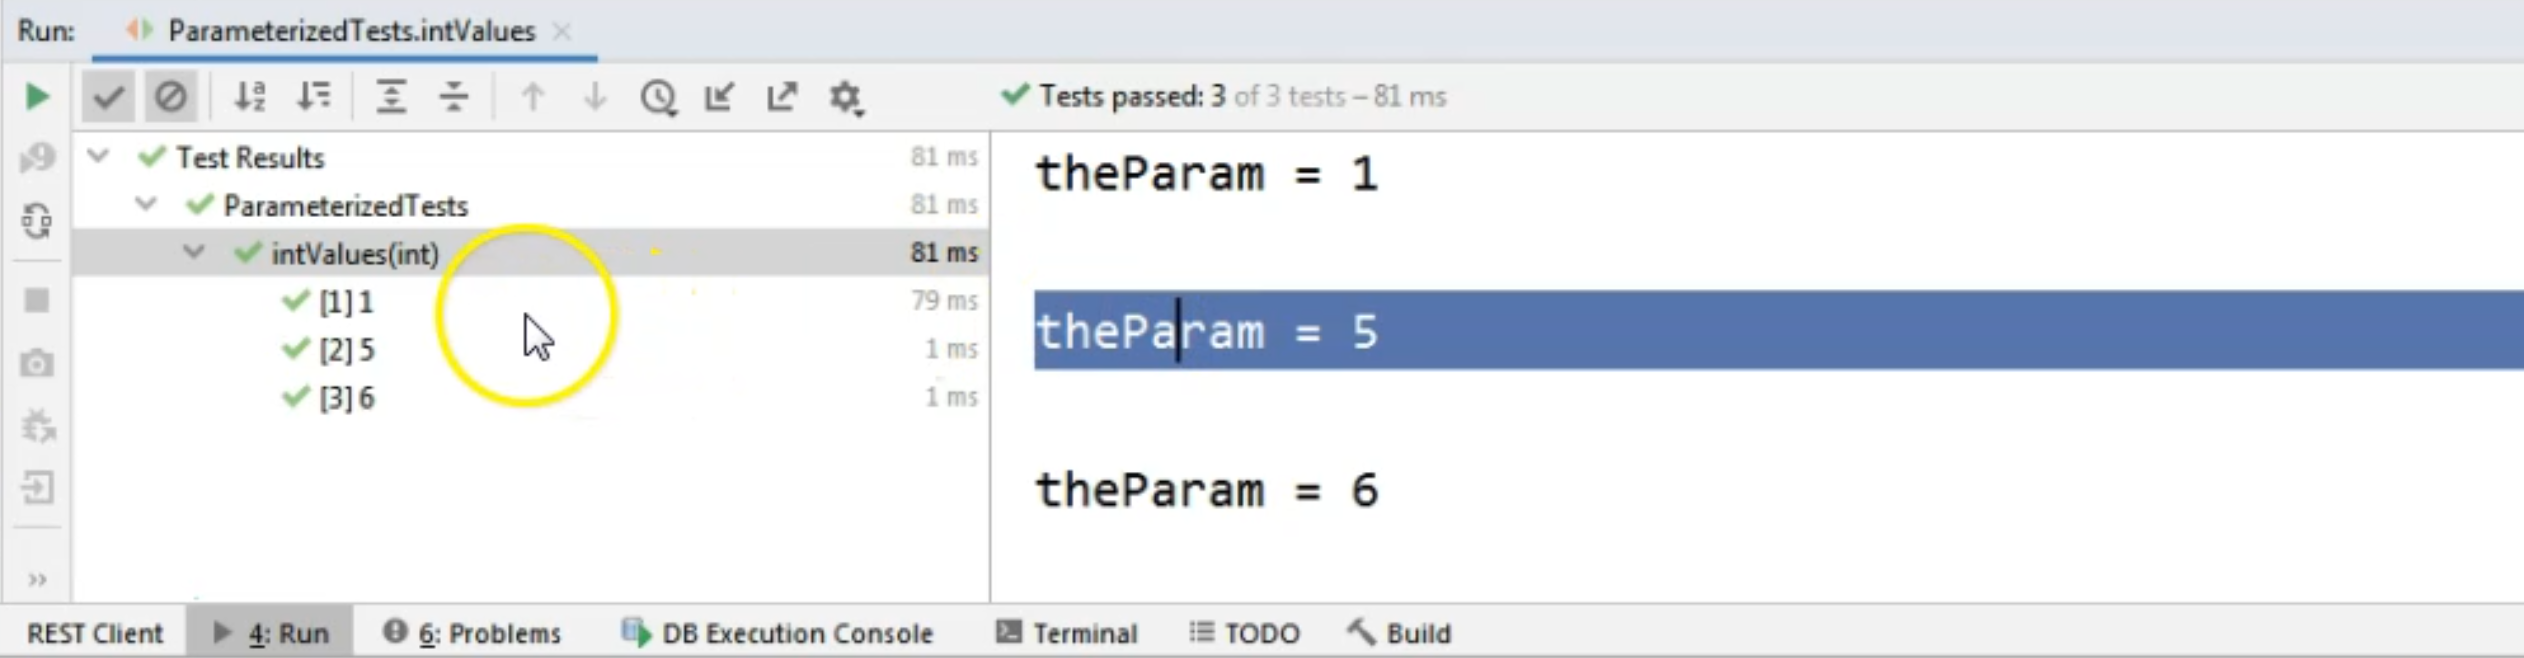
This is when the test ran for the first time, and this is when the test method ran for the second time.
Now, in our case, this display is not very easy to read.
So we might want something that's a bit more specific for us.
In that case, we can go to the @ParameterizedTest annotation and we can open the rounded brackets and we see a hint there.

As you can see, the hint is showing us that the current display shows the index and the values of the arguments.
We will change these and we will say that we want the name to be something like "Run:" and here we want to specify the {index}.
So we want to know which run as a number this was, and we want to specify value because we want to see what value was passed into the test at this particular run.
For specifying the values, we will say {arguments}.
So {index} between curly brackets gives us the position of the argument value in the array that we are passing to the method, and {arguments} actually gives us the values for each of the parameters.
package junit5tests;

import org.junit.jupiter.params.ParameterizedTest;
import org.junit.jupiter.params.provider.ValueSource;

public class ParameterizedTests {
    @ParameterizedTest(name = "Run: {index}  -  value: {arguments}")
    @ValueSource(ints = {1,5,6})
    void intValues (int theParam) {
        System.out.println("theParam = " + theParam);
    }
}
If we run this test again, we will see a different output on the left-hand side - namely, the method, or the run names, will be different.
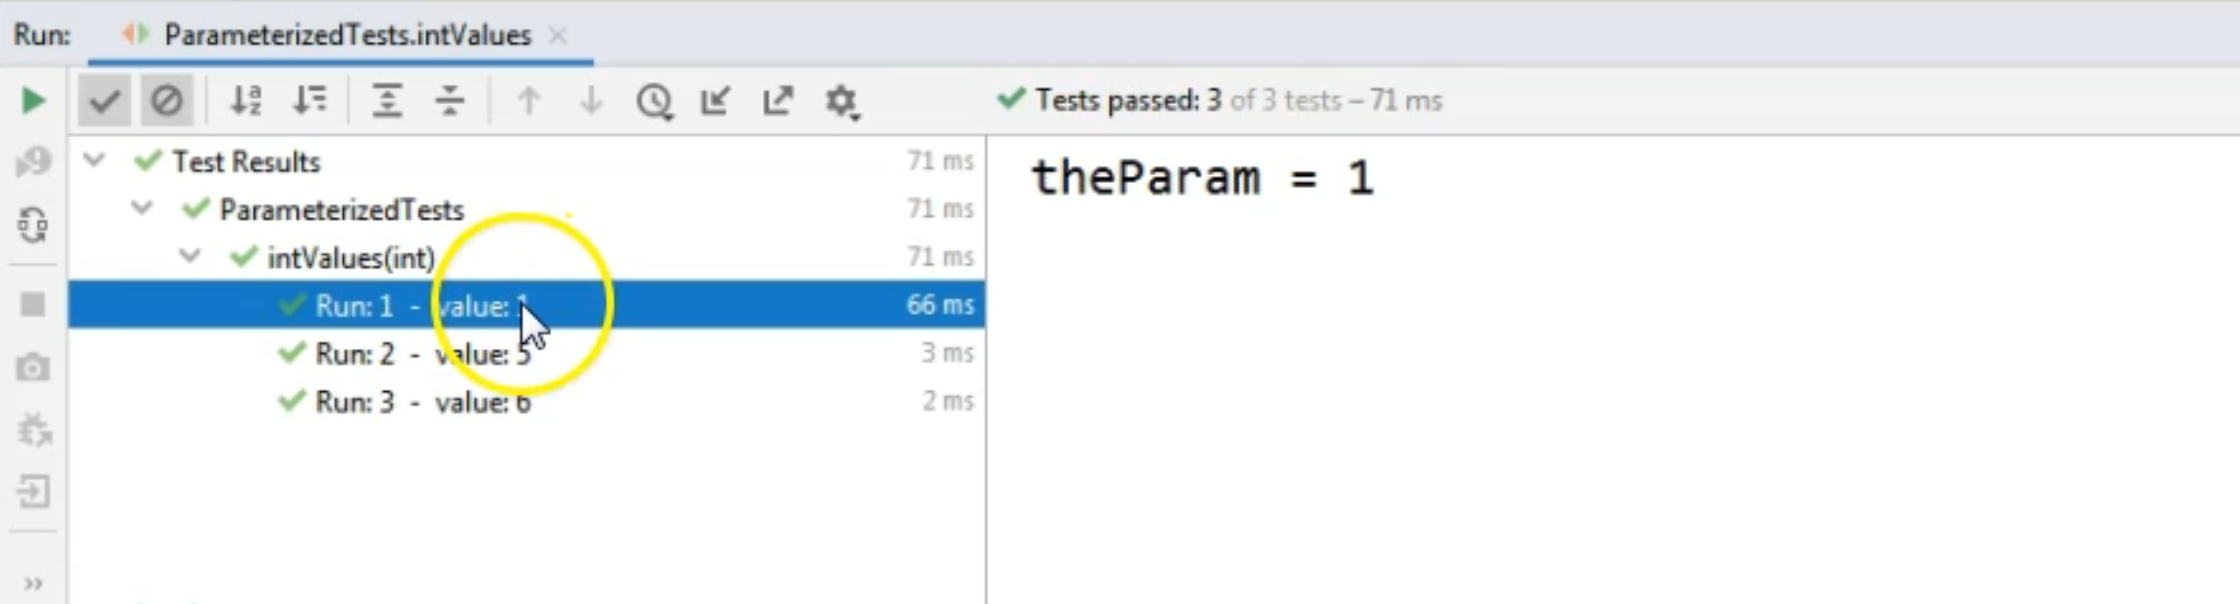
For the first run, we had "value 1", for the second run, we had "value 5" and for the third run we had "value six", as we expected.
So this is the way to improve the display in the console.
At this point, what we did was we pass some int values.
Notice that we're passing the values directly, so we cannot call any method that generates some values for us in the @ValueSource annotation - we only need to specify the values directly.
For example, if we wanted to use booleans instead of ints, we would need to specify true or false, not some sort of evaluation of a condition, which would in turn result in a boolean value.
# Passing string values
Let's take a look at another example where we will pass strings as parameters.
So I will create a new test and I will use the @ParameterizedTest annotation.
Then I will use the @ValueSource annotation, and this time I will say strings =, and here we will say, for example, {"firstString", "secondString"}.
Our method will be called stringValues, and, of course, it will take one single parameter and that one will be a String theParam.
package junit5tests;

import org.junit.jupiter.params.ParameterizedTest;
import org.junit.jupiter.params.provider.ValueSource;

public class ParameterizedTests {
    @ParameterizedTest(name = "Run: {index}  -  value: {arguments}")
    @ValueSource(ints = {1,5,6})
    void intValues (int theParam) {
        System.out.println("theParam = " + theParam);
    }

    @ParameterizedTest
    @ValueSource(strings = {"firstString", "secondString"})
    void stringValues (String theParam) {
        System.out.println("theParam = " + theParam);
    }
}
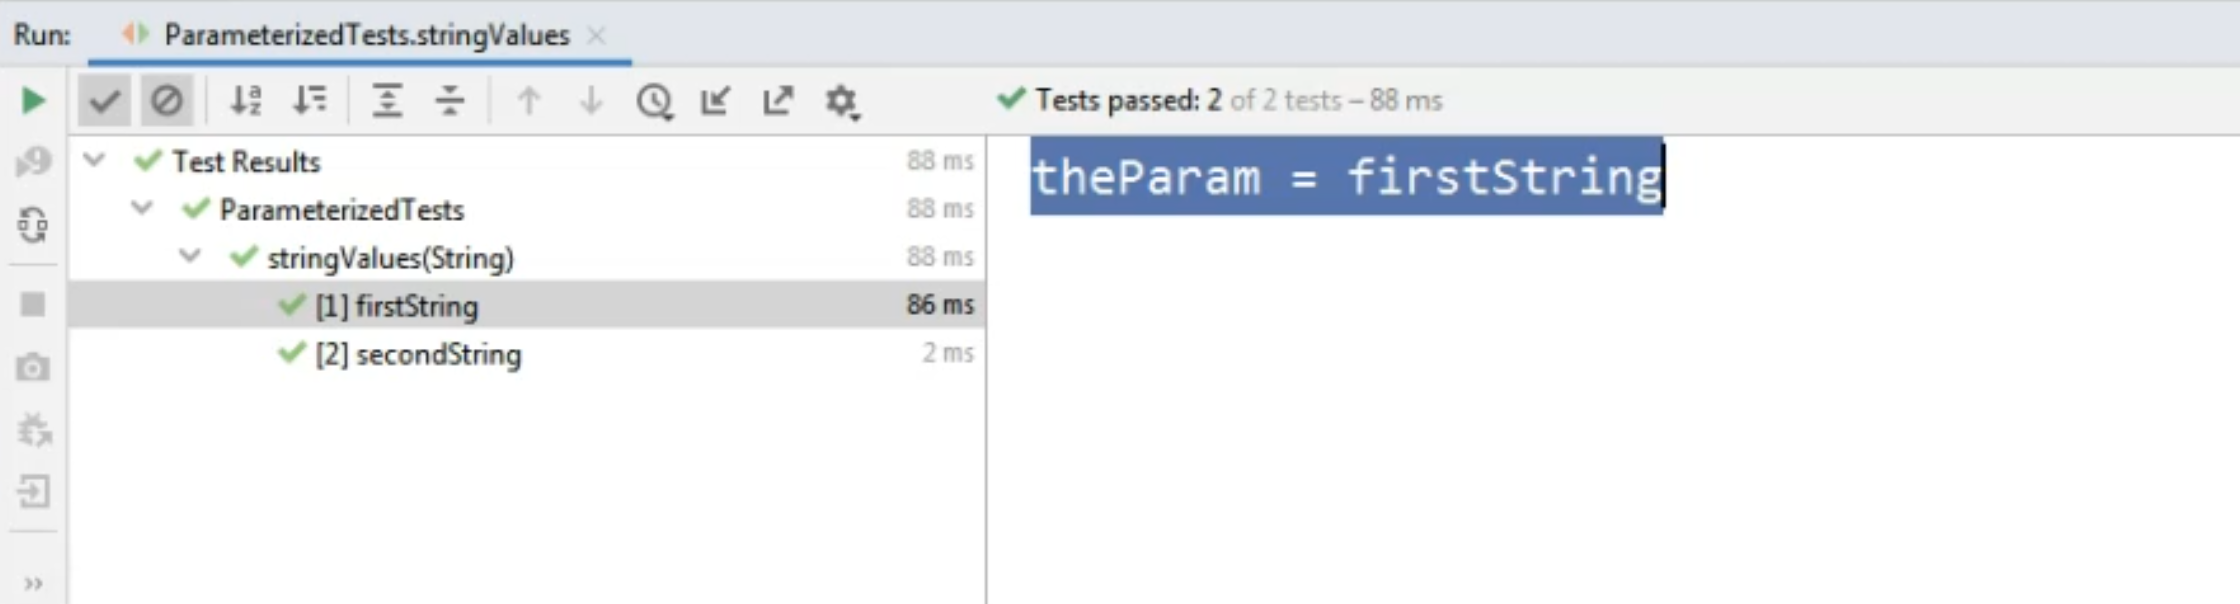
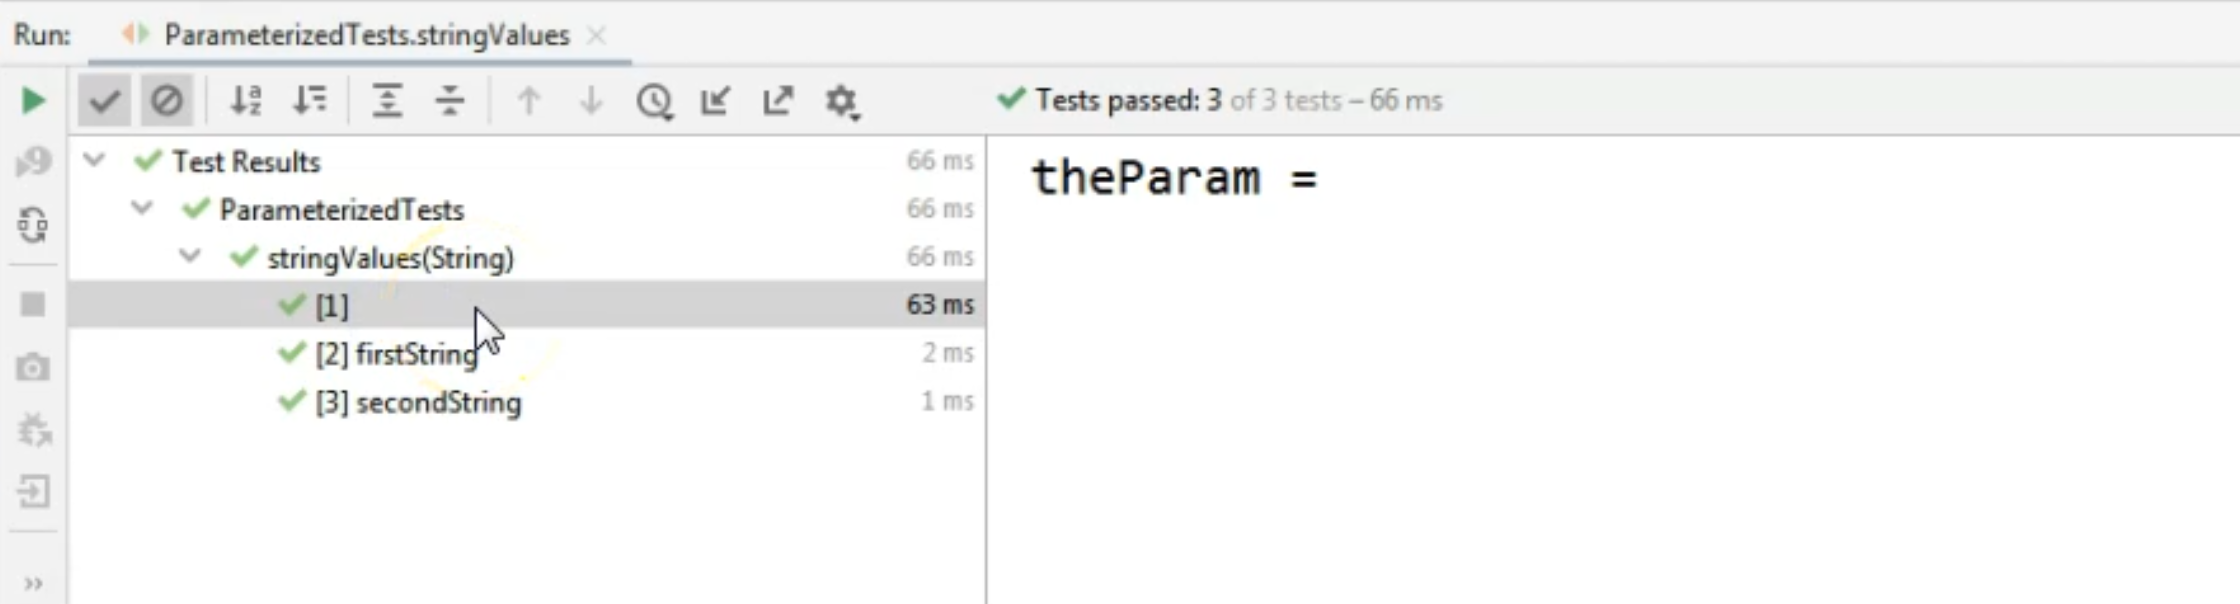
In the test, again, we will only output the value of theParam to the console and I will quickly run this test.
And again, in the console, we will see on the left-hand side that we ran the method called stringValues and that for the first run, the value of the parameter was firstString.
Now, when it comes to strings and ValueSource, we could also use two additional options.
If we want to pass in either a null value or an empty string, we could use two other annotations.
# Passing an empty string
Let's start with the empty string.
So if we want to pass an empty string, we could do it by saying @EmptySource, in addition to the @ParameterizedTest and the @ValueSource annotation.
This annotation, however, does not work with primitives, so do not use this one with ints or floats or booleans.
package junit5tests;

import org.junit.jupiter.params.ParameterizedTest;
import org.junit.jupiter.params.provider.ValueSource;

public class ParameterizedTests {
    @ParameterizedTest(name = "Run: {index}  -  value: {arguments}")
    @ValueSource(ints = {1,5,6})
    void intValues (int theParam) {
        System.out.println("theParam = " + theParam);
    }

    @ParameterizedTest
    @EmptySource
    @ValueSource(strings = {"firstString", "secondString"})
    void stringValues (String theParam) {
        System.out.println("theParam = " + theParam);
    }
}
Let's now run the test again to see the console output.
Of course, I didn't change the way these are shown to the console, but you will see that for the first index, the value is basically empty because we passed in an empty string.
# Passing a null value
If we want to pass a null value, actually a null, not the string "null", we can use an additional annotation - namely the @NullSource one.
package junit5tests;

import org.junit.jupiter.params.ParameterizedTest;
import org.junit.jupiter.params.provider.ValueSource;

public class ParameterizedTests {
    @ParameterizedTest(name = "Run: {index}  -  value: {arguments}")
    @ValueSource(ints = {1,5,6})
    void intValues (int theParam) {
        System.out.println("theParam = " + theParam);
    }

    @ParameterizedTest
    @NullSource
    @EmptySource
    @ValueSource(strings = {"firstString", "secondString"})
    void stringValues (String theParam) {
        System.out.println("theParam = " + theParam);
    }
}
If we run the test again, we will see that instead of three runs we will now have four runs.
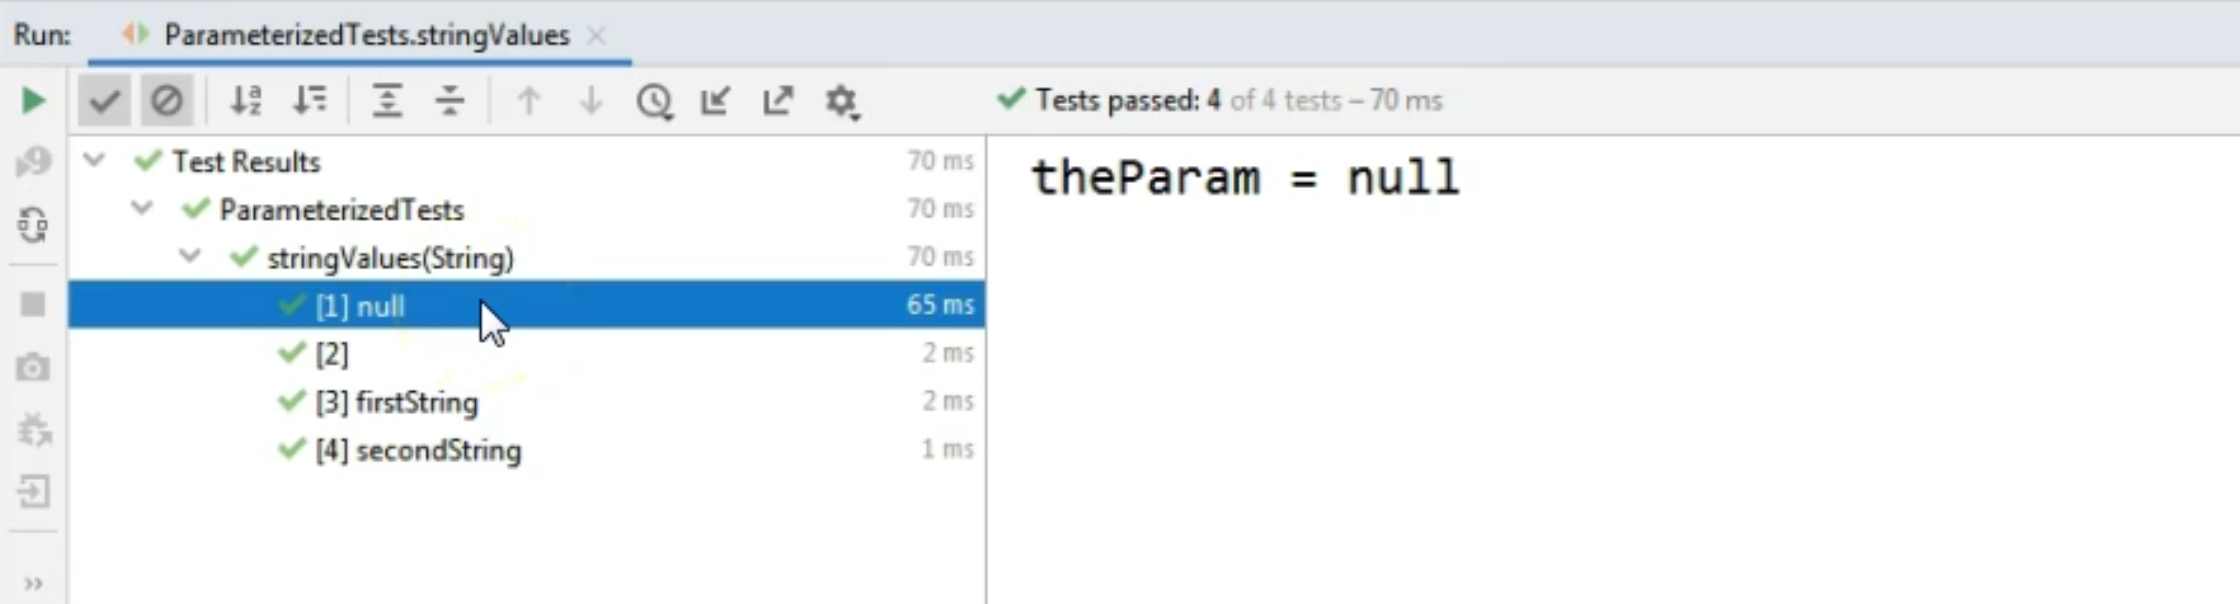
And for the first run, theParam was null, so not the null string, just null.
To make it a bit easier, in case we wanted both null and empty as parameter values - again, for this method where we only have one parameter in the method definition - we can use a composite annotation - basically, an annotation that will generate for us both a null and an empty value.
That one is the @NullAndEmptySource annotation.
package junit5tests;

import org.junit.jupiter.params.ParameterizedTest;
import org.junit.jupiter.params.provider.ValueSource;

public class ParameterizedTests {
    @ParameterizedTest(name = "Run: {index}  -  value: {arguments}")
    @ValueSource(ints = {1,5,6})
    void intValues (int theParam) {
        System.out.println("theParam = " + theParam);
    }

    @ParameterizedTest
    @NullAndEmptySource
    @ValueSource(strings = {"firstString", "secondString"})
    void stringValues (String theParam) {
        System.out.println("theParam = " + theParam);
    }
}
Let's run the test again to see that we actually do get the null and empty values as parameters when we are running the test.
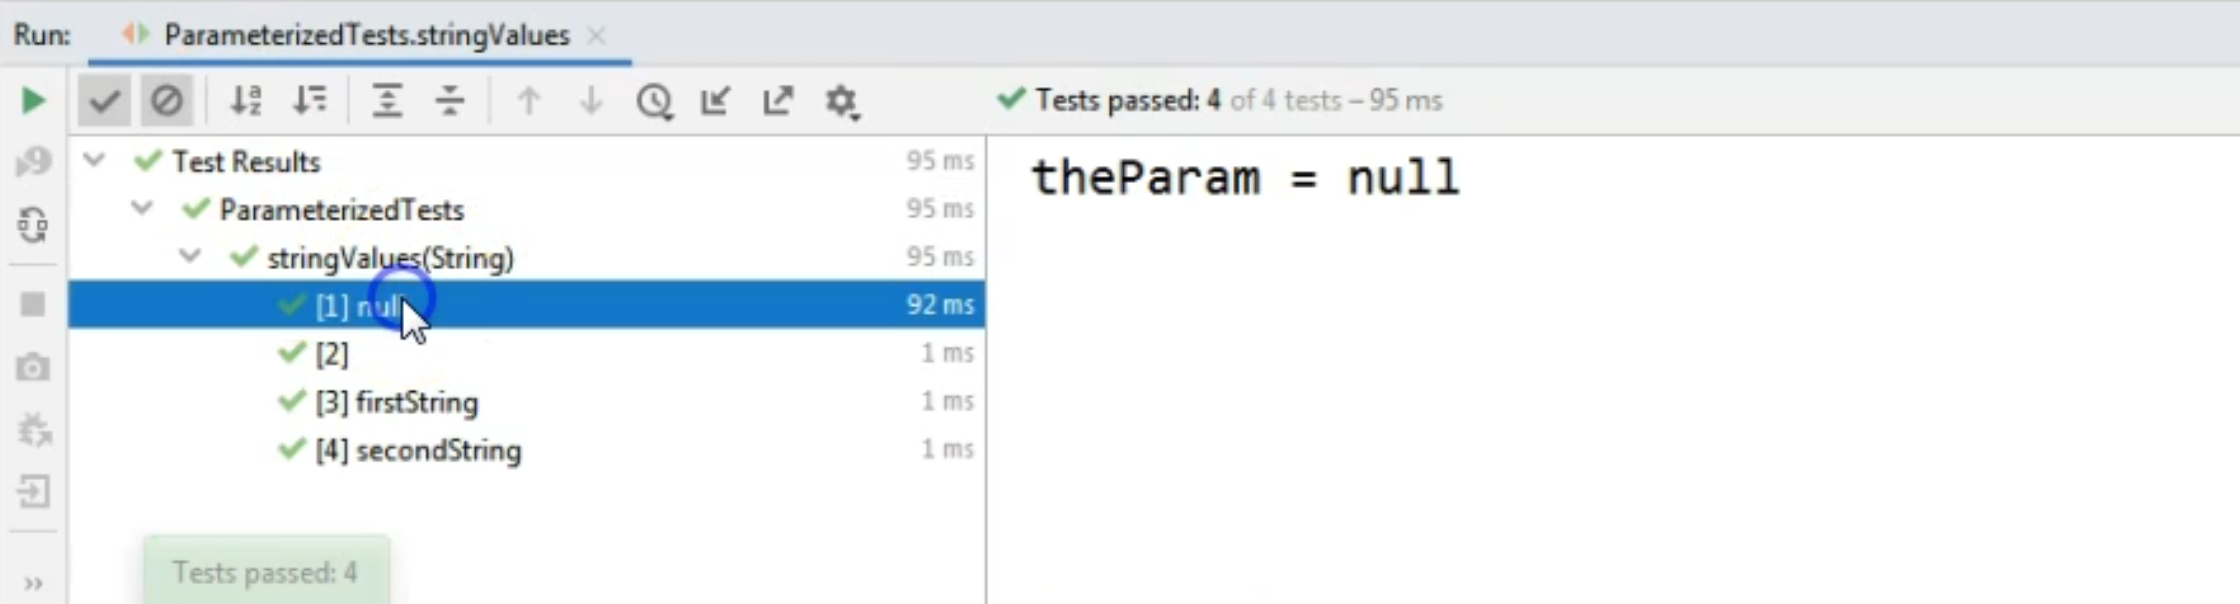
And as you can see on the left hand side, that is correct.
So our test ran with a null value, an empty value for the string and with the two values that we specified in the @ValueSource annotation definition.
To conclude this chapter, we have seen how to create parameterized tests where we only pass in one parameter and the value of the parameter is constant.
We've also seen how to improve the way the method runs are shown in the console, and we've also seen how to pass in null and empty values - only for the string parameters.
