

Transcripted Summary
In the second chapter, we will focus on creating our first basic tests.
We will be using the @Test annotation for that purpose.
We will also see how to run the newly created test.
Last but not least, we will take a look at how the test names are displayed in the console because we will be running these tests in IntelliJ, and we will see how we can change the way the test methods are displayed in the console.
So let's get started.
Let's start by creating a package where we will create our further tests.
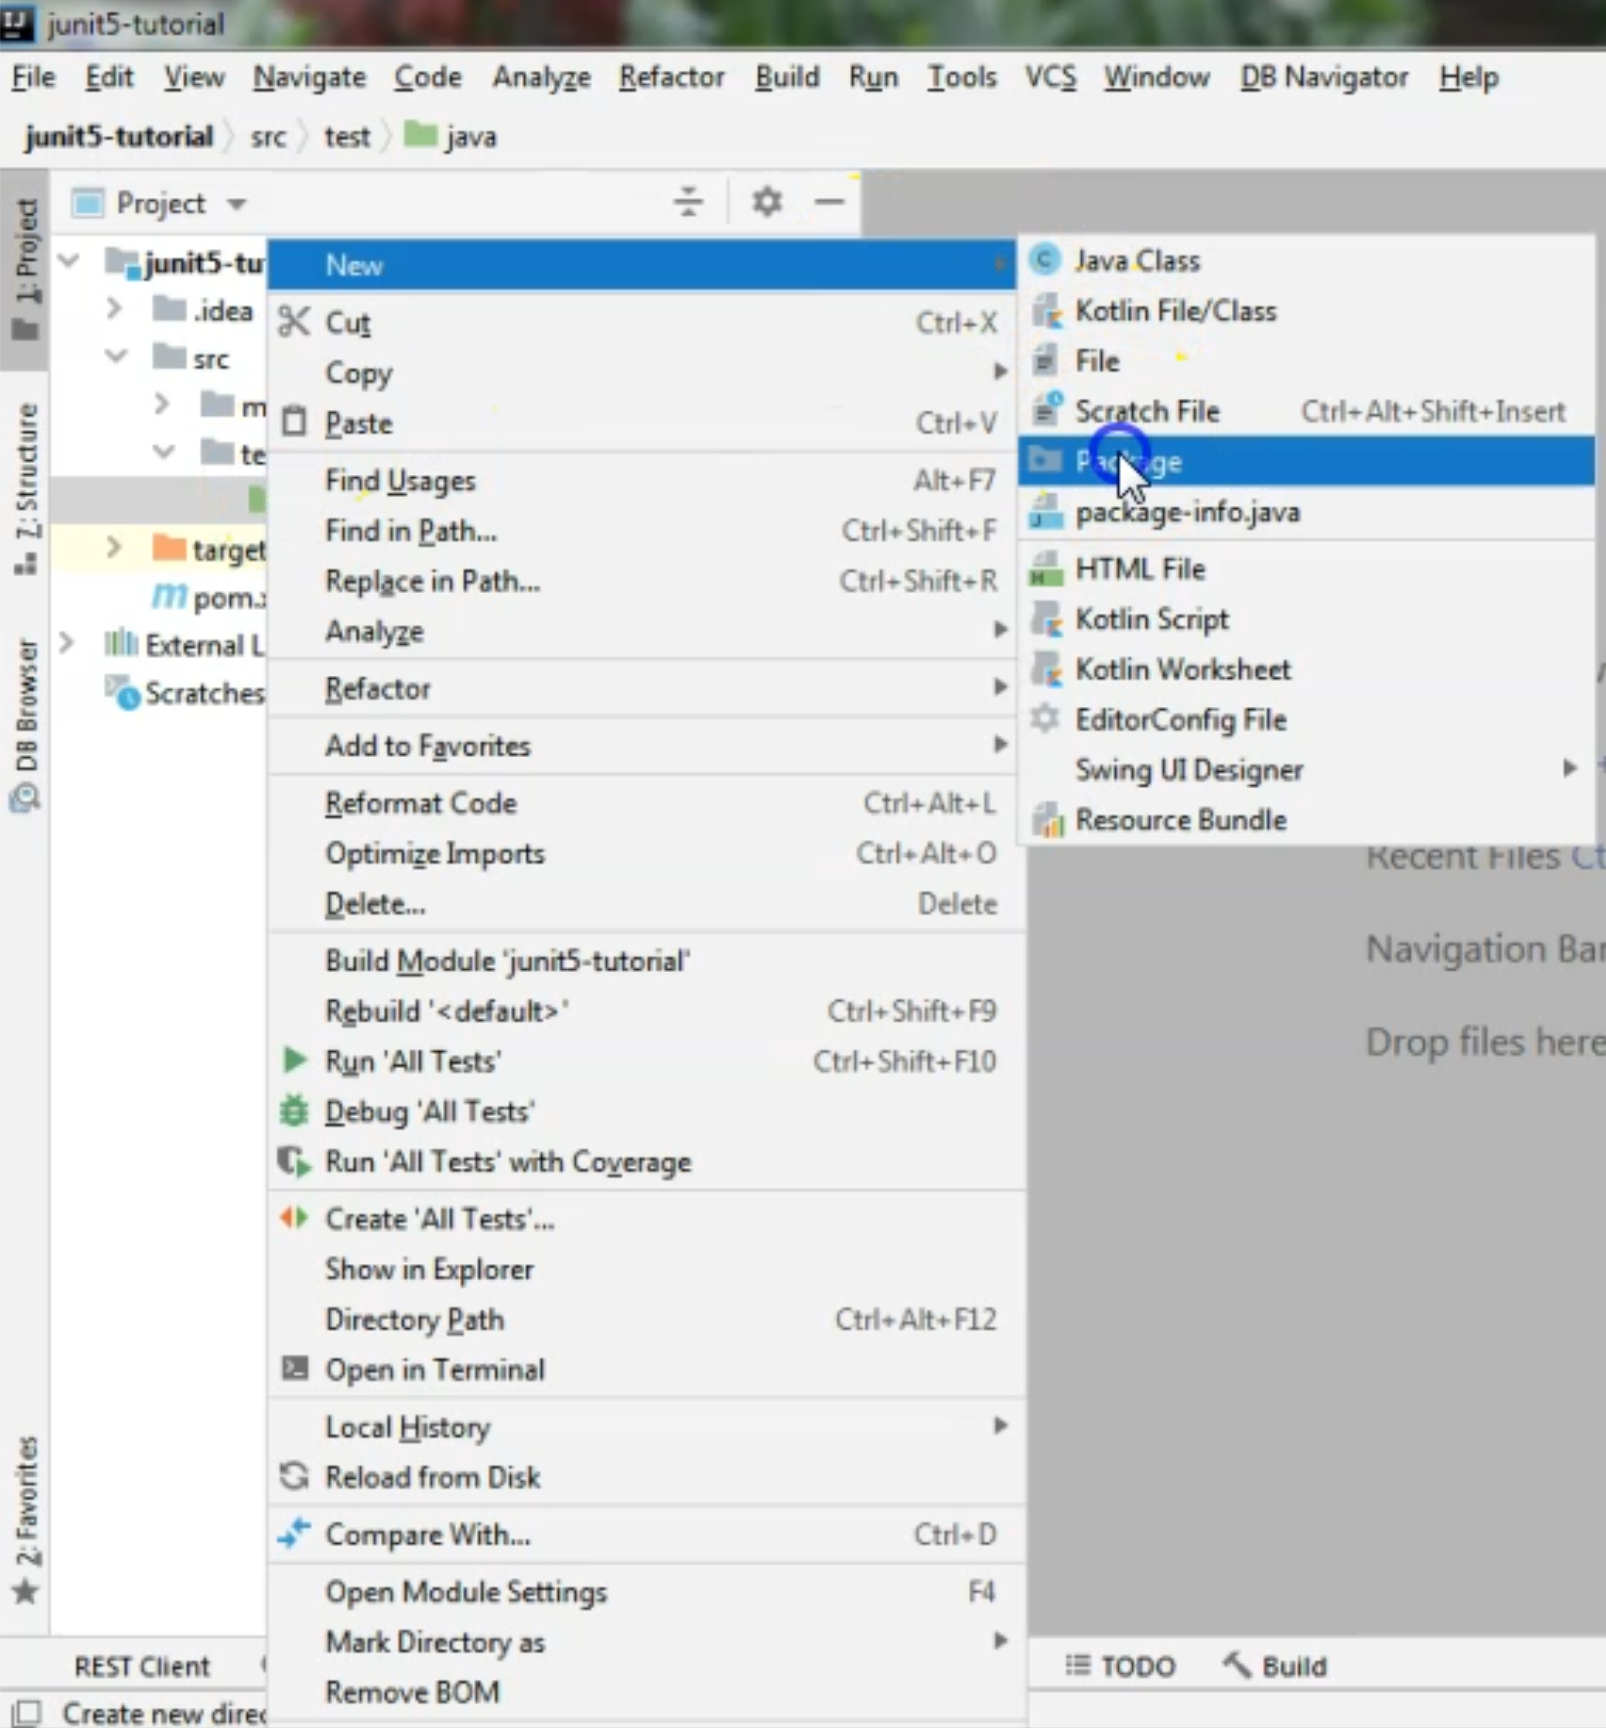
I will go to src, test, java, and here I will right-click, choose "New", "Package", and I will create the package name, junit5tests.
Inside this package, I will create our first test class.
At the beginning, I will just create a simple class and I will show you how to get from the simple class to an actual test class.
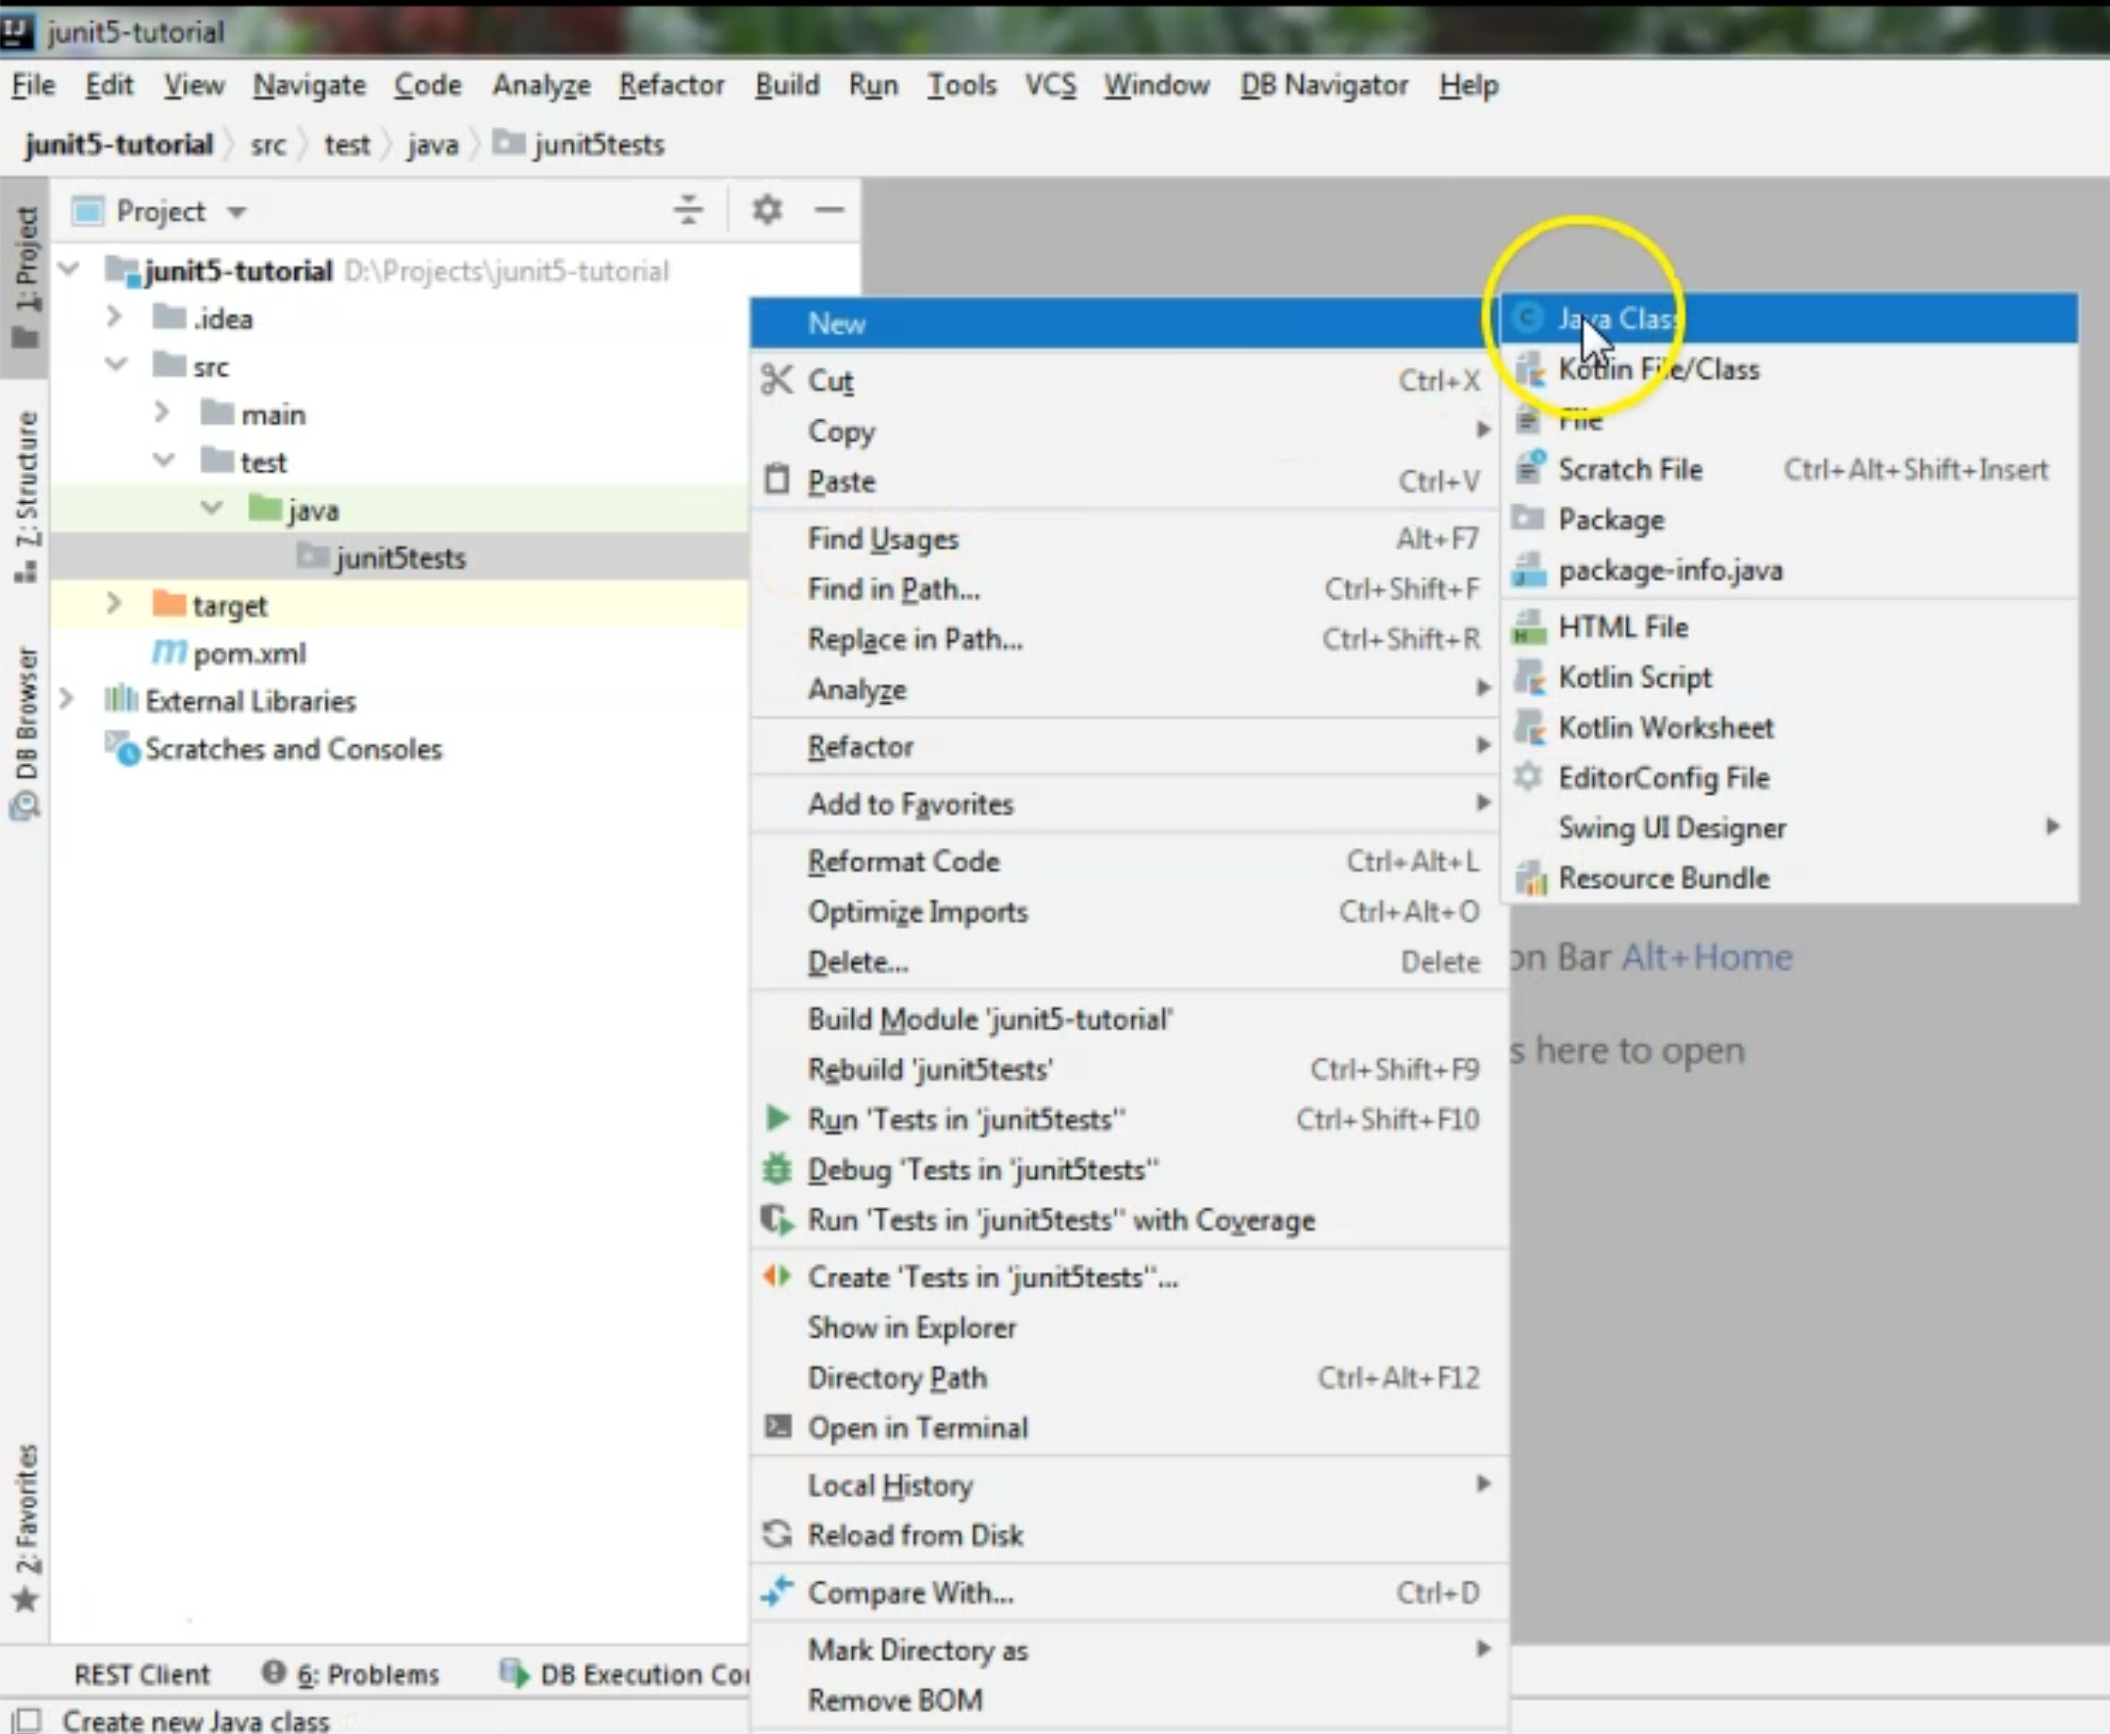
I will right-click the package name and choose "New", "Java Class". I will name it FirstTestClass.
Now we have a place where we can actually create our first real test.
But this method needs to be annotated with some specific JUnit5 annotations.
I will discuss a few of them in later chapters, but the most basic one is the @Test annotation.
So I will go ahead and I will just say in my editor @Test, and you can see that the IntelliJ is offering me suggestions regarding what to import.
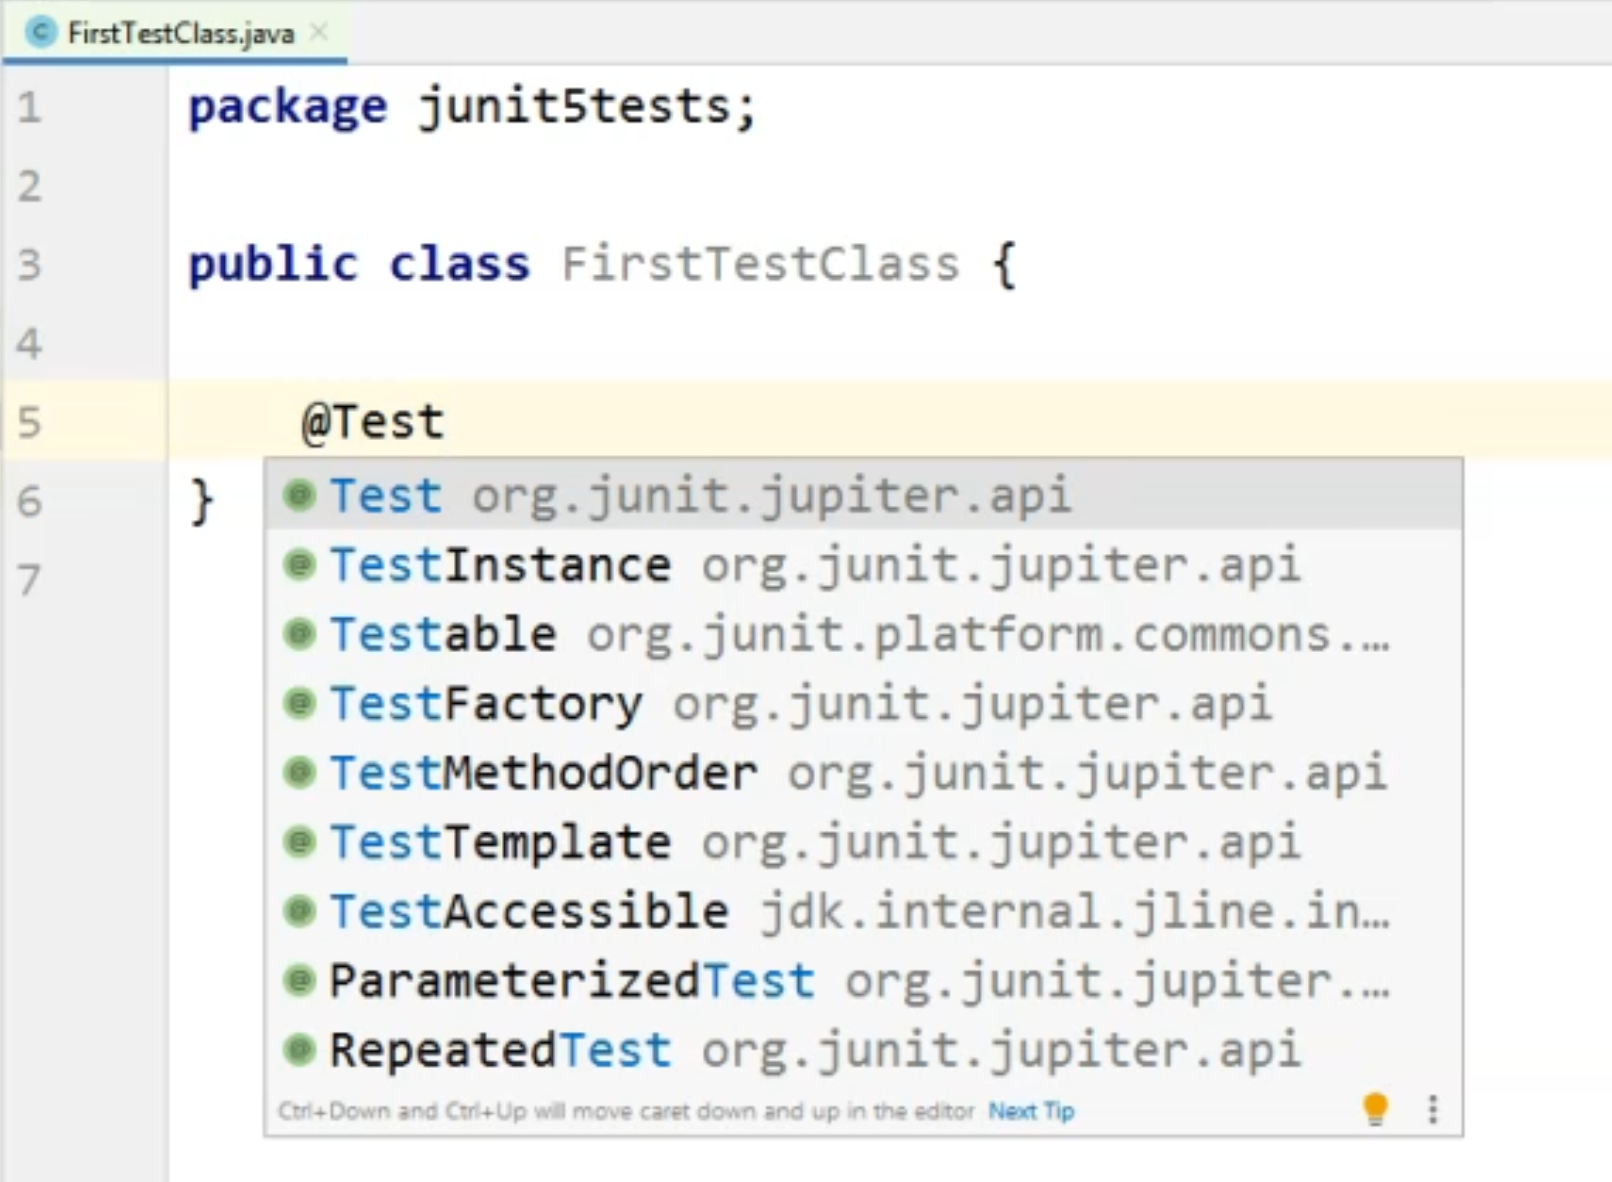
I will choose the first option that is actually highlighted here - namely, I will choose the @Test annotation that comes from the org.junit.jupiter.api package. So this is the one we are interested in.
Next, we will need to define the method, so we need to provide a method signature.
Normally, when we define the new method, we should specify an accessModifier, then a returnType, a nameOfMethod and some parameters, if it takes any parameters.
So let's take each one and look at what values we need to provide when creating the test method.
When it comes to the accessModifier, this is actually a part that we can omit.
JUnit does not require us to specify the accessModifier when we're defining a test method.
However, it does not allow for the accessModifier to be private, so keep that in mind.
Do not use a private accessModifier for a test method, no matter if it's annotated @Test or another test annotation.
So in this case, I will just remove this one and we will look at the returnType.
A test method cannot return any value, therefore, we will need to specify that the returnType is void for all of our tests.
In this example, we are not going to pass in any parameters, so I'm going to delete that part and I will choose a different name for this method - I will call it firstMethod.
Of course, we will need to specify the brackets.
This is what a very simple, still empty, test looks like.
Now, in order for us to actually see something at the console when we will run the test, I will do a simple System.out and I will just say, "This is the first test method."
Just so we can actually see something when we are going to run the test.
So this is the message that we will see at the console.
Now I want to just go ahead and create a second test method, and I'm going to say @Test again and I'm going to say, void secondMethod().
Here, I will just do a print of the text, "This is the second test method."
So right now, what we have here is a class which contains two test methods.
package junit5tests;

import org.junit.jupiter.api.Test;

public class FirstTestClass{
    @Test
    void firstMethod() {
        System.out.println("This is the first test method");
    }

    @Test
    void secondMethod() {
        System.out.println("This is the second test method");
    }
}
Now, **any class that contains at least one test method is considered a test class. **
We have created two tests.
We can actually start running these tests.
I will discuss more options about running the tests in a further chapter, but for now, for this very basic example, we can choose the option to run the test from IntelliJ directly.
As you can see on our screen right now, we have several green icons here.
We have one next to the class name and we have several ones next to the method names.
If we want to run only one test method, we will click the icon which is inline with the method signature that we want to run.
So in our case, if we want to run the first method test, we would just click this icon right here.
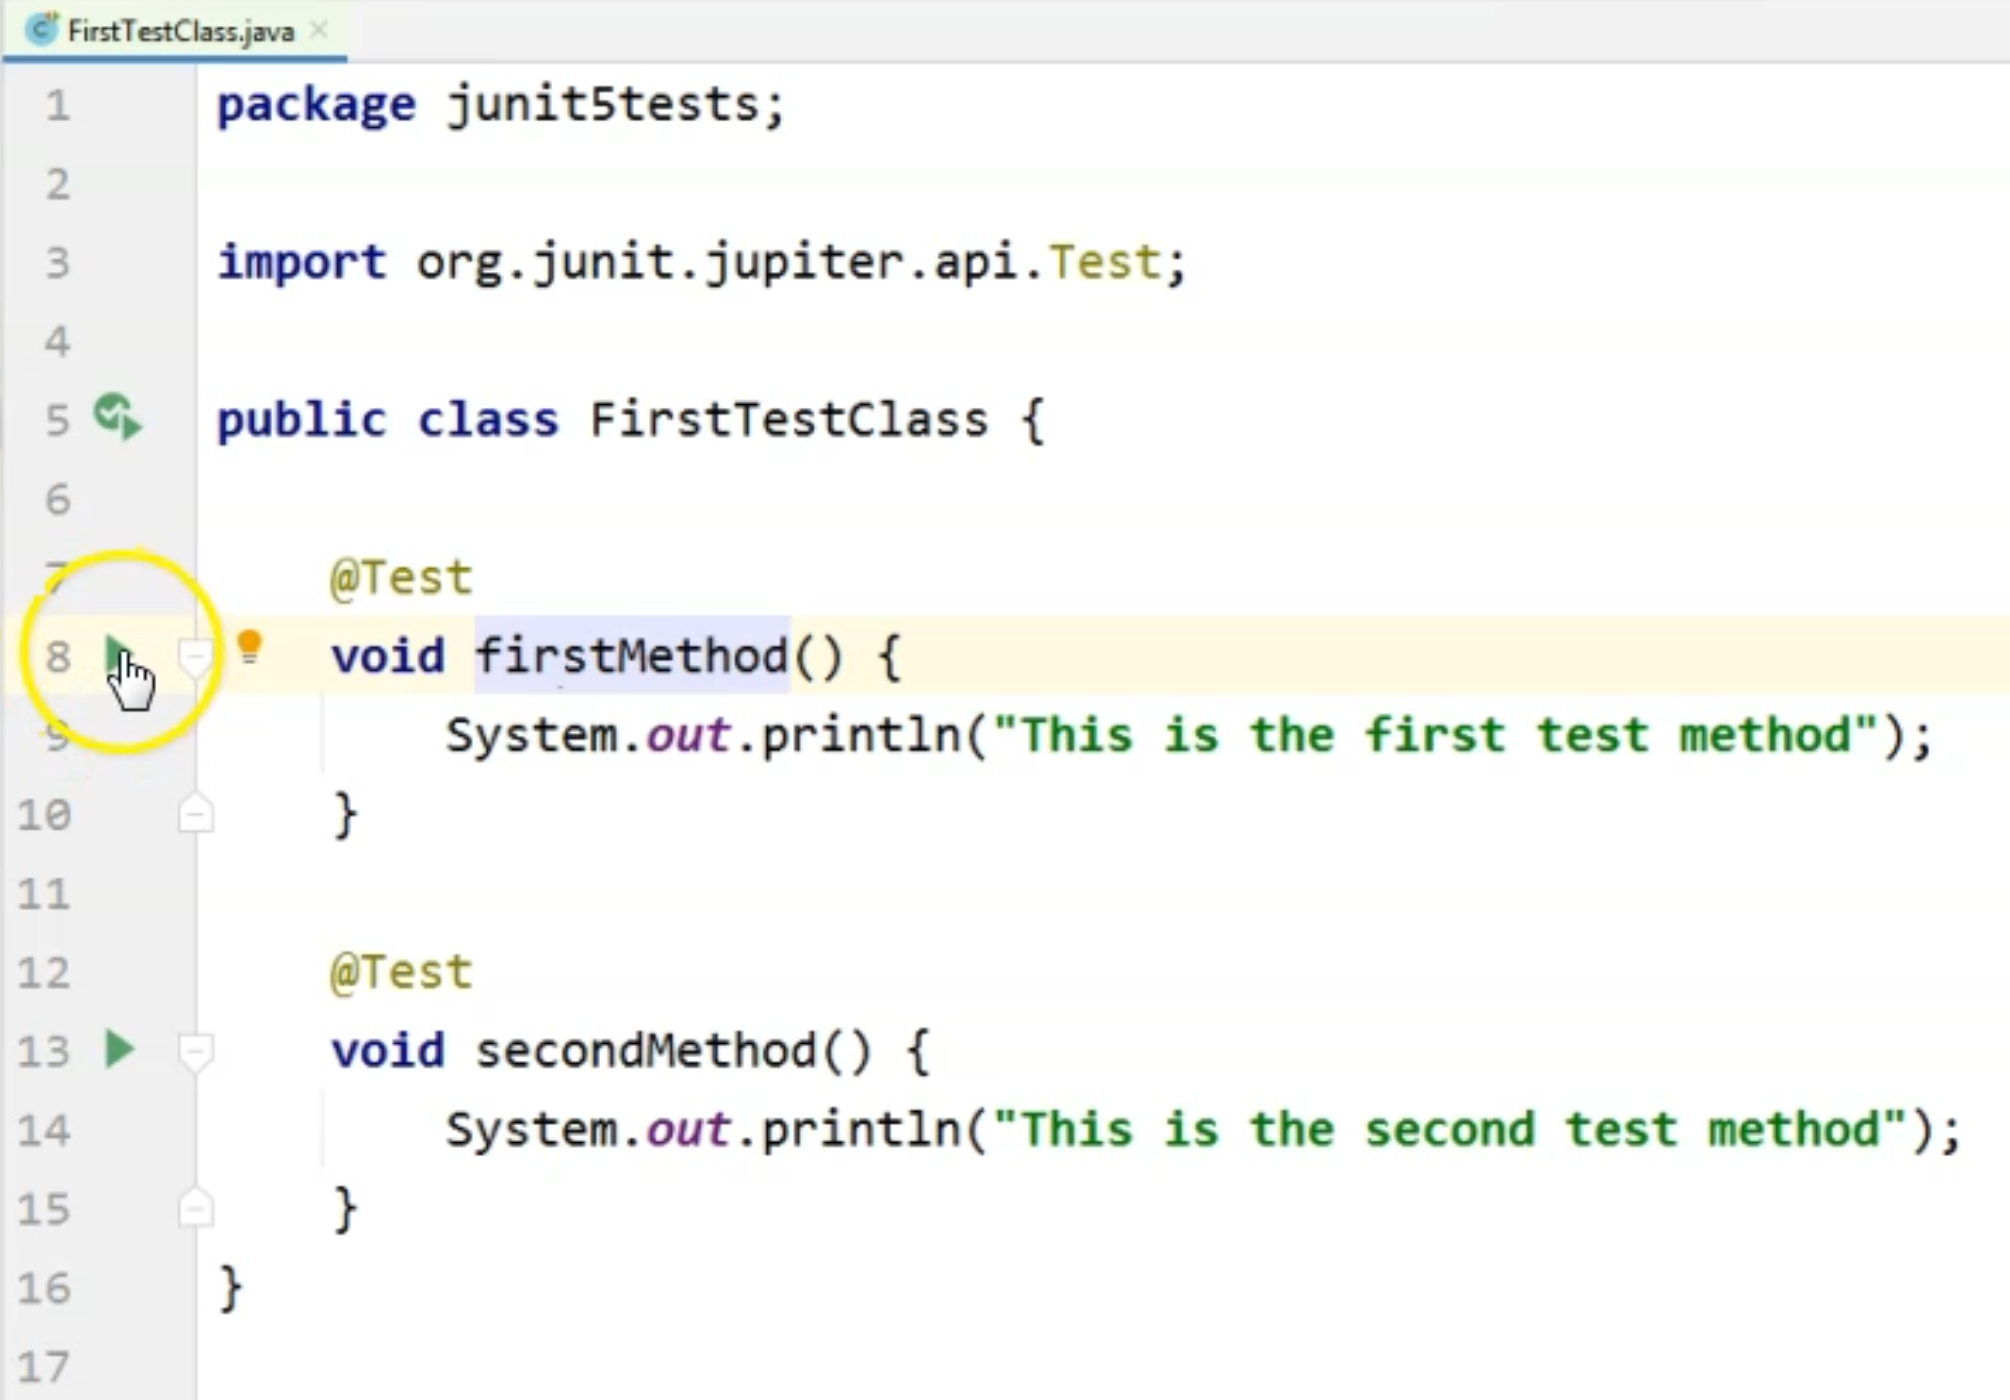
If we want the second one, then we will click the corresponding icon.
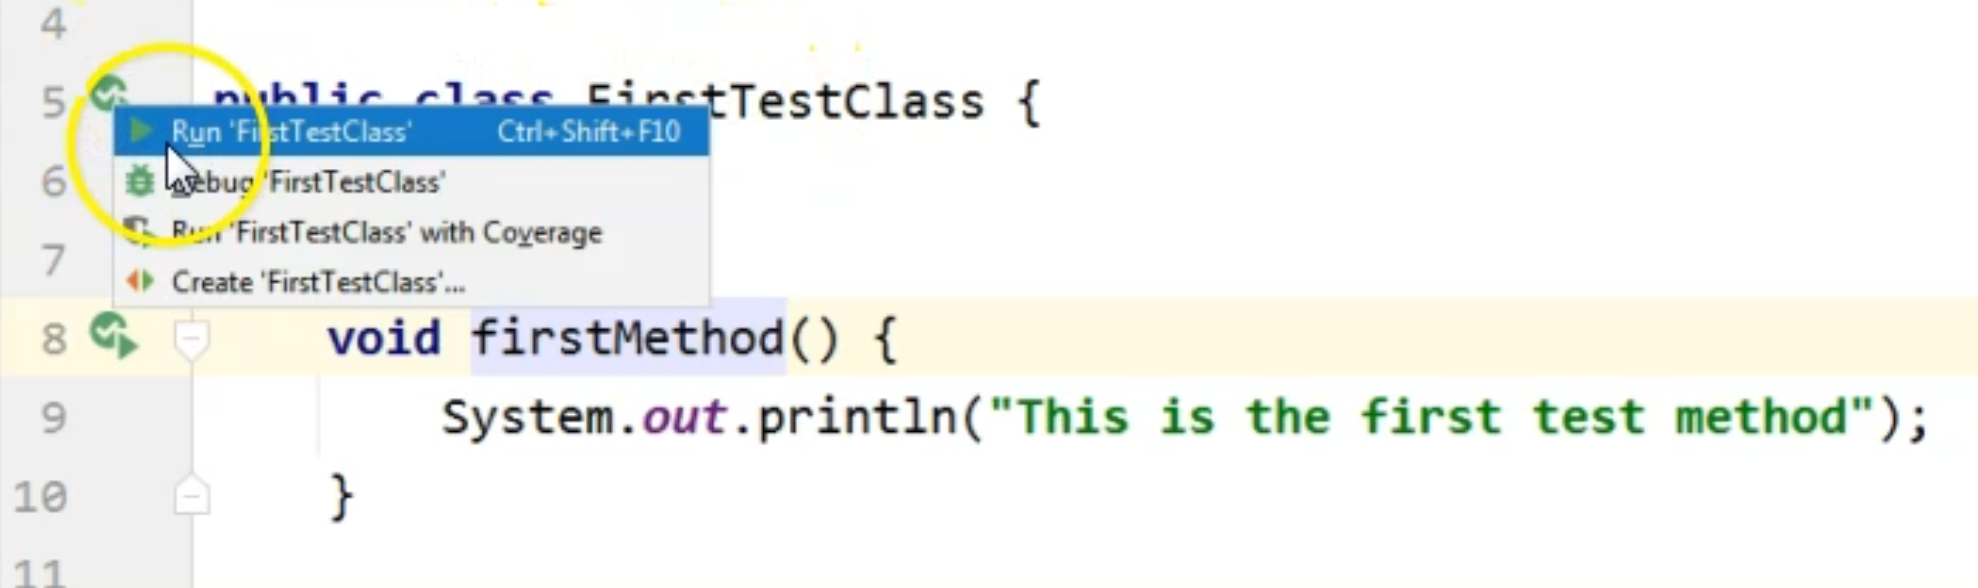
In the case we want to run all of the tests, we would click the icon which corresponds to where we defined the class, so on line 5.
For now, I will just run the firstMethod, so I would just click this icon and I would choose the first option which says "Run 'firstMethod()'".
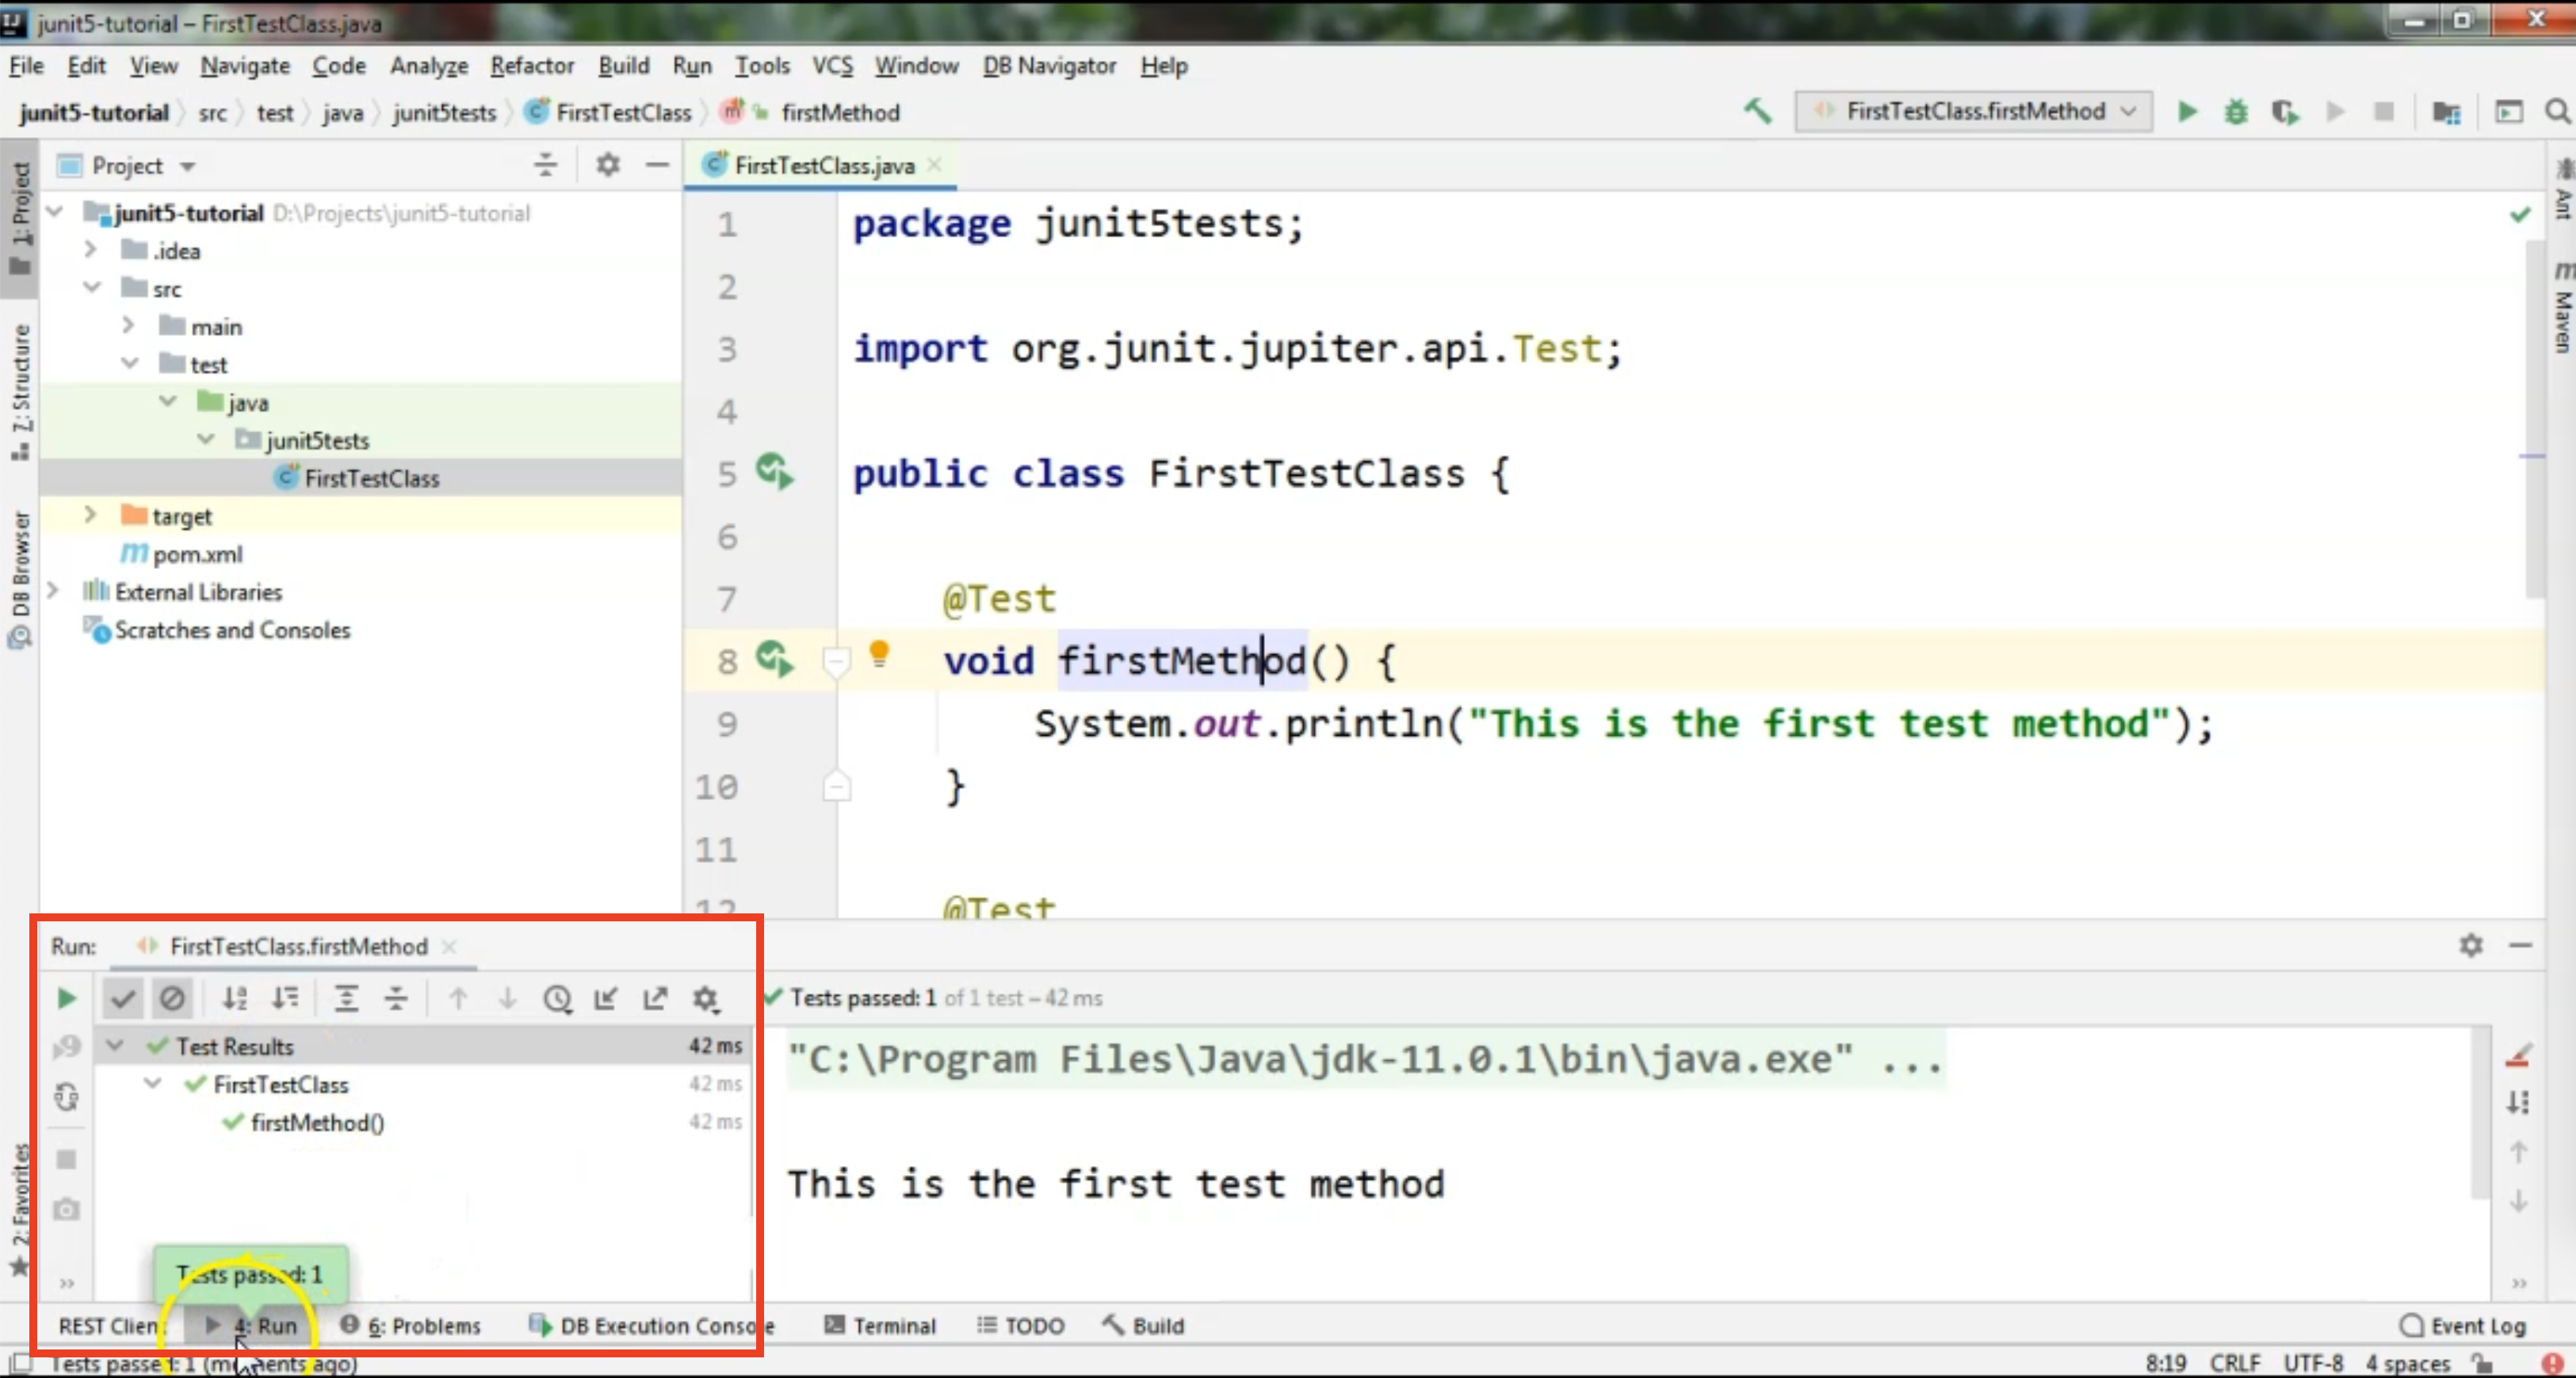
You can see that we have a new panel that opened here and it's called "Run".
This is the panel where we will see all the information regarding the test run.
On the left-hand side, we have the name of the class that we just ran, the name of the method that we ran, and this is the output of the method.
So we printed to the console a specified message.

So in this case, for now, we managed to successfully run a first test method.
If we want to run all of the tests that we have in this class, we can just click the icon next to the class name, and we'll do that right now.
And we will choose the option "Run 'FirstTestClass'".
Again, in the console we will see that we were running the class named FirstTestClass and these were the two methods that we ran.
As you can see, firstMethod ran first, secondMethod ran second.
If we want to see all of the output of the class at once, we can go and we can click either on the FirstTestClass name here or on "Test Results".
Both of them will give us the output from the test runs, from all of the methods that actually ran.
As you can see in the console, when we're looking at the test run for each test method, we will see the name of the test method.
Sometimes you want to see something a bit more detailed.
You want some more information regarding what the test is all about.
The name of the method will not always suggest all the information that you need because you are limited in the length of the method name.
Instead, what you can do is, you can choose to change the appearance of the method name in the console.
What we are going to use for that is the so-called "DisplayName", so I will go ahead and make updates to our second test method here.
I will just create a new line and I will use another annotation, which is called "DisplayName".
As you can see in the editor, I already have a list of items I can choose from when I'm typing @Disp.
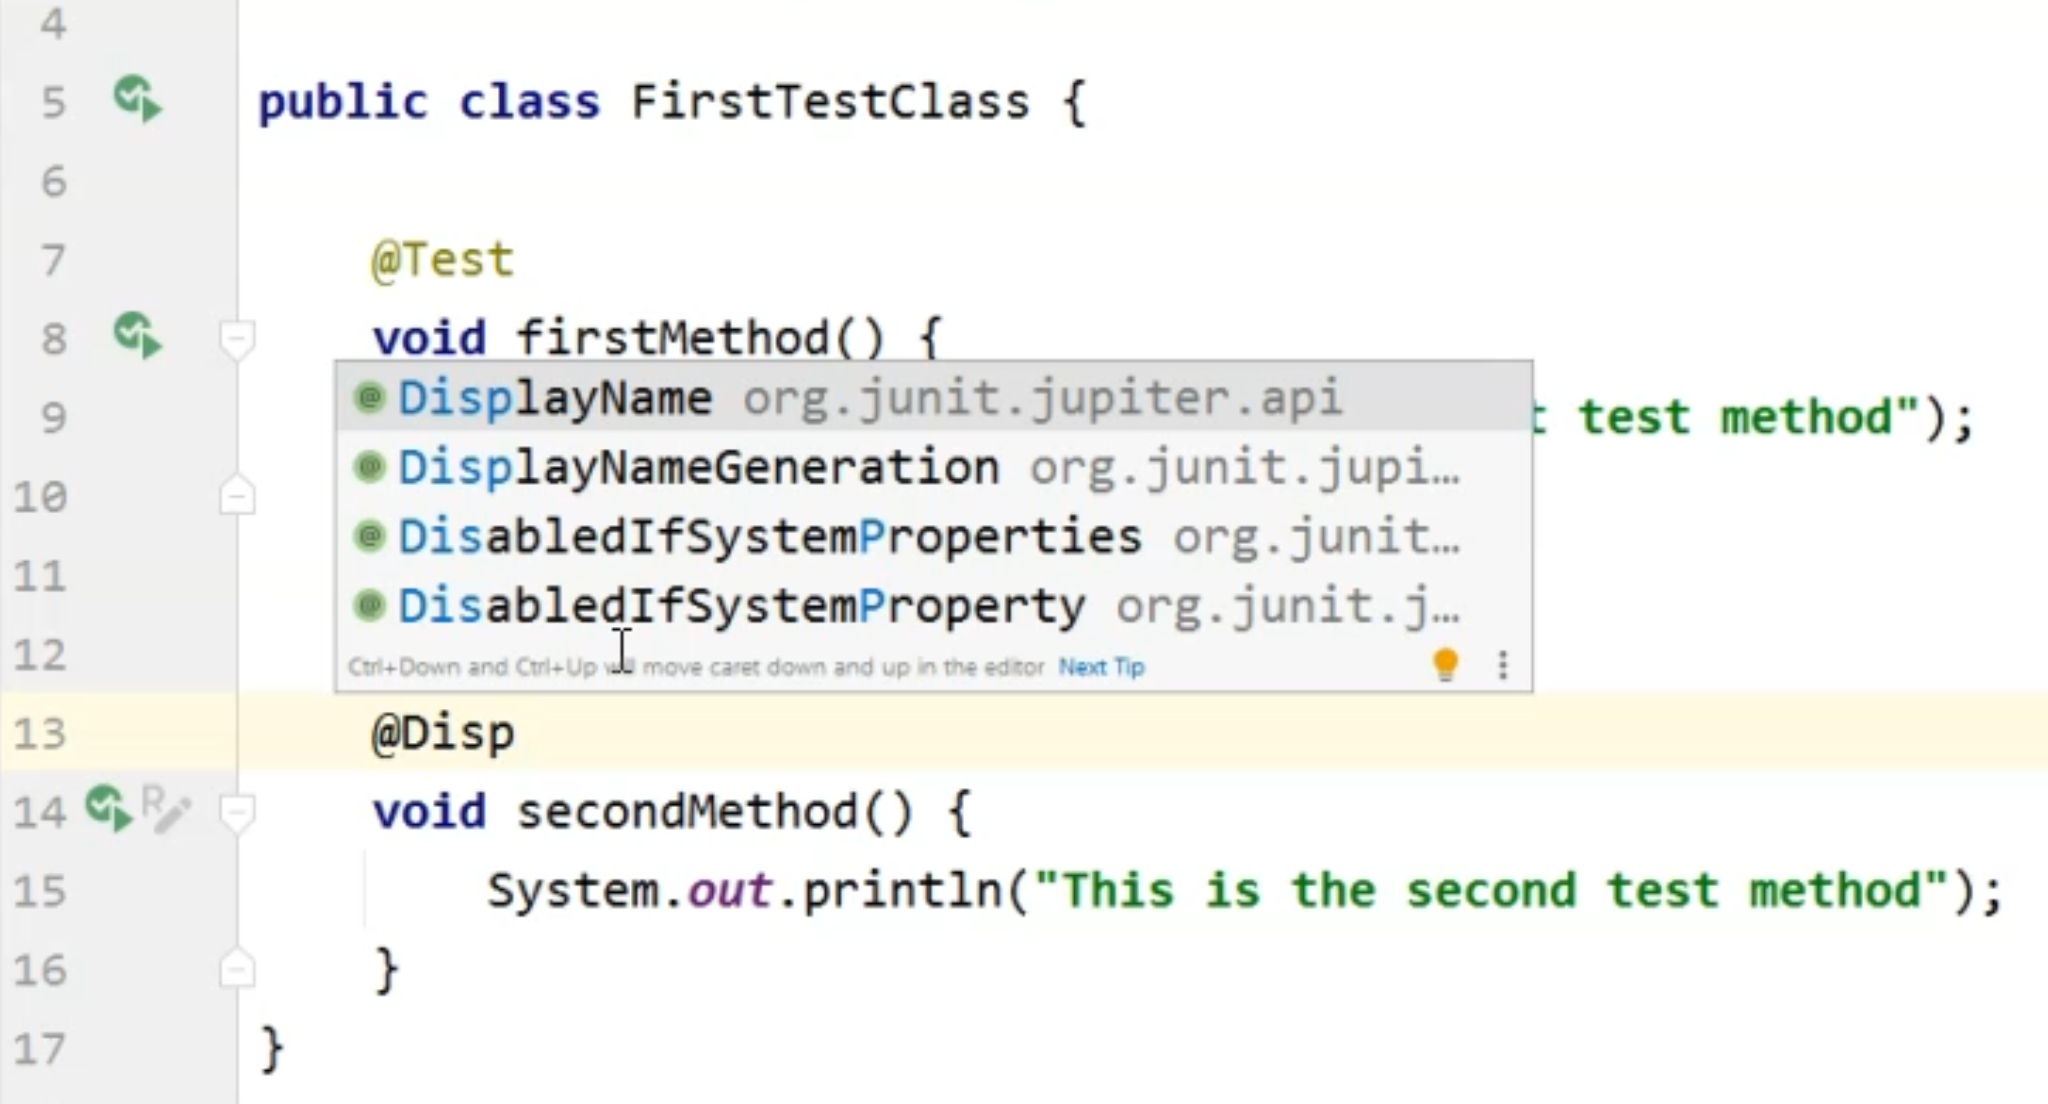
I will choose the first option, which is DisplayName, which also comes from the org.junit.jupiter.api package.
For @DisplayName, we will specify a string.
Now, because it is a string, we can specify regular characters or even special characters or even emojis, if you really want that.
I would just create a DisplayName the way I would do it if I used it in my test.
I would normally probably want to link this test method to a specific user story that it relates to.
So I'm just going to say, "US1234", as an example.
I might also want to somehow link it to a test case that already exists somewhere in the system.
I might want to say that this is regarding "TC12" for the particular user story.
Then I might want to give some information regarding what the test does.
So, I'm just going to say, for example, "this method is the second one."
So, this is just some random information I could display to the console when running the tests.
package junit5tests;

import org.junit.jupiter.api.DisplayName;
import org.junit.jupiter.api.Test;

public class FirstTestClass{

    @Test
    void firstMethod() {
        System.out.println("This is the first test method");
    }

    @Test
    @DisplayName("US1234 - TC12 - this method is the second one")
    void secondMethod() {
        System.out.println("This is the second test method");
    }
}
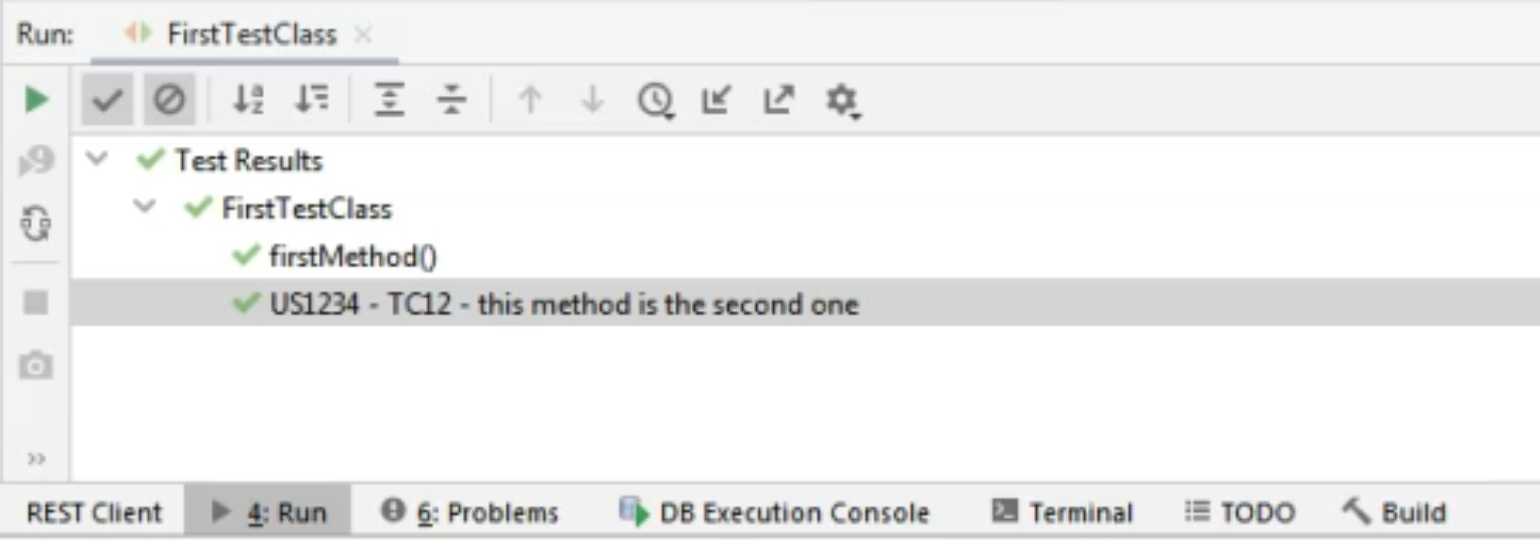
Now, I will rerun the entire class, just so we see the difference between what we had initially and what we have right now.
As you can see in the console, we still have the name of the class here.
We still have the name of the first method because we didn't change anything there.
But instead of the name of the second method, we have the description that we provided as a string in the @DisplayName annotation.
So this is a very useful way of changing the display and making it a bit more useful when we are running the tests, so that we can see some more information from which we can understand what tests actually ran.
