

Transcripted Summary
Sometimes in our automation efforts, we need to be able to run the same code from within a test method several times.
In this case, using parameterized tests is not exactly the best option because we don't really need to pass in any parameter values.
So we are not going to use parameterized tests because we don't want to pass in some dummy values, just so we can repeat the test.
However, for such situations, we can use the @RepeatedTest annotation from JUnit.
This way we can run the exact same test several times.
We can set how many times we want this to run and we can also perform some actions based on which test run this is.
Let's take a look.
As usual, let's create a new test class where we will look at the features from this chapter.
I'm going to call this new test class RepeatedTests.
I will start by creating the first test method.
As you remember, we've already introduced two annotations that signal that the method, which is annotated with those annotations, is a test method.
In this chapter we're introducing the third such annotation, namely the @RepeatedTest annotation.
This annotation also signals that the method that we will create here, for example, void firstRepeatedMethod is indeed a test method.
Now, @RepeatedTest means that this will be a test where we want to repeat it several times.
What this annotation requires is at least to specify how many times we want the same test to run.
So let's say that our test does nothing more than say, "We are repeating this test." - this is the message we will print to the console.
Now let's say that we want to see this message in the console five times.
In order to do that, in the @RepeatedTest annotation, I would provide the value 5 to say that we want to run the code from within this method five times.
package junit5tests;

import org.junit.jupiter.api.RepeatedTest;

public class RepeatedTests {

    @RepeatedTest(5)
    void firstRepeatedMethod() {
        System.out.println("We are repeating this test");
    }
}
As you have seen, we are not passing in any parameters and the signature of the test method does not take any parameter value.
So, let's run the test method to see the output in the console.
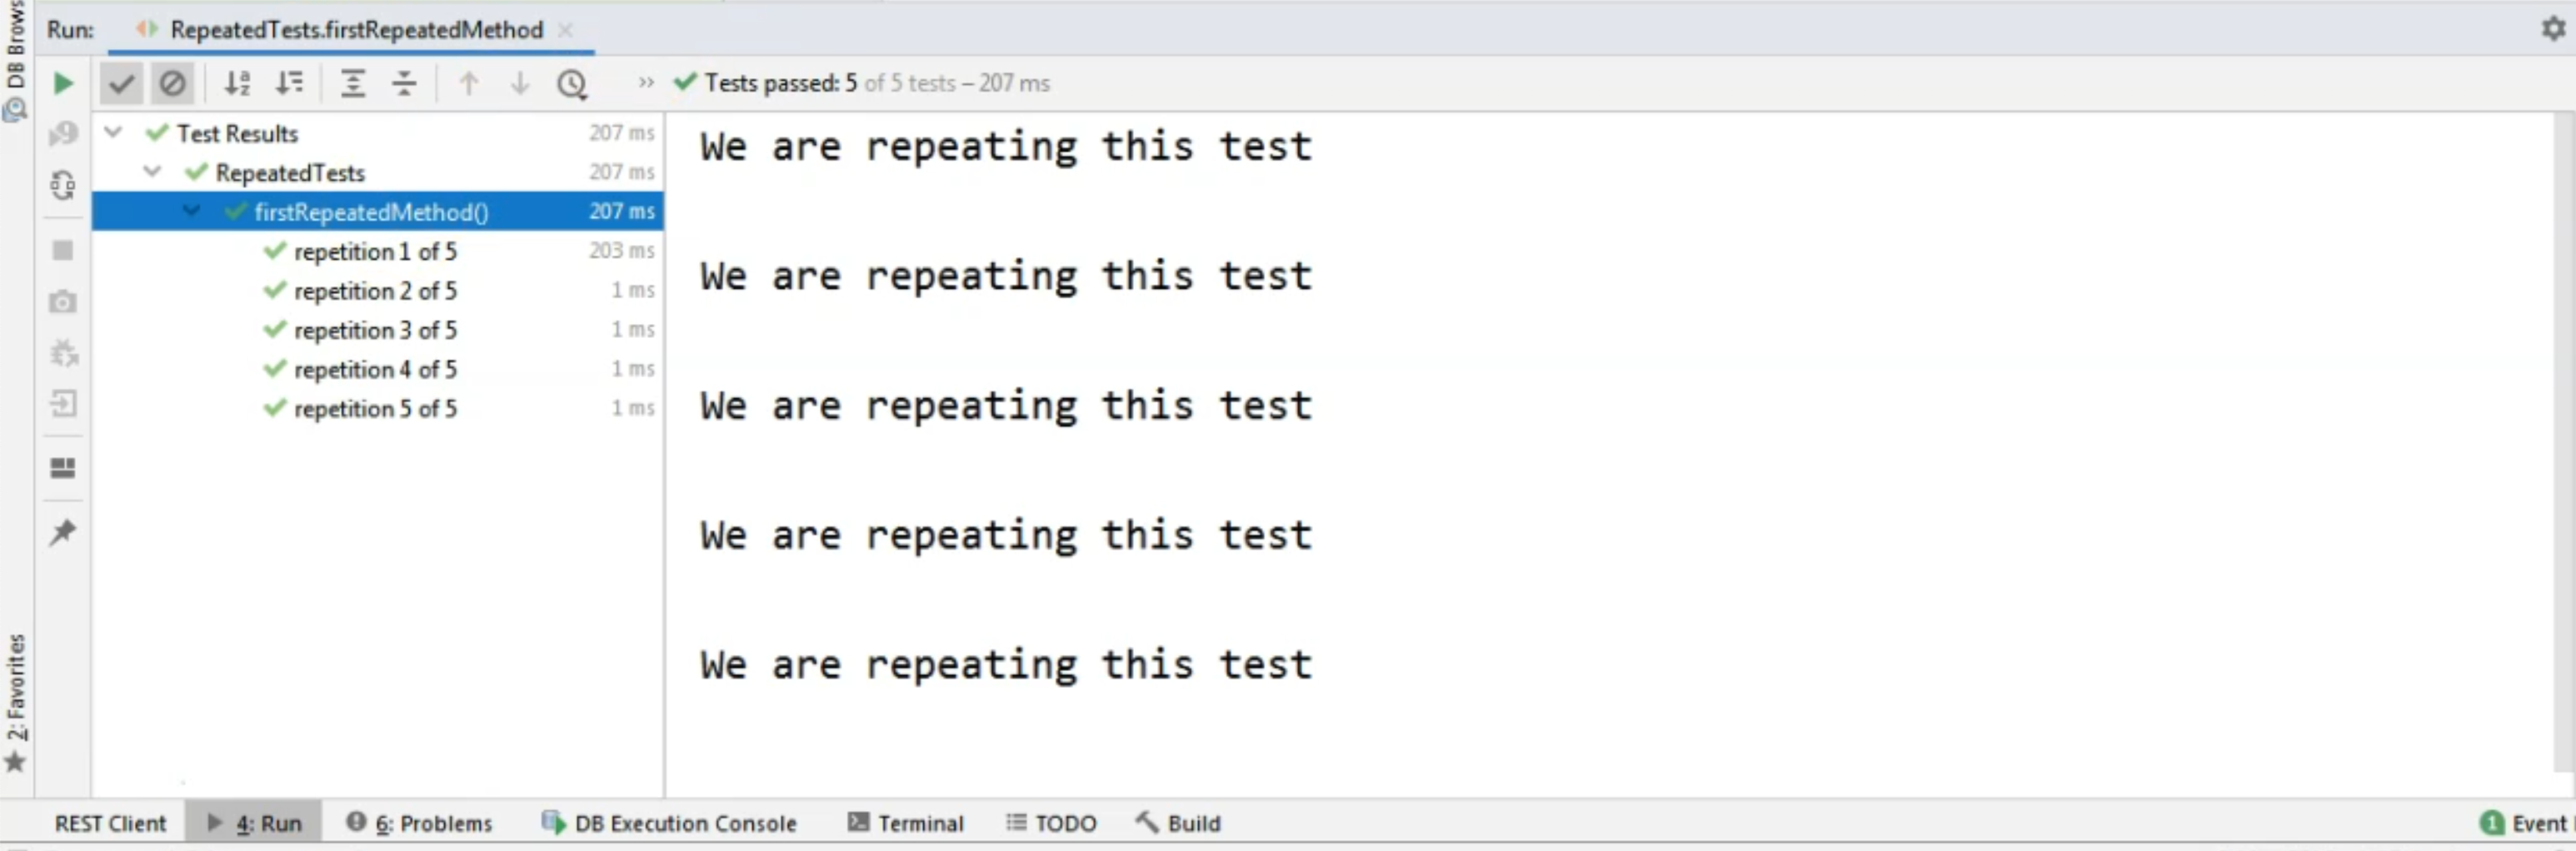
Of course, on the left-hand side, we will see the executions of the method.
We will take a look at this because here we will, first of all, get the name of the method.
So as you can see, our method is firstRepeatedMethod and on the left-hand side, we get the name of the method first.
Then we get a text that says, "repetition 1 of 5", "repetition 2 out of 5", and so on.
This repetition text is basically a sort of display name which is specific to the repeated test annotation.
If we want, we can update this and we can change it to something else.
Before we take a look at that, though, let's look at the right-hand side and let's see that we, in fact, have five System.outs of "We are repeating this test."
So our code from within the method executed five times.
Of course, in the test method, you will have something else, not a system output.
You will have your actual test method code and that code will be executed five times.
Now, let's say we want to change this display that we have for the repetitions.
In order to do that, we could create a brand new method, again, a @RepeatedTest method.
Let's say that this time we want to run it 3 times and we want a new name for it.
Now, if we want to also specify the name, as you can see, we also have to say that 3 is the value.
In our previous test, in the first one, we only provided the number - so how many times we want the test to be repeated.
However, if we also want to change the display name of the repetitions of the test method, then we will say that the value is 3.
Then we will say that the name is something specific that we want.
Now, in order to change this name to something that we are interested in, we can use the {currentRepetition} and{totalRepetitions}` variables in our text.
These are coming from JUnit and they will give us the numbers of the current repetition.
So, which is the test method run, out of the total repetitions number?
Let's say that I want my new name to be "Running repetition: {currentRepetition}. Total is {totalRepetitions}".
Now, I also wanted to create the method secondRepeatedMethod.
I'm going to do a System.out and I'm going to say, "We are repeating a new test."
    @RepeatedTest(value = 3, name = "Running repetition: {currentRepetition}." +
            " Total is: {totalRepetitions}")
    void secondRepeatedMethod() {
        System.out.println("We are repeating a new test");
    }
So what would change in this case is that instead of running the same test method five times, we are going to run it three times and we will have a different look in the "Run" pane.
Let's run this test and let's see that on the left-hand side, the text that we now have for each repetition name or display name, is different.
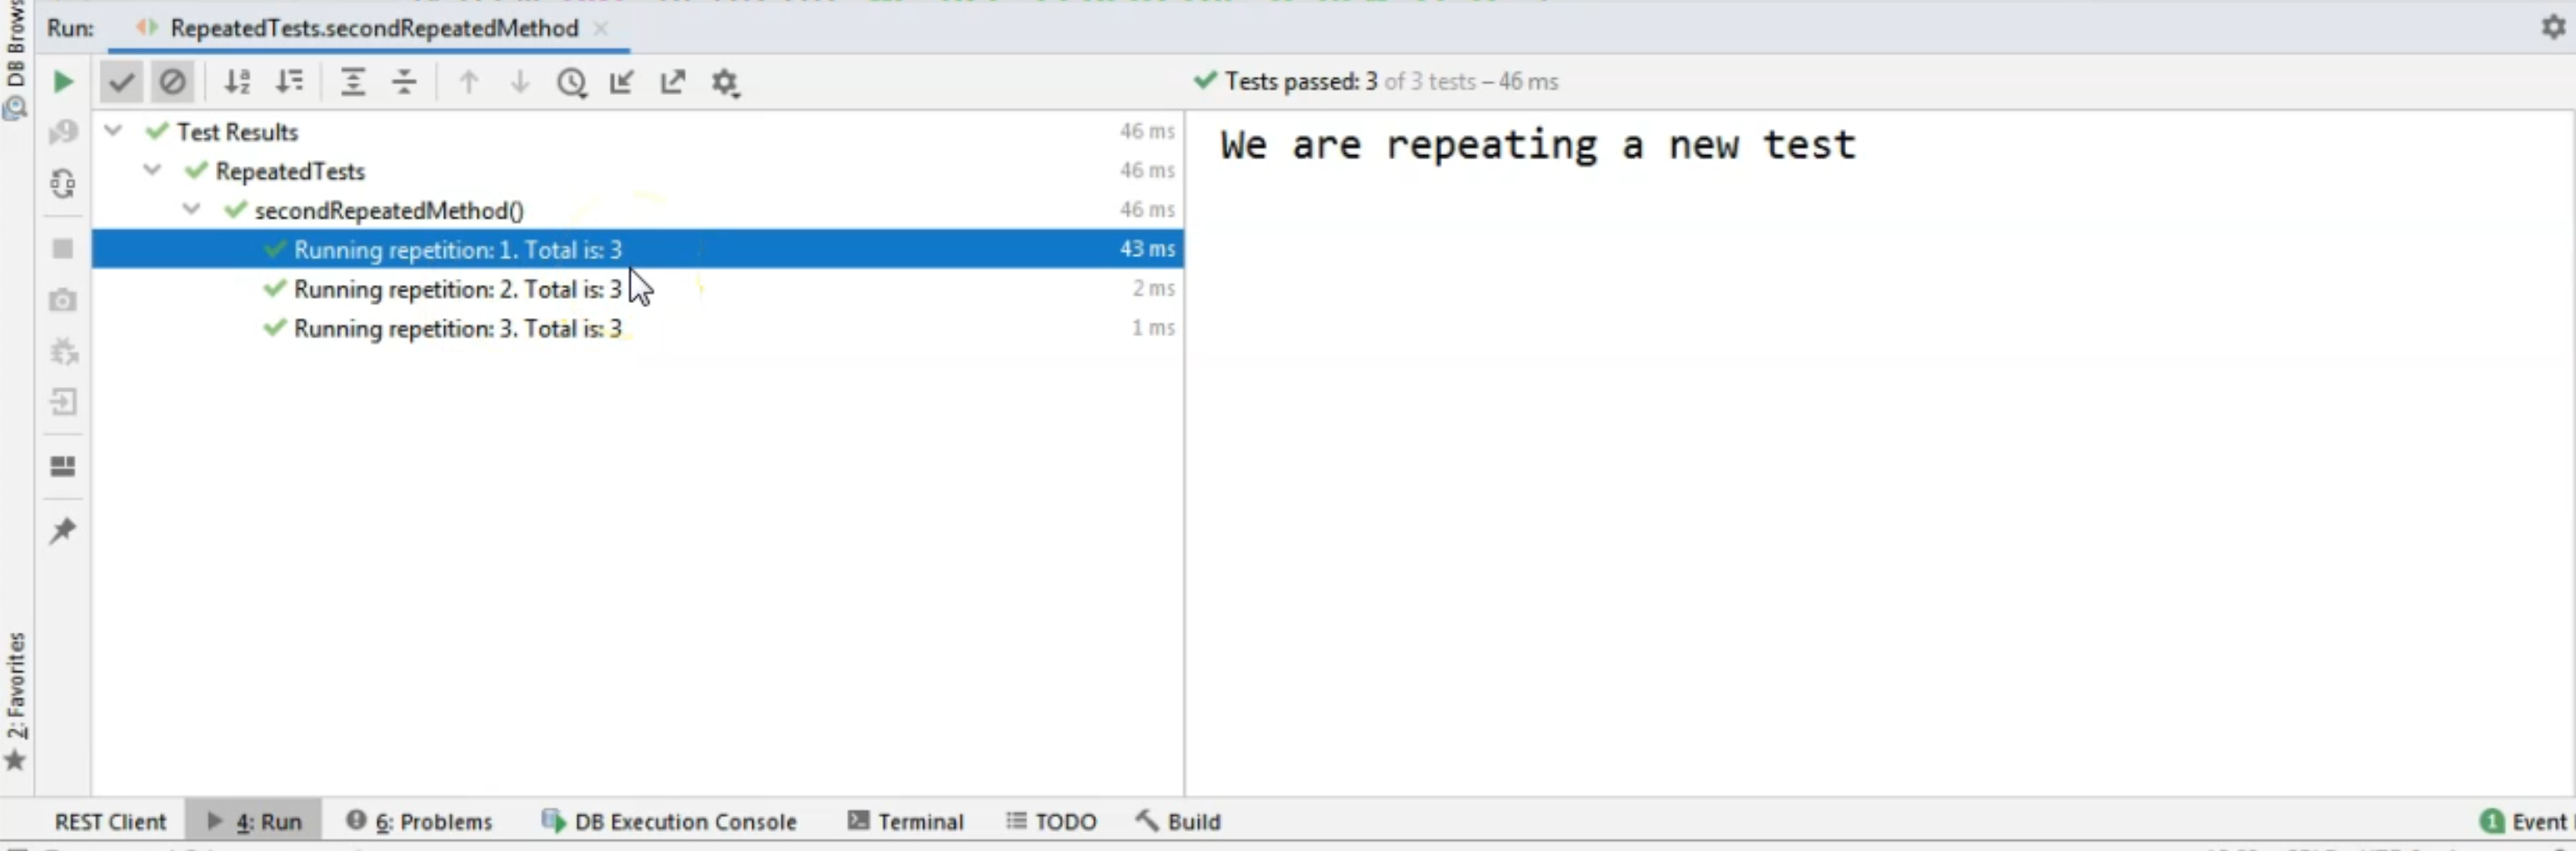
It says, "Running repetition: 1. Total is: 3." "Running repetition: 2", then "Running repetition: 3".
So we managed to change the name of the repetitions.
However, maybe we want to also change the fact that we have secondRepeatedMethod in the console output.
Maybe we want to change the name of the method itself. Maybe we want to use the @DisplayName annotation that we've introduced in one of the first chapters.
We can totally do that.
So we can add a further @DisplayName annotation here and say, "This is a repeated test method."
    @RepeatedTest(value = 3, name = "Running repetition: {currentRepetition}." +
            " Total is: {totalRepetitions}")
    @DisplayName("This is a repeated test method")
    void secondRepeatedMethod() {
        System.out.println("We are repeating a new test");
    }
So in this case, when we are going to run the test again, of course the part where we are describing the repetitions is going to be exactly the same, but the name of the method will not be here anymore.
Instead, we will have the display name.
So let's rerun the test and we can see that now we don't see the method name here anymore.
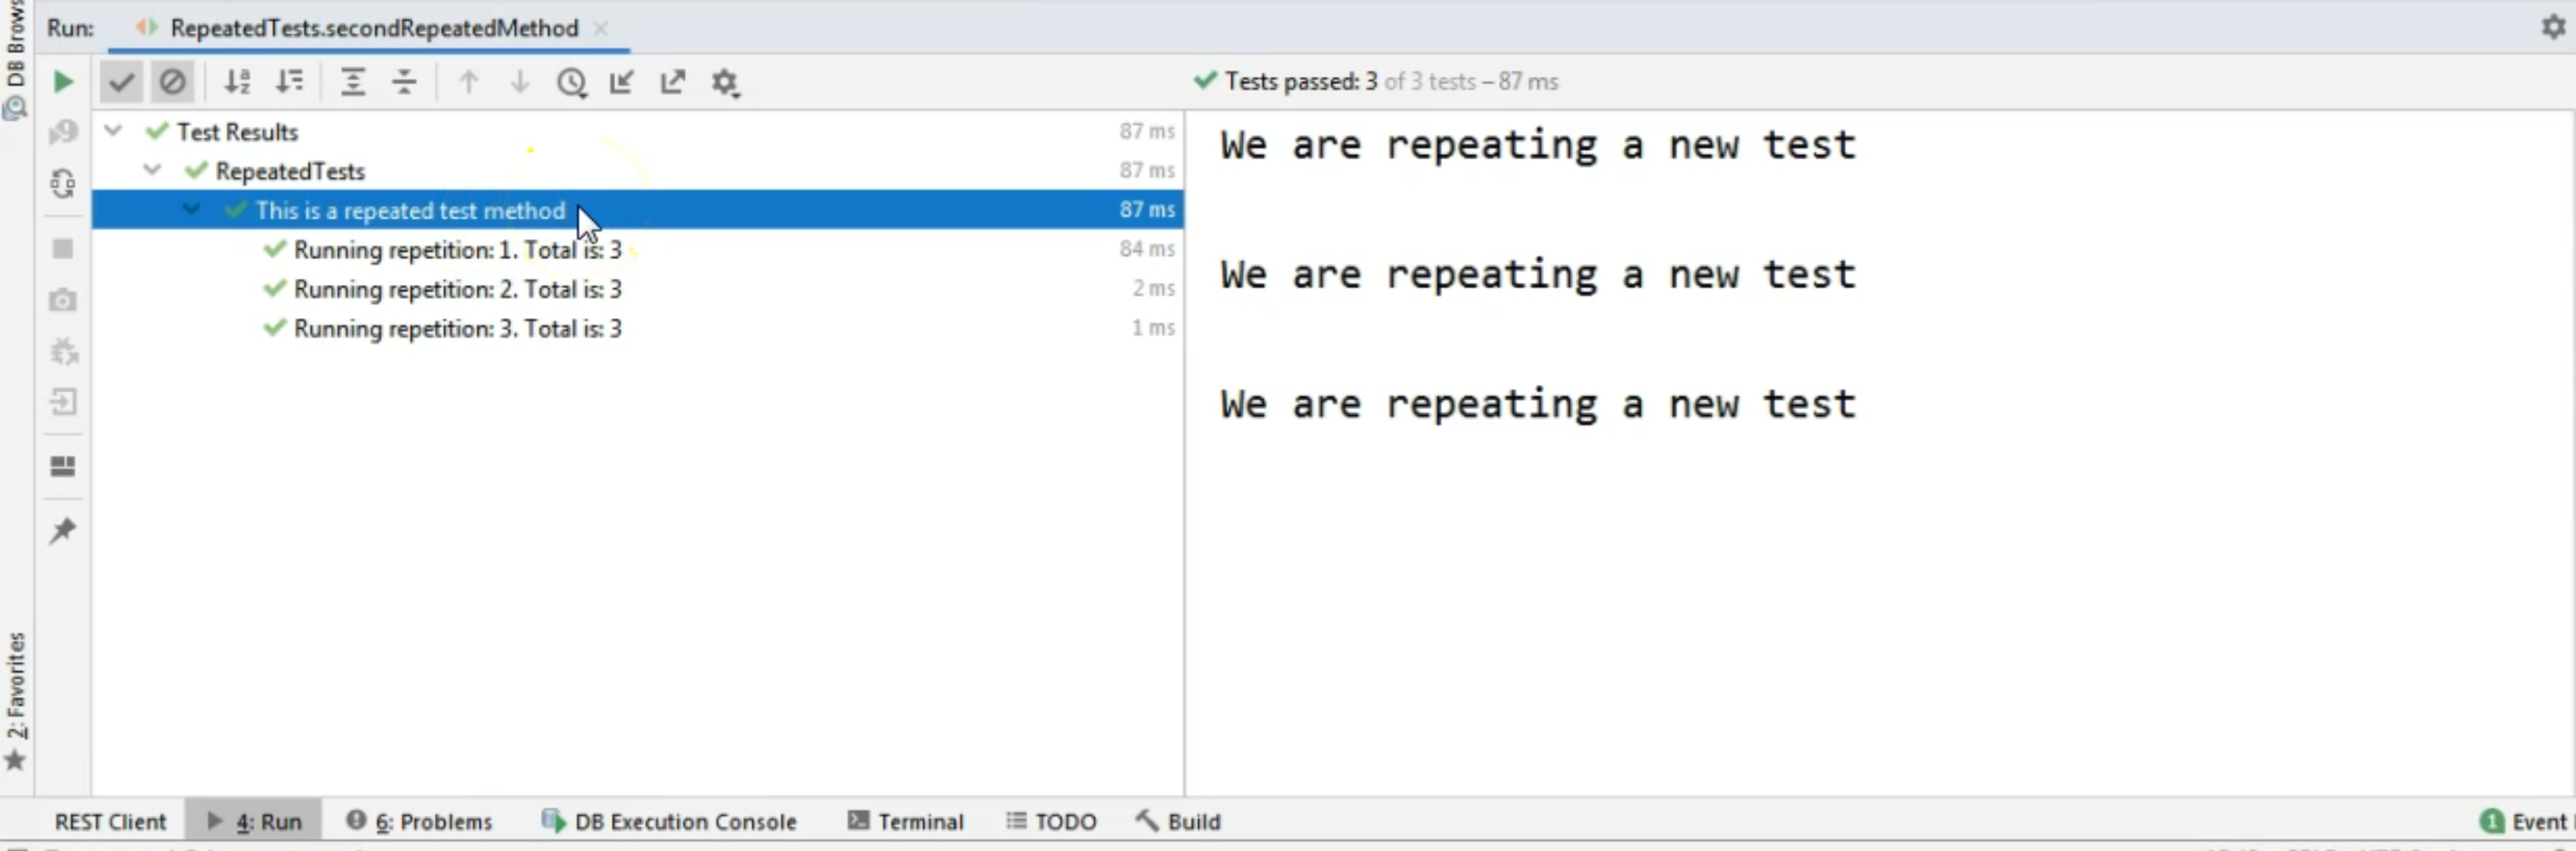
We only see the display name of the test method and then the custom name we have added here in the @RepeatedTest for each of the test repetitions.
Now, these repetitions are only useful if, for example, we are interested in what happens when a certain repetition occurs.
In this case, we would need to know inside the test, which is the number corresponding to the current repetition.
In order to find that out, we can easily provide this information to our test.
I will create a new test and I will say, @RepeatedTest and I want to run this one 3 times and I'm going to say, void thirdRepeatedMethod.
This time, I want to pass in a parameter here.
However, this is not a value that we will pass from another annotation.
This is something that is called RepetitionInfo.
This is something that we will receive from JUnit directly - we don't need to provide it in any way.
It comes by default because we are using this @RepeatedTest annotation.
Remember how we talked about assumptions in another chapter?
Well, here we can couple the assumption with the repetition info.
So we can say something like this in the System.out - "This code will run at each repetition".
Then, we can couple the code we have here, including the RepetitionInfo, with Assumptions.
So we can say that, assuming that repetitionInfo is 3, we are going to execute some further code.
For that, I'm going to call the Assumptions.assumingThat() method and I'm going to say, repetitionInfo..
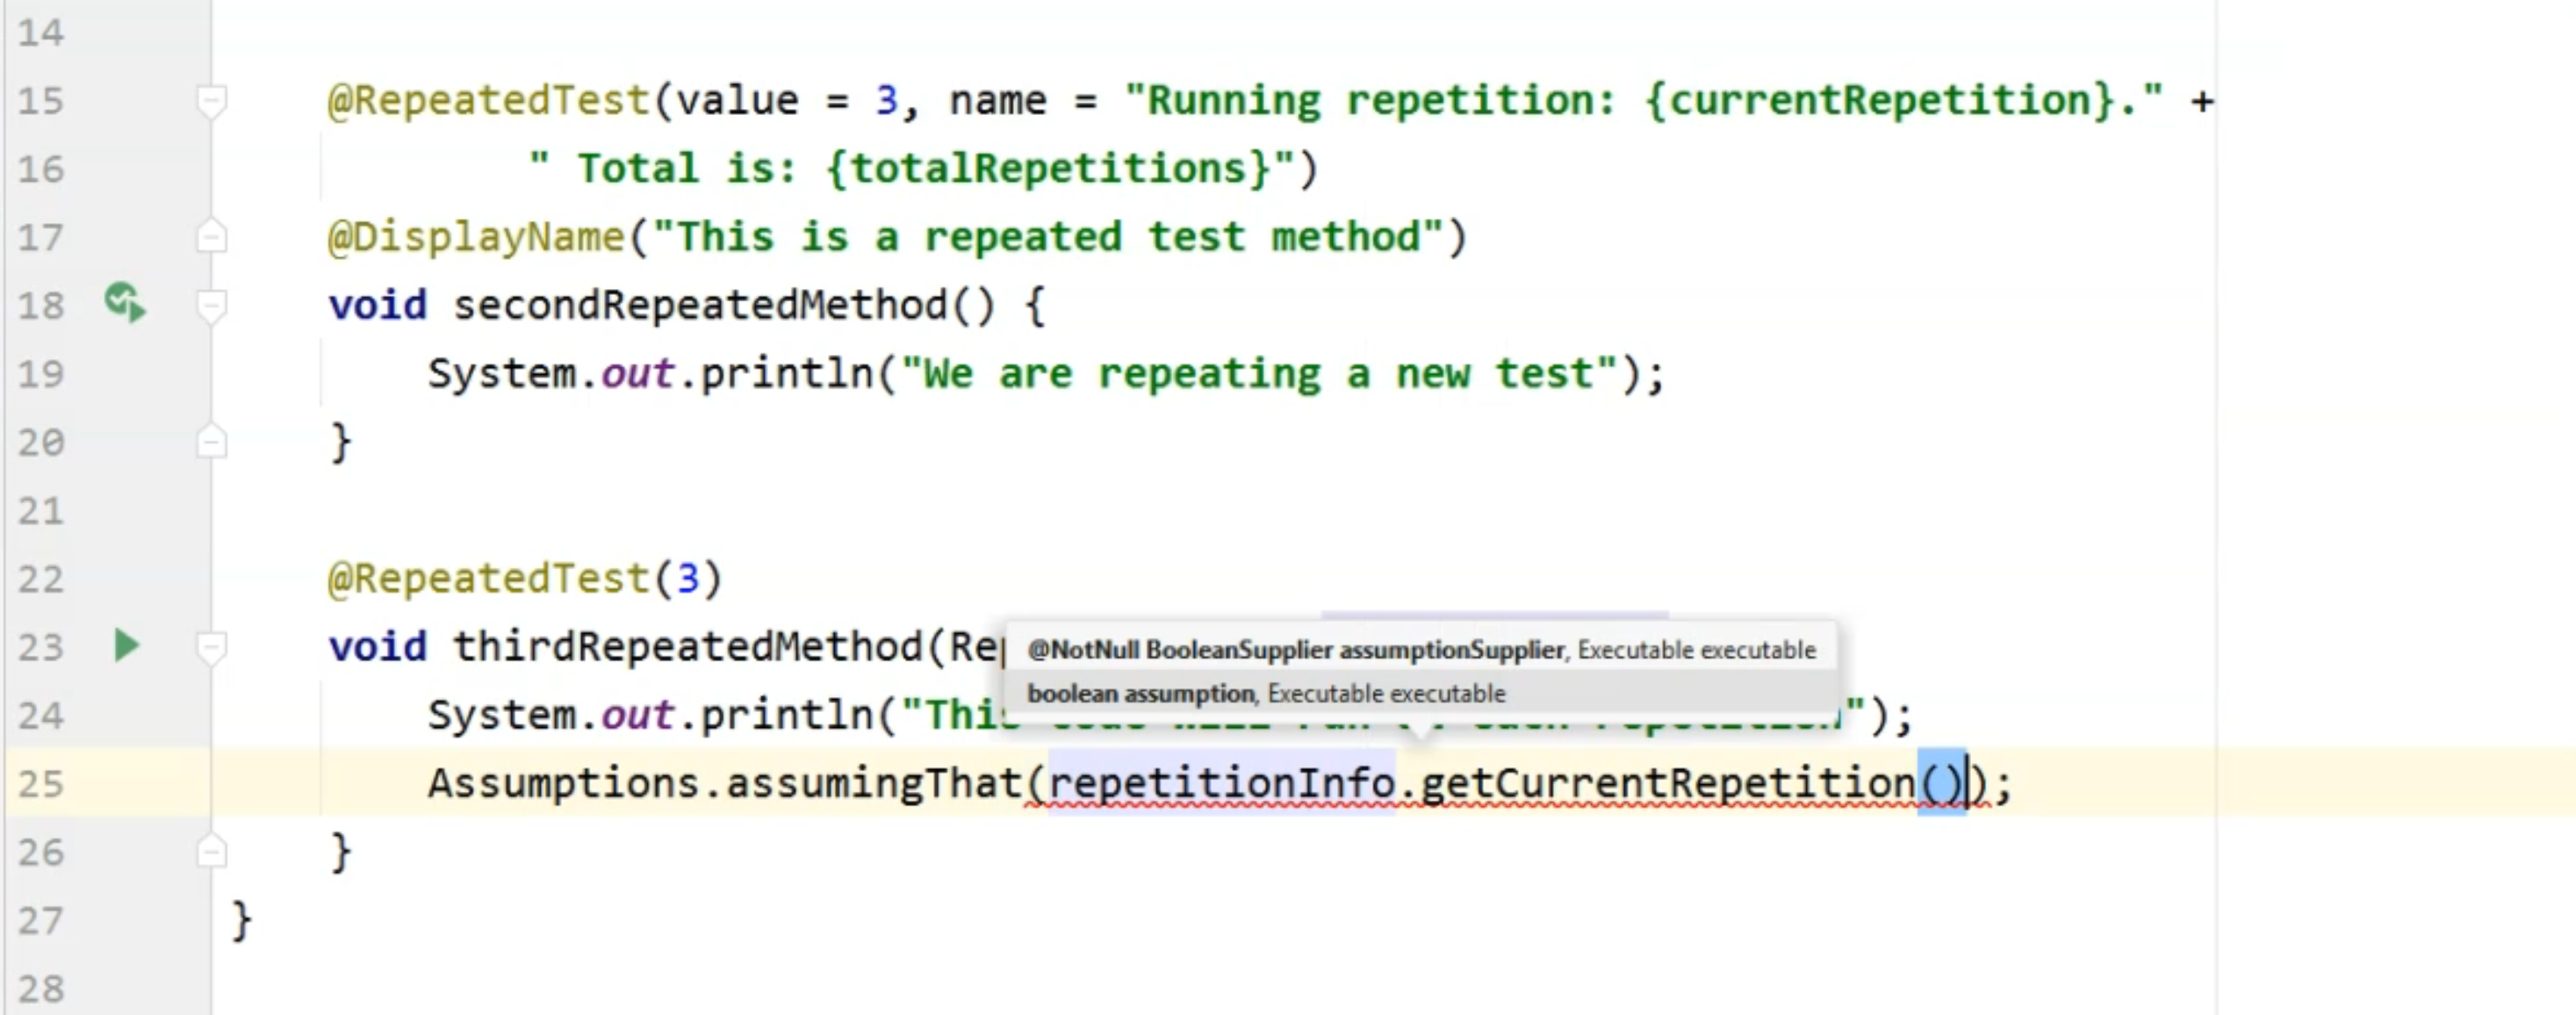
Here, I can obtain which is the current repetition as an int by calling the getCurrentRepetition() method.
So assuming that the current repetition is 3, then I'm going to do something.
In my case, I'm just going to do a System.out and I will say, "This code only runs for repetition 3."
So in this case, because I have information regarding which repetition the current one is, I can execute some additional code without having to use any ifs inside my test method. \
    @RepeatedTest(3)
    void thirdRepeatedMethod(RepetitionInfo repetitionInfo) {
        System.out.println("This code will run at each repetition");
        Assumptions.assumingThat(repetitionInfo.getCurrentRepetition() == 3,
                () -> System.out.println("This code only runs for repetition " +
                        "3"));
    }
}
Let's run this one again and see the output in the console.

In this case, I didn't change the display names at all.
I just added the repetition info.
As we can see on the right-hand side, for the first two test method runs, we only had the first System.out executing, while at the third run of the same method, we executed the first and the second System.outs because the condition was met.
The current repetition was three.
So this is a way you can run the same code inside the methods several times without having to do any for, whiles, ifs, and so on.
So use the @RepeatedTest annotation.
