

Transcripted Summary
Need a way to debug your work? Capybara has a built-in way to save screenshots.
Going to the GitHub site for Capybara, under the DSL there's a section marked debugging.
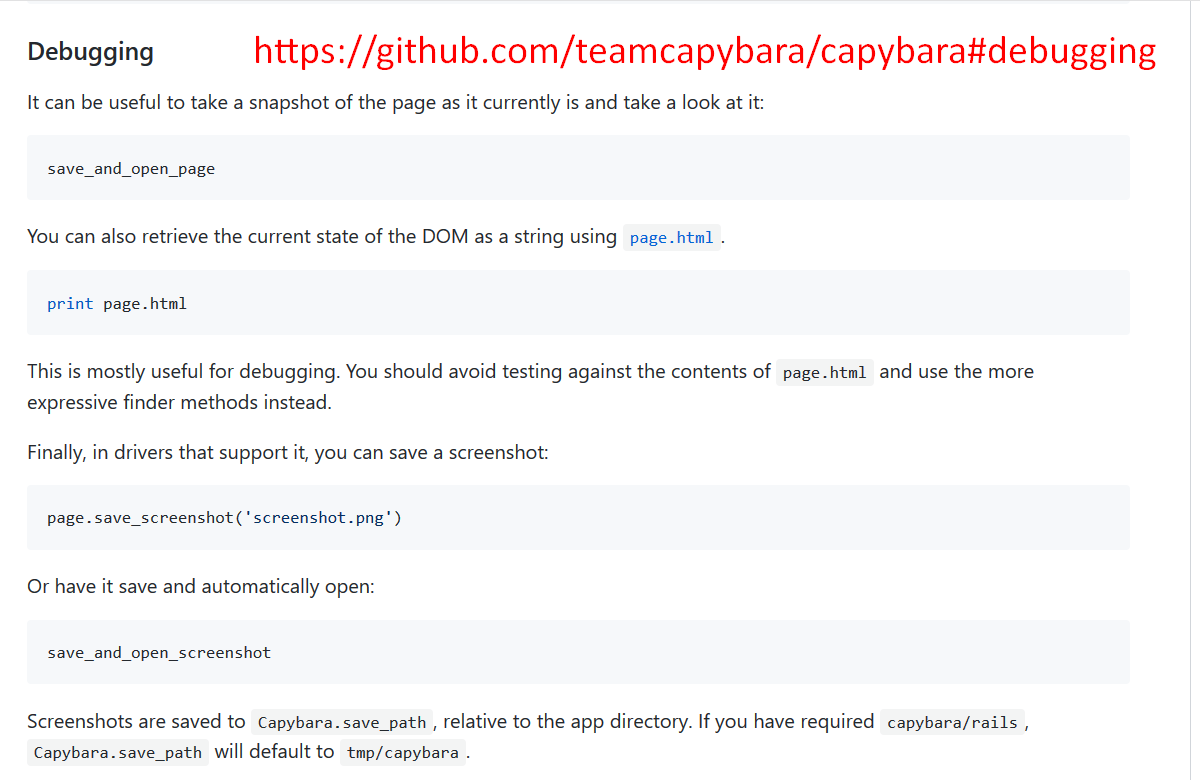
We'll go over two ways you can start debugging: save_and_open page and save_and_open_screenshot.
As it says in the documentation, screenshots will automatically default to a temp directory: tmp/capybara
To see a code example, let's go to our TAU Capybara demo project that I've created and drill down into advanced topics. Let's go into debugging with save and open.
For this project, we're going to need the Capybara Ruby gem in order to have access to the built-in Capybara commands, the RSpec test framework, Selenium WebDriver, and another gem called Launchy.
To find out more about this gem, we go to rubygems.org and search for “Launchy”.
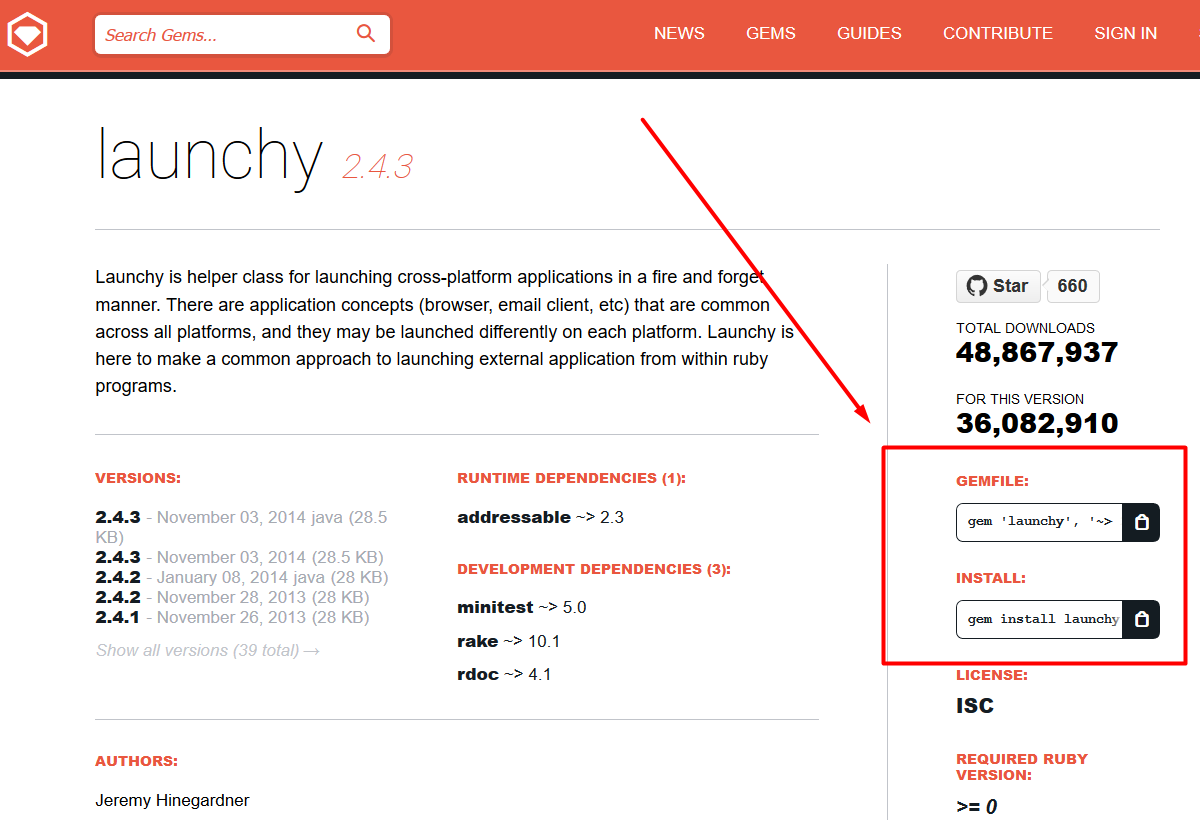
As you can see, Launchy is a pretty old program back in 2014. Launchy will allow us to open both pages in screenshots after we've saved them.
To install, copy the gemfile to the clipboard, and paste it into your gemfile.
# Example Test with Capybara + RSpec – 01_debugging_with_save_and_open: Gemfile
source 'https://rubygems.org'

gem 'capybara', '~> 3.13', '>= 3.13.2' # Released: January 24, 2019
gem 'rspec', '~> 3.8' # Released: August 4, 2018
gem 'selenium-webdriver', '~> 3.141' # Released: November 1, 2018
gem 'launchy', '~> 2.4', '>= 2.4.3' # Released November 3, 2014
Going into our spec_helper, you can see it's much like our other projects where we're requiring bundler to install dependencies and execute the RSpec tests.
# Example Test with Capybara + RSpec – 01_debugging_with_save_and_open: spec_helper.rb
require 'bundler'
require 'capybara/dsl'
require 'capybara/rspec'

Bundler.setup(:default)
Bundler.require

Capybara.default_driver = :selenium_chrome
Capybara.app_host = 'https://the-internet.herokuapp.com'
Capybara.default_max_wait_time = 10

# Set the save directory.
Capybara.save_path = 'tmp/capybara'

RSpec.configure do |config|
  config.formatter = :documentation
end
We're requiring Capybara DSL to have access to the built-in Capybara methods. We're including Capybara RSpec in order to set up our test framework. Let's have our default driver be Selenium Chrome. Our app_host, we're going to _the_internet. _
But the one difference that we have is we're setting up the save_path for the screenshots to be tmp/capybara.
Our test will be very simple — checking that the save and open page works.
# Example Test with Capybara + RSpec – save_and_open_page_spec.rb
feature 'Debugging' do
  background do
    visit '/'
  end

  scenario 'save_and_open_page' do
    save_and_open_page
  end
end
Here the feature we're testing is “Debugging”, going to the main page, and we're checking the save and open functionality.
With save_and_open_page you can place this command anywhere in order to check that the page looks the way you expect it to when you're debugging.
Let's kick off the test.
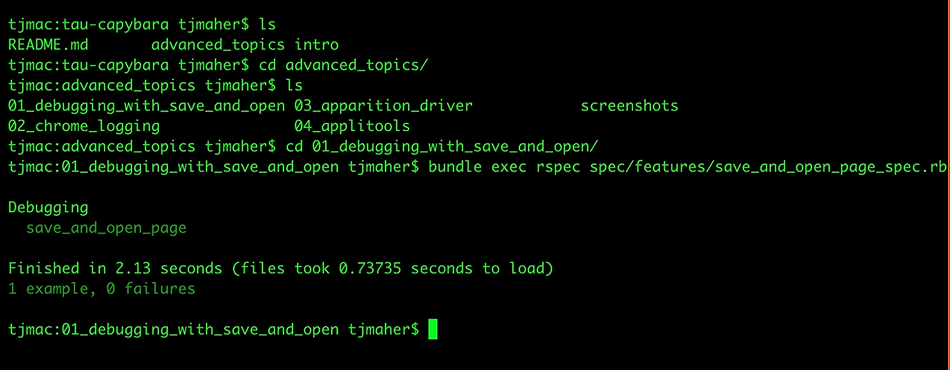
In our project, you can see there's 2 categories: intro and advanced topics.
Going into advanced topics:
cd advanced_topics
We're going to look for debugging with save and open; let's change directory to that:
cd 01_debugging_with_save_and_open
Let's use bundle to execute our RSpec tests in the spec features folder. We're going to be running the save and open page specification we were just looking at:
bundle exec rspec spec/features/save_and_open_page_spec.rb
Our test passed!
We ran the debugging scenario, which saved and opened the page.
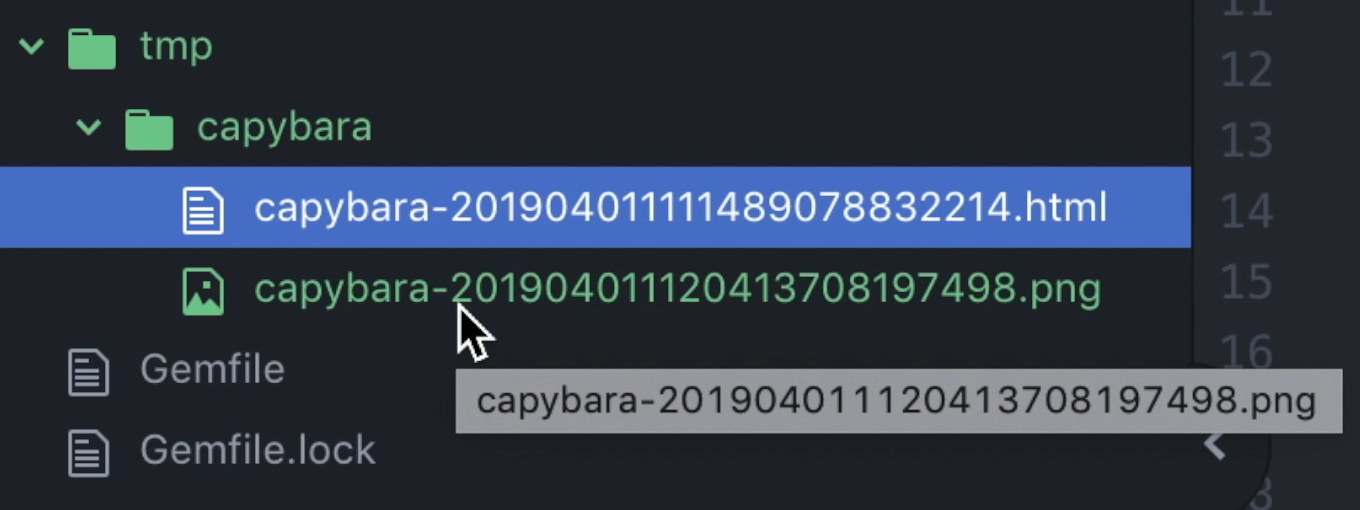
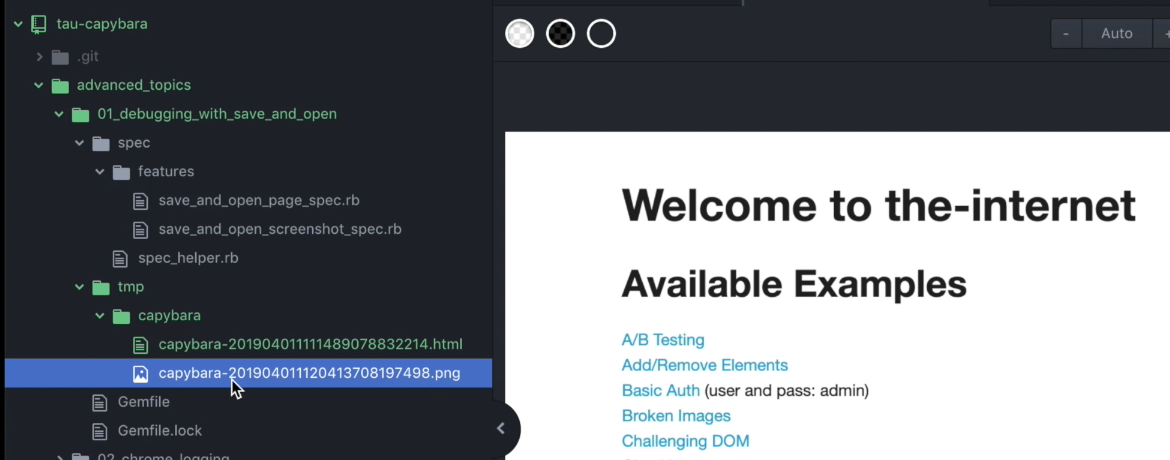
We can see a new temp folder has been created with a Capybara sub-folder, which contains a copy of the page we were looking at, the saved copy of all the HTML of the page.
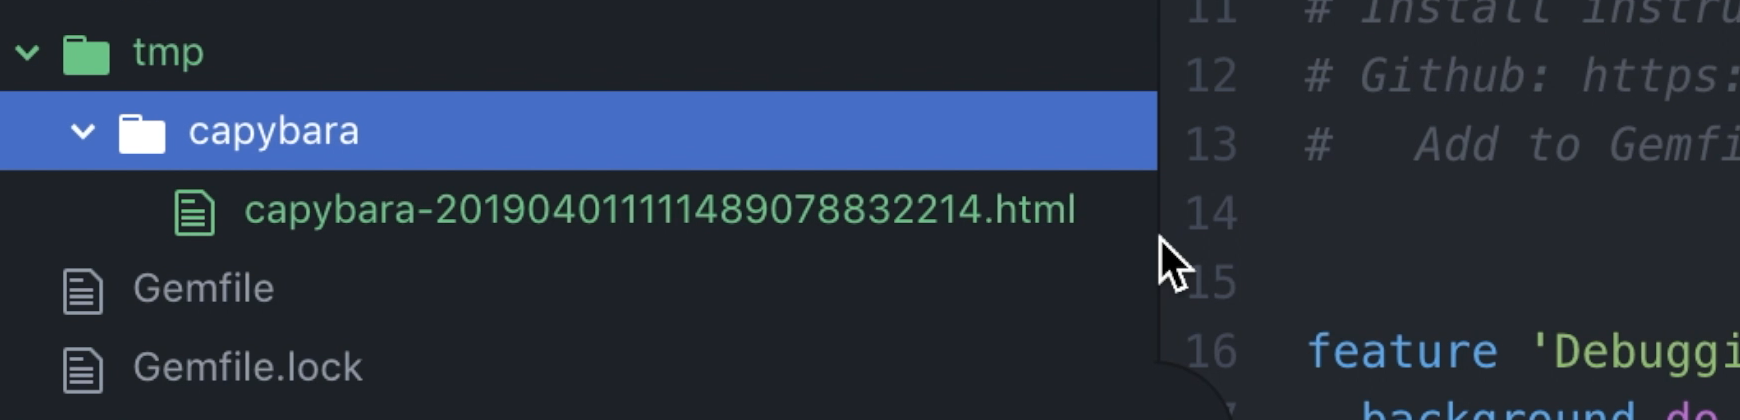
It also saved and opened an un-styled version of the page.
This is the live versions of the page with all the style sheets intact.
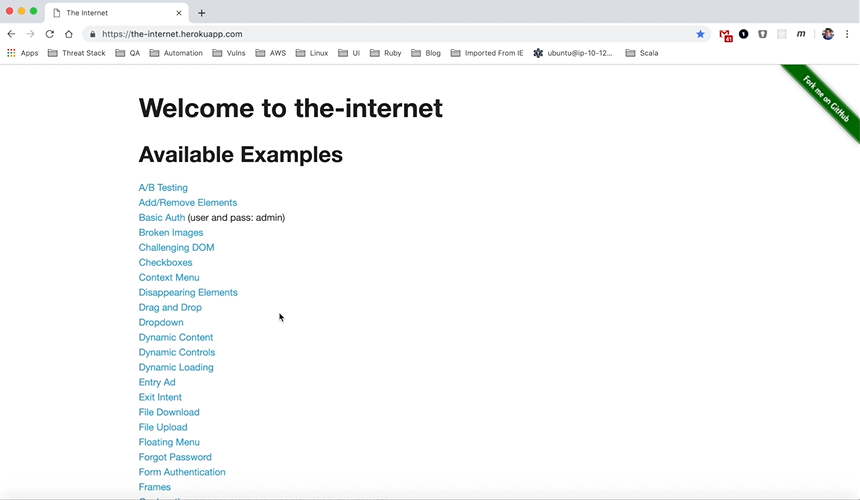
And this is the saved page without the style sheets active.
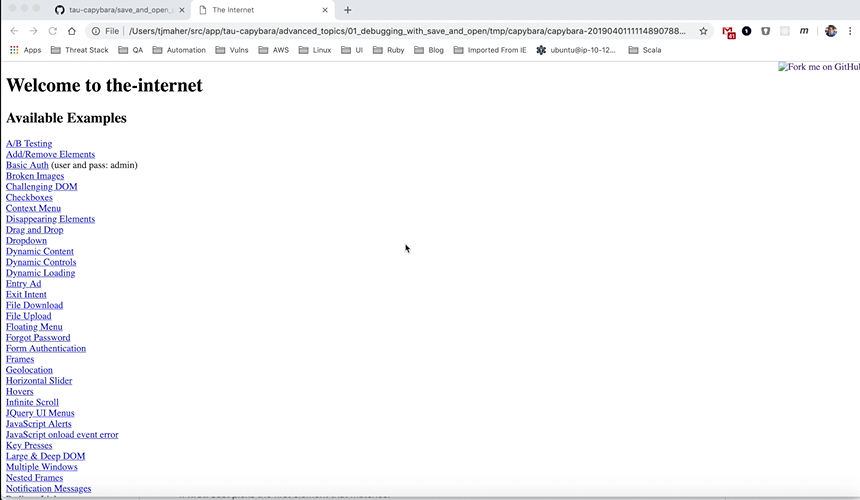
If, say, a web element was missing at that time, we'd be able to review this page and find the error.
Now let's go into save and open screenshot.
Let's say we come across an error which we can't seem to reproduce. By placing anywhere in our Capybara framework — save_and_open_screenshot — we can save a screenshot and have it open to take a look at it.
Example Test with Capybara + RSpec – save_and_open_screenshot_spec.rb
feature 'Debugging' do
  background do
    visit '/'
  end

  scenario 'save_and_open_screenshot' do
    save_and_open_screenshot
  end
end
All of this is because of the Launchy gem, which I can use for Capybara testing.
Here in our advanced topics directory, we're going to change the directory back to:
cd 01_debugging_with_save_and_open
And we're going to run bundler to execute the RSpec test for save and open screenshot:
bundle exec rspec spec/features/save_and_open_screenshot_spec.rb
And here we can see in the temp Capybara folder of our project, we have the page saved as a PNG file.
It assumed the test was run, the screenshot opened.
save_and_open page and save_and_open_screenshot are very good with debugging problems which don't always occur.
Sometimes tests go by so fast it's very hard to see what's actually happening on the page. With these two commands, you can take a snapshot of exactly what is happening. If there is any error messages, if there is any web elements that are supposed to be appearing that aren't appearing, those two commands are very good for debugging purposes.
Resources
Quiz
The quiz for this chapter can be found in section 7.4
