

Transcripted Summary
So far with Capybara, we've seen that as a very good tool when it comes to acceptance testing and functional testing. If you have a login page, if you want to make sure you can enter your username, a password, and click the login button, Capybara is a wonderful tool.
But what if you want to check that the title is correct or if any text on the page is correct?
If you wanted to verify that the actual web element on the page met the expected value of the element of the page, you would have to write a test for each and every web element, making sure the title is correct, the text, the username text box, the password text box, the login button, the footer, the font size.
It would really be a big headache.
Applitools performs visual validation where you can set it up to take screenshots of your application as it's running.
You can develop a baseline of how the product should look. You can fine tune what areas you want to check and focus on, and what areas you want to leave out. And after the baseline is generated, you can compare that baseline with every other time the tests are run and you can tell what passes and what fails.
Applitools provides documentation to pair itself with a multitude of automation frameworks. To see Applitools's tutorials, just go to applitools.com/tutorials.
Let's take a look at the Capybara Tutorial.
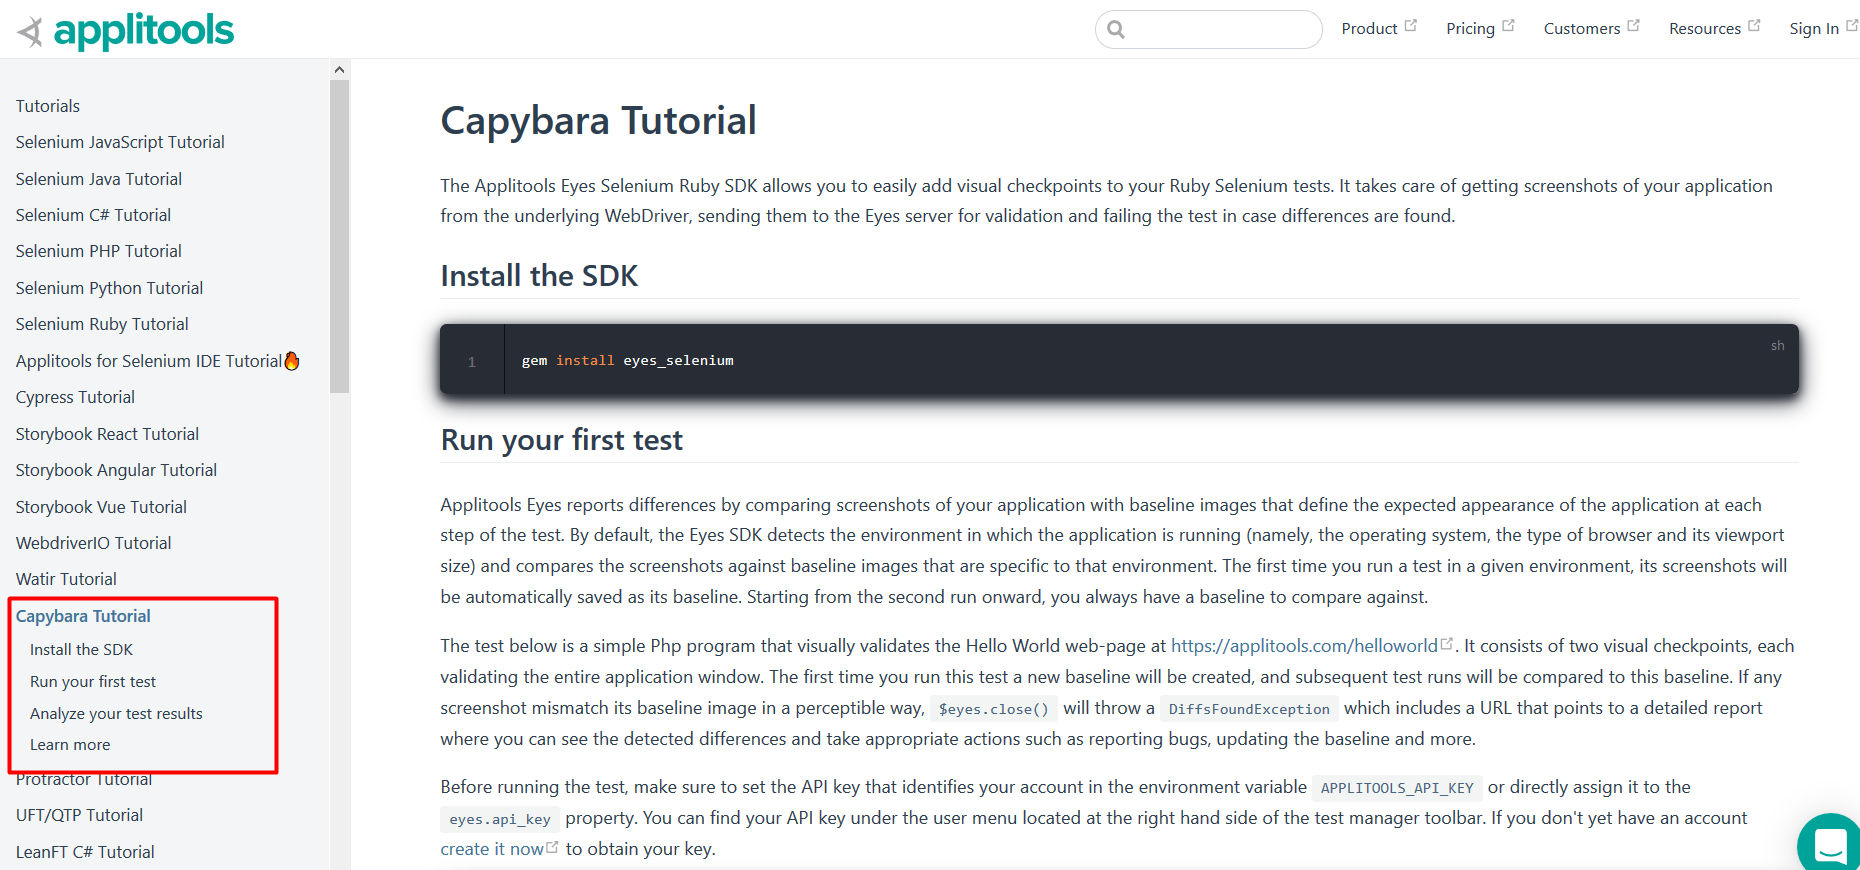
In order to set up Applitools to work with our framework, you need to install the software development kit [SDK].
In order to install the software development kit, you can install it directly with:
gem install eyes_selenium
Or you can figure out how to install it into your gemfile by going to rubygems.org, search for Applitools and search for “eyes_capybara”.

You can see the latest version is version 3.14 released on March 13th [at the time of this recording]. We can copy this to the clipboard and paste it into our project’s gemfile.
Here you can see in our gemfile, we're using the gems of Capybara, RSPec and Selenium WebDriver.
# Example Test with Capybara + RSpec – Applitools: Gemfile
source 'https://rubygems.org'

gem 'capybara', '~> 3.13', '>= 3.13.2'
gem 'rspec', '~> 3.8'
gem 'selenium-webdriver', '~> 3.141'
gem 'eyes_capybara', '~> 3.14', '>= 3.14.10'
To run our first test, we're going to base it on the code that Applitools provides.
What you're seeing is another version of the RSpec test that we've been using.
- Instead of using the alias
feature, it uses the worddescribe - Instead of talking about scenarios, it sets it up with the
itkeyword
Personal Preference
If you view the Capybara README, and click on using Capybara with RSpec, you can see they set up something similar. When I was working on this project, I found that Capybara's built-in DSL for creating descriptive acceptance testing a lot more readable.
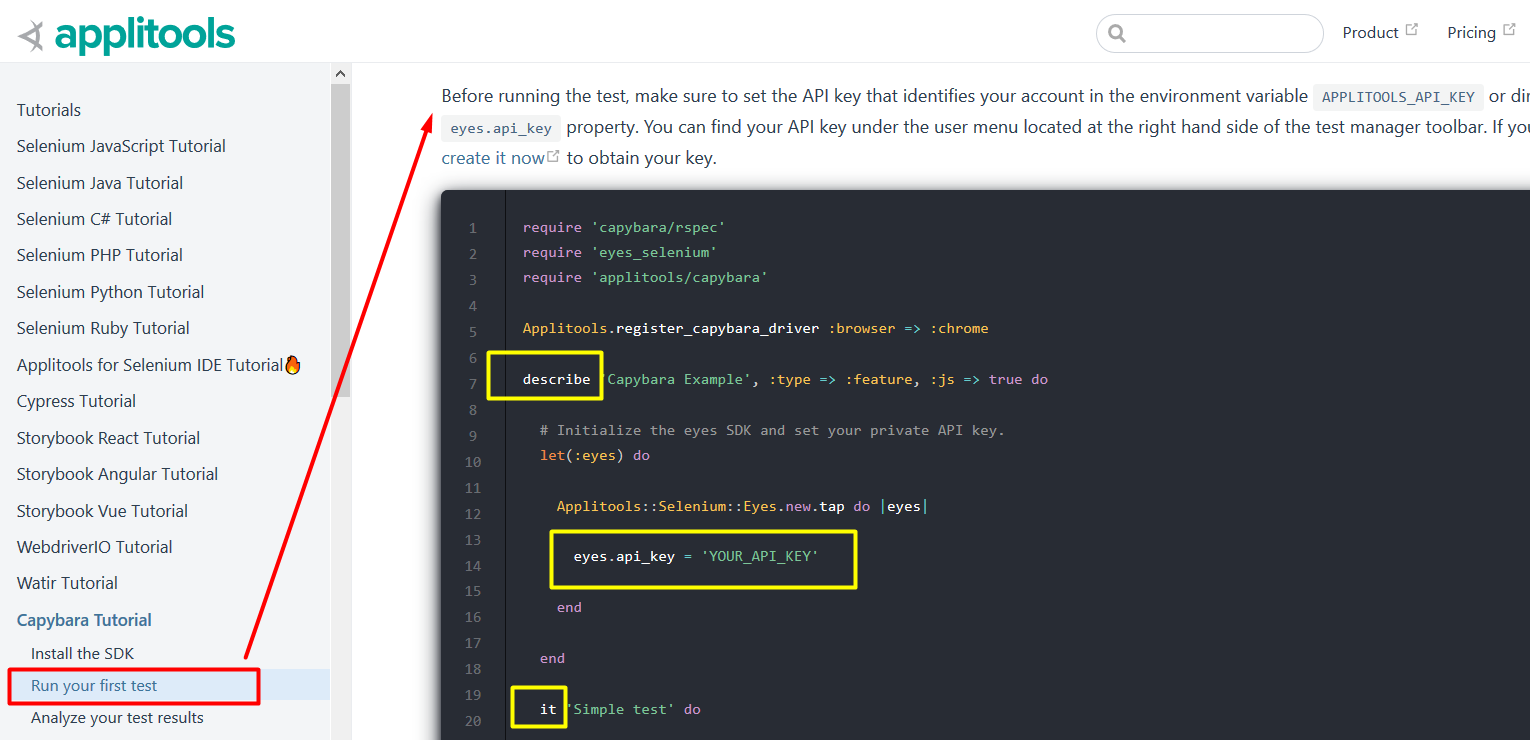
Before running the test, we need to get an Applitools API key.
You click on “create it now” and see that you can sign up for a free account through applitools.com/users/register.
Once you've created an account for Applitools, you have access to their dashboard where you can run tests and manage the test results.
Applitools does provide code for us to write our test, bringing us back to the tutorials page.
What we're going to do is write our own test based on this code.
Okay, when setting up our project, we've already added the eyes_capybara gem to the gemfile.
In our spec_helper file, we're going to require eyes_selenium and eyes_capybara, and we're going to set the Applitools property register_capybara_driver to Chrome.
# Example Test with Capybara + RSpec – Applitools: spec_helper.rb
require 'bundler'
require 'capybara/dsl'
require 'capybara/rspec'

require 'eyes_selenium'
require 'eyes_capybara'

Bundler.setup(:default)
Bundler.require

Capybara.default_max_wait_time = 10
Capybara.app_host = 'https://the-internet.herokuapp.com'

Applitools.register_capybara_driver :browser => :chrome

RSpec.configure do |config|
  config.formatter = :documentation
end
For our test, let's go to the-internet Login Page, enter "tomsmith” and the "SuperSecretPassword!", as the username and password — and we will ;og into the secure area and log back out.
# Example Test with Capybara + RSpec – Applitools: 01_login_and_logout_spec.rb
require 'spec_helper'

describe 'Applitools Capybara Example', :type => :feature, :js => true do

  # Initialize the eyes SDK and set your private API key.
  let(:eyes) do
    Applitools::Selenium::Eyes.new.tap do |eyes|
      eyes.api_key = APPLITOOLS_API_KEY
    end
  end

  it 'Login Page: Valid Credentials Login to Secure Area' do

    # Start the test and set the browser's viewport size to 800x600.
    eyes.open(app_name: 'The-Internet!', test_name: 'Login and Logout', driver: page.driver,
              viewport_size: { width: 800, height: 600 })

    # Go to the Login Page. Create: Visual Checkpoint #1.
    visit '/login'
    eyes.check_window('Login Page!')

    # Login and create: Visual Checkpoint #2.
    login('tomsmith', 'SuperSecretPassword!')
    eyes.check_window('Secure Area!')

    # Logout and Create: Visual Checkpoint #3
    logout_of_secure_area
    eyes.check_window('Back to Login Page!')

    # End the test.
    eyes.close

  end
end

def login(username, password)
  fill_in('Username', with: username)
  fill_in('Password', with: password)
  click_button('Login')
  expect(page).to have_css('h2', text: 'Secure Area')
end

def logout_of_secure_area
  find('a.button').click
  expect(page).to have_css('h2', text: 'Login Page')
end
We're going to name the test “Applitools Capybara Example", and just as according to Applitools's instructions, we're going to create a new instance of Applitools and insert the Applitools API key.
With our feature test, we can describe/it as “Login Page: Valid Credentials Login to Secure Area”.
First, we initialized our eyes class. In this test, we're going to use it, by doing the eyes.open command.
With this test, that's going to be pretty simple: the eyes.open, the eyes.check_window and the eyes.close.
When the eyes.open we're going to start setting properties for a project such as:
- The
app_name— let's call it “The-Internet!” - The
test_name— let's call it “Login and Logout” - The `driver — will be “page.driver”
- Let's set, as according to the instructions, the
viewport_size— let's have it be like an 800 by 600 screen.
Now that eyes is initialized, we're going to visit the login page, we're going to take a screenshot using the check_window method, and let's call the screenshot “Login Page!”.
We're going to login. We're going to take a screenshot of the secure area.
We're going to logout_of_secure_area and take another screenshot, checking that we're back to the Login Page.
Ending the test, the eyes are going to close with eyes.close.
This login method is something that we've defined [as we did in previous lesson], where we feed into this login method, a username, a password, fill the username text box with username and the password with the password. Click the button saying “Login” and expect(page).to have_css with the header level 2 with text “Secure Area”.
Log out — logout_of_secure_area — we don't really need to pass any parameters into this method. All we need to do is click on the button and expect(page).to have_css header level 2, with a text of “Login Page”.
Now, let's run the test.
Okay, in our TAU Capybara project, let's change directory:
cd advanced topics/
Let's go into the Applitools project:
cd 04_applitools/
And to kick off the tests have Bundler execute the RSpec tests in the spec folder :
bundler exec rspec spec
The test is running, the browser's opened up, and the browser closed.
If you go back to the Applitools dashboard, you can see that we have a new test.
Clicking on Login and Logout, you can see 3 screenshots that we took as the application was running; the login page that we first visited, the secure area, and back to the login page.
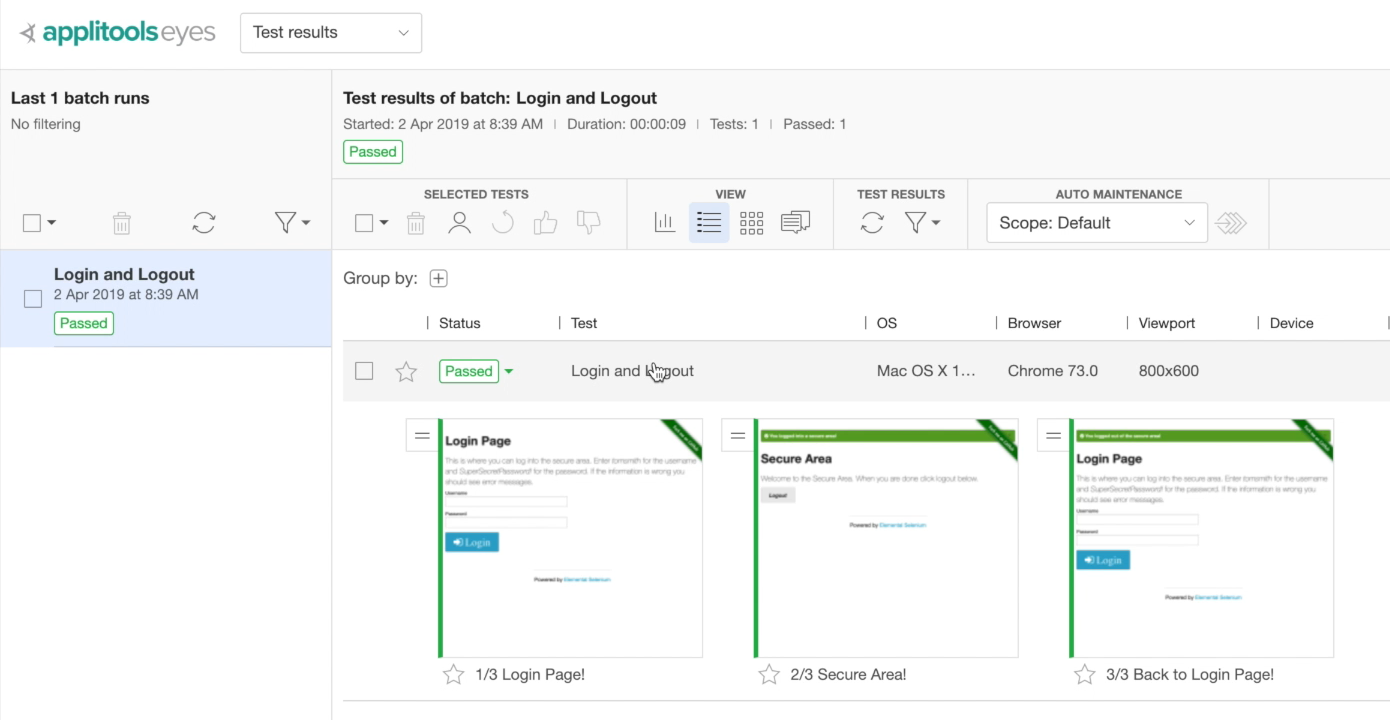
How do these pages look? Do they look correct?
If so, you can give it a thumbs up and save the changes to the baseline. We could also give them some was up to the thumbnails.
Hovering the cursor over the screenshots, you can see you can accept the changes, reject changes, highlight any differences, show the baseline image, and open up the screen in the step editor.

And once you give everything to the thumbs up, you can save everything to the baseline.
Let's say the color of the login page changed. The style changed. Any pieces to the text changed, the username just appeared, the footer disappeared. The “Fork me on GitHub” banner disappeared.
Because Applitools compares and contrasts screenshots, the entire page of the UI and all of its web elements will be tested in order to perform visual validation.
Learn More about Visual Testing with Applitools
If you want to learn more about Applitools, Test Automation University has a great introductory course by Angie Jones called Automated Visual Testing with Java.
# Wrapping It Up
Well, that's the end of our course. I hope you had as much fun taking the course as I did creating it.
Want to learn more about Capybara? Make sure to go to teamcapybara.github.io/capybara to to get all the latest information about Capybara.
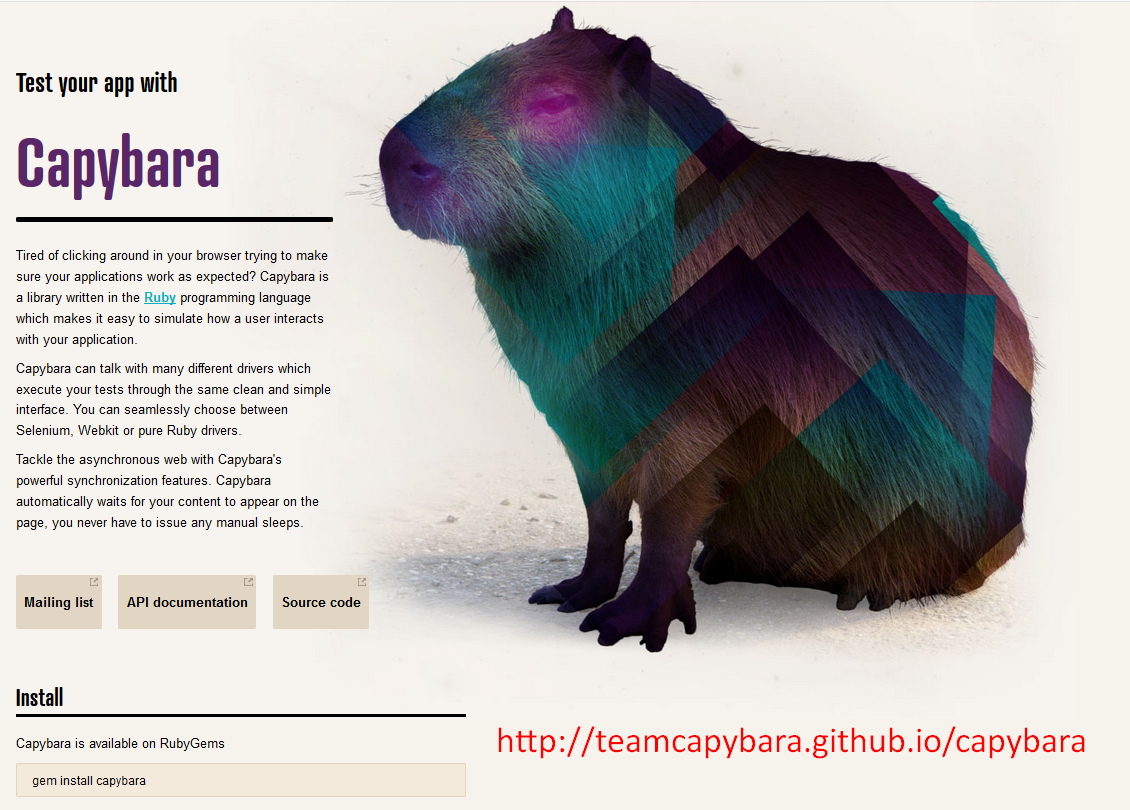
You can see links to the mailing list, the API documentation, and the Ruby doc and the source code contained in the team Capybara GitHub site.
If you want to drop me a line on Twitter, I am @TJMaher1 and I'm always online.
Thank you. And happy testing.
Resources
[Applitools: Capybara Login Page: https://applitools.com/users/login
How Applitools Eyes Compares Checkpoints and Baseline Images
About T.J. Maher:
