

Transcripted Summary
In this lesson, we are going to learn about elements and locators.
Anything that is present in an application is an element- such as text, text area, button, dialogue, menu, etc.
Elements can be identified by a name, ID or some type of value.
These values can be unique.
In the client API, you will find these five.

The FindElementByAccessibilityId is the first one.
The locator strategy is usually the accessibility id.
The matching attribute is AutomationId.
An example of the value looks like "AppNameTitle".
The second one is FindElementByClassName.
The locator strategy is called class name.
The matched attribute is ClassName.
An example of this for the value is "TextBlock".
The third one is FindElementById.
The locator strategy is typically an id.
The matched attribute is a RuntimeId inside the application.
The example of the value looks like "42.33389631".
The fourth locator is FindElementByName.
The locator strategy is name.
The matched attribute is Name.
An example of this would be "Calculator".
The fifth locator is FindElementByXPath.
The locator strategy is xpath.
The matching attribute can be anything within the application.
An example of this is "//Button0".
Element locator tools will help us identify these elements. It will also show the locator types that we could possibly use.
We are going to use WinAppDriver UI Recorder and the Accessibility Insights for Windows.
# WinAppDriver UI recorder
It's a UI automation service for Windows 10 that users can use to test their applications.
It has the ability to generate XPath queries for elements.
It's open source and provides C# recordings of interactions of any application.
# Accessibility Insights for Windows
It enables you to select any UI element and view the element's accessibility data.
You can verify the UI automation properties using Live Inspect.
It is also open source.
# Installation
Now let's go install WinApp UI Recorder and Accessibility Insights.
Let's open up a web browser and type in "winappdriver recorder" and press "Enter".
We want to look for the "github.com" domain.
We are going to click on this link here for the releases.
Once we are on this page, we are going to scroll down a little bit and find this "WinAppDriver UI Recorder v1.1'.
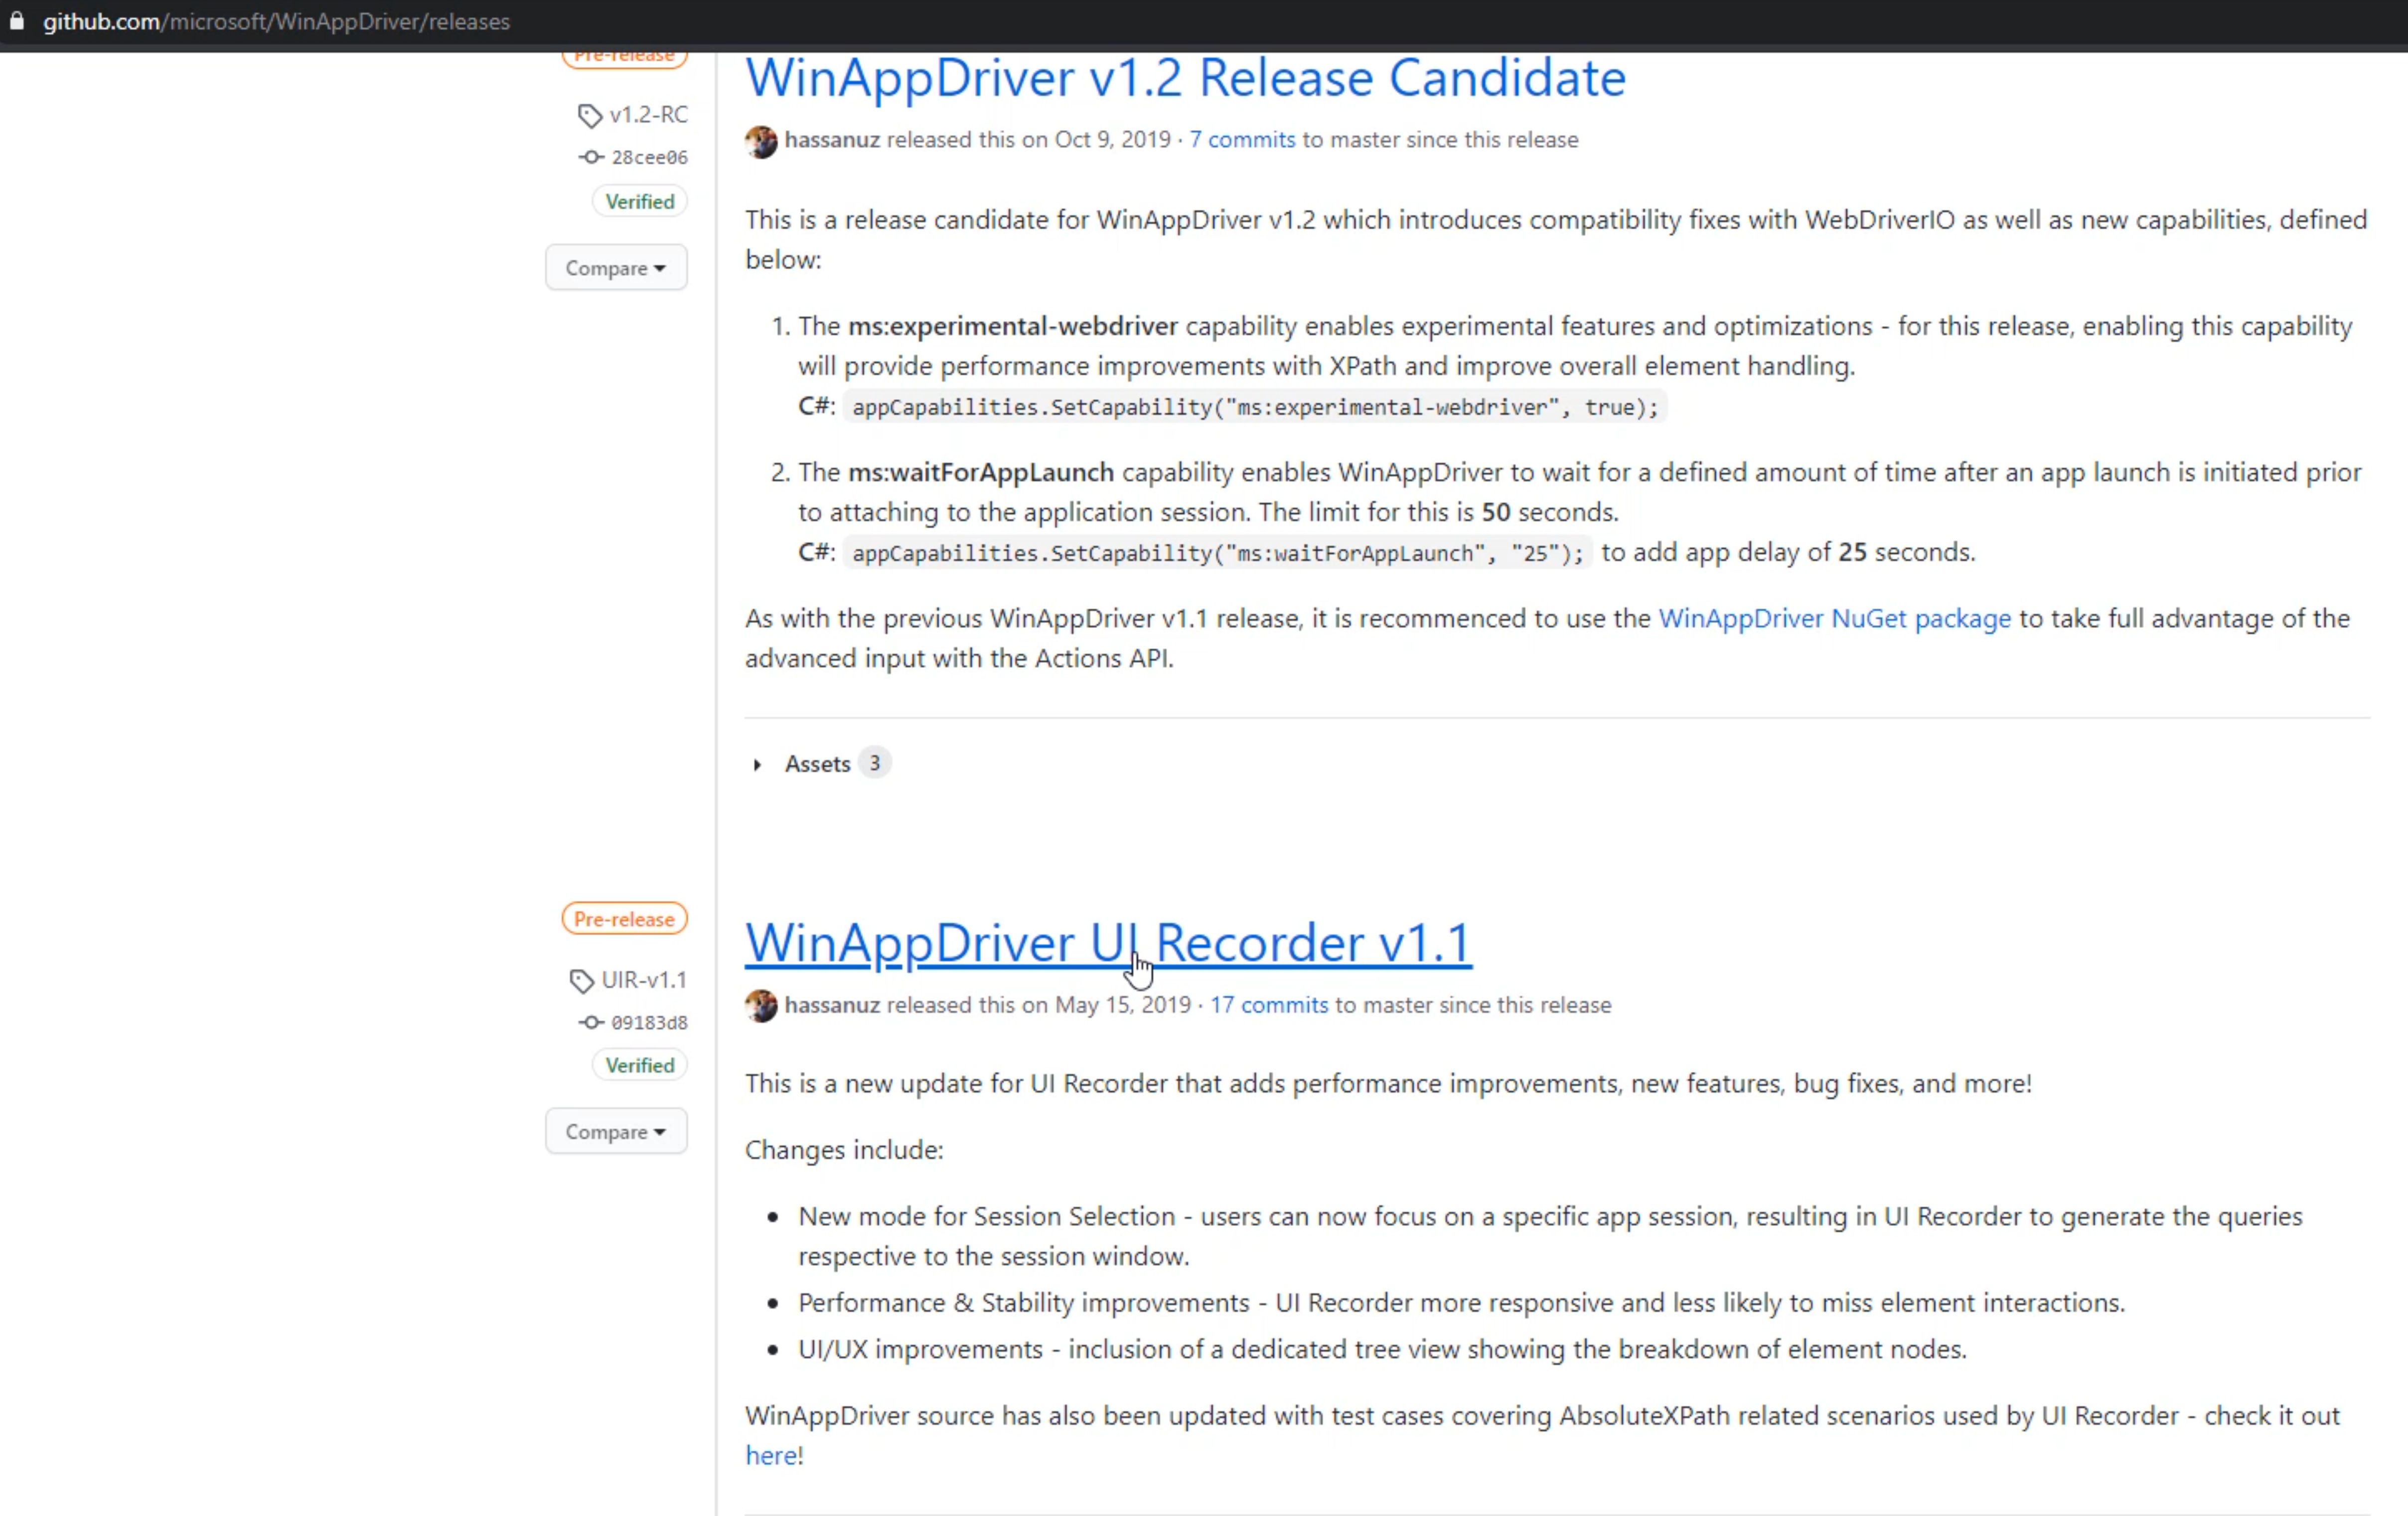
Once we click on the link, we are going to find the zip file that we can download and down here at the bottom, there is a zip file.

Now that we have WinAppDriver UI Recorder downloaded, we're going to click on this drop arrow and select "Show in folder".
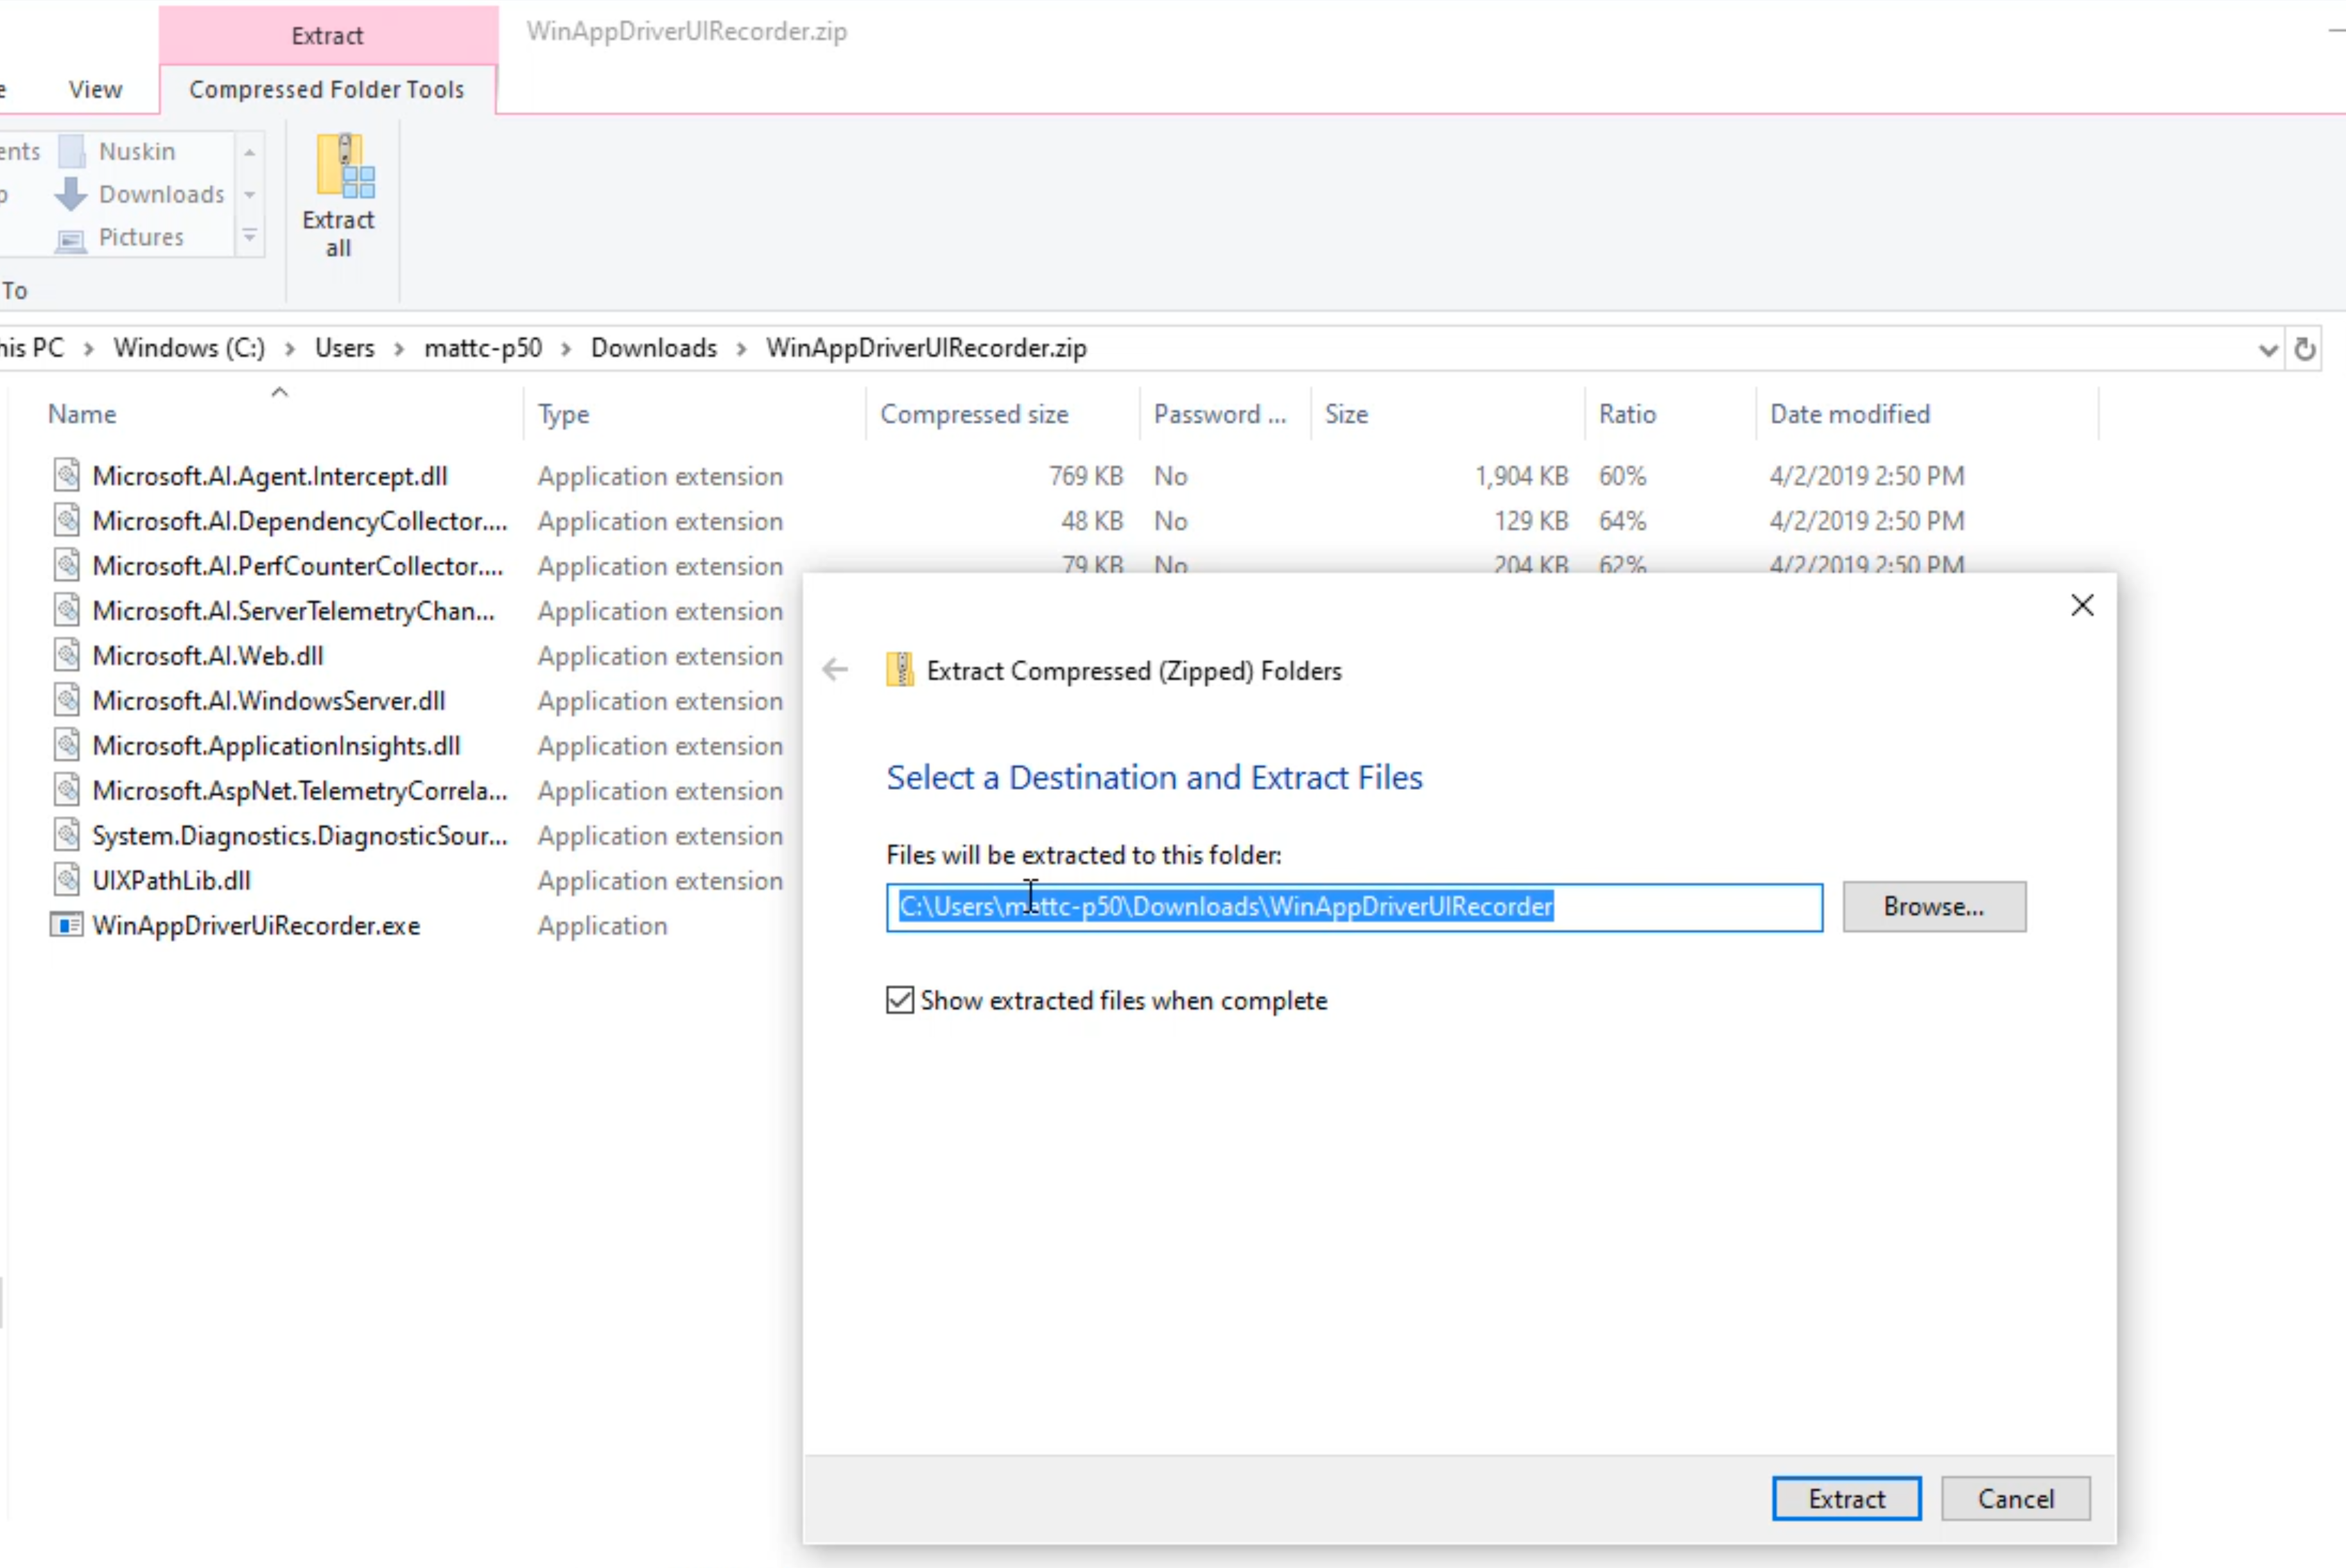
Now we can double-click on this zip file that we just downloaded and verify the files are there.
We can click on this button to extract all.
This will open up another dialogue, and we can just select the default location.
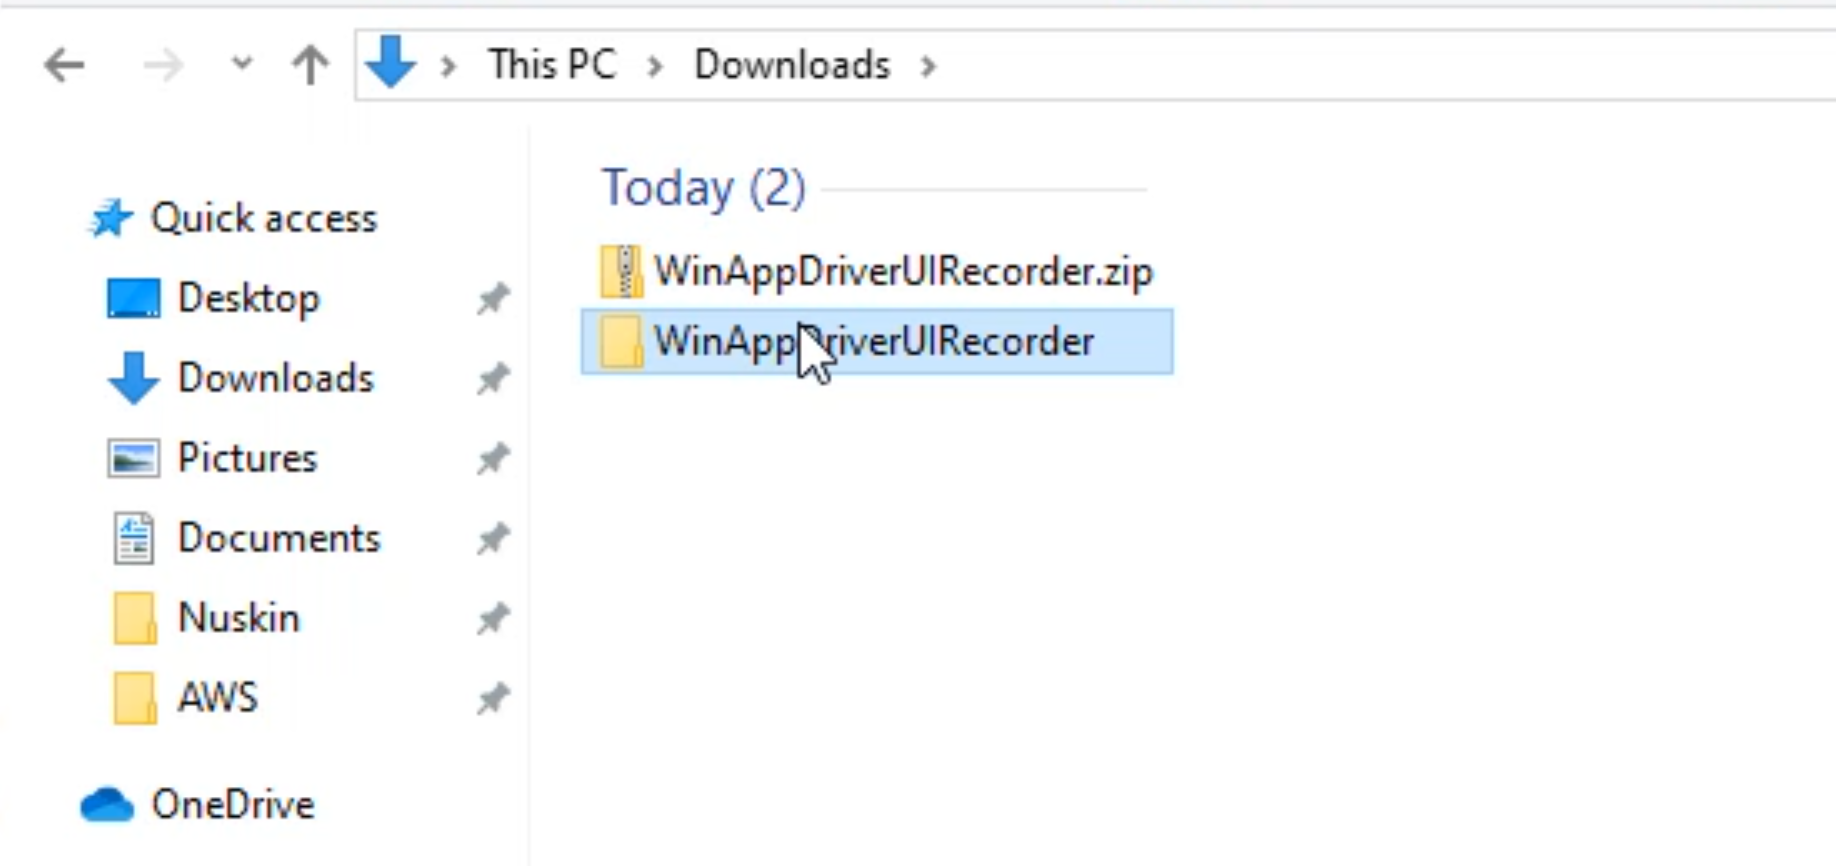
Once the files are extracted, you will be presented with Windows Explorer.
To see where it's installed, you just have to go look at this Explorer bar.
It looks like it's within our "Downloads" folder.
If you click on "Downloads", you will see your zip file where the location extracted files are.
You double-click to get in and you will see the WinAppDriverUiRecorder.exe.
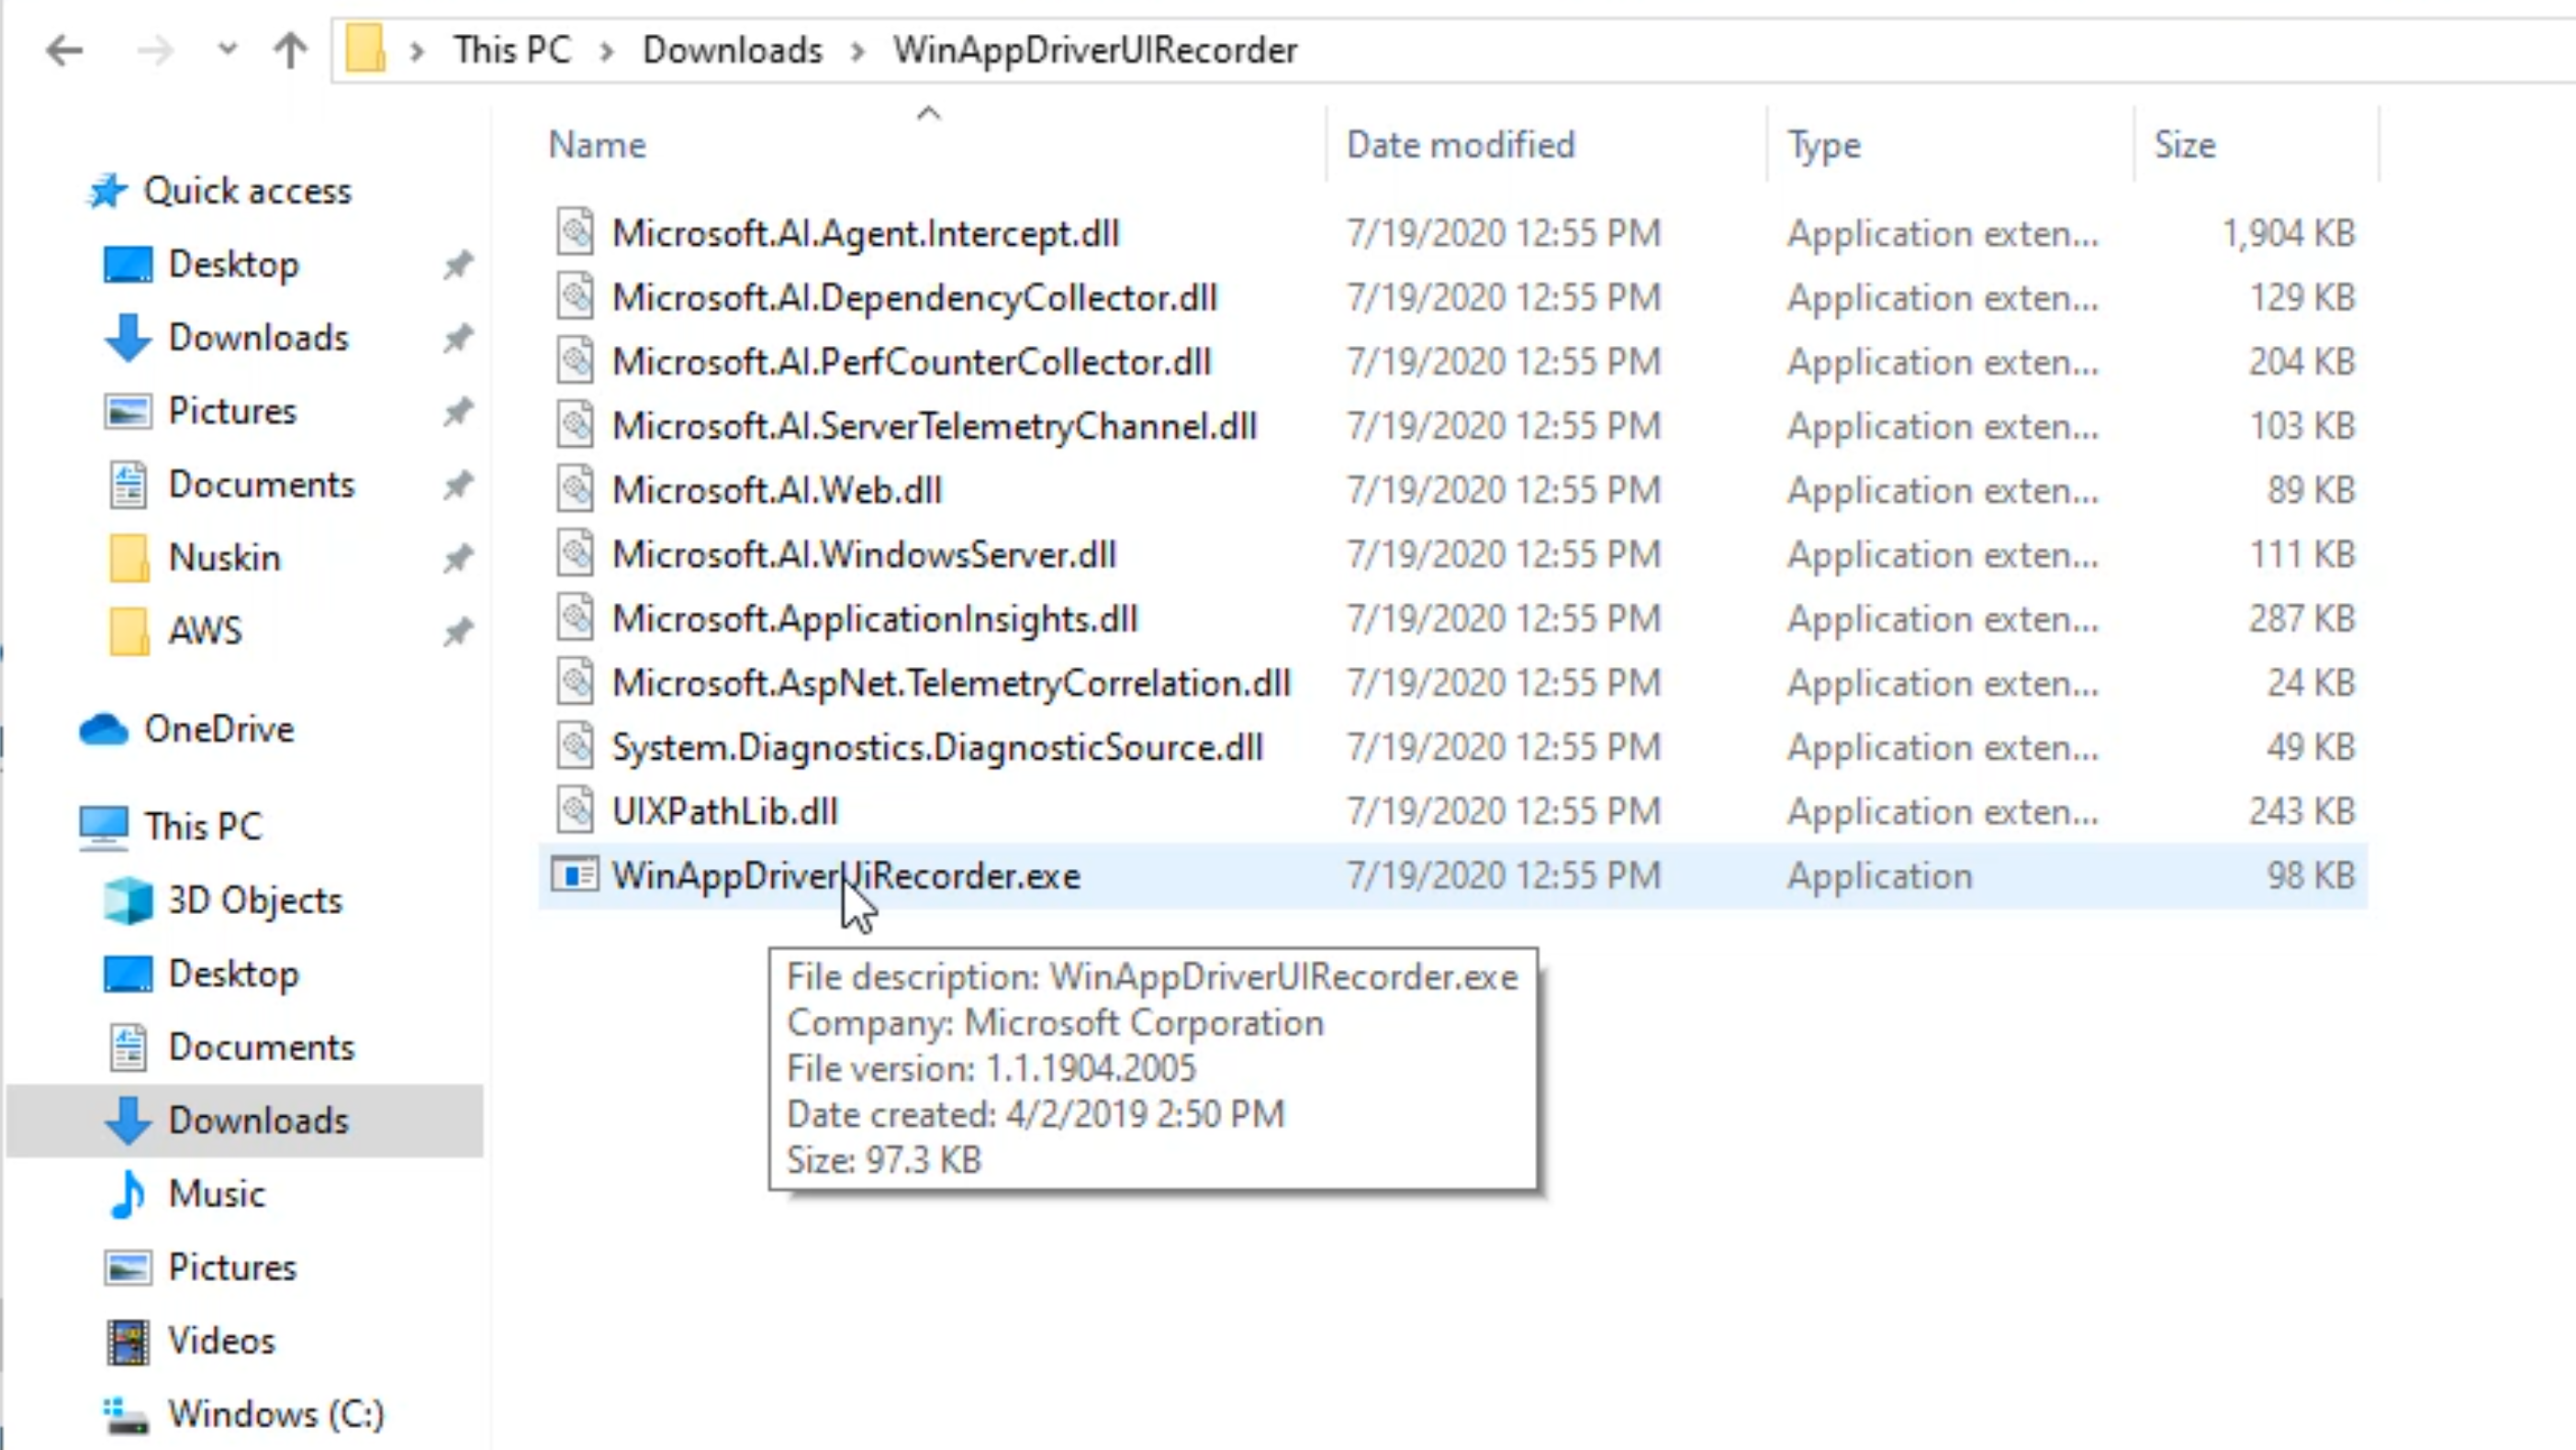
Now, remember where you placed this file. We will be using it in the future.
Let's try the WinAppDriver UI Recorder by double-clicking on the executable.
Once the UI recorder is open, let's open up Calculator. You can do this by clicking on the start and searching for it.
We'll search for "calc" and that should find the Calculator app - go ahead and click on the calculator app.
Let's scoot these two applications close to each other.
Click on the "Record" button in the UI recorder.
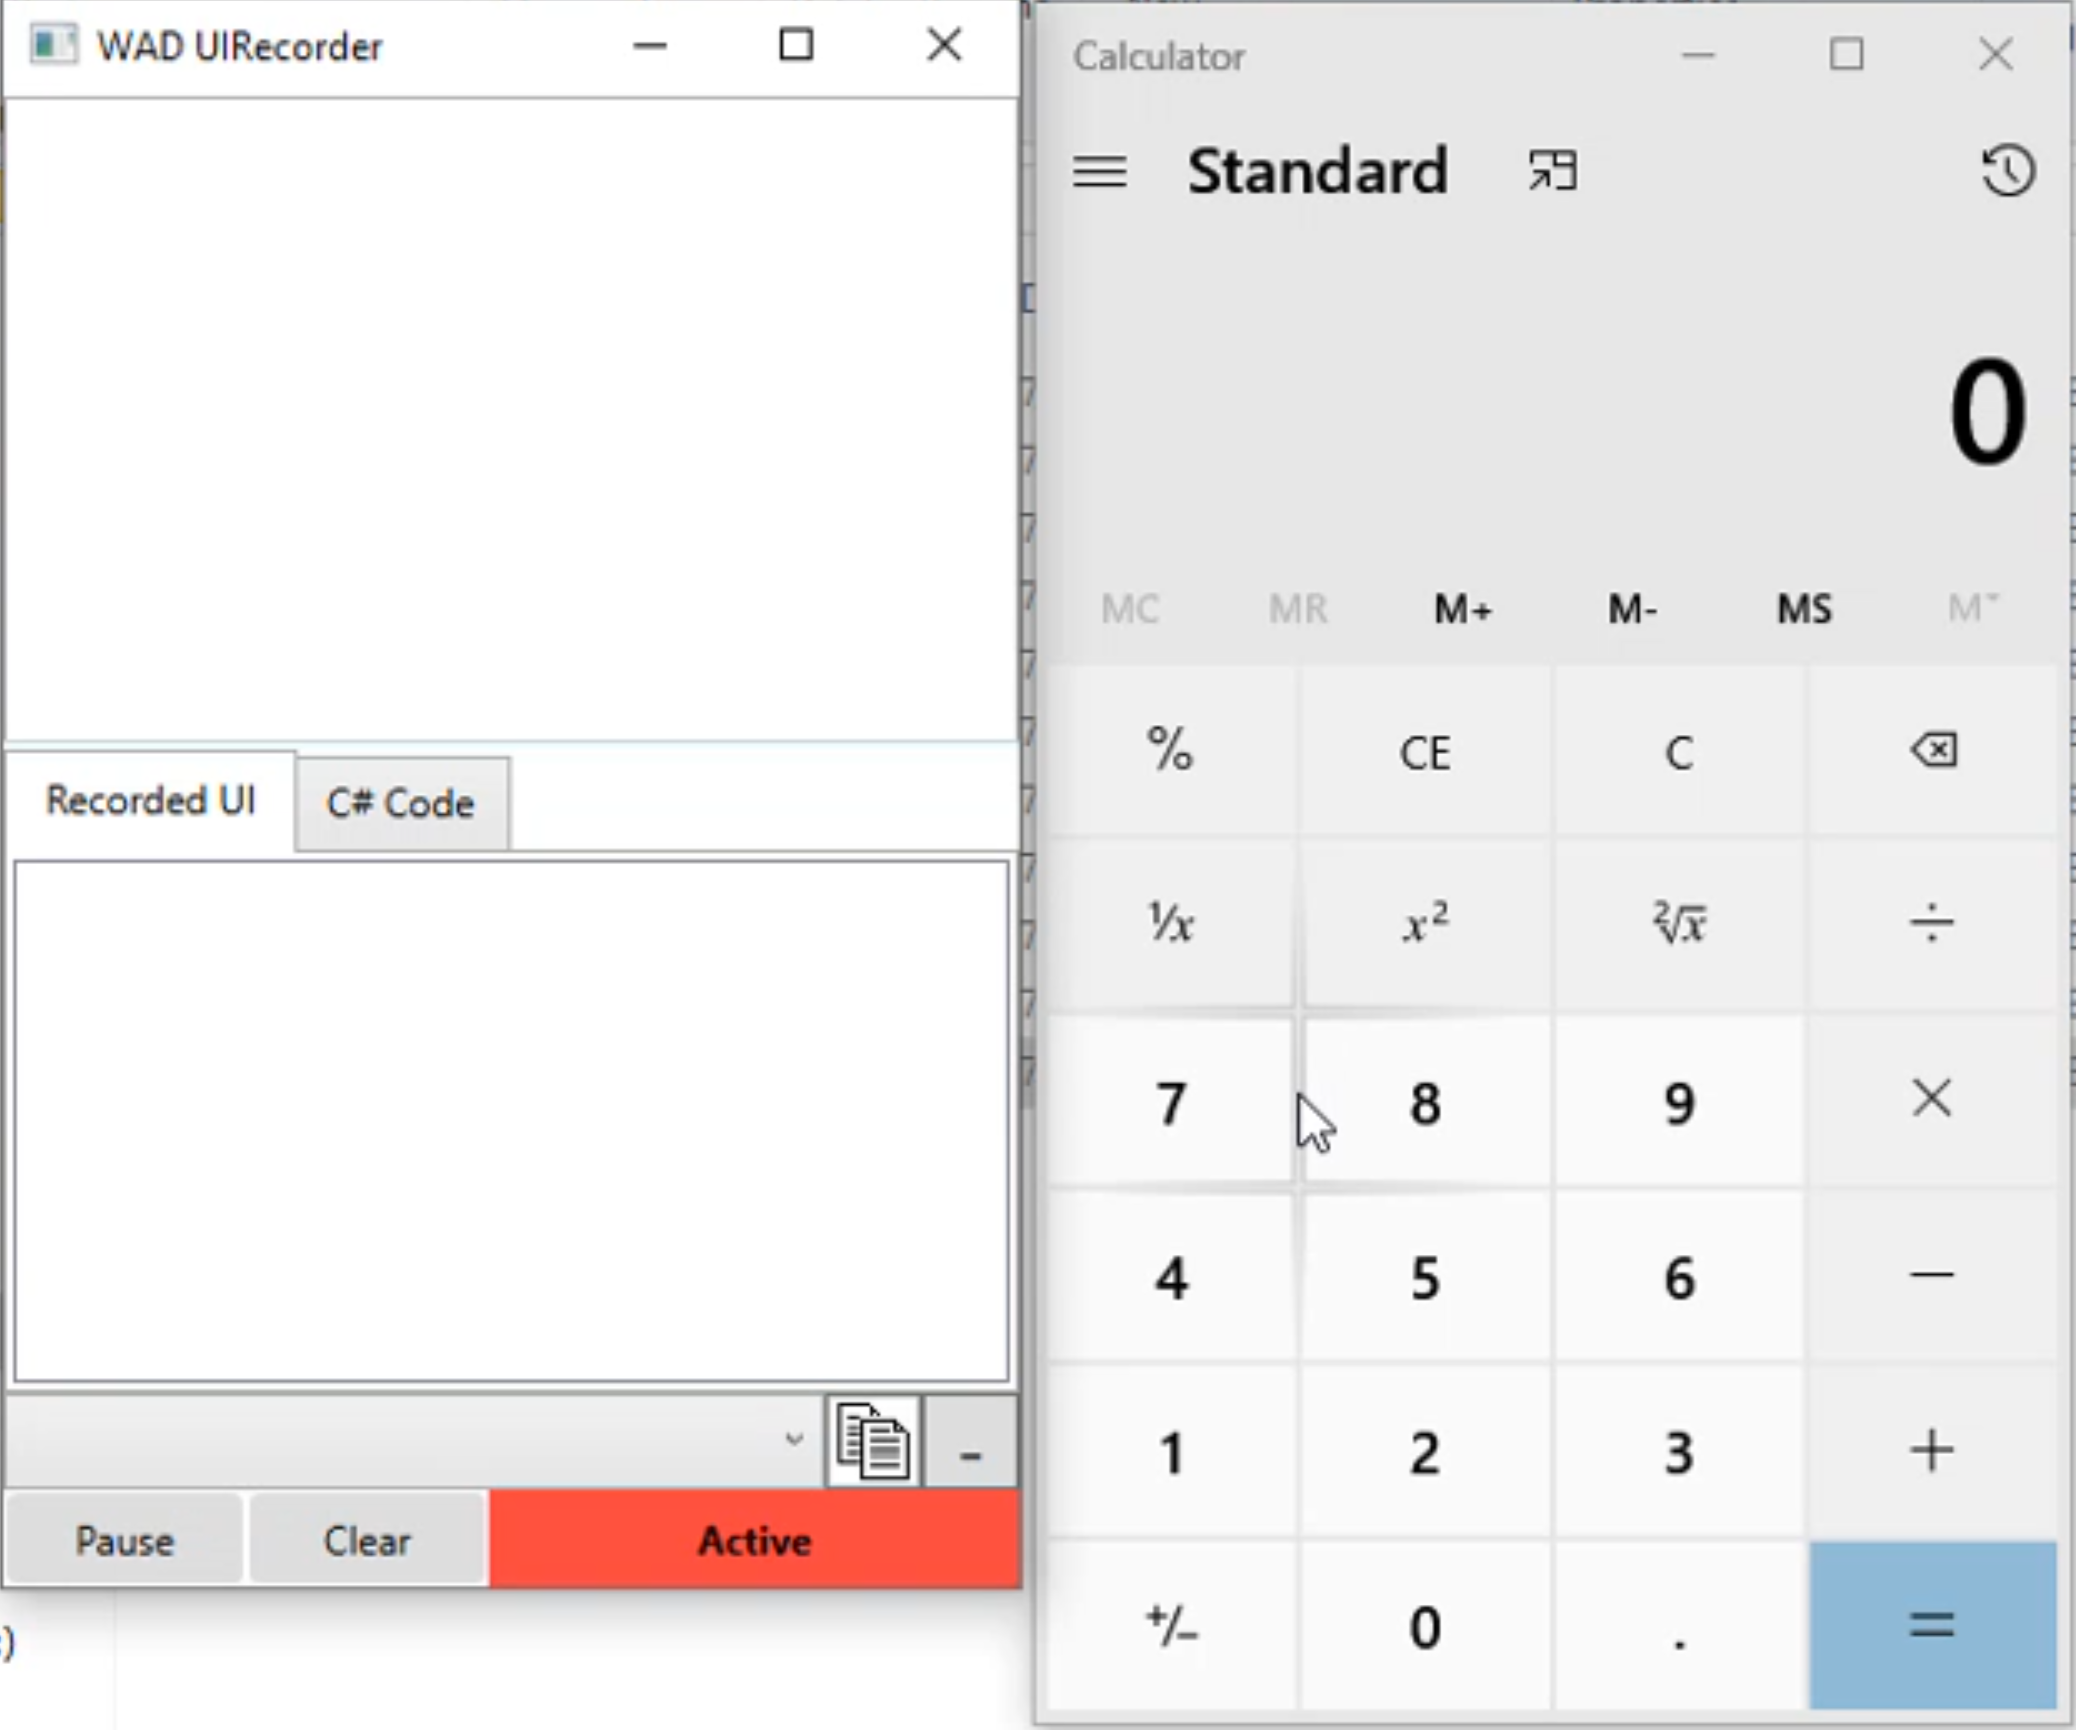
As you hover over each of these elements, notice the UI recorder will update with element information.

The top pane is the Xpath for each element.
The lower pane is a tree view of the element.
Now let's hover over additional elements.
Notice as you hover over each of these elements, automation information gets updated.
However, within the Xpath pane, it's a little more difficult to identify the target locator.
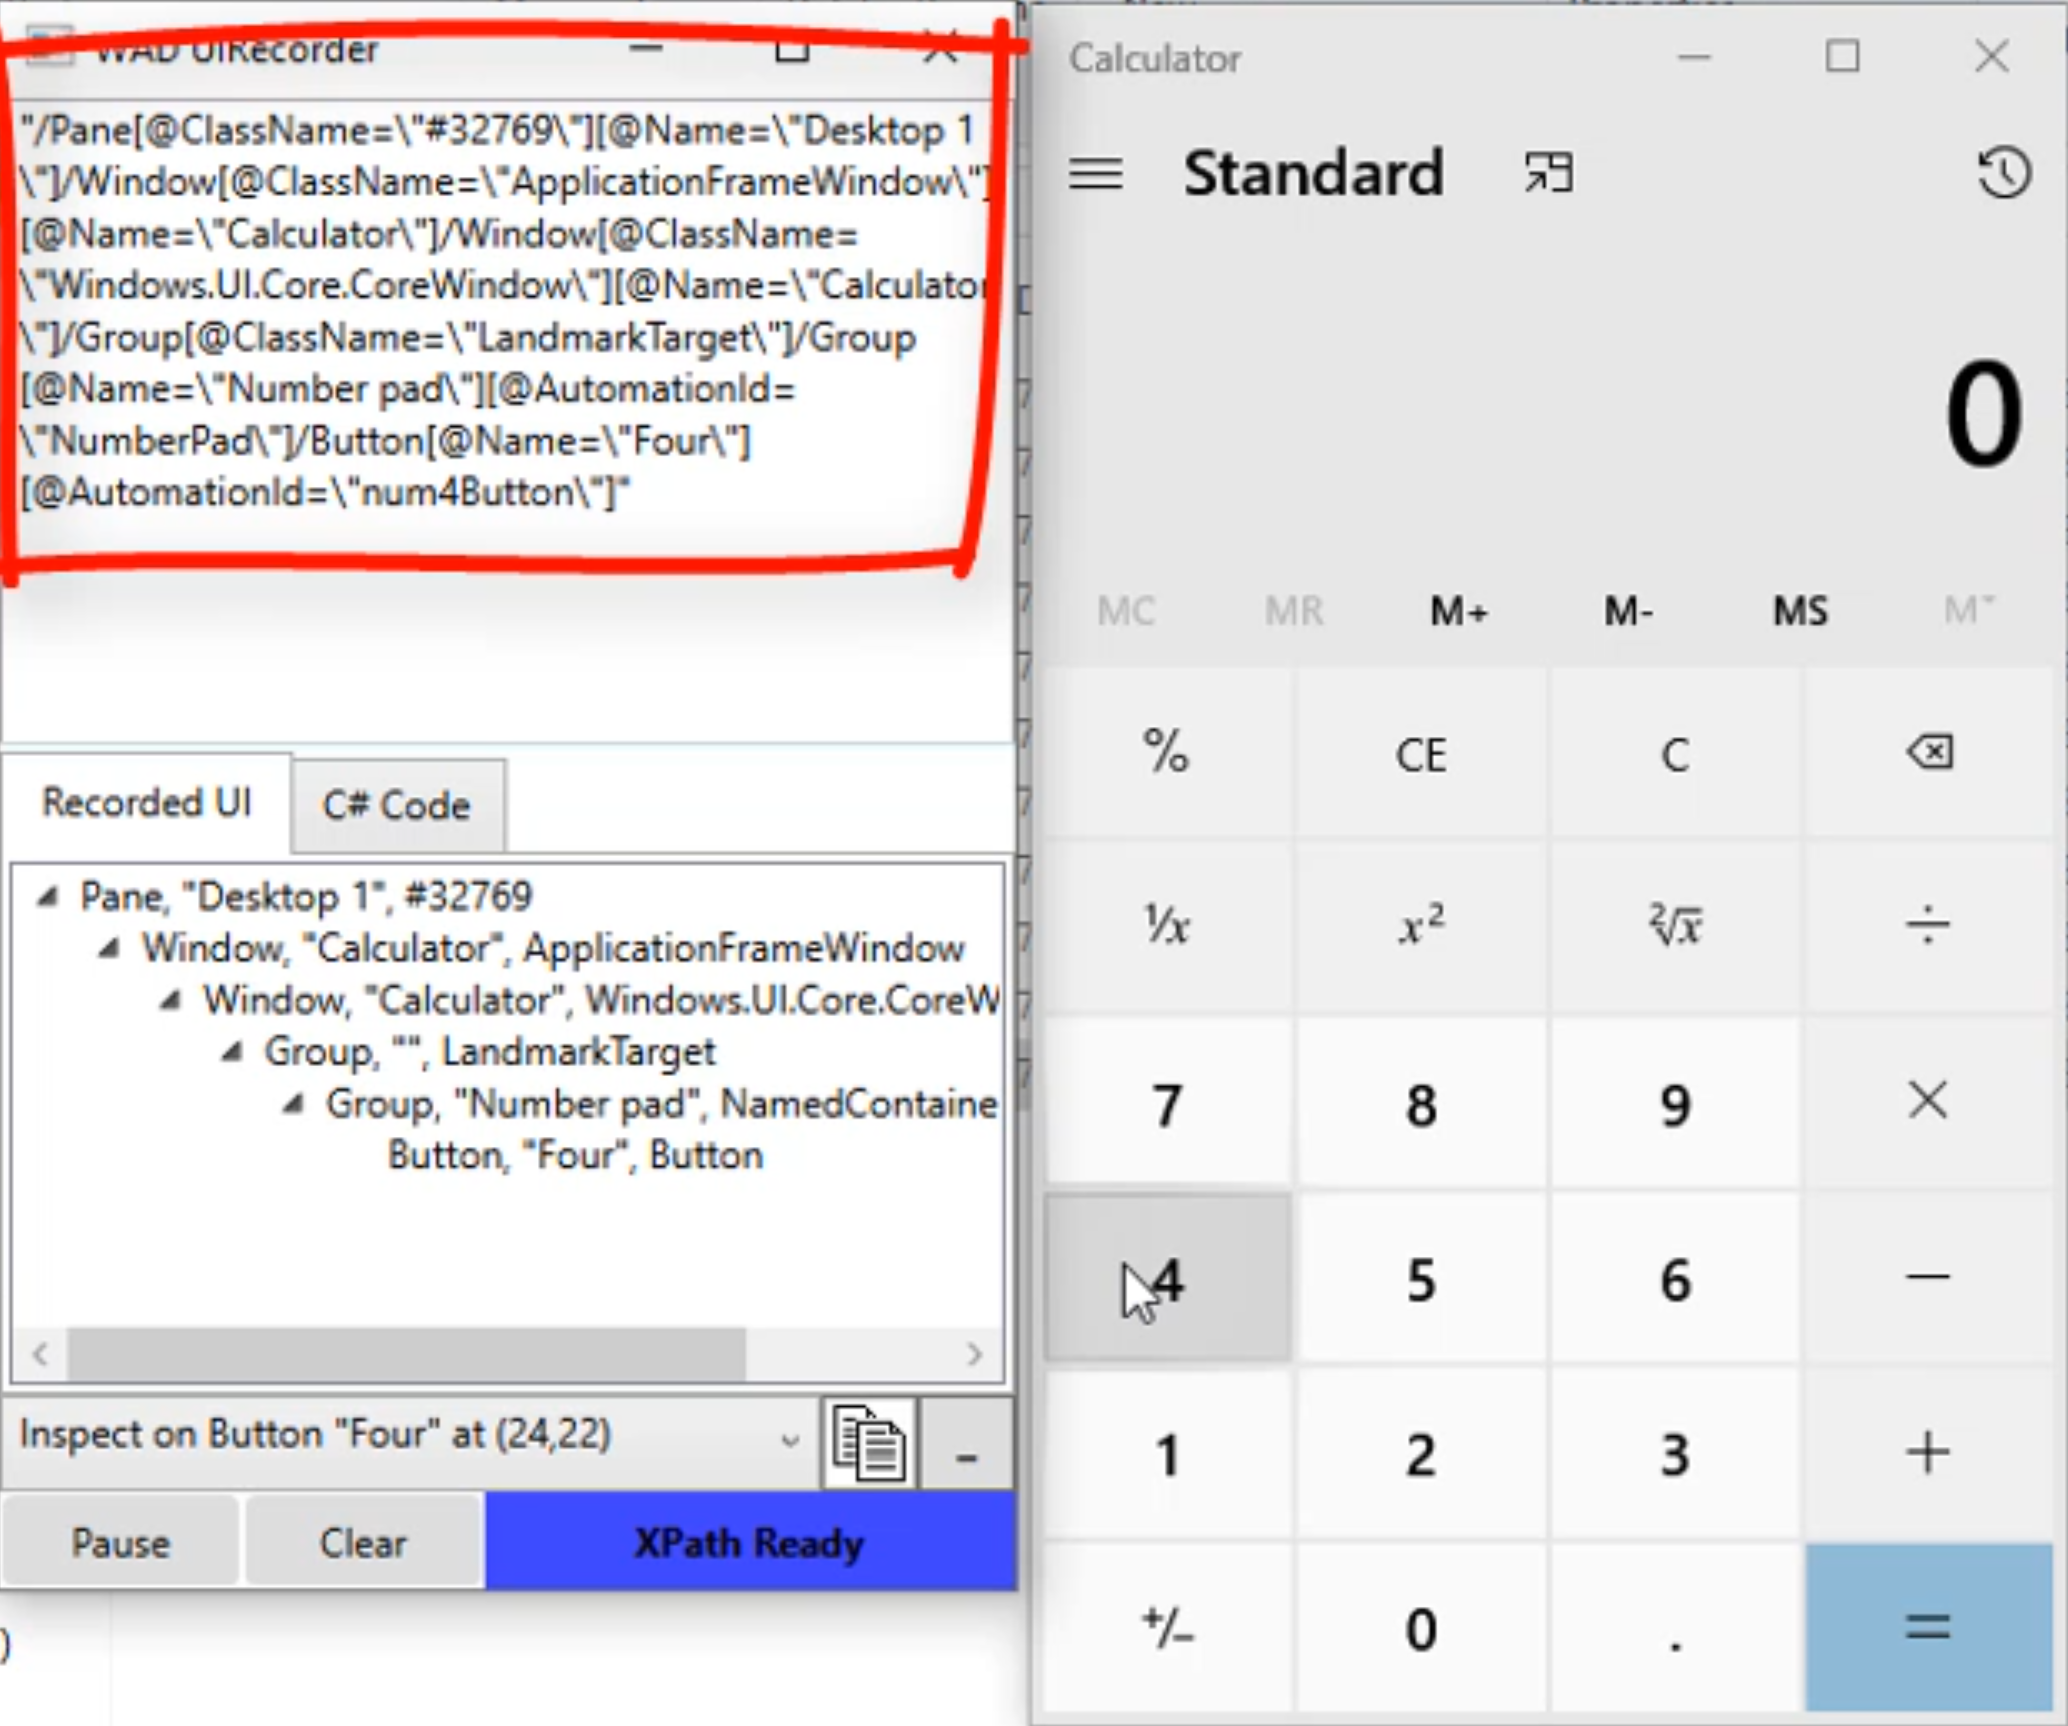
Notice our values are jumbled in the Xpath. You'll notice AutomationId num4Button.
Just a little bit above that, you'll also notice an AutomationId of NumberPad.
Which one do you use?
Technically you can use either one of them, but this is a little harder to view.
Let's go ahead and close this out and try a simpler tool.
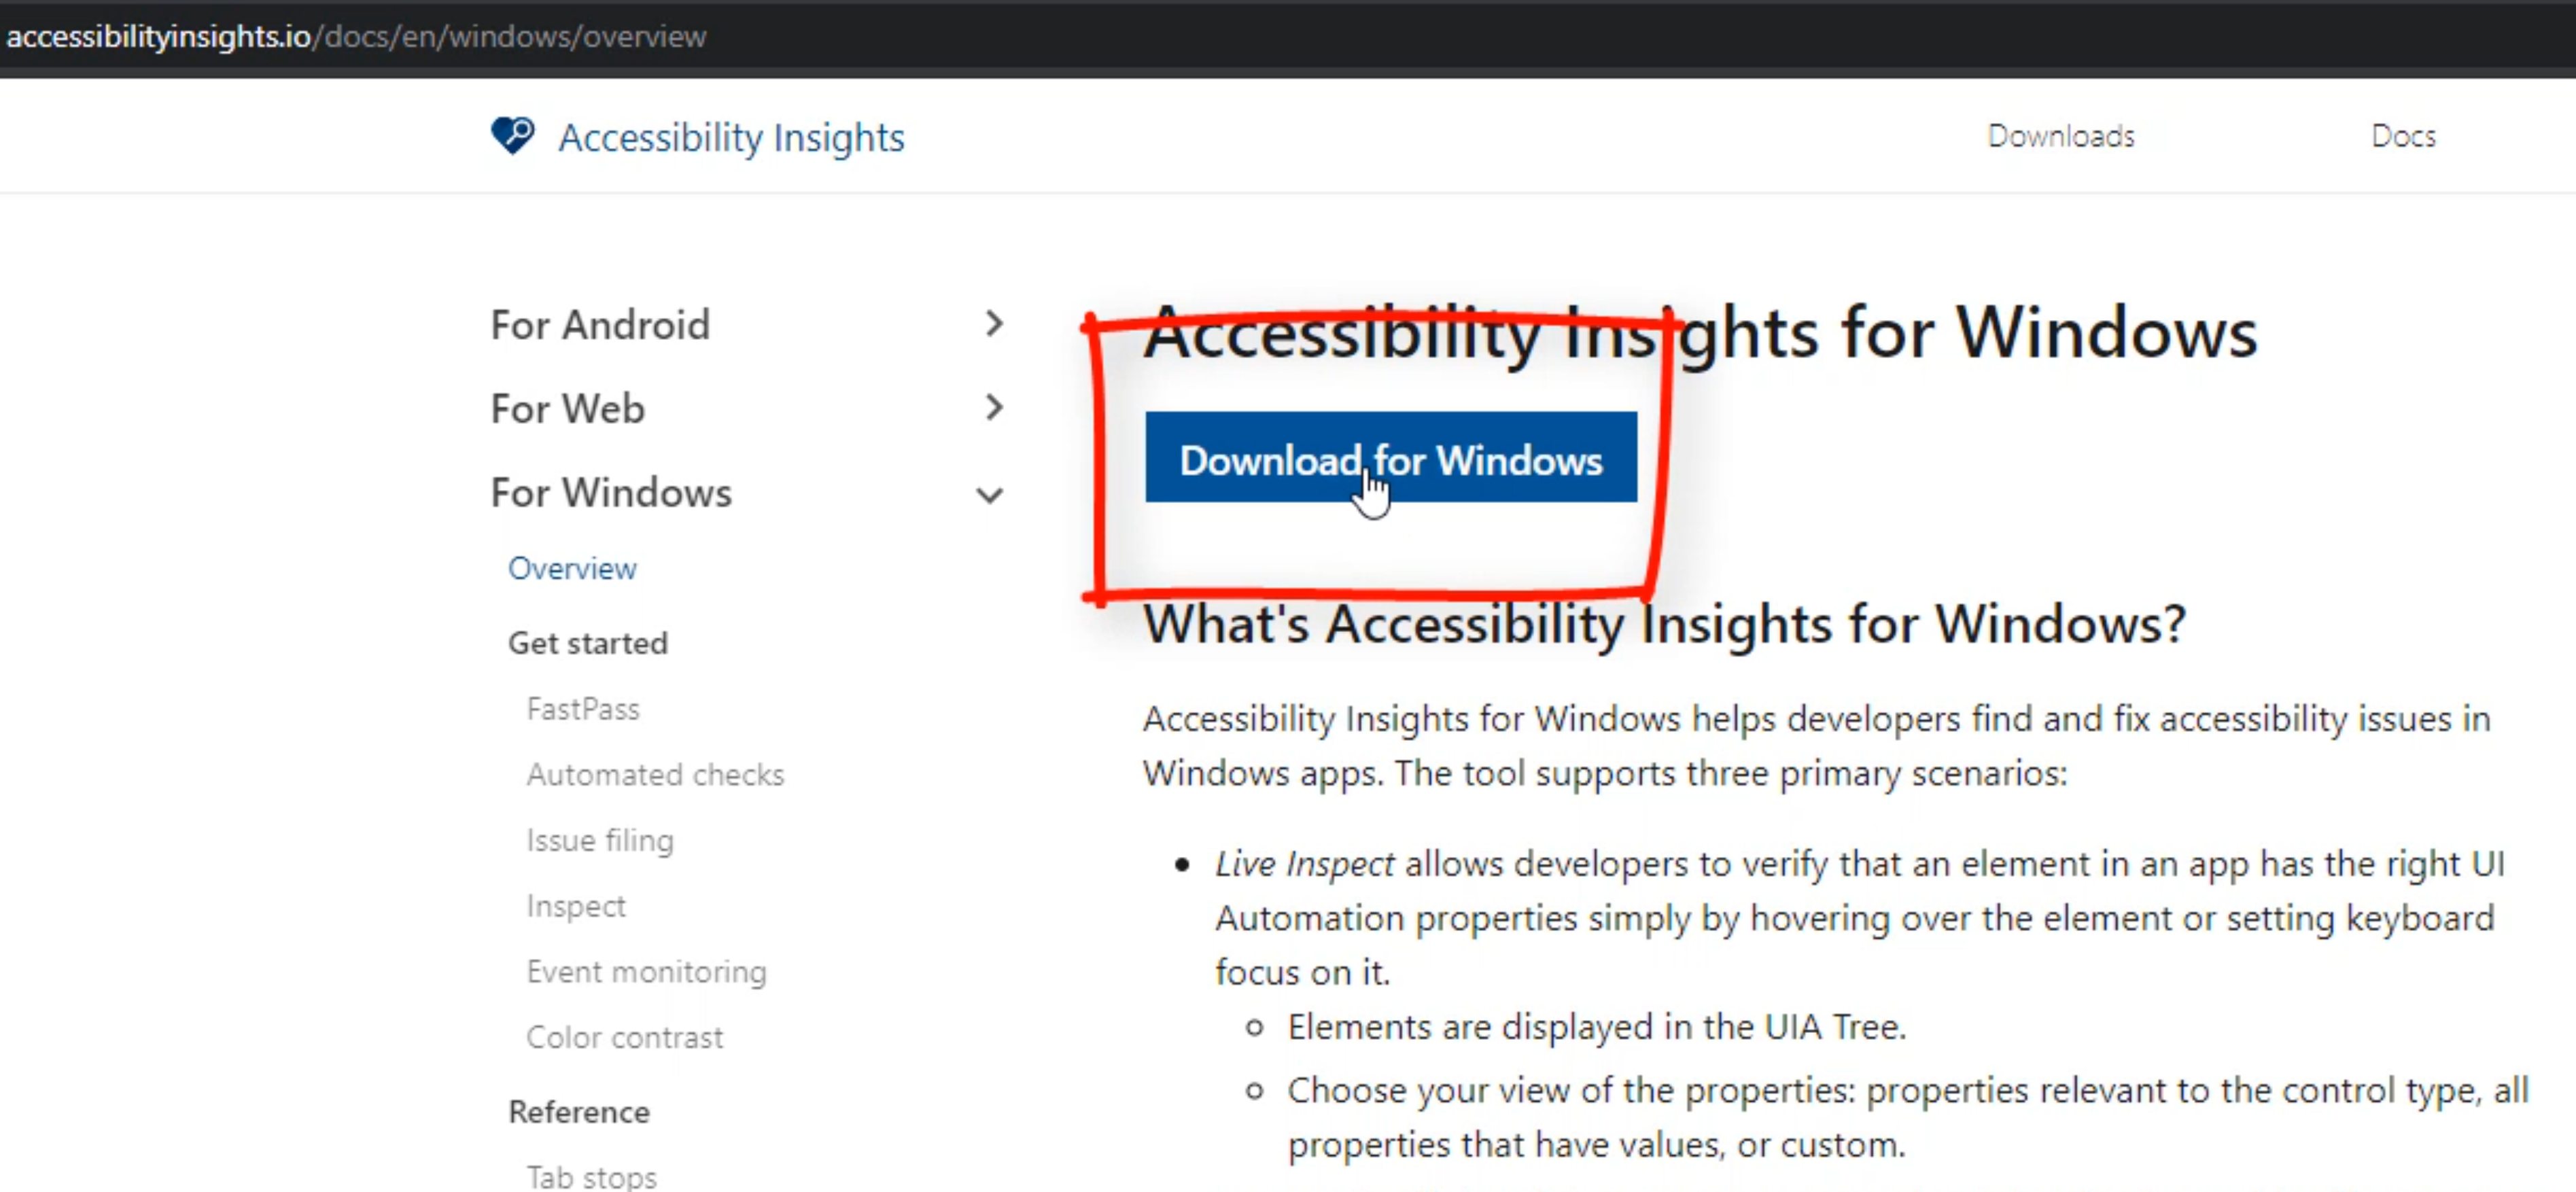
Now let's open up a new web browser and find another tool called Accessibility Insights.
I'm just going to type "accessibility insights" into the browser search bar, and we will see this URL.
We're going to look for the one for Windows.
Here's the link for it - let's click on this.
Let's click on "Download for Windows".
We'll "Keep" this file in case you get the warning.
Now we'll click on this little drop arrow and click on "Show in folder".
You should see the Accessibility Insights download now. Let's double click on this and install it.
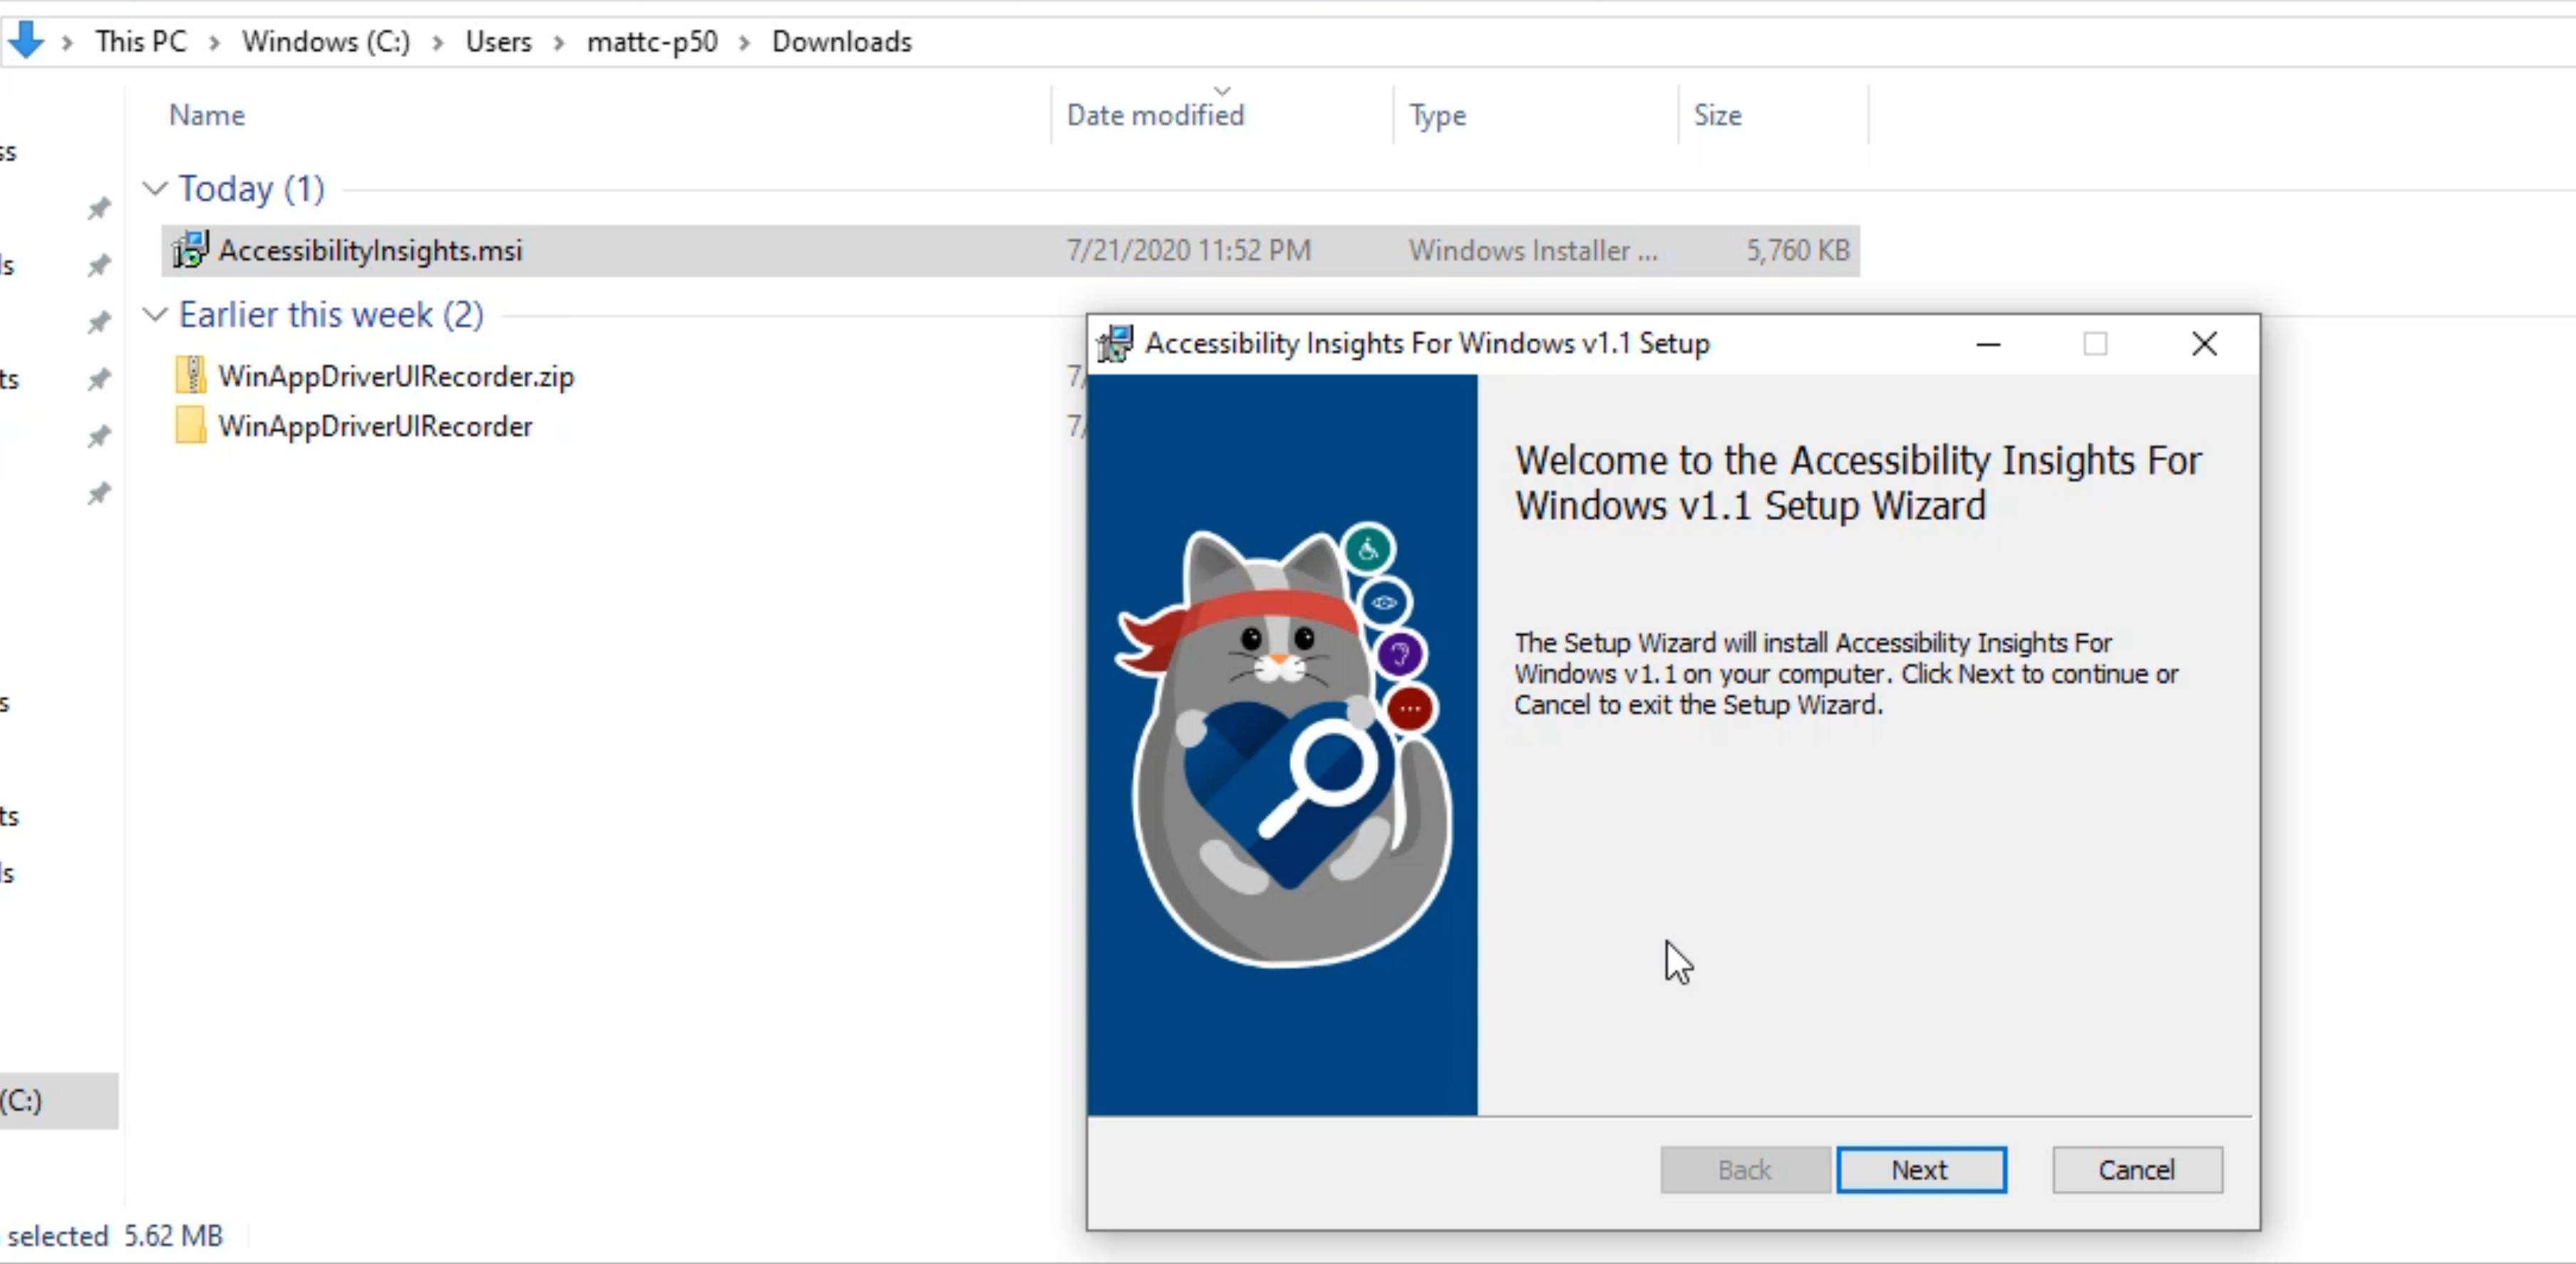
This should start the installer for you.
Let's click the "Next" button and accept the terms and agreements and click "Next".
We'll just choose a default location and click "Next" and we'll install.
Click the "Finish" to finish the install.
Now let's open up Accessibility Insights. It should open up by default.
In case it doesn't, you can click on the Start button and find it there.
Next you'll be presented with this startup window.
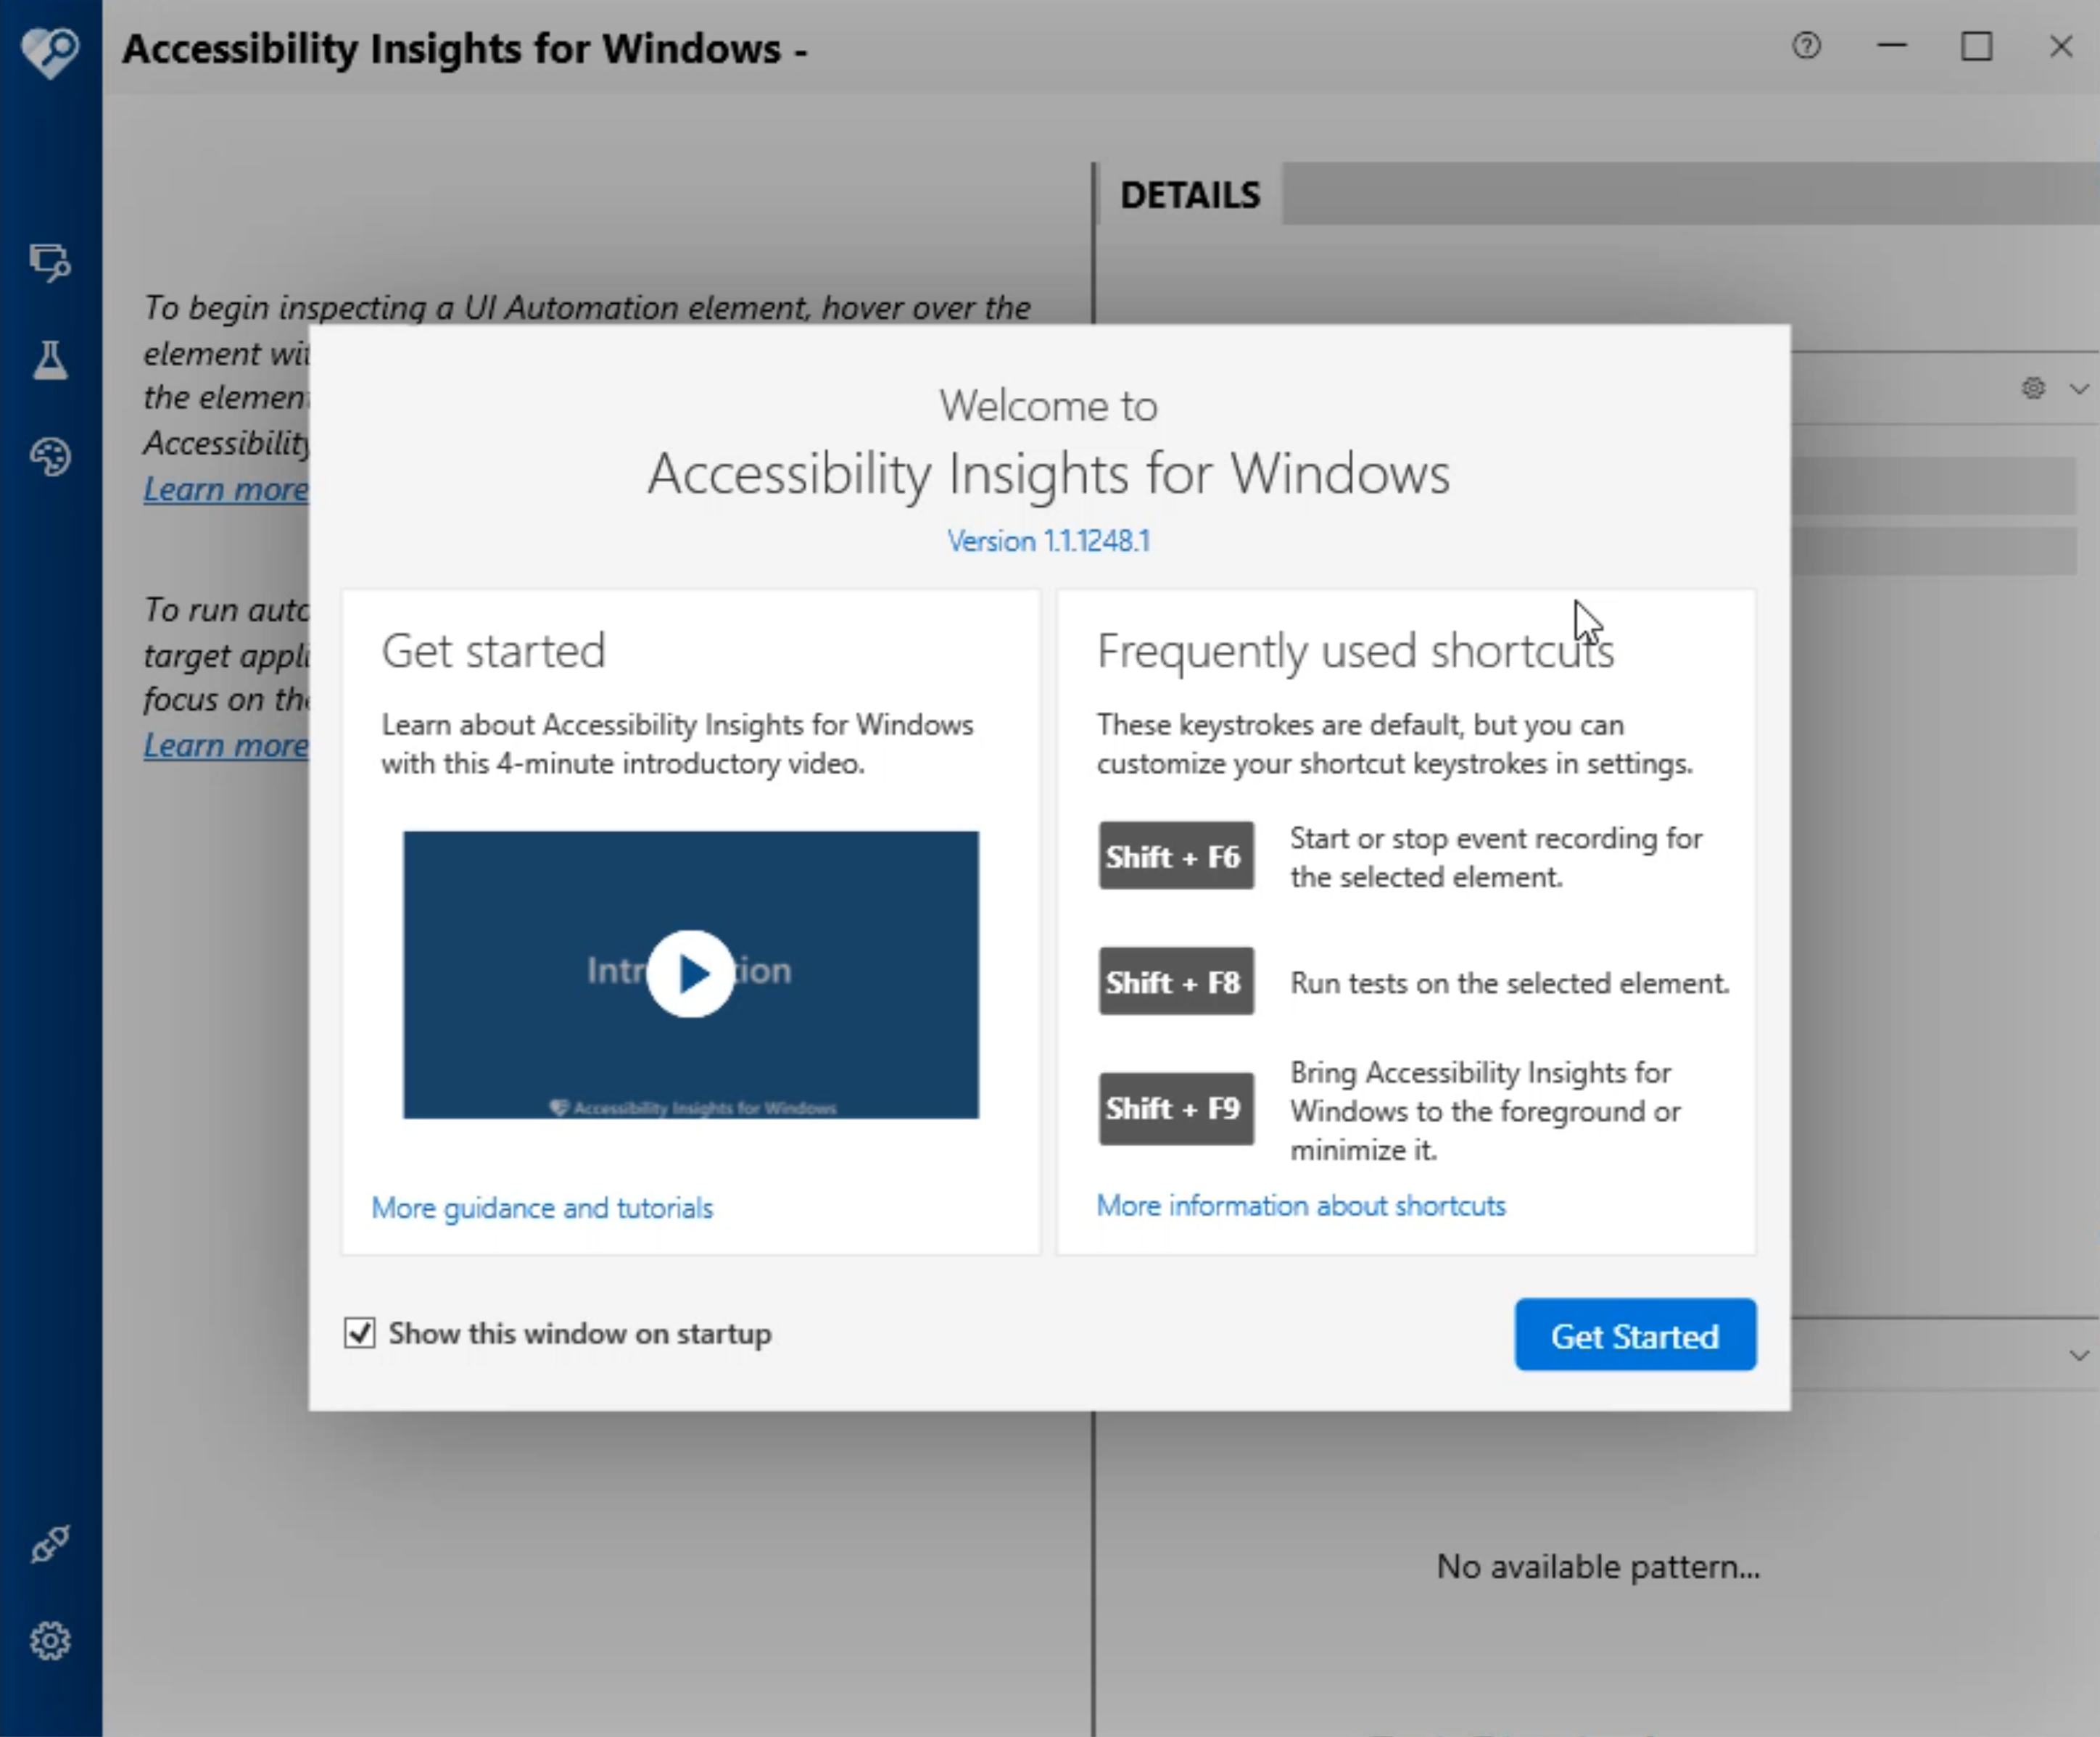
Go ahead and click the "Get Started" button.
Let's close this for now, because it's going to create a lot of weird behaviors on your desktop, until we were ready to capture some automation elements.
Let's open up the Calculator.
Now that we have the calculator window open, we're going to scoot it over to the right a little bit.
Let's open up Accessibility Insights.
You can do this by clicking the Start button and it should be the top option for you.
Otherwise, you can just type in "Accessibility Insights for Windows".
Let's click there on the "Get Started" button again.
This time you'll notice as I'm moving it around the window... you'll notice it's highlighting the whole entire calculator application.
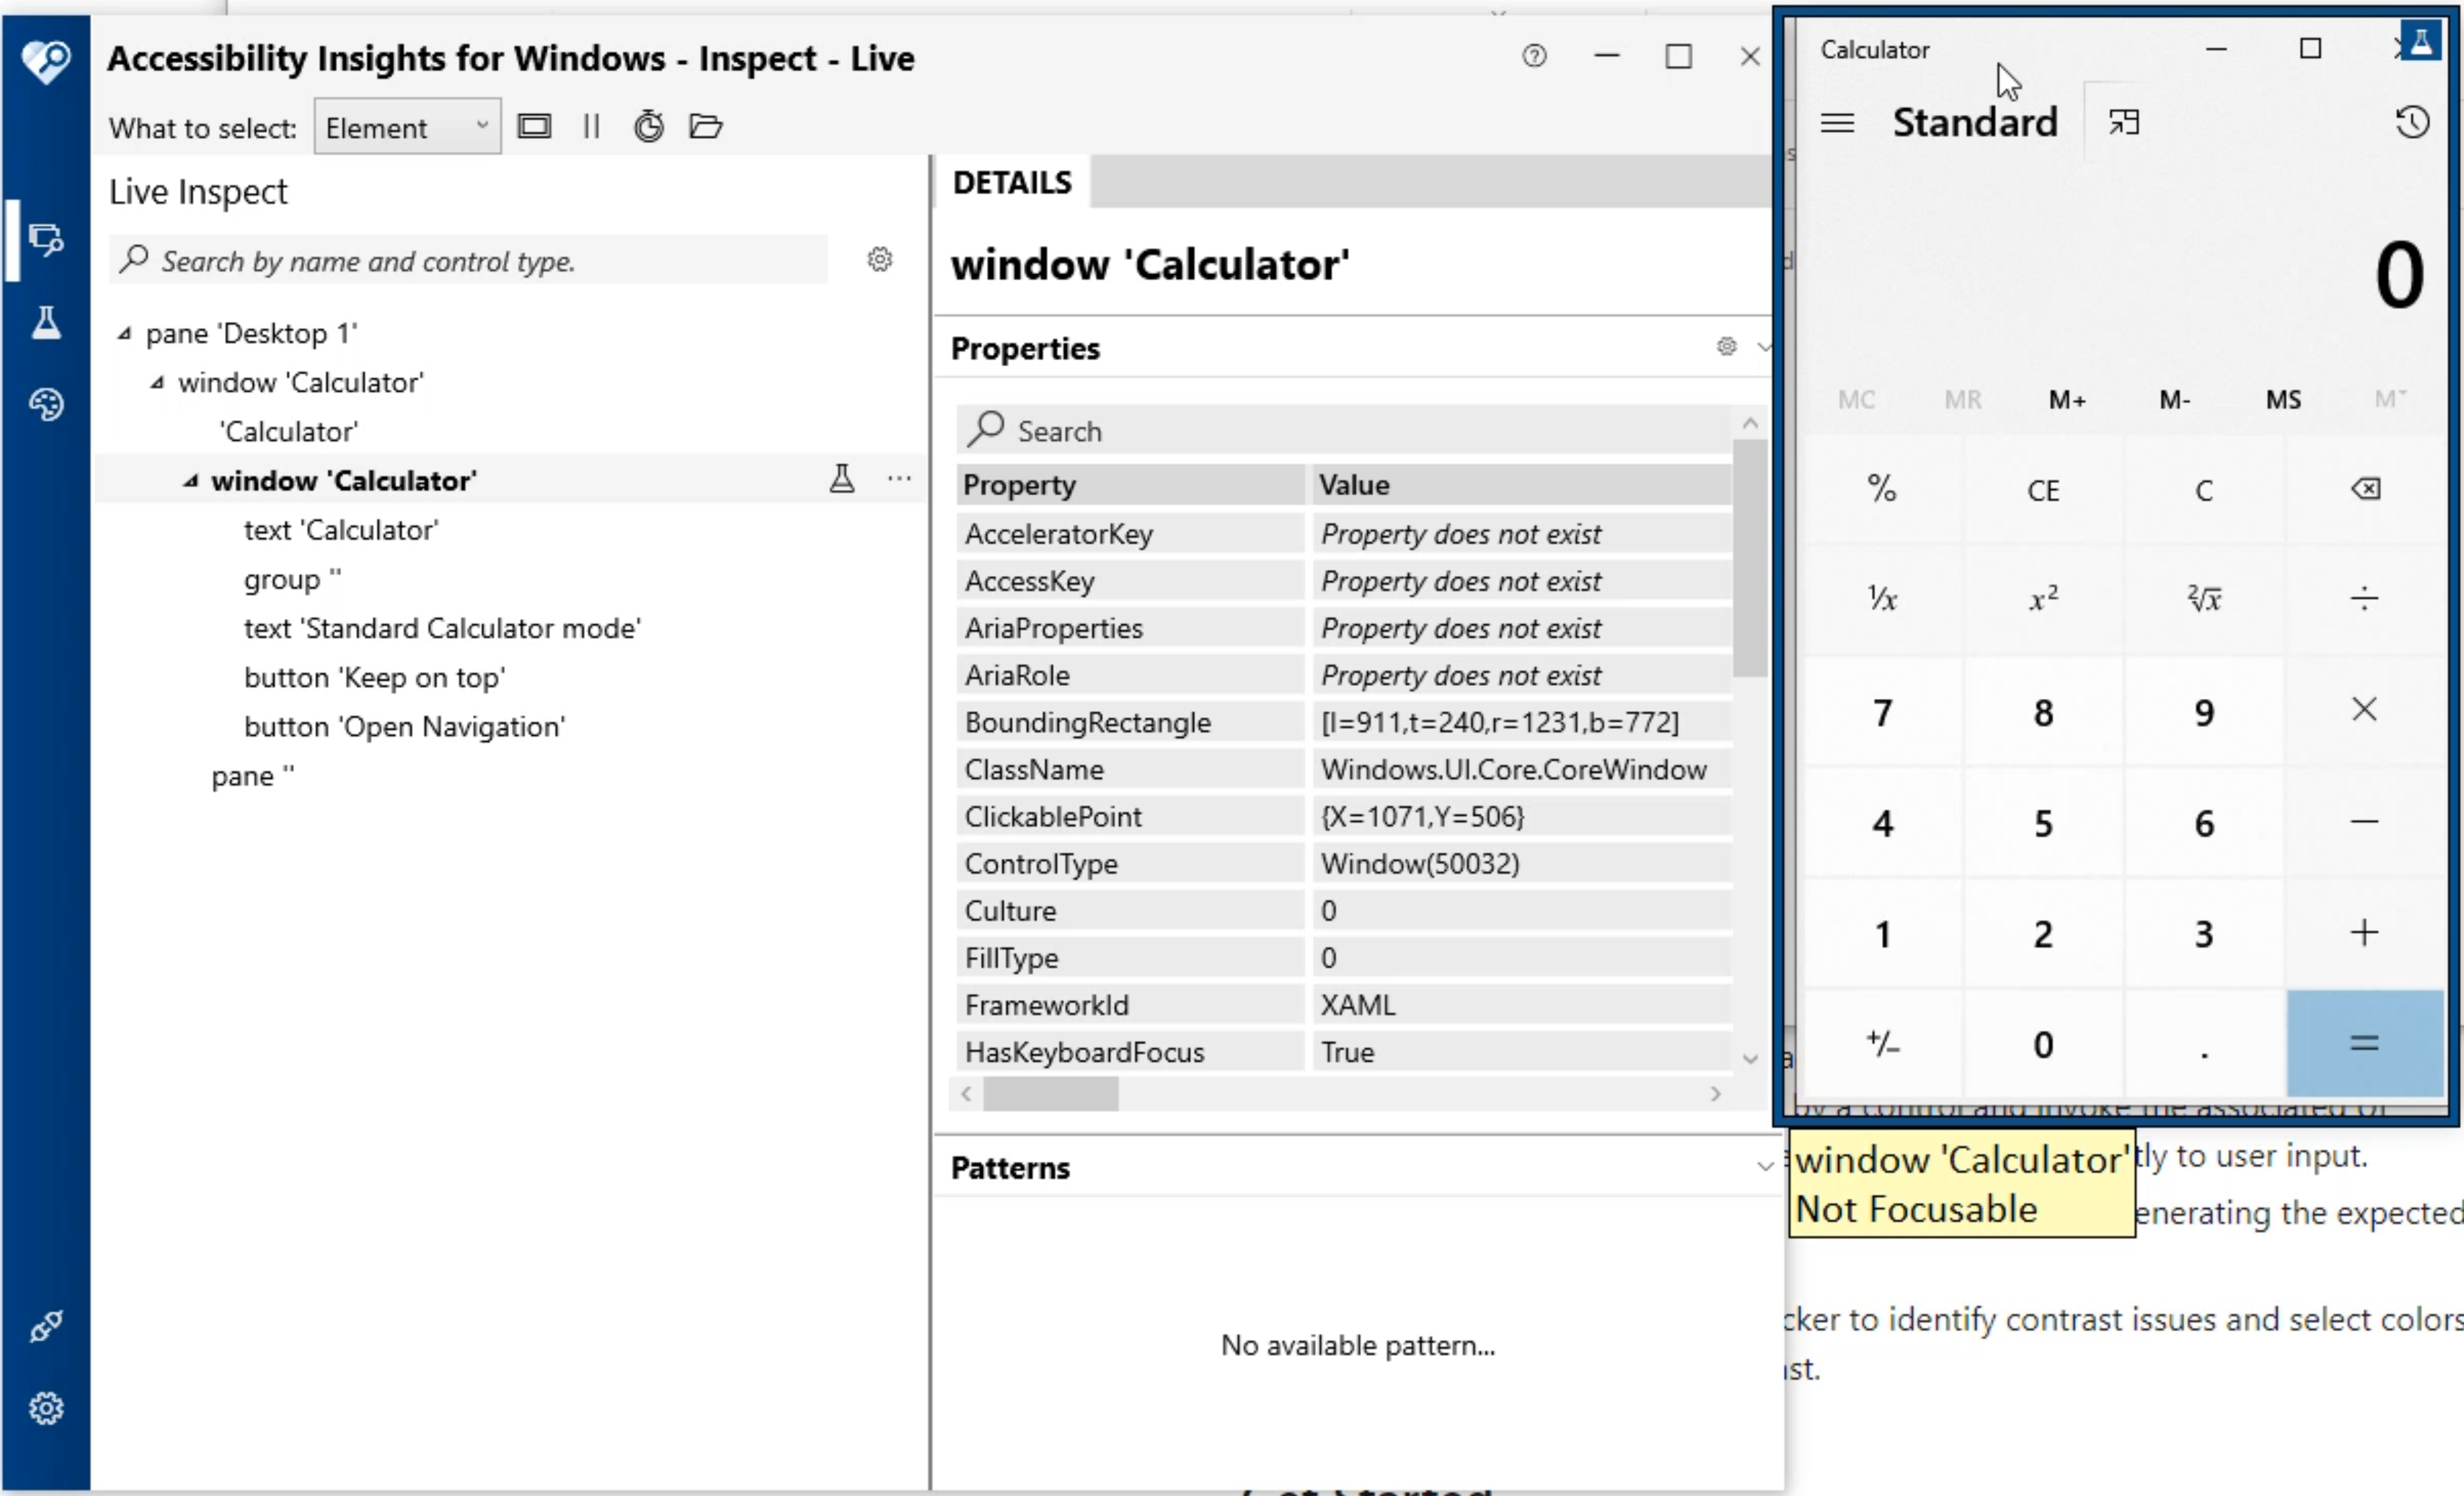
As you highlight over on these buttons, you will find a lot of different values as it changes.
In this right pane of the Accessibility Insights, you will see a bunch of different elements and a bunch of different properties you can look for.
Let's scroll up a little bit more.
Now you can see the "Processid" and you can see the "Runtimeid".
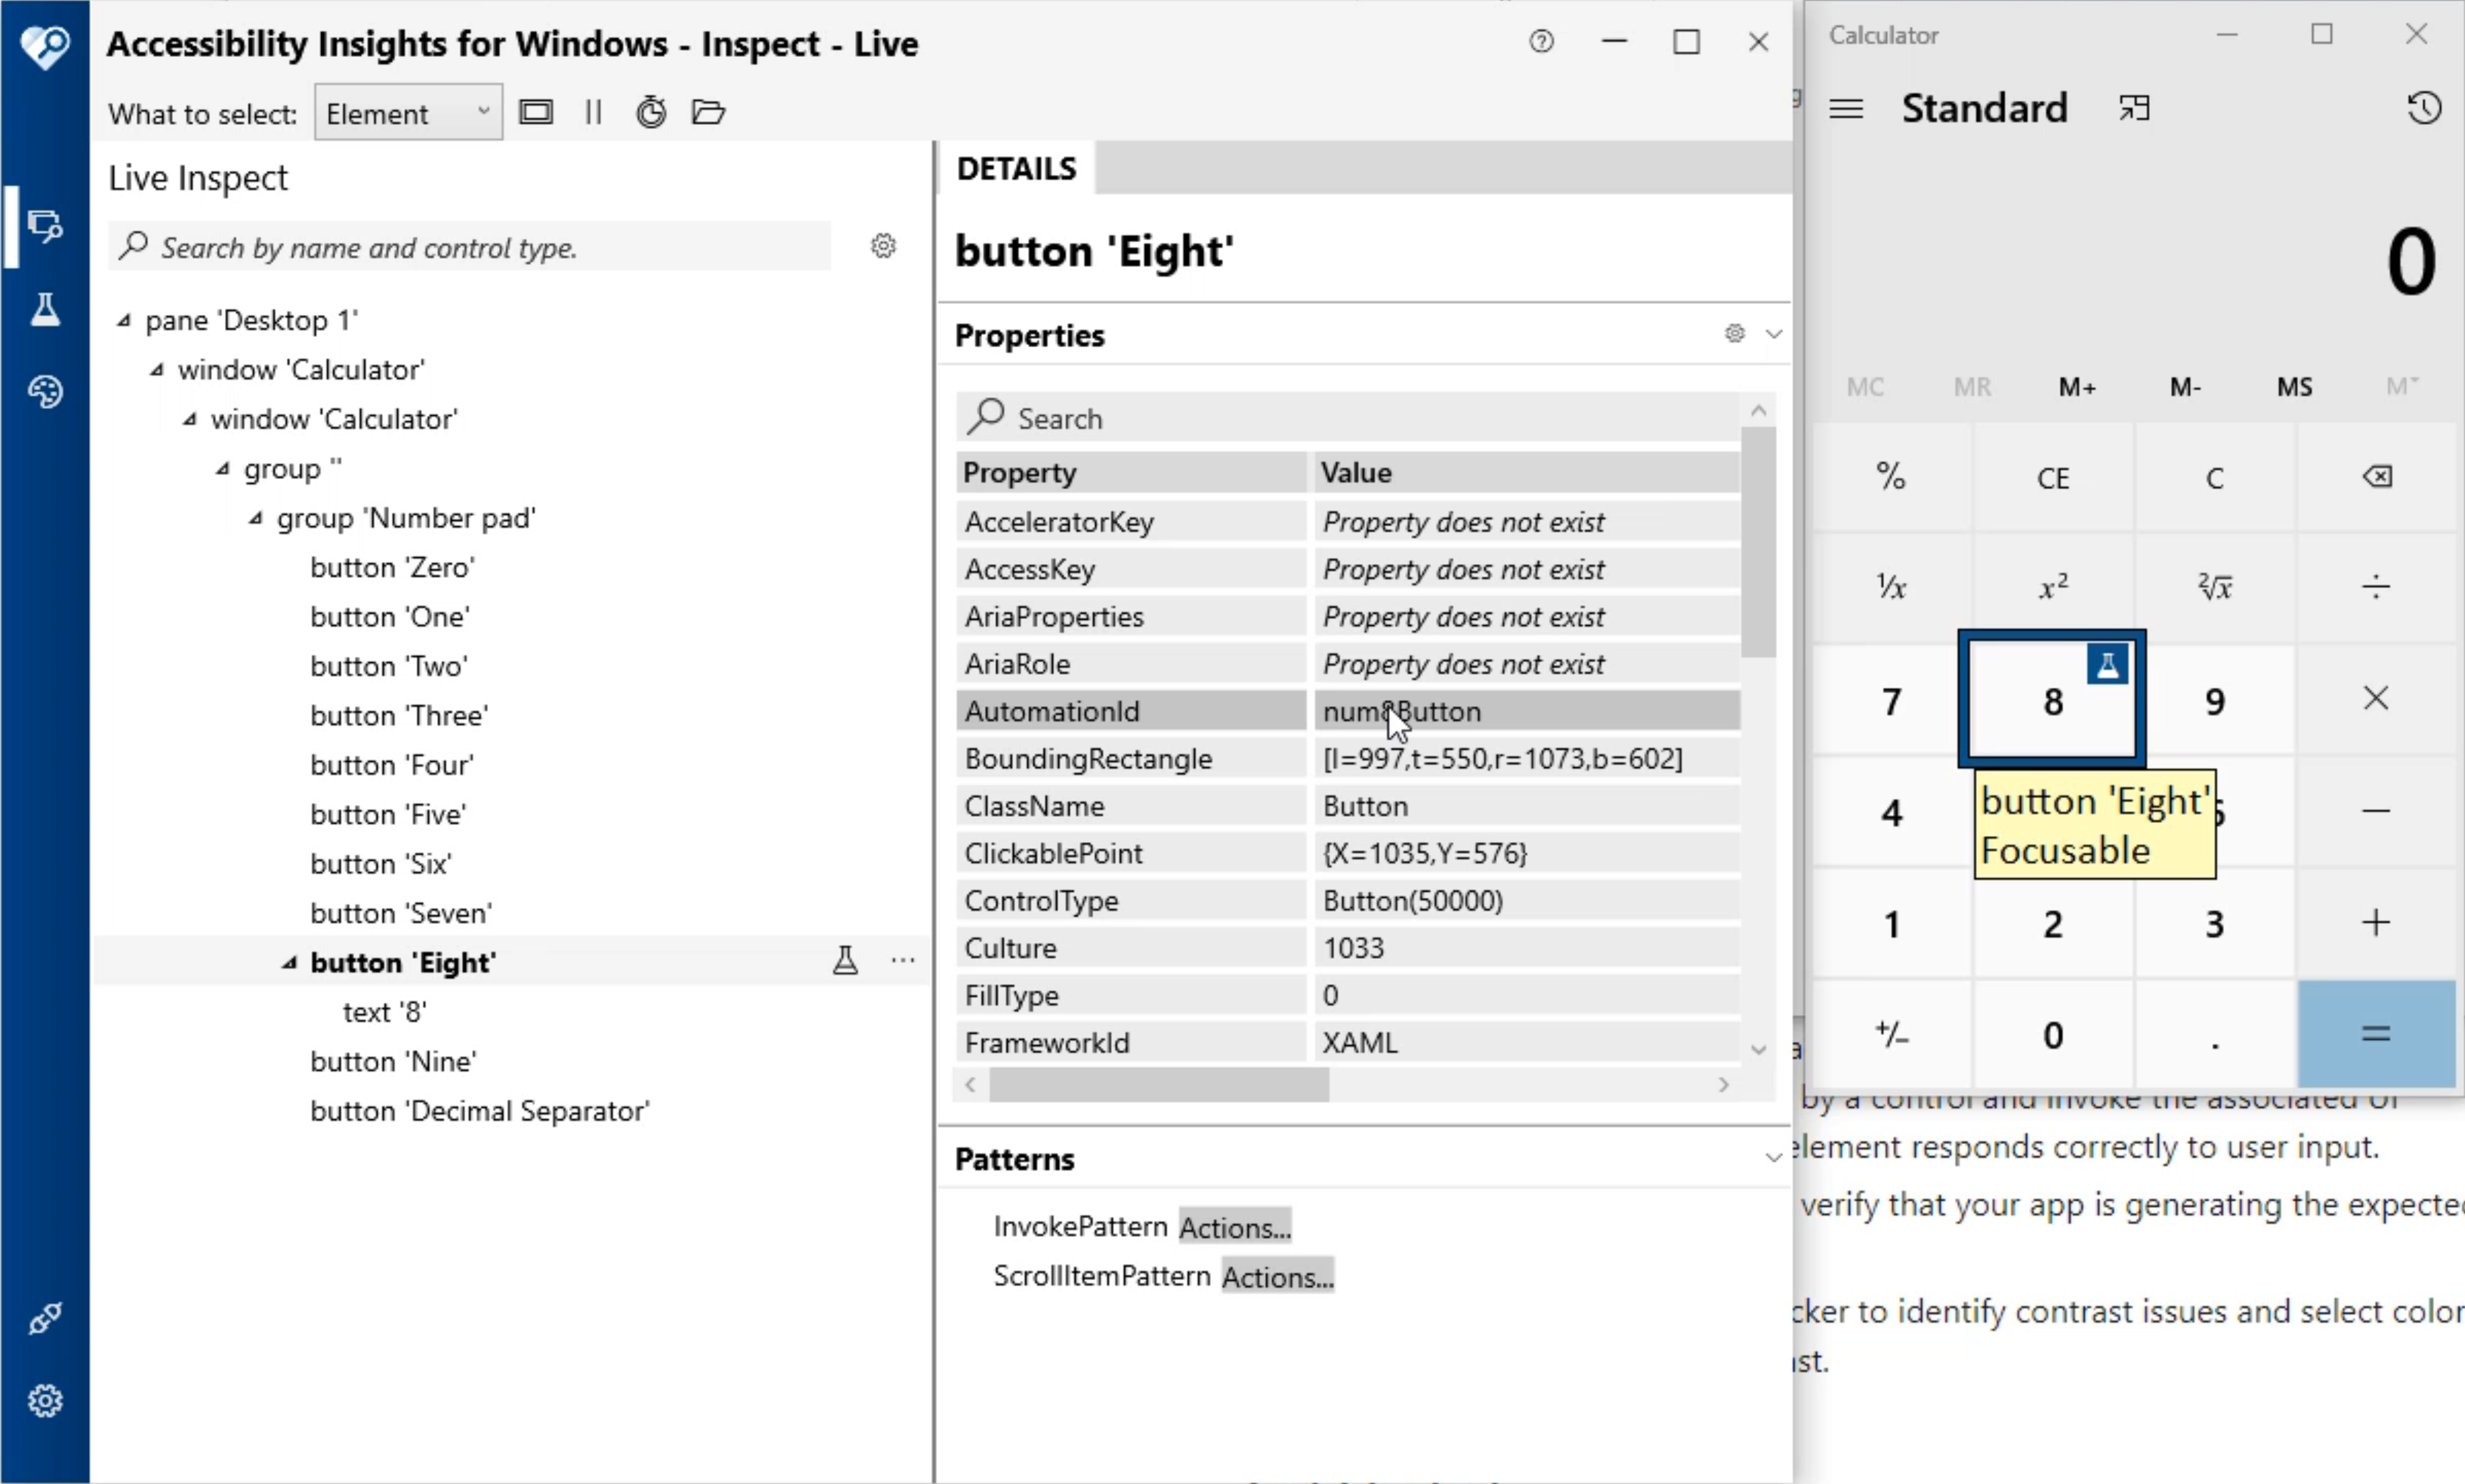
Notice now it's easier to identify the "AutomationId".
Now you can see the "ClassName".
Now you can see this is a little bit easier to look for.
The other thing you'll notice, there's also a "group 'Number pad'".
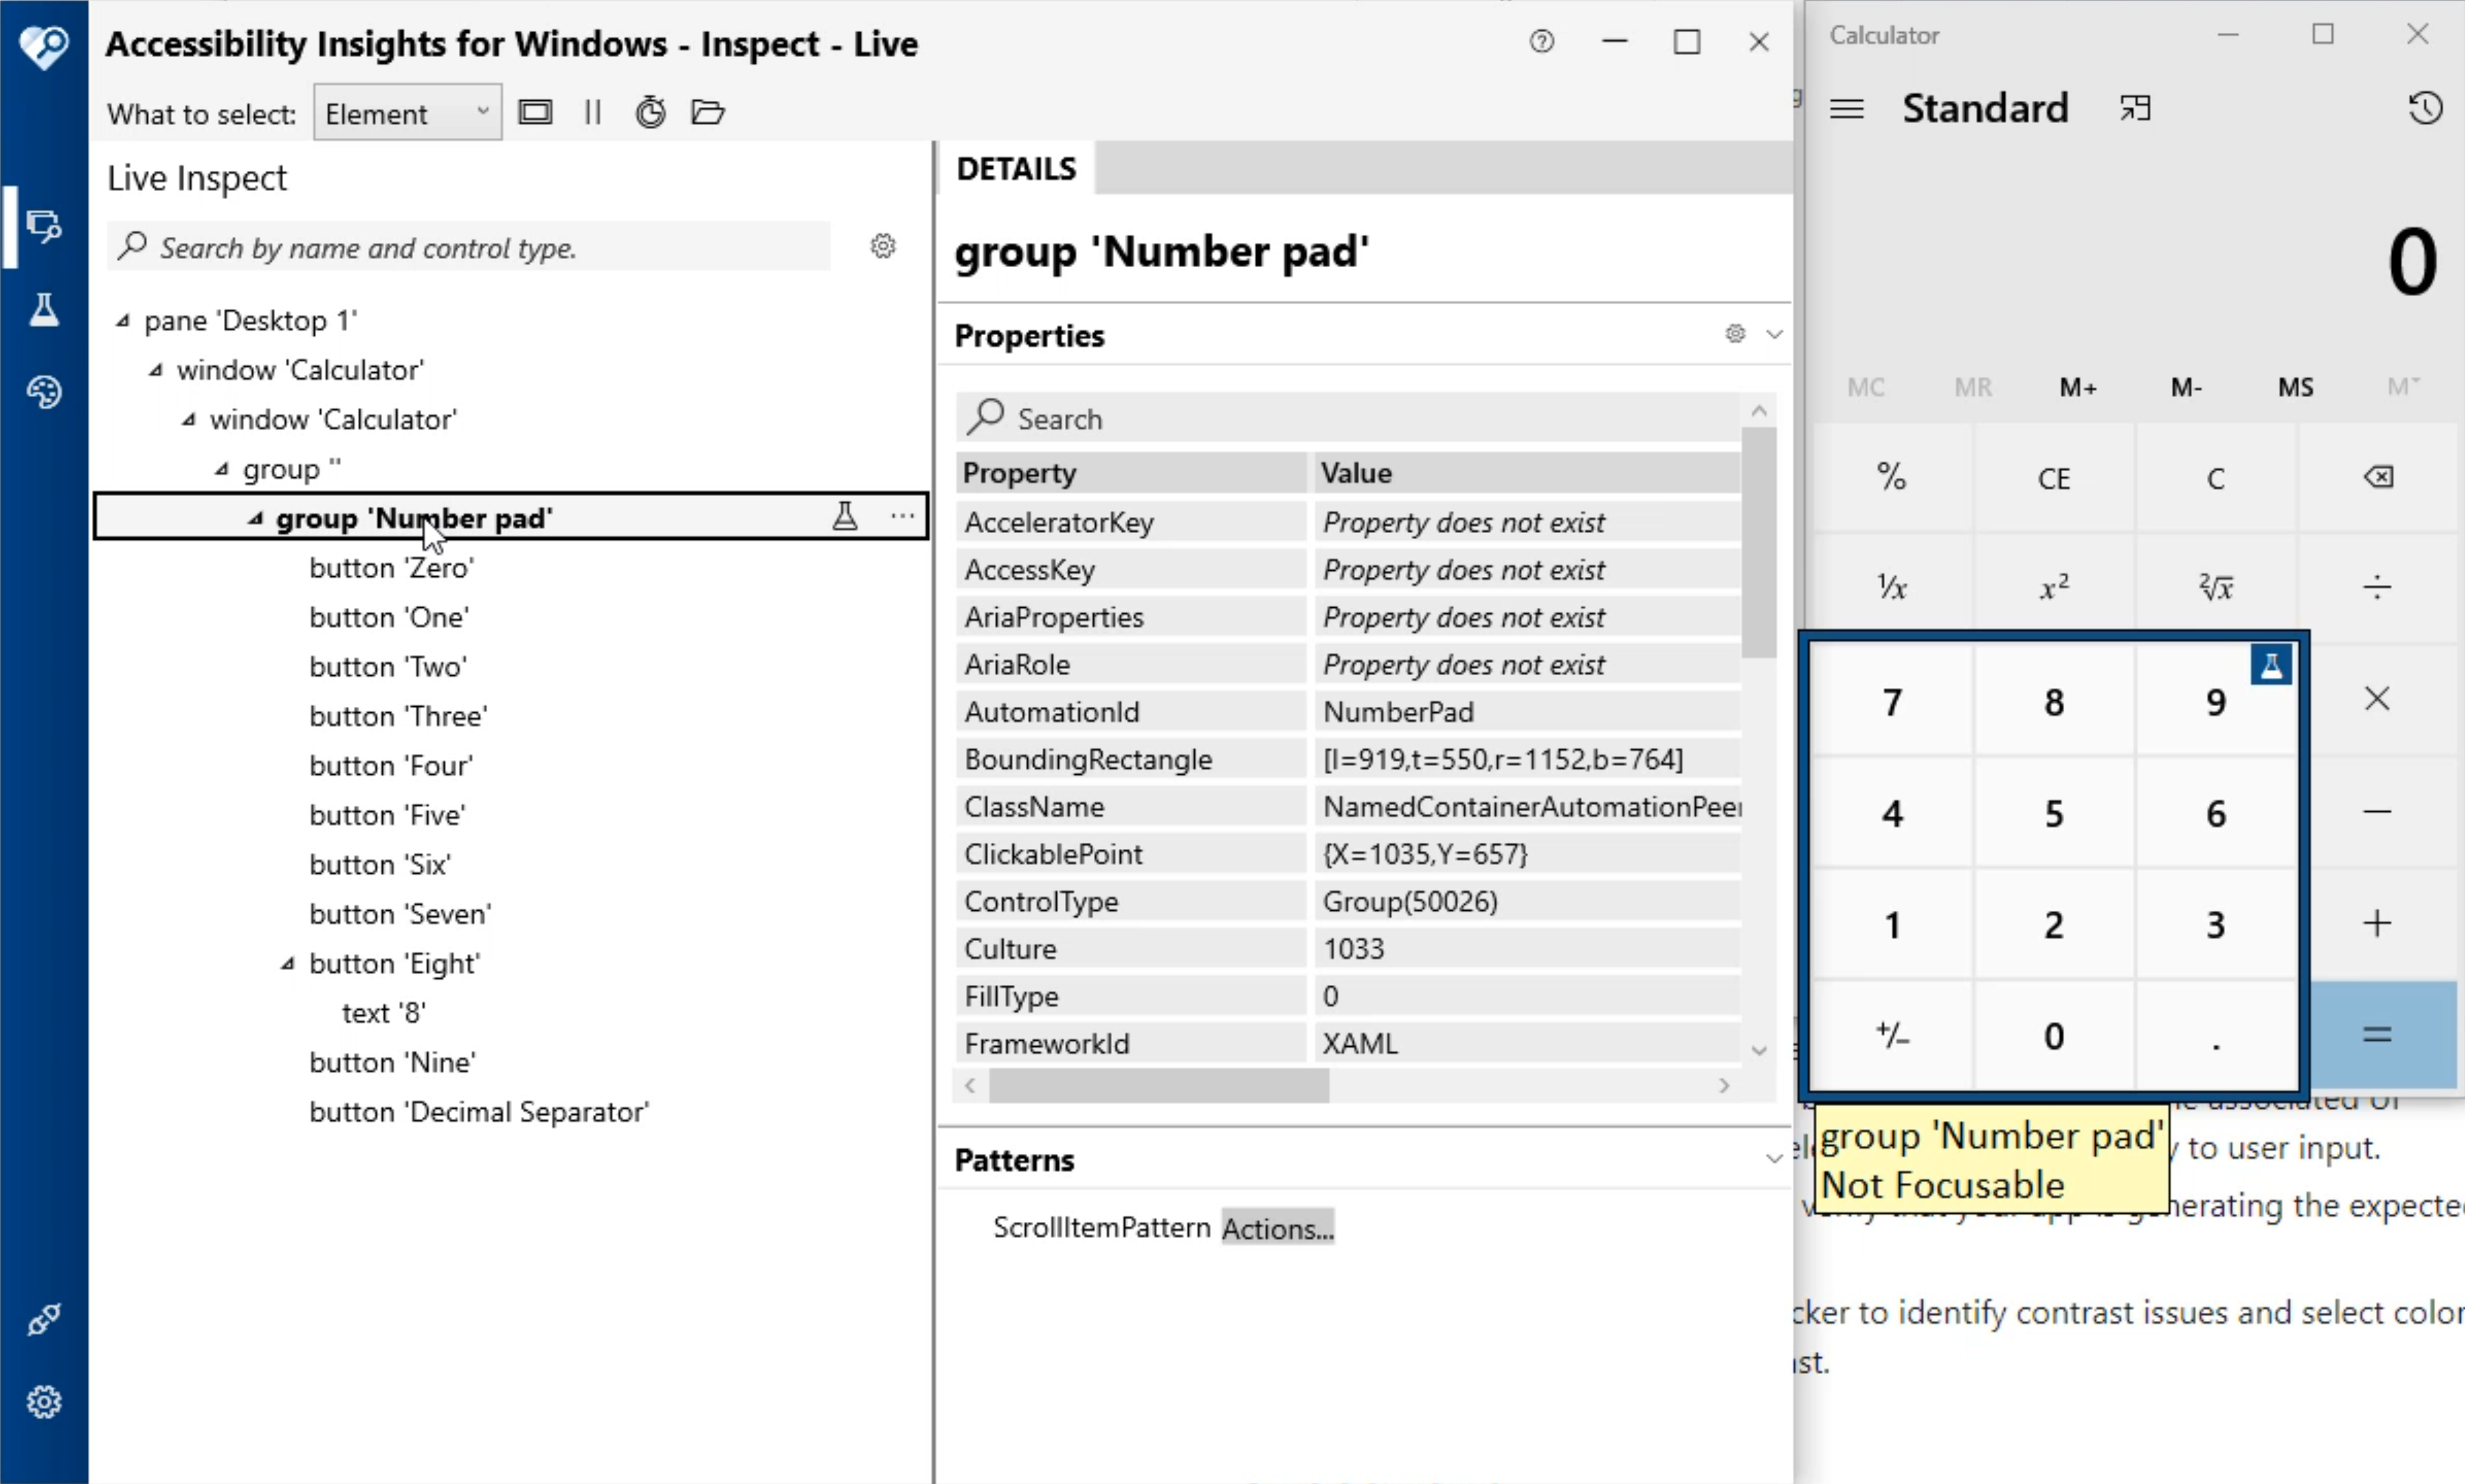
This group number pad highlights the hierarchy for this element tree.
You'll notice that the button 'Eight' is within the group 'Number pad'.
As you highlight more of these elements - when you hover over the 'CE', you can see the clearEntryButton attribute in this "AutomationId".
This would be the ID that you would use or the value that you would use to click on this button in your automation.
Now let's go and download the WinAppDriver.
The WinAppDriver is the engine that will drive our automation.
Let's open up a web browser and type in "winappdriver". Typically, this is the first link that comes up on a Google search.
We're going to go to the github repo.
Inside this repo, we're going to scroll down and we're going to find the first link right here, where it says, "Download Windows Application Driver installer".
It should be under the WinAppDriver releases.
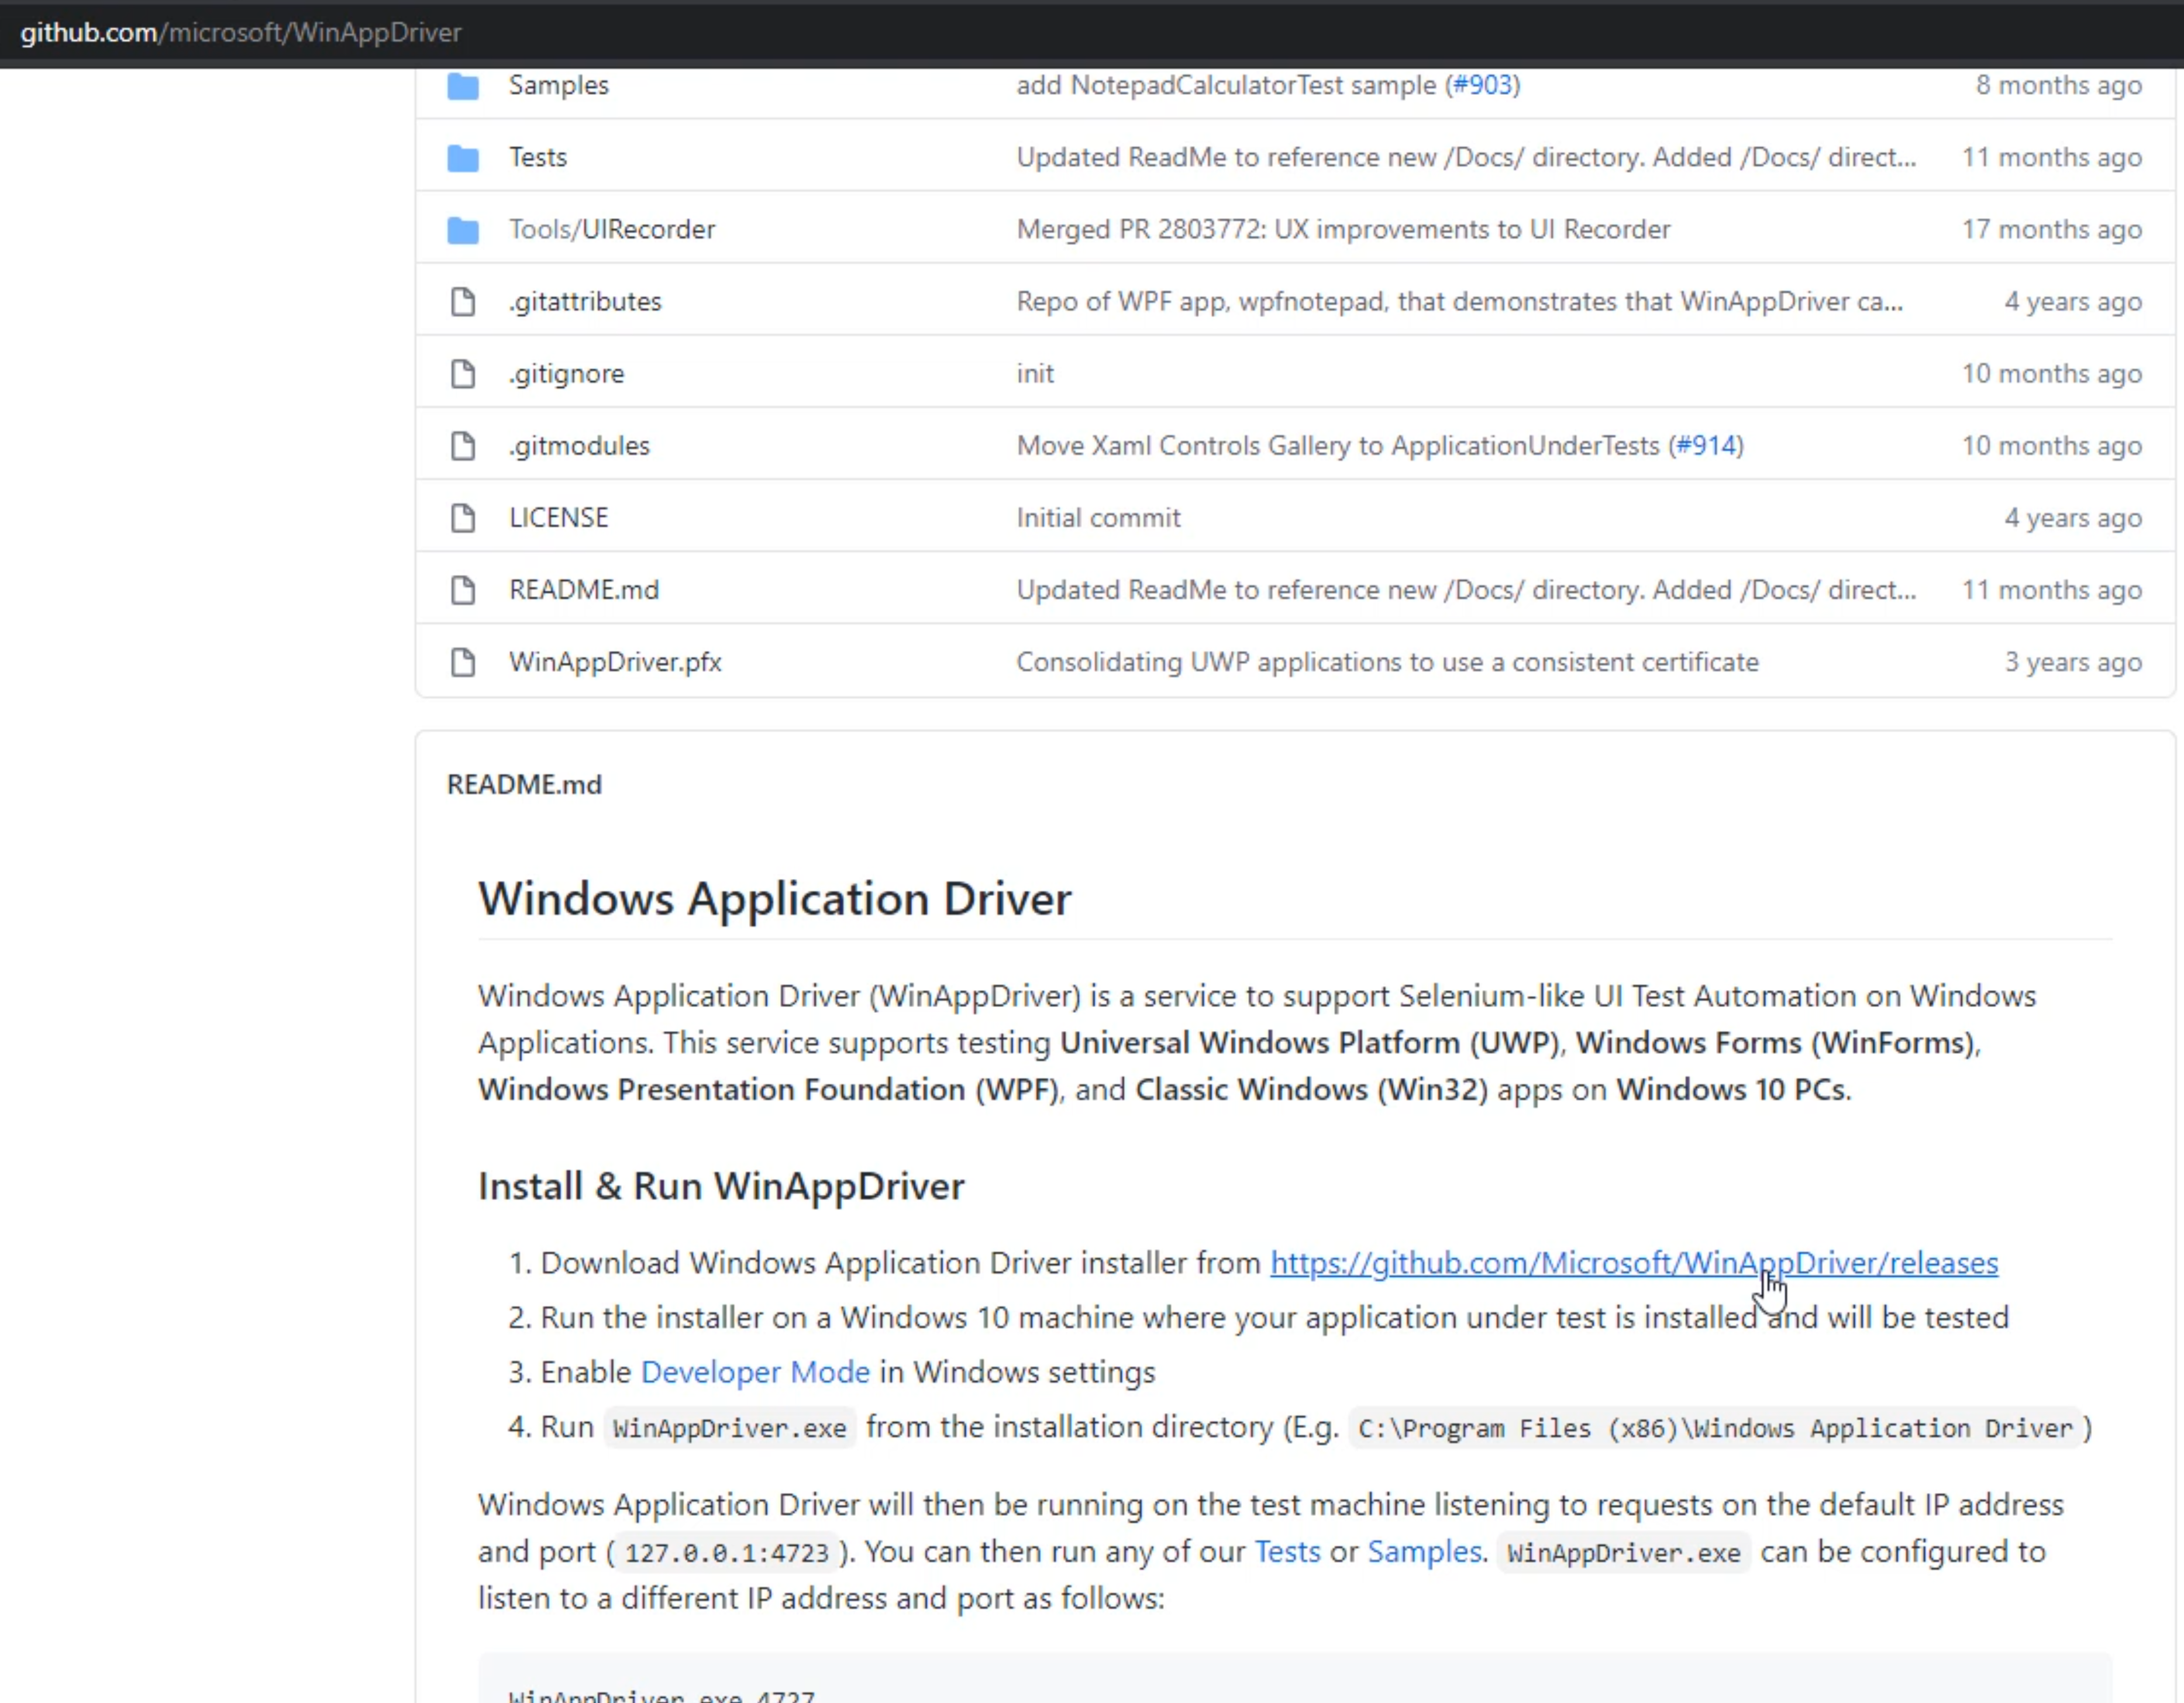
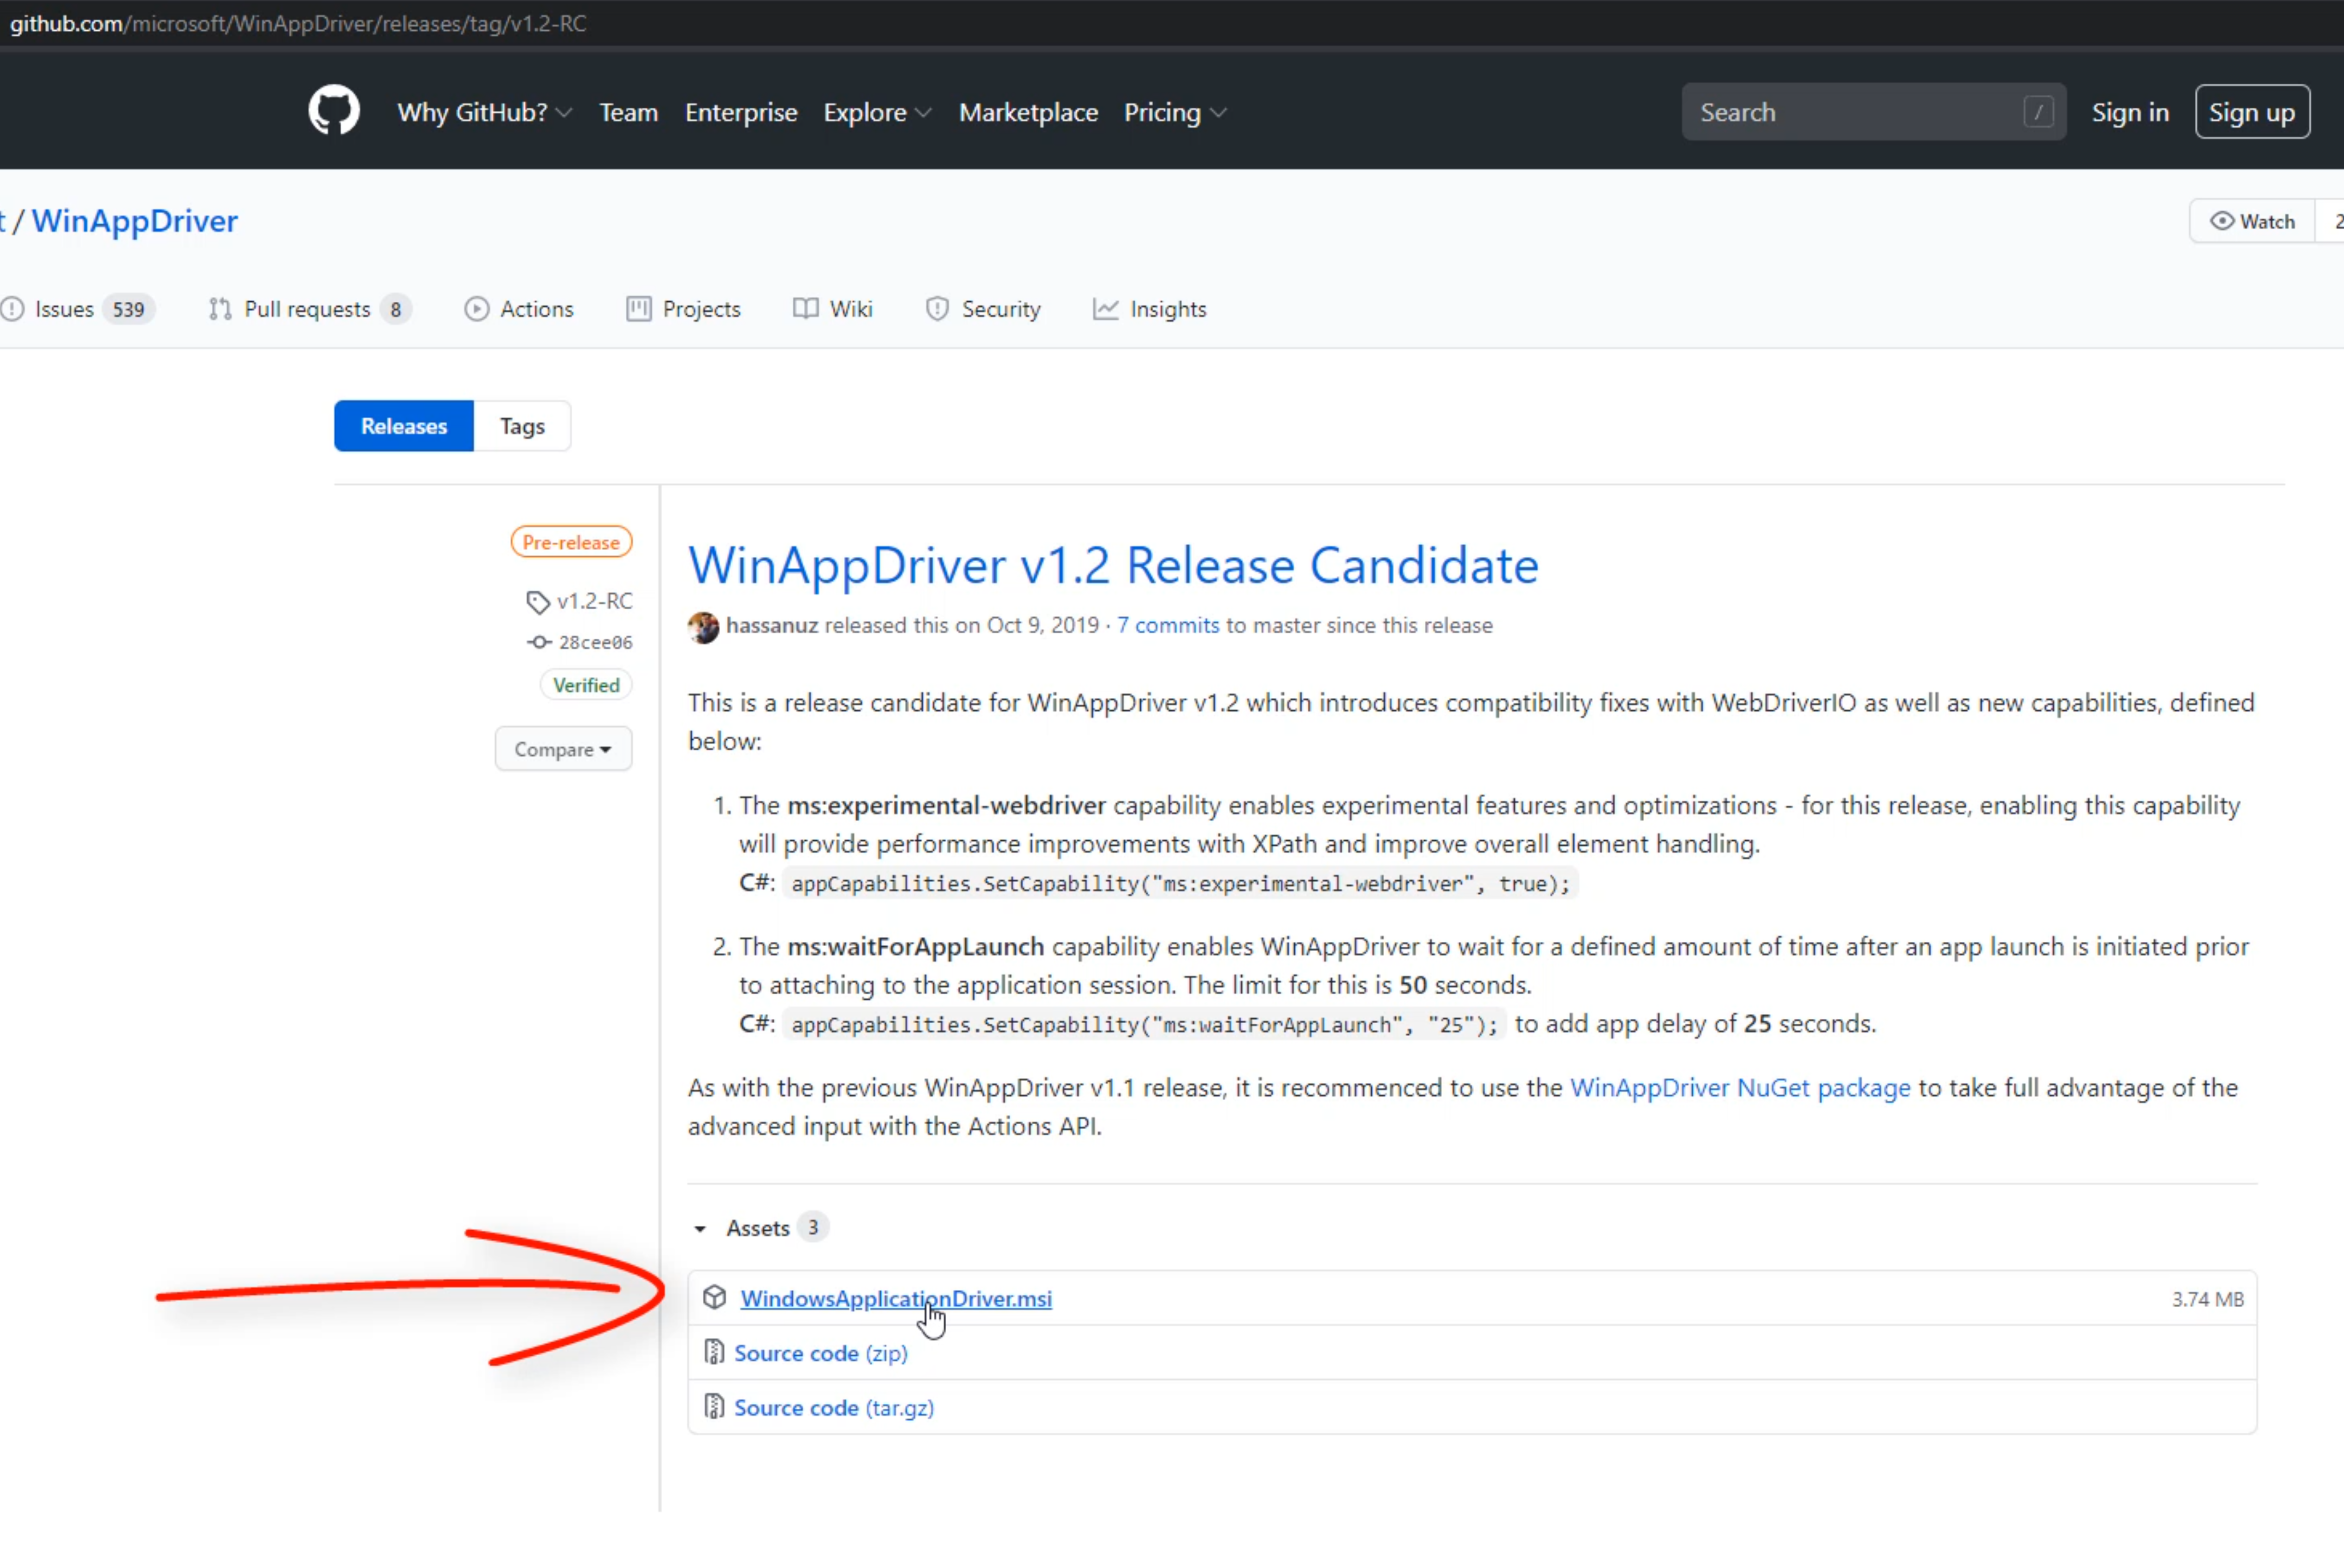
We're going to click on this first link to go to the Release Candidate.
The recording right now is 1.2.
We're going to click on download this WindowsApplicationDriver.msi file.
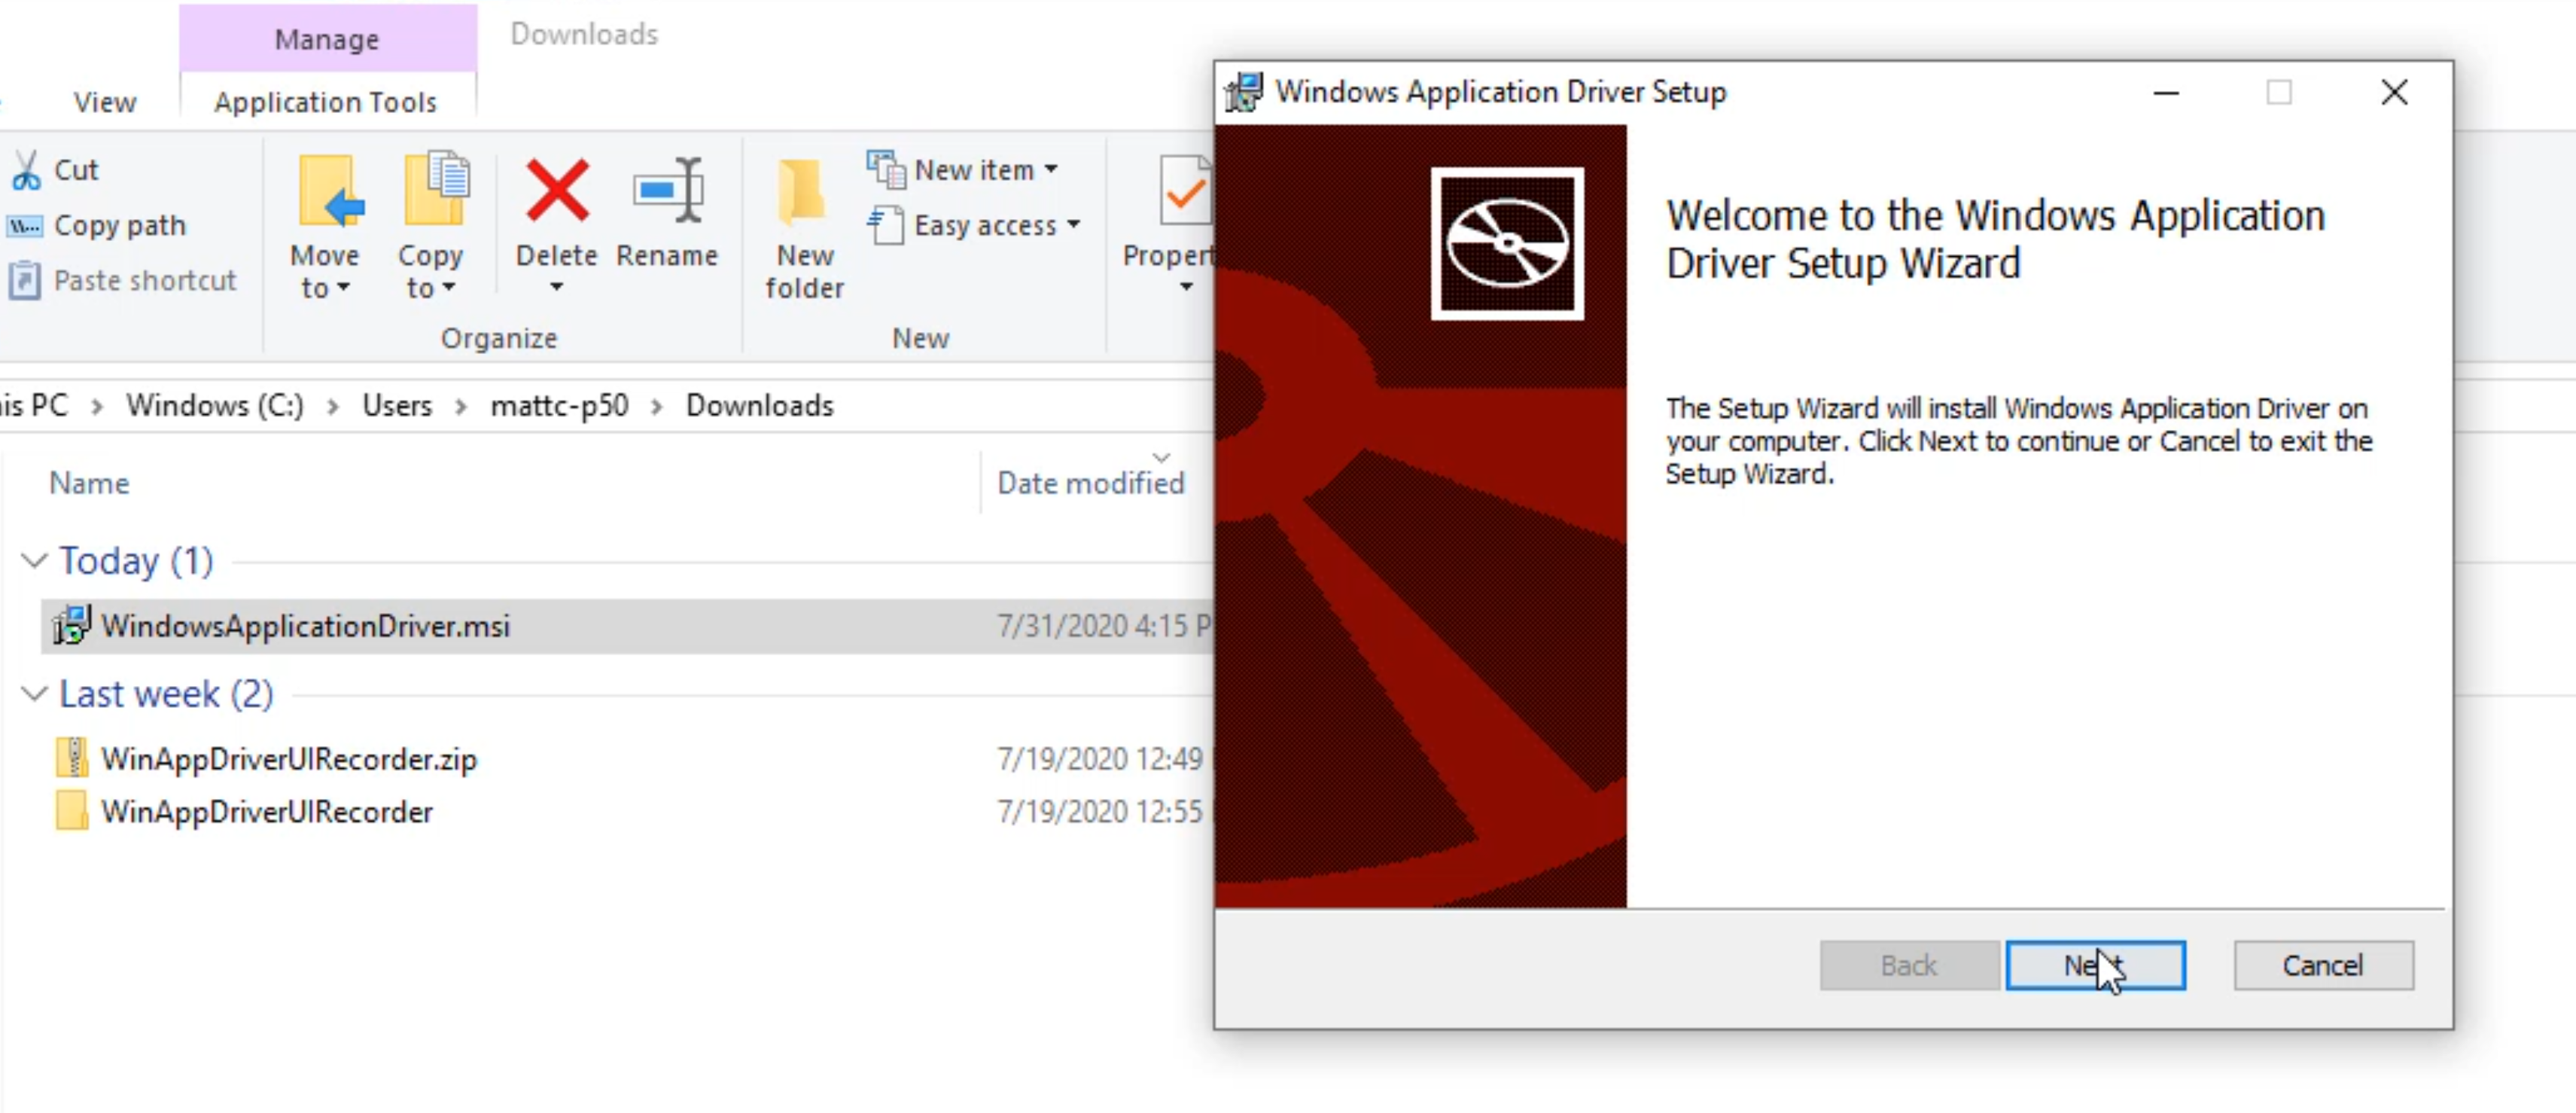
Once it's downloaded, we're going to click on "Show in folder".
It should be in our Downloads folder.
Now we're going to double-click on this and we're going to install this file.
Now that we have WinAppDriver installed, let's search for it and run it to make sure it's installed correctly.
We're going to click on our Search button and type in "winappdriver".
That should show you the WinAppDriver that's installed.
We're going to click on it and you should see the WinAppDriver run.
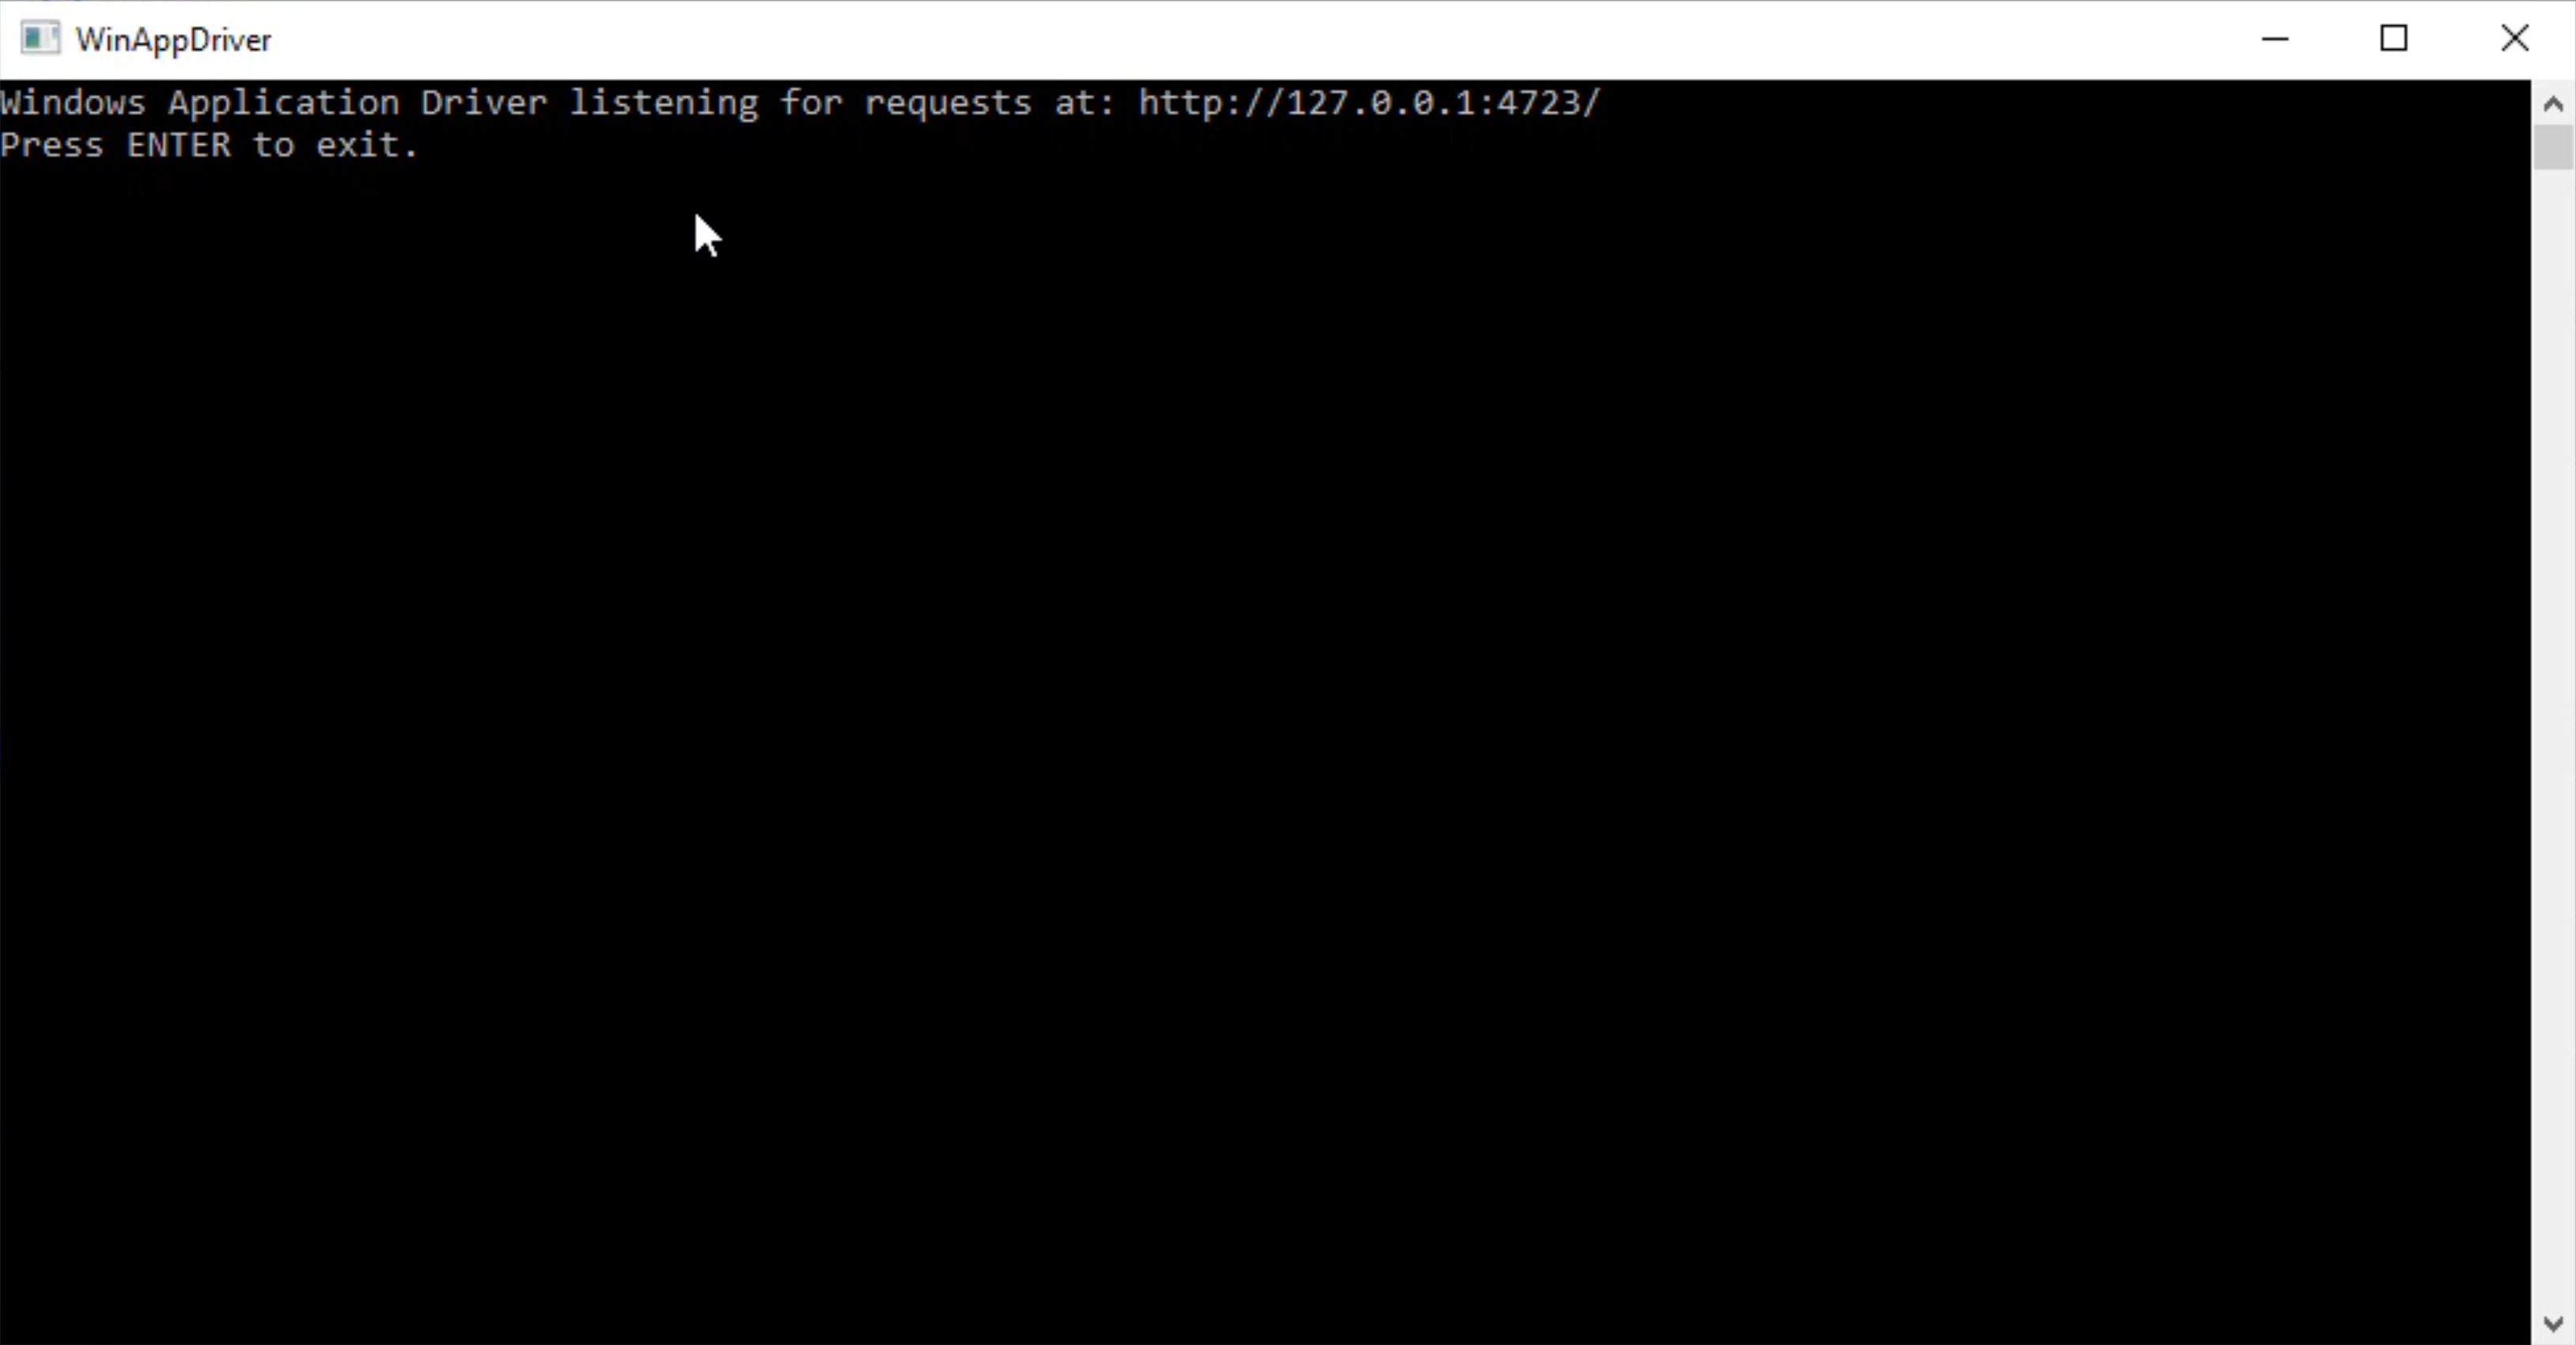
This shows that the WinAppDriver is ready to accept commands to drive your code with an application.
