

Transcripted Summary
Now we'll learn about how to use a mouse movement.
In this situation, we're going to use the Action Class.
To find additional documentation, you can go to https://www.selenium.dev.
These are some of the methods we can use:
clickAndHoldwill move to the middle of the element and click without releasing the left mouse buttoncontextClickmoves the mouse to the element and performs a right clickdoubleClickdouble clicks in the middle of the elementmoveToElementmoves the mouse to the middle of the elementmoveByOffsetmoves the mouse from its current position by the given offset in pixelsdragAndDropperforms a click and hold on their source element and moves to the target element and releases mouseReleasereleases the depressed left mouse button
Now let's go give these methods a try.
# Coding in Java
Let's open up our IntelliJ IDE.
Here's our previous calculator test - CalculatorPO_test.java.
Let's create a new class now.
We'll do this by typing @Test - this will denote that we have a new test.
We'll name this test - public void move().
The first thing we are going to need is the action class - we can do this by typing Actions.
Let's give it a name. We'll call it move = new Actions().
You'll notice here you have a red underline - part of this is because you have to pass a driver into this Action class.
We can do this by passing calcsession - this is our current WindowsDriver.
Now that we have passed calcsession into the Action class, we can utilize it.
Let's create a new line of code. We can type in move., and now you can see the full list of all the methods you have access to.
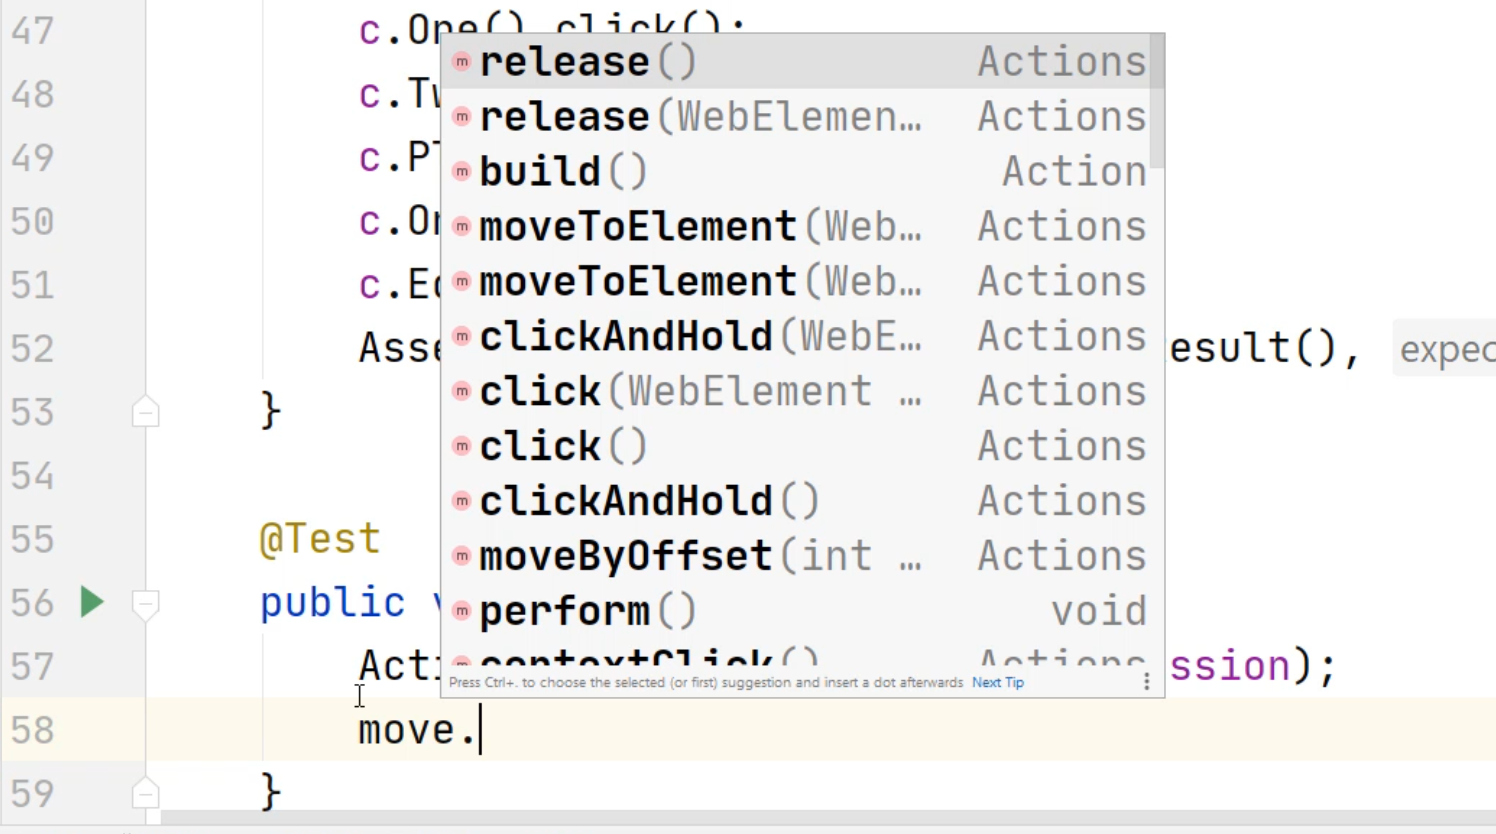
You can give this a try later with all these other methods, but for now, we're going to do the simple one.
We're going to first do a clickAndHold.
You'll notice that you'll see a popup dialog and it says "WebElement target".

Let's go and find a target for what we're going to do for our move.
Let's open up Accessibility Insight and the Calculator.
Now that the Calculator is open, we are going to try to click and move the window.
We can do this typically by moving to the top of the menu bar, click and drag to any position that we want to.
We're going to do the same.
With WindowsDriver, you have to find an element.
So let's hover over this section here.
This right-hand section has a "Minimize", "Maximize" and "Close Calculator".
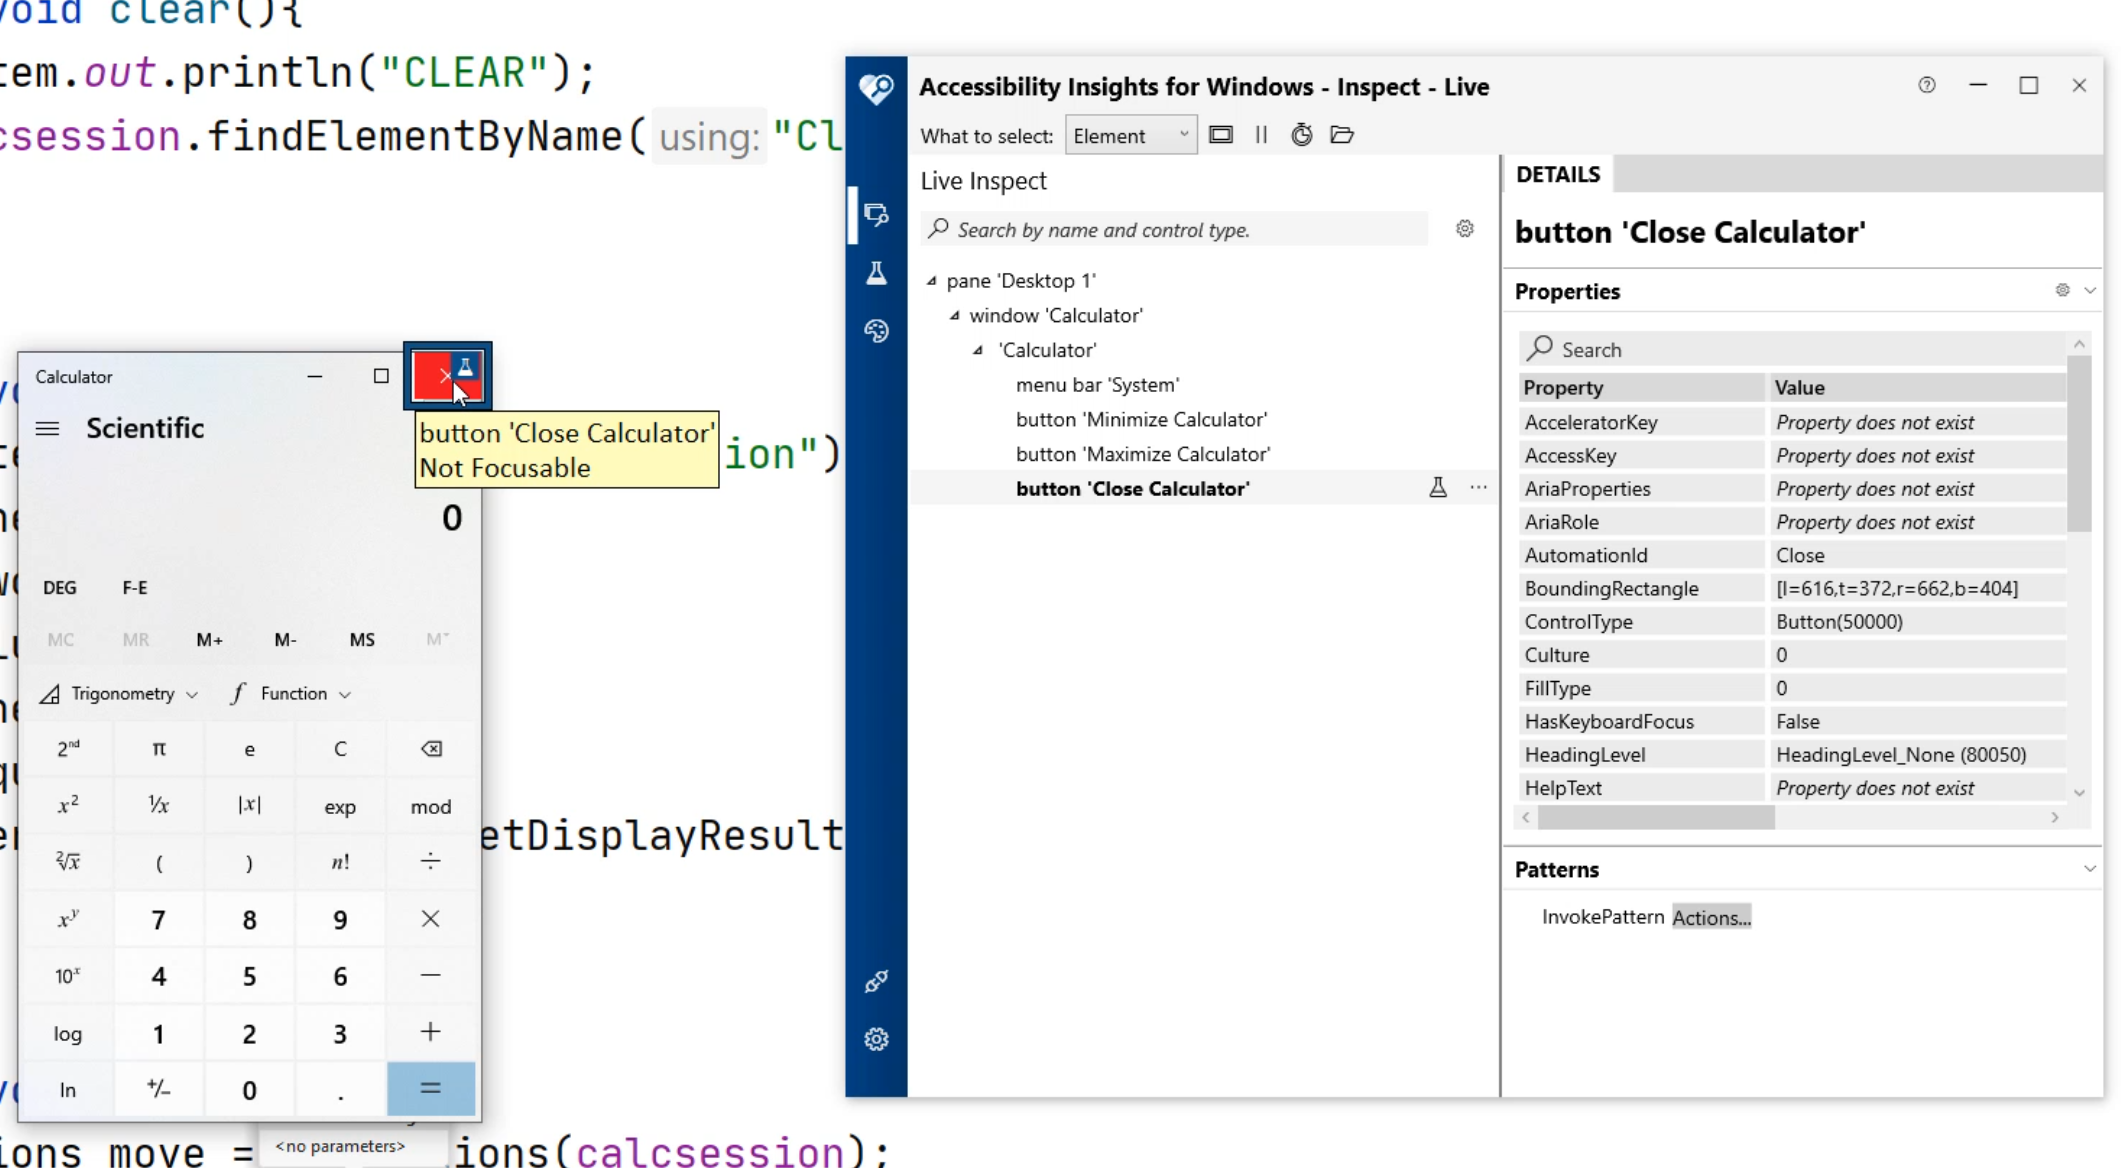
However, if you click the middle of these elements, it will perform an action.
So we want to be able to click at a certain area that does not have an action - let's continue to move left.
Now you'll notice this section where the name of the application is located.
If you look inside the detail section inside the Accessibility Insights, you'll notice there's an AutomationId. We can find that right here.
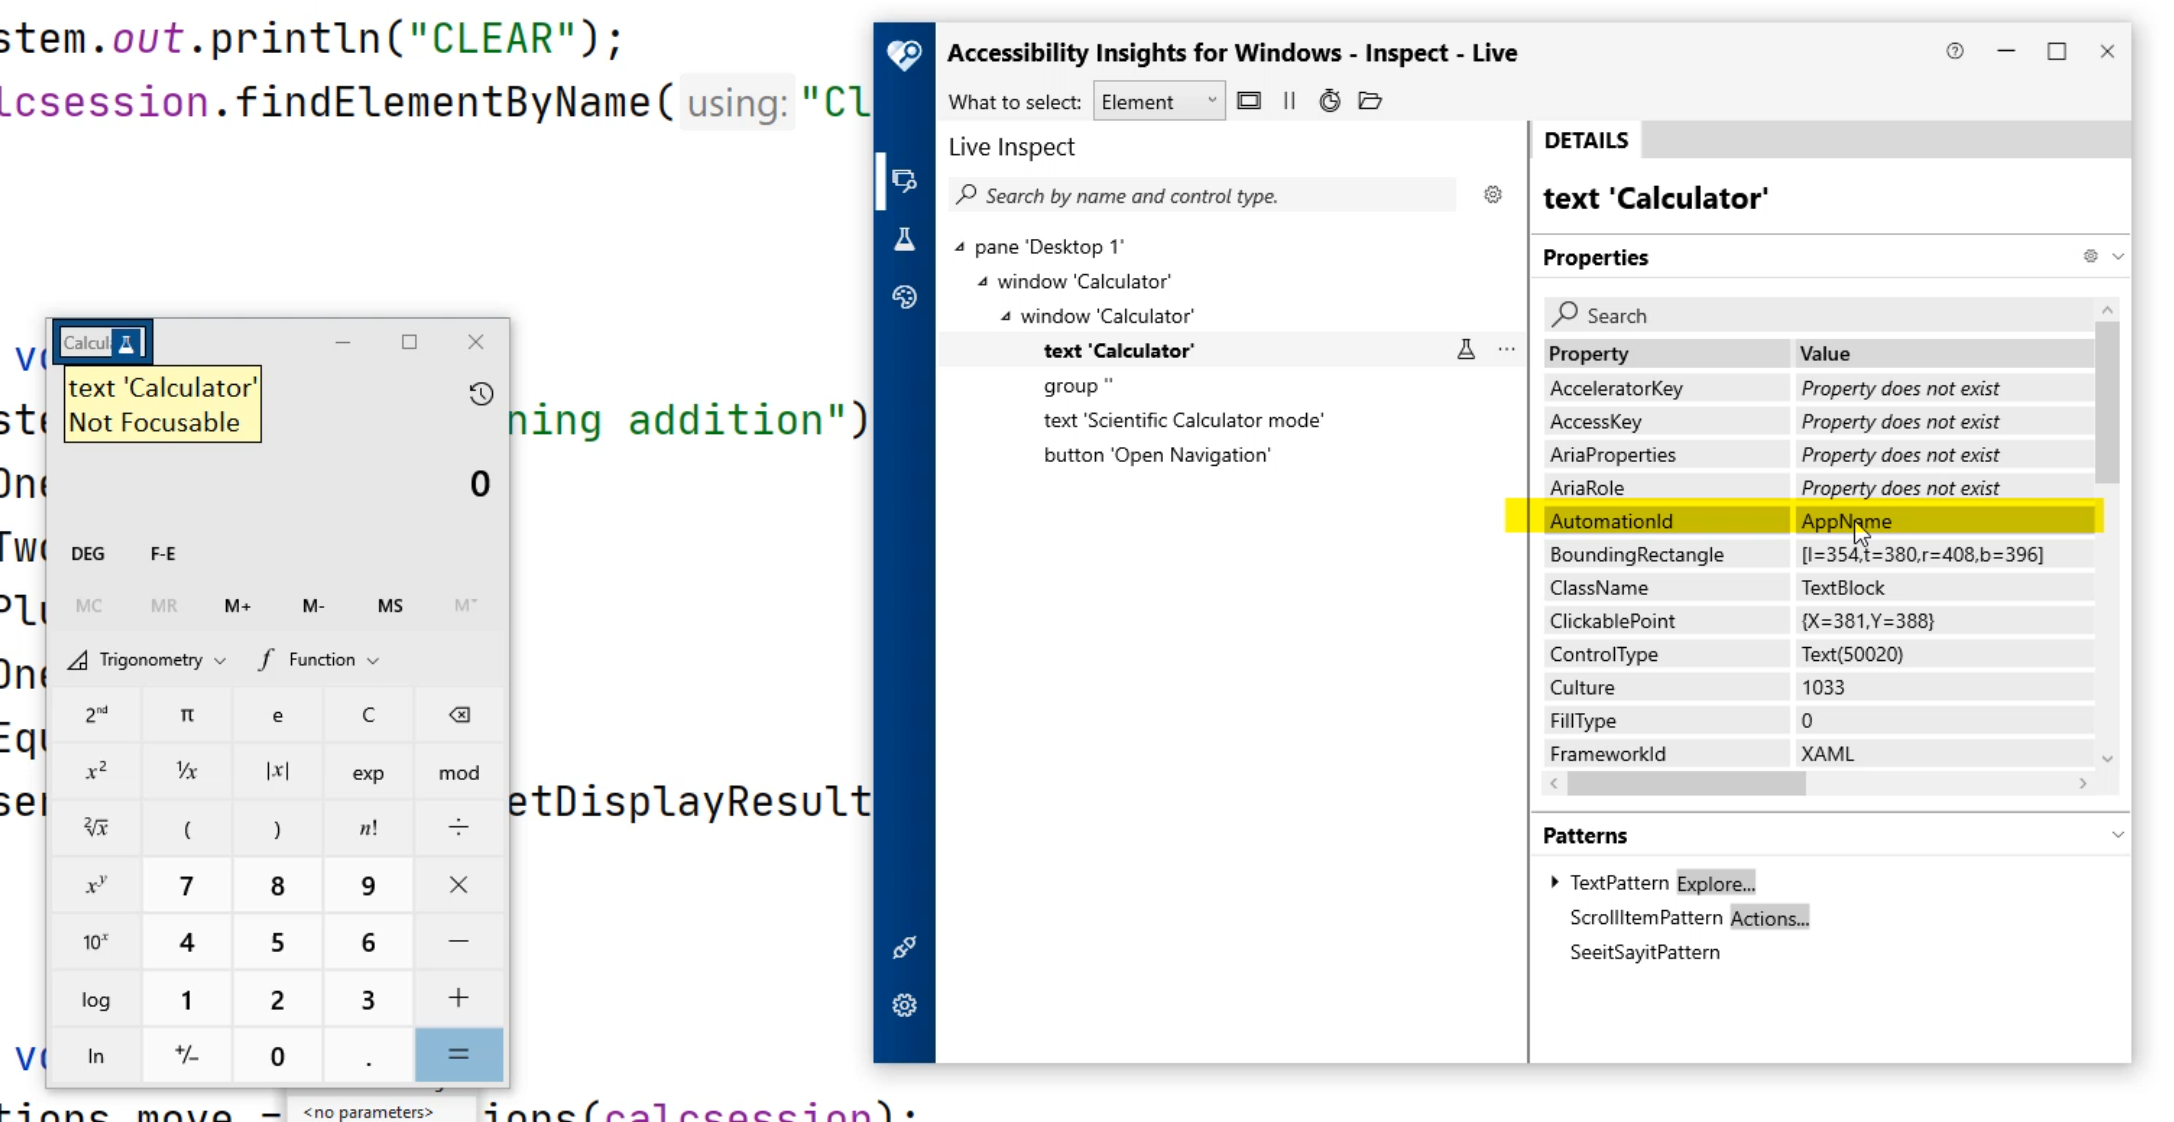
The "AutomationId" is "AppName".
This is what we will use as our initial offset that we are going to start clicking from.
As you can see, if you click on the middle of this element, you can drag and move.
Let's minimize our calculator, pause our UI tree, and disable the highlight.
Here, to find the element that we want to start off from, we're going to type in `calcsession.findElementByAccessibilityId - remember the accessibility ID is the one that maps to "AutomationId".
We're going to type in AppName and let's create a new line.
And here we are going to type in . and we can see additional actions that we can do.
Let's do the moveByOffset.
Inside the parentheses, we're going to put the X and Y coordinates of what we want to move to offset by - let's do 50, 50.
What we're going to do is move the window 50 pixels to the right and 50 pixels down on your screen.
Let's click on a new line. Now let's type in `.release() and then below this, we're going to create a new line.
We're going to type in .build().perform().
With WindowsDriver, what you want to do with the mouse actions is you want to chain your actions together - that's what we are doing now.
We are chaining the mouse movement with a clickAndHold, moveByOffset by 50 pixels, and then release the mouse button.
After we give the move object all the steps we want to take, we have to do a build and perform.
import org.openqa.selenium.interactions.Actions;

    @Test
    public void move() {
        Actions move = new Actions(calcsession);
        move.clickAndHold(calcsession.findElementByAccessibilityId("AppName"))
                .moveByOffset(50, 50)
                .release()
                .build().perform();
    }
}
Let's see if this works at this point.
Let's click on the play icon and select "Run 'move()'".
That was pretty quick. Did you see it happen?
If not, let's try a couple more steps so you can see it happen.
Let's minimize our console.
Now after the action, we're in type in Thread.sleep, and we're going to put a sleep of three seconds - the value is in milliseconds. 3000 milliseconds equals three seconds.
You also notice that sleep here has an "Unhandled exception" error.
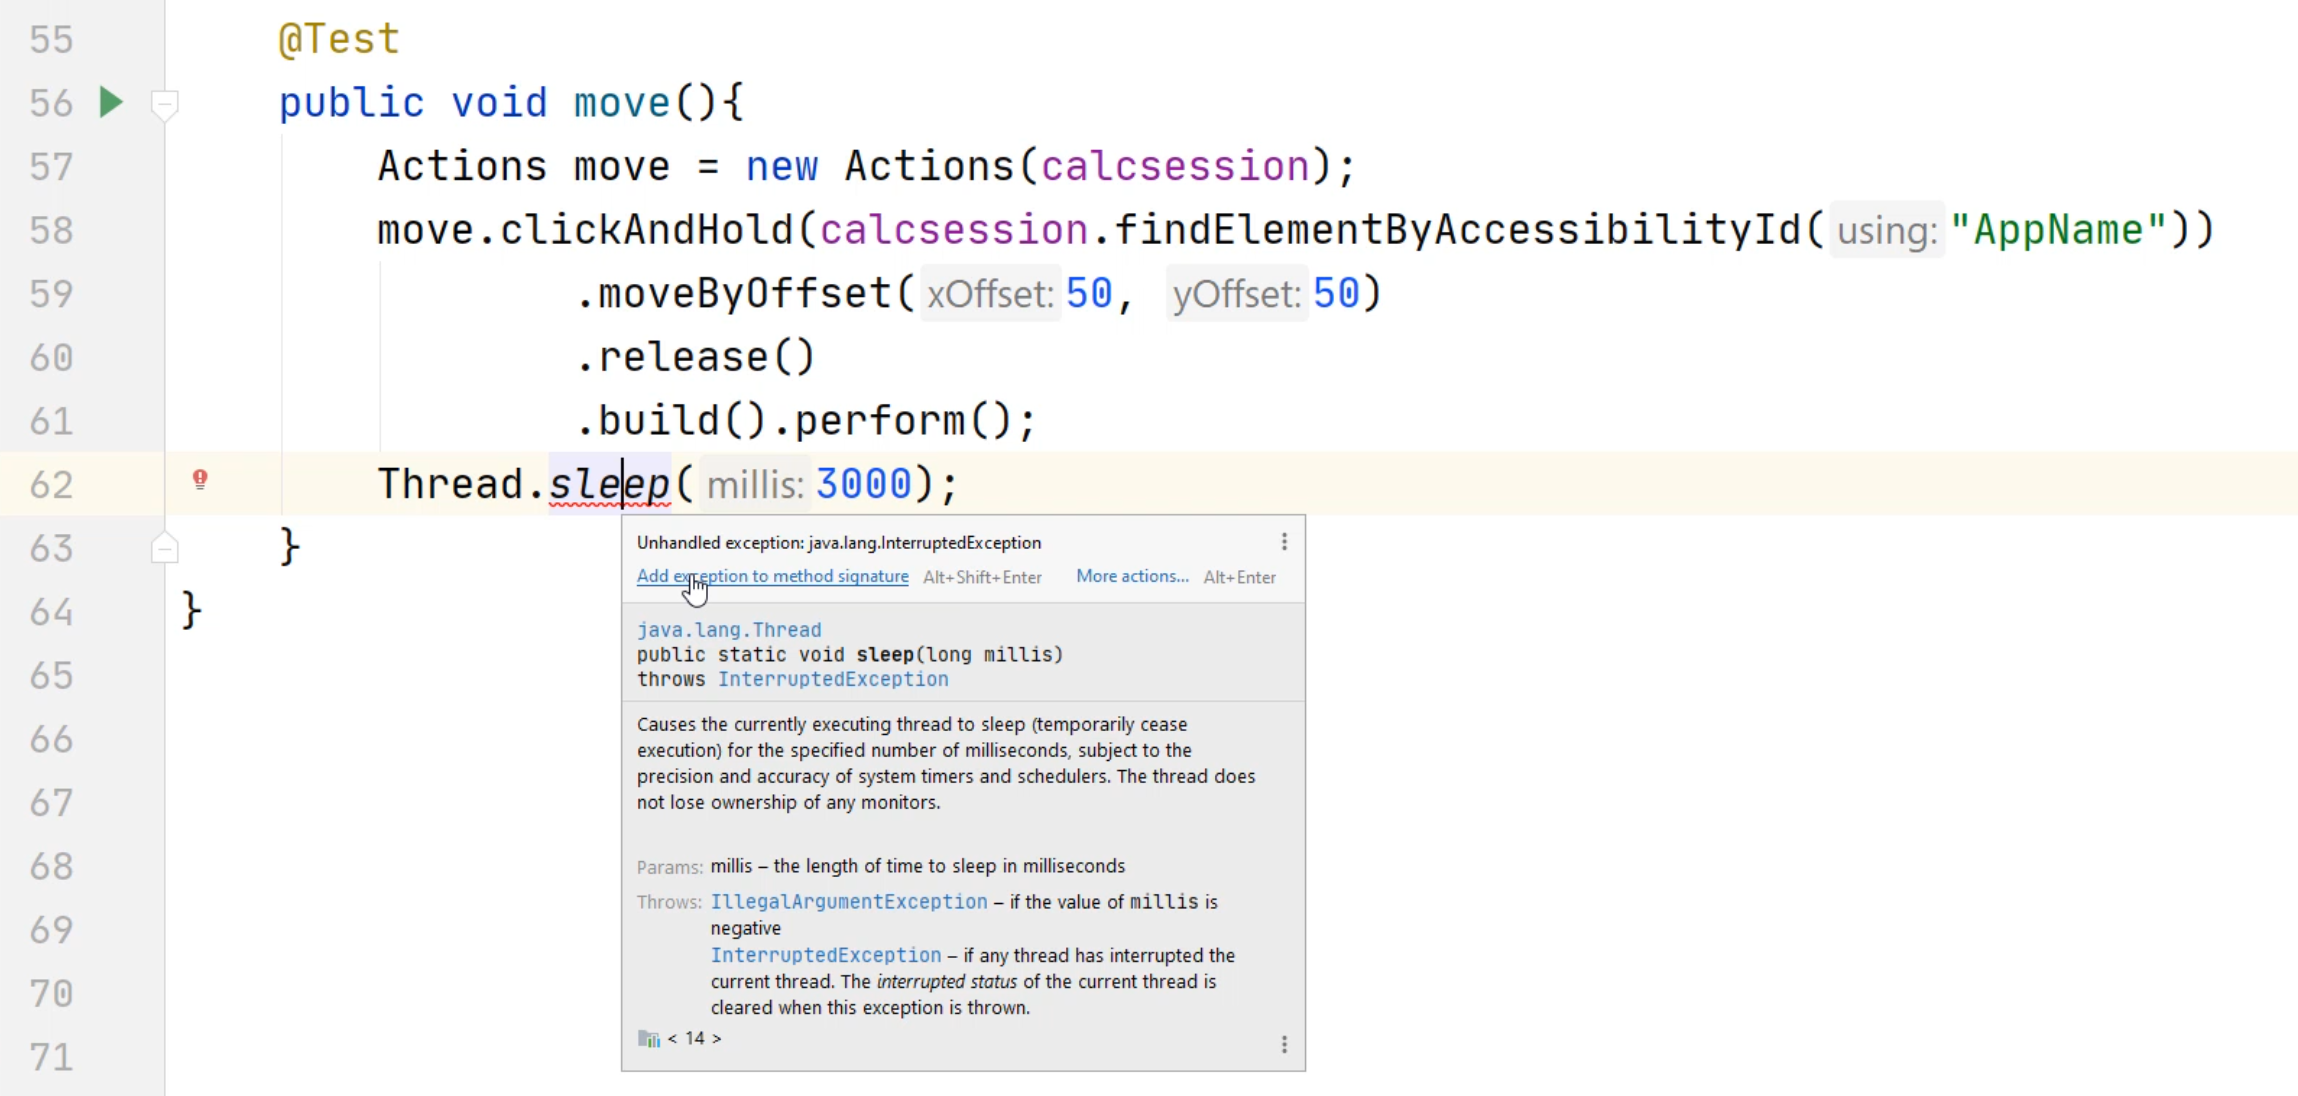
There are a couple options you can do.
One is you can hover over the text and say "Add exception to method signature".
This will solve the problem that you were seeing.
Let's create a new line of code.
Rather than typing additional code in, what we're going to do is just copy and paste.
We'll select the previous code that we typed in, right-click, "Copy", right-click, "Paste".
Here we're going to do a -50 pixels - so we're going to do -50 and -50.
This will return our window back to its original position.
Along the way, after it moves 50 pixels, it's going to wait for three seconds.
After waiting three seconds, it will move the position back to the original location.
import org.openqa.selenium.interactions.Actions;

    @Test
    public void move() throws InterruptedException {
        Actions move = new Actions(calcsession);
        move.clickAndHold(calcsession.findElementByAccessibilityId("AppName"))
                .moveByOffset(50, 50)
                .release()
                .build().perform();
        Thread.sleep(3000);
        move.clickAndHold(calcsession.findElementByAccessibilityId("AppName"))
                .moveByOffset(-50, -50)
                .release()
                .build().perform();
    }
}
Let's give this a try now. Let's click on this play button and select "Run 'move()'".
Here it's waiting and there it returns back to the original position.
Let's try a couple more methods.
First we're going to type in move.clickAndHold() and we're passing in calcsession.findElementByAccessibilityId() and we're going to find that same title area.
This time we're going to do a .moveToElement() and we're going to go move to the "One" button.
With the "One" button, you can use our Calc_PO object that we created earlier.
Type in c.One() - remember the c.One() will return a WebElement - this can be the target that we're moving to.
Create a new line. Type in .release().build().perform().
import org.openqa.selenium.interactions.Actions;


    @Test
    public void move() throws InterruptedException {
        Actions move = new Actions(calcsession);
        move.clickAndHold(calcsession.findElementByAccessibilityId("AppName"))
                .moveByOffset(50, 50)
                .release()
                .build().perform();
        Thread.sleep(3000);
        move.clickAndHold(calcsession.findElementByAccessibilityId("AppName"))
                .moveByOffset(-50, -50)
                .release()
                .build().perform();
        move.clickAndHold(calcsession.findElementByAccessibilityId("AppName"))
                .moveToElement(c.One())
                .release()
                .build().perform();
    }
}
Now let's give this a try.
I'll click on the play button and select "Run 'move()'".
Now it's waiting for three seconds.
Notice the clickAndHold moved the element a little bit further down on our window.
Let's minimize our console and try one last one.
This time we're going to try the contextClick.
The contextClick() does a right-click with your mouse button.
We're going to type in move.contextClick.
Before we select one of these, notice there's two different options.
One is a contextClick.
One is a contextClick with a WebElement - you can see that right here.
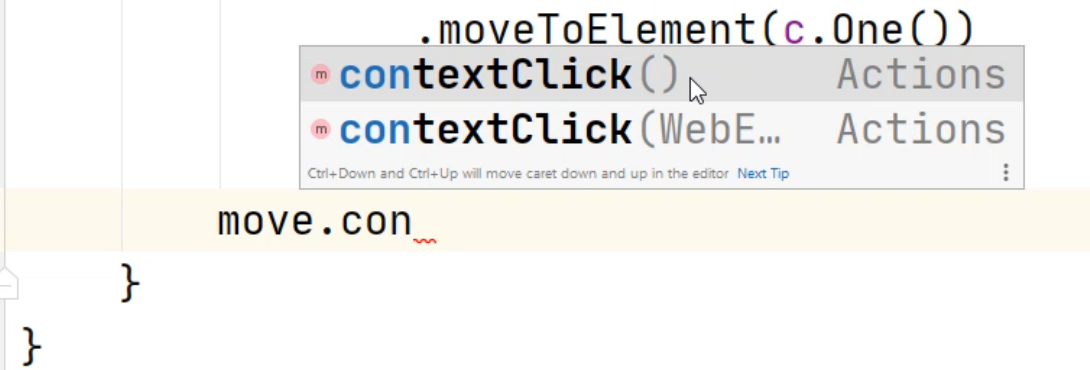
The difference between the two is the first contextClick() will just perform the right-click wherever the mouse is currently located.
The second contextClick() will move to the center of the WebElement and perform a right-click - let's do that now.
We're going to select this WebElement one.
We're going to type in calcsession.findElementByAccessibilityId("AppName").build().perform().
Type in Thread.sleep() and this time we'll put in 5000 milliseconds.
import org.openqa.selenium.interactions.Actions;


    @Test
    public void move() throws InterruptedException {
        Actions move = new Actions(calcsession);
        move.clickAndHold(calcsession.findElementByAccessibilityId("AppName"))
                .moveByOffset(50, 50)
                .release()
                .build().perform();
        Thread.sleep(3000);
        move.clickAndHold(calcsession.findElementByAccessibilityId("AppName"))
                .moveByOffset(-50, -50)
                .release()
                .build().perform();
        move.clickAndHold(calcsession.findElementByAccessibilityId("AppName"))
                .moveToElement(c.One())
                .release()
                .build().perform();
        move.contextClick(calcsession.findElementByAccessibilityId("AppName"))
                .build()
                .perform();
        Thread.sleep(5000);
    }
}
Let's run this test one last time.
Do you see the context click?
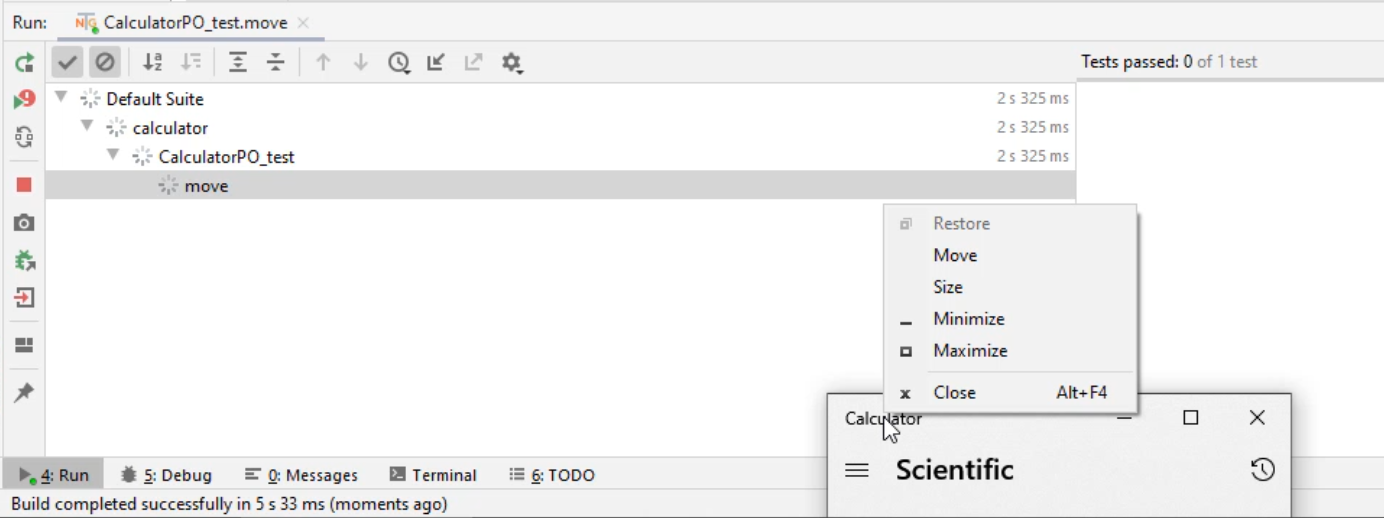
Now your Calculator will close.
At this point, you should be fluent enough with WebDriver to try the other actions and give it a try yourself.
# Coding in Python
Let's now try the action builders in Python.
Let's go to our Python project.
We can continue to use this calculatorPO_test.py example.
First, let's go to the top of the file and type in imports.
We are going to have to import from the Selenium library instead of the Appium library.
Here, we are going to type from selenium.webdriver.common.action_chains import ActionChains - action_chains is the library that we want to import.
This will allow us to chain our actions together, and this will work with the Appium WebDriver.
Let's go down to the end of our project and create ourselves a new test.
We'll call this def test_movecalc - we're just going to move the calculator.
To match your Java example, first we're going to declare a variable move = ActionChains() and that's expecting a WebDriver.
In our example, our driver is self.calcsession - we'll pass the calcsession into this ActionChains.
Next we'll create a new line of code.
We're going to type in move.click_and_hold().
Now we need to add the element that we want to click and hold from.
We're going to do self.calcsession.find_element_by_accessibility_id() and the "AutomationId" that we used previously in the Java example is called "AppName".
Now we'll select the move_by_offset and it's expecting an offset. We'll do 50, 50, and we will do a .perform().
Notice that we don't have to do the build here.
Also notice that this line of code is really long now.
What we can do is before each of these actions, you can hit "Enter" similar to what we did in Java.
Be careful if you manually try to type this \ in - that is utilized to denote a continuation of each line of code.
import unittest
from appium import webdriver
from calc import calc_PO
from selenium.webdriver.common.action_chains import ActionChains

    def test_movecalc(self):
        move = ActionChains(self.calcsession)
        move.click_and_hold(self.calcsession.find_element_by_accessibility_id("AppName"))\
            .move_by_offset(50, 50)\
            .perform()
Let's copy this bit of code, and we'll paste it back in here, and we'll move the Calculator back to its original location.
Now we'll do a -50, -50.
Next, we are going to do a move.context_click().
We're going to do the context click in the "AppName" section so we can just copy this locator and now we're ready to run our test.
import unittest
from appium import webdriver
from calc import calc_PO
from selenium.webdriver.common.action_chains import ActionChains

    def test_movecalc(self):
        move = ActionChains(self.calcsession)
        move.click_and_hold(self.calcsession.find_element_by_accessibility_id("AppName"))\
            .move_by_offset(50, 50)\
            .perform()
        move.click_and_hold(self.calcsession.find_element_by_accessibility_id("AppName")) \
            .move_by_offset(-50, -50) \
            .perform()
        move.context_click(self.calcsession.find_element_by_accessibility_id("AppName"))
