

Transcripted Summary
Welcome back. In the last video we spoke a bit about desired capabilities and now we'll be going a bit more in depth about it.
But first let's go ahead and make 2 adjustments to our project.
In the last video, if you remember clearly, we ran over this by using ./node_modules/.bin/wdio and then the name of the config file which is “wdio.conf.js”.
Now, let's go ahead and copy this command and open our package.json and navigate to scripts and test.
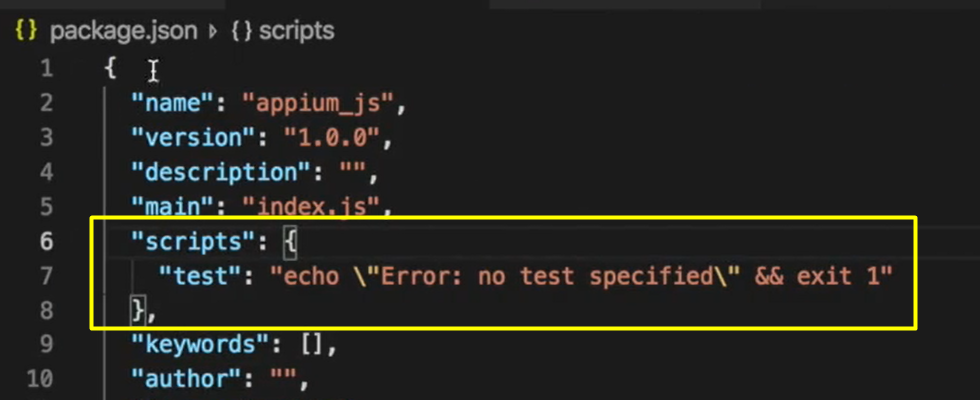
We can replace what's currently in the String with that command and what that will do is we're now able to run our test by just saying npm test.
  "scripts": {
    "test": "./node_modules/.bin/wdio wdio.conf.js"
  },
So, it executes that command for us and runs our test with a very simple command.
Next, we want to look in our config file.
And within our capabilities, you'll notice that we had to specify the full path to our APK which is something that we don't necessarily want to do because this might change per device and we don't want that to mess up our project.
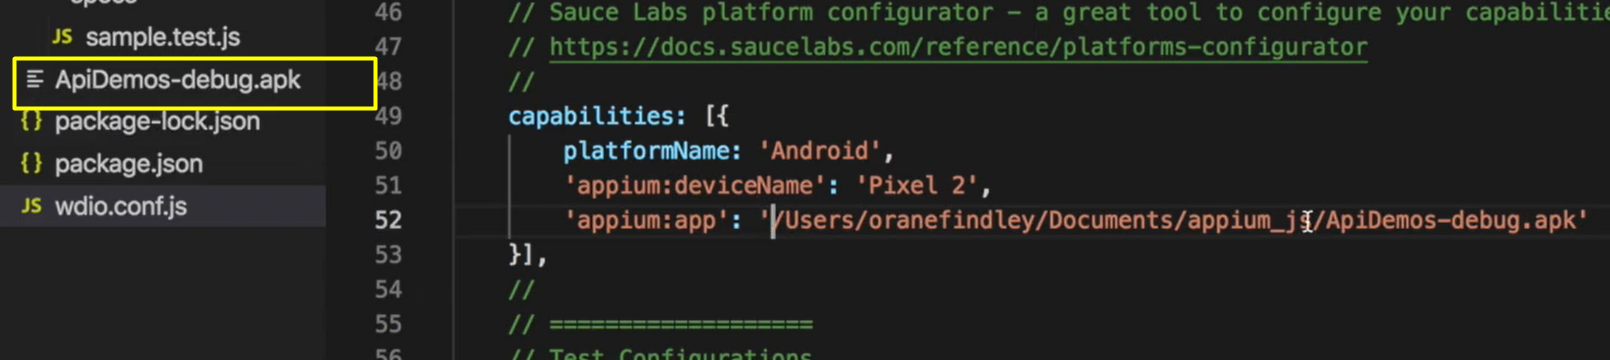
Also, we already have our APK within our project so it would be good if we could just reference our APK by ./ and the name of the APK being that it's on the same level with our config file.
    capabilities: [{
        platformName: 'Android',
        'appium:deviceName': 'Pixel 2',
        'appium:app': './ApiDemos-debug.apk'
    }],
How we can do this is by requiring the path and using join from path at the top of the config file (path comes built in with node.js.).
So, let's say.
let { join } = require('path');
If we require “join from path”, what that will do, join joins 2 Strings and that will be translated into the full path for our application, our APK.
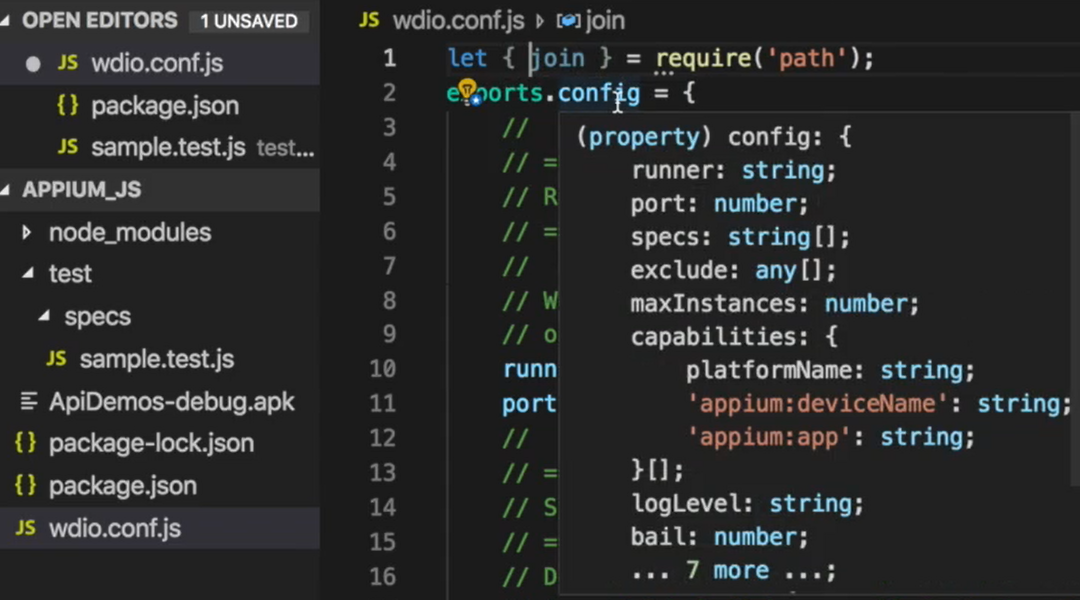
So, let's go ahead and specify join down in our capabilities section of the wdio.conf.
What we'll need to do, we'll need to get our current working directory and join that with this path that we have here in the String.
So, to get that we can just type process.cwd with a comma, like this:
    capabilities: [{
        platformName: 'Android',
        'appium:deviceName': 'Pixel 2',
        'appium:app': join(process.cwd(), './ApiDemos-debug.apk')
    }],
And that will join the result from the current working directory with this APK path, which gives us the finishing path to our APK.
Okay, great.
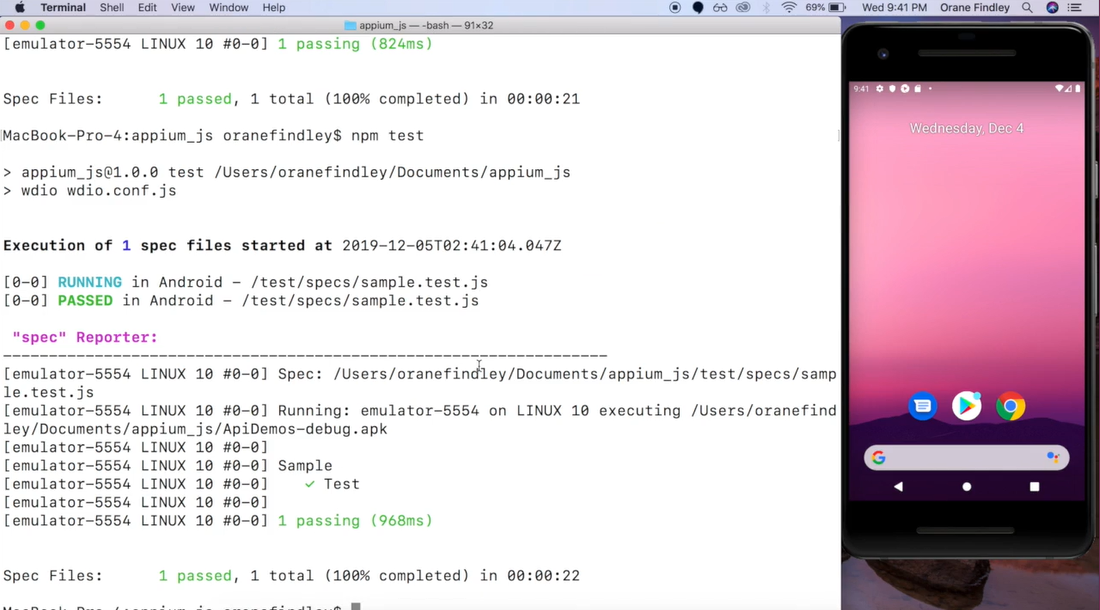
Everything still works.
Now let's move on into desired capabilities.
# What are desired capabilities?
Desired capabilities are settings or options that you can specify to run your app in a specific way when doing testing.
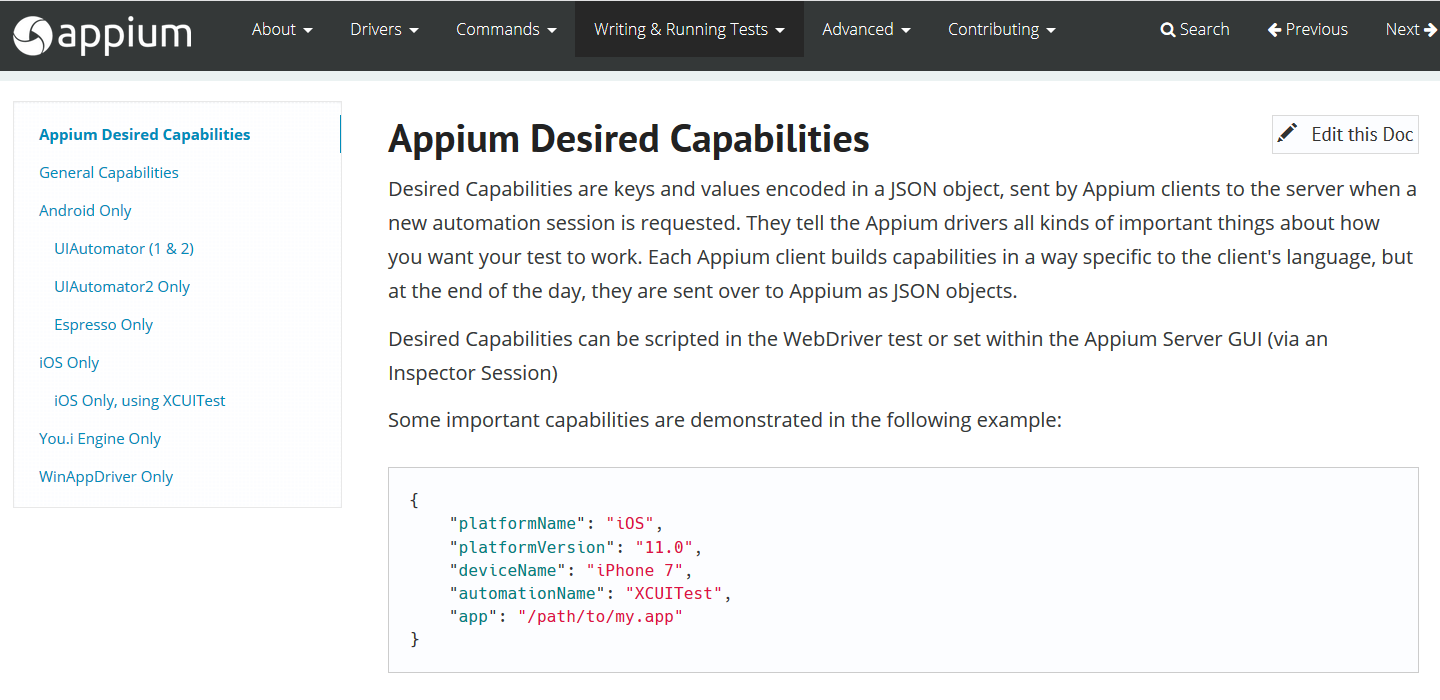
For example, platformName specifies if your application will be run on iOS or Android or another platform.
In the last video we spoke about mandatory capabilities.
There are also capabilities that can be shared across multiple platforms. Those are called general capabilities. There are a lot of capabilities that you can set and the Appium website is a good place to find all capabilities and what you can do using Appium.
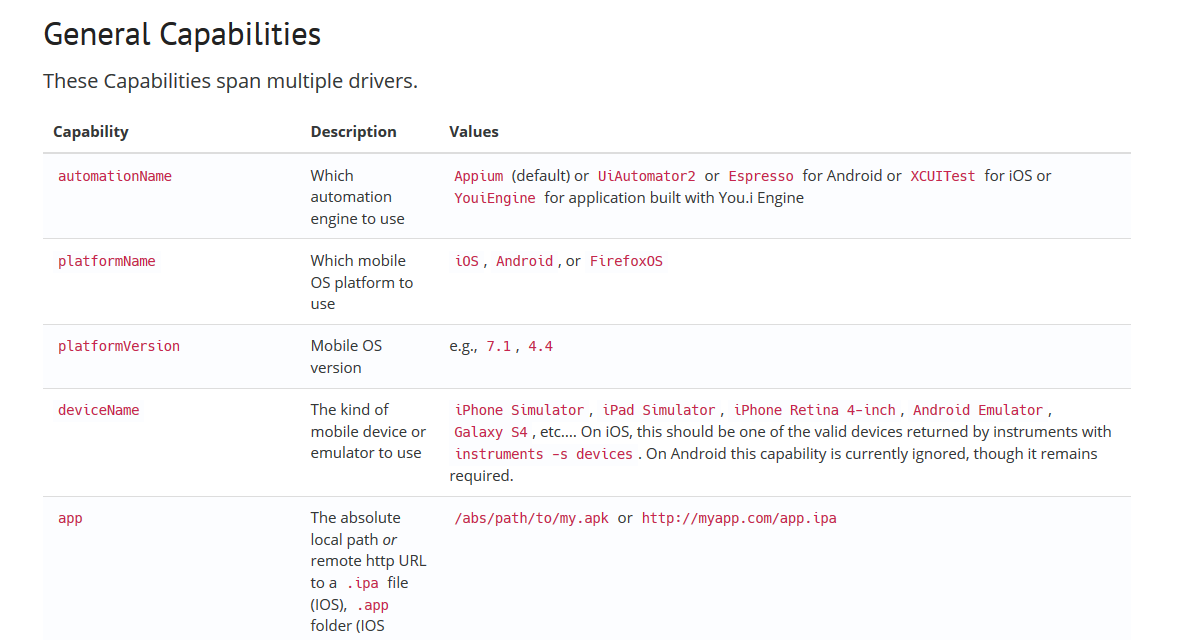
As the name suggests, platformName is about platform, deviceName is the name of the device or the name of your emulator and app is the path to the application or APK.
If we were doing browser testing on a mobile, we could also look at browserName.
Some other capabilities that are not really mandatory are stuff like orientation and this speaks to how you want the application to load if you would like it to load in a portrait mode or landscape.
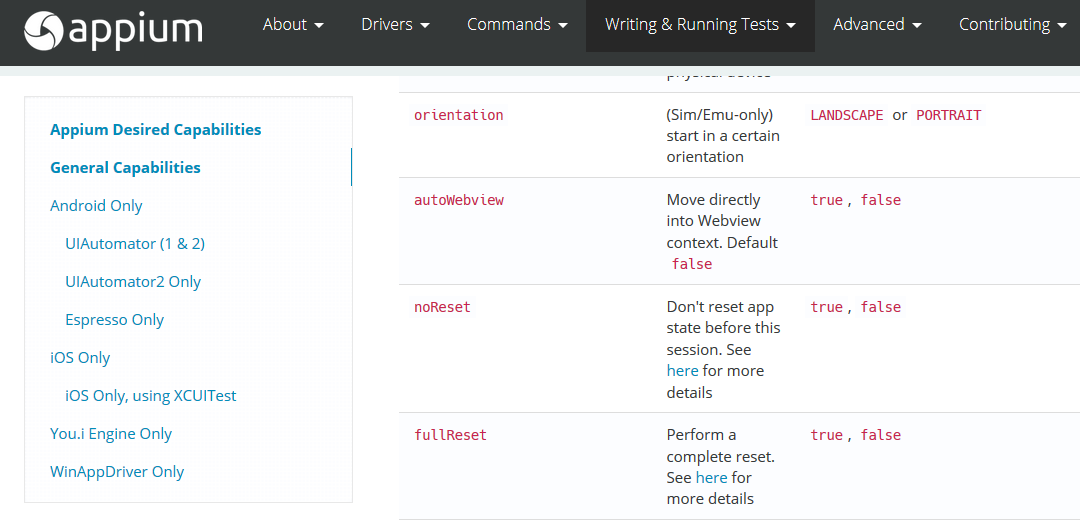
There are also capabilities like noReset, which speaks to how the application is loaded on each test run. If it's uninstalled, if the data is cleared and all of that.
You also have fullReset, which is also similar, and you can find out more by clicking the link on the Appium doc.
There are also platform specific capabilities. However, we won't go too much into that.
I just wanted to ensure that you guys understood what capabilities are and how they can be used and also where to find them and find out what you can use.
