

Transcripted Summary
In this video, we'll be looking at element interactions.
First, we'll look at finding elements, then we'll look at adding value to elements.
We'll also look at clearing value from an element, clicking on different elements and navigating the app. And then we'll look at getting text from different elements to do our assertions.
Let's go ahead and get started.
What I like to do is have 2 different emulators loaded — one that I will use to find elements and one that I will use to run my test against. So, let's go ahead and open Android Studio AVD Manager, and I'll use this Pixel as my second emulator.
Then you want to go ahead and open Appium, start the Inspector session.
So, we'll need to define our desired capabilities just as if we were running test so that Appium knows how exactly to launch our application.
The first thing that we'll need is platformName, and we'll be using Android.
Then we'll need platformVersion, and we can just double check this. My platform version is 7.
We'll also need deviceName, and I call my device Pixel.
And the last thing that we'll need is app, which is the path to the app.
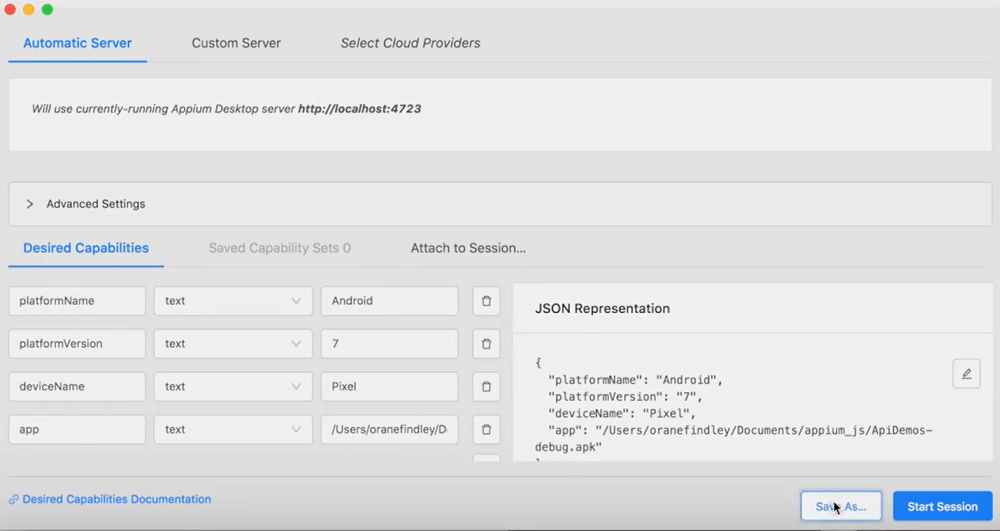
So, I'll go ahead and save that as “Pixel”, and it will now be saved under “Saved Capabilities Set 1”.
You can go ahead and start the session using that.
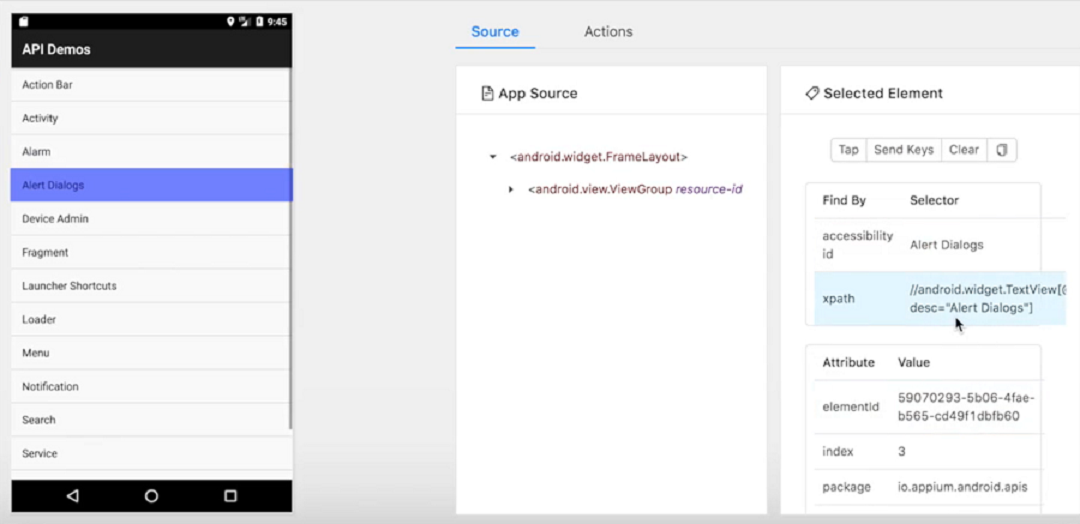
What this does, it shows you a screen of your emulator right over here to left, and you can select elements and get details on those elements.
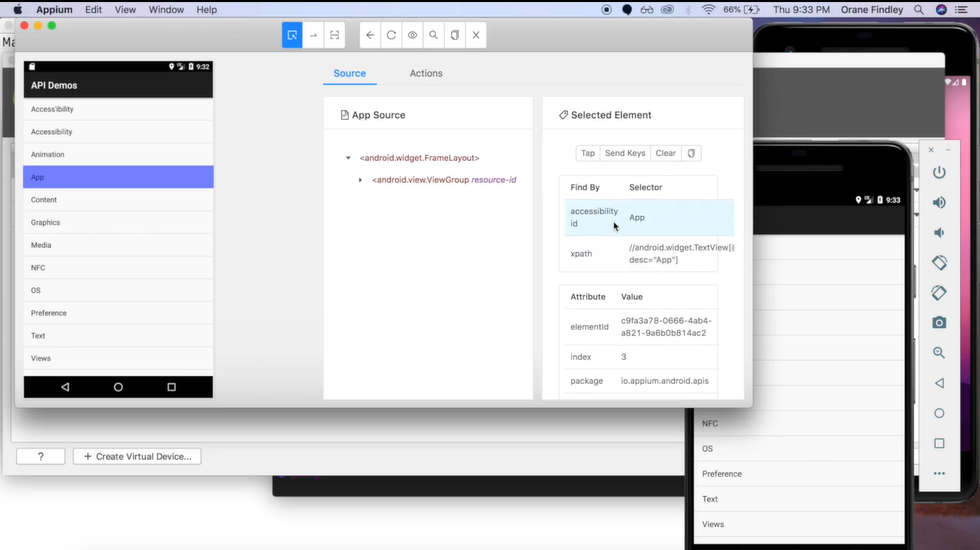
So, if we select app and take a look to the right, we'll see that we can find by accessibility id. We'll see that we were given xpath, and a bunch of attributes and value on that element.
We'll be writing a test that we will use to depict these element interactions.
First, what we will be doing is, we'll be navigating to App
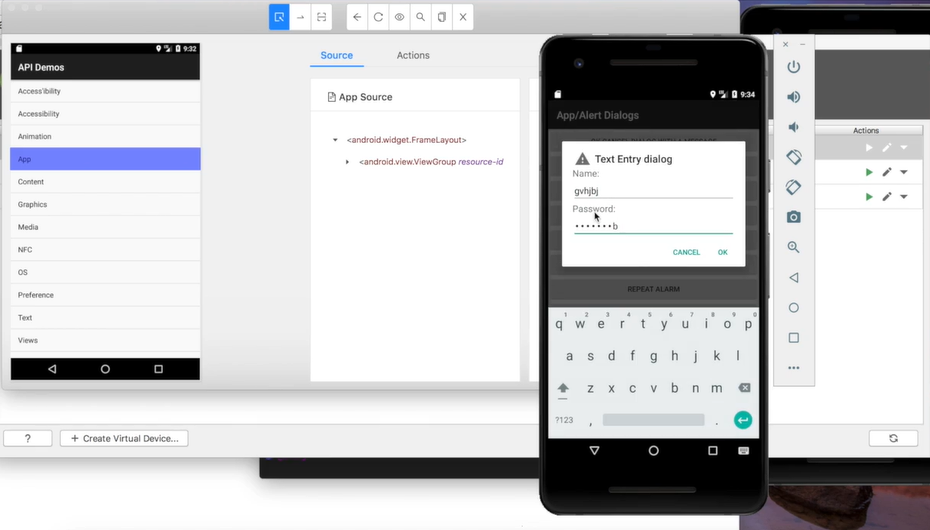
Then we will be going to Alert Dialogs
We will then select Text Entry Dialog, and here, we'll enter a random name, some password, probably clear the field
Then we'll verify that that was entered correctly
So now, let's go ahead and find those elements.
For our app, a good way that we could find this element is by using the accessibility id.
We need to go ahead and create our Page Object.
Let's add a folder for this. Let's call this “pageObjects”.
Let's create a file, call it “dialog.page.js”.
And we can also go ahead and rename this “sample.test.js” to be “dialog.test.js”.
Let's just go ahead and create a class for our pageObject.
Let's call this Dialog, and let's export this.

Now let's go ahead and create our first element.
Let's say, get, and let's call this “appBtn”, and let's just return the element.
So, this sign — ~ — is what you use to depict that you'll be using accessibility id.
We'll be having several of these, so let's go ahead and add some comments.
class Dialog {
  /**
   * Define Elements
   */
  get appBtn() {return $("~App");}
}

module.exports = new Dialog();
Let's navigate to our test file and let's require our pageObject file within the test file.
So, we can say const and let's call this “dialog” as well, with a lowercase d, and let's require. Let's go up 2 levels to “pageObjects” and “dialog.page”.
Let's also change “Sample” in the describe to “Dialog”.
const dialog = require('../../pageObjects/dialog.page');

describe('Dialog', ()=>{
    it('Test', ()=>{

    });
})
Let's come up with a name for the test.
We want to “Verify that the text entry dialog username field & password fields are editable”.
And let's just do a test to ensure that we were able to get our element so we can reference the dialog and then we can say “appBtn”.
And we can call the click function on that element.
describe('Dialog', ()=>{
    it('Verify that the text entry dialog username & password fields are editable', ()=>{
        dialog.appBtn.click();
    });
})
Let's go ahead and try that using npm test.
Great. So, as you can see there, it clicked on the App button.
However, we didn't have anything else in our test, so it just stopped there.
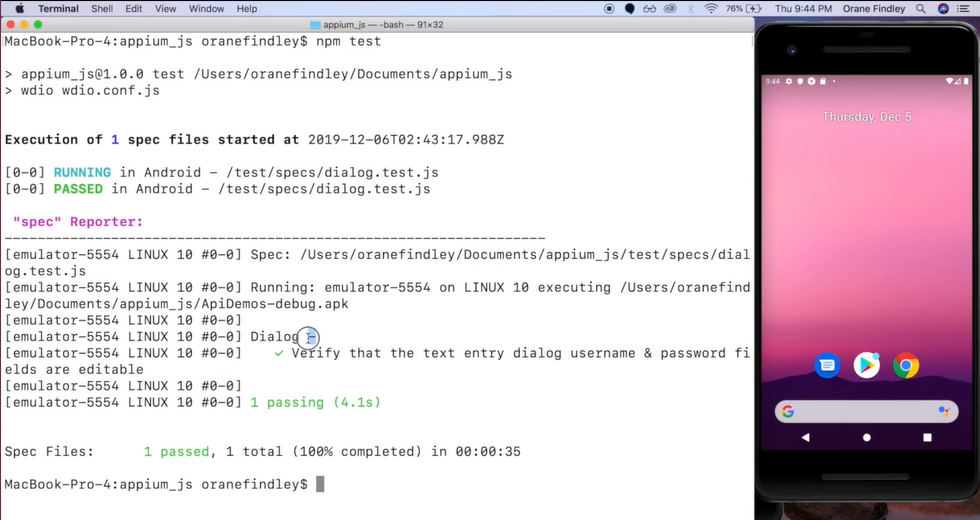
And you can also see the name of our test right here.
All right, so now we can go ahead and finish creating our test.
The next thing that we'll need to do, we'll need to navigate from the App button.
Then we'll need to navigate to Alert Dialog button.
Let's go ahead and find those elements.
We can Tap under the element that's selected — that will take us to the next page. We can select this element and get all the data surrounding this element.
We can go ahead and use xpath for this one.
Let's go ahead and navigate to our Page Object and let's create a function for this.
Let's call this get alertDialogBtn and let's say return.
get alertDialogBtn() {return $('//android.widget.TextView[@content-desc="Alert Dialogs"]');}
When finding elements, this single dollar sign ($) means that it will return 1 element based on what it finds from this that we specified in the string.
If we wanted it to return multiple elements, we'd use 2 dollar signs ($$), and I'll show you guys that further on in another test.
Now we can then go ahead and click on that “alertDialogBtn” in our test.
What I'll do, I'll go ahead and find all the other elements that I'll be using for this test and you guys can follow along.
class Dialog {
  /**
   * Define Elements
   */
  get appBtn() {return $("~App");}
  get alertDialogBtn() {return $('//android.widget.TextView[@content-desc="Alert Dialogs"]');}
  get textEntryDialogBtn() {return $('//android.widget.Button[@content-desc="Text Entry dialog"]');}
  get userNameField() {return $('//android.widget.EditText[@resource-id="io.appium.android.apis:id/username_edit"]');}
  get passwordField() {return $('//android.widget.EditText[@resource-id="io.appium.android.apis:id/password_edit"]');}
  get dialogOkBtn() {return $('//android.widget.Button[@resource-id="android:id/button1"]');}
  get dialogCancelBtn() {return $('//android.widget.Button[@resource-id="android:id/button2"]');}
}

module.exports = new Dialog();
Now that we have all our necessary elements, let's go ahead and build out our test.
So, after we click on the Alert button, we'll then need to click on the Text Entry Dialog button.
Let's go ahead and get that in.
describe('Dialog', ()=>{
    it('Verify that the text entry dialog username & password fields are editable', ()=>{
        dialog.appBtn.click();
        dialog.alertDialogBtn.click();
        dialog.textEntryDialogBtn.click();
    });
})
So far, this bit right here should take us up to here.
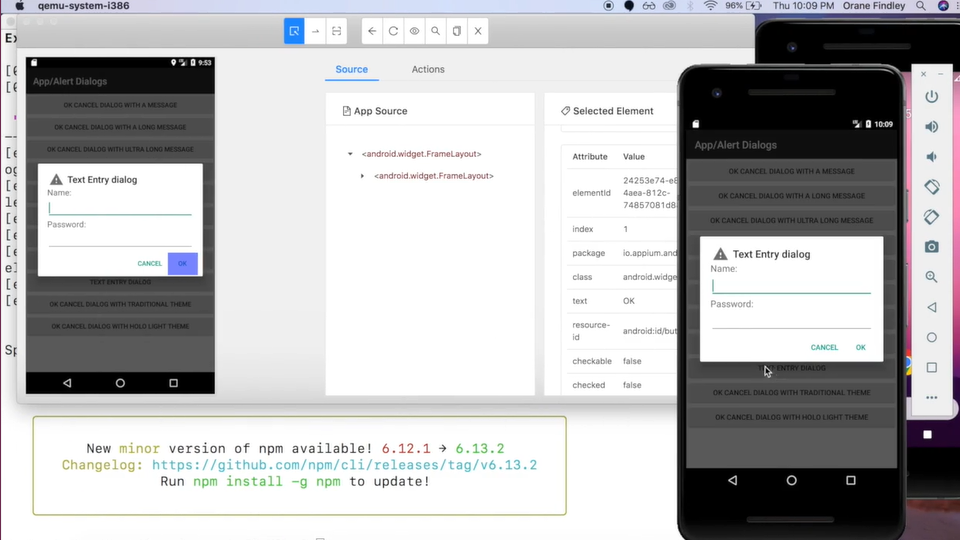
Then we'll go ahead and add some text here in the name field and also some text in the password field and then we'll verify those.
What we need to do now is to use the function called addValue.
Let's go ahead and get the “userNameField” and then we'll use addValue, and this function accepts the value that you want to add. So, let's call this value “Test User”.
Let's also add another value for the “passwordField” and call it “Test Pass”.
Another thing that we'd also like to do is, we'd like to clear the field just in case there was something in the field before, and this is a common practice.
So, before we even go ahead and add anything to the username field, let's go ahead and get the “userNameField” and do clearValue. And what this does is, clear any value that is currently in that field.
We can go ahead and replicate that for our password.
describe('Dialog', ()=>{
    it('Verify that the text entry dialog username & password fields are editable', ()=>{
        dialog.appBtn.click();
        dialog.alertDialogBtn.click();
        dialog.textEntryDialogBtn.click();
        dialog.userNameField.clearValue();
        dialog.userNameField.addValue("Test User");
        dialog.passwordField.clearValue();
        dialog.passwordField.addValue("Test Pass");
    });
})
Let's go ahead and check this out.
And as you can see, that runs fine.
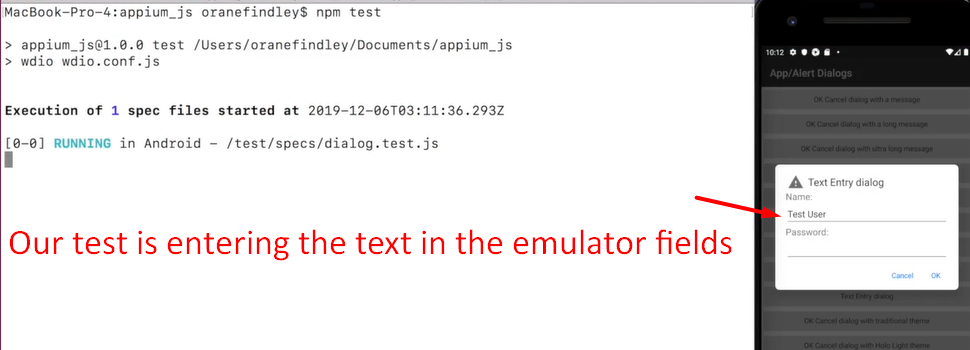
Actually, what we might do is, add some value before the clear value, just so you can see that command working.
All right, so let's start off by calling this “Test User” and then we will clear it and add our “Actual User”.
        dialog.userNameField.addValue("Test User");
        dialog.userNameField.clearValue();
        dialog.userNameField.addValue("Actual User");
So far, we have gone to finding elements, clearing value, adding value and clicks.
Now, what we want to do to kind of finish off our tests is to get the text that we've entered and then run some verification against that text.
To do this, we'll need to use ``getText`.
Let's go ahead and use dialog and let's get the text from the “userNameField” and this function actually returns a value.
Let's go ahead and create our variable called “text” and let’s store what that function has returned into that variable.
So, for starters, let's go ahead and just
console.logthis in the terminal.And after all of that is done, I guess we can just go ahead and
clickthe “dialogOkBtn”.
        let text = dialog.userNameField.getText();
        console.log(text);

        dialog.dialogOkBtn.click();
So, we have not yet done any assertion or verification, and that is the last step that we will be putting in.
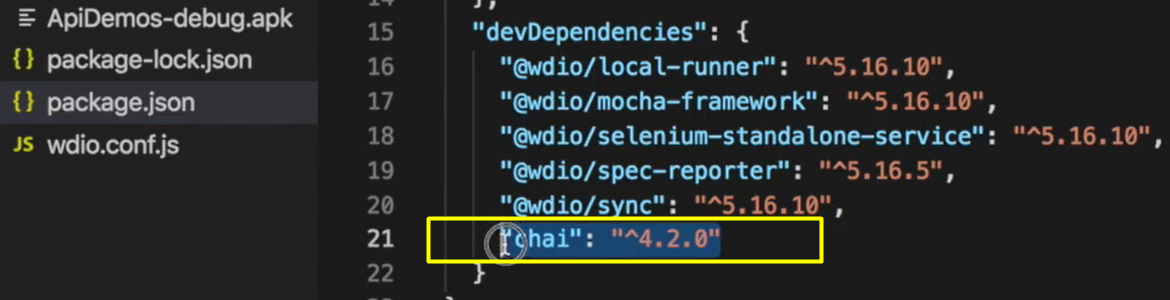
To do this, I'll go ahead and get the Chai library, so I'll say npm i chai --save-devin the command line of my terminal.
And if we look in our package.json, we can see that the Chai library has been installed.
What this allows us to do is, from our test file, we can import that library.
So, let's go ahead and import expect.
const expect = require('chai').expect;
This will allow us to use expect within our test.
So right after we've gotten our “text”, we can go ahead and say something like expect, which is a keyword.
And we're expecting this “text” to be equal and we can just match that to what we have entered above. So, we're expecting that to be “Actual User”.
# dialog.test.js
const dialog = require('../../pageObjects/dialog.page');
const expect = require('chai').expect;

describe('Dialog', ()=>{
    it('Verify that the text entry dialog username & password fields are editable', ()=>{
        dialog.appBtn.click();
        dialog.alertDialogBtn.click();
        dialog.textEntryDialogBtn.click();
        dialog.userNameField.addValue("Test User");
        dialog.userNameField.clearValue();
        dialog.userNameField.addValue("Actual User");
        dialog.passwordField.clearValue();
        dialog.passwordField.addValue("Test Pass");

        let text = dialog.userNameField.getText();
        console.log(text);
        expect(text).equal("Actual User");

        dialog.dialogOkBtn.click();
    });
})
Let's rerun this test.
And there, you can see that our test has passed.
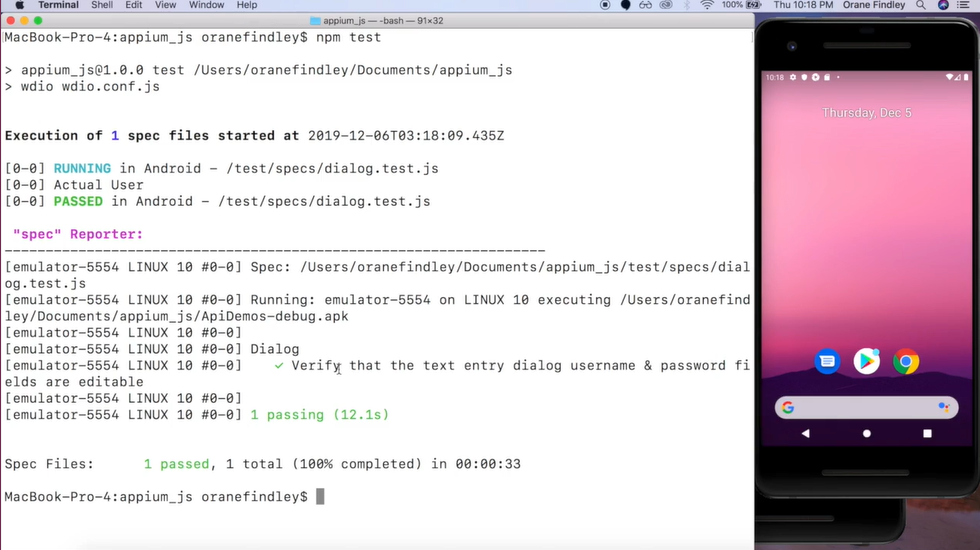
Congratulations, you have just written your first full-fledged test using Appium and WebDriverIO.
