

Transcripted Summary
In this chapter, I'll give an overview of some of the accessibility testing tools out there that you can use.
The tools that I have included in this course are only a subset, and doesn't include everything, because there are tons of available tools out there.
However, the tools that I'm going to mention should help you get started.
I'll categorize the different accessibility testing tools into three categories, which I'll talk about in different subchapters.
Tools which require human assistance
Semi-automated tools in the form of browser extensions
Automated tools which you can add in your code base, and run as part of your CI pipeline
# Tools which require human assistance
All right, so let's first look at tools which require human assistance. As I mentioned in the previous chapter, you need to check if your website can only be accessed via keyboard only.
So, the first testing tool that can help you to test for accessibility is your very own keyboard.
Here are some of the common shortcuts that you can start using, and you might already know some of them.
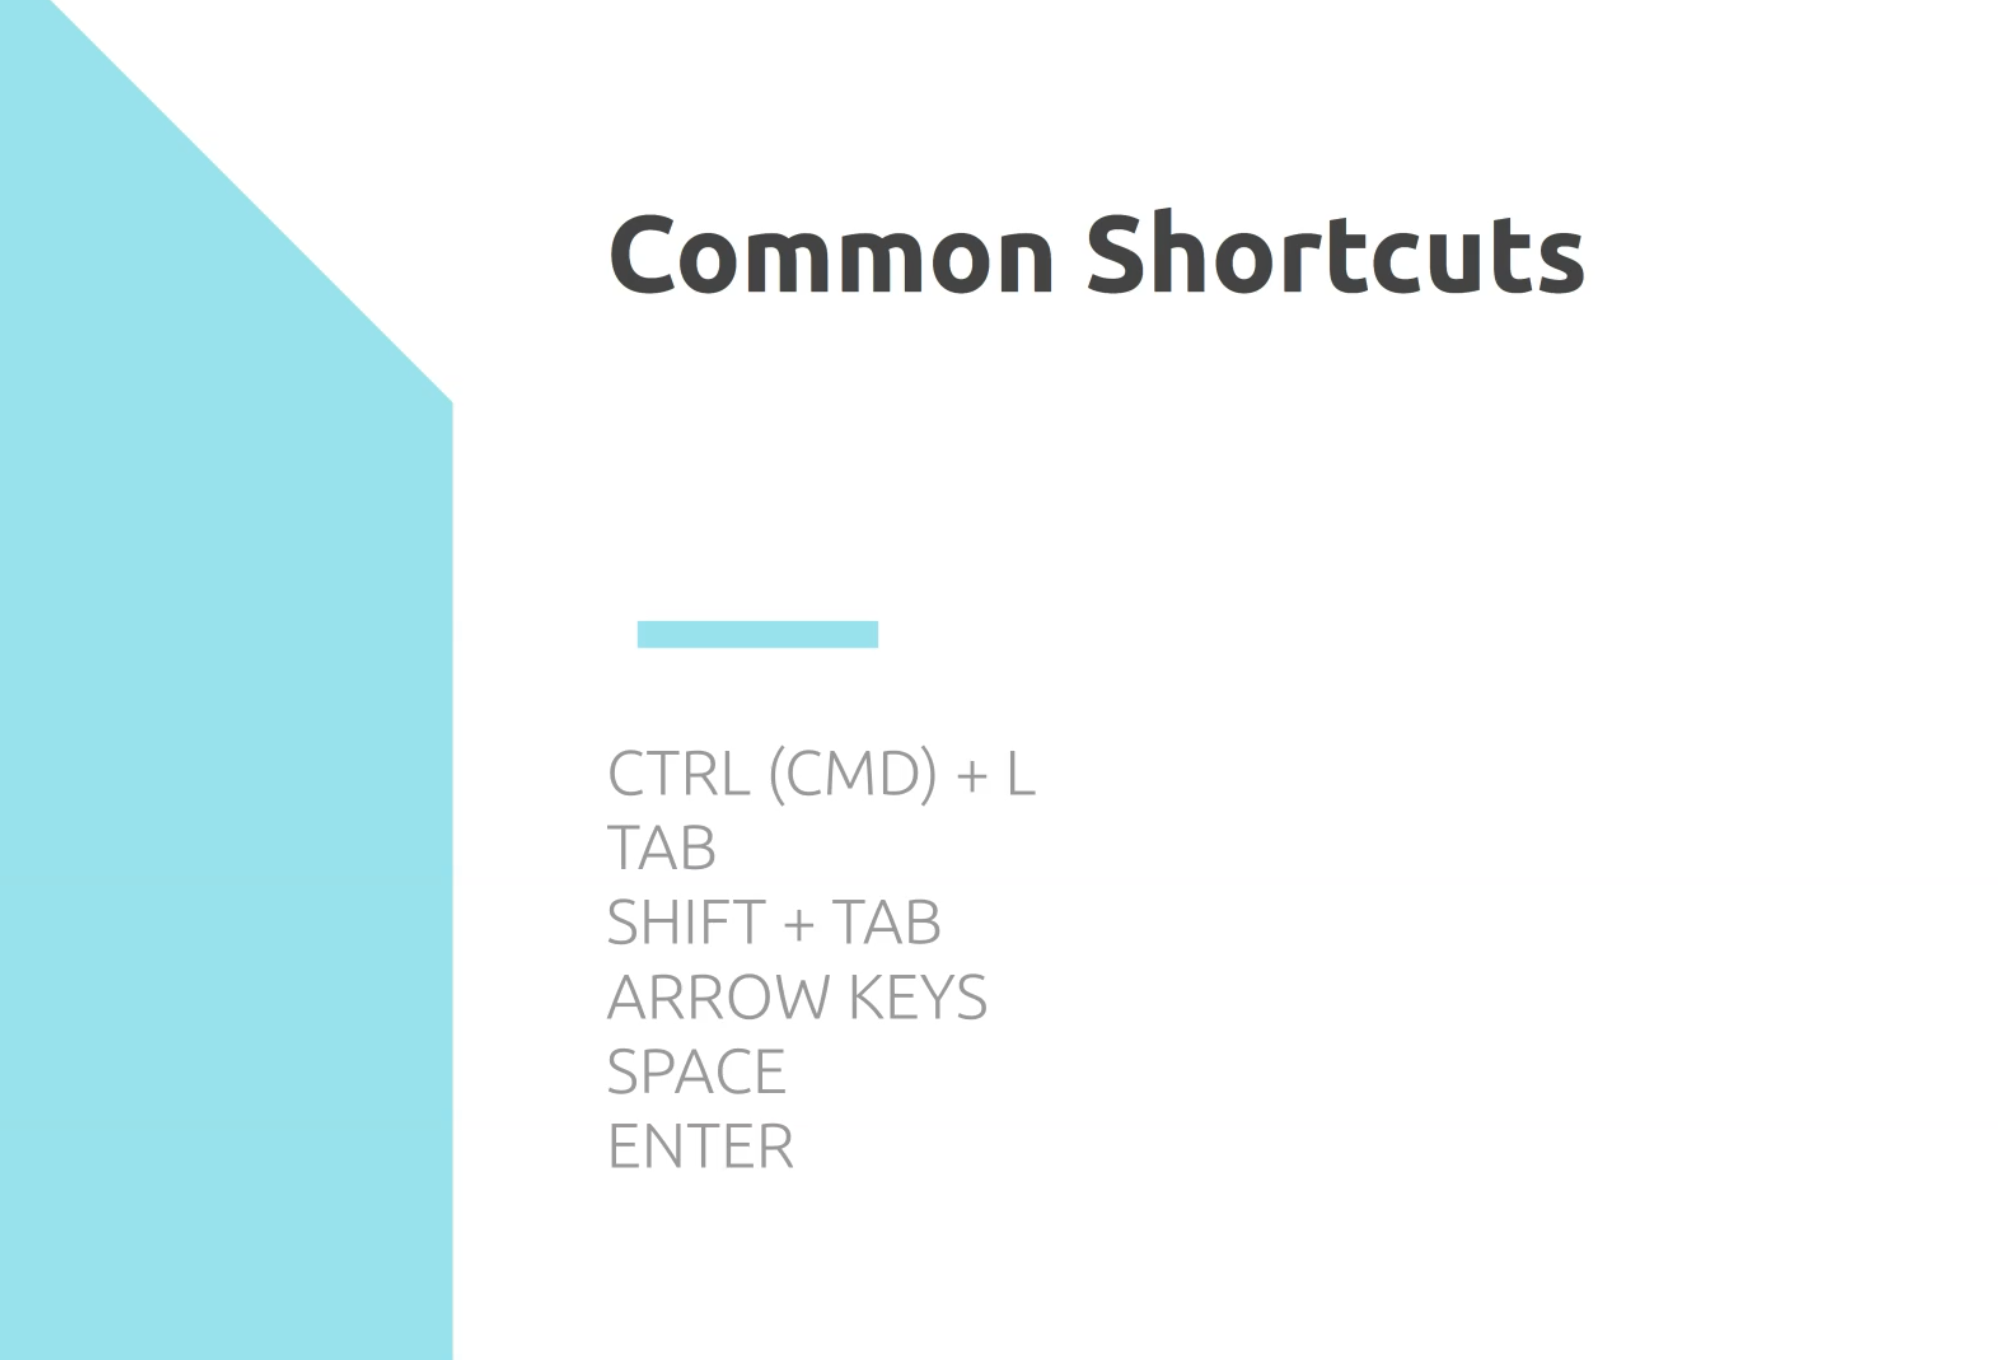
ctrl or cmd, if you're a Mac user, + L will put the focus on your browser's address bar, so you can navigate to any sites you like.
tab is used to go to specific elements, such as links or buttons.
Pressing shift before tab will simply reverse the direction, so you can go back to previous links or buttons.
Arrow keys, of course, to scroll to a specific viewport.
And you can also use the spacebar to tick or untick checkboxes or radio buttons.
enter key can also be used to activate buttons or links that are currently focused on.
I have an icebreaker activity that you can try.
If you pick a website that you like using, and then only use your keyboard to navigate through it, and then use the common keyboard shortcuts that I have mentioned on the previous slide, see if you can use it the same way without using your mouse.
Just simply pause this video, and spend a couple of minutes doing this activity to get yourself comfortable with only using your keyboard.
When you're finished, just hit the Play button, and we'll look at other tools that you can use.
I hope you enjoyed that little activity and managed to access the website of your choice without any issues, I hope.
# Screen Readers
So anyway, the next tool that I want to introduce to you is the screen reader.
A screen reader allows people with disabilities - specifically those who have visual impairments - to use a computer.
It translates everything a user normally sees on their screen to speech.
There's a lot of screen readers out there that you can use for testing, but here are some of the popular ones.
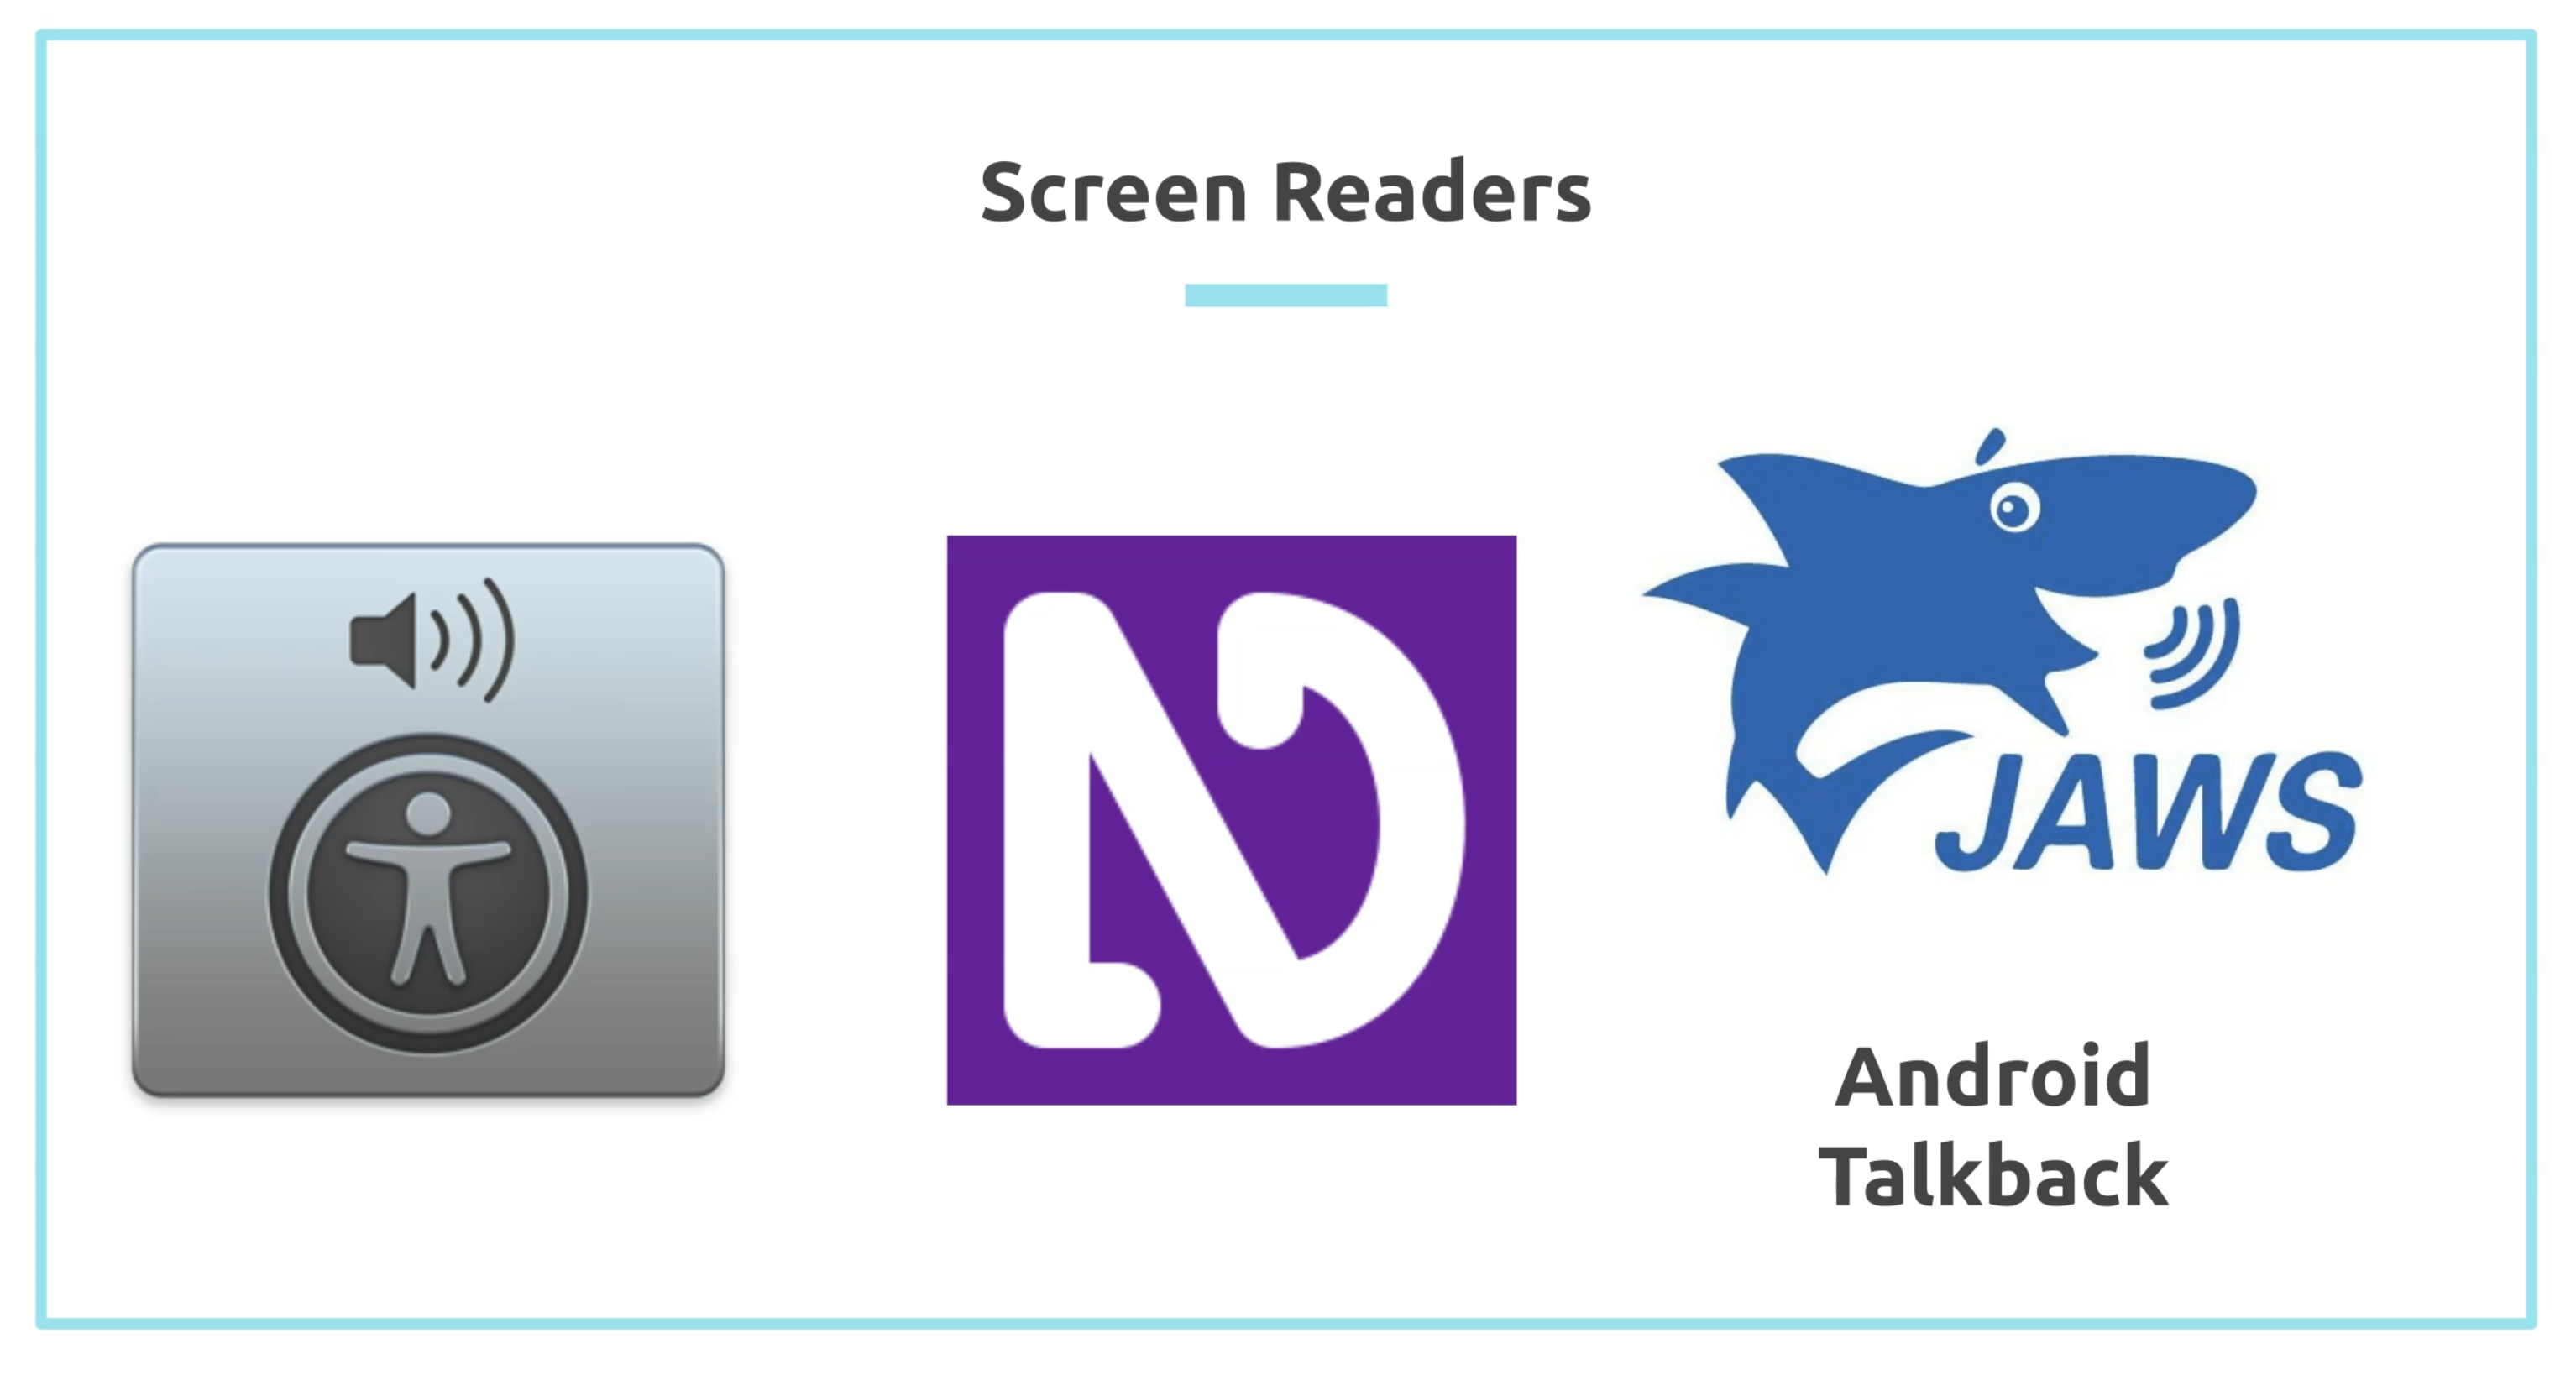
If you're a Mac and an iPhone user, VoiceOver is built in already and you just need to enable it, which I'll demo quickly on the next slide.
NVDA and JAWS are the two most popular screen readers out there for Windows.
NVDA is a free tool, while JAWS is a commercial one.
And lastly, you also have the TalkBack screen reader for Android phones.
To enable VoiceOver, just head to System Preferences and select the Accessibility icon.
From there, click VoiceOver and simply enable it.
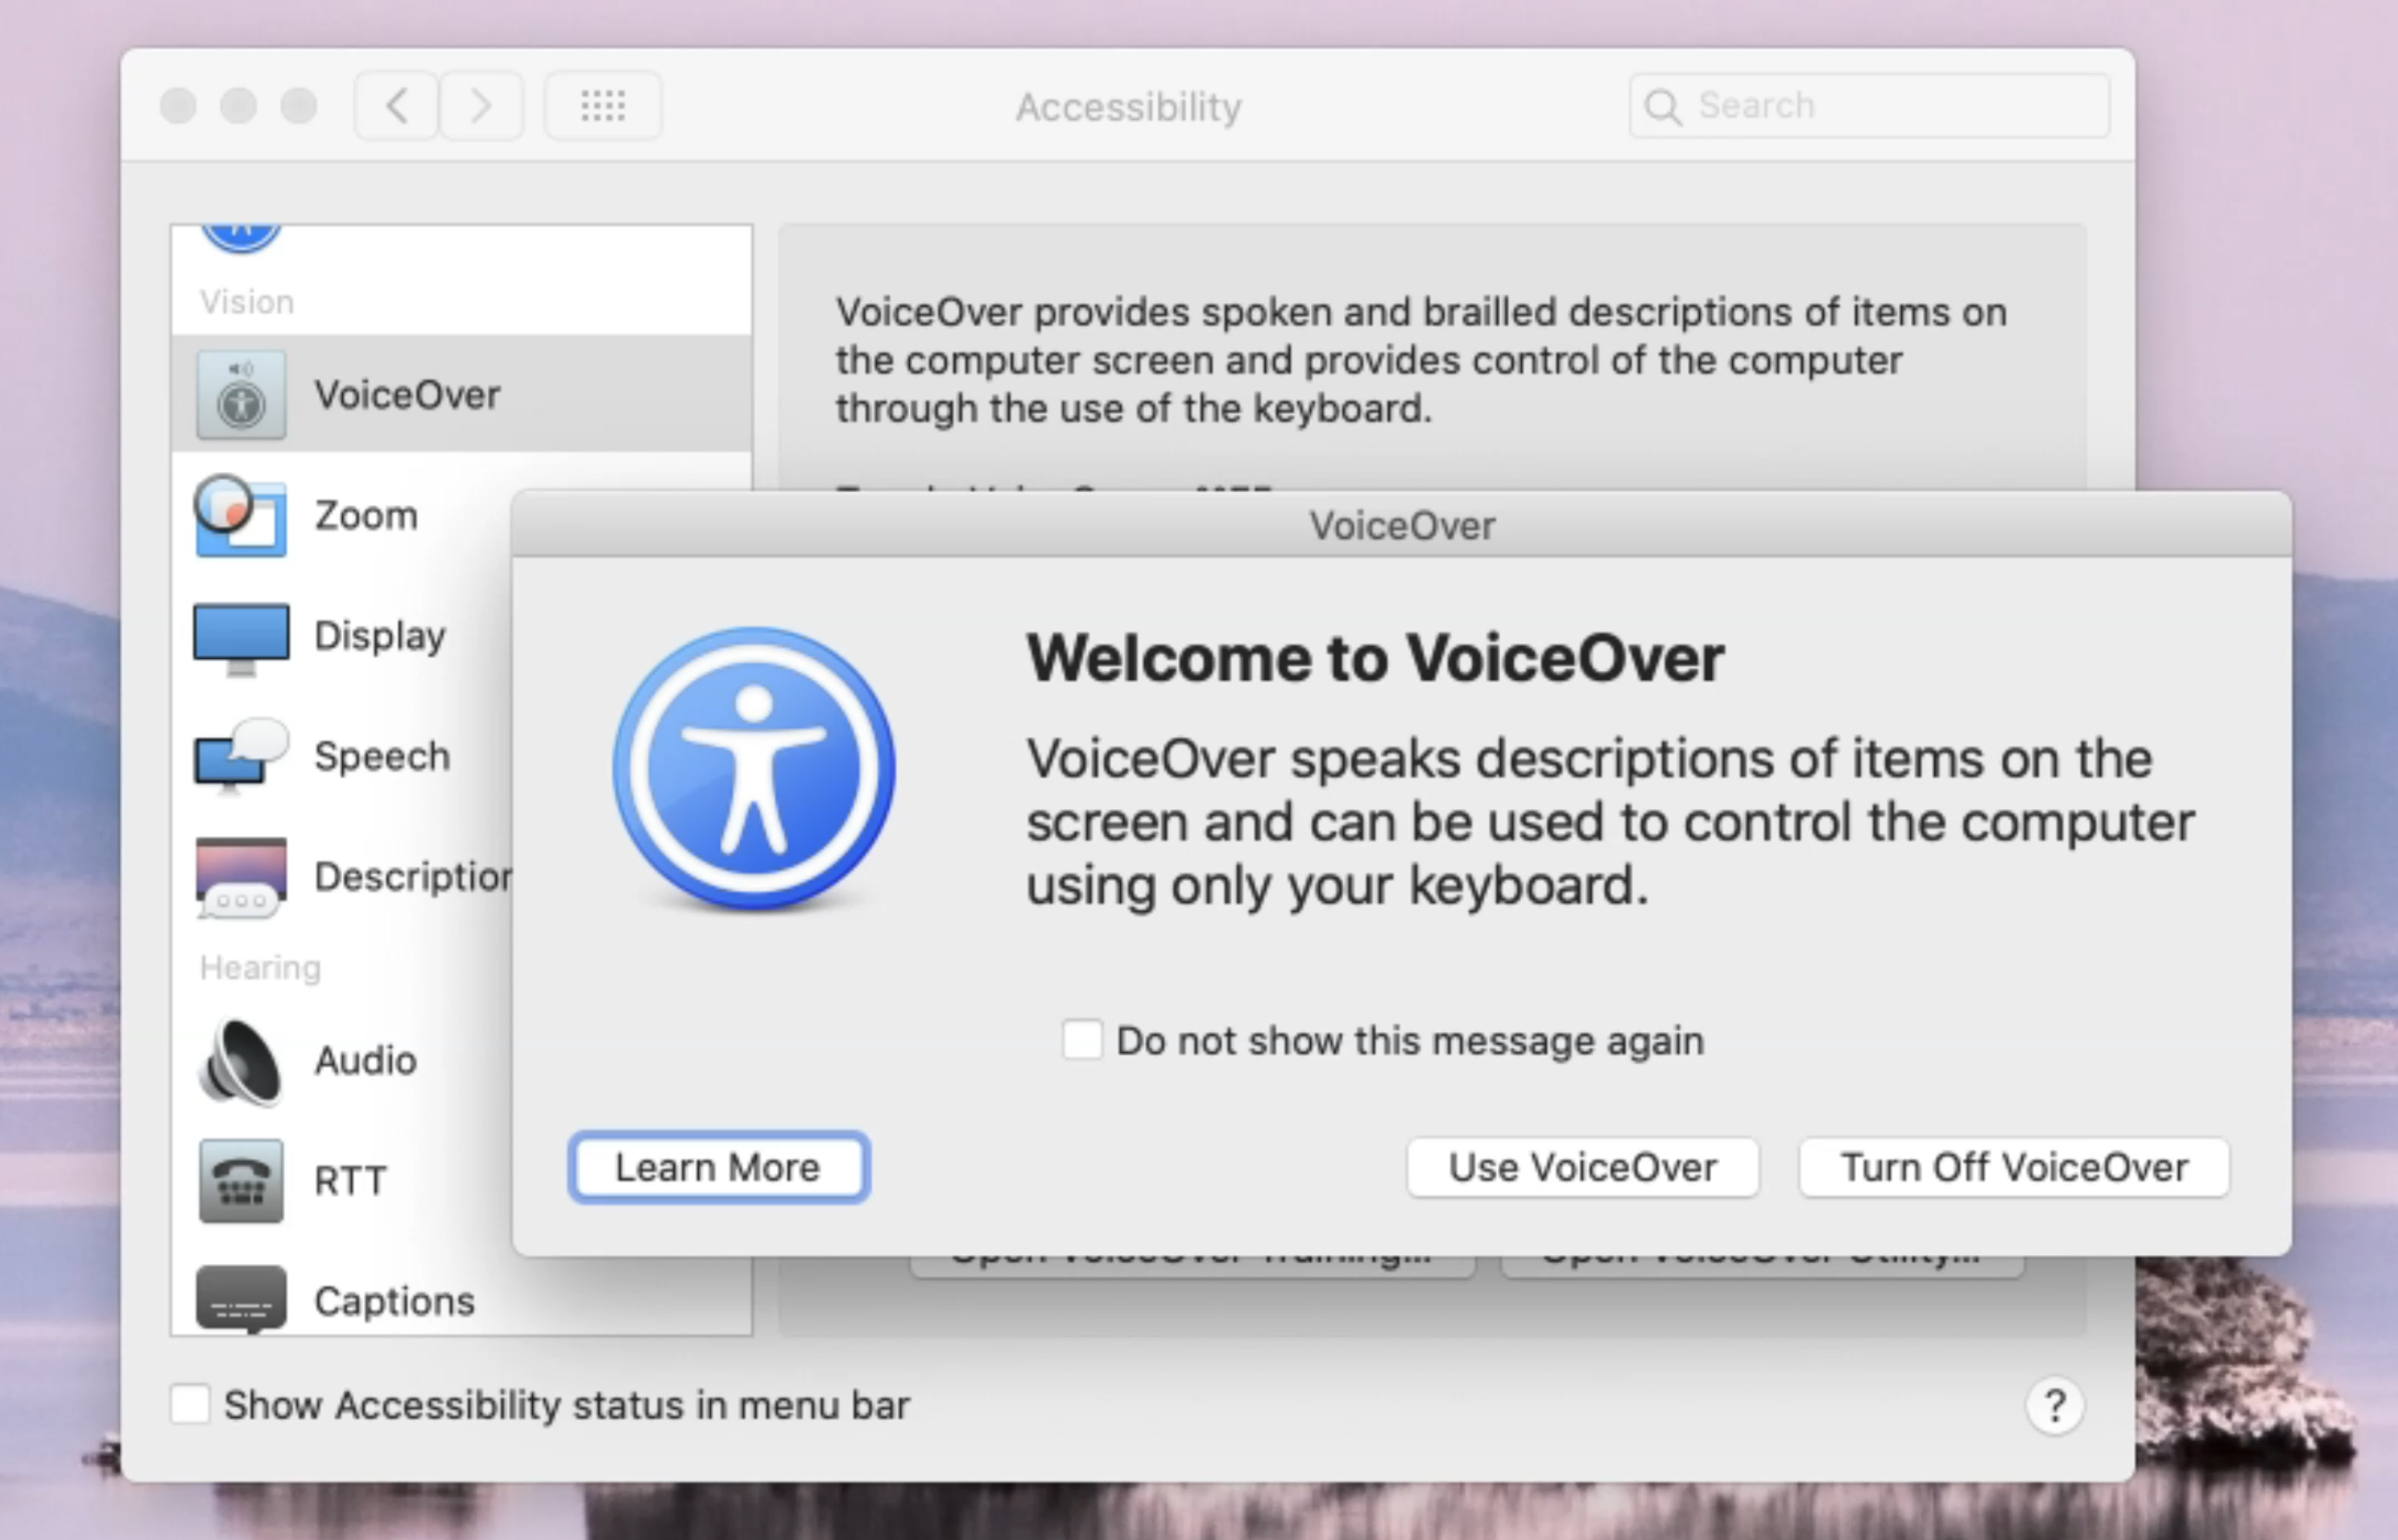
Once it's enabled, you should then start hearing a voice reading out descriptions of elements on the page.
Alternatively, you can also press cmd+F5 to toggle VoiceOver on and off.
Once that's enabled, you can set your keyboard shortcut to use the VoiceOver keyboard.
In my case, it's the Control + Option key.
When you want to refer back to the keyboard commands that you're going to use, just key in ctrl + option + H, and this should show up the VoiceOver Help.
From here, you can access the User Guide, General Commands, and Keyboard Help.
So if you find yourself wondering what shortcut to use, just launch the VoiceOver Help, and find the command that you need.
When you're finished, simply press the esc button.
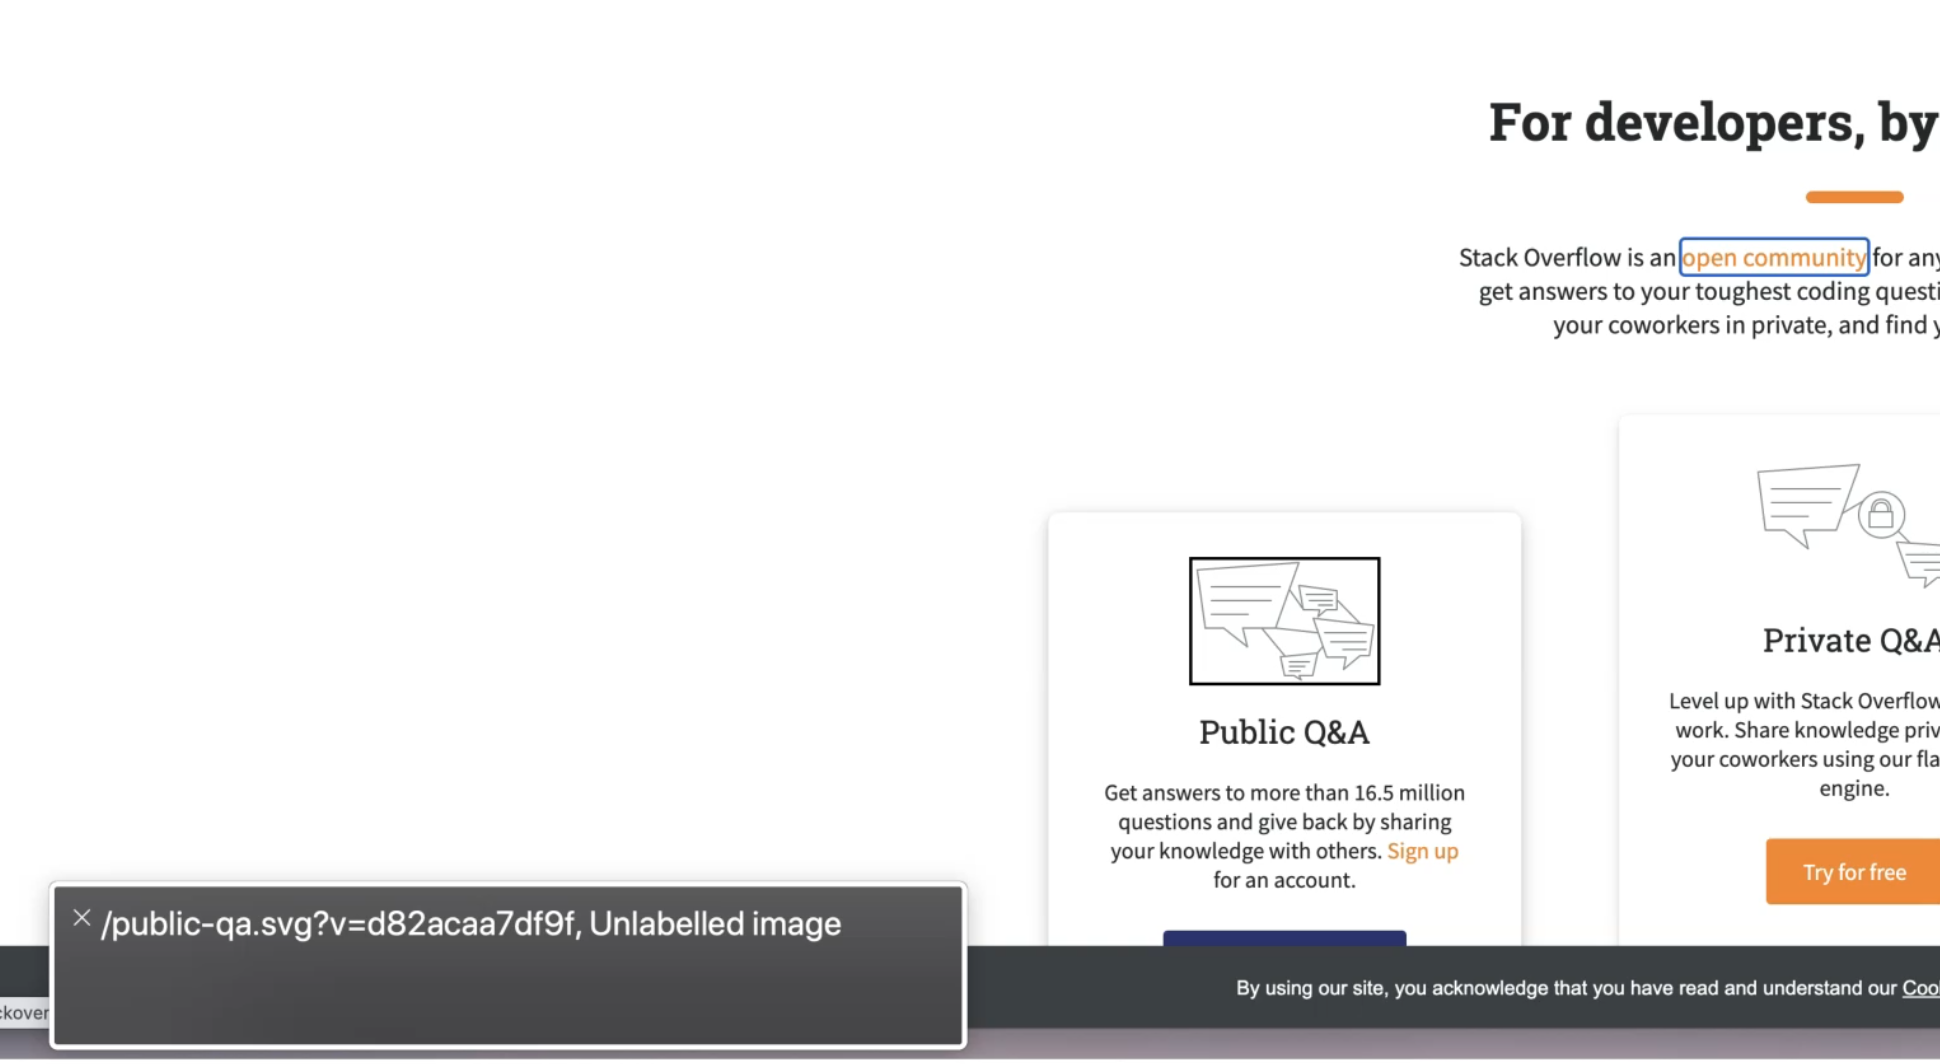
To show you a quick demo, I've opened up Deque's website, and noticed that every time that I focus on an element, a description is being read.
You can't hear it on this video, but just imagine a voice reading out the description that you can see here on the bottom left of the screen.
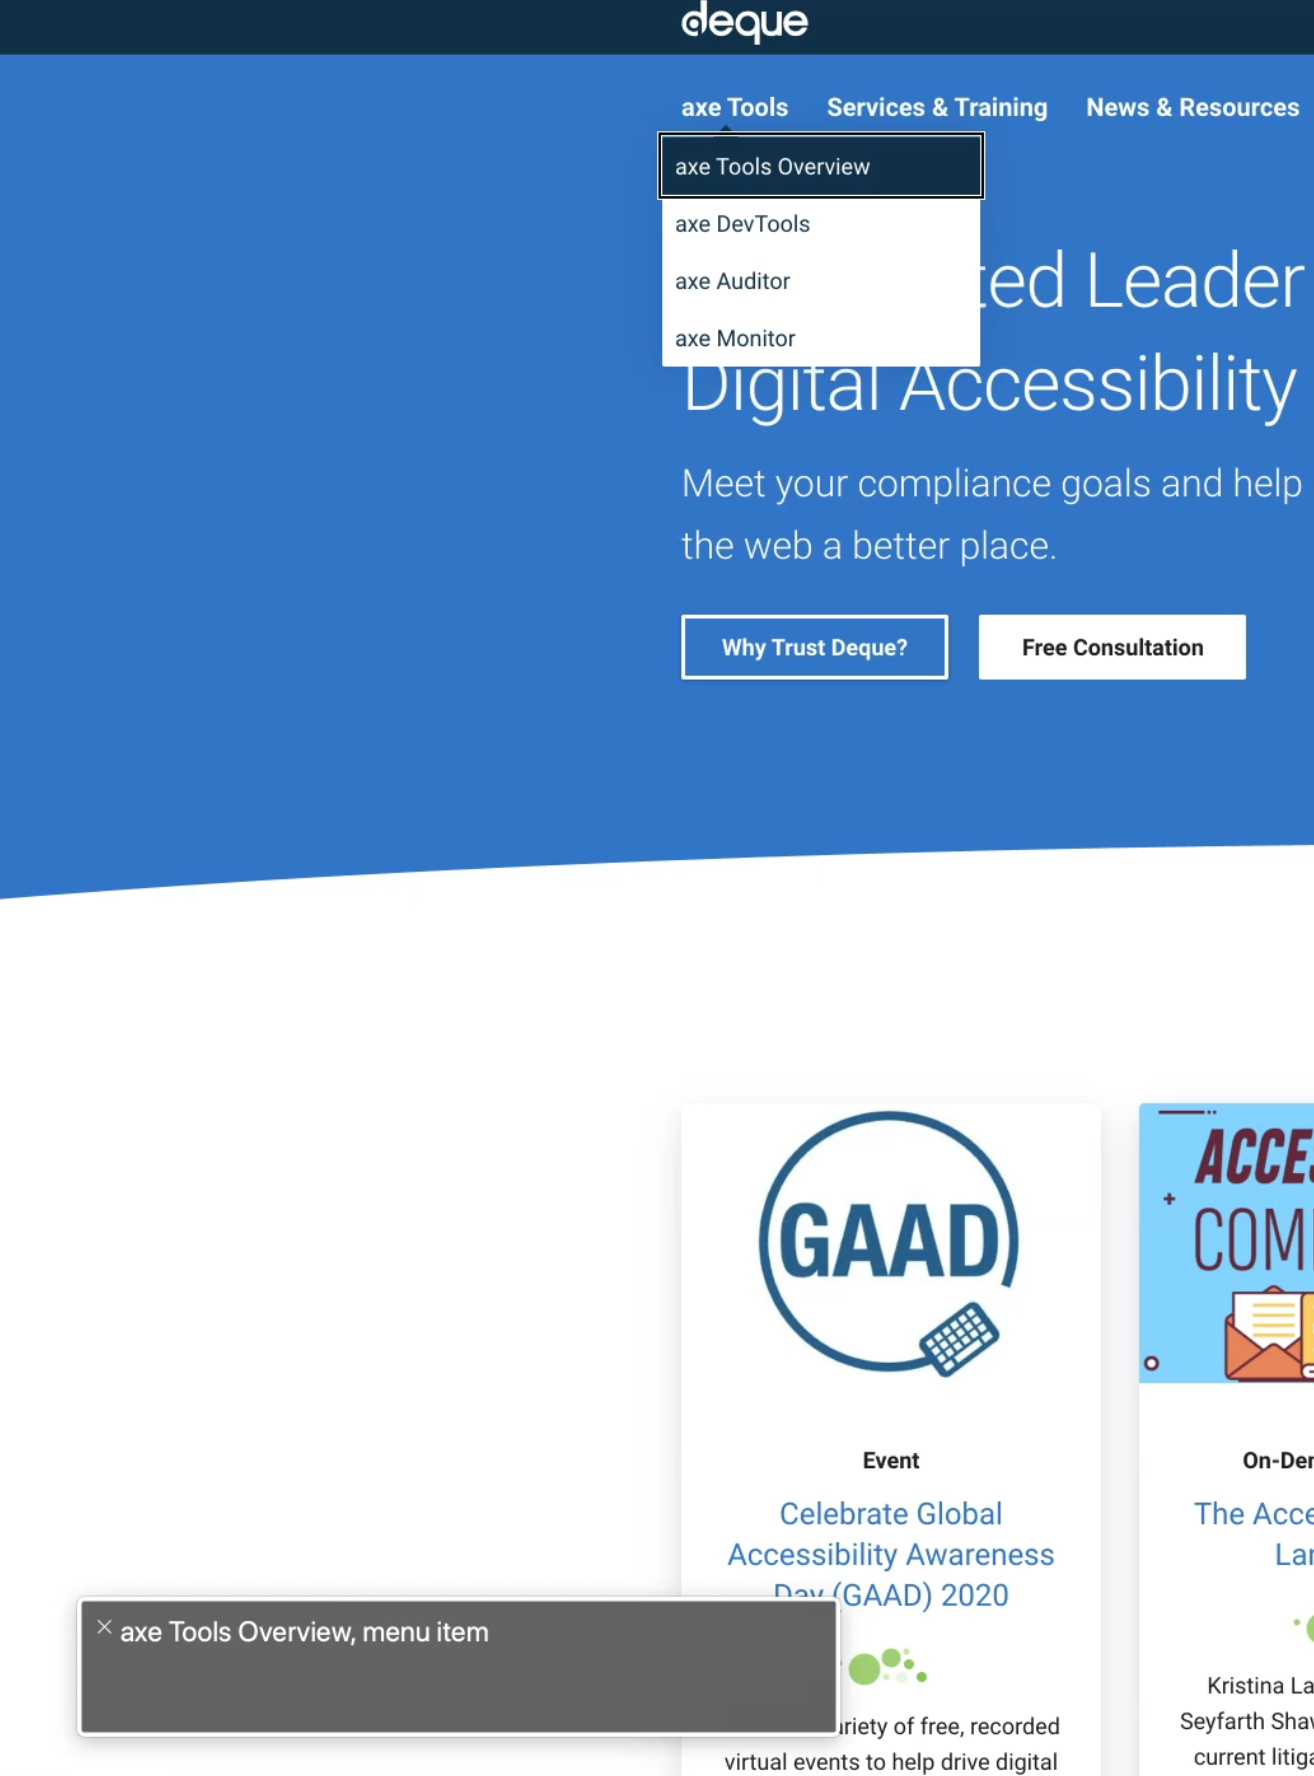
This is why it's important to use the correct heading structure, the correct labels, and descriptions, because this is what the screen reader would read aloud.
An impact of not having alternative text is that the description will not make sense to people using screen readers.
In this particular example, the Public Q&A image is unlabeled, and you can see that the description on the screen reader is hard to understand.
If your users have low vision, they would also use a zoom feature to magnify the content, so they can read it better.
When they zoom the content of your website, you need to make sure that the elements are stacking up nicely, and not on top of one another, and that everything is flowing in nicely.
In some cases, when you zoom in too much, if a website has been poorly designed, it can become unreadable, and therefore not very accessible.
To demo the zoom feature, I'm using Deque's website again.
And since I'm a Mac user, to increase the size of the content, I need to press cmd and the + key.
This would be equivalent to ctrl and + key, if you're on Windows.
The menu has collapsed once I zoom in closely.

Then once expanded, the navigation is still fully accessible.
Looking at this, you can see that all the elements are stacking up nicely, and the content is still very much readable.
Let's take a quick break. And in the next subchapter, let's look at some browser extensions that you can use to help you with catching accessibility issues quickly.
Quiz
The quiz for this chapter is in section 4.3
