

Transcripted Summary
In this demo, we will learn how to configure workflows for GitHub Actions.
After pushing our Android project to GitHub we need to configure our workflow for GitHub Actions.
We will configure our workflow using the YAML syntax and save this information as workflow files in the project.
Once a YAML workflow file is successfully created and triggered you will see the build logs, test results, artifacts, and statuses for each step in your workflow.
Create our workflow file by following these steps.
Click on the "Actions" tab in GitHub.
Here you will find workflow templates for different project types, including Java, Maven, .NET Core, AWS, and Azure.
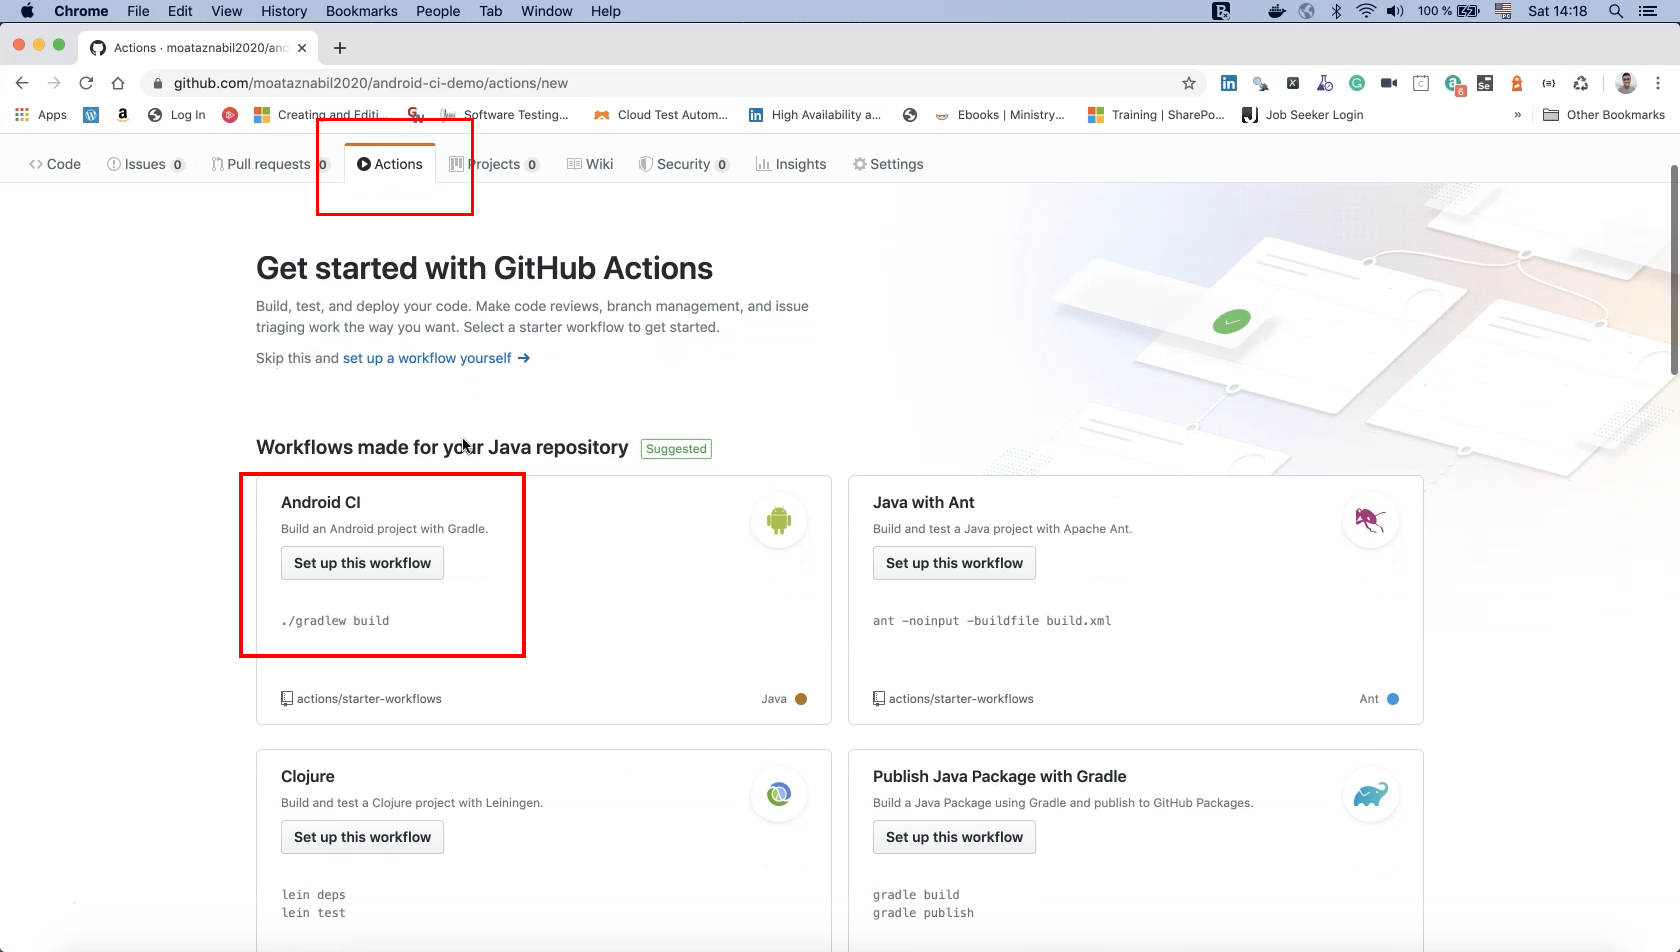
In our case we will select the Android CI template to build our Android project with Gradle.
Click on the "Set up this workflow" button and this will create a new YAML file named "android.yml" that contains the main sections of the workflow.
We can modify this as needed.
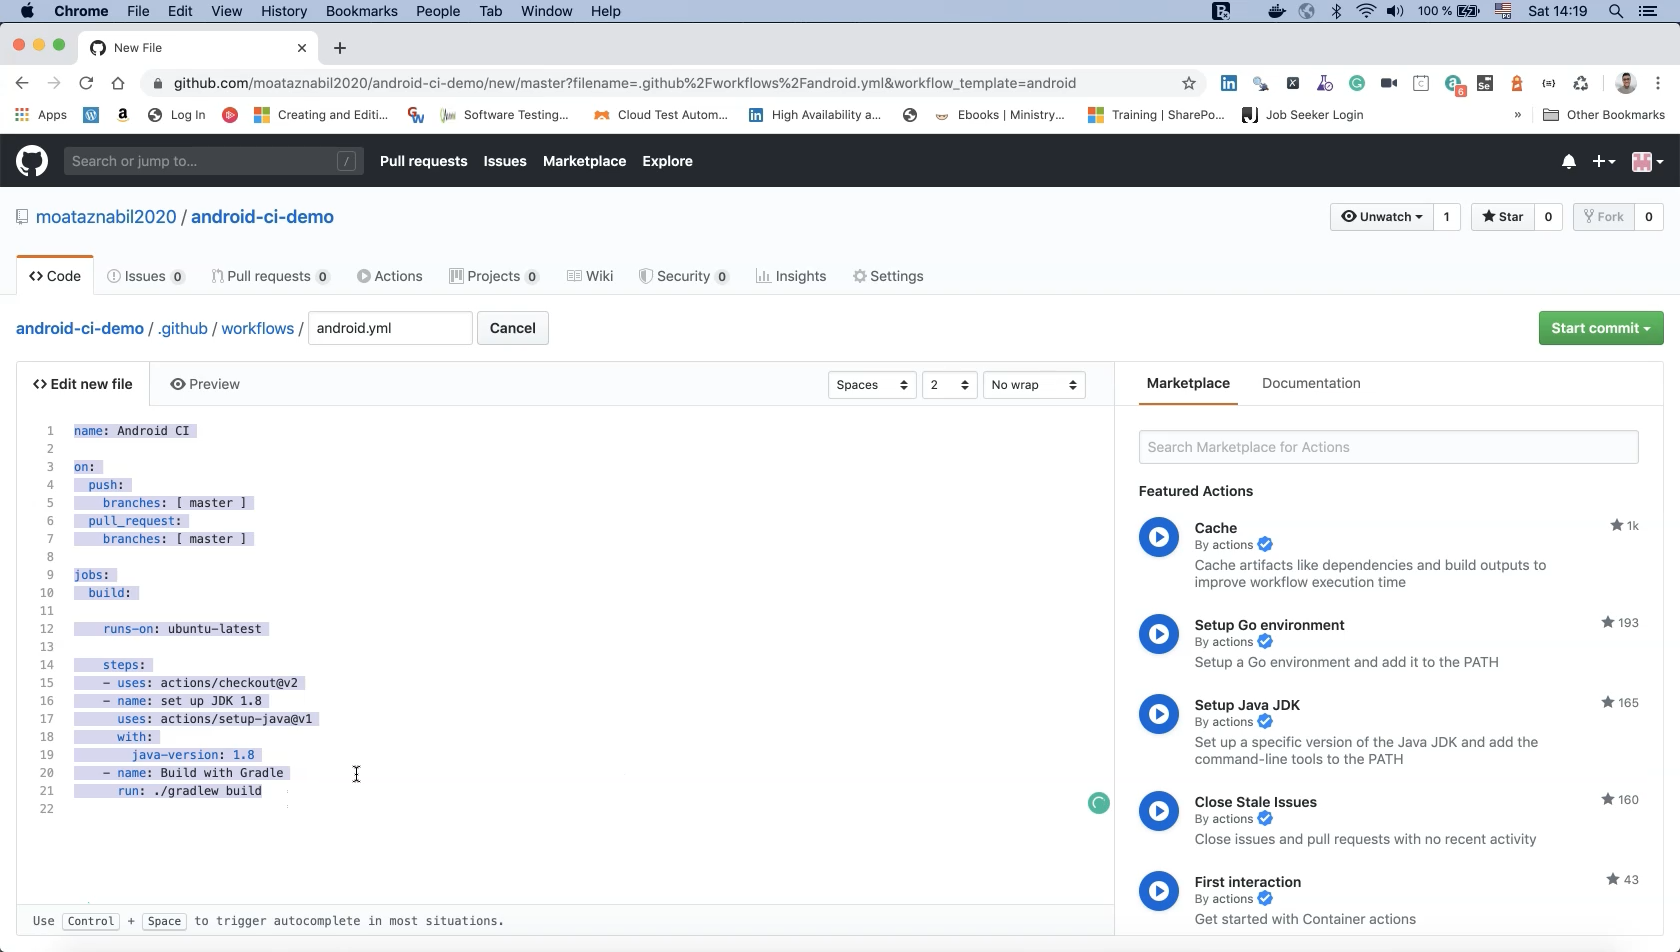
Notice that the YAML file is created inside of folder "workflows" under ".github".
When we build changes locally we can push any YAML file changes to GitHub.
Both the file name and workflow names are configurable but we will leave the default values.
The first part of the workflow is a trigger section.
Here we specify when to trigger this workflow, whether it is on every pull request or on every code change.
The branch name can be changed as needed.
name: Android CI

on:
    push:
        branches: [ master ]
    pull_requests:
        branches: [ master ]
Every GitHub Action workflow must contain a "jobs" and a "build" section.
In this section we specify the machine we will run our workflow with.
For example, where it says "runs-on: ubuntu-latest" the parameter value could also be set to "macos-latest" or a self-hosted machine.
We are running macOS in this demo because the Android emulator we will use to run our tests only supports macOS machines.
So let's make that change now.
jobs:
    build:

        runs-on: macos-latest
Under the "steps" section we do not need to make any changes to "uses".
Here, we are checking out the latest changes from the GitHub repository.
But for "name" we will change the string from "Build with Gradle" to "Run Espresso Tests".
        steps:
        - uses: actions/checkout@v2
        - name: set up JDK 1.8
          uses: actions/setup-java@v1
          with:
              java-version: 1.8
        - name: Run Espresso Tests
          run: ./gradlew build
In the marketplace tab we will enter the search string "Android Emulator Runner" to locate this Action and add it to our workflow.

Click on "Android Emulator Runner" to check the configuration and learn about usage guidelines in the details section.
Alternatively, open its GitHub repo to learn more information.
We will add the following configuration values:
        steps:
        - uses: actions/checkout@v2
        - name: set up JDK 1.8
          uses: actions/setup-java@v1
          with:
              java-version: 1.8
        - name: Run Espresso Tests
          uses: reactivecircus/android-emulator-runner@v1 # install and create the Emulator
          run: ./gradlew build
          with:
              api-level: 28
              target: default
              arch: x86_64
              profile: Nexus 6
              run: ./gradlew build
For "api-level" we specify "28".
For "target" version we specify "default".
For architecture "arch" we specify "x86_64".
For "profile" we specify "Nexus 6" or any additional devices that we wish to run or set up scripts on.
Finally, replacing the "run" command, we will add the same gradle terminal command that was used locally to build and run our test.
              arch: x86_64
              profile: Nexus 6
              script: ./gradlew connectedDebugAndroidTest -Pcucumber -Ptags="@e2e"
We will also add "strategy" and "matrix" under the "build" section, enabling us to run workflows in parallel on different devices and operating systems.
jobs:
    build:
        runs-on: macos-latest
        strategy: # we are using strategy if we need to run on parallel with different devices and version
            matrix:
                api-level: [28] #Google api level for example [25, 23, 28]
                target: [default]
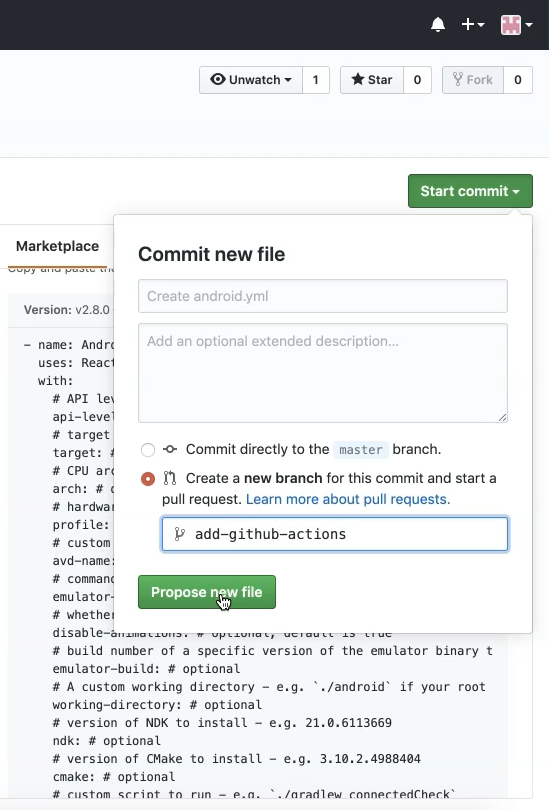
Our configuration is now finished and we can commit the changes to our repository.
Click on the "Start commit" button, select "Create a new branch" and change the name to "add-github-actions".
Then click on "Propose new file".
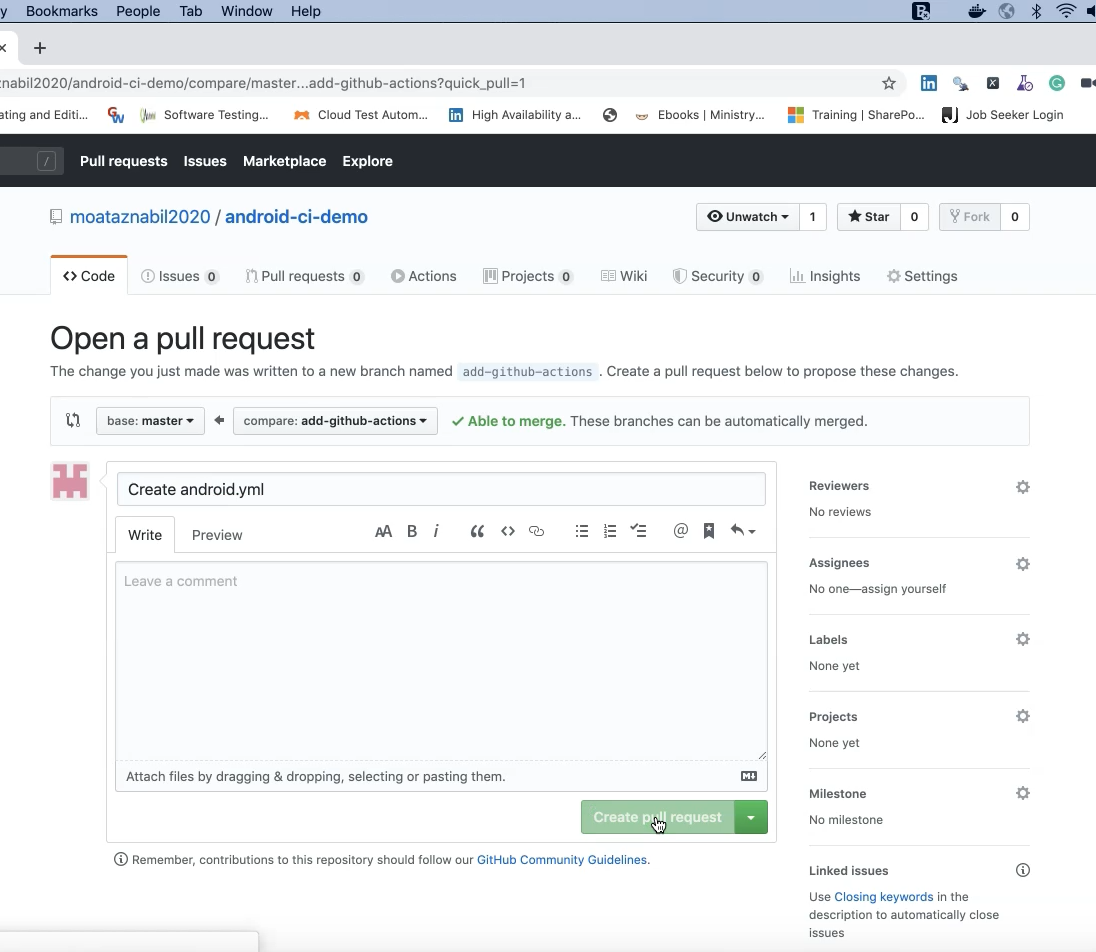
Now click on "Create pull request" to see the workflows run on this pull request.
In the workflow we can see the GitHub integration running now.
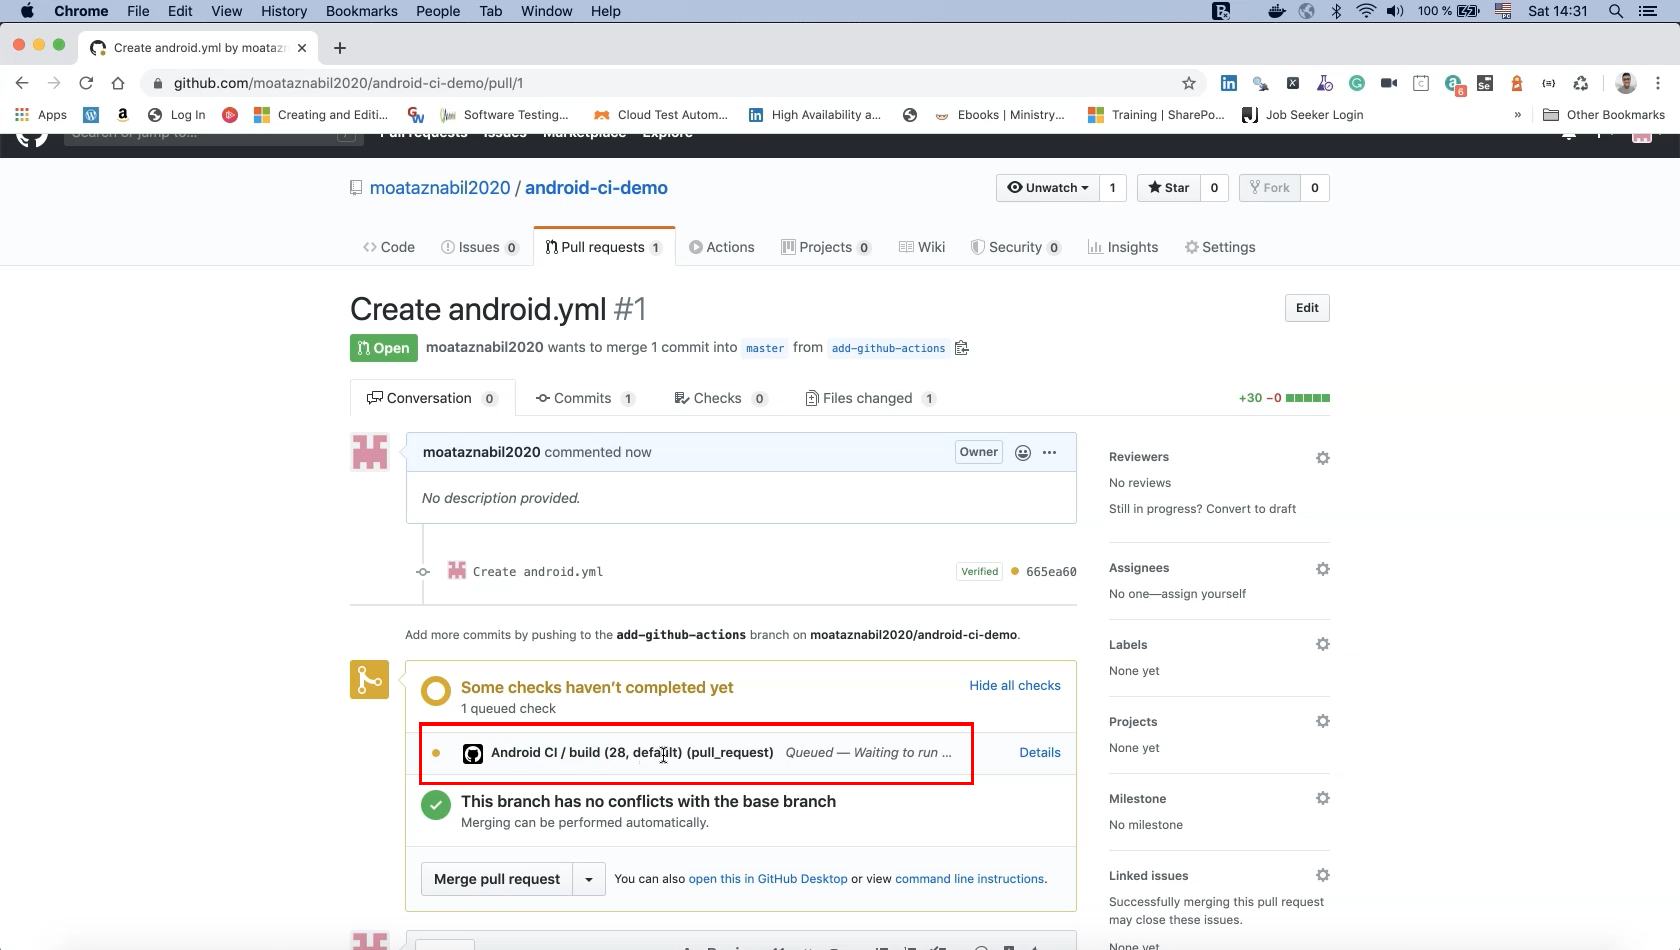
We can click on "Details" to check workflow logs in detail and inspect test results.
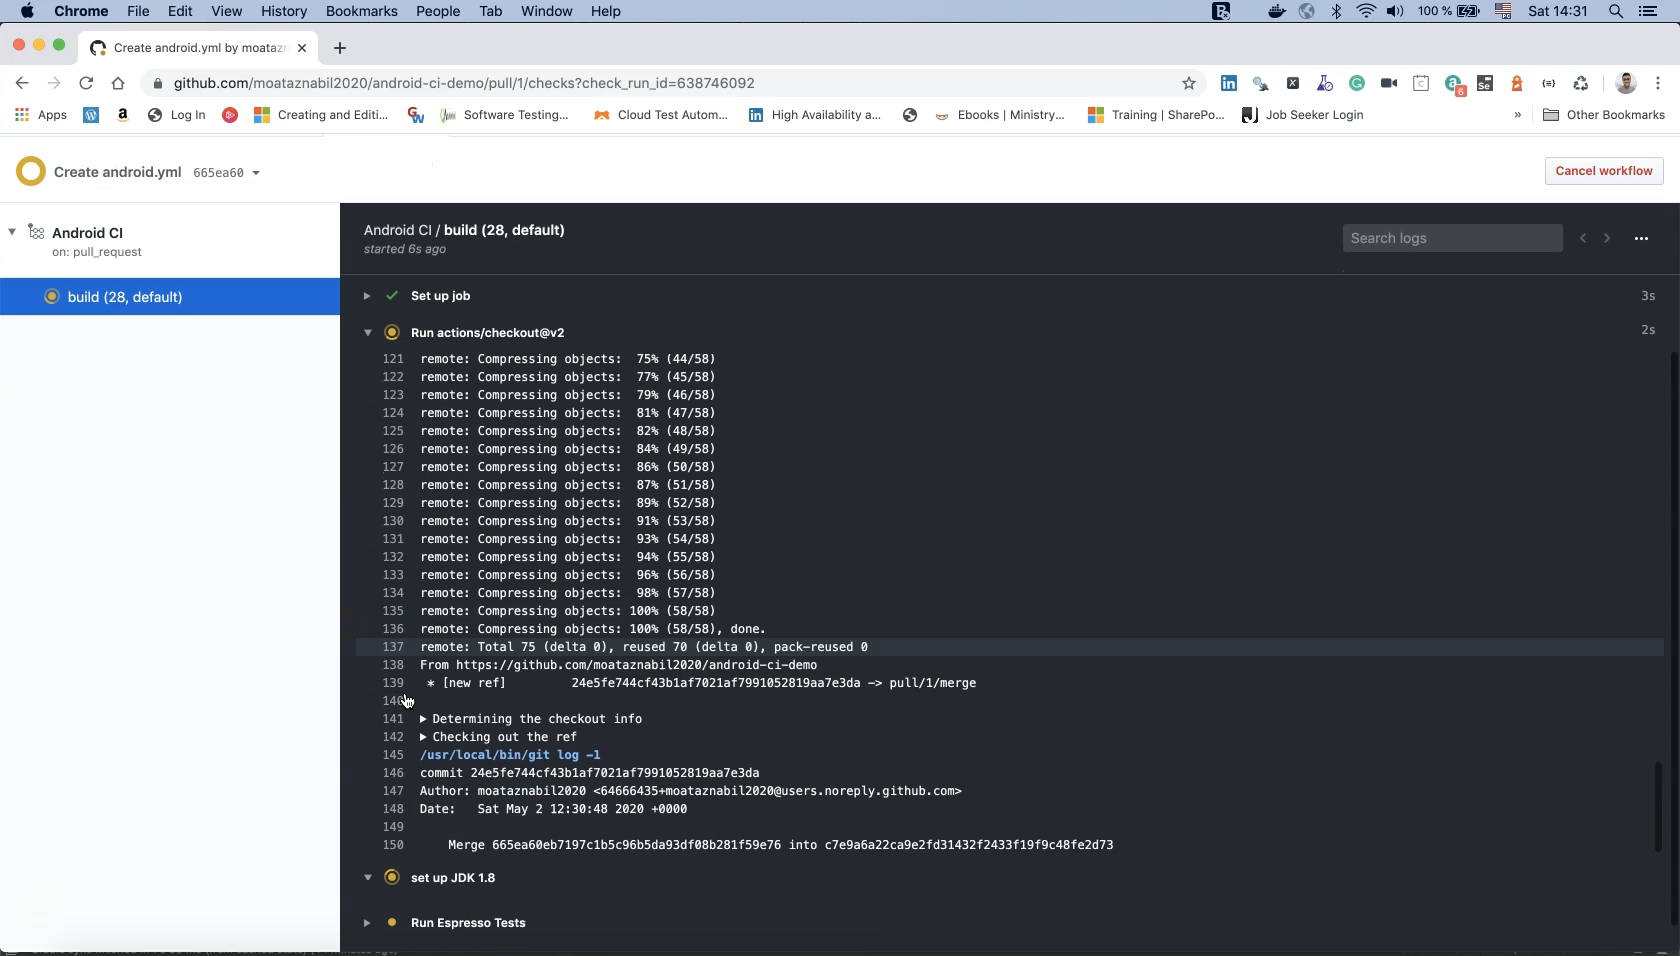
After the workflow is finished we can view the test results.
Notice that the workflow is green and we can now merge our pull request changes.

# Run GitHub Action on Schedule
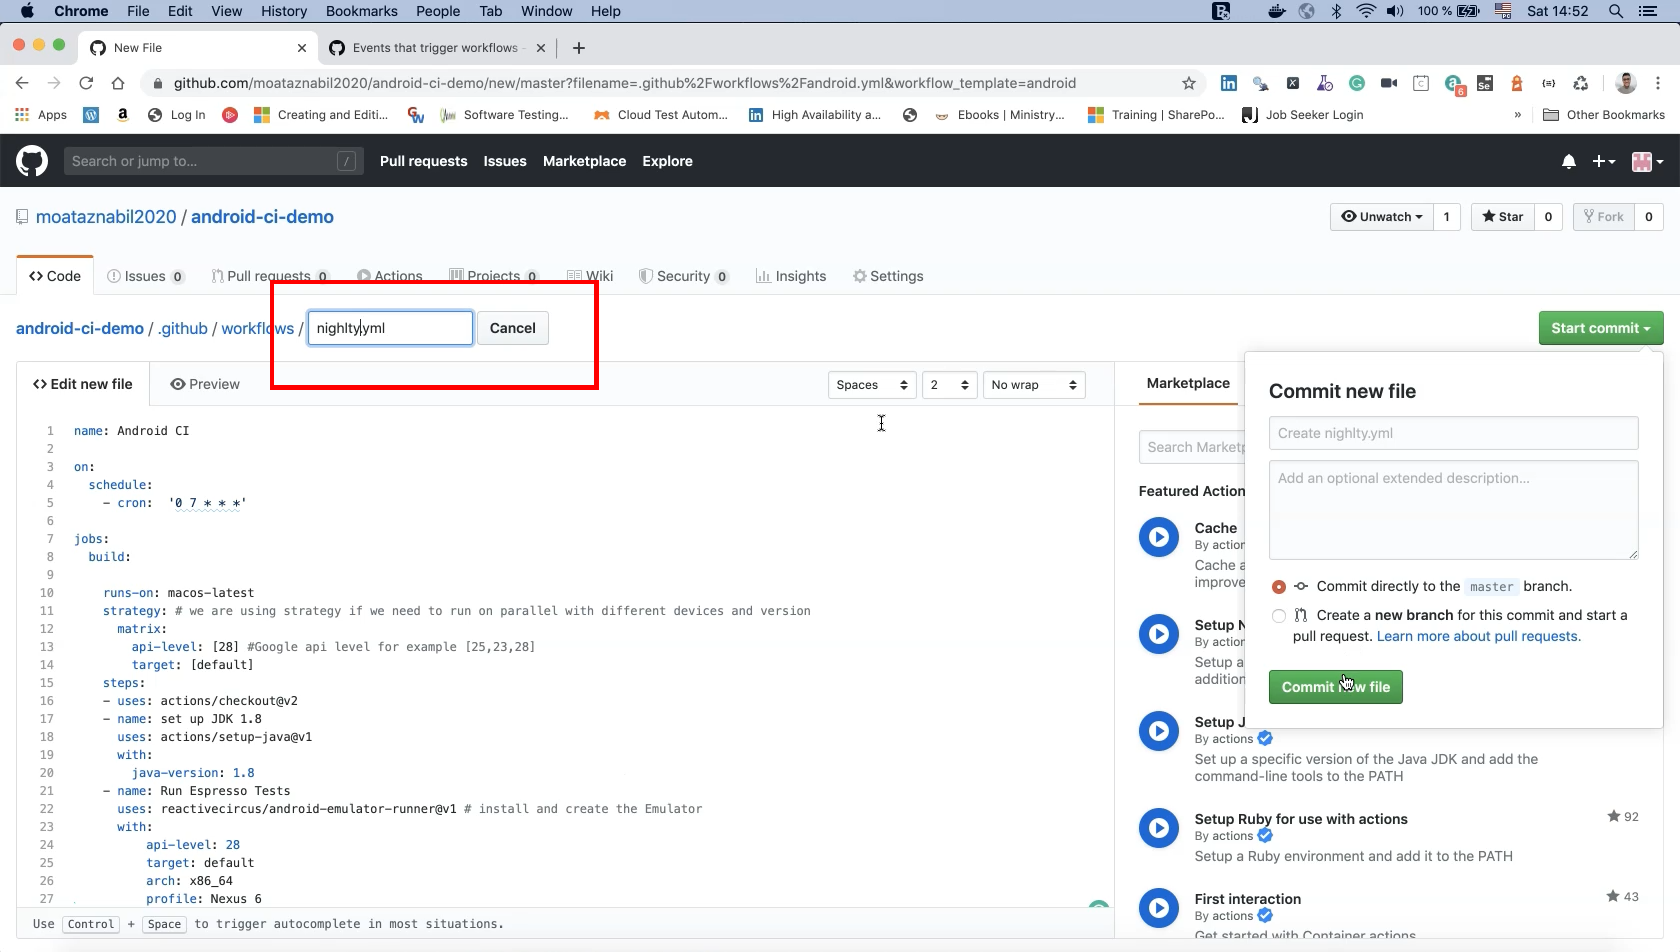
After configuring and adding our workflow to our GitHub repository, we need to understand how to run it on a schedule (for example, as a nightly build).
To configure scheduled builds in GitHub Actions we can copy our existing workflow and create a new one for scheduled builds.
We will only change the "on" trigger section in our YAML file from "push" to "schedule":
on:
    schedule:
        - cron: '0 7 * * *'
Here we are using the cron syntax to run the job with a specific UTC time.
For more information about the cron syntax please refer to the GitHub Action documentation on scheduled events.
Now that we have made this change let's commit our changes.
We can add this in the branch directly or create a new branch for this change.
# Code
name: Android CI
# on push we will trigger our code
on: [push]


jobs:
  build:
	runs-on: macos-latest # the machine type
	strategy: # we are using strategy if we need to run on parallel with different devices and version
  	matrix:
    	api-level: [28] #Google api level for example [25,23,28]
    	target: [default]
	steps:
	- uses: actions/checkout@v2 #checkout the code
	- name: Set up JDK 1.8
  	uses: actions/setup-java@v1
  	with:
    	java-version: 1.8
	- name: Run Espresso Tests
  	uses: reactivecircus/android-emulator-runner@v1 # install and create the Emulator
  	with:
    	api-level: ${{ matrix.api-level }}
    	target: ${{ matrix.target }}
    	arch: x86_64
    	profile: Nexus 6
    	script: ./gradlew connectedDebugAndroidTest -Pcucumber -Ptags="@e2e" --info # running our test with info to check the results
name: Nightly CI
on:
  schedule:
	- cron:  '0 * * * *'

jobs:
  build:
	runs-on: macos-latest # the machine type
	strategy: # we are using strategy if we need to run on parallel with different devices and version
  	matrix:
    	api-level: [25] #Google api level for example [25,23,28]
    	target: [default]
	steps:
	- uses: actions/checkout@v2 #checkout the code
	- name: Set up JDK 1.8
  	uses: actions/setup-java@v1
  	with:
    	java-version: 1.8
	- name: Install and Run Appium Server
  	run: |
    	chmod +x ./scripts/RunAppiumServer.sh # install and run appium server in the background
    	./scripts/RunAppiumServer.sh
	- name: Run Appium Tests
  	uses: reactivecircus/android-emulator-runner@v1 # install and create the Emulator
  	with:
    	api-level: ${{ matrix.api-level }}
    	target: ${{ matrix.target }}
    	arch: x86_64
    	profile: Nexus 6
    	script: ./gradlew connectedDebugAndroidTest -Pcucumber -Ptags="@e2e" --info # running our test with info to check the results
