

Transcripted Summary
What we will do now is refactor our test cases to use the page object model.
The first thing we should do is refactor our rule code.
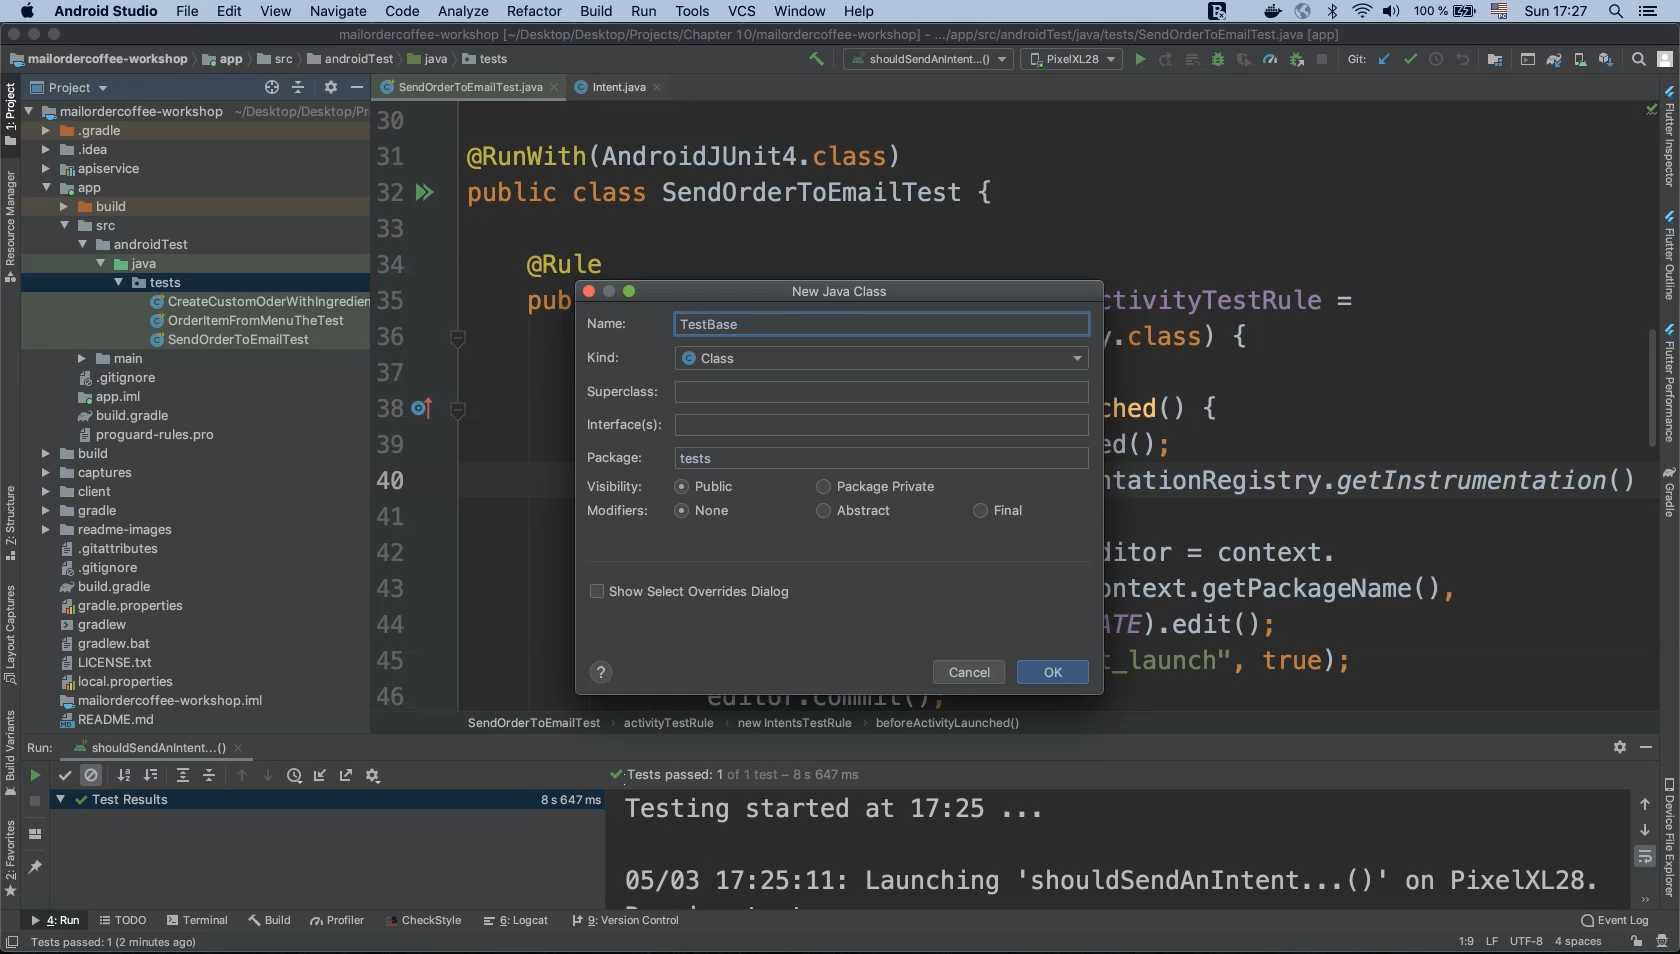
Since it is identical between our three test classes it can be refactored into a base test class. Right-click on our test folder and select "New > Java Class".
Name this new class "TestBase" and click "OK".
Now cut and paste the shared rule code from any one of the test classes. Don’t forget to import any necessary dependencies!
package tests;

public class TestBase
{
    @Rule
    public IntentsTestRule<MainActivity> activityTestRule =
        new IntentsTestRule<MainActivity>(MainActivity.class) {
            @Override
            public void beforeActivityLaunched() {
                super.beforeActivityLaunched();
                Context context = InstrumentationRegistry.getInstrumentation().getTargetContext();
                SharedPreferences.Editor editor =
                    context.getSharedPreferences(context.getPackageName(),
                        Activity.MODE_PRIVATE).edit();
                editor.putBoolean("is_first_launch", true);
                editor.commit();
            }
        };
}
Using the test case from the previous lesson as an example ("SendOrderToEmailTest"), let’s change this class definition to subclass from our new base class using the keyword "extends".
public class SendOrderToEmailTest extends TestBase {

}
Let’s execute the test again at this point to see if anything has changed. The test passes and everything appears to be running normally. Now let’s make the same change to the other two test classes.
public class OrderItemFromMenuTheTest extends TestBase {

}

public class CreateCustomOderWithIngredientsTest extends TestBase {

}
This refactor works for our tests because the application exhibits a consistent startup sequence (recall setting the "is_first_launch" parameter from the previous lesson). But if a particular test case requires bypassing the onboarding splash screen, that class can choose to override the base class Rule implementation with its own.
Now we can begin implementing our page object classes. As mentioned in the previous lesson, we need to create a separate class for each screen.
# Onboarding Screen Page Object
On application startup the very first screen displayed is the onboarding splash screen.
So inside of our Android test package we can begin creating our page object package.
Right-click on the "java" folder, select "New" and select "Package".
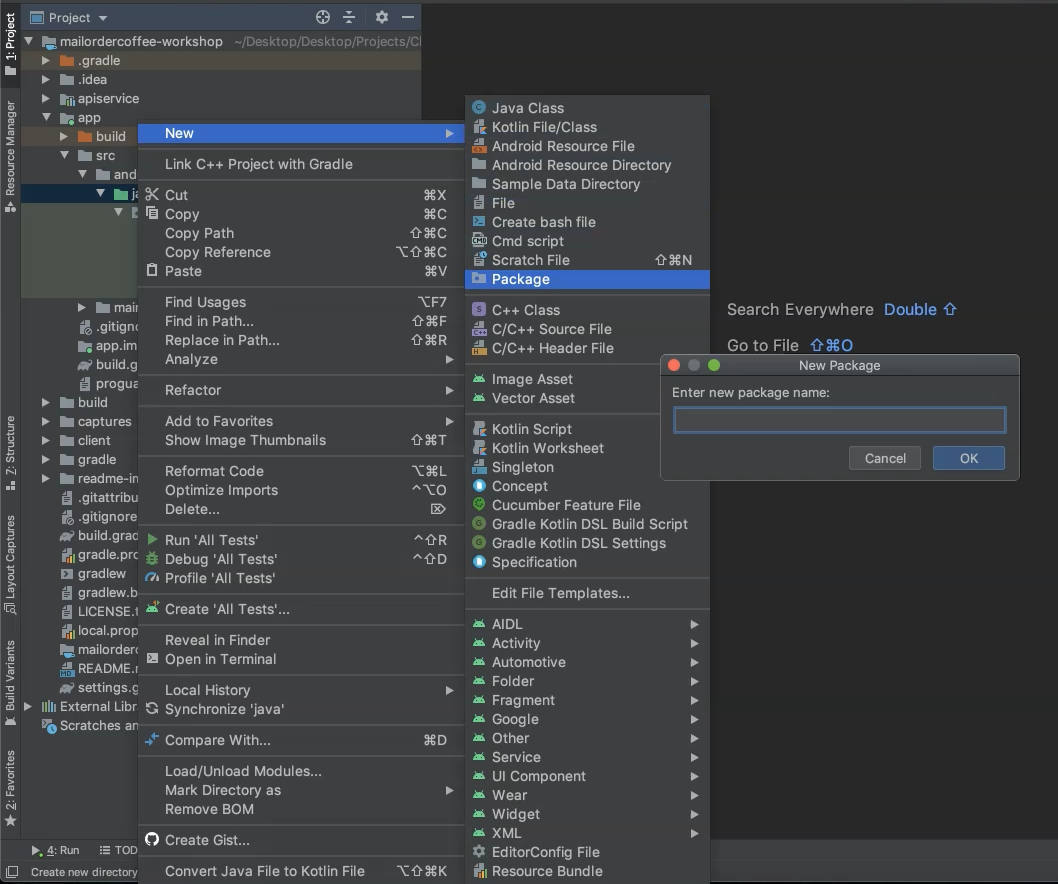
Name this new package "pageobjects" and click "OK".
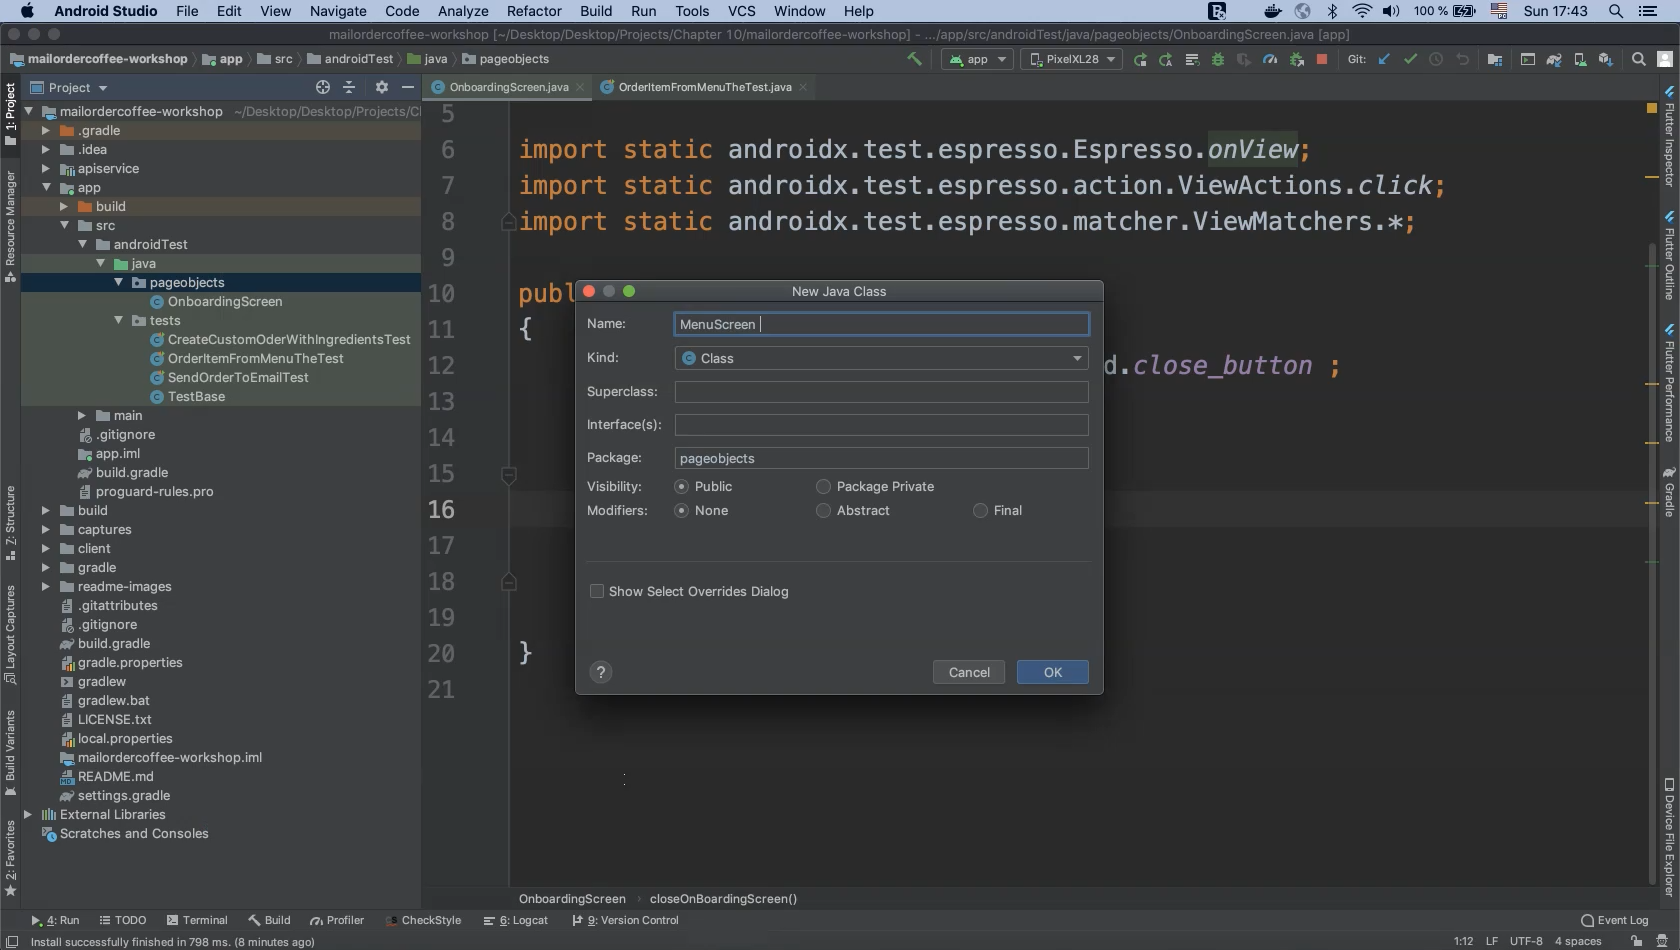
And inside of the new "pageobjects" folder let’s create a new class for the onboarding screen, "OnboardingScreen".
This class will include all of the onboarding page functionality including the close ("X") button.
package pageobjects;

public class OnboardingScreen {
}
For the onboarding screen we are using just a single element.
This is the close button and we can borrow the code from our existing test cases.
Don’t forget to import resources as needed!
package pageobjects;

public class OnboardingScreen {
    public void closeOnBoardingScreen()
    {
        onView(ViewMatchers.withId(R.id.close_button))
            .perform(click());
    }
}
Let’s clean up this code a bit by adding a static import on ViewMatchers as well as defining "R.id.close_button" as an integer so that it can be used elsewhere if necessary.
public class OnboardingScreen {
    private final int closeButton = R.id.close_button;

    public void closeOnBoardingScreen()
    {
        onView(withId(closeButton))
            .perform(click());
    }
}
# Menu Screen Page Object
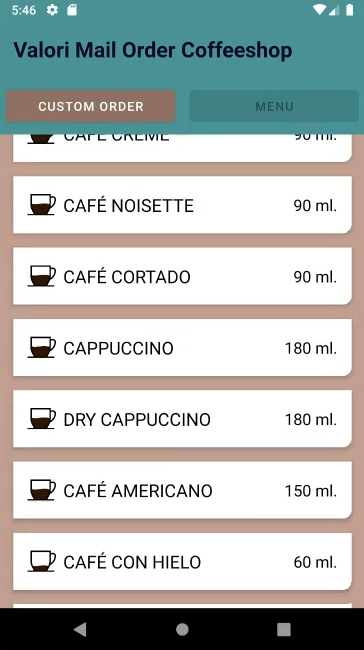
Our second page object is the menu screen containing the RecyclerView list of order items.
Right-click on the "pageobjects" folder and select "New > Java Class".
Name this new class "MenuScreen" and click "OK".
package pageobjects;

public class MenuScreen
{

}
There are two interactable elements of interest on this screen.
We need to click on the "MENU" button and we need to reference RecyclerView in order to scroll inside it and select order items.
For our menu class we can copy the following two commands from the existing method shouldBeAbleToSelectAnItemInTheMenu().

Now define the method scrollToMenuItem() and inside it we can past our code:
    public void scrollToMenuItem()
    {
        onView(withId(R.id.beverage_recycler_view))
            .perform(actionOnItem(hasDescendant(withText("CAPPUCCINO"))
                , click()));

        onView(withId(R.id.beverage_detail_title))
            .check(matches(withText("Cappuccino")));
    }
The current string literals are hard coded.
We need to pass these values from the test cases to make them configurable.
Let’s refactor some of the code here to use arguments and final variables.
    private final int menuList = R.id.beverage_recycler_view;
    private final int beverage_detail_title = R.id.beverage_detail_title;

    public void scrollToMenuItem(String item, String itemTitle)
    {
        onView(withId(menuList ))
            .perform(actionOnItem(hasDescendant(withText(item))
                , click()));

        onView(withId(beverage_detail_title))
            .check(matches(withText(itemTitle)));
    }
Now when we start using scrollToMenuItem() we can select or add any item, scroll through the element, and check that the item details are correctly displayed.
# Custom Order Page Object
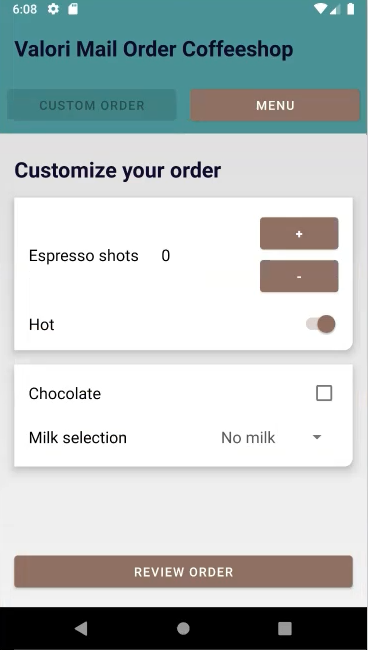
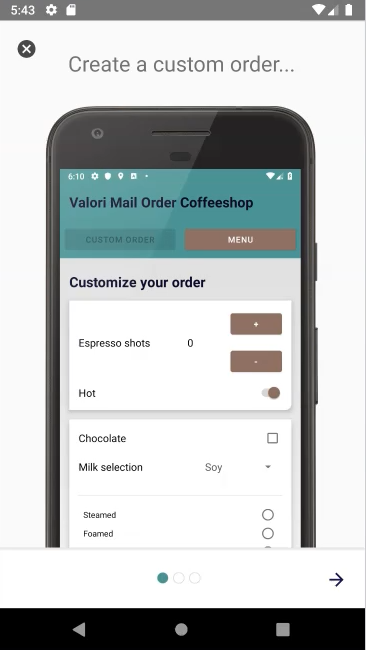
The next screen is for custom orders.
If we open our application and click on "CUSTOM ORDER" we can click on buttons to add or remove espresso shots at any time as well as selecting chocolate.
We can then click the "REVIEW ORDER" button.
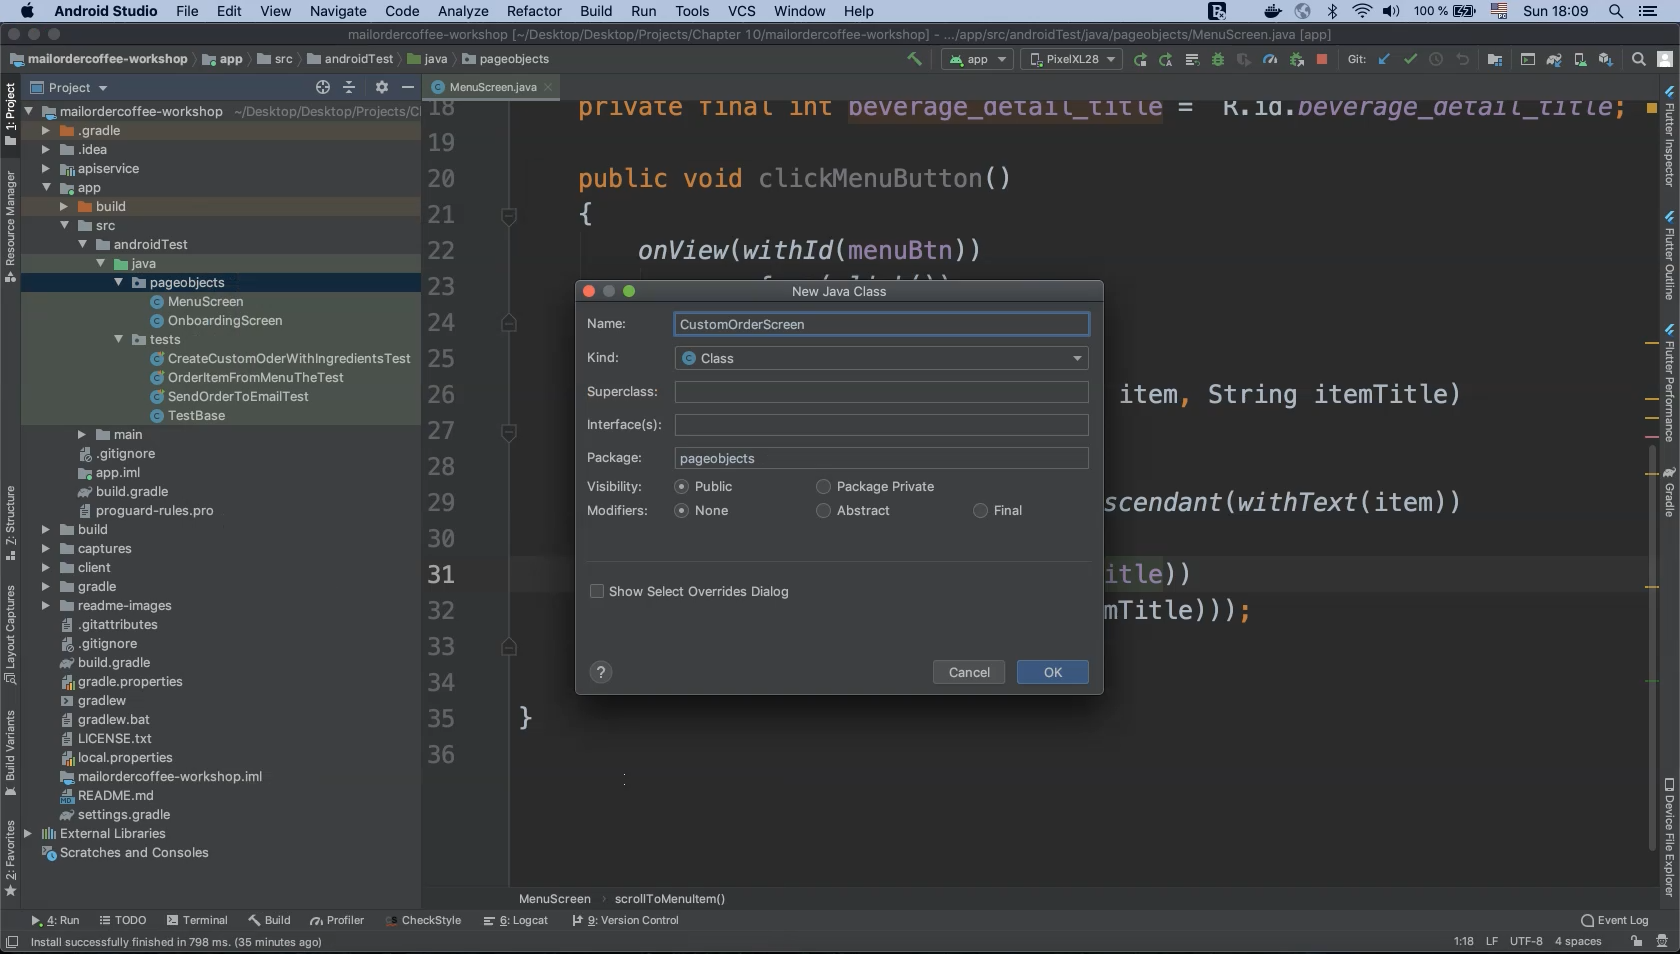
Right-click on the "pageobjects" folder and select "New > Java Class".
Name this new class "CustomOrderScreen" and click "OK".
package pageobjects

public class CustomOrderScreen
{

}
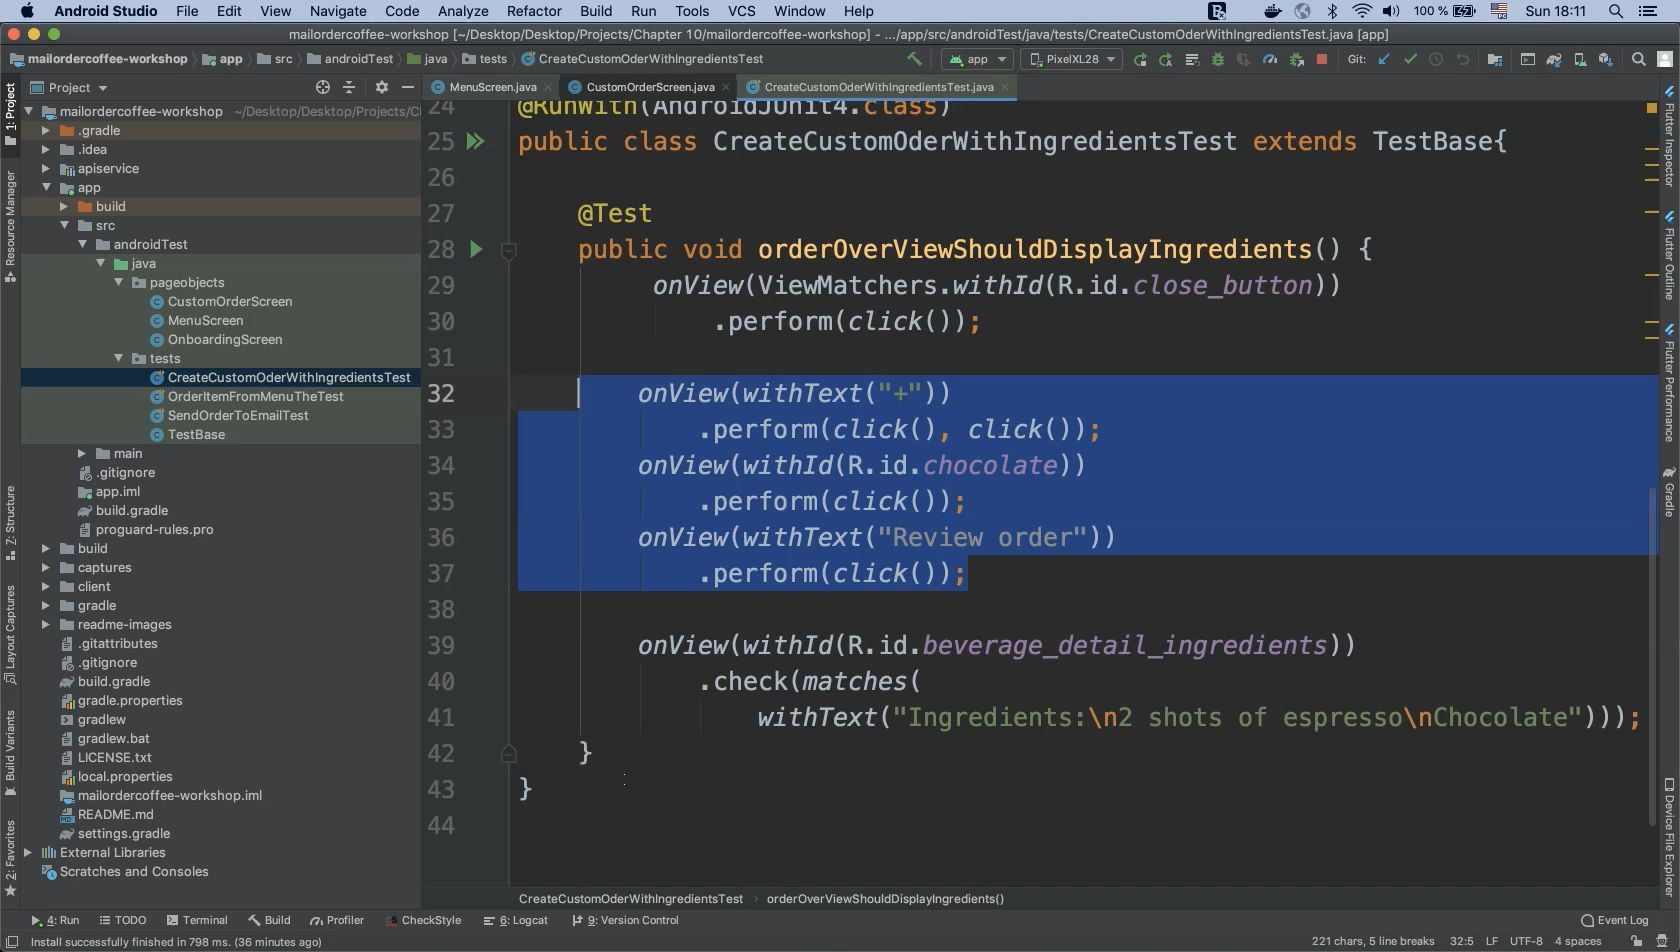
In the "CreateCustomOrderWithIngredientsTest" class let’s see what code we can borrow for our refactored page object.
We can copy the code that performs clicks on the "+", "Chocolate" and "REVIEW ORDER" buttons.
    public void customizeYourOrder()
    {
        onView(withText("+"))
            .perform(click(), click());
        onView(withId(R.id.chocolate))
            .perform(click());
        onView(withText(R.string.review_order_button))
            .perform(click());
    }
As in the previous example, the current string literals are hard coded.
We need to pass these values from the test cases to make them configurable.
The next step of our refactor will change some of the code to use arguments and final variables.
    private final String increaseButton = "+";
    private final String decreaseButton = "-" ;
    private final int chocolateCheck = R.id.chocolate;
    private final int review_order_button = R.string.review_order_button;

    public void customizeYourOrder()
    {
        onView(withText(increaseButton))
            .perform(click(), click());
        onView(withText(decreaseButton))
            .perform(click());
        onView(withId(chocolateCheck))
            .perform(click());
        onView(withText(review_order_button))
            .perform(click());
    }
Let’s also refactor the code to set the number of clicks on the "+" button programmatically.
We can do this with a "for" loop and a counter variable named "itemNumber" which will be passed as a method argument.
    private final String increaseButton = "+";
    private final String decreaseButton = "-" ;
    private final int chocolateCheck = R.id.chocolate;
    private final int review_order_button = R.string.review_order_button;

    public void customizeYourOrder(int itemNumber)
    {
        for (int i = 0; i < itemNumber; i++) {
            onView(withText(increaseButton))
                .perform(click());
        }
        onView(withText(decreaseButton))
            .perform(click());

        onView(withId(chocolateCheck))
            .perform(click());
        onView(withText(review_order_button))
            .perform(click());
    }
So the "+" button will be clicked however many times the value of "itemNumber" is set to, "-" will be clicked once, the "Chocolate" checkbox will be checked, and finally the "REVIEW ORDER" button will be clicked.
# Review Order Page Object
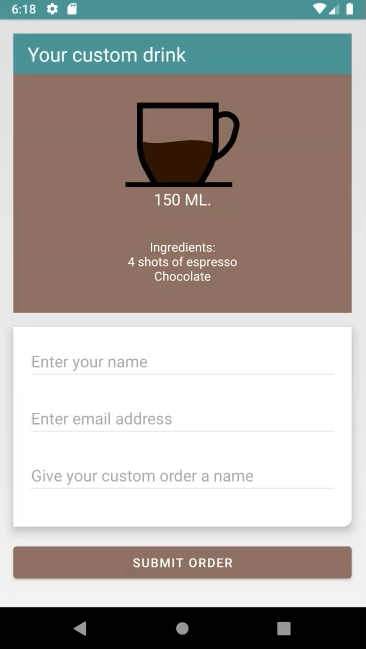
The last page object screen to implement is for "Review Order".
If we open our application and click the "REVIEW ORDER" button we can check or review our order, enter our email, our name, and the custom name for the order.
Afterwards we click the "SUBMIT ORDER" button.
Create a new page object class by right-clicking on the "pageobjects" folder and select "New > Java Class".
Name this new class "ReviewOrder" and click "OK".
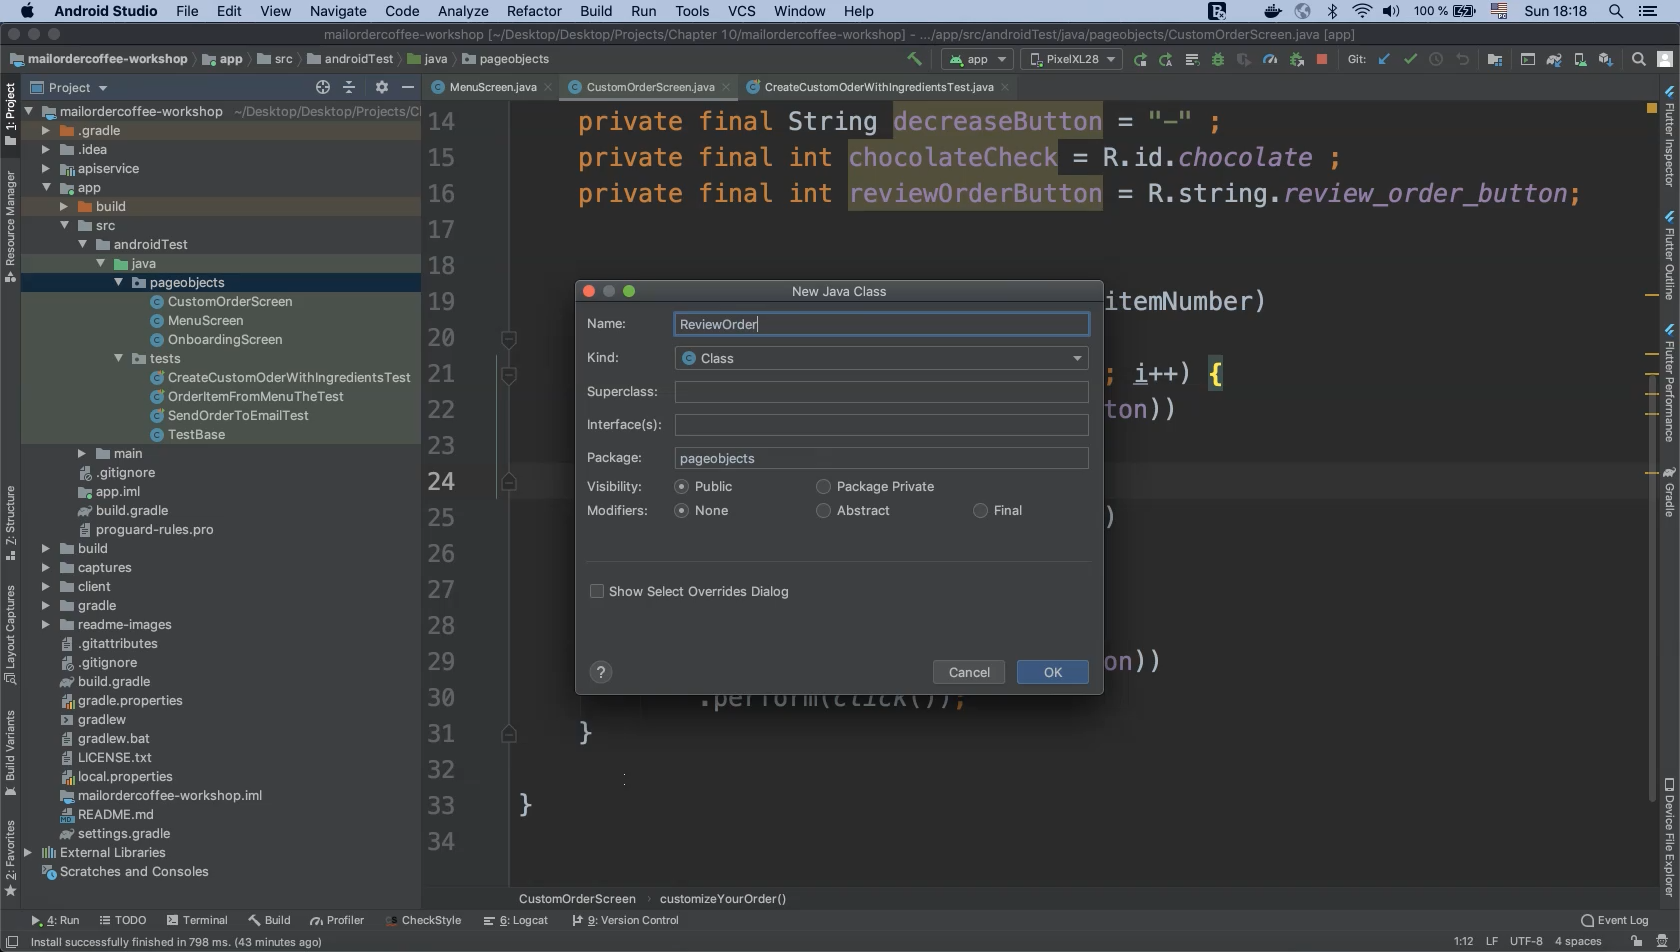
package pageobjects;

public class ReviewOrder
{

}
Most of the actions needed here have already been implemented in other classes:
For example, clicking the Close ("X") button from the onboarding screen can be found in method shouldSendAnIntentContainingTheRightOrderDetails() from the "SendOrderToEmailTest" class.
This method also contains the required menu screen actions.
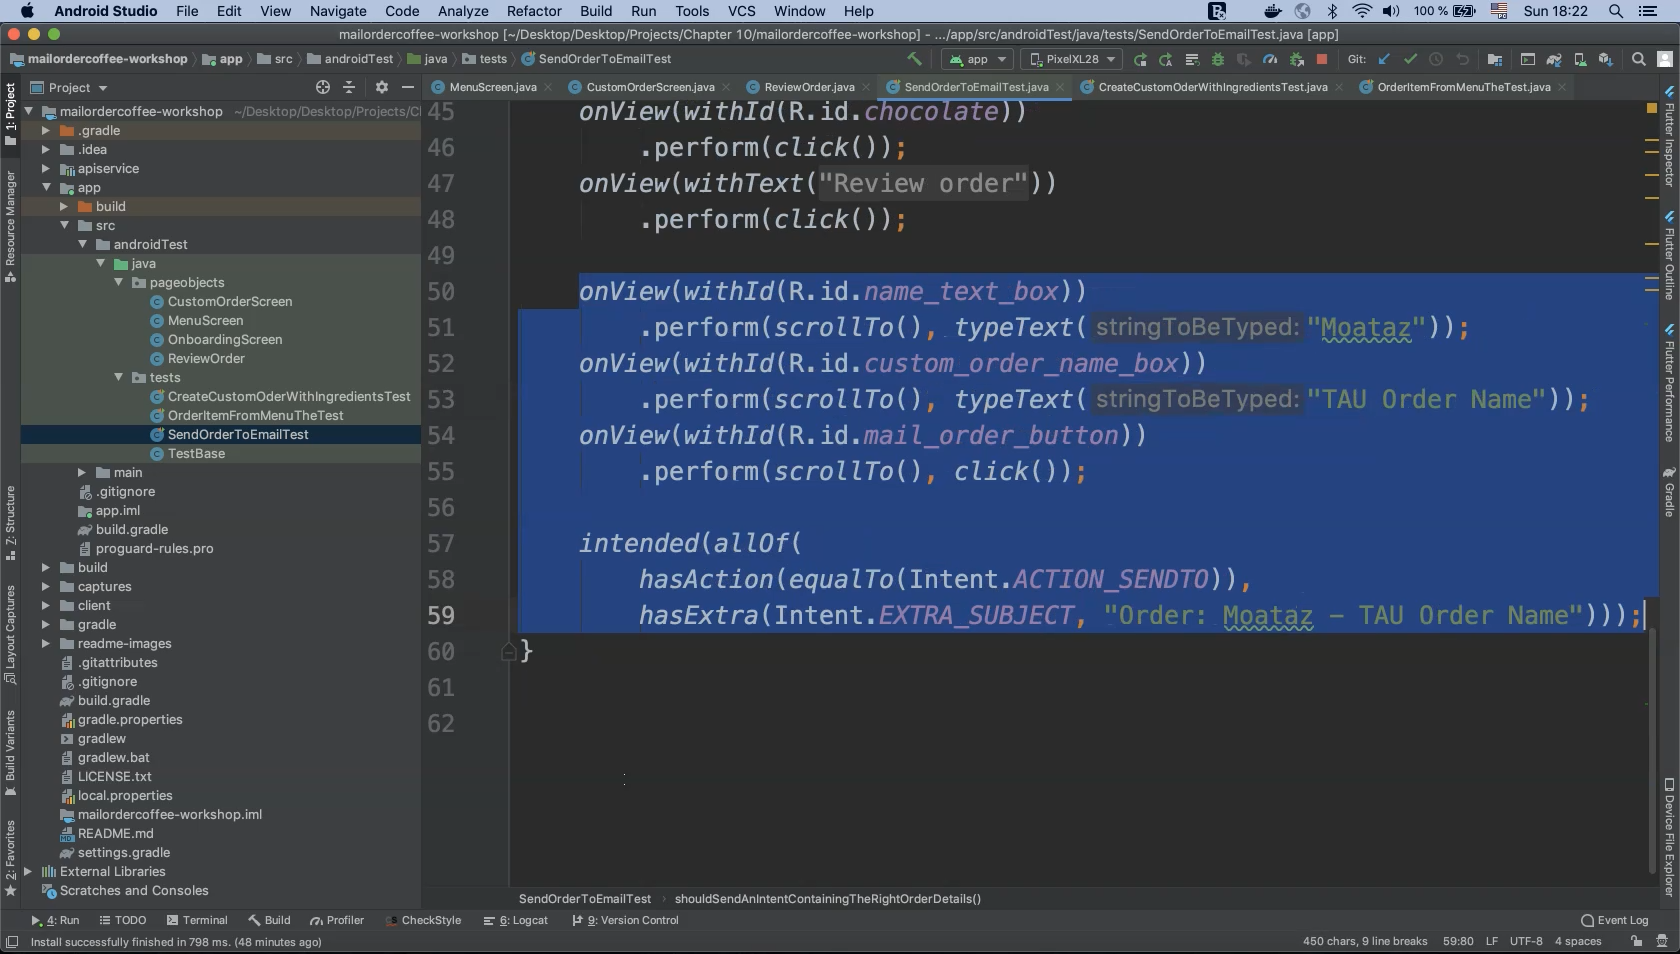
After clicking "REVIEW ORDER" we need to enter a name, e-mail, custom order name and then click on "mail_order_button" ("SUBMIT ORDER").
Using the intent, we then need to check that the action contains "ACTION_SENDTO" and that "EXTRA_SUBJECT" contains the text string we entered inside of our test.
Let’s copy this code and use it for our "ReviewOrder" class.
We need to refactor this code by removing all hard coded values and parameterizing data as needed.
    private final int nameTextBox = R.id.name_text_box;
    private final int customOrderNameBox = R.id.custom_order_name_box ;
    private final int mail_order_button = R.id.mail_order_button ;

    public void reviewOrder(String name, String orderName, String orderSubject)
    {
        onView(withId(nameTextBox))
            .perform(scrollTo(), typeText(name));
        onView(withId(customOrderNameBox))
            .perform(scrollTo(), typeText(orderName));
        onView(withId(mail_order_button))
            .perform(scrollTo(), click());

        intended(allOf(
            hasAction(equalTo(Intent.ACTION_SENDTO)),
            hasExtra(Intent.EXTRA_SUBJECT, orderSubject)));
    }
Now we have removed all of the hard coded data and parameterized our test values.
We still have one method left to implement to complete our page object refactor.
If we open the "CreateCustomerOderWithIngredientsTest" class and look at the method orderOverViewShouldDisplayIngredients() we will find that we left some code here:
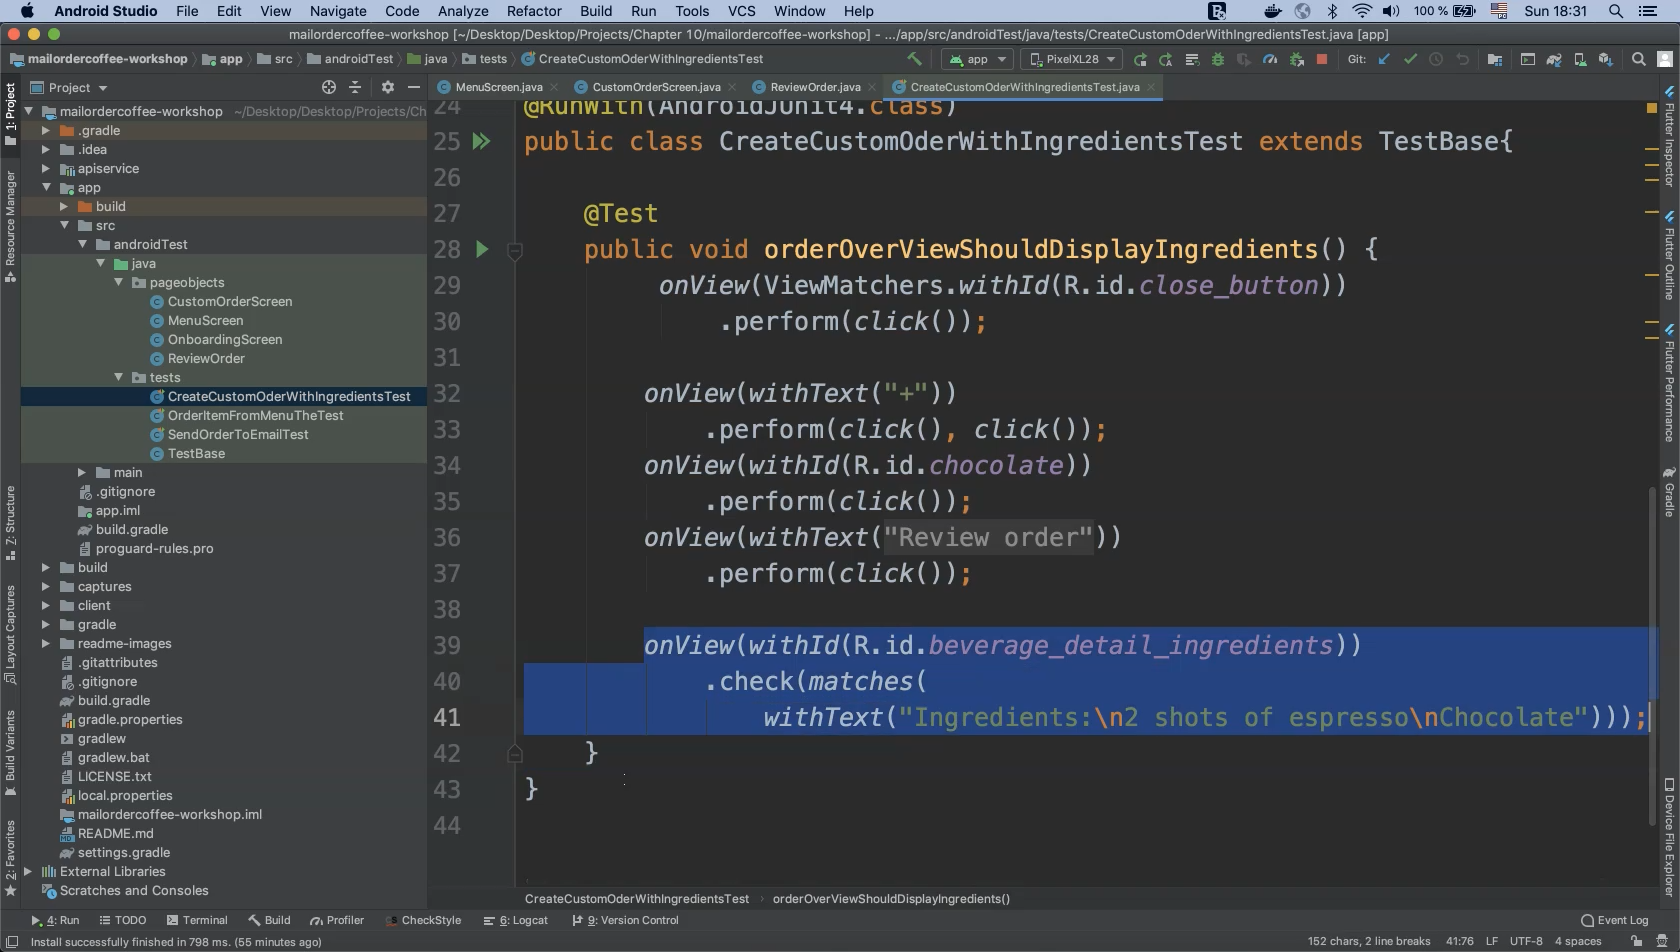
We need to copy this code and implement it as a new method in our "ReviewOrder" class.
Assign the value "R.id.beverage_detail_ingredients" to a variable and parameterize the number of shots with a "shots" argument.
    private final int beverageDetailIngredients = R.id.beverage_detail_ingredients;
    public void  checkIngredients(int shots)
    {
        onView(withId(R.id.beverage_detail_ingredients))
            .check(matches(withText("Ingredients:\n"+shots+" shots of espresso\nChocolate")));
    }
So whether the number of shots is five, four or six, we will always perform the assertion against the correct value.
# OnboardingScreen
package pageobjects;

import androidx.test.espresso.matcher.ViewMatchers;
import nl.testchamber.mailordercoffeeshop.R;

import static androidx.test.espresso.Espresso.onView;
import static androidx.test.espresso.action.ViewActions.click;

public class OnboardingScreen
{
    private final int closeButton = R.id.close_button;

    public void closeOnBoardingScreen()
    {
        onView(ViewMatchers.withId(closeButton))
            .perform(click());
    }
}
# MenuScreen
package pageobjects;

import androidx.test.espresso.contrib.RecyclerViewActions;
import androidx.test.espresso.matcher.ViewMatchers;
import nl.testchamber.mailordercoffeeshop.R;

import static androidx.test.espresso.Espresso.onView;
import static androidx.test.espresso.action.ViewActions.click;
import static androidx.test.espresso.assertion.ViewAssertions.matches;
import static androidx.test.espresso.matcher.ViewMatchers.hasDescendant;
import static androidx.test.espresso.matcher.ViewMatchers.withId;
import static androidx.test.espresso.matcher.ViewMatchers.withText;

public class MenuScreen
{
    private final int menuButton = R.id.use_menu;
    private final int menuList = R.id.beverage_recycler_view;
    private final int itemDetailsTitle = R.id.beverage_detail_title;

    public void clickOnMenuButton(){
        onView(withId(menuButton)).perform(click());
    }

    public void scrollToMenuItem(String item , String title)
    {
        onView(withId(menuList))
            .perform(RecyclerViewActions.
                actionOnItem(hasDescendant(withText(item)), click()));
        onView(withId(itemDetailsTitle)).check(matches(withText(title)));
    }
}
# CustomOrderScreen
package pageobjects;
import nl.testchamber.mailordercoffeeshop.R;

import static androidx.test.espresso.Espresso.onView;
import static androidx.test.espresso.action.ViewActions.click;
import static androidx.test.espresso.matcher.ViewMatchers.withId;
import static androidx.test.espresso.matcher.ViewMatchers.withText;

public class CustomOrderScreen {

    private final String increaseButton = "+";
    private final String decreaseButton = "-" ;
    private final int chocolateCheck = R.id.chocolate;
    private final int review_order_button = R.string.review_order_button;

    public void customizeYourOrder(int itemNumber)
    {
        for (int i = 0; i < itemNumber; i++) {
            onView(withText(increaseButton)).perform(click());
        }
        onView(withText(decreaseButton))
            .perform(click());
        onView(withId(chocolateCheck))
            .perform(click());
        onView(withText(review_order_button))
            .perform(click());
    }
}
# ReviewOrderScreen
package pageobjects;


import android.content.Intent;

import nl.testchamber.mailordercoffeeshop.R;

import static androidx.test.espresso.Espresso.onView;
import static androidx.test.espresso.action.ViewActions.click;
import static androidx.test.espresso.action.ViewActions.scrollTo;
import static androidx.test.espresso.action.ViewActions.typeText;
import static androidx.test.espresso.assertion.ViewAssertions.matches;
import static androidx.test.espresso.intent.Intents.intended;
import static androidx.test.espresso.intent.matcher.IntentMatchers.hasAction;
import static androidx.test.espresso.intent.matcher.IntentMatchers.hasExtra;
import static androidx.test.espresso.matcher.ViewMatchers.withId;
import static androidx.test.espresso.matcher.ViewMatchers.withText;
import static org.hamcrest.CoreMatchers.equalTo;
import static org.hamcrest.core.AllOf.allOf;


public class ReviewOrderScreen {

    private final int nameTextBox = R.id.name_text_box;
    private final int customOrderNameBox = R.id.custom_order_name_box ;
    private final int mail_order_button = R.id.mail_order_button ;
    private final int beverageDetailIngredients = R.id.beverage_detail_ingredients;

    public void reviewOrder(String name , String orderName , String orderSubject)
    {
        onView(withId(nameTextBox))
            .perform(scrollTo(), typeText(name));
        onView(withId(customOrderNameBox))
            .perform(scrollTo(), typeText(orderName));
        onView(withId(mail_order_button))
            .perform(scrollTo(), click());

        intended(allOf(
            hasAction(equalTo(Intent.ACTION_SENDTO)),
            hasExtra(Intent.EXTRA_SUBJECT, orderSubject)));
    }

    public void  checkIngredients(int shots)
    {
        onView(withId(R.id.beverage_detail_ingredients))
            .check(matches(withText("Ingredients:\n"+shots+" shots of espresso\nChocolate")));
    }
}
Resources
Quiz
The quiz for this chapter can be found in section 7.3
