

Transcripted Summary
In this chapter we will begin by asking why we should use Cucumber in our tests.
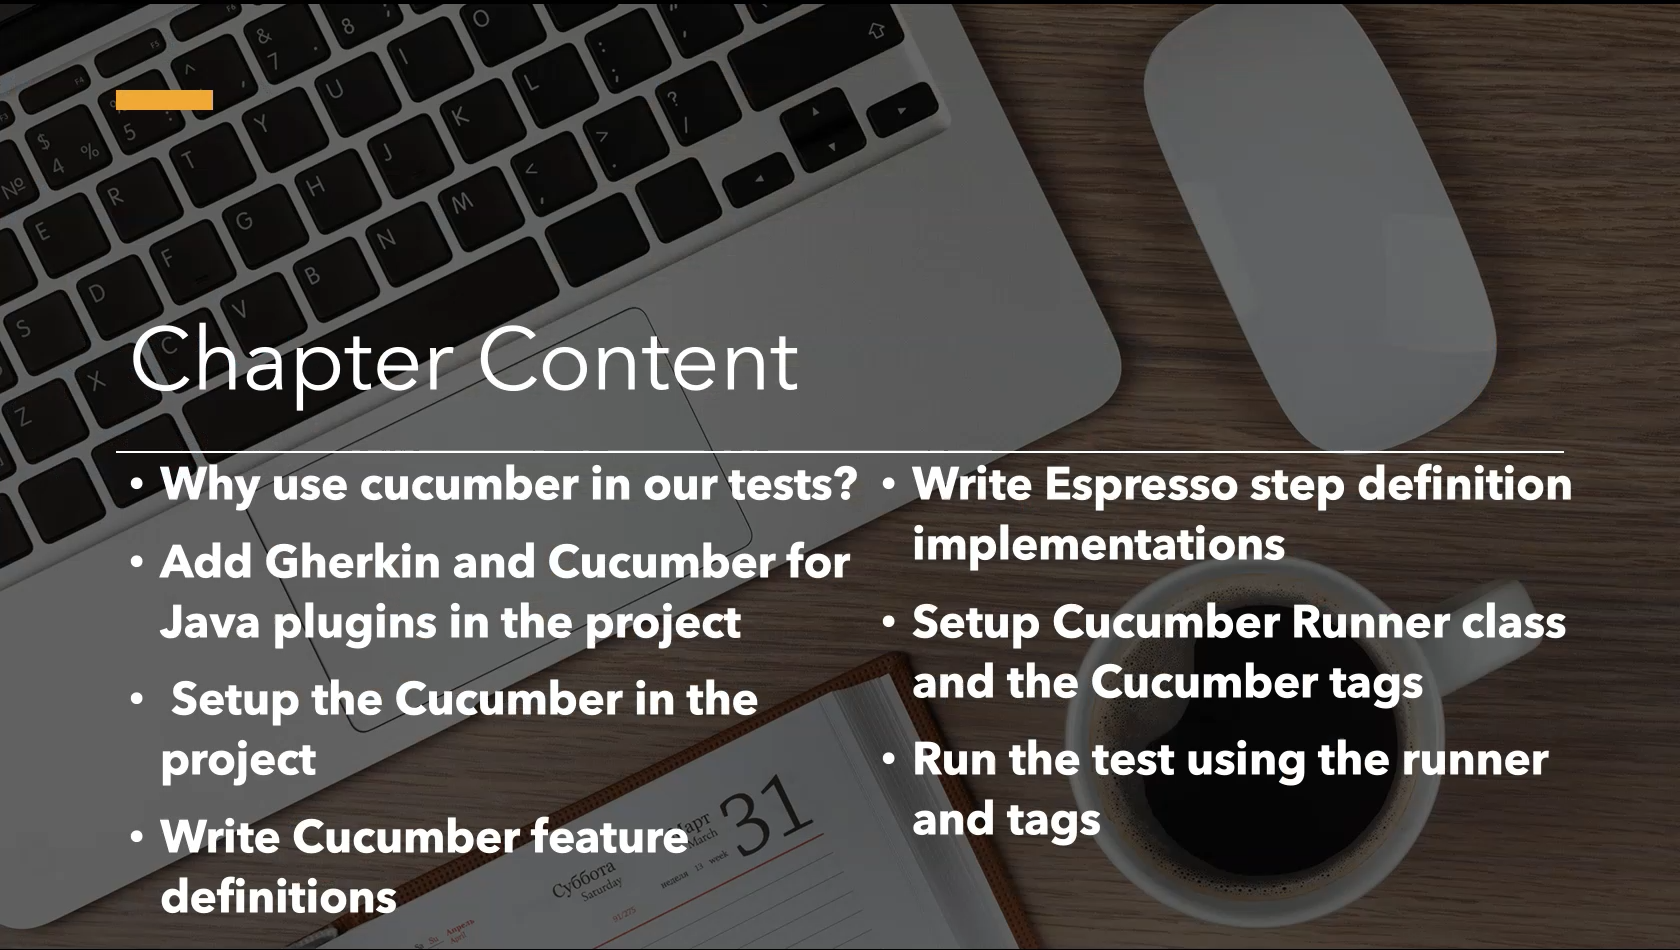
We will go over:
adding the Gherkin and Cucumber Java plugins into our project
setting up and configuring Cucumber
writing the Cucumber feature file and creating step definitions
setting up the Cucumber Runner Class and Cucumber tags
running our tests using the runner and tags
# Why Use Cucumber in our Tests?
Cucumber was created to drive the Behavior-Driven Development (BDD) process.
Customers can describe business requirements as a series of examples called scenarios using a plain-text natural language syntax called Gherkin (Given… When… Then).
In Cucumber these files are called Feature files which are reviewed by the scrum team to gain a clear understanding of the requirements before starting actual development.
Once development is underway, the developers or QA will write step definitions.
Step definitions are essentially snippets of code that map the natural language syntax of feature file scenarios to actual test code executing actions against the application under test.
# Login Application
Before we start let's explore the application we will be working with in this chapter.
Go ahead and open the "BDDExample" application.
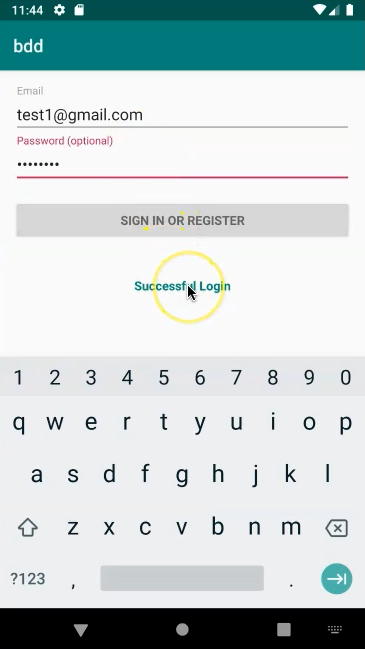
This is a simple application for a login test case.
We will enter the email and the password and click "SIGN IN OR REGISTER".
In our test case we will need to assert that the "Successful Login" message is displayed.
In our application project we see two page objects, "LoginScreen" and "LoginTest".
Class "LoginScreen" implements various user input actions as well as a test login case.
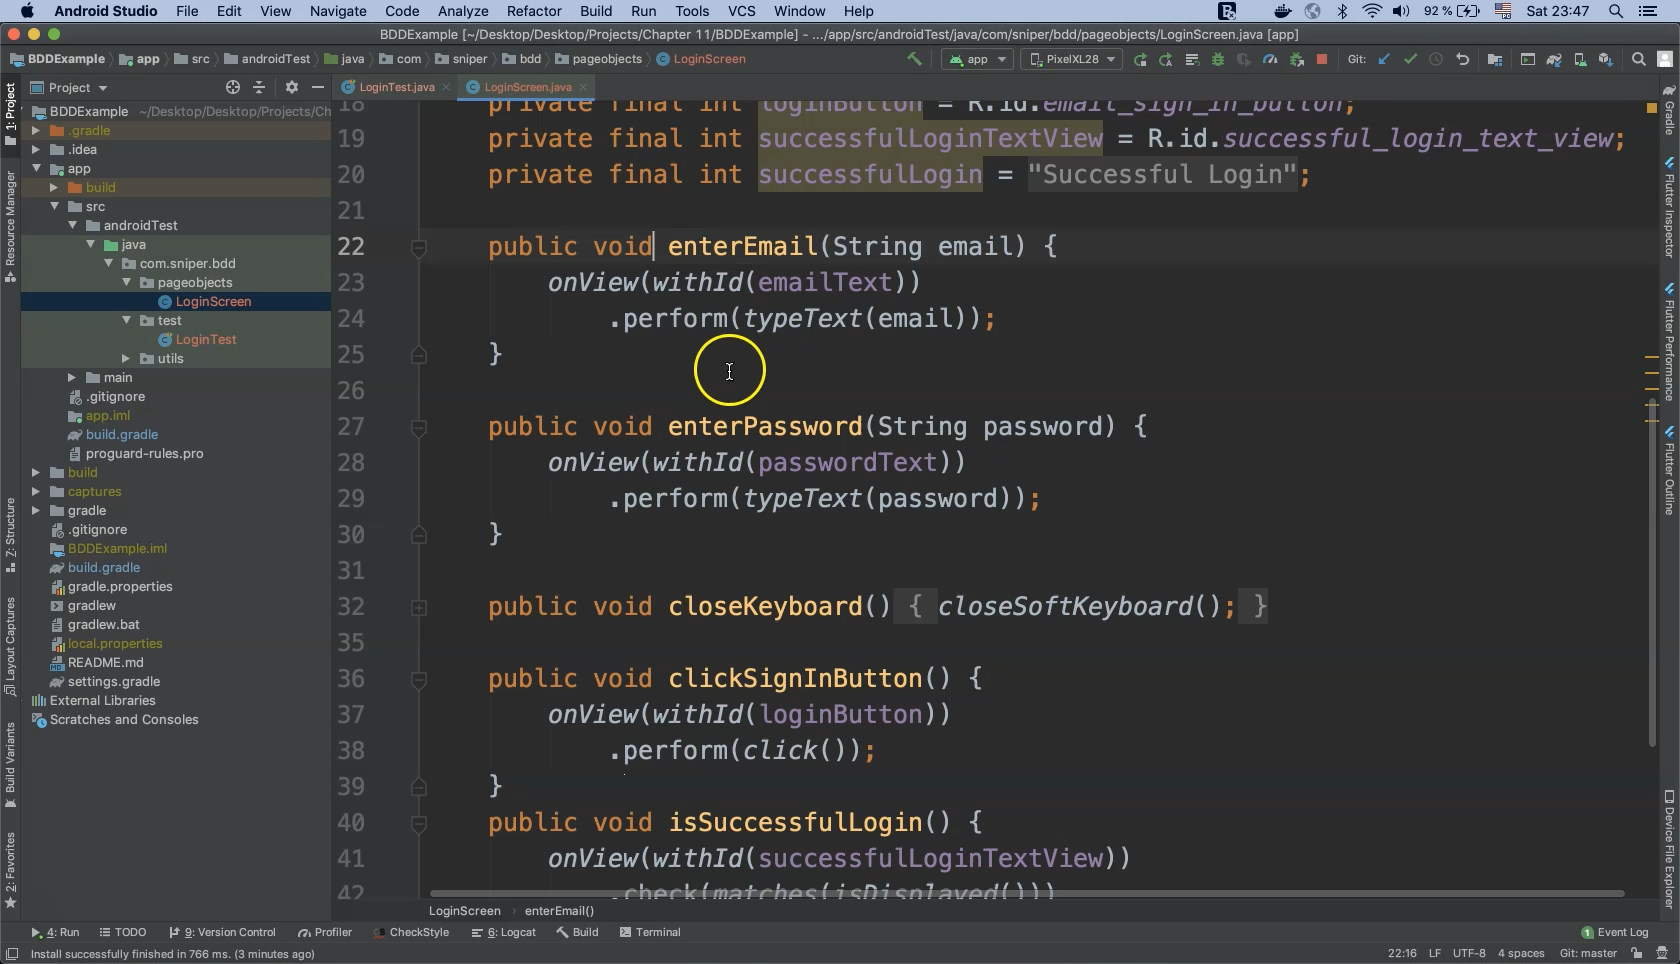
Our goal here is to implement our tests using these page object methods with a step definition class after writing our feature file.
# Add Gherkin and Cucumber for Java Plugins in the Project (Demo)
Let’s begin by adding the Gherkin and Cucumber for Java plugins to our project.
For Android Studio we need to download two plugins.
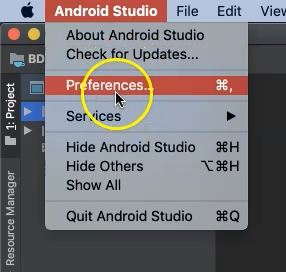
Click on the "Android Studio" toolbar and select "Preferences".
On the next screen click on "Plugins" then click on "Marketplace".
In the "Plugins" section search for "Gherkin".
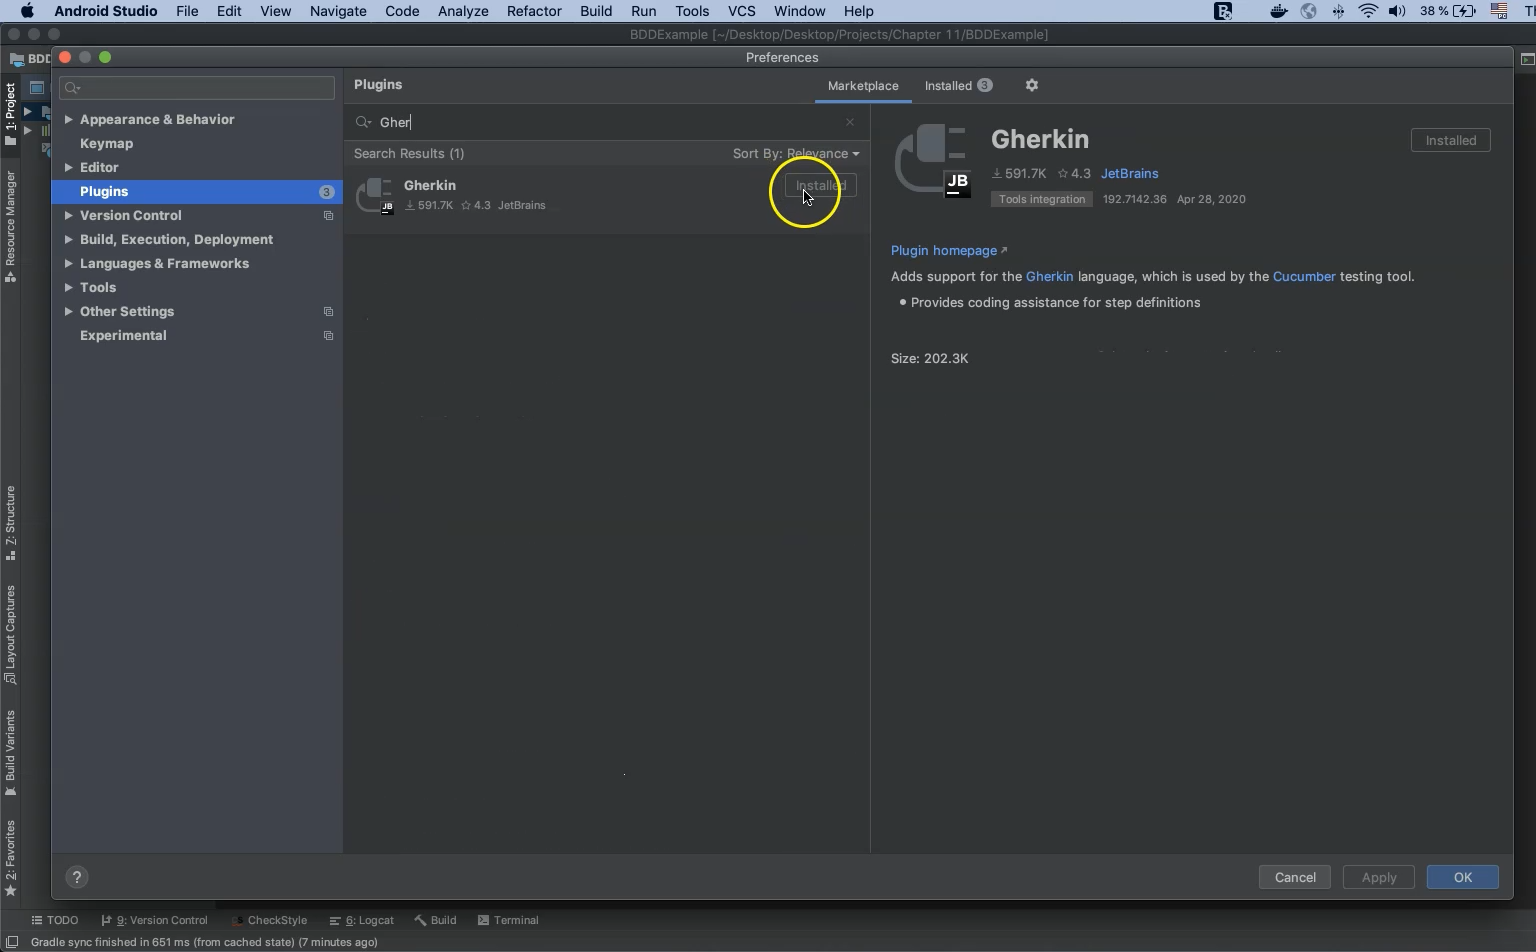
In my case the Gherkin plugin is already installed but you will need to install it if you haven’t already.
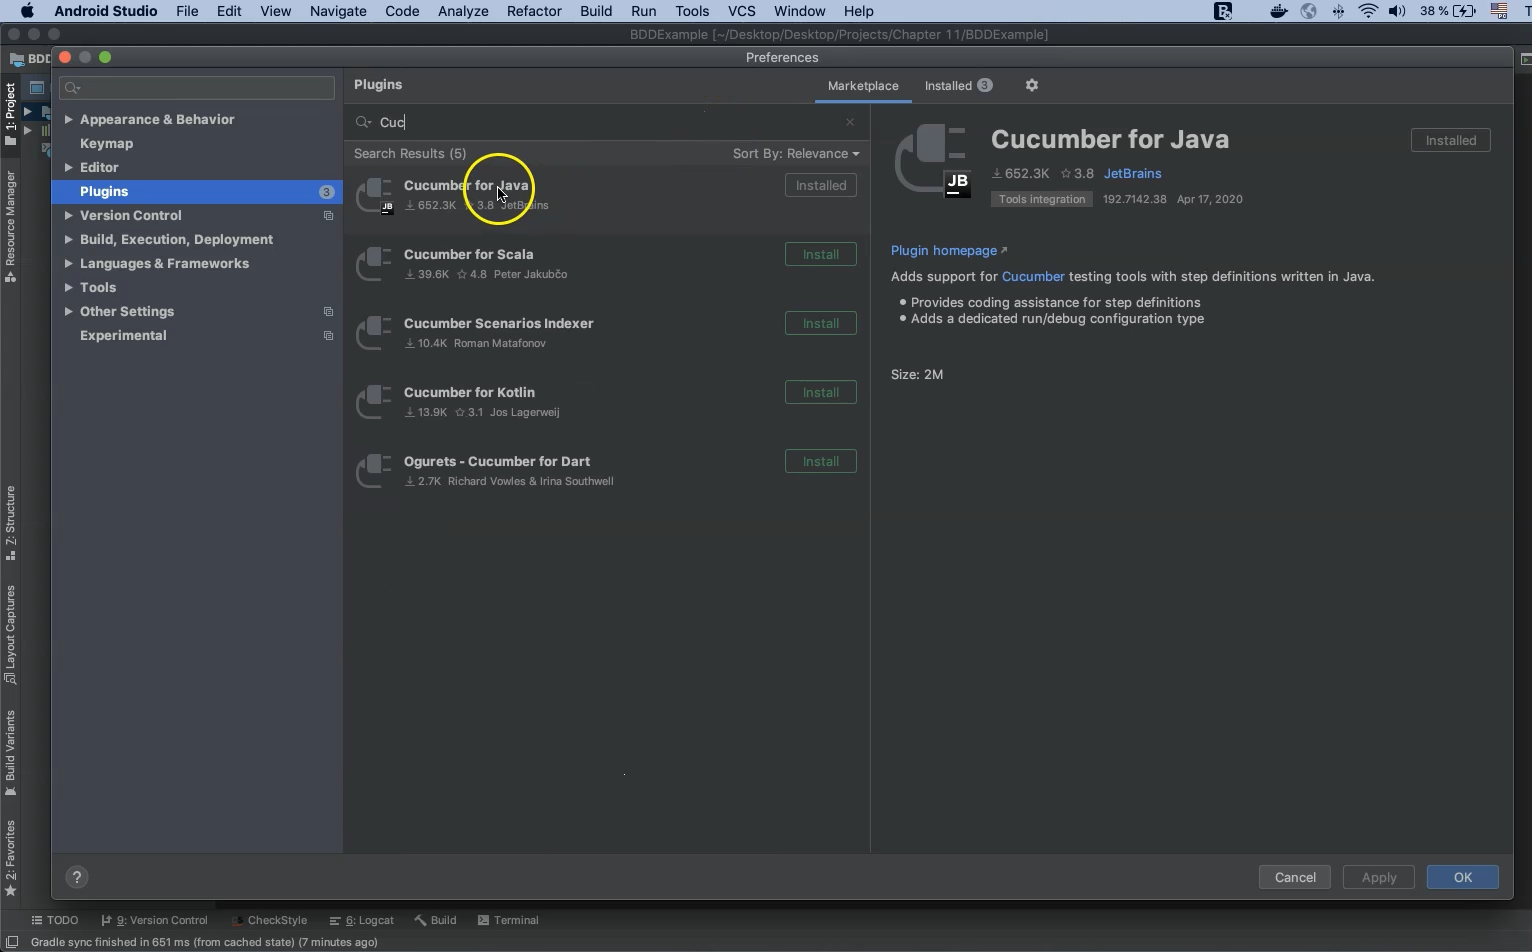
The second plugin is Cucumber for Java and needs to be installed as well.
Now click the "Apply" button and restart Android Studio for these downloads to take effect.
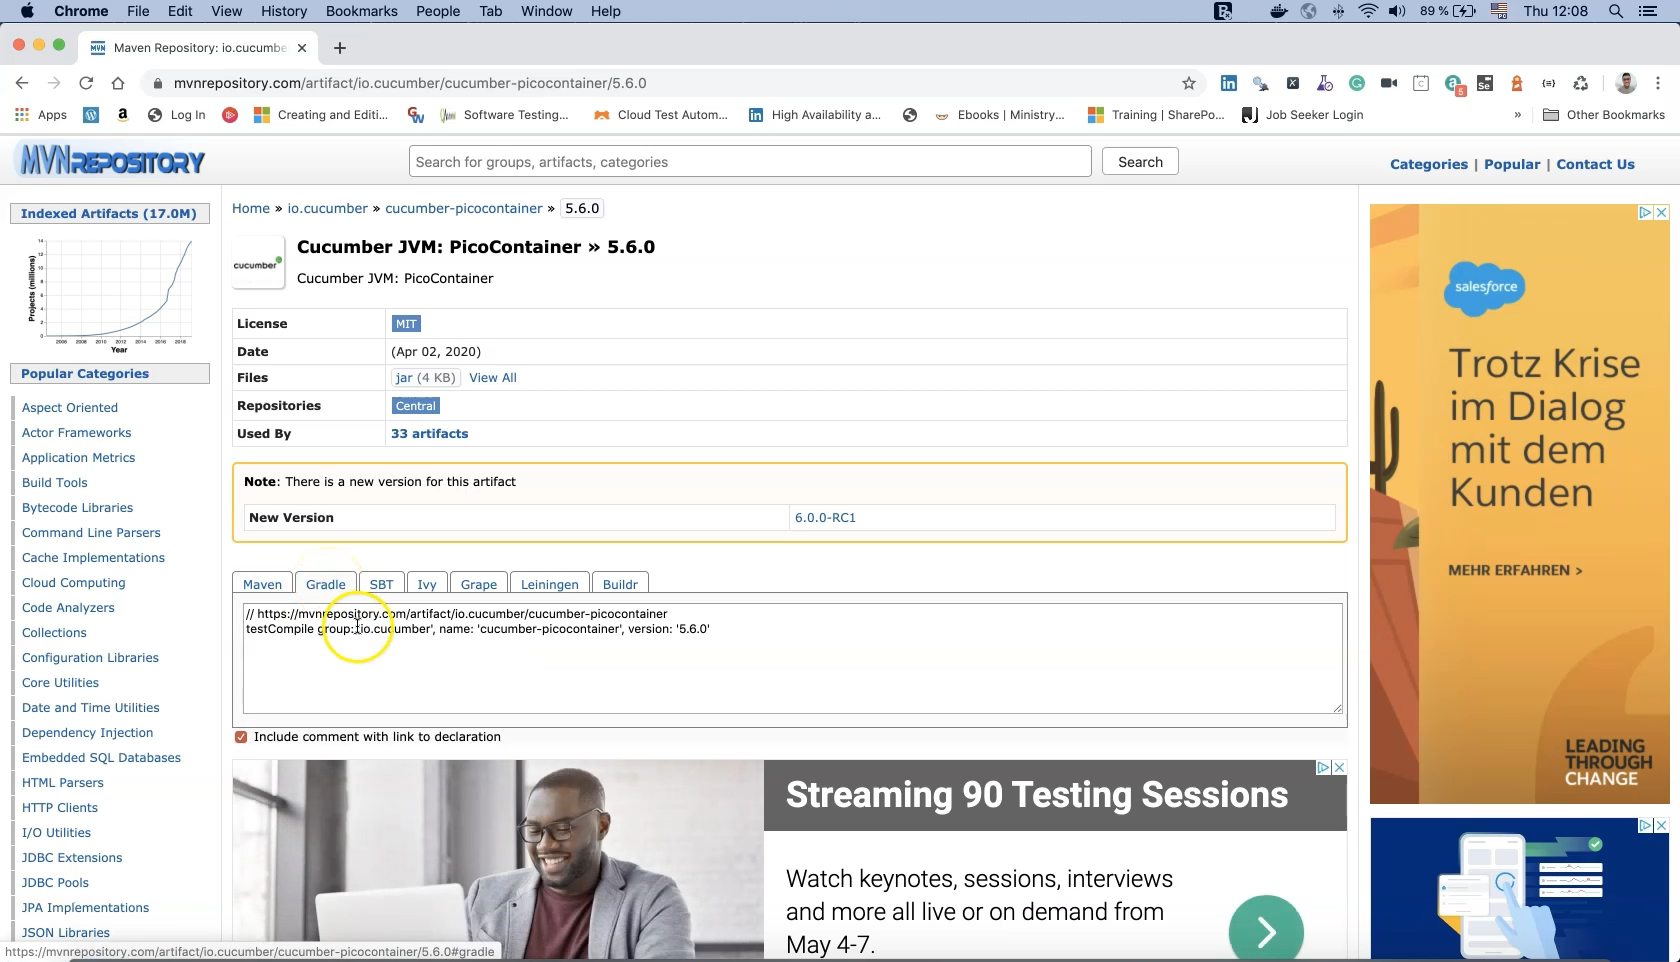
To set up Cucumber for our Android project we need to download two dependencies which can be found in the Maven repository for Cucumber.
The first one is "Cucumber JVM: PicoContainer".
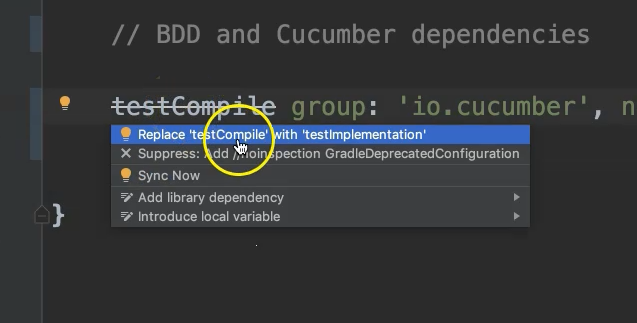
Find the latest stable release and copy the line of text that begins with "testCompile" under the "Gradle" tab.
Back in Android Studio, open up the "build.gradle" file in the "app > build" folder and paste the copied text.
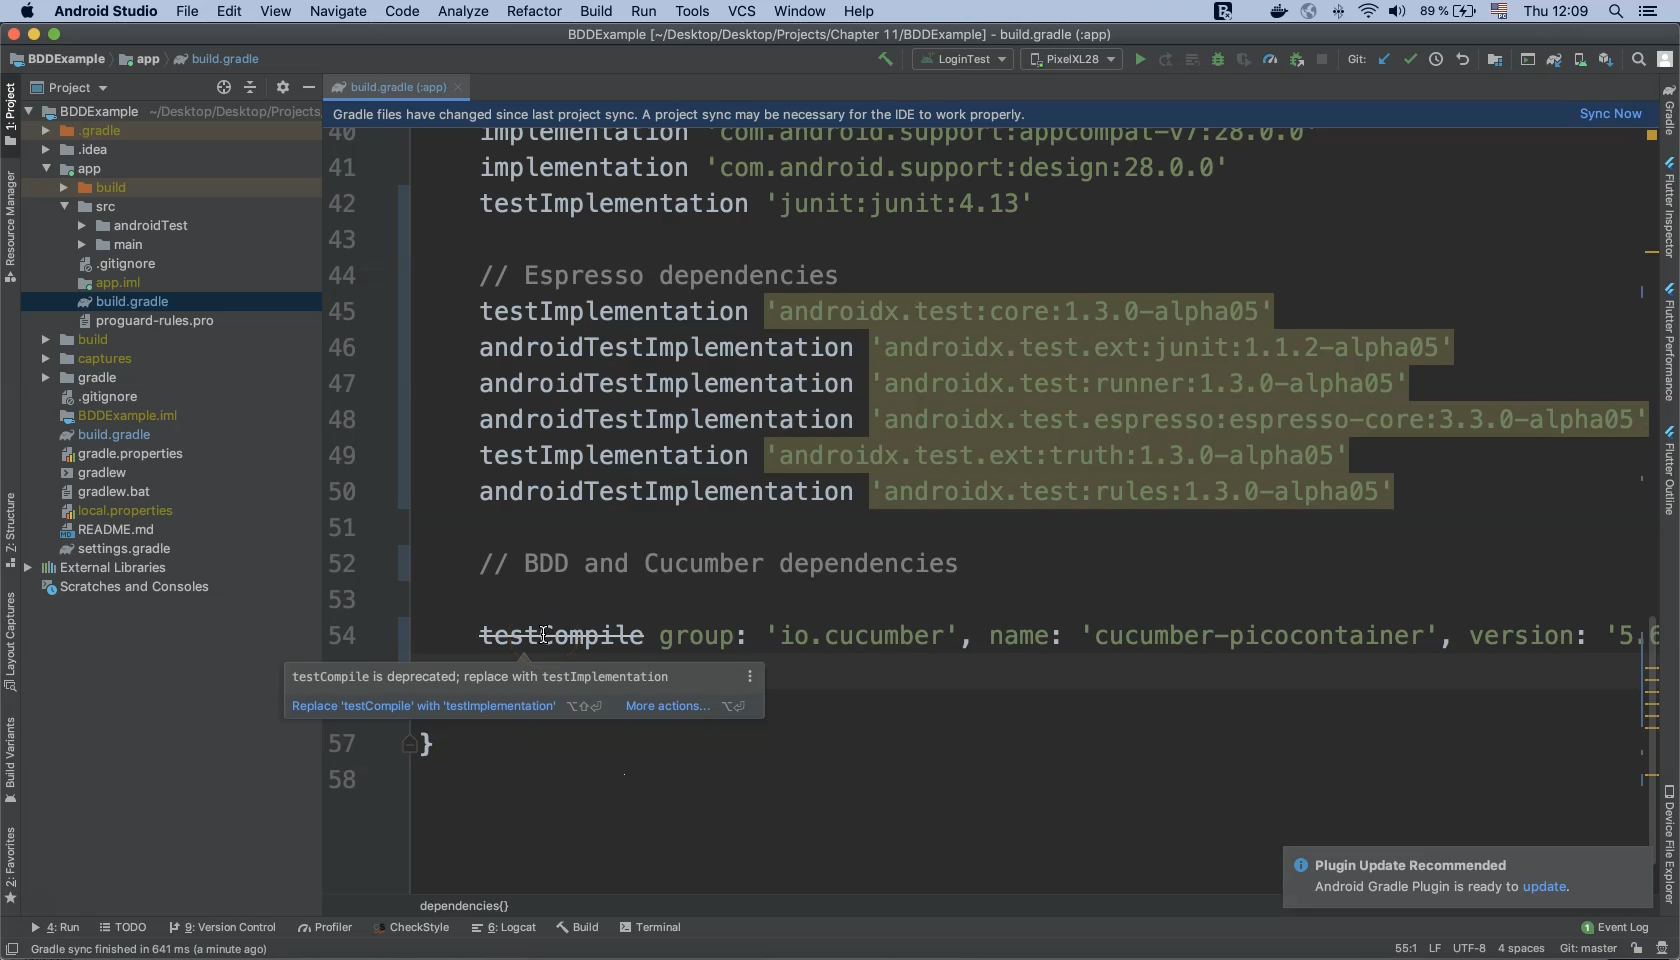
Note that "testCompile" is crossed-out in the above screenshot, indicating that this dependency is deprecated. We need to replace it with "testImplementation".
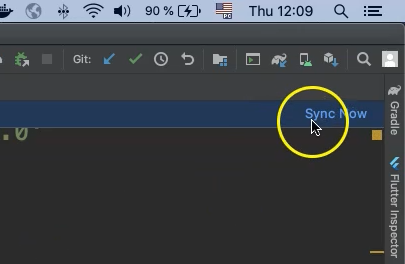
After that we need to hit the "Sync Now" button to download the dependency.
The second plugin we need to install is "Cucumber JVM Android" from the same Maven repository for Cucumber.
As before, find the latest stable release and copy the line of text that begins with "compile group" under the "Gradle" tab.
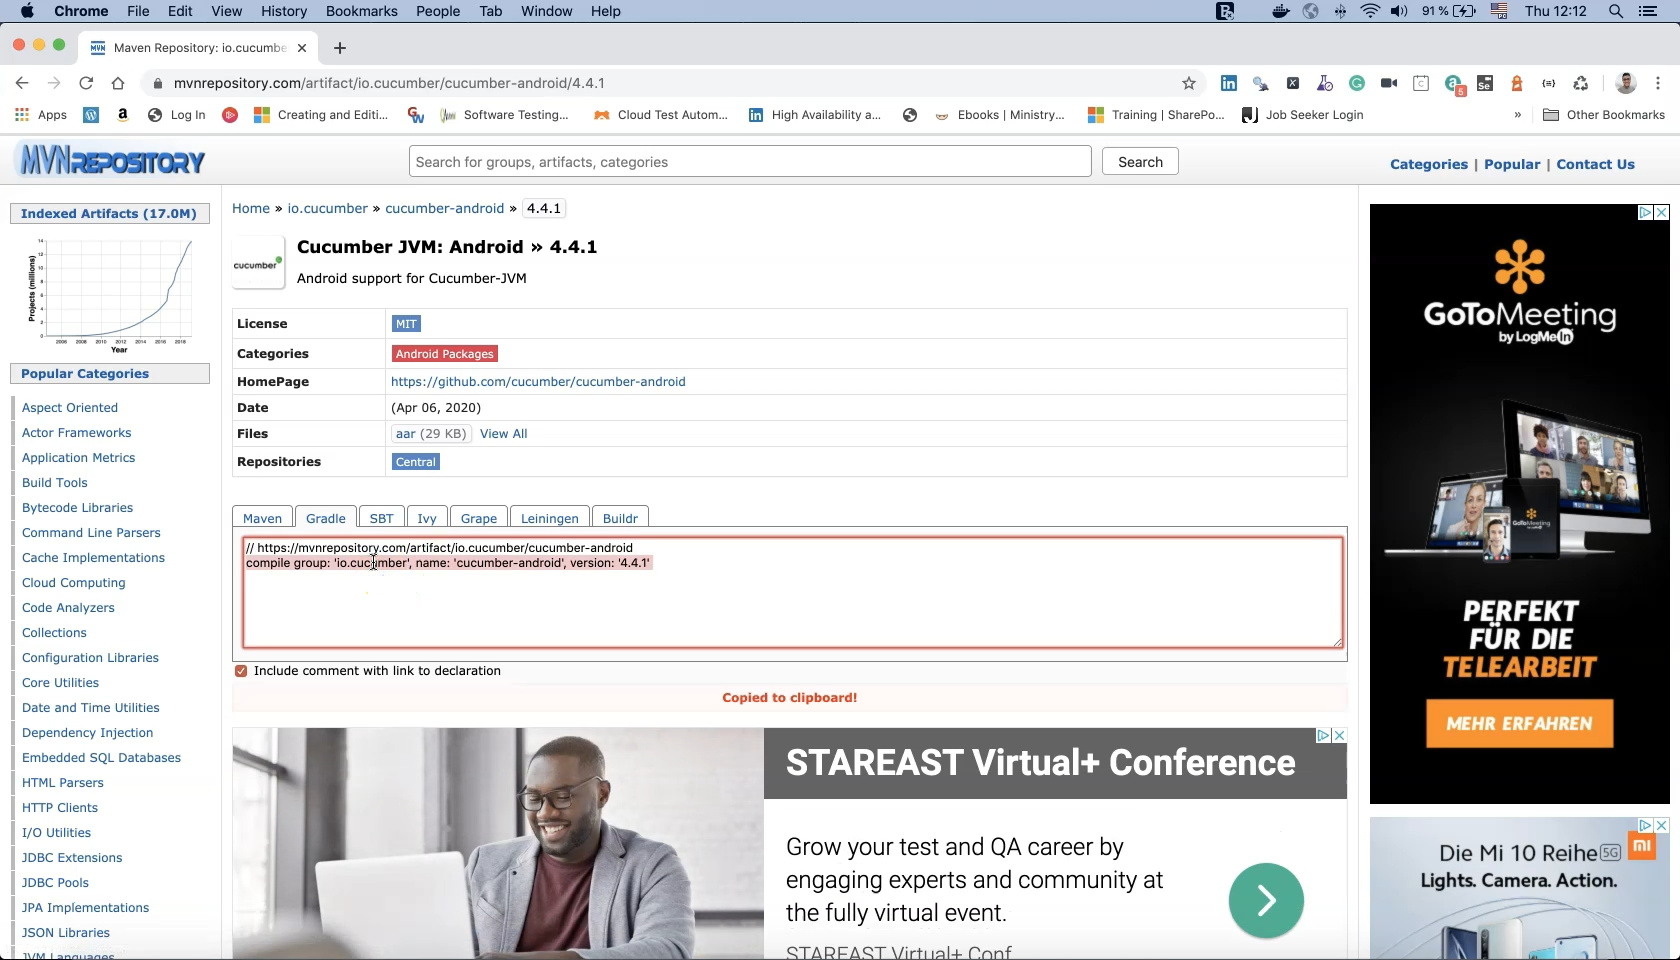
Copy this text into the "build.gradle" file.
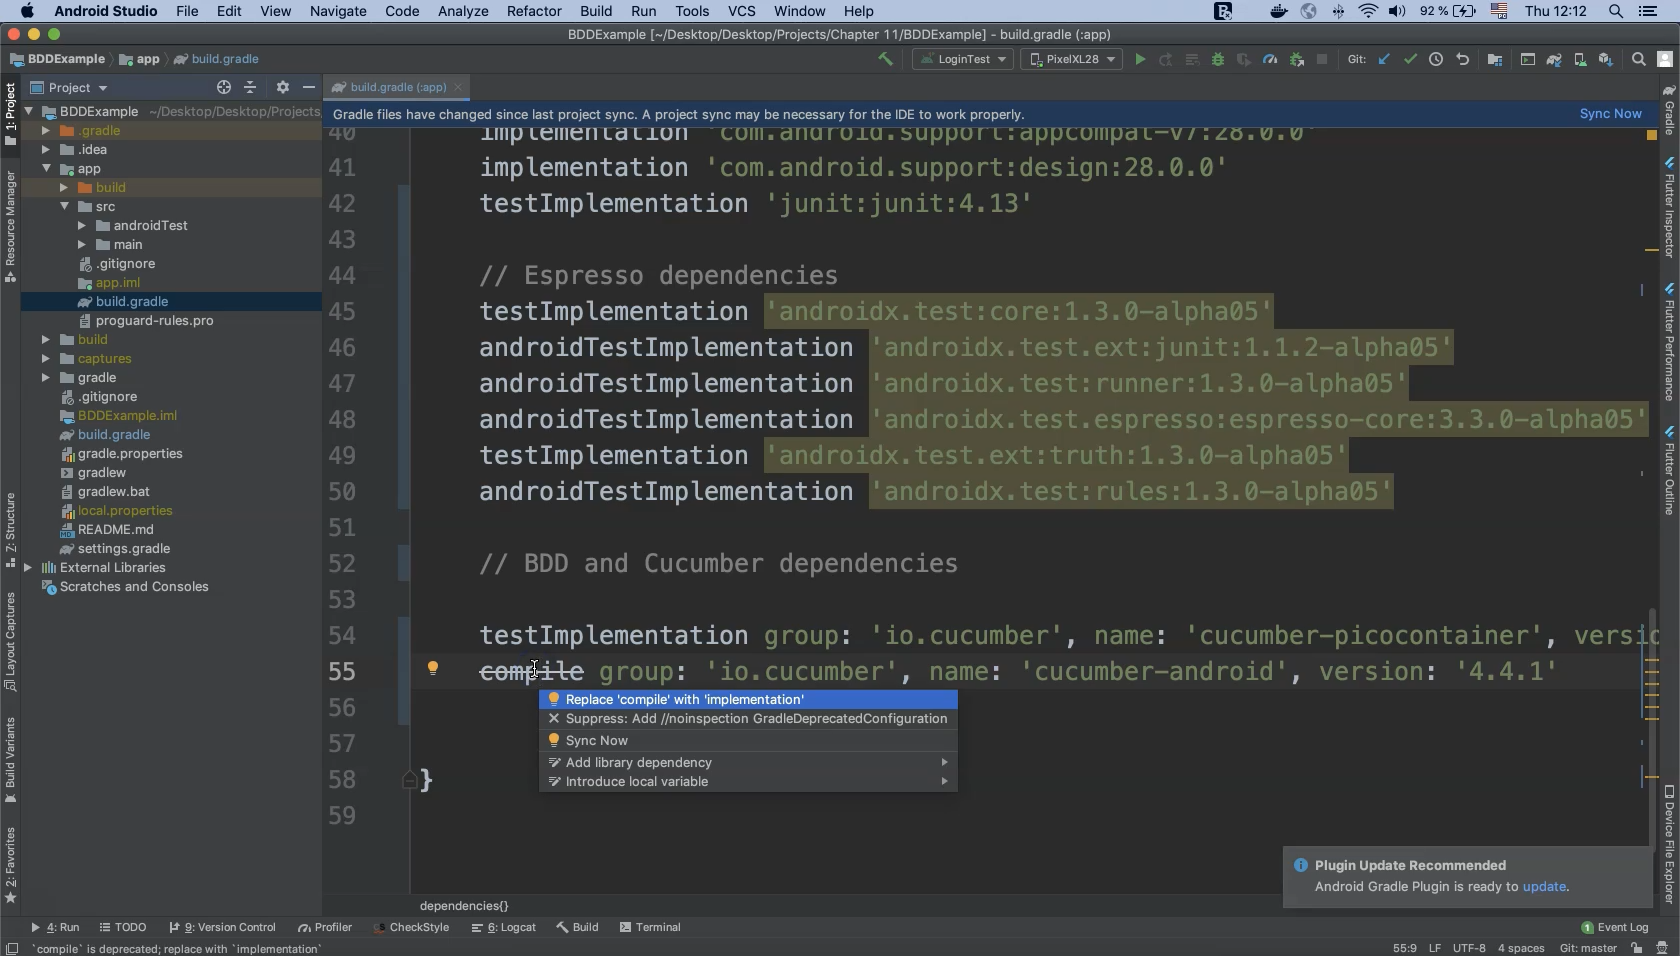
Again, "compile" needs to be replaced with "implementation" here.
Don’t forget to hit "Sync Project" again to download this dependency into our projects.
We have finished preparing our environment for Android and Cucumber by downloading and installing the required plugins and dependencies.
# Creating the Feature File
Right-click on "androidTest" and select "New > Directory" to create a new directory for our feature file.
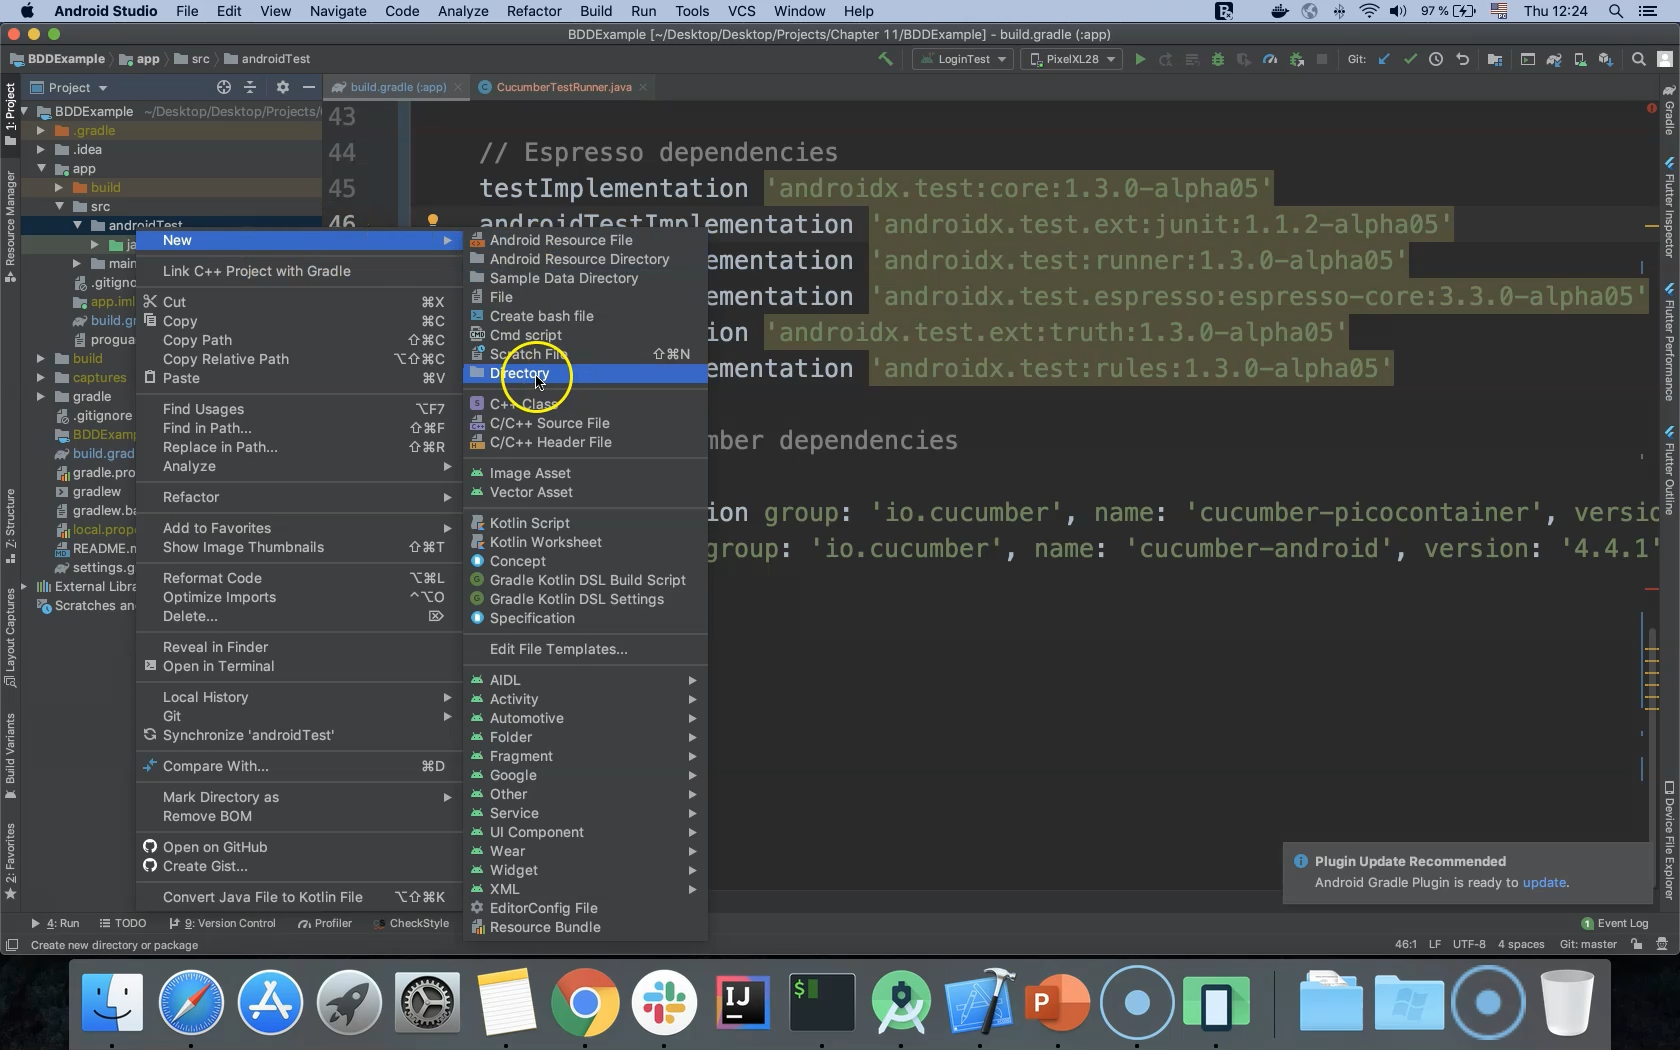
Name this new directory "assets" and click "OK".
Now right-click on this "asserts" folder and select "New".
Note that although there is no dedicated option to create a feature file we can do this by selecting a generic "File".
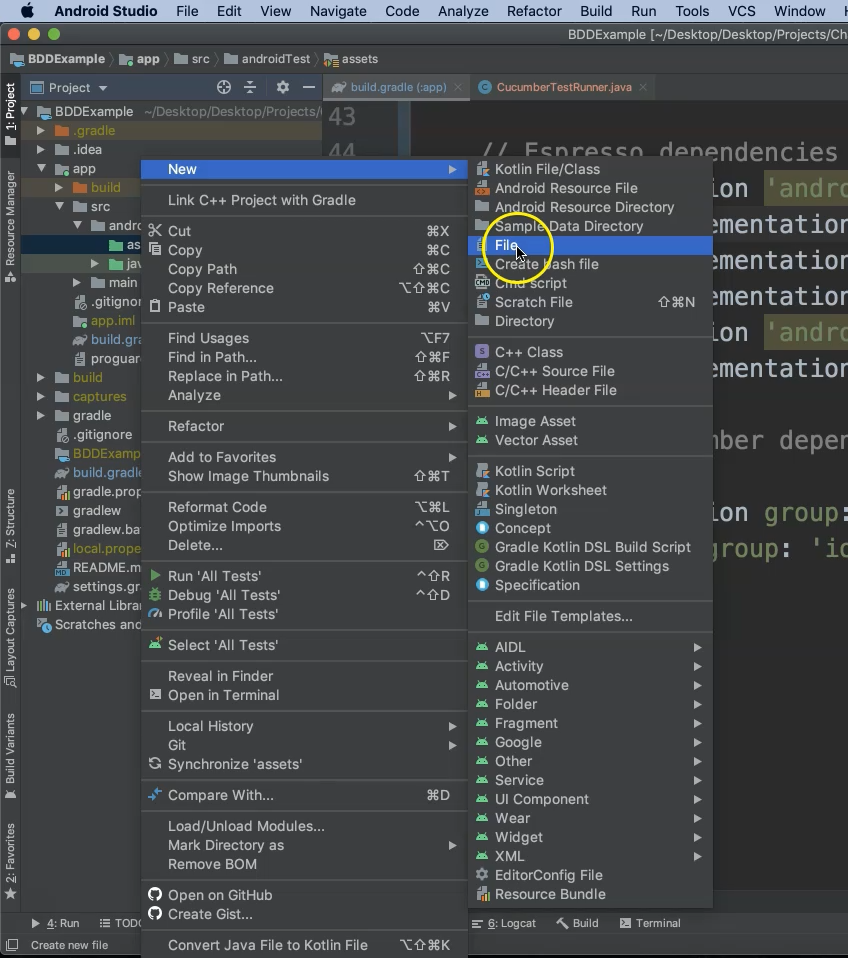
Call this file "login.feature" and click "OK".
# Project File Templates
Let’s take a step back for a moment. If you would prefer to add a dedicated feature file or another type of Cucumber file to the project’s file templates, you can do so by following these steps.
Right-click again on the "assets" folder and select "New > Edit File Templates…".
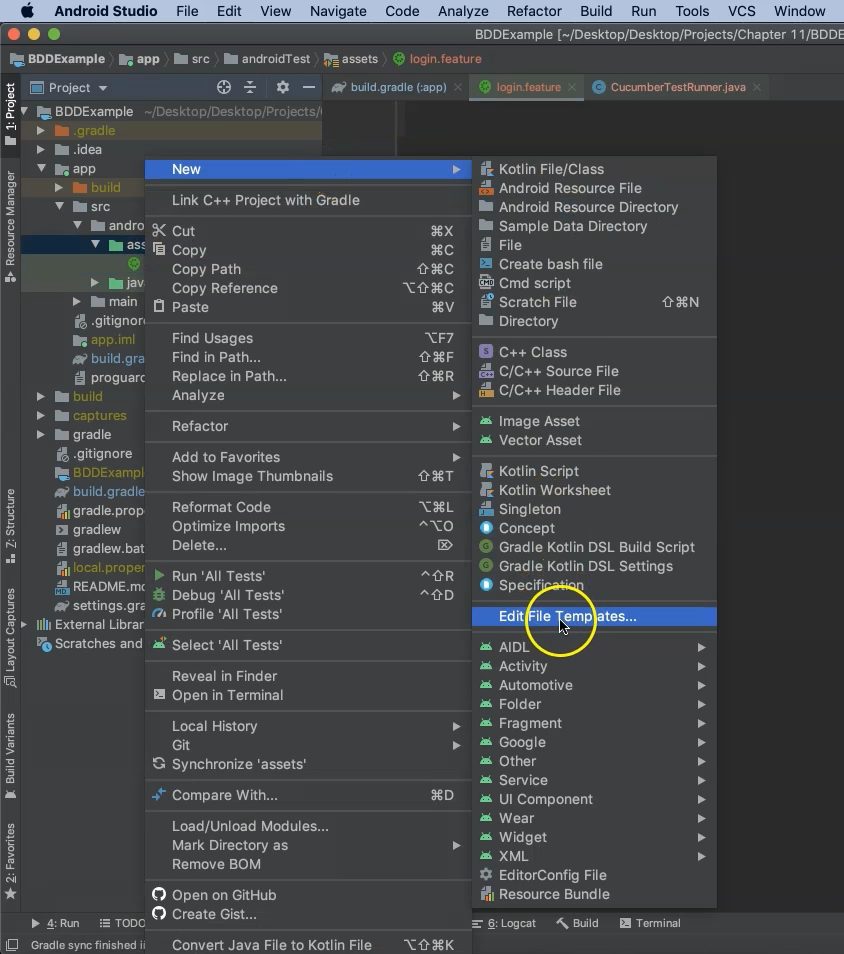
This will open the "File and Code Templates" window.
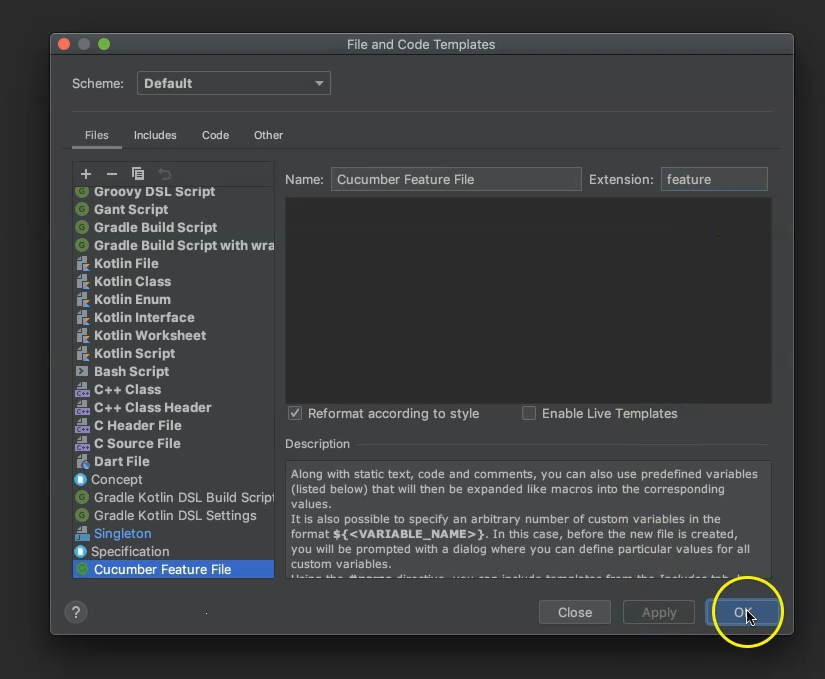
Click on the "+" button to add a new template.
Name it "Cucumber Feature File", set the extension as "feature", click "Apply", then click "OK".
Now if we go back and explore the "New" context menu we should find our new option.
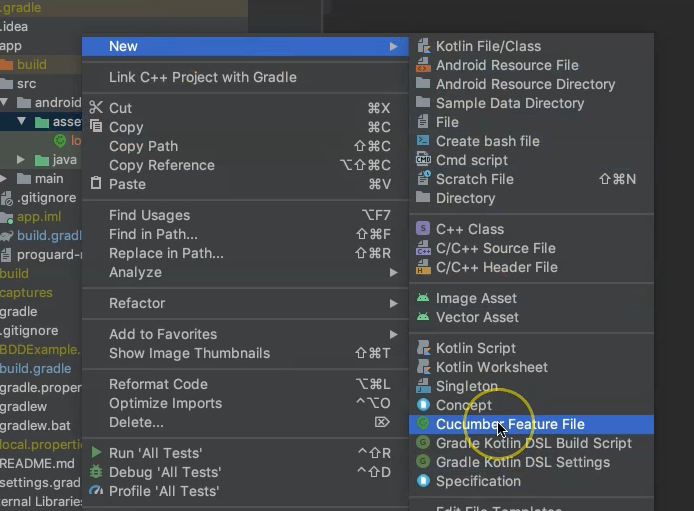
Let’s create our feature file this way and name it "login_details_feature".
# Implementing the Feature File
Now we can start writing our feature file after installing the required dependencies.
Begin with the feature name.
Feature: Enter Login Details
Next, we will use the keyword "Scenario Outline" which uses a table to populate test data. In our case this table will contain different user login information.
Feature: Enter Login Details

    Scenario Outline: Successful Login
The conventional Gherkin syntax comes next.
Feature: Enter Login Details

    Scenario Outline: Successful Login
        Given I start the application
        When I enter valid email <email>
        And I enter valid password <password>
        And I close the keyboard
        And I click sign in button
        Then I expect to see successful login message
Now that I have finished the scenario outline I need to add an Examples table to make this work with different sets of data.
Feature: Enter Login Details

    Scenario Outline: Successful Login
        Given I start the application
        When I enter valid email <email>
        And I enter valid password <password>
        And I close the keyboard
        And I click sign in button
        Then I expect to see successful login message
        Examples:
          | email | password |
          | test3@mail.com | 12345678   |
          | test4@mail.com | 12345678900   |
Now I have created a scenario and this feature file is nearly complete.
Additional data can be added to the Examples table at any time.
The final step is to add two annotation tags.
These tags enable us to run our test cases from the command line or using different annotations and types.
Any tests with tags "end-to-end" or "smoke" can be identified across project files and collectively executed.
# Demo Code
Feature: Enter Login Details

    @smoke
    @e2e
    Scenario Outline: Successful Login
        Given I start the application
        When I enter valid email <email>
        And I enter valid password <password>
        And I close the keyboard
        And I click sign in button
        Then I expect to see successful login message
        Examples:
          | email | password |
          | test3@mail.com | 12345678   |
          | test4@mail.com | 12345678900   |
Resources
Quiz
The quiz for this chapter can be found in section 8.2
