

Transcripted Summary
In this chapter, we'll be writing our first test script using Espresso for Android.
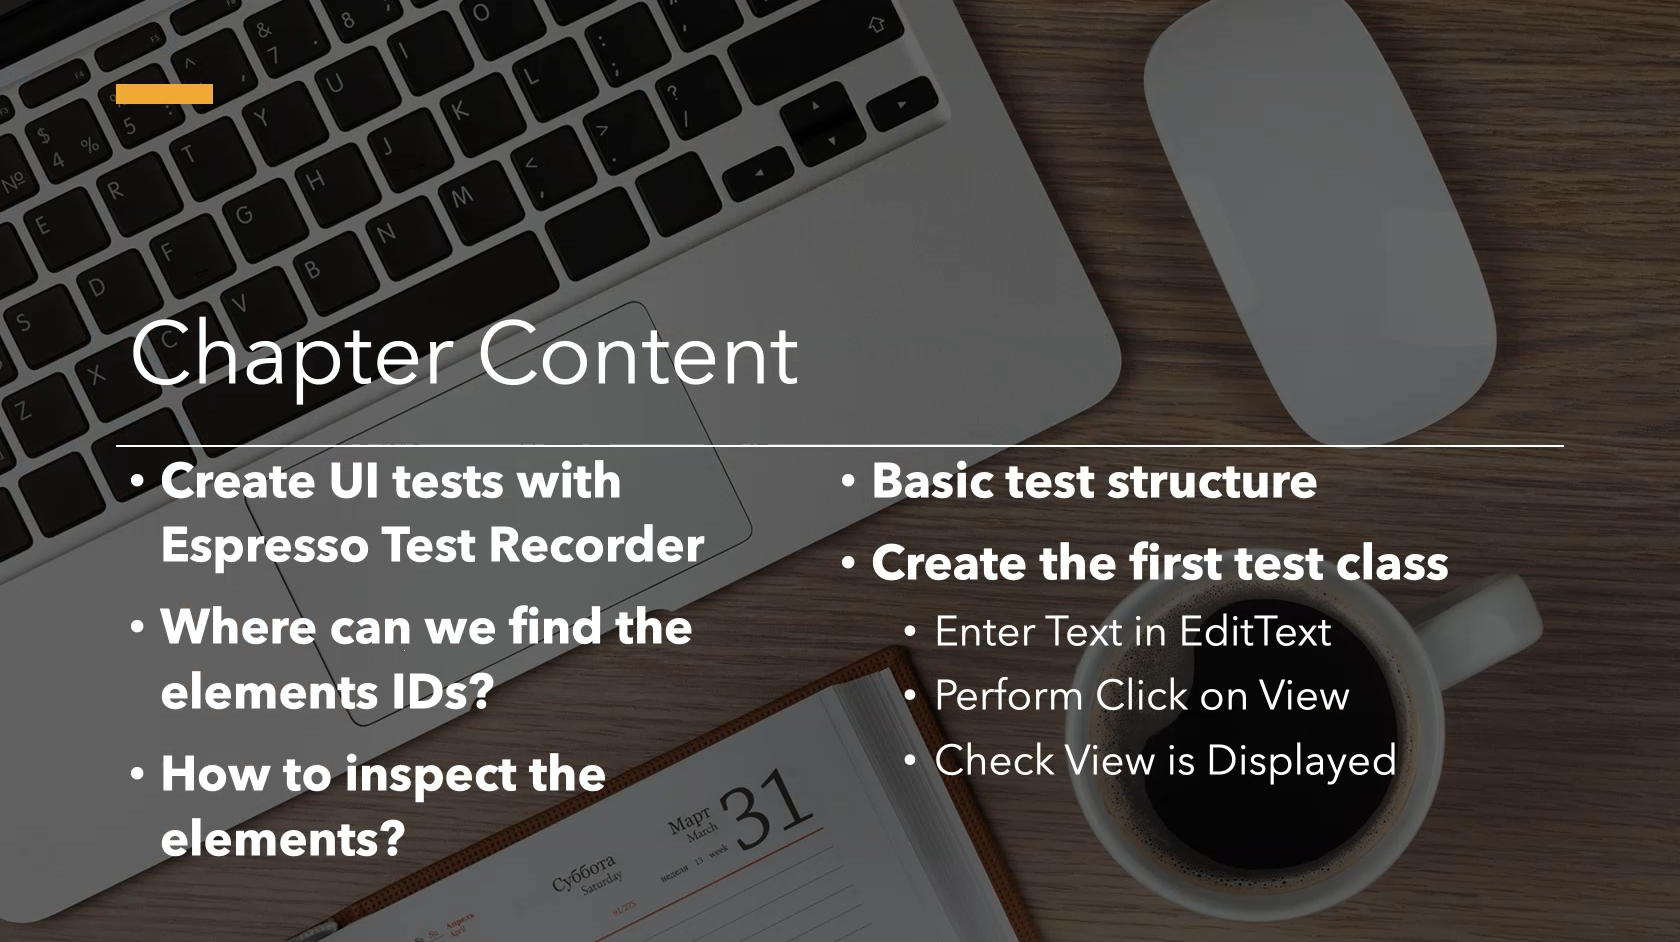
In this chapter we will learn:
how to add Espresso dependencies into our project
how to create our first UI test with Espresso Test Recorder
how to find element IDs
how to inspect elements in Android Studio
Then we will discuss basic test structures and create our first test class using Java and Espresso.
The following instructions can be found on Espresso’s setup instructions page.
# Espresso Dependencies
To add or use Espresso in our project, two steps are required.
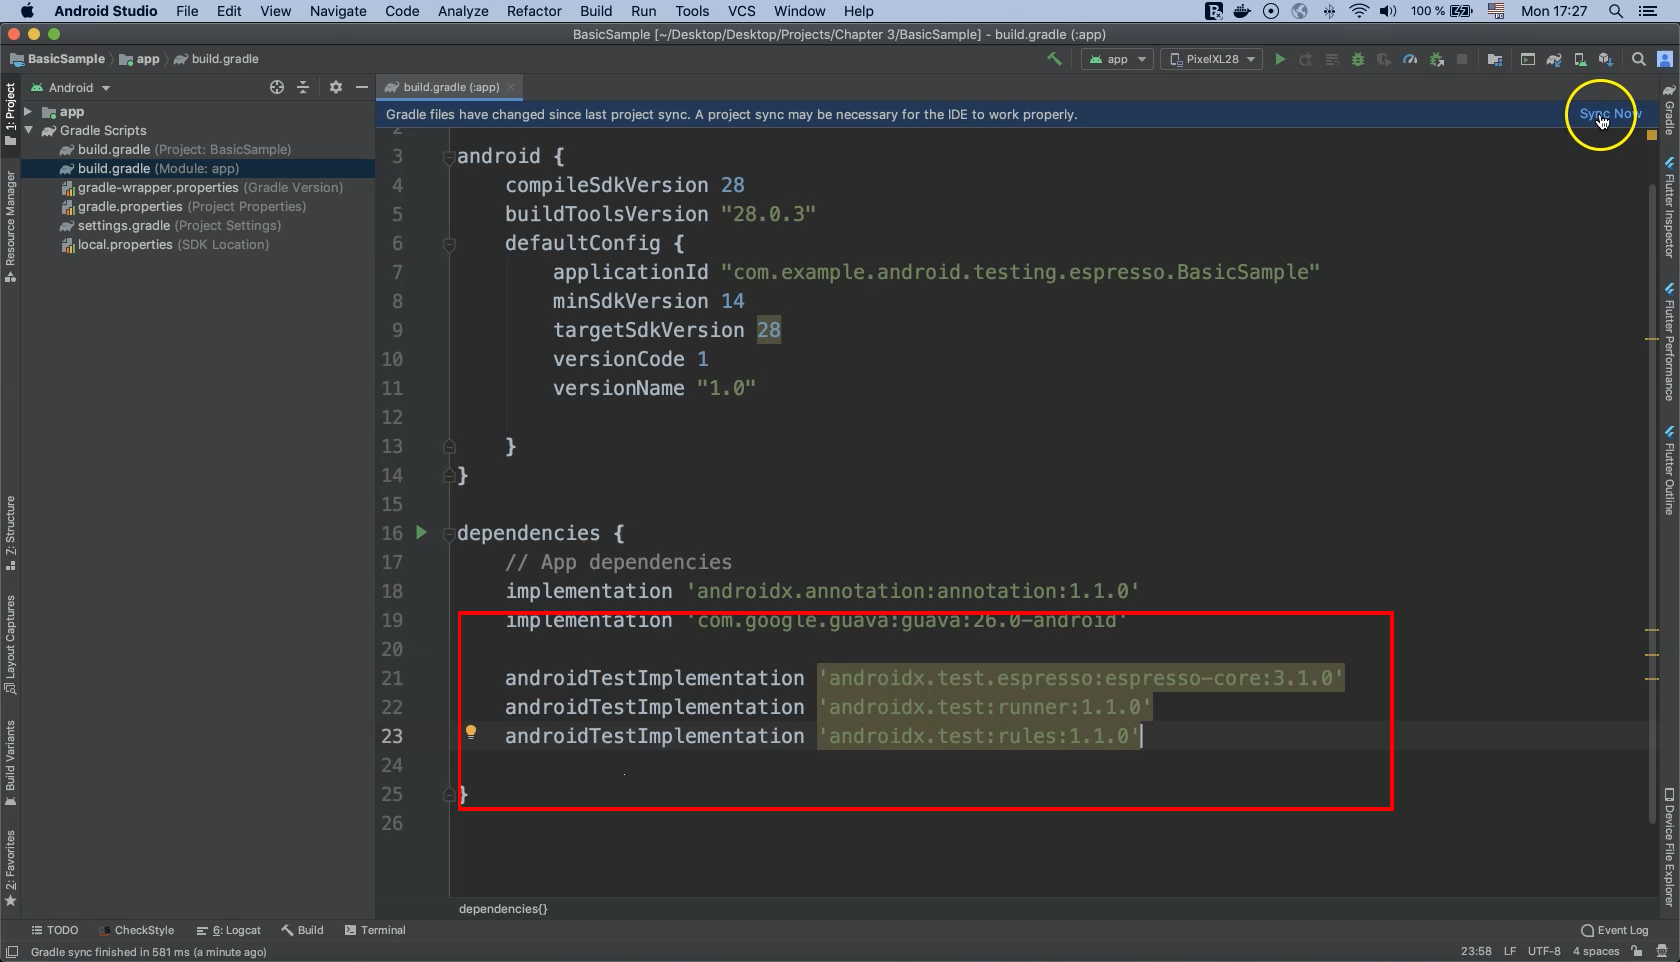
Open the "app/build.gradle" file and add the following lines inside of "dependencies": one for the Espresso core, one for the test runner, and one for the rules:
androidTestImplementation ‘androidx.test.espresso:espresso-core:3.1.0’
androidTestImplementation ‘androidx.test:runner:1.1.0’
androidTestImplementation ‘androidx.test:rules:1.1.0’
In Android Studio, our example application "BasicSample is already open and the project structure discussed in the previous chapter is visible.
Note that we have two separate "build.gradle" files, one for the project and another for the module.
Double-click on "build.gradle" for the module.
In "dependencies" we need to add the same three lines from the Espresso documentation on Android's developer website.
Afterwards it is important to click "Sync Now" in the upper right corner to begin downloading dependencies for Gradle.
NOTE
Dependencies with newer versions available will be highlighted and identify themselves as such. To update a highlighted dependency, click on it and use the shortcut Option + Enter to update to the newest version. "Sync Now" needs to be clicked again after the updates have completed.
Now these dependencies are ready to be used with Espresso.
# Test Runner
The next step is to add our test runner "AndroidJUnitRunner" as the Android default in "build.gradle (Module: app)"
Add the following line to "android.defaultConfig":
testInstrumentationRunner "androidx.test.runner.AndroidJUnitRunner"
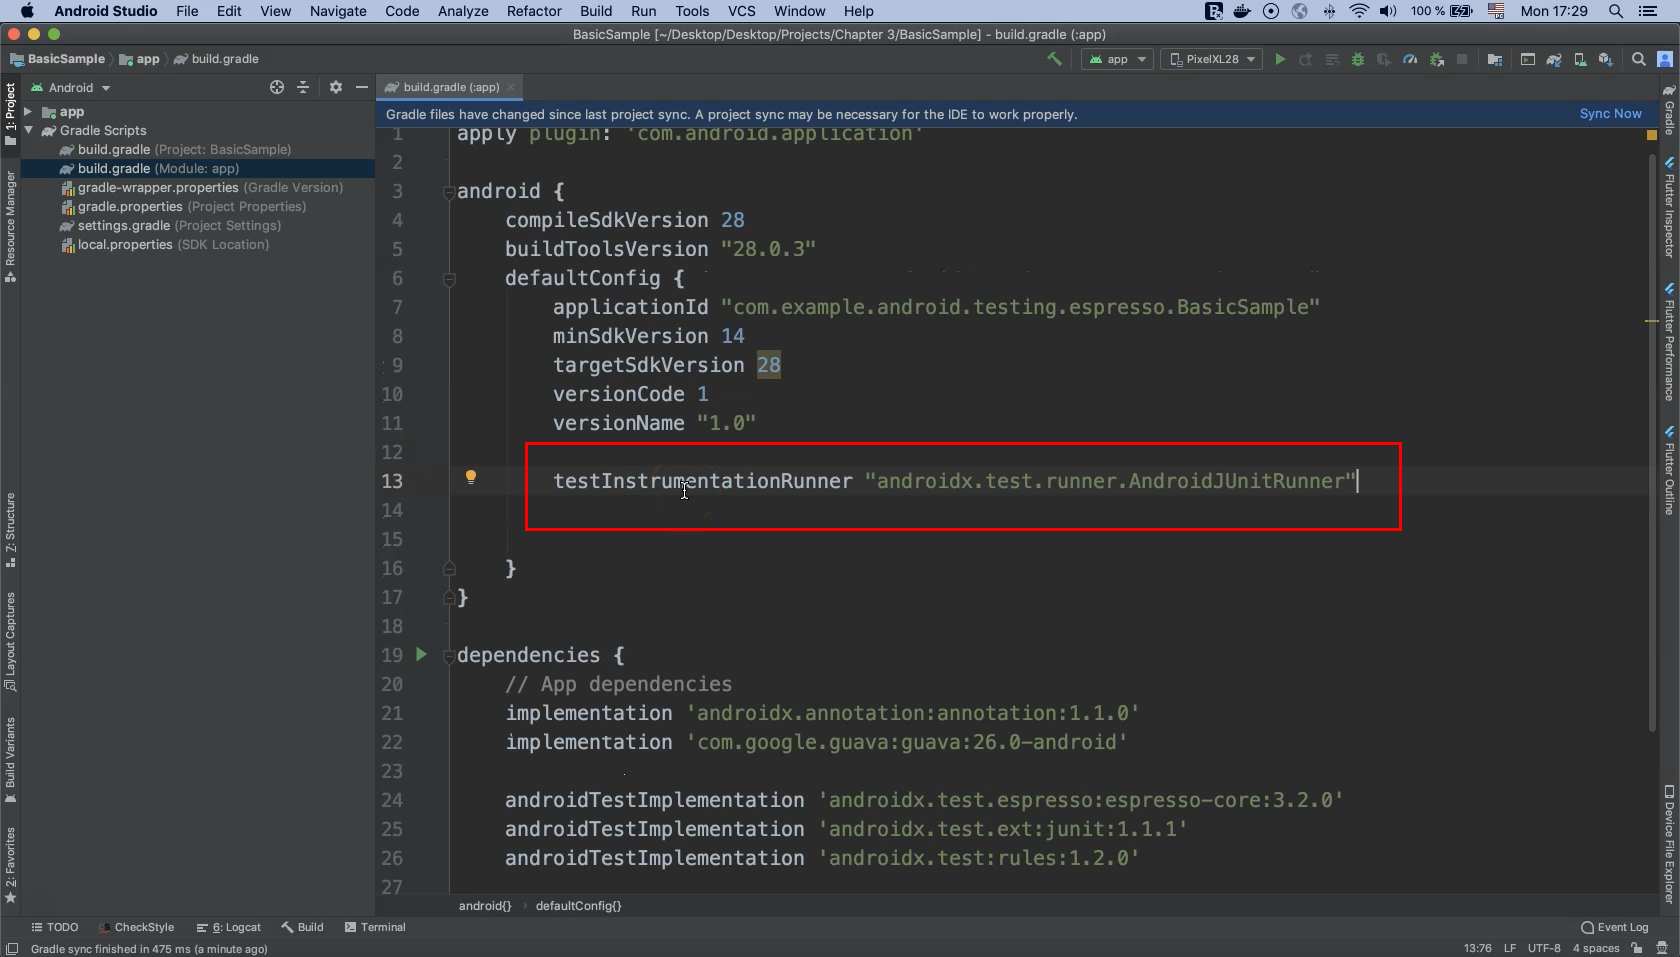
This is now the default test runner for our test cases.
We will use AndroidJUnitRunner from androidx.test.runner.
Remember that if we add anything to the "build.gradle" file we always need to click "Sync Now" to perform the requested download and update actions.
Let’s do that now.
# Espresso Test Recorder
The Espresso Test Recorder tool allows you to create UI tests for your app without writing any test code.
By recording a test scenario, you can record your interactions with a device and add assertions to verify UI elements in screenshots of the application. Espresso Test Recorder then takes the saved recording and automatically generates a corresponding UI that can be run to test your application.
# Installing an App
After adding Espresso dependencies and the test runner in our "build.gradle" file we can begin exploring our application under test in this module.
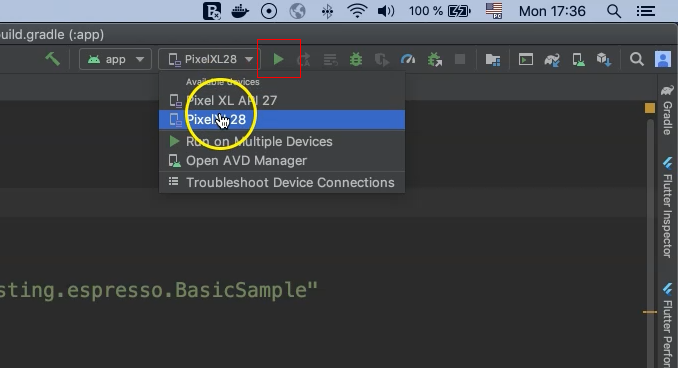
Select the application ("app") and the device that we wish to run it on ("PixelXL28").
In this project two devices are available and more can be created as necessary.
Click on the "Run" button to install the app on the target emulation device.
Now the application is successfully installed and running in the emulator. This is the emulator and this is our application running in the emulator.
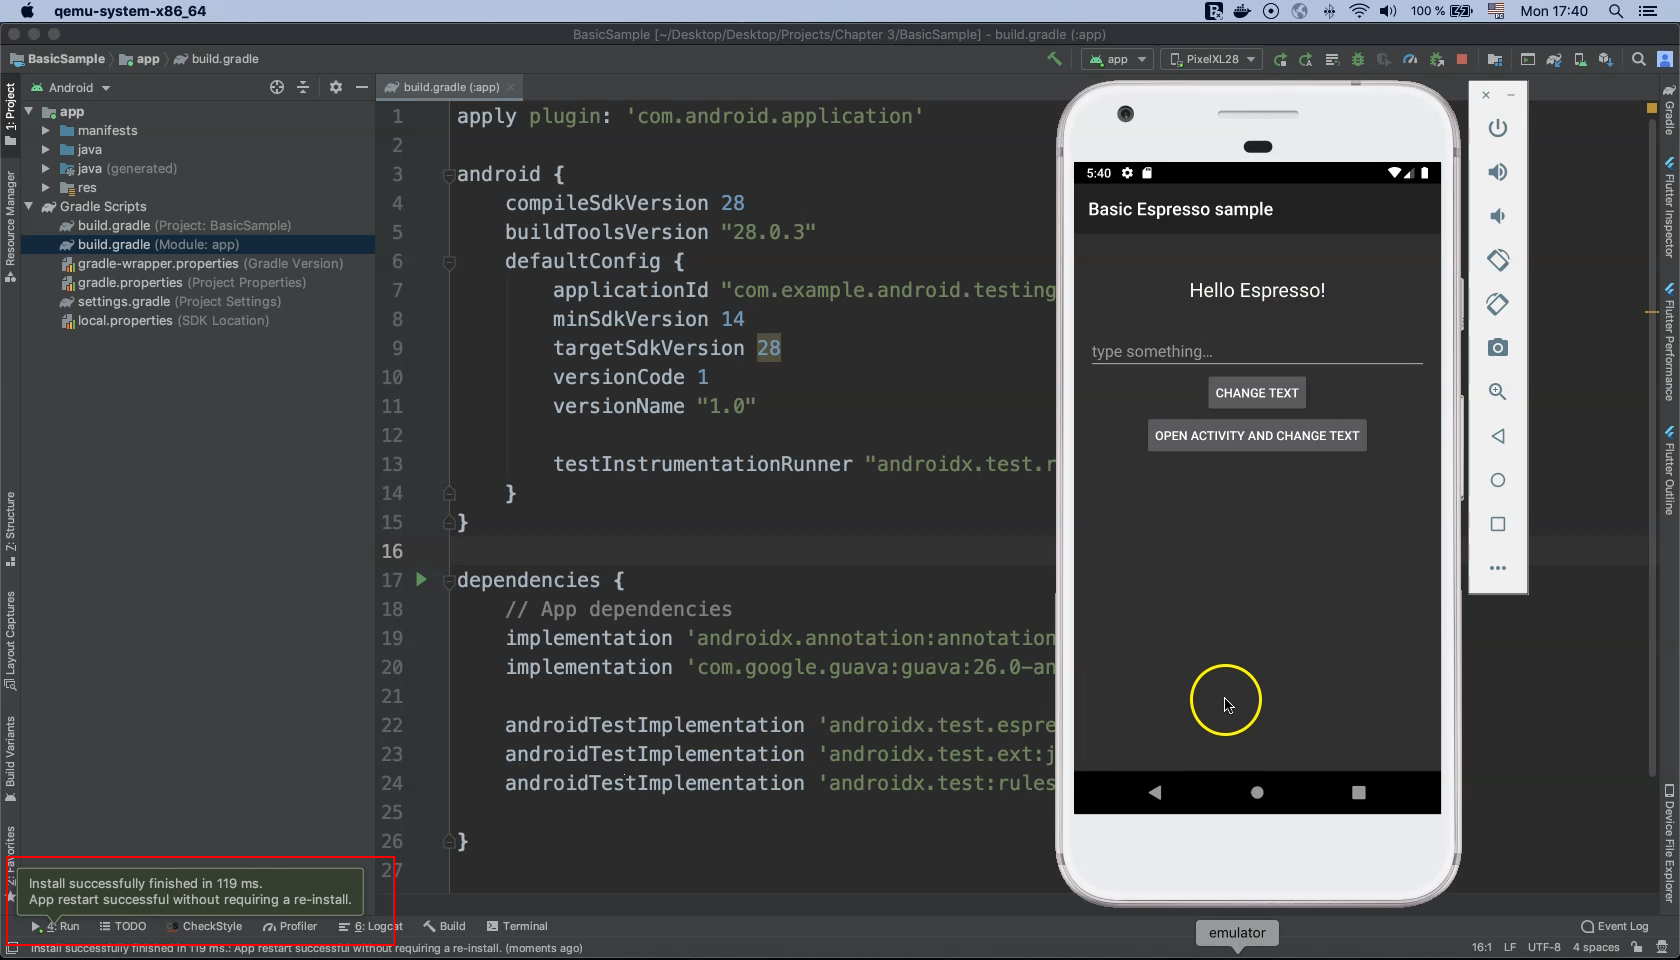
Observe our basic Espresso sample app with a text field and two buttons.
In this app we can type something in the text field ("Espresso" for example) and click the "CHANGE TEXT" button to update the label above it.
An associated test case should check to see that the label text has successfully changed.
We can also click the "OPEN ACTIVITY AND CHANGE TEXT" button to switch to a different screen and its associated test case should check to see whether or not an expected text string is displayed.
These actions are what we will automate in our first test case using Espresso.
# Creating UI tests with Espresso Test Recorder
To record a test with Espresso Test Recorder, follow the steps below:
In the selected deployment target window, choose the device on which you will record the test.
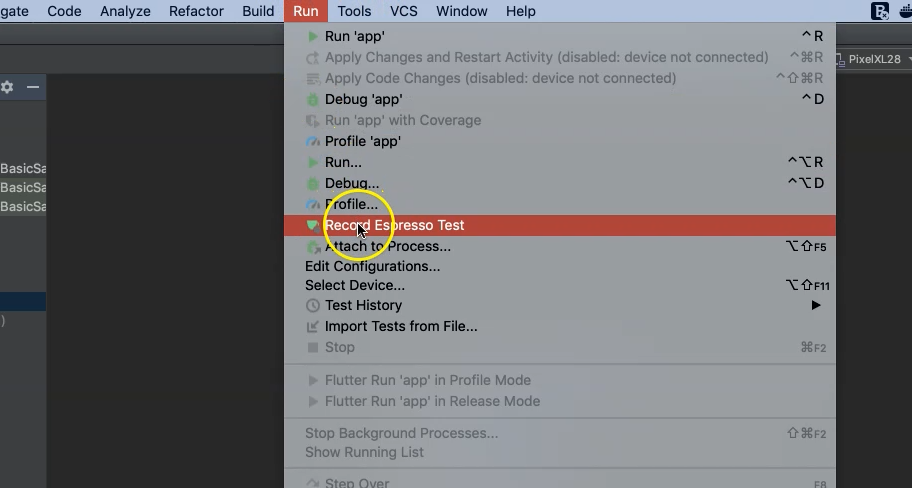
Click on the Run menu, then select "Record Espresso Test".
Notice that Espresso Test Recorder triggers a build of your project and the app must install and launch on the virtual device before Espresso Test Recorder allows you to interact with it.
The recorder test window appears after the app launches.
Since you haven't interacted with the device yet the main panel displays no recorded actions. Interact with your device to start a logging event.
For example, type "hello TAU" into the text field and click the "CHANGE TEXT" button.
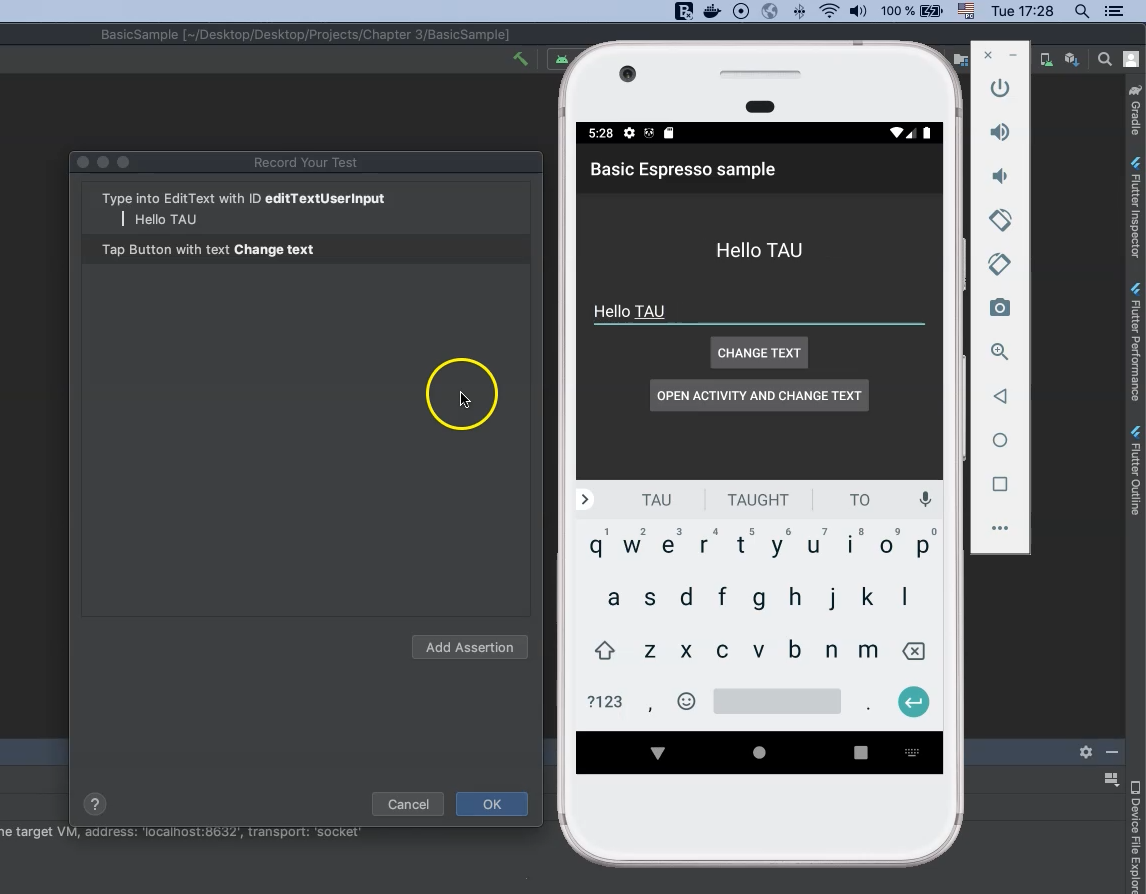
To verify UI elements, add an assertion by clicking on the "Add Assertion" button.
The recorder will take a screenshot from the current activity and then we can hover our cursor over the element on which we wish to assert.
When an element is selected the "Edit assertion" section will display the focused element ID.
The assertion type can be changed here but for now we will leave it with the default value.
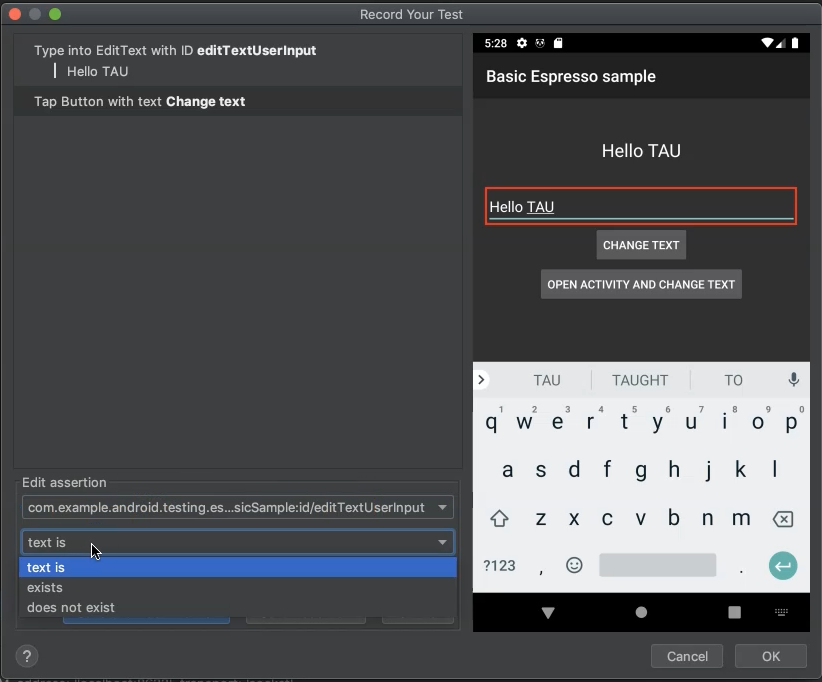
Now click on "Save Assertion".
We can also save and add another assertion by clicking the second button.
If we need to cancel the operation we can cancel it with the "Cancel" button. Now click "OK".
Change the test name or leave it as the default value, then click "OK" to save the recorded test in the Android Test package.

To run the Espresso test that we just recorded, click on the green play icon next to the class name.
Notice that Gradle builds our application, installs and runs the application on the device, and finally runs our tests on the device.

We can then check the test result in the "Run" window of Android Studio.
# Limitations of Espresso Test Recorder
Following this demonstration of Espresso Test Recorder, we need to be aware of three main limitations:
Currently you can only record a single test method per class.
UI assertions appear limited to using your own UI code.
Background task management must be handled manually.
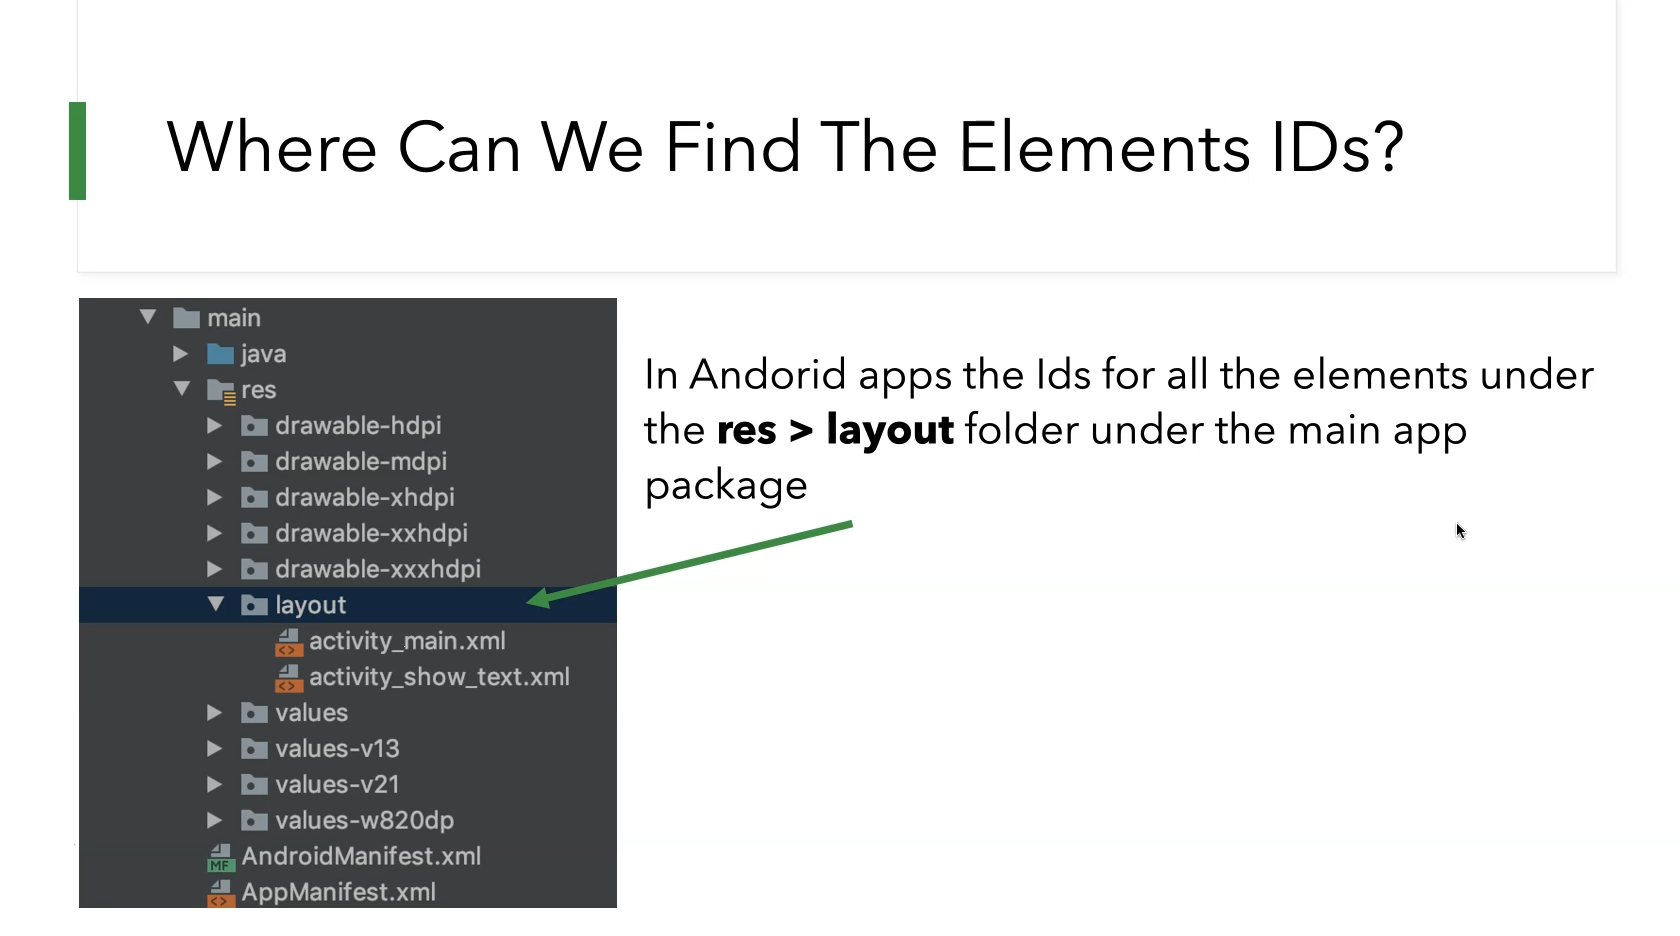
# Where Can We Find the Element IDs?
Typically all android app element IDs are located in the "res > layout" folder under the main app package folder.
# Element Inspection with UIAutomatorViewer
How do we inspect the elements of our Android applications? "UIAutomatorViewer" is a useful GUI tool that can scan and analyze the UI components of an Android application.
With UIAutomatorViewer you can inspect the UI of an Android application to understand its hierarchy and view different properties like ID, text values, and locations of elements.
UIAutomatorViewer is a part of the Android SDK and is accessible after installation under Android/sdk/tools/bin/uiautomatorviewer.
NOTE
Currently UIAutomatorViewer supports Java 8 but is not working correctly with Java 11.
When we run UIAutomatorViewer from the command line we are presented with the following view.
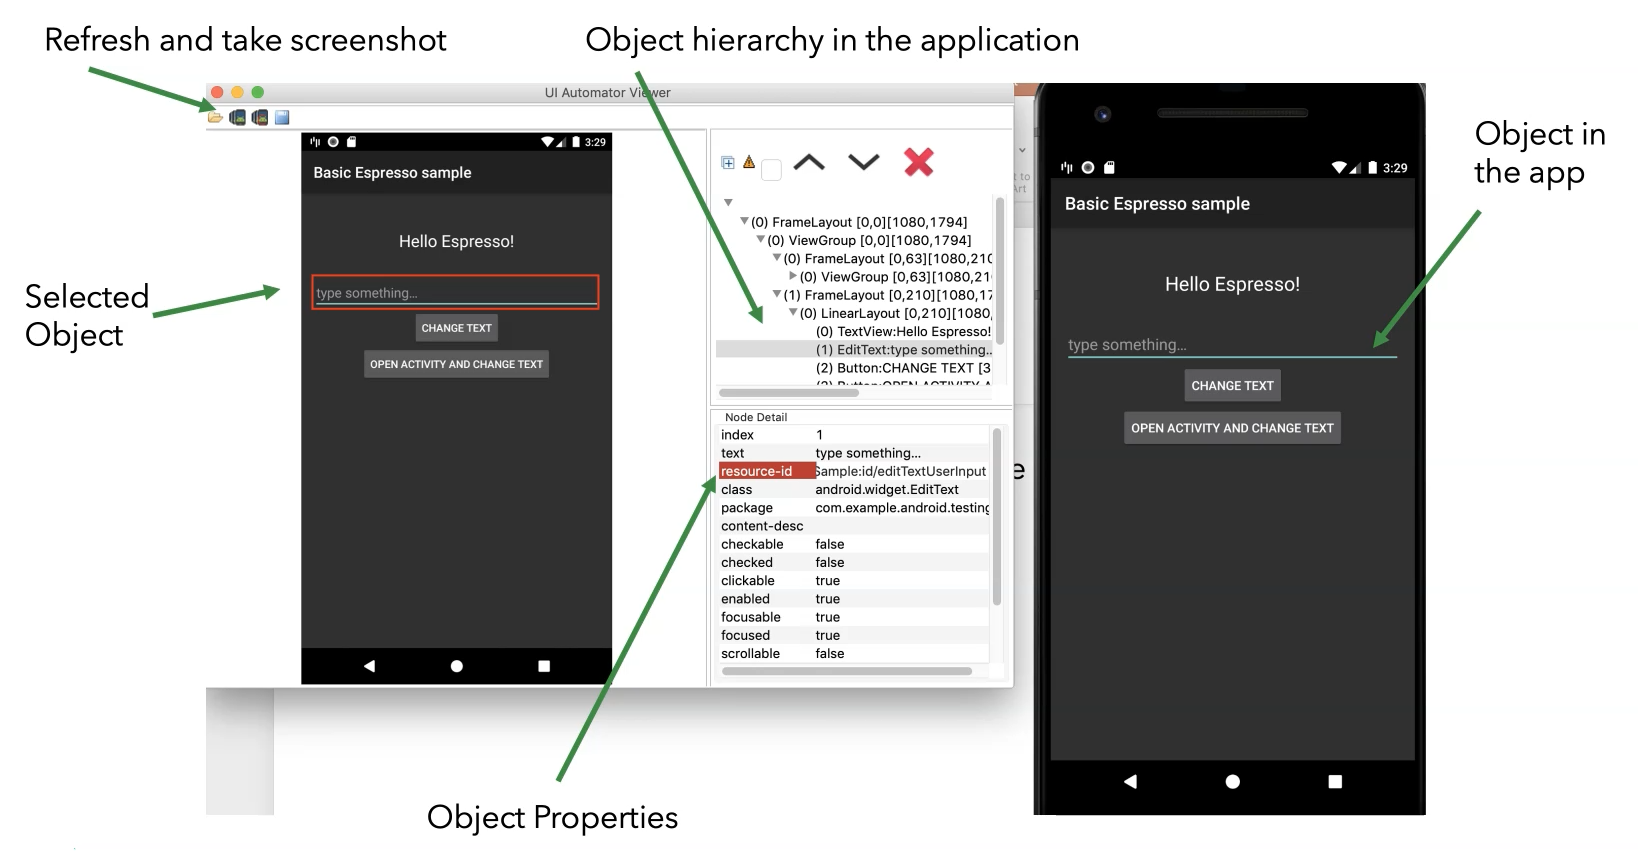
UIAutomatorViewer opens a screenshot from the current activity or the current screen that is enabled or displayed on the device.
We can highlight a specific element in the screenshot and check its resource ID and other properties.
From this window we can refresh and take new screenshots.
The object in the app is displayed on the right while the selected object is displayed on the left.
Object properties such as "elementID" appear in the bottom center while the application structure appears in the top center.
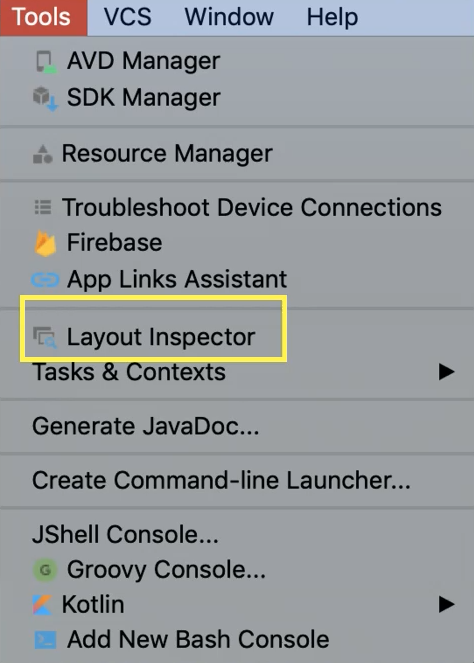
# Element Inspection with Layout Inspector
The second tool that can be used for element inspection with Android Studio is "Layout Inspector". You can find it under the Tools menu.
Layout Inspector in Android Studio allows you to compare your app layout with design mockups and examine details of its layout at runtime.
This is useful when your layout is built at runtime rather than entirely in XML.
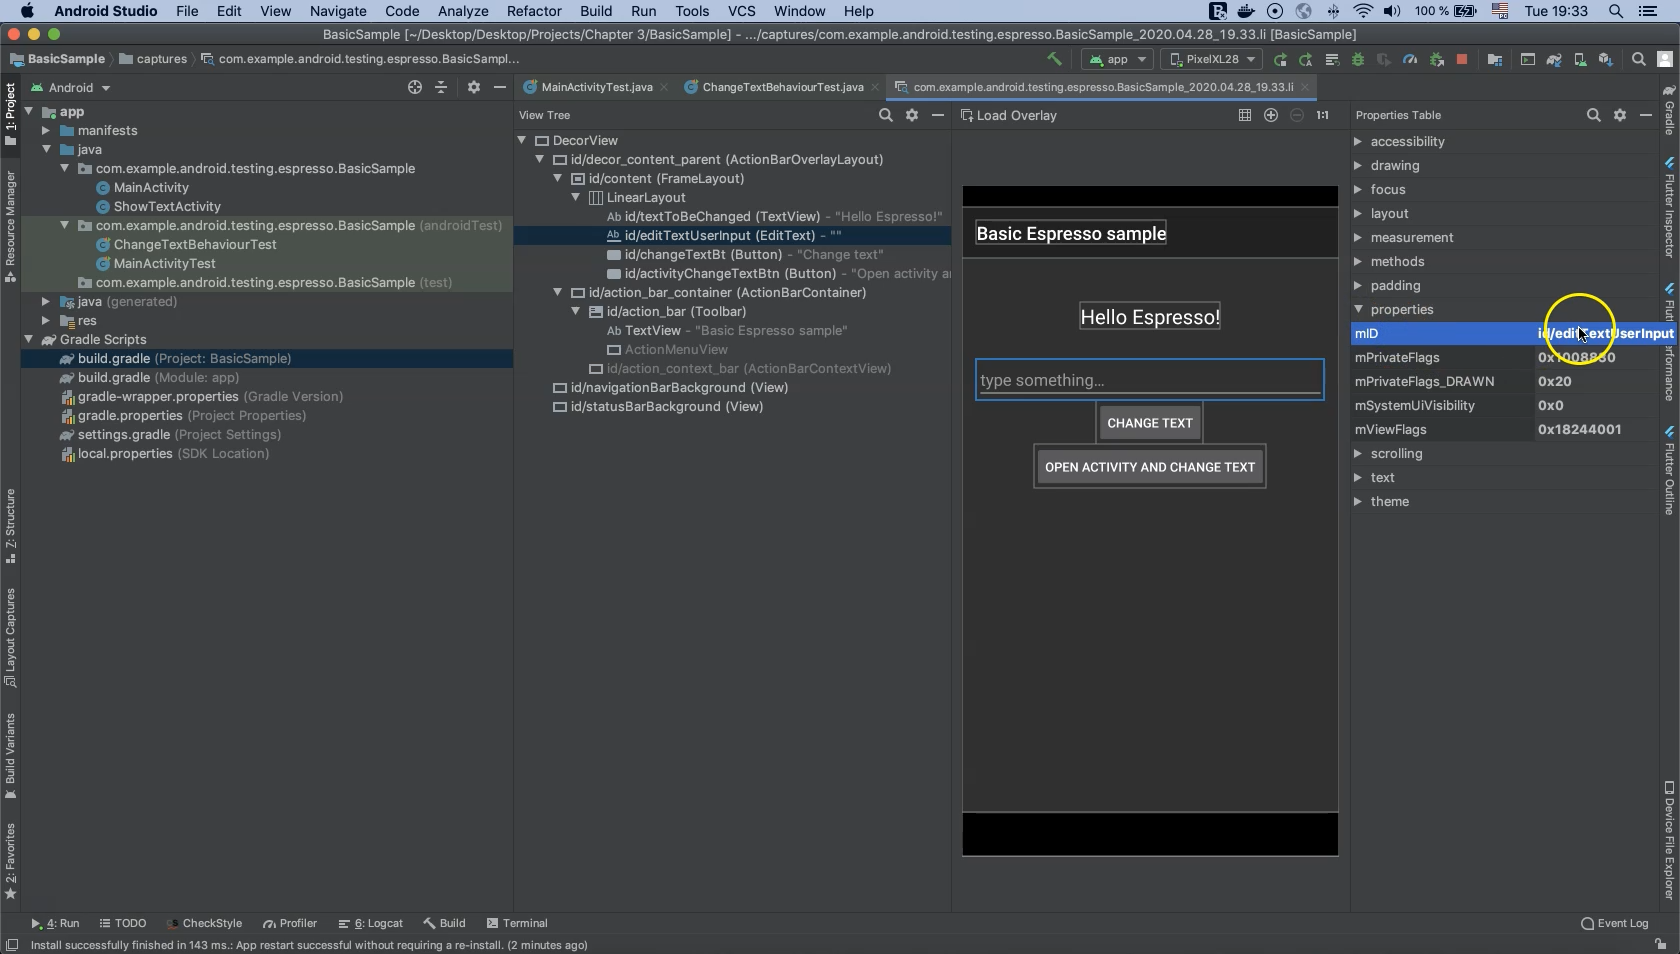
When we open the Layout Inspector we see four views:

Number one is the View Tree which describes the structure and layout of the view.
Number two is the Layout Inspector Toolbar.
Number three is a screenshot of the app layout as it appears on your device with layout boundaries visible.
Number four is a properties table. Here we find element properties such as the elementID.
# Basic Test Structure
We will create the basic test structure of our first Espresso UI test class by performing the following actions for a text box element:
Open the sample application and enter text into the EditText view.
Perform a click on the "CHANGE TEXT" button.
Assert that the view updated correctly.
In this demo we will create our first test script using Espresso and Java.
To create our first test case we need to go to the "androidTest" package which contains the previous test case that we created with the Android Espresso Test Recorder.
We can right-click on this package and select a new Java class.
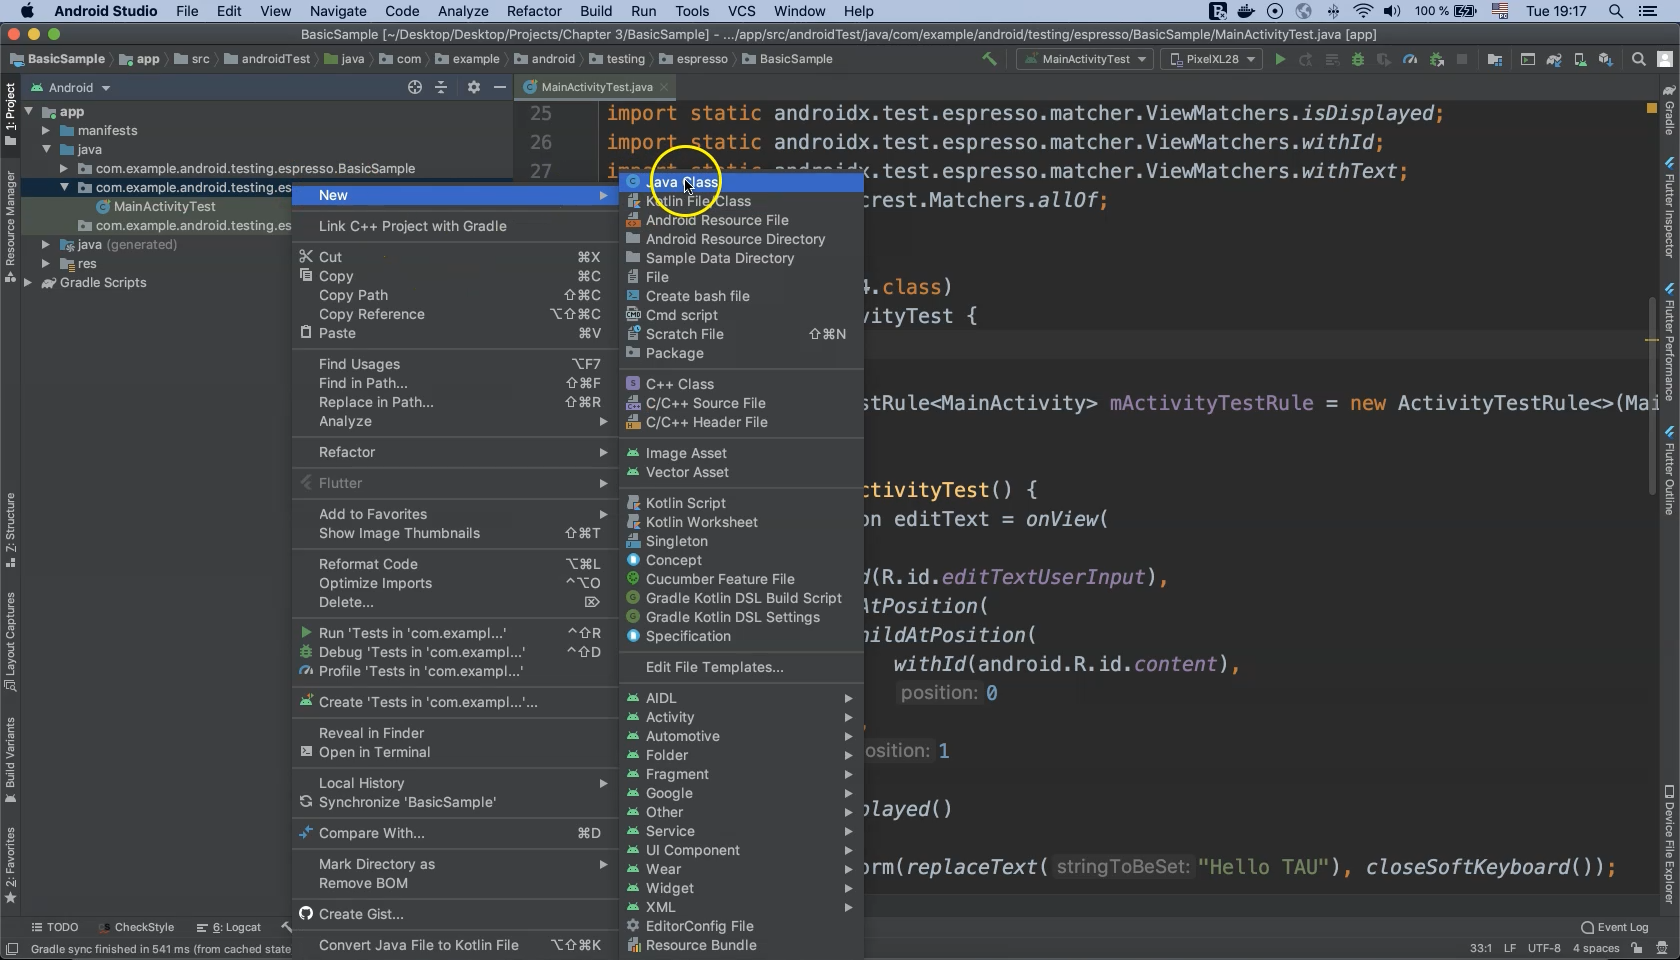
The class name can be anything but we will use "ChangeTextBehaviorTest" in this example. Now click "OK".
The first thing that needs to be added is an annotation to run this test using AndroidJUnitRunner. The annotation "@RunWith" will take "AndroidJUnit4.class" as an argument:
package com.example.android.testing.espresso.BasicSample;

import org.junit.runner.RunWith;
import androidx.test.ext.junit.runners.AndroidJUnit4;

@RunWith(AndroidJUnit4.class)
public class ChangeTextBehaviorTest {

}
Notice that after filling in the "@RunWith" annotation a green icon appears next to the test class that enables us to run our test.
The next step is to add an activity test rule.
A test rule allows us to initialize, open, start, or close an activity or screen in the application.
Let’s do this now by adding the "@Rule" annotation to a new method within the test class called "ActivityTestRule".
package com.example.android.testing.espresso.BasicSample;

import org.junit.Rule;
import org.junit.runner.RunWith;
import androidx.test.ext.junit.runners.AndroidJUnit4;
import androidx.test.rule.ActivityTestRule;

@RunWith(AndroidJUnit4.class)
public class ChangeTextBehaviorTest {
    @Rule public ActivityTestRule<MainActivity> activityTestRule = new ActivityTestRule<>(MainActivity.class);
}
"MainActivity" designates the active screen to be initialized at the start of the test. "MainActivity.class" needs to be passed as an argument when instantiating a new instance of "ActivityTestRule".
Now we need to create our test method. Begin by adding the annotation "@Test" from JUnit and give it the name "changeText_sameActivity":
package com.example.android.testing.espresso.BasicSample;

import org.junit.Rule;
import org.junit.runner.RunWith;
import androidx.test.ext.junit.runners.AndroidJUnit4;
import androidx.test.rule.ActivityTestRule;

@RunWith(AndroidJUnit4.class)
public class ChangeTextBehaviorTest {
    @Rule public ActivityTestRule<MainActivity> activityTestRule = new ActivityTestRule<>(MainActivity.class);
    @Test
    public void changeText_sameActivity() {

    }
}
Before we proceed further we need to know the application element IDs in order to reference them in our Espresso test script.
Go ahead and run the application.
We need to find the element IDs of the text box and button elements.
To do this, open the "Tools" menu and click on "Layout Inspector".
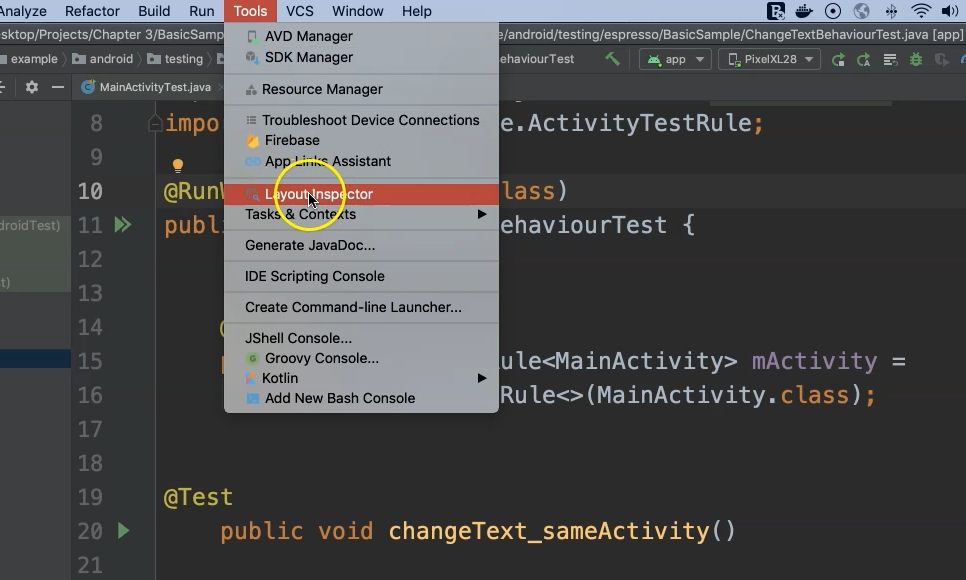
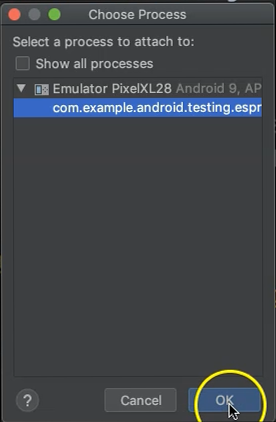
In the next window we will select the application that is installed and running on the device emulator. Click "OK".
After that, a screenshot from the current application view will display.
From here we can select and highlight different elements such as the text field and view its ID.
This value and others can be copied from the "Properties Table" for use in our test cases.
For now, I’ll paste this ID into my test method (commented out).
@Test
public void changeText_sameActivity()
{
    // editTextUserInput
}
The second element I need is the button. So I will return to the screenshot, click on the button and copy its ID from the Layout Inspector.
@Test
public void changeText_sameActivity()
{
    // editTextUserInput

    // changeTextBt
}
Now that I have all of my element references I can proceed with writing my Espresso test script.
The basic script structure involves three steps:
Locate the elements.
Perform actions on elements.
Assert or verify the element state.
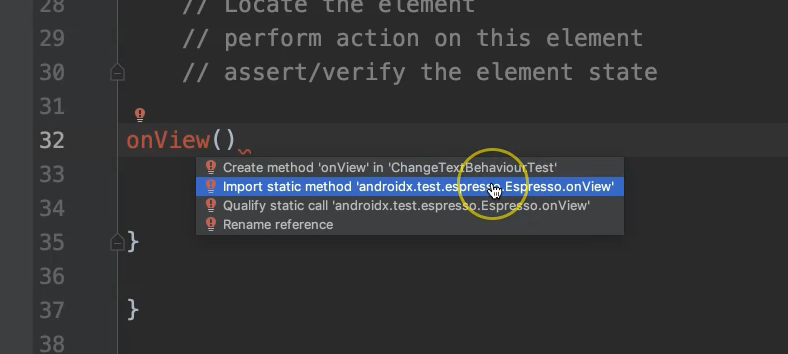
Locating an element requires the use of a method onView() from the Espresso namespace. I will use the shortcut Option + Return to import the static method onView() from Espresso.
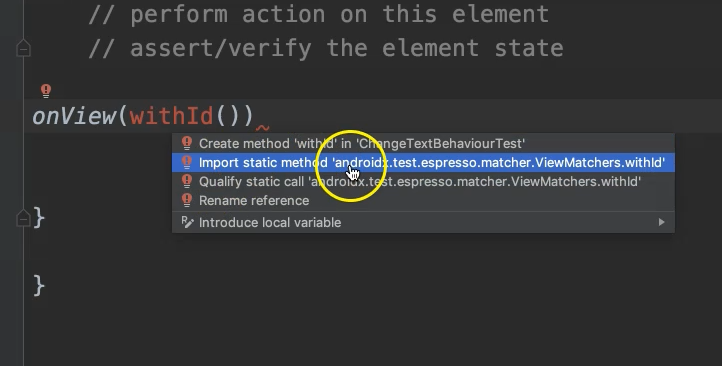
I also need to import the static method withId() which is another method from Espresso.
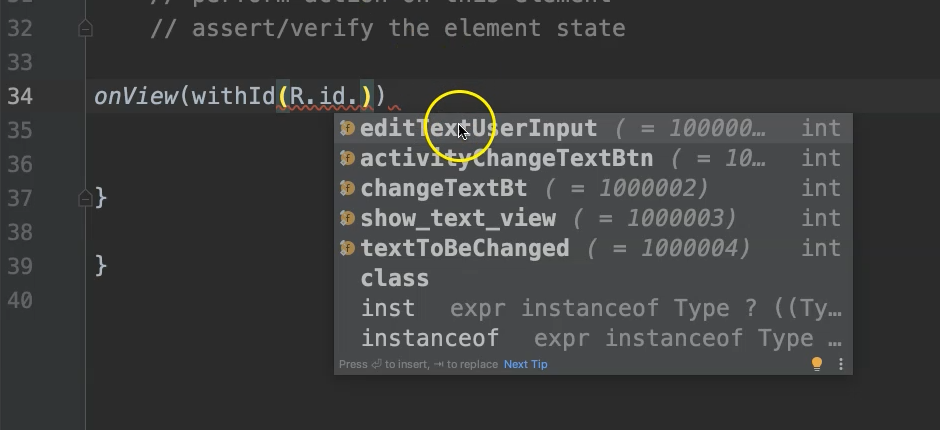
Now I need to fill in this ID. Usually IDs are stored in the resources file of an Android application.
I will begin by typing "R.id" and the autocomplete function should automatically display candidate elements within that namespace.
The element we want here is "editTextUserInput", matching the commented-out element ID we pasted earlier.
With this element reference we should now perform an action on the element. Several options are available to us but in this example let’s use perform().
As the element reference in question is a text box, the desired action will be to input text.
Method typeText() can be used for this purpose but needs to be imported from the espresso namespace prior to use.
Don’t forget to add the text string to be typed.
Here we will use "Hello TAU" to match our previous Test Recorder example.
Remember to close the keyboard input object after typing text into any element of the application.
@Test
public void changeText_sameActivity()
{
    // editTextUserInput

     // changeTextBt

    onView(withId(R.id.editTextUserInput)).perform(typeText("Hello TAU"));
    closeSoftKeyboard();
}
Now we need to follow the same steps to perform a click action on the "CHANGE TEXT" button to update the application label text. This second element ID is "changeTextBt" and will perform a click action.
@Test
public void changeText_sameActivity()
{
    // editTextUserInput

     // changeTextBt

    onView(withId(R.id.editTextUserInput)).perform(typeText("Hello TAU"));
    closeSoftKeyboard();
    onView(withId(R.id.changeTextBt)).perform(click());
}
The last step is to verify that the application label text matches the contents of the text box after the appropriate button is clicked. It seems I forgot to look up the application label ID so let’s switch back to the Layout Inspector and find it now.
// editTextUserInput
// changeTextBt
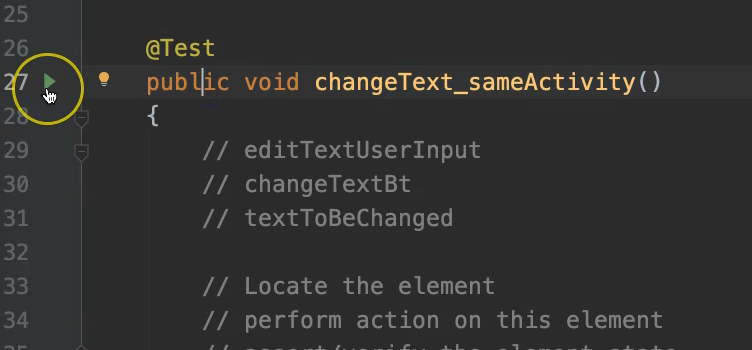
// textToBeChanged
After getting our label element reference let’s perform an assertion with the method check().
The argument to this method requires importing yet another static method matches() that checks for equivalence.
NOTE
Be careful not to import the wrong namespace when importing static methods. In this case, matches() needs to be imported from ViewAssertions.matches because we are asserting with Espresso.
Finally, use withText() to set the verification string value.
@Test
public void changeText_sameActivity()
{
    // editTextUserInput

    // changeTextBt

    onView(withId(R.id.editTextUserInput)).perform(typeText("Hello TAU"));
    closeSoftKeyboard();
    onView(withId(R.id.changeTextBt)).perform(click());
    onView(withId(R.id.textToBeChanged)).check(matches(withText("Hello TAU")));
}
This completes the third step of our script structure.
Before we run our test I can optionally auto-indent the code by using the shortcut CTRL + Option + I or by selecting the option under the "Code" menu toolbar.
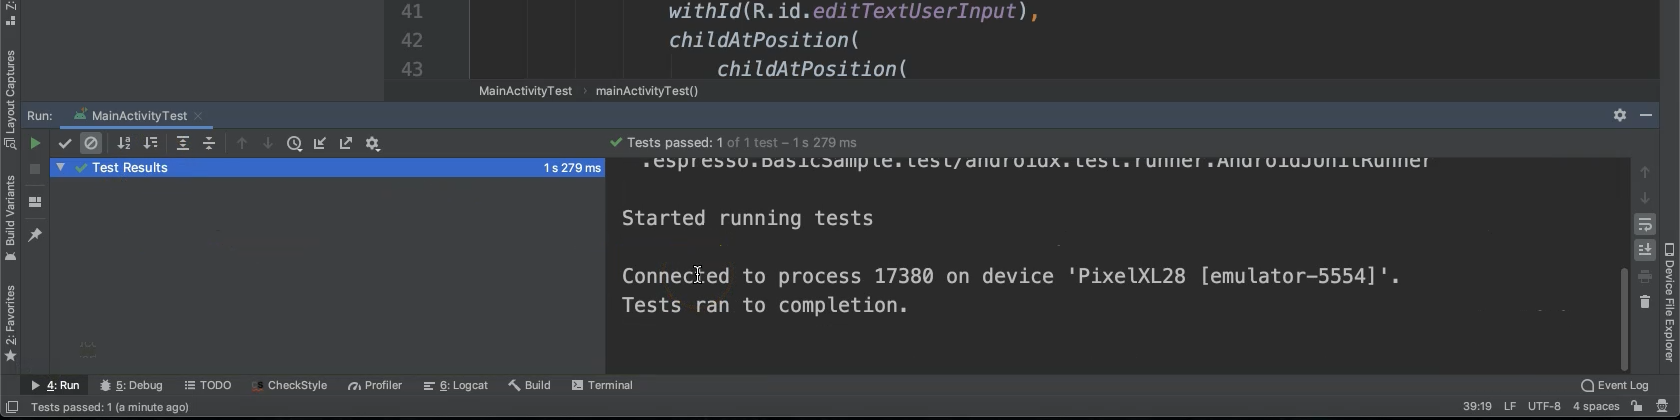
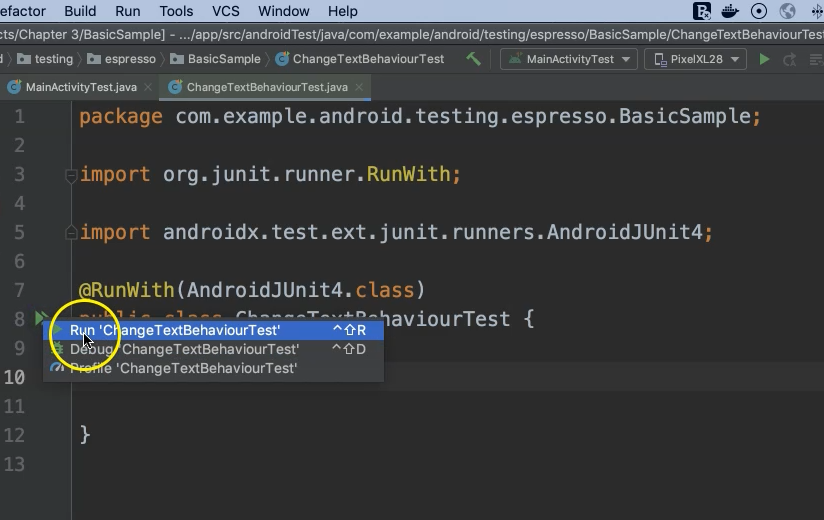
My test case is now ready and I can run it from different places. If I want to run only the changeText_sameActivity() method I can click on the green play button to the left of the method definition.
I can also click on the green double-play button to select my test method.
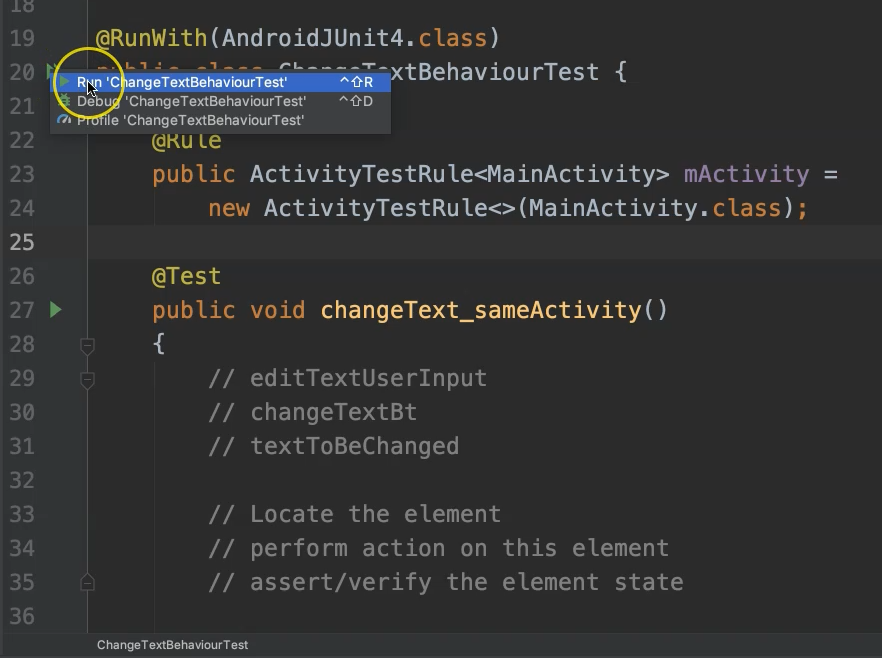
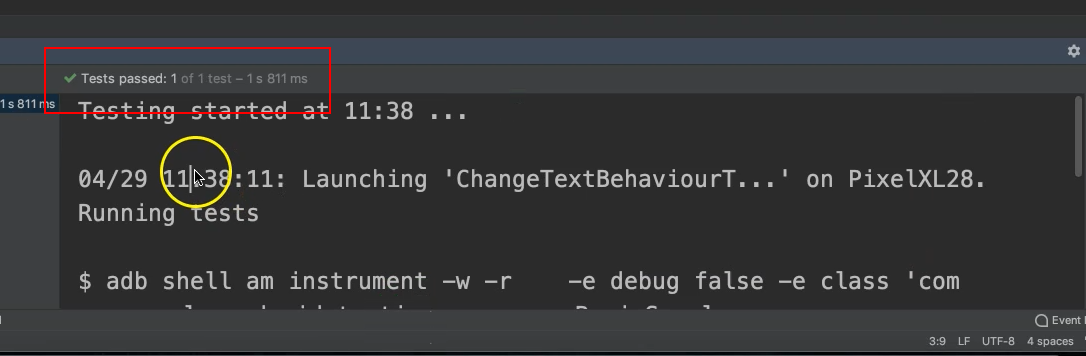
Then Gradle will build the application, install it on the device and run the test.
The final test result should display next to the total test execution time.
Congratulations! We just finished our first test script using Espresso and Java.
# Code
package com.example.android.testing.espresso.BasicSample;

import org.junit.Rule;
import org.junit.Test;
import org.junit.runner.RunWith;
import androidx.test.ext.junit.runners.AndroidJUnit4;
import androidx.test.rule.ActivityTestRule;
import static androidx.test.espresso.Espresso.onView;
import static androidx.test.espresso.action.ViewActions.click;
import static androidx.test.espresso.action.ViewActions.closeSoftKeyboard;
import static androidx.test.espresso.action.ViewActions.typeText;
import static androidx.test.espresso.assertion.ViewAssertions.matches;
import static androidx.test.espresso.matcher.ViewMatchers.withId;
import static androidx.test.espresso.matcher.ViewMatchers.withText;

@RunWith(AndroidJUnit4.class)
public class ChangeTextBehaviorTest {

	@Rule public ActivityTestRule<MainActivity> activityTestRule
        	= new ActivityTestRule<>(MainActivity.class);

	@Test
	public void changeText_sameActivity() {

   	    // editTextUserInput

    	// changeTextBt

    	// textToBeChanged

    	// Locate the element

    	// perform action on this element

    	// assert/verify the element state

    	onView(withId(R.id.editTextUserInput))
        	.perform(typeText("Hello TAU"));

    	closeSoftKeyboard();

    	onView(withId(R.id.changeTextBt))
        	.perform(click());

    	onView(withId(R.id.textToBeChanged))
        	.check(matches(withText("Hello TAU")));
	}
}
