

Transcripted Summary
Nightwatch provides us with a lot of ways for us to find elements that we would like to interact with.
# .element()
The base one is element function - .element(using, value, callback). This searches for an element on the page starting from the document root, and then it will return a web element JSON object that we can then later on use to perform some action with the results or the value depending on what we'd like to do. This function accepts your strategy that you're using, the value that you're searching for, and then you can add your callback so you can interact with that information.
In this example, they are showing you how you can use this method.
module.exports = {
 'demo Test' : function(browser) {
    browser.element('css selector', 'body', function(result) {
      console.log(result.value)
    });
  },

  'es6 async demo Test': async function(browser) {
    const result = await browser.element('css selector', 'body');
    console.log('result value is:', result.value);
  }
}
So you can call browser.element and use the css selector strategy, you're looking for the body and then we're going to wait for the results and then we're going to print this to the terminal.
I'll run these commands for us to evaluate them as we go. I'll create a new file in our test project, call it finding.elements.js. I'll paste the example into this file.
Let me go ahead and run this file. We'll navigate to our bin folder, go to nightwatch.
We don't have to specify which config to use because by default, it will search for nightwatch.json and then what we would definitely like to specify is our case that we'll want to run - our tests.
We'll use the argument -t and we'll specify the path of our tests.
So we have: ./node_modules/.bin/nightwatch -t ./tests/finding.elements.js
What's missing from this right now is we are telling Nightwatch to check if an element exists but we did not navigate to our URL.
So, let me say dot URL and let's use our test website. We'll add:
browser.url('https://www.ultimateqa.com/filling-out-forms')
We'll get rid of the es6 async demo Test section so it's easier to read and now we'll run it.
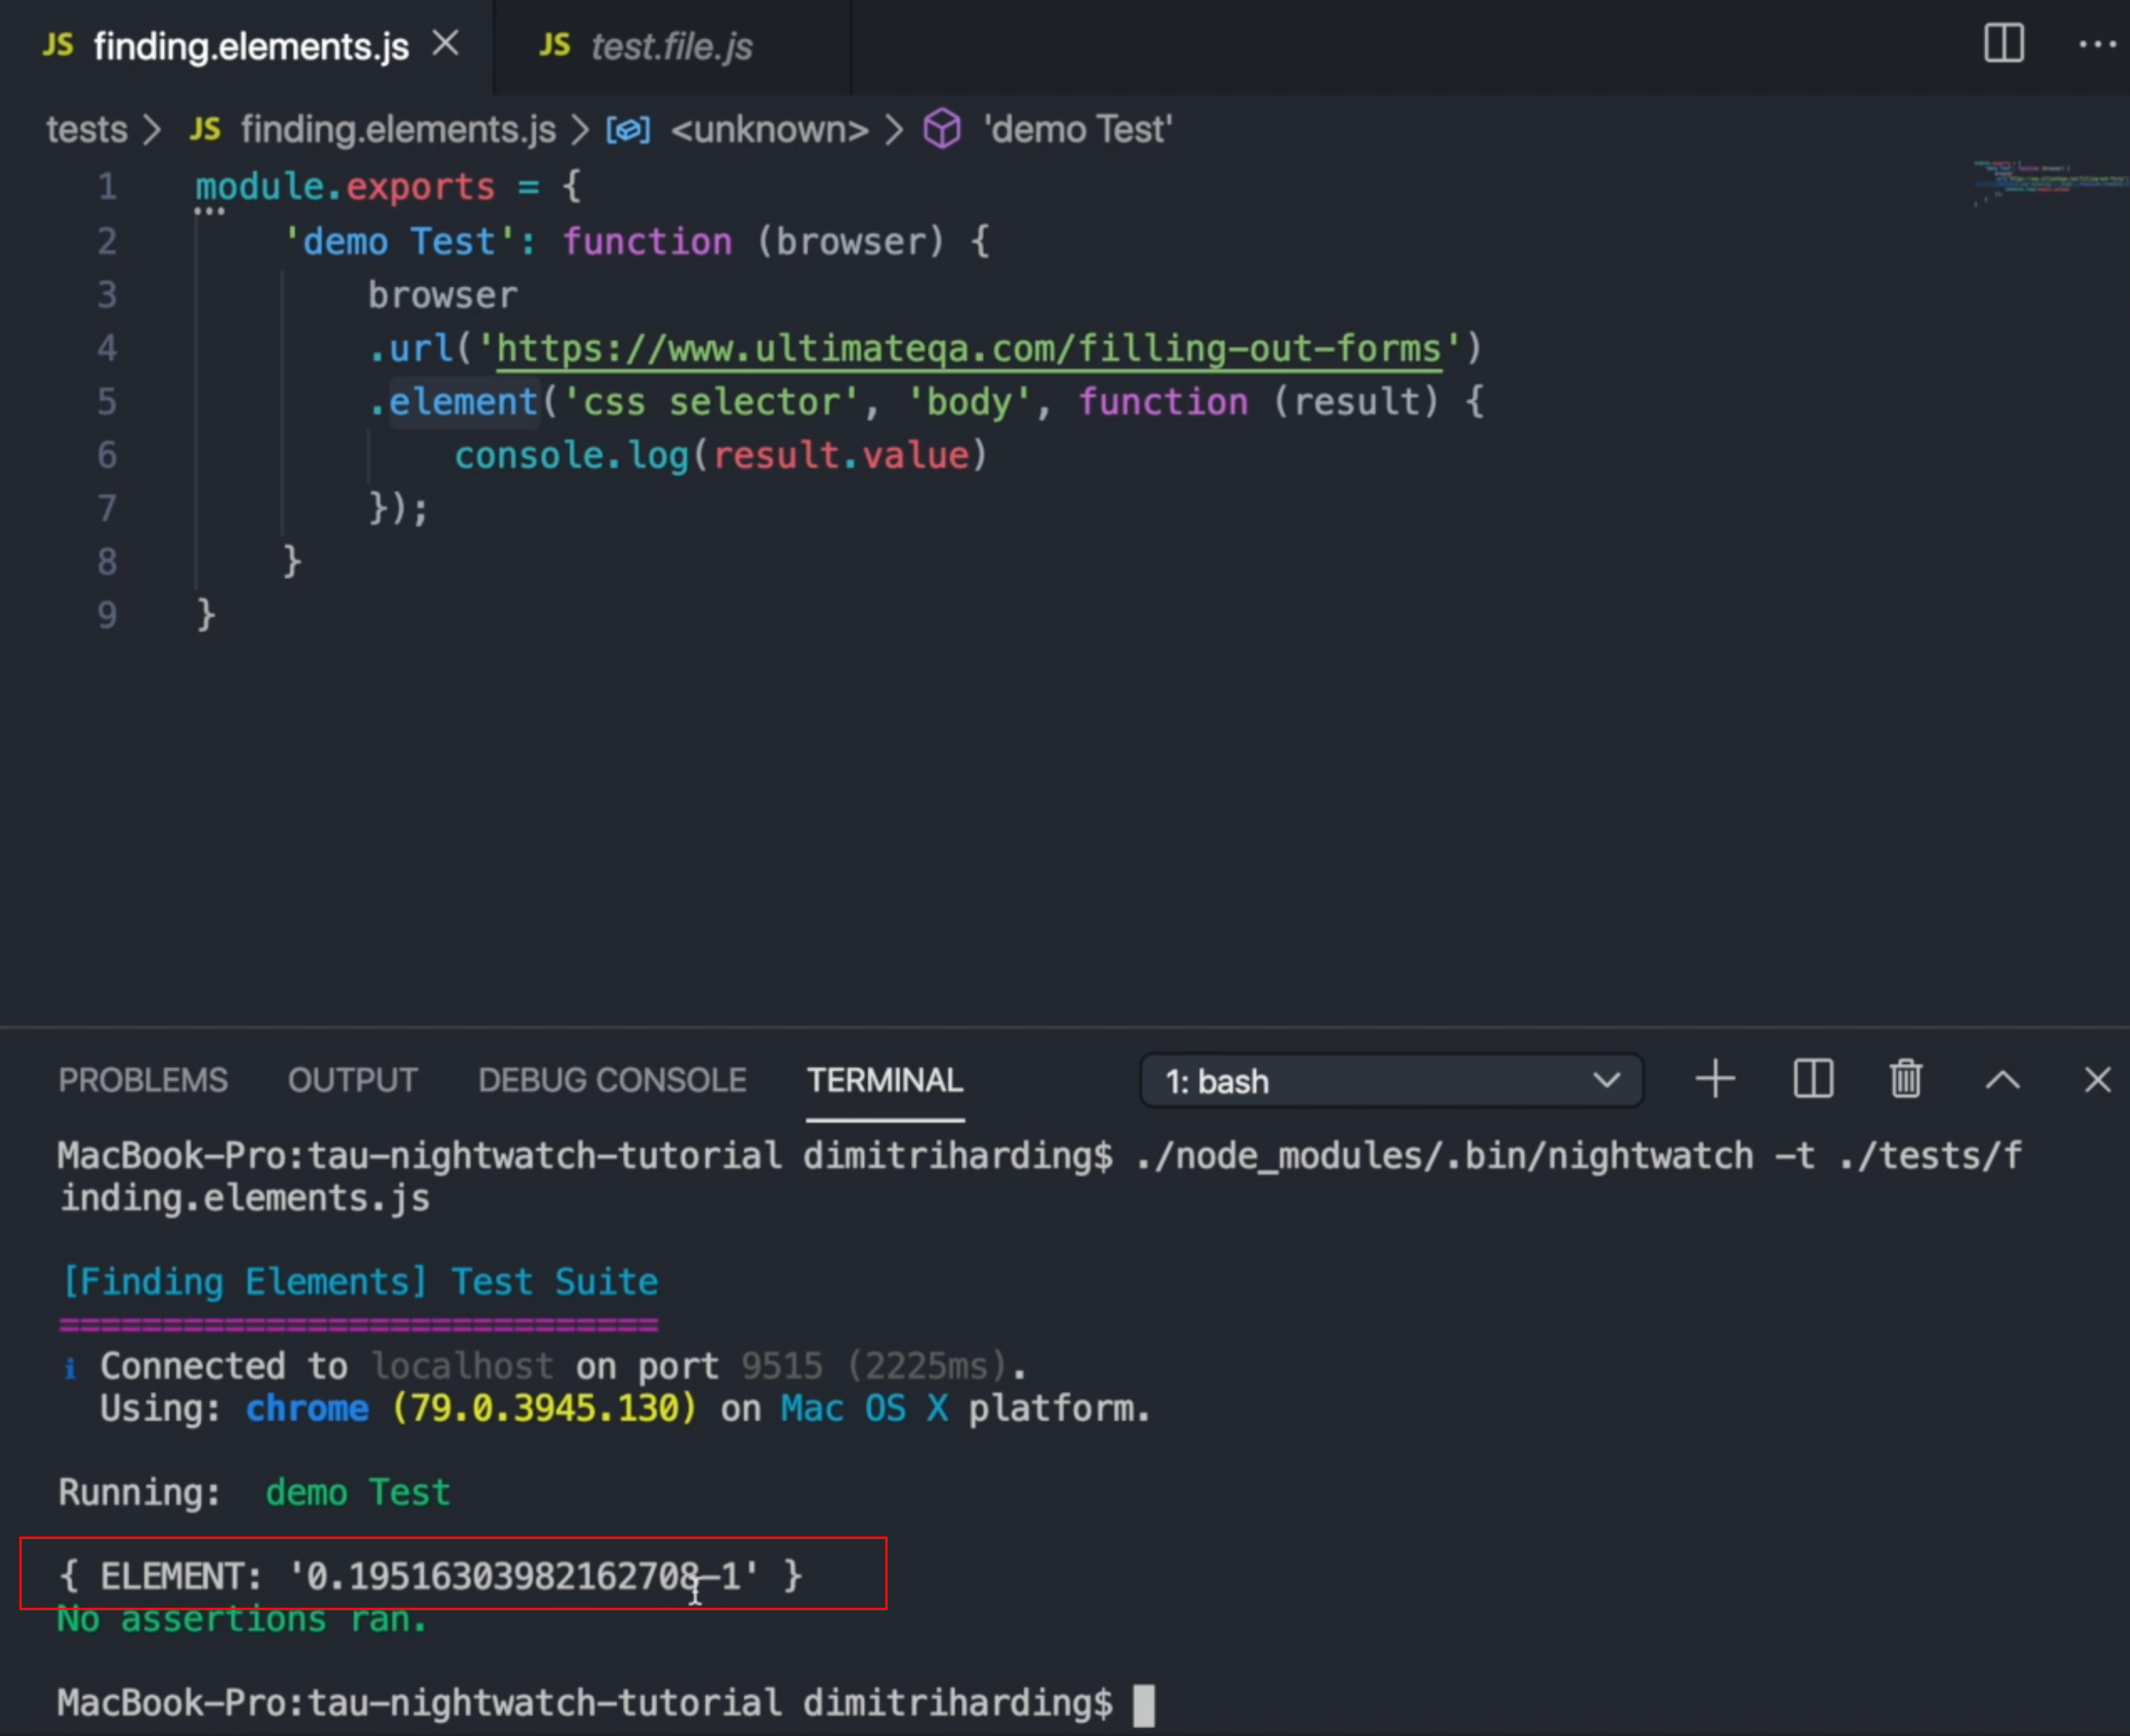
As we mentioned before, the element function would return a web element JSON object. So, as we can see, we have an element and we have the ID for that element, which we can later on use in other functions.
# .elements()
Now let's talk about the .elements() function.
The .elements() function searches for multiple elements and returns the web element objects for those.
So, it's the same as the last function that we used before, but it's just that you're returning multiple elements.
We'll go ahead and change .element() to .elements() and let us find a selector, or multiple selectors, that we would like to search for.
We have multiple input fields on this page, so we can use cmd+F to find, and we can say input and we want it to be of [type="text"].
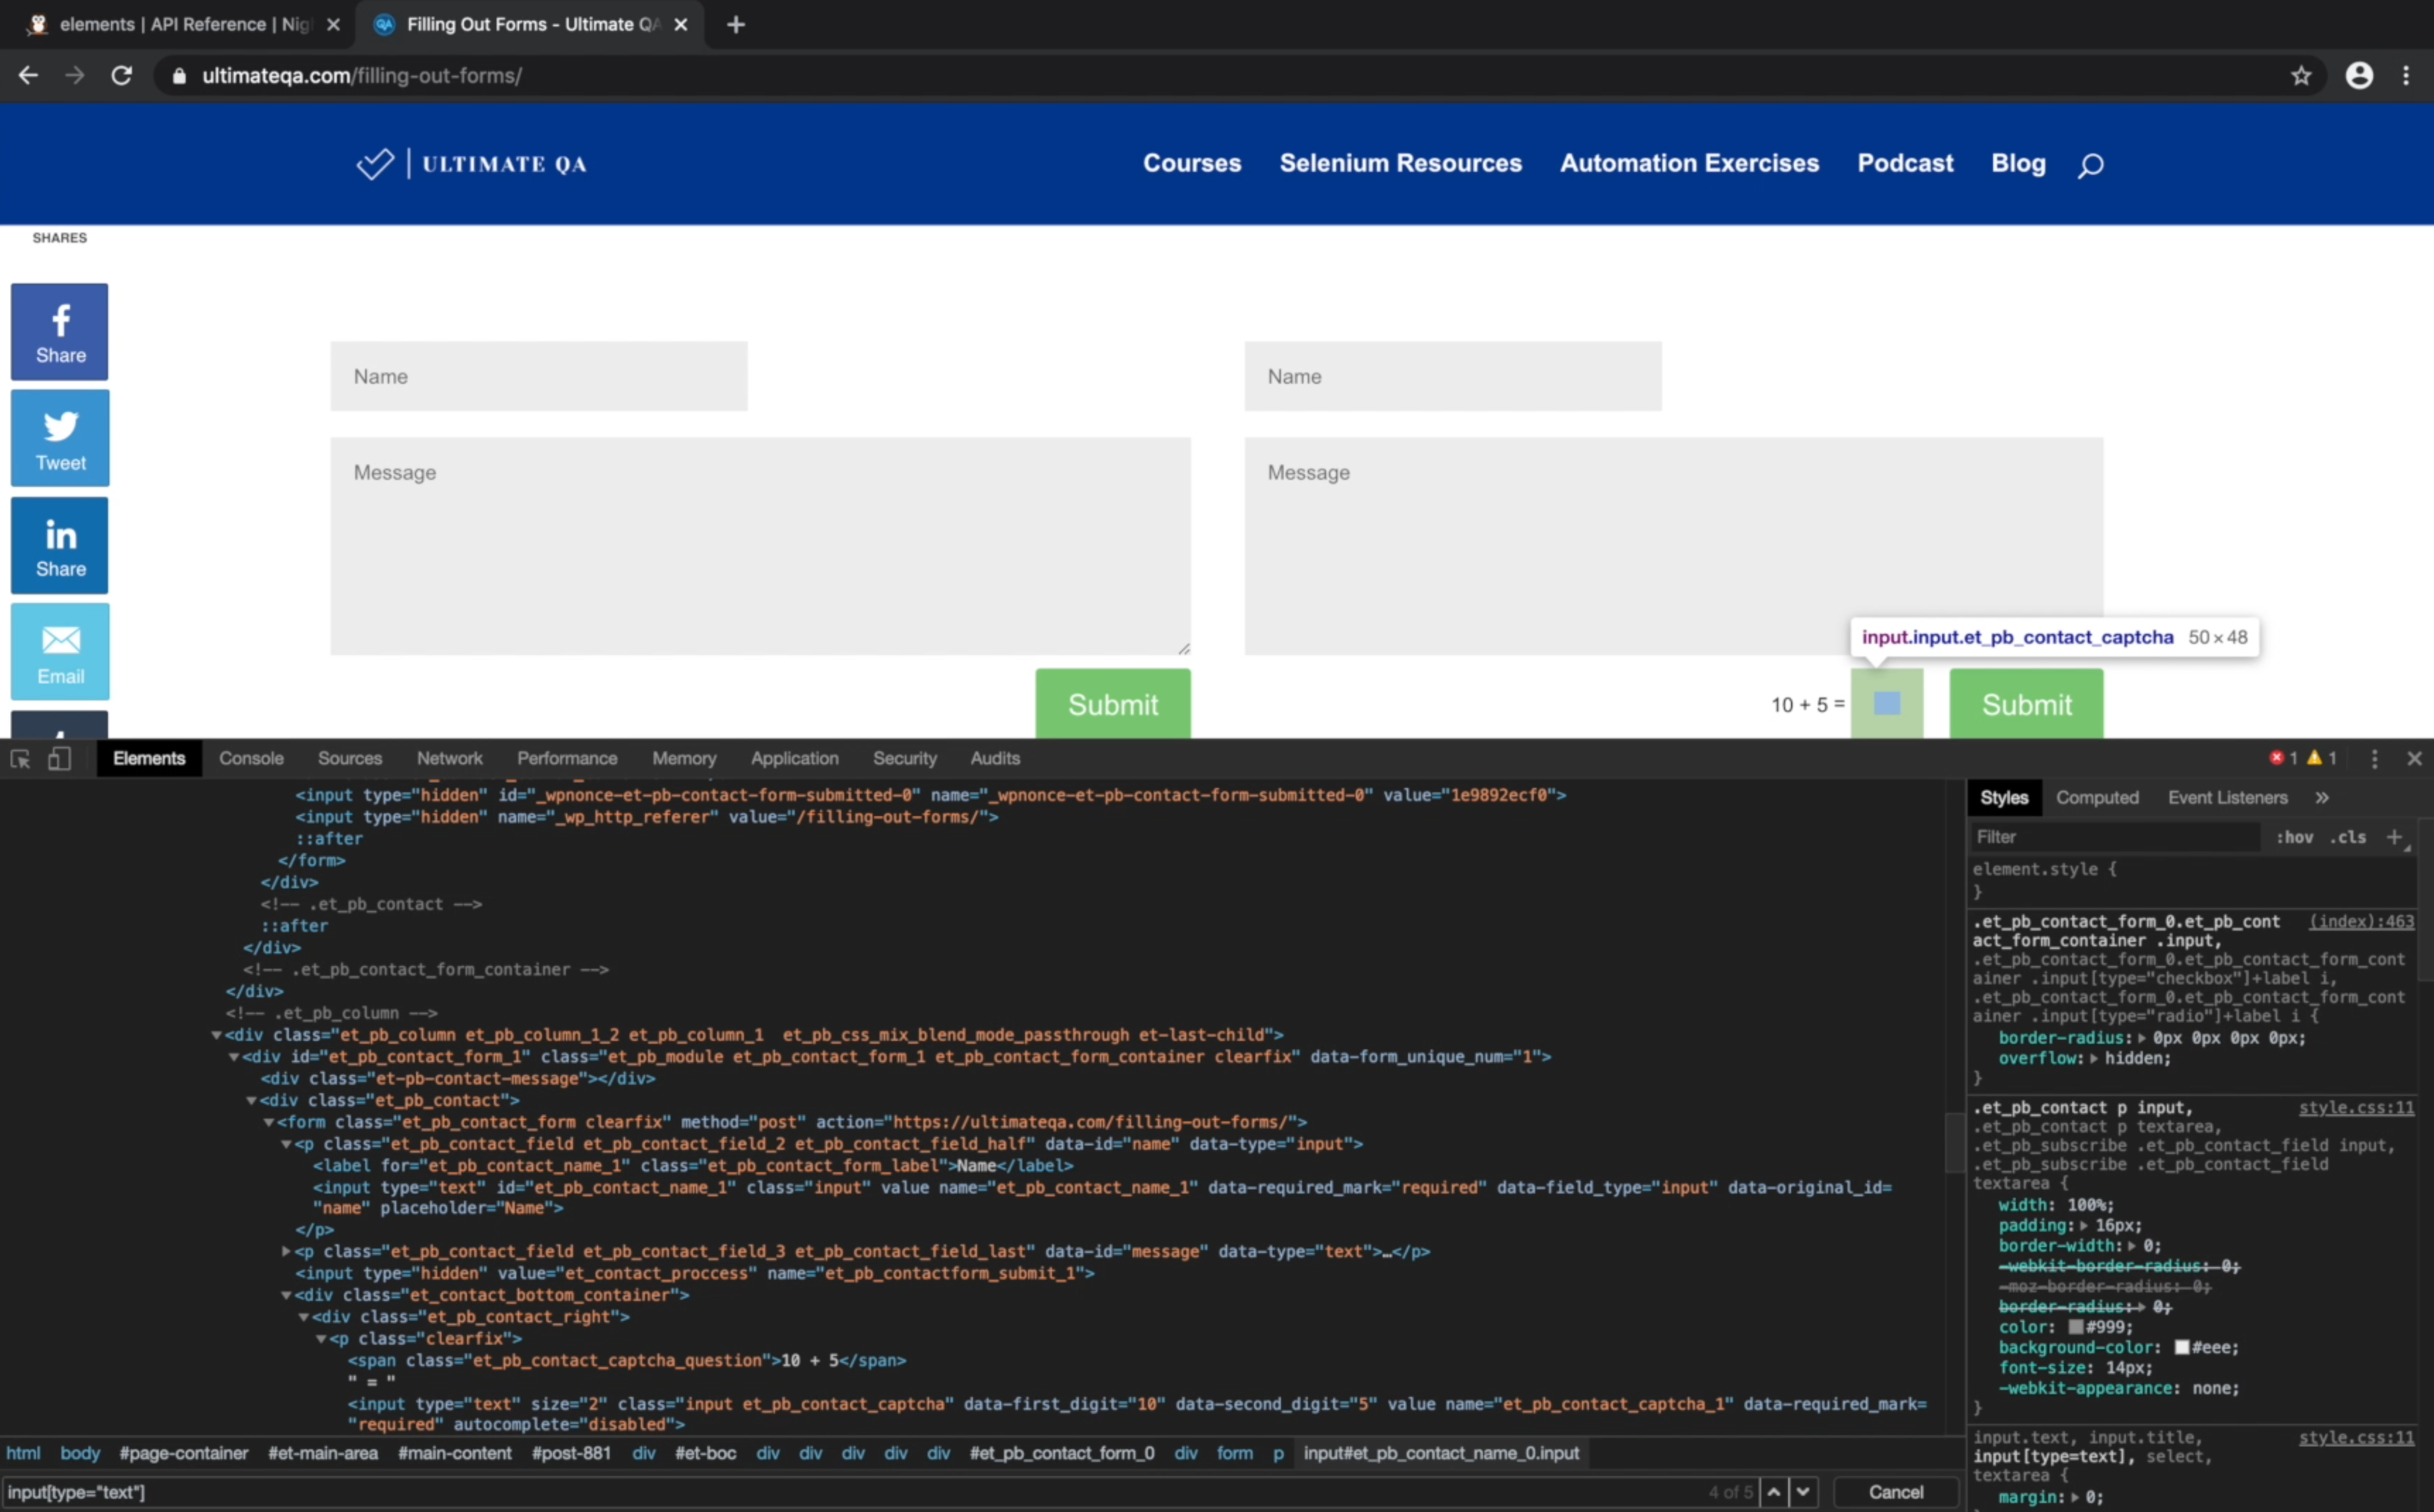
So we'll add input[type="text"] as our selector to .elements().
The file now looks like this:
module.exports = {
 'demo Test' : function(browser) {
    browser
    .url('https://www.ultimateqa.com/filling-out-forms')
    .elements('css selector', 'input[type="text"]', function(result) {
      console.log(result.value)
    });
  }
}
Let's run this test again with ./node_modules/.bin/nightwatch -t ./tests/finding.elements.js and see the values that we get.

So, as you can see, it found five of these elements on the current page.
This function comes in handy if we want to interact with a particular element and it does not have a unique identifier, but we know that it is an input text and we know that there are five of them on the page - and what if we wanted to get to number four? We would use this ID in a subsequent method that Nightwatch has for us to interact with this element without actually knowing where that element can be found.
Other useful methods are waitForElementVisible and waitForElementNotVisible.
Let's wait for the submit button to be visible. We'll use the name of this button et_builder_submit_button - we'll go ahead and first check if it is not visible because we know that it is there.
module.exports = {
    'demo Test': function (browser) {
        browser
        .url('https://www.ultimateqa.com/filling-out-forms')
        .waitForElementNotVisible('button[name="et_builder_submit_button"]')
    }
}
This will fail because the element is present, and it will not disappear.
Let's see how long it's going to wait. So, the test is running.
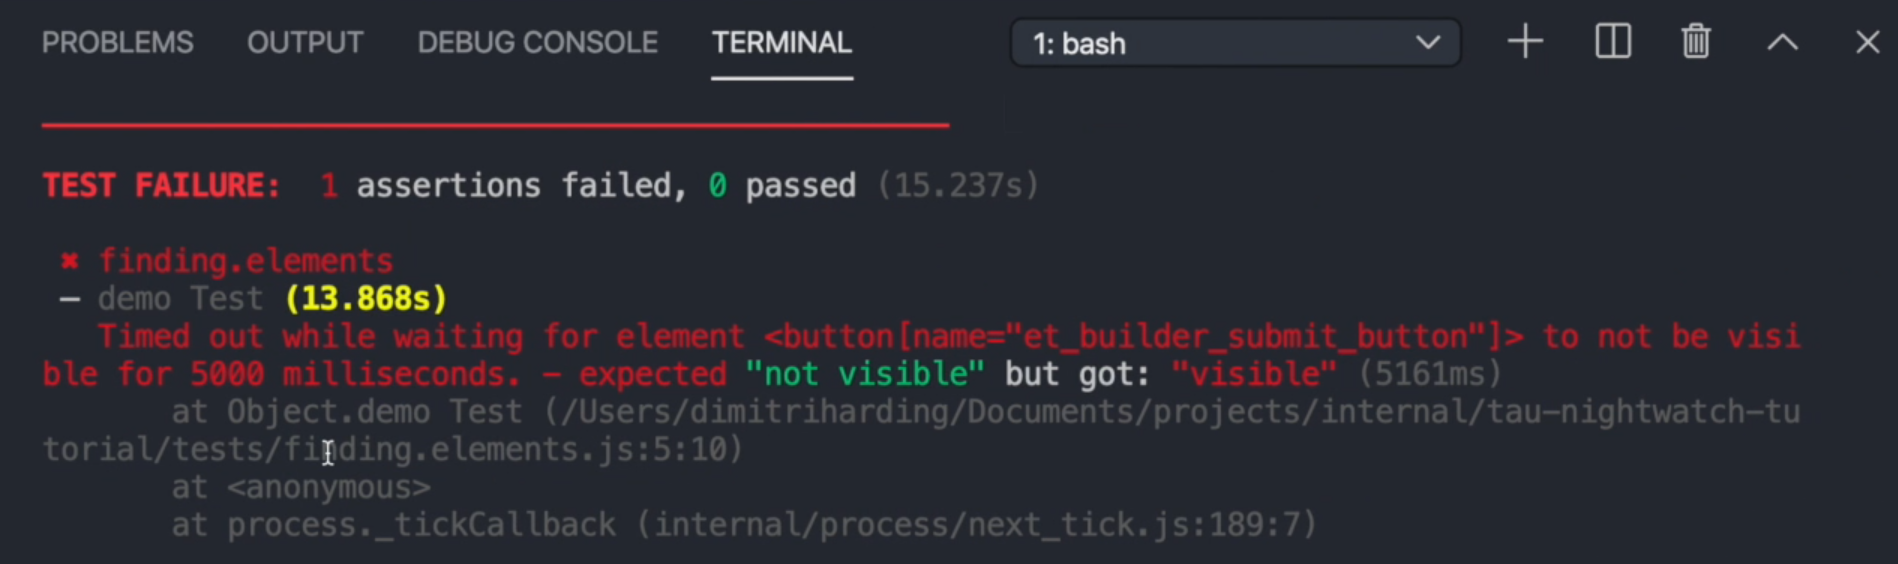
It failed because it timed out after 5,000 milliseconds and you can see it expected "not visible" but got "visible", which is correct and is the expected behavior.
Now we can change this to visible.
module.exports = {
    'demo Test': function (browser) {
        browser
        .url('https://www.ultimateqa.com/filling-out-forms')
        .waitForElementVisible('button[name="et_builder_submit_button"]')
    }
}
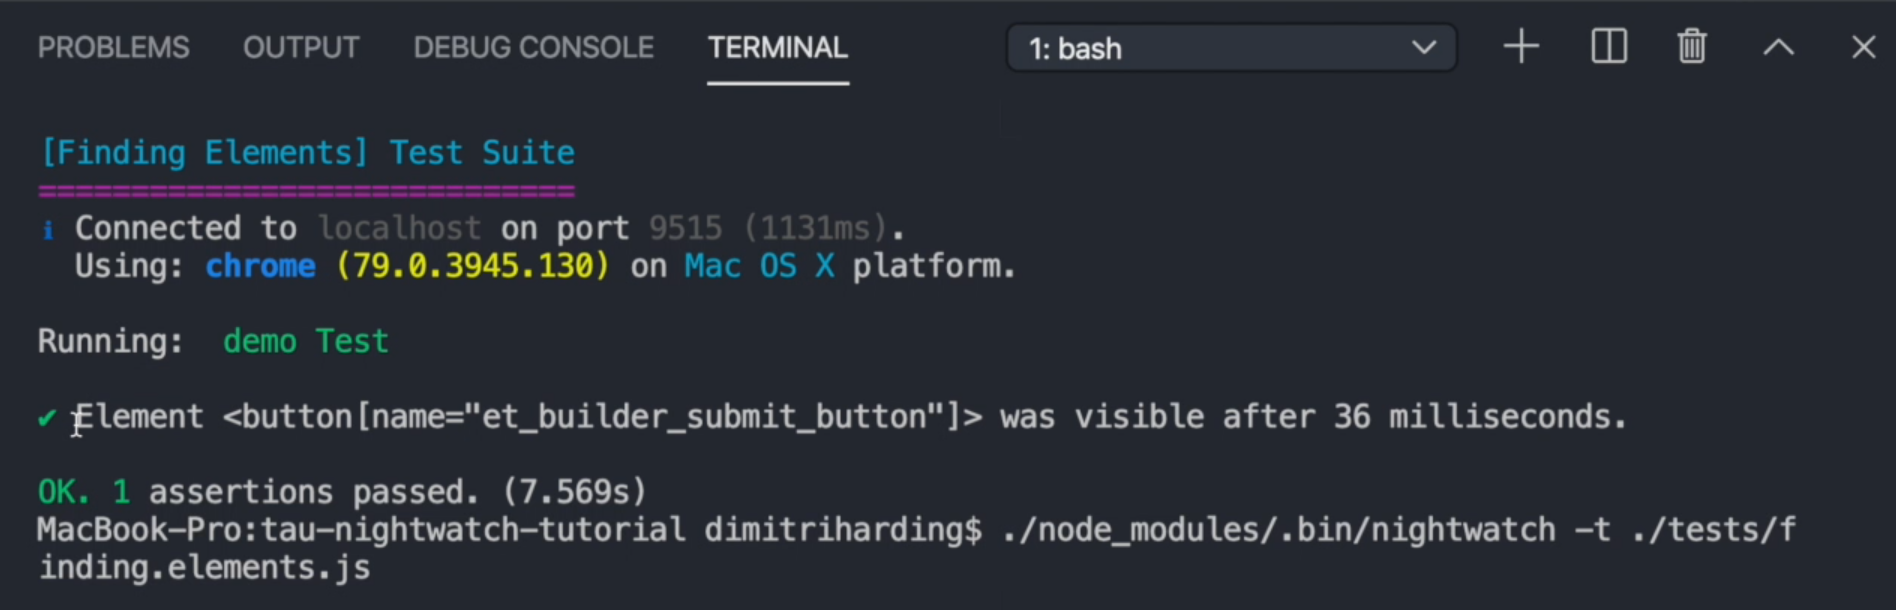
We like to use these functions when we want to interact with a particular element on the page, but before we can interact with it we have to wait for it to be visible. The element that we specified was visible after 36 milliseconds.
Now there are a few things that we can do. The selector for this method is the only required field. Everything else is optional. Now, the thing that I like to do is to add a custom message to this element.
For example, I would say 'Submit button is visible'.
module.exports = {
    'demo Test': function (browser) {
        browser
        .url('https://www.ultimateqa.com/filling-out-forms')
        .waitForElementVisible('button[name="et_builder_submit_button"]', 'Submit button is visible')
    }
}
When we run this, checks are completed.
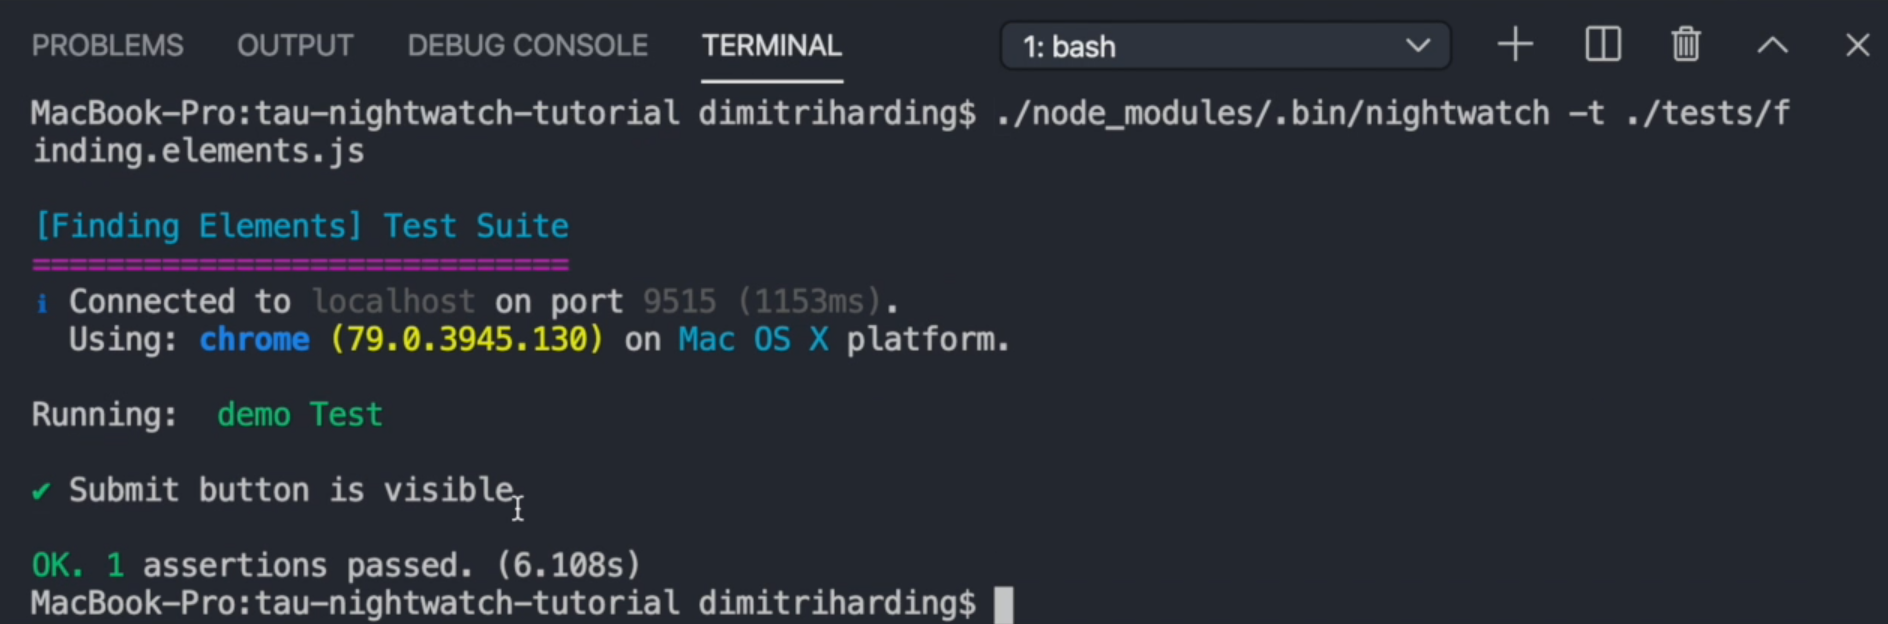
Now you can see it says 'Submit button is visible' and for me, this is much easier to read than Element <button ... }.
waitForElementPresent is another good feature as well that is used.
Between waitForElementPresent and waitForElementVisible, you can use those interchangeably based on what you're doing or before you start interacting with objects on the page.
Quiz
The quiz for this chapter can be found in section 3.4
