

Transcripted Summary
Let's jump right in and set up our environment.
In order to write scripts using the Selenium WebDriver Java client, we'll need the following:
The Java programming language. For this course, we'll use version 10 or higher
We're also going to use the Intelligent Editor to write our code. You can use a different editor if you like, but all of the examples in this course will be done in IntelliJ
Selenium WebDriver can be executed against all of the major browsers, but in this course, we'll use Chrome. So we need the Selenium chromedriver executable
We'll also need the Chrome browser itself
The links for each of these can be found in the resources section. Let's begin.
# Installing Java
We're on Oracle's website and this is where we can download Java.
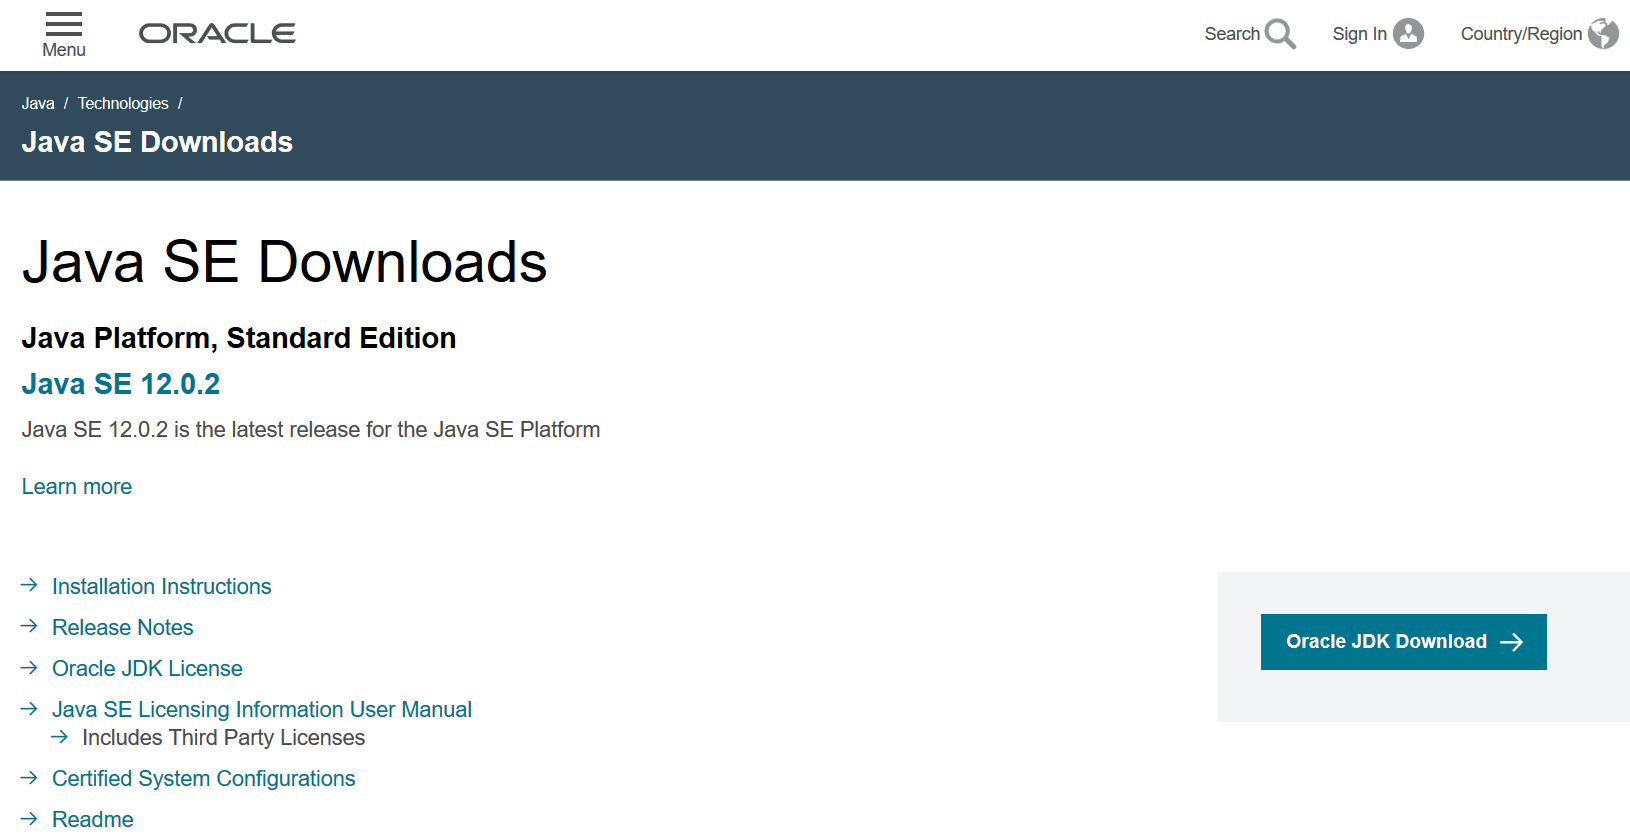
We see here that there are multiple versions there is Java 12, as well as Java 11, and Java 8. We need Java 10 or greater for this course.
- If you already have 10 or greater, then you're fine. You don't need to download this again.
- If you don't have any of those, then let's go ahead and get you set up.
Let's use version 12.
Java Version
If by the time you take this course, 12 is no longer there. That's okay. Java 11 is the long-term support version, so that one should still be there for at least 3 years. So, pick whichever one you want for now.
We've pressed the download button and here we see that there is some information about the licensing.
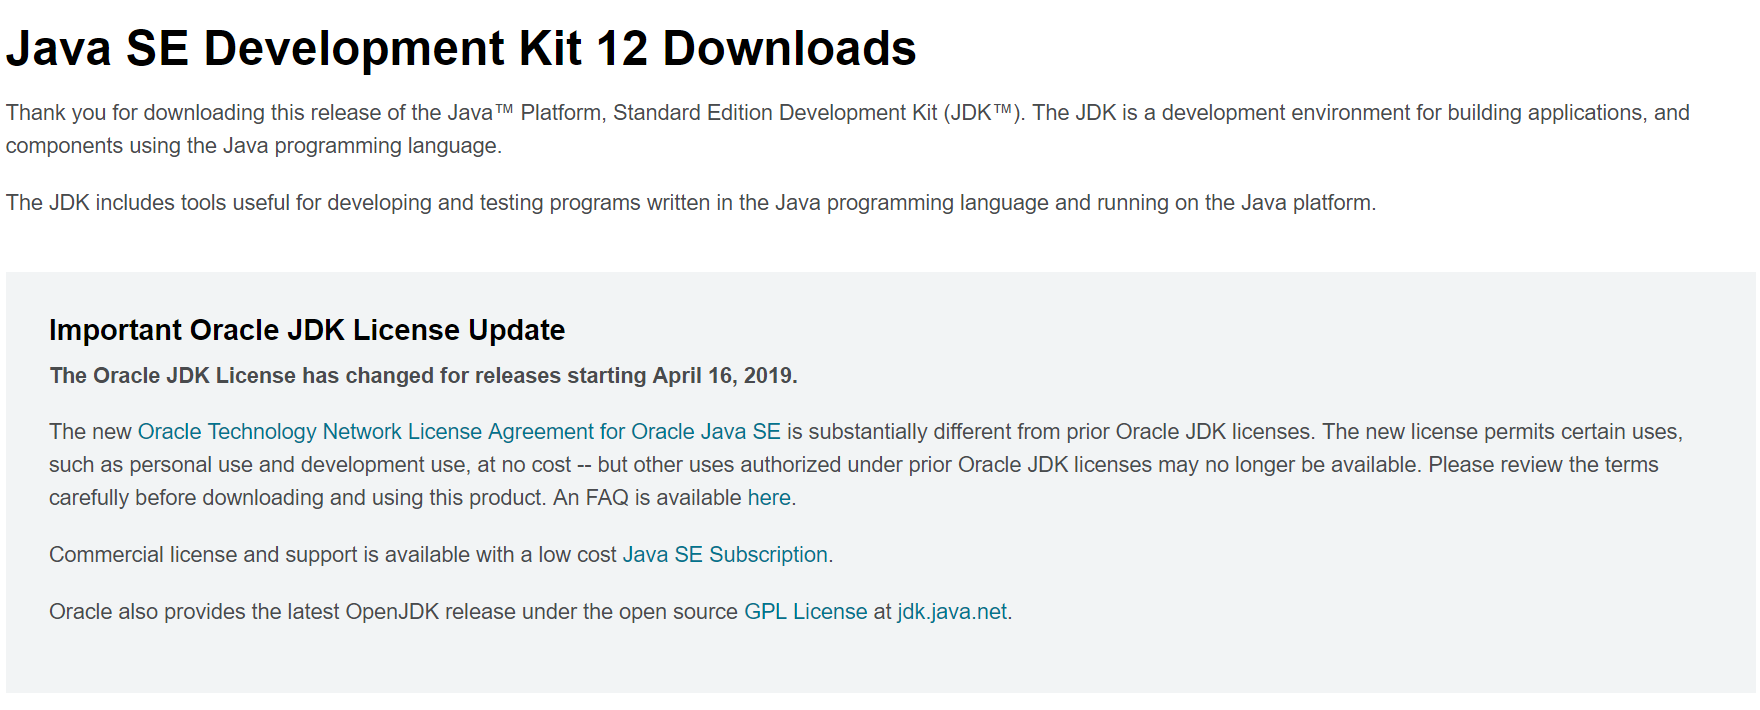
Important Information About Licensing
For the purposes of this course and also if you're just using this for test automation, then you are fine to download this. However, if you're using this for production development or plan to ship with this, then please read this carefully and decide on how to proceed.
So again, for this course and the purpose of just doing test automation code, we're fine to download this. We'll go ahead and accept the license agreement after reading and you'll see that there are multiple versions.
There's some for Linux, Mac, and Windows. I am going to download this one because I am using a Mac.
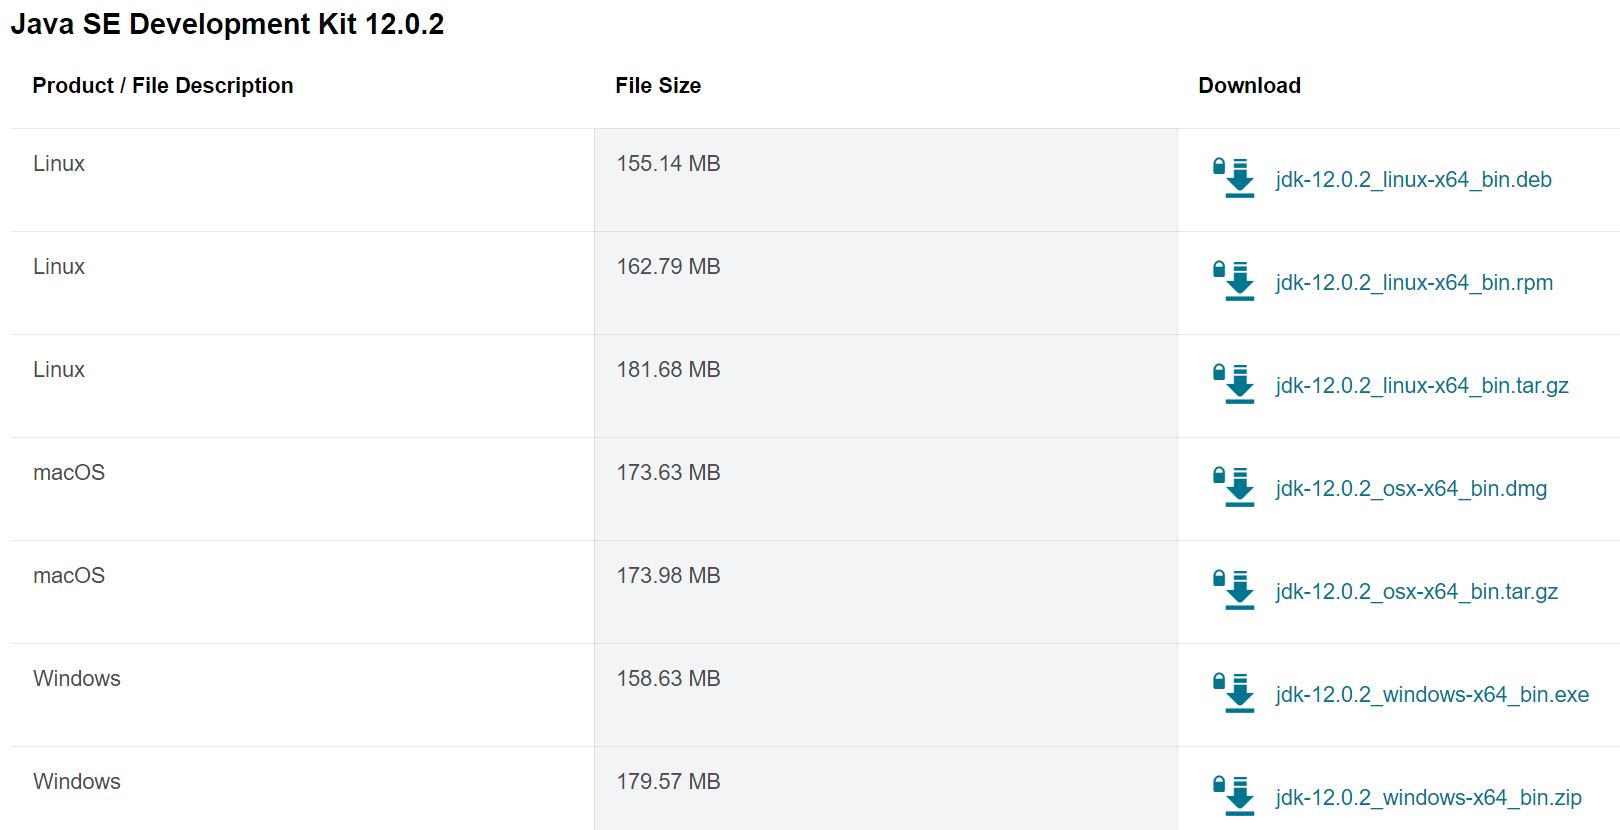
We click on the file name, which begins the download.
So, I have it downloaded, I double click on that file. Again, I'm on Mac and so I see here that I can install this. I double click on this package and now I have an install it option here.
Let's just go through the steps and we click install.
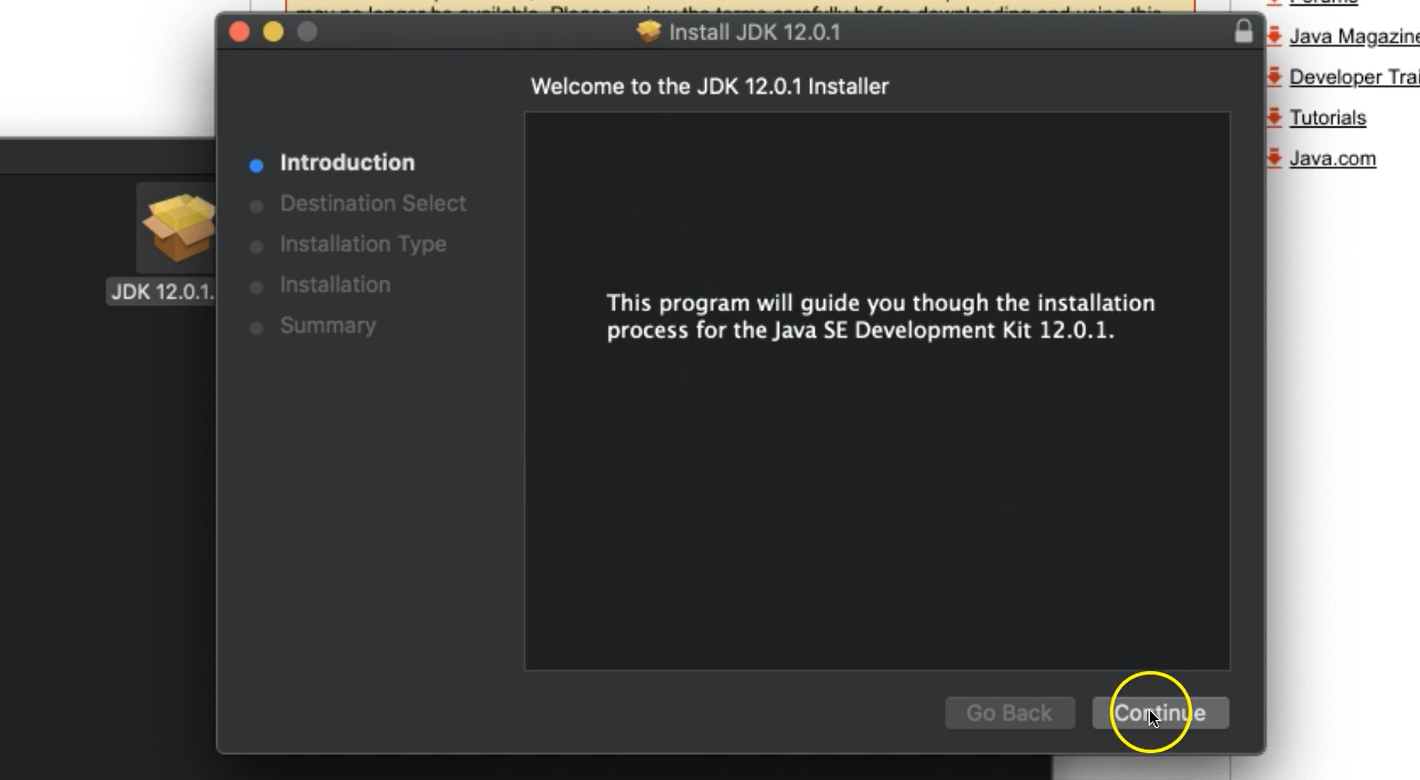
You'll need to enter the password for your computer, and these will be different steps if you're using Windows or Linux, but just follow the prompts. There's nothing special that we're doing or selecting.
Okay, the installation has succeeded.
# Installing IntelliJ
The next thing we're going to do is to install IntelliJ, which again will be the editor that we write our code in.
There are multiple operating systems supported Windows, Mac and Linux, so choose the operating system of your choice.
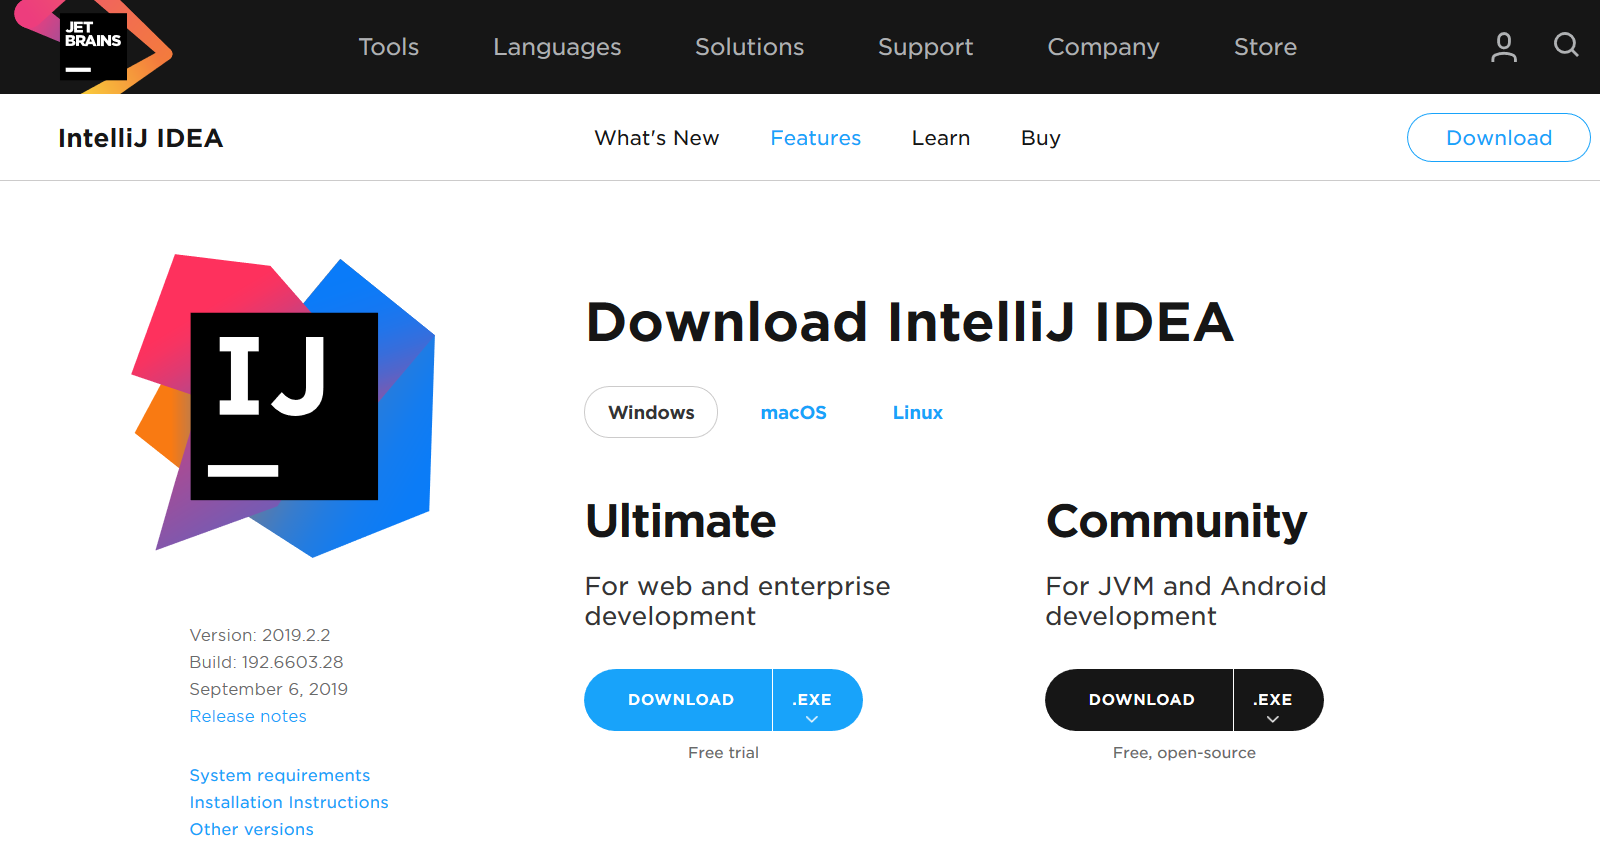
And then there are also 2 options here: one that says Ultimate and one for Community.
The Ultimate is for web and enterprise development. There is a free trial but then you need to purchase it.
Or you can use the Community edition, which is what I use. This one is free and open source.
You just click “DOWNLOAD”.
Don't worry about the form that comes up, it's already downloading.
Once it's finished downloading, just double click on that file. Again, this will be different if on Windows, but you'll still have an executable that you can use, and it'll walk you through.
For Mac, all we need to do is to drag this over and follow any prompts.
Again, we're just using default options, so nothing special there.
# Installing Chrome Browser
Next we're going to install the Chrome browser.

If you already have Chrome, you're fine. Don't worry about this part.
If not, go ahead and click the download button (and this may be a different operating system if you're not on Mac). Again, we just download it.
Once the file has been fully downloaded, you simply follow the instructions here on how to finish the install.
# Installing Chrome Driver
Finally, we want to download chromedriver.
This is the WebDriver for Chrome, which is the browser that we'll be using.
It has to match with whatever version of Chrome that you're actually using.
So, go ahead and check your version of Chrome. You can click on the hamburger menu in the top right corner and then on “Help” > “About Google Chrome”. There we can see what version of Chrome than you're on.
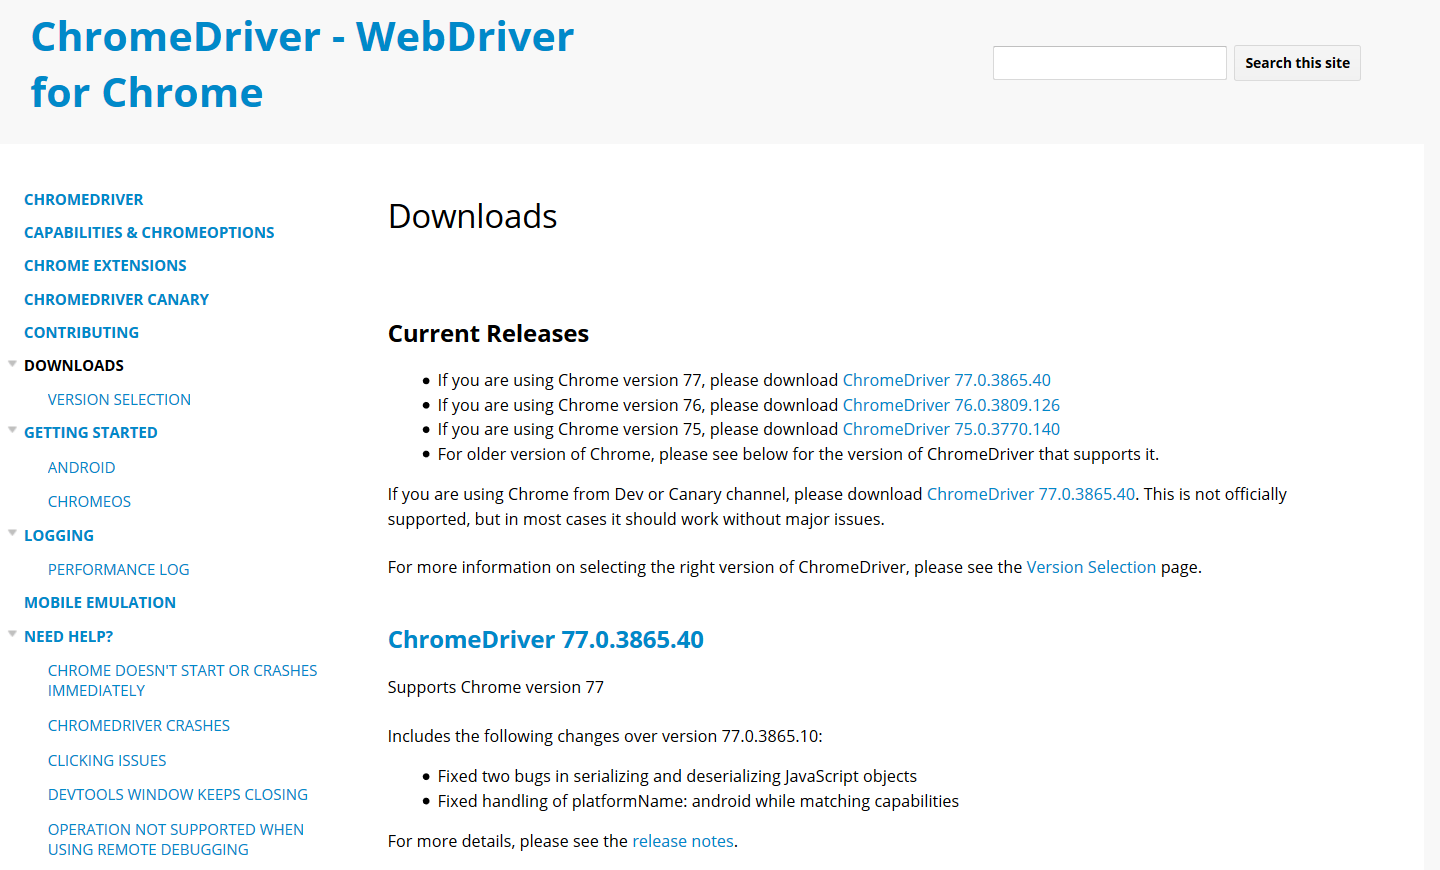
I'm on version 75 so I'm going to need to get the chromedriver that corresponds to this version.
On this page, I see that if I'm using Chrome version 75 to download the chromedriver for version 75, so I click that link and then again you have operating system options.
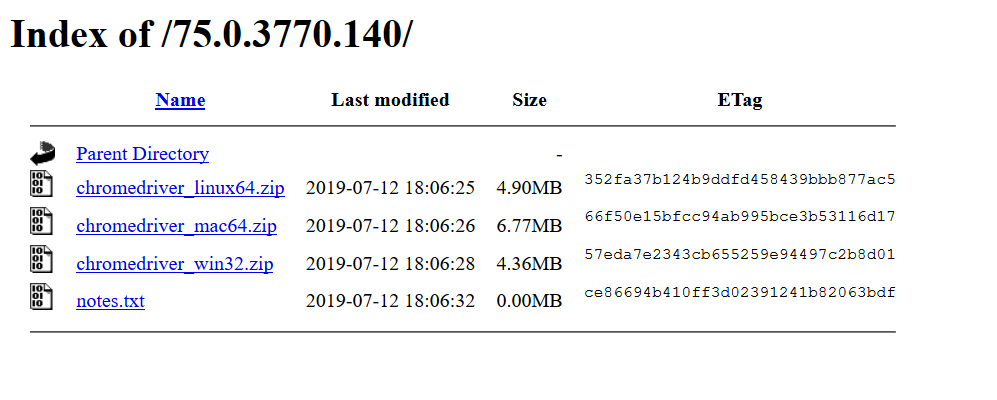
I'm on Mac, so I choose the one for Mac. If you're on Linux or Windows, you choose the one for you.
I download this zip file and let's look inside of that zip. Okay, I have this download, so I'm just going to double click it to unzip it.
Opening Zip Files
If double clicking on the file doesn't work for you, you may need an unarchiver to unzip your files. You'll need to just search on Google for a way to unzip your files on your operating system and get a program to do so. Hopefully you already have one installed.
When I double click this, it expanded, and this is the executable file that was inside of this.
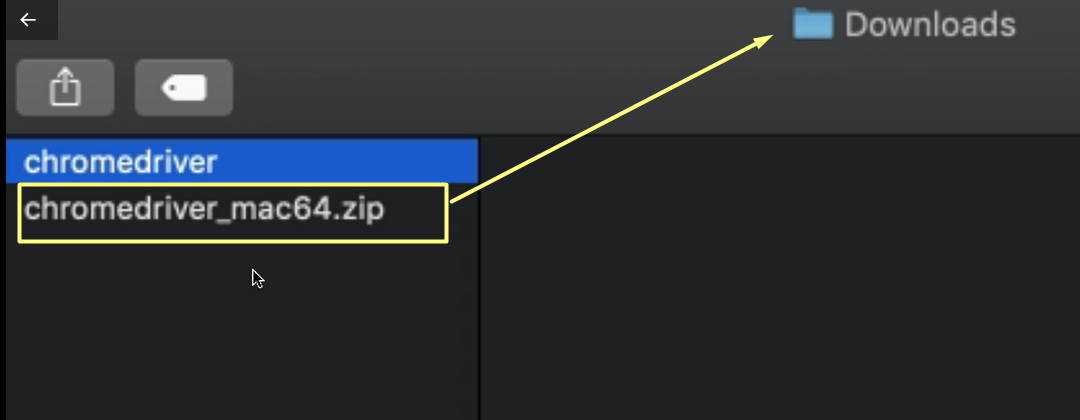
If you're on Windows, this will say “chromedriver.exe”. Otherwise it just says “chromedriver”.
We'll just keep this, and remember where it's stored [in my case in the “Downloads” folder] because we'll need to move it to a new location in a little while.
# Creating a New Project
Okay, let's open the IntelliJ editor that you've downloaded.
We're going to create a new project, so click on “Create New Project” and it gives you some options here.
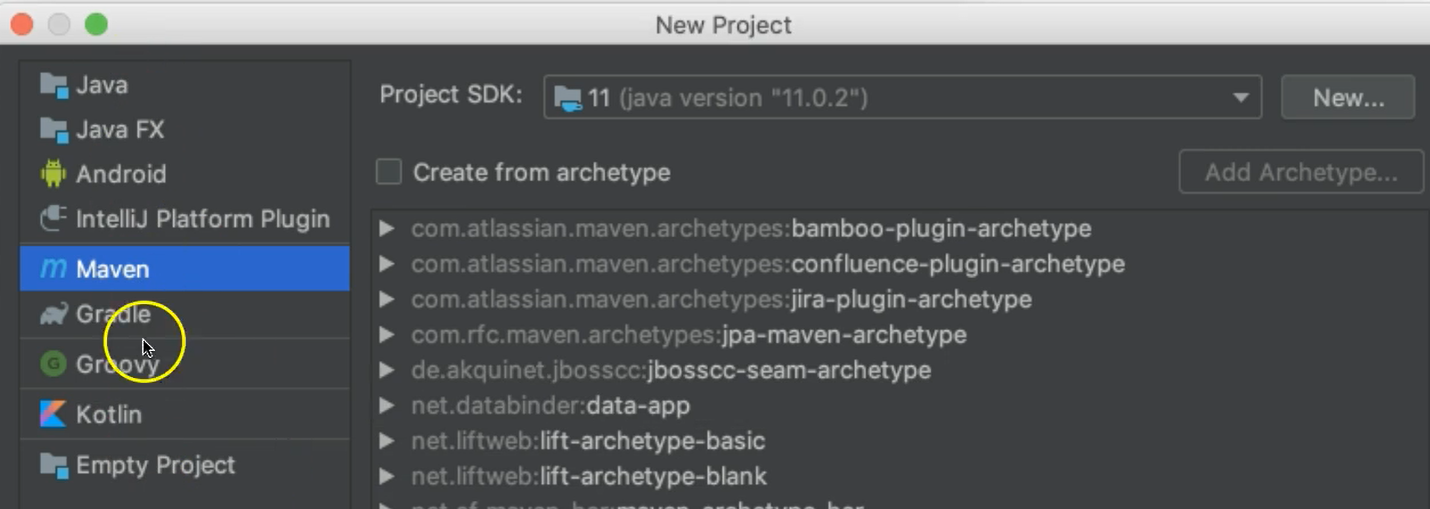
We want to create a Maven project.
If you want to use Gradle, that's fine as well. However, in this course we'll be using Maven.
For the Project SDK, I’ll choose version 12.
Now I'm going to just click “Next”.
In here, they're going to ask you for a GroupId and an ArtifactId.
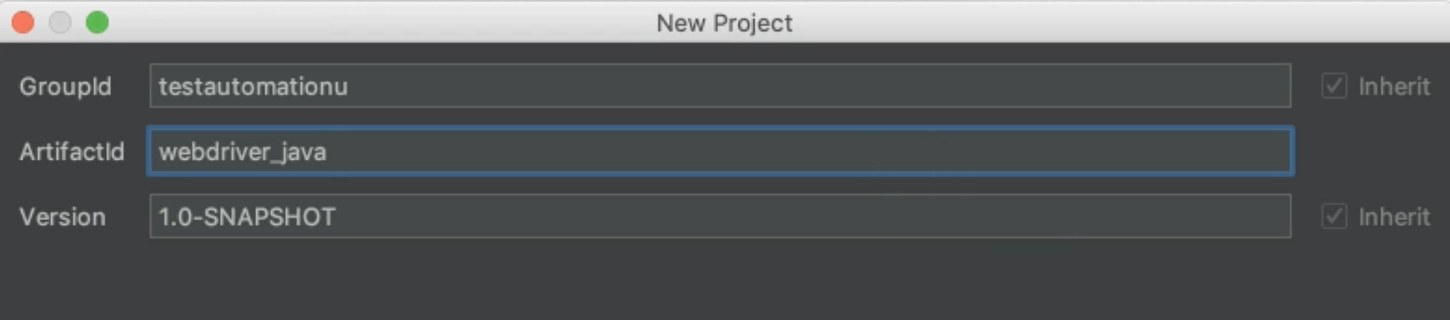
For my GroupId, I'm just going to say “testautomationu” — you can make this whatever you want.
And then for the ArtifactId, that's the project, we'll just say “webdriver_java”, and then click “Next”.
Next it will ask you the location of where you want to store the project.
Choose wherever you want. Maybe outside of the download somewhere you can make a new directory.
To do that you simply type it in; or you can click on the right side to browse.
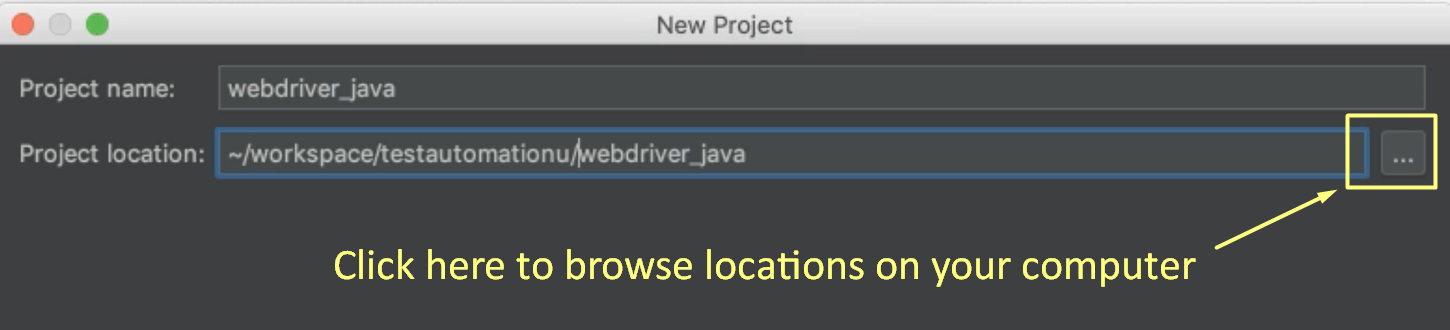
I'm going to put mine and my workspace and I will put it under “testautomationu” and then “webdriver_java” [workspace/ testautomationu/webdriver_java]
Once you have decided on your location, go ahead and click “Finish”.
You'll get a prompt if this is the new location and it says the “Directory Does Not Exist”. That's great because I want a new directory here. This is asking would you like us to create it? You say, “OK”.
So here we see our project has opened and we have a couple of pop ups here.
The first one is just explaining that Java 12 comes with some experimental features that have not yet made it to the library officially. Just go ahead and click “Accept”
Then there's another pop up here that says: “Maven projects need to be imported”. Tthere are 2 options: Import changes or Enable auto import. Let's click “Enable auto import”
Now there are a couple of things we want to add into here — the first thing we want to add is the properties.
We are going to let IntelliJ know to compile our code using Java 12. To do that, I'm going to paste this bit of code here after the version information.
<properties>
    <maven.compiler.target>1.12</maven.compiler.target>
    <maven.compiler.source>1.12</maven.compiler.source>
</properties>
This is available on Github. So, if you want to copy this you can do so as well.
The next thing we want to do is to add dependencies because we're using Selenium WebDriver.
There is one dependency that we need right now. We're using the chromedriver one so that's the Maven dependency. Let's go out to Maven and grab it. I've supplied the link for the Maven repository in the resources section below.
I've come to the Selenium Chrome Driver version 3.141.59. Deselect the “include comment with link”, because I don't need that.
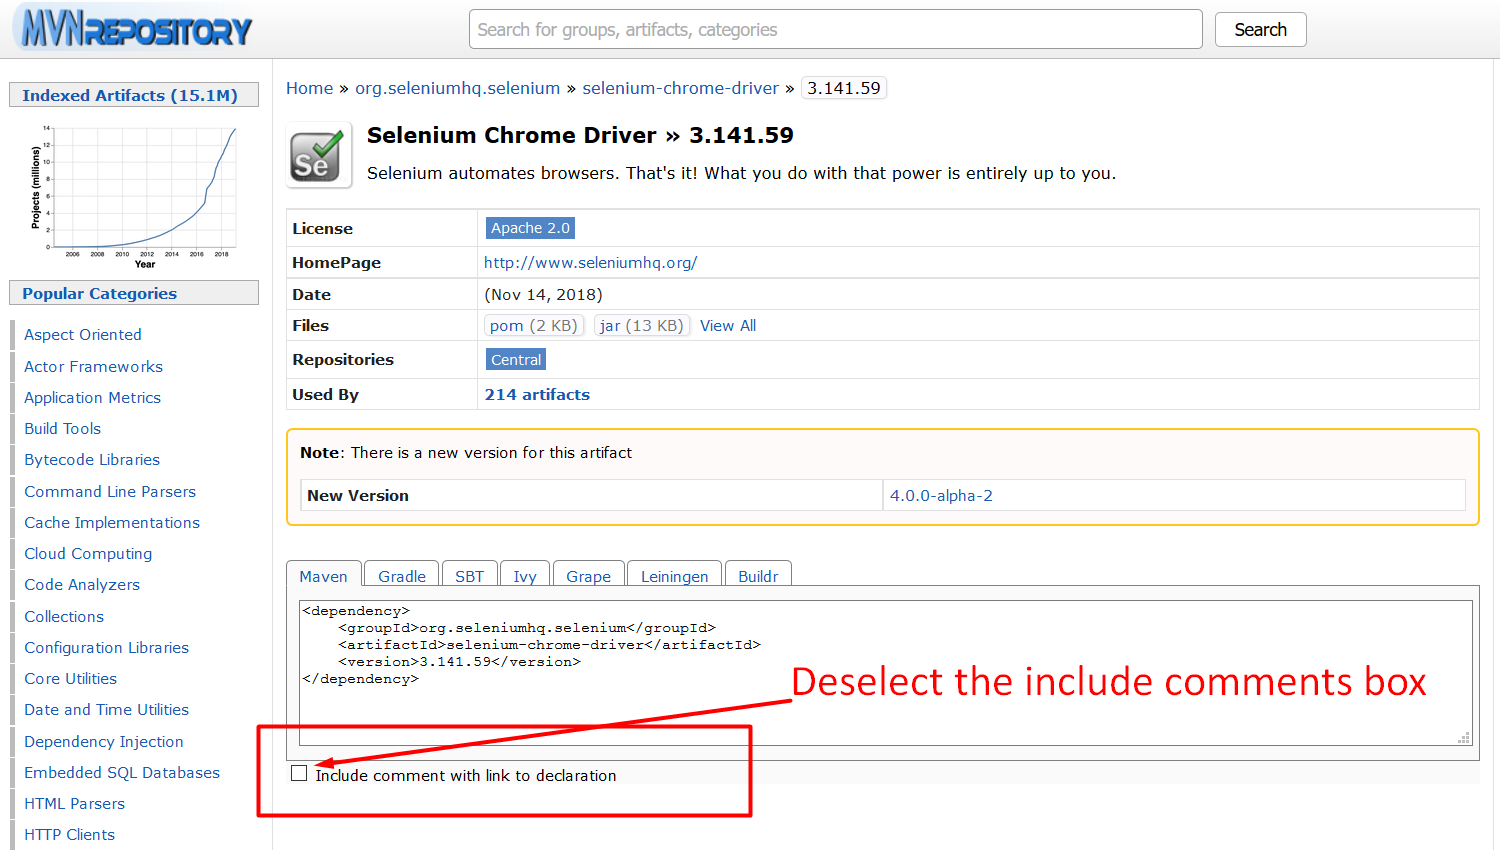
Now we just copy this and let's go back to our project.
Okay, let's paste this under the properties and we notice that we get a little error.
That's because this needs to be in dependency section.
Let's make a dependency section and when you start typing it should autocomplete for you. Just select that one and then we're going to cut this and put it in between the dependencies in the closed dependencies tab.
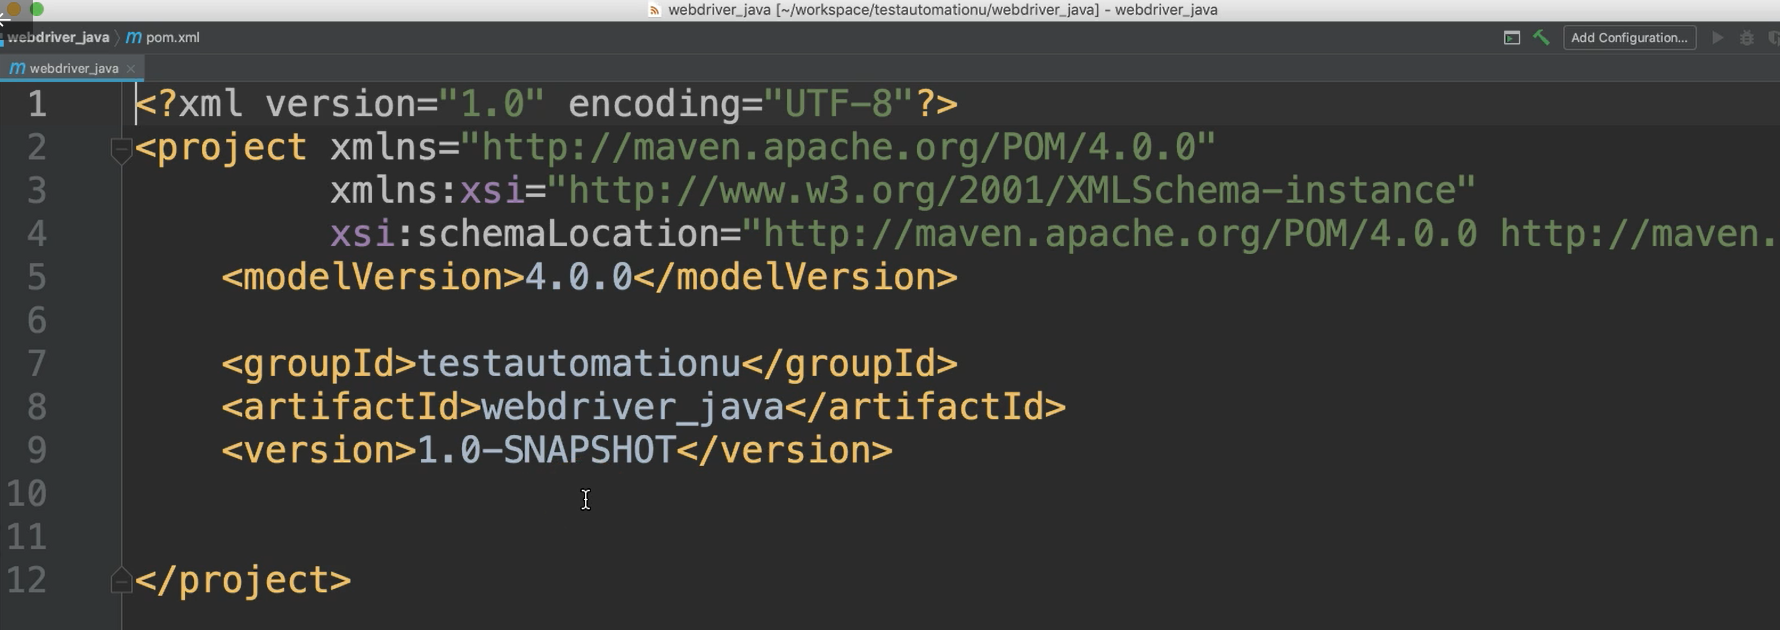
This is our pom file:
# pom.xml
<?xml version="1.0" encoding="UTF-8"?>
<project xmlns="http://maven.apache.org/POM/4.0.0"
         xmlns:xsi="http://www.w3.org/2001/XMLSchema-instance"
         xsi:schemaLocation="http://maven.apache.org/POM/4.0.0 http://maven.apache.org/xsd/maven-4.0.0.xsd">

    <modelVersion>4.0.0</modelVersion>
    <groupId>testautomationu</groupId>
    <artifactId>webdriver_java</artifactId>
    <version>1.0-SNAPSHOT</version>

    <properties>
        <maven.compiler.target>1.12</maven.compiler.target>
        <maven.compiler.source>1.12</maven.compiler.source>
    </properties>

    <dependencies>
        <dependency>
            <groupId>org.seleniumhq.selenium</groupId>
            <artifactId>selenium-chrome-driver</artifactId>
            <version>3.141.59</version>
        </dependency>
    </dependencies>
</project>
We want to go over here in the top right corner and you can click Maven and let's make sure that the dependency is there.
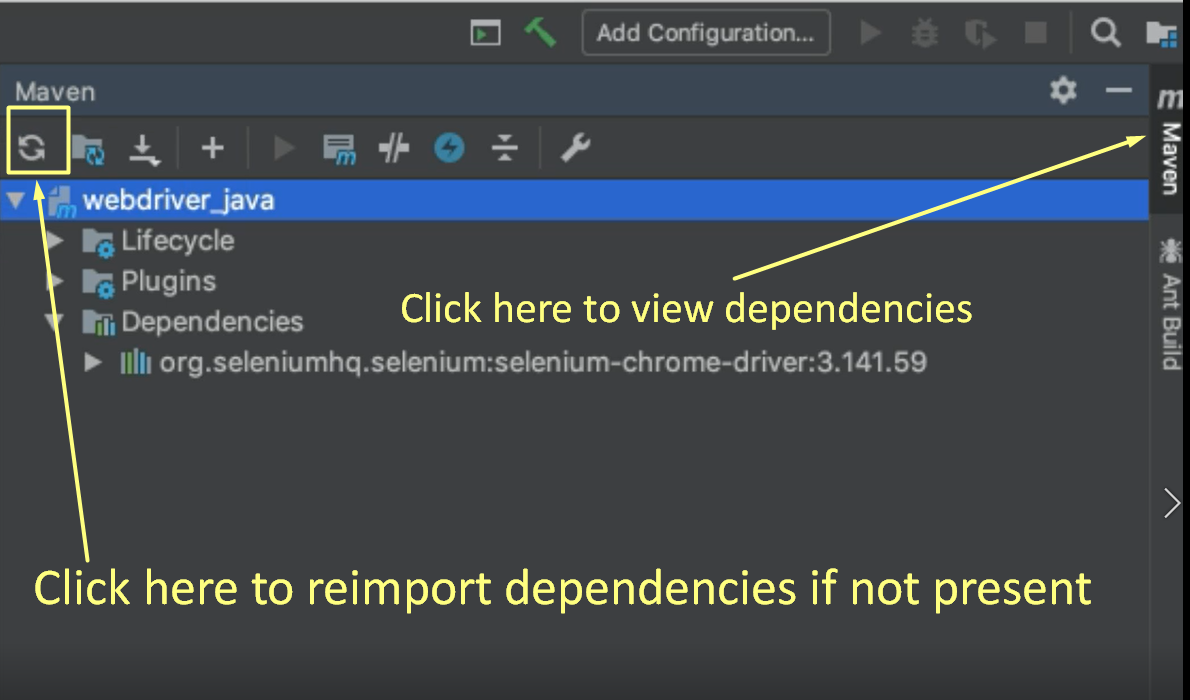
And yes, we see chromedriver 3.141, perfect. If this is not there, then you can just click on this to re-import and then that will read from here. And that should go ahead and download your dependency.
Okay. Once you have your dependency, you can go ahead and close that view.
There's just one more thing that we need to do to get set up.
Remember we downloaded the chromedriver executable? We want to put that inside of our project.
Go ahead to the project view, _click “Project” _here on the left, right click on the project name and we are going to click “New” > “New Directory”.
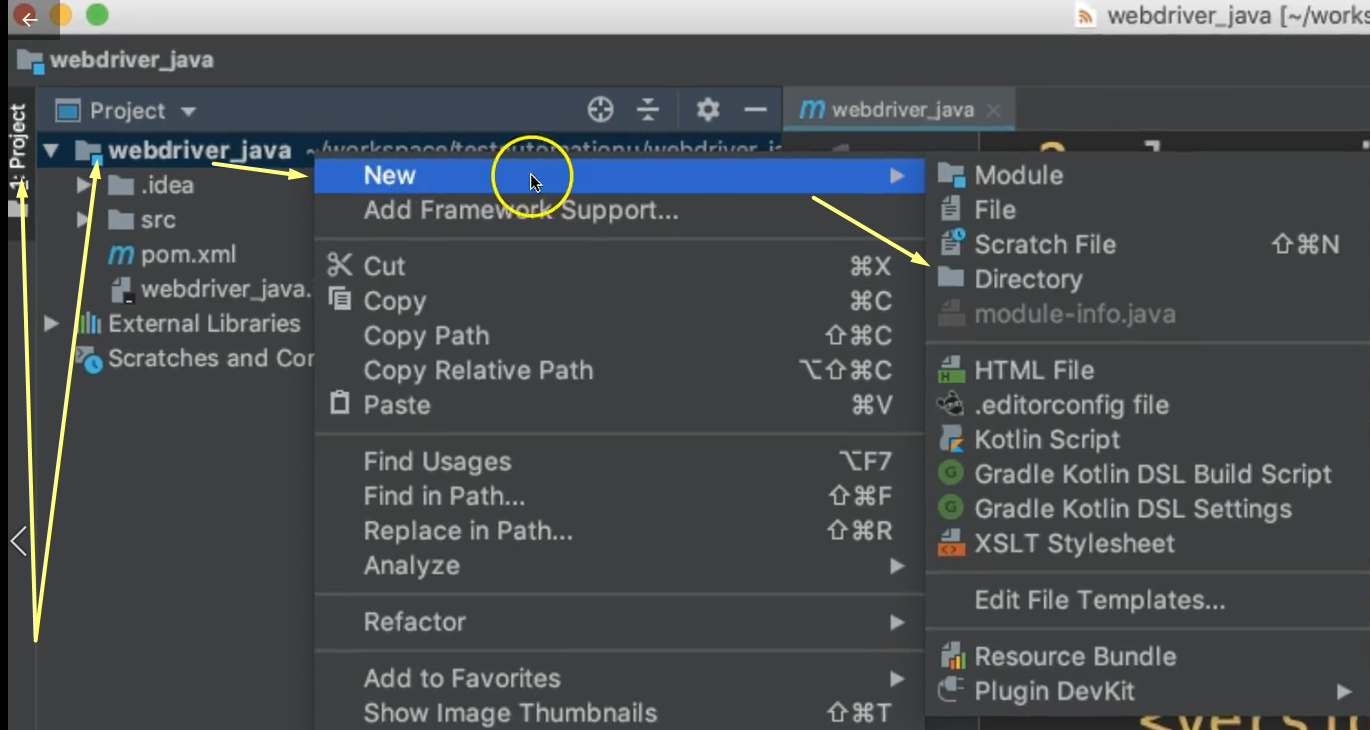
Let's call this “resources”, in lowercase, and click “OK”.
This will create that directory for you.
Next we're going to move that chromedriver executable into this directory.
So here I'm just going to drag this over here to the resources directory and that will add it there.
We see a pop up and it asks us if this is where we want to move it. We click “OK”, and it's there.
And that might take a little while for that all to process. That's okay. Just be patient.
Okay, now we're all set up. Meet me in the next chapter and we'll begin writing code.
