

Transcripted Summary
In this chapter we'll learn about element interactions.
In test automation projects there are typically two layers: one is known as the framework layer and the other is known as the test layer.
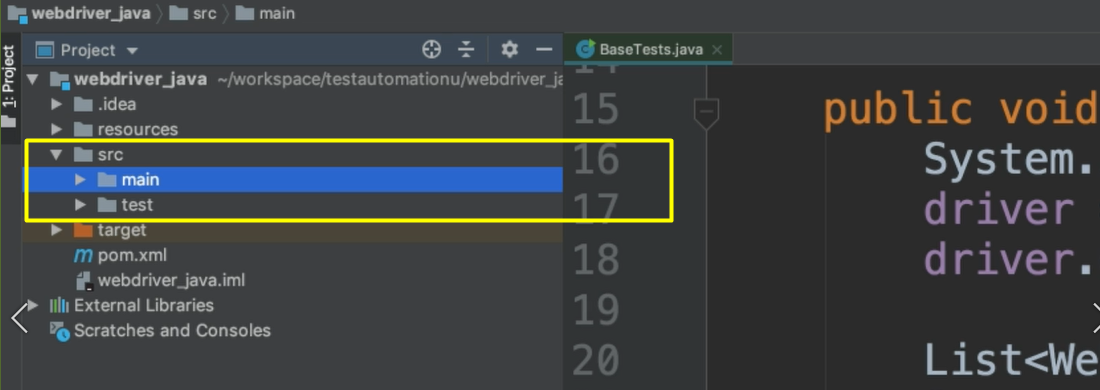
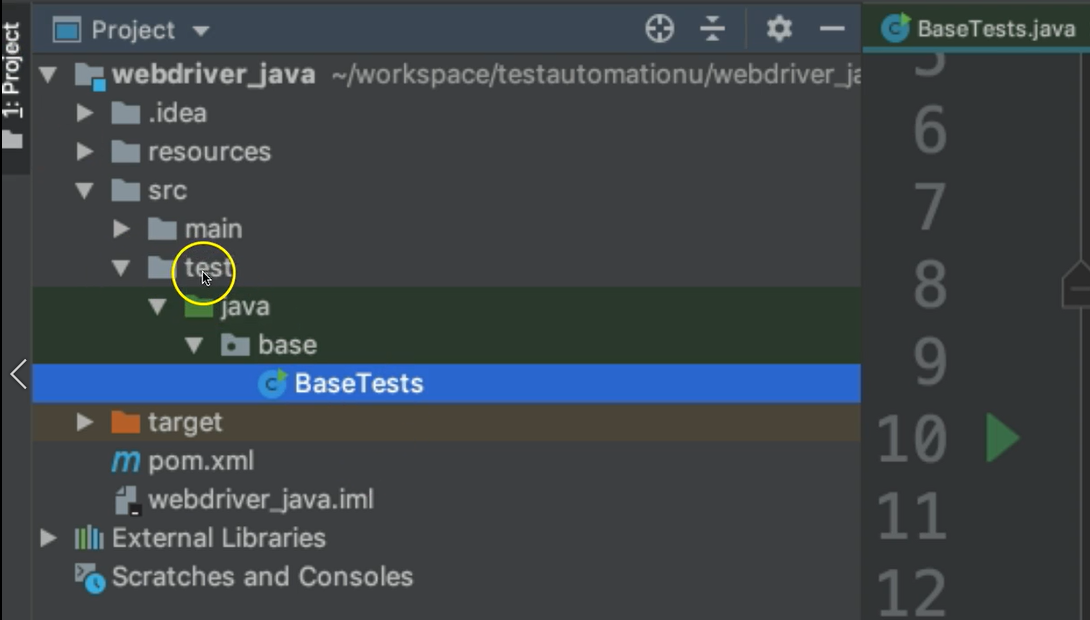
If we go to our project view and we look under the source [“src”] folder we notice that there are 2 folders here, one for main and one for test.
The main folder is where people typically put their framework
The test folder is where people typically put their tests
All of your interactions with the web browser — basically all of the coding that's done under the covers of the application — should be in your framework. And your test files should just focus on the test itself.
Let's demonstrate this using an example.
Here's our test application again.
Things like finding the elements and clicking on them are things that should be done in the framework. Your test itself wouldn't focus on finding a specific element by its locator.
Your test would do things like specify, “I want to click a link.”
The internals of how that link gets clicked should be in your framework section.
# We're going to use a pattern called the Page Object Model design pattern.
This is one of the most popular design patterns in test automation. Now, it's not the only way to design your framework, but again, it is the most popular, so that's what we'll use in this course.
The way the Page Object Model design pattern works is that you create a class in your framework section of the project that represents a page in your application — and for every page in your application you'd create a new class in the framework section of your project.
This is our home page. Let's go ahead and create a class in the framework section of our project.
So again, the framework section is called main.
Under main we have this “java” folder.
Let's go ahead and create a New > Package under here.
We'll call this package “pages”, and this will represent our page object classes.
We want to make one to correspond to the home page of the application. Let's do a New > Java Class and we'll call this “HomePage”.
Naming Convention
It's a nice convention to have the word “Page” in your class somewhere so that you know what this represents.
package pages;

public class HomePage {

}
In your page object class, you want fields that represent the elements on a page and then methods to interact with those elements.
Let's look at our application again. There are a lot of things here.
Theoretically, we could create elements for all of these different links, as well as these titles, but that would be a bit overkill. It's recommended that you only create what you need at the time, and then you add on as you need more scenarios automated.
Let's just take a scenario and we'll build out the Page Object Model for that scenario.
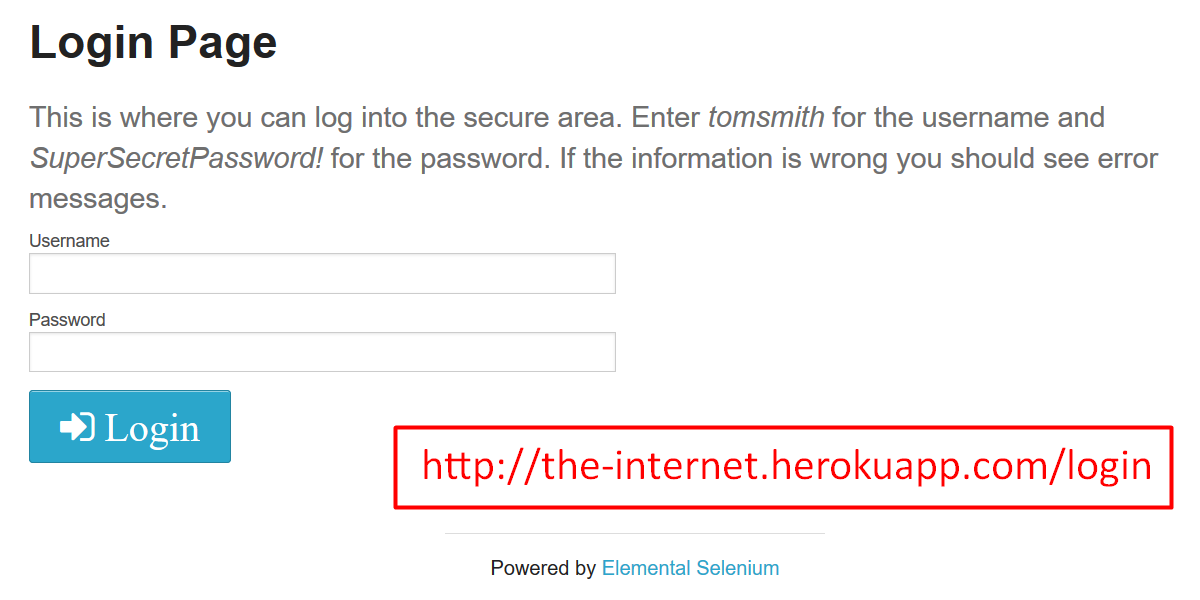
Let's say that we want to log into the application — there is a link here called “Form Authentication”.
In our scenario we're going to click this link.
Then we are going to enter data into the username and the password fields.
And then we're going to click on this login button.
This login page is actually a new page, which means it would need a new class if we were to follow the Page Object Model design pattern. Let's not worry about that one just now.
On the homepage all we need is to click this “Form Authentication” link, so let's just create the elements and the methods to do this.
As we learned in the last chapter, in order to interact with any of the elements you must know the locator. So, let's go ahead and get the locator for this link.
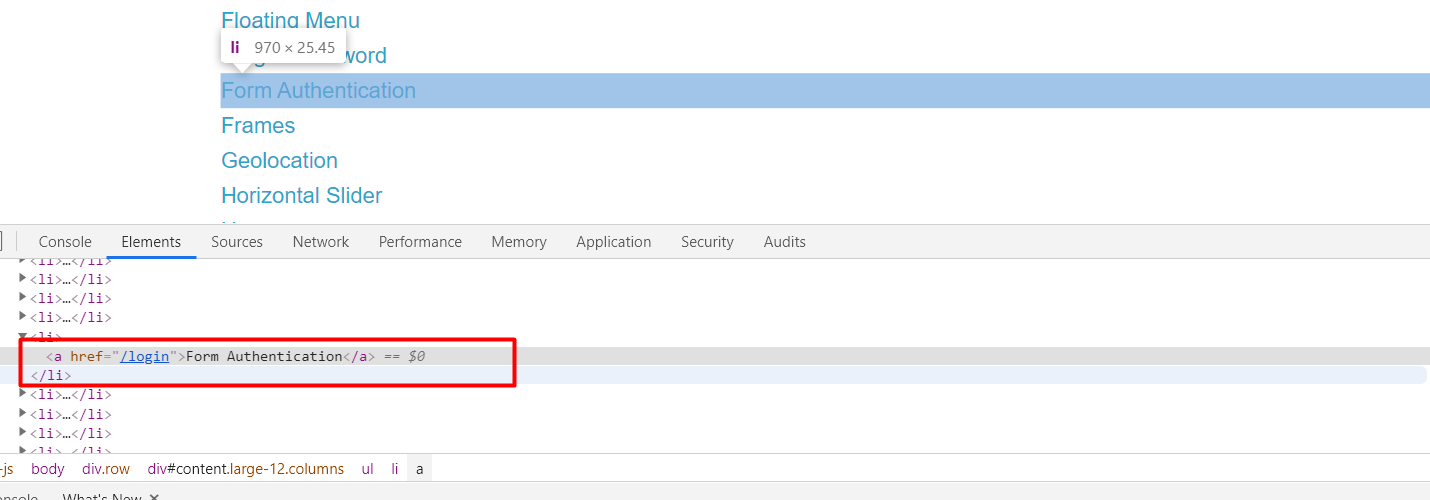
We see here that this is an <a> element, and it has this “Form Authentication” as the title of the link.
Let's go ahead and use that as our identifier.
package pages;

import org.openqa.selenium.By;

public class HomePage {

    private By formAuthenticationLink = By.linkText("Form Authentication");
}
Let’s break down this code block.
We're going to create this as a By locator. We're going to make this private because it is a field and we're practicing encapsulation. We'll use the By type, and import it.
We're going to give this a name. This represents the Form Authentication Link so let’s call it formAuthenticationLink, and we'll set this equal to By.linkText() and then pass in that text "Form Authentication”.
And so, this is a field, and this represents the link.
Now we want to create a method to allow our tests to interact with that link.
We'll create a public method, and for now let's say void, and then we give this method a name. It's nice to make sure that it's expressing what it is that you're actually doing, so we can call this clickFormAuthentication().
And what this method will do is it's going to need to do a findElement passing in this By.
But in order to do findElement we're going to need the WebDriver object, and we don't have that just yet.
So, we're going to create a constructor, which will specify that when you instantiate this class you must pass in the WebDriver, and we'll use that driver in order to interact with the webpage.
public class HomePage {

    private WebDriver driver;
    private By formAuthenticationLink = By.linkText("Form Authentication");

    public HomePage(WebDriver driver){
        this.driver = driver;
    }
}
What will be passed in here is the actual driver that has launched the browser already. And so the session will already be open and in play, so we'll just continue using that driver to interact with the website.
Now that we have our driver, we can go back to this clickFormAuthentication method, and we can say driver.findElement, and then pass it in our formAuthenticationLink. This will find the web element.
Then we need to take an action on that web element.
So, we'll call click, and this will click the link.
public void clickFormAuthentication(){
    driver.findElement(formAuthenticationLink).click();
}
Now, going back to our application, if we click this Form Authentication link we're actually taken to a new page.
NOTE
It's custom in the page object model design pattern that if your action changes the page then you should return a handle to that new page.
So, from our method of clicking on that link, we should return a “Login Page” object. Let's do that.
So instead of void, we're going to change this to LoginPage.
public LoginPage clickFormAuthentication(){
     driver.findElement(formAuthenticationLink).click();
     return new LoginPage(driver);
}
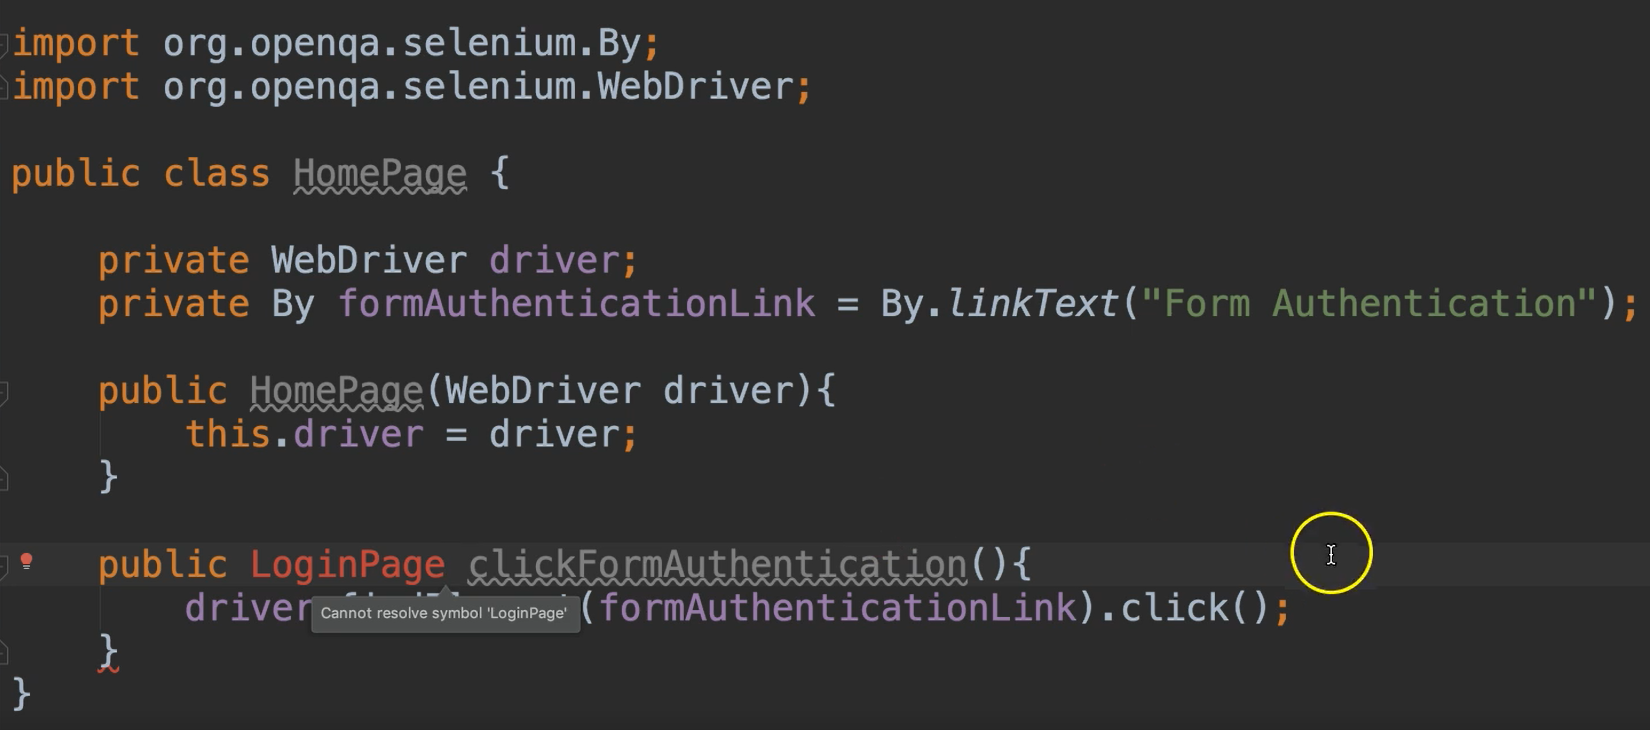
It's red now because we haven't created it and that's okay — we'll do that in a moment.
And then we'll just say return new LoginPage(driver) and this will also need a driver because all of the pages will need a driver in order to interact with the browser.
We want to pass in this same driver that we already have, that already has an open session, and we're going to send that over to the LoginPage so that it can continue to interact with the browser.
Let's create this class, LoginPage.
So where should this log in page class be created?
Well, it's going to represent a page in the application, so we know that it's going to go into the framework section, and we have this package called pages.
We're going to just create another class in here, and this one will be called “LoginPage”, and we click OK.
Now again, we already know that this will need to have a WebDriver.
private WebDriver driver;
And it'll need to have a constructor that takes that WebDriver.
public LoginPage(WebDriver driver){
    this.driver = driver;
}
Going to our application, we know we need to enter a username, so we're going to need to inspect this “Username” field and get the handle for that, we are going to need this “Password” field, and we're going to need this Login button.
That's three elements that we have to interact with for our tests, so that's three fields that we'll add in our page object model class, and then three methods to interact with them.
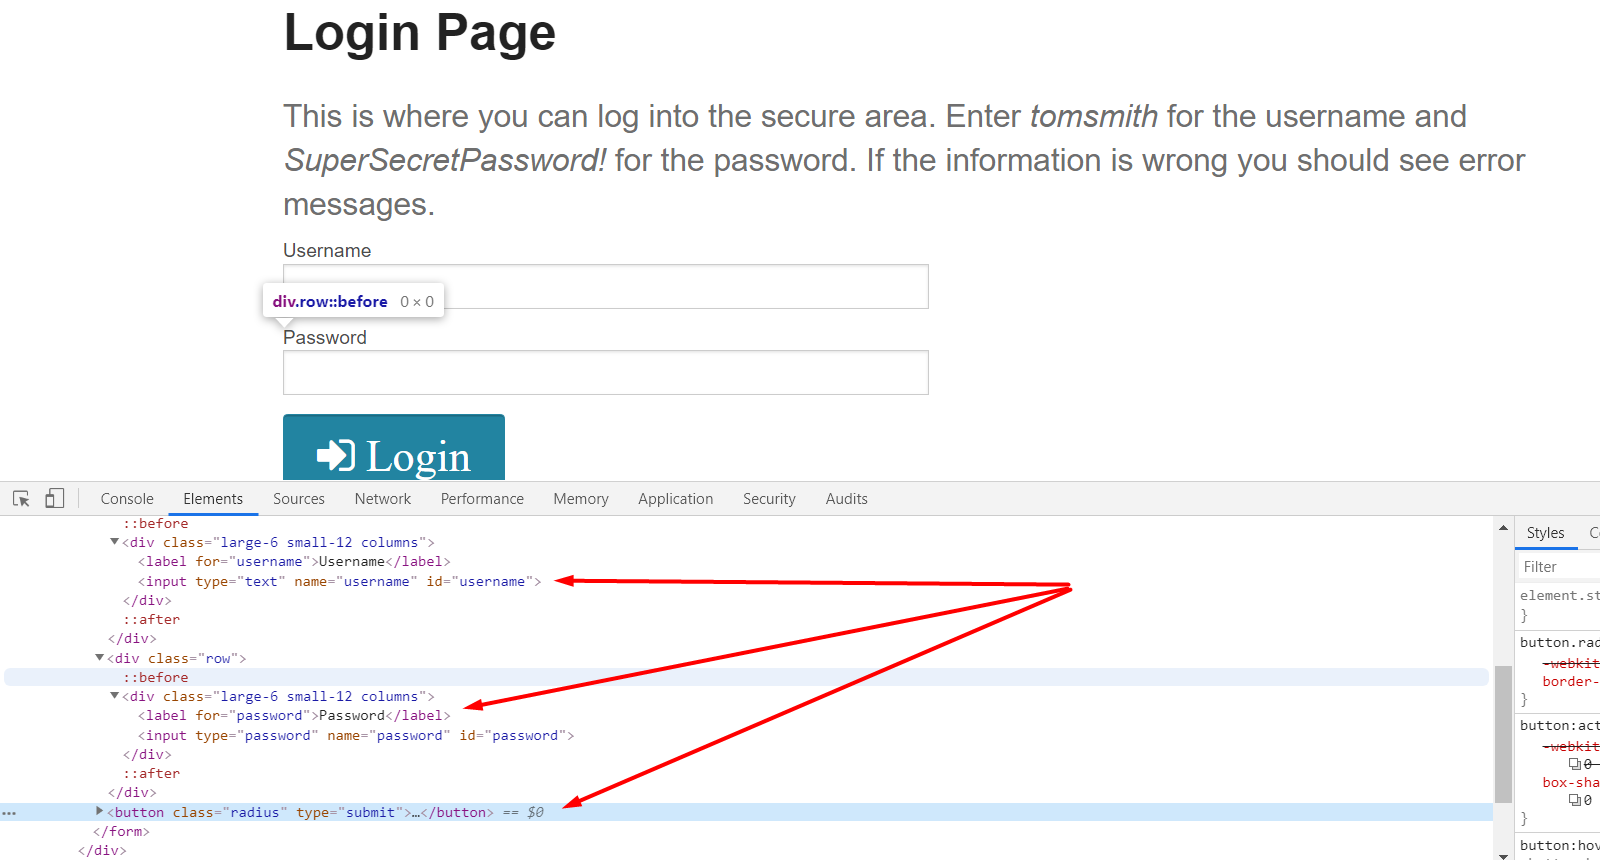
Let's go ahead and inspect this Username field.
We see here that it has an id of "username".
Let's add that to our framework.
private By usernameField = By.id("username");
Let's do the same for the password field. So, the password field has an id of "password".
We'll use that for our fields.
private By passwordField = By.id("password");
And then finally let's get the Login button.
So, this one, we have this button here, and it doesn't have an id. It has a type of submit, but we can see we can go up and maybe find a better locator here by its parent perhaps.
Yes, so this “form” does have an id, so we could say find the “login” form and then the button under there. So, we can use a CSS selector.
I'm going to do Ctrl F so that I can test out the selector.
We want to say find us an id called “login” that's followed by a button [#login button], and that will get us the login button.
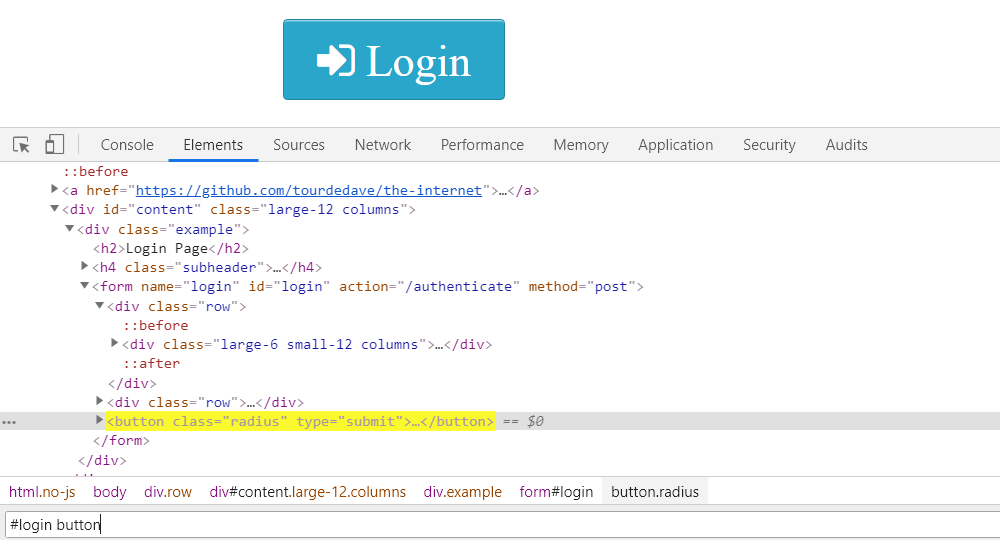
So, let's use that — and this time we're using By.cssSelector.
private By loginButton = By.cssSelector("#login button");
Now we need our methods to interact with those fields.
Let's create those.
We'll call this setUsername.
Our tests we'll need to pass in the username that it wants us to use. We'll just call that “username”.
public void setUsername(String username){

}
And we can say driver.findElement, give it the “usernameField” that we have defined there.
Now the method to type in text is sendKeys, and sendKeys basically means to type it in.
So, the keys that we want to send in is the username field that was given to us, so you pass in that and this will set that text field.
Now, in doing that there's no page change or anything like that, so it's fine to have this return type as void.
public void setUsername(String username){
    driver.findElement(usernameField).sendKeys(username);
}
Now let's do the same thing for the password field.
public void setPassword(String password){
    driver.findElement(passwordField).sendKeys(password);
}
Okay, so now we have a button.
Let's say public, and we need to specify a return type.
Well let's see what happens when we click on the button.
If I enter “tomsmith” and the “SuperSecretPassword!” and then I click the login button, we see that now we have been taken to a new page called “Secure Area”.
Since we've changed the page, it's our methods responsibility to return a handle to this new page.
So, we'll make a new class for the Secure Area page.
Our return type here will be SecureAreaPage, which we haven't created yet, and this method, we'll call it clickLoginButton. That doesn't need to accept anything.
public SecureAreaPage clickLoginButton(){

}
We say driver.findElement, we give it the “loginButton” field, and then we say .click,
Knowing after that clicks the page has been turned, so we return a new Secure Area page, and give it the driver.
public SecureAreaPage clickLoginButton(){
     driver.findElement(loginButton).click();
     return new SecureAreaPage(driver);
}
# LoginPage.java
package pages;

import org.openqa.selenium.By;
import org.openqa.selenium.WebDriver;

public class LoginPage {

    private WebDriver driver;
    private By usernameField = By.id("username");
    private By passwordField = By.id("password");
    private By loginButton = By.cssSelector("#login button");

    public LoginPage(WebDriver driver){
        this.driver = driver;
    }

    public void setUsername(String username){
        driver.findElement(usernameField).sendKeys(username);
    }

    public void setPassword(String password){
        driver.findElement(passwordField).sendKeys(password);
    }

    public SecureAreaPage clickLoginButton(){
        driver.findElement(loginButton).click();
        return new SecureAreaPage(driver);
    }
}
Let's create the class for the Secure Area page.
Again, this will be in our framework under pages, new Java class, we name the class SecureAreaPage, and of course this will need the WebDriver as well as a constructor.
package pages;

import org.openqa.selenium.WebDriver;

public class SecureAreaPage {
    private WebDriver driver;

    public SecureAreaPage(WebDriver driver){
        this.driver = driver;
    }
}
Now, let's go back to our application and see what is it that we need, if anything, off this page.
For our scenario, once we've logged in, we see this banner here that says, “You logged into a secure area!”
We can check to make sure that that's there. In order to check to make sure that's there, we'll need to add a field that represents this element and a method to read it.
Let's go ahead and inspect this.
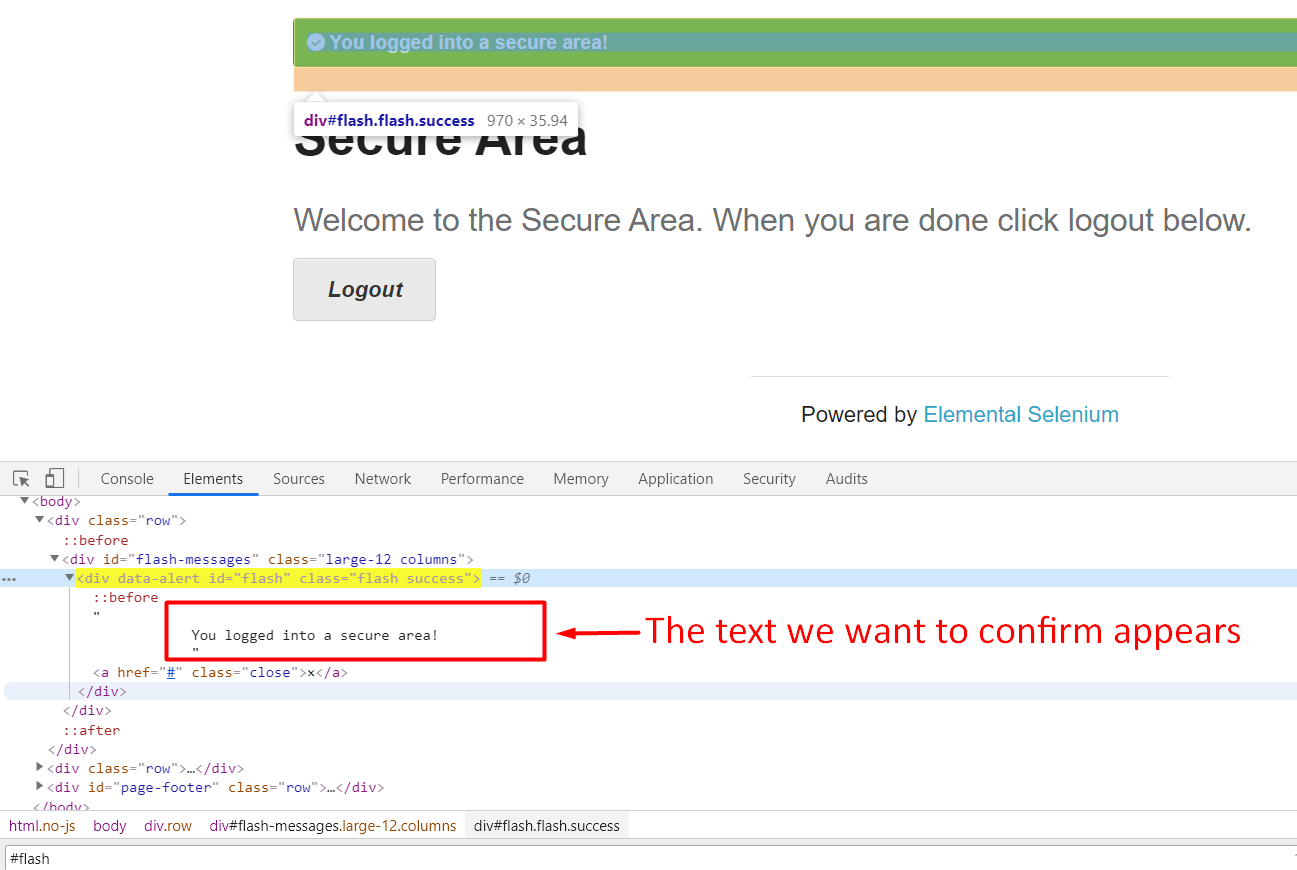
And we see here we have an id called “flash”.
Let's go ahead and test this out to make sure it's the only one. So, we say how many elements have this id?
One of one, so that's great. It's a unique identifier. We'll use this.
Let's go ahead and create this, and we'll call it statusAlert.
private By statusAlert = By.id("flash");
And we'll create a method to interact with that statusAlert.
What we want to do is read the text from that alert, so we want to return a String which will represent the text.
public String getAlertText(){

}
We will say driver.findElement, and we give it the statusAlert.
And we can use this method called getText, and this will return the text of that element.
public String getAlertText(){
     return driver.findElement(statusAlert).getText();
}
# SecureAreaPage.java
package pages;

import org.openqa.selenium.By;
import org.openqa.selenium.WebDriver;

public class SecureAreaPage {

    private WebDriver driver;
    private By statusAlert = By.id("flash");

    public SecureAreaPage(WebDriver driver){
        this.driver = driver;
    }

    public String getAlertText(){
        return driver.findElement(statusAlert).getText();
    }
}
This is all that we need in order to complete the scenario.
Let's revisit the BaseTests class we made previously.
In this class we have findElements and findElement calls.
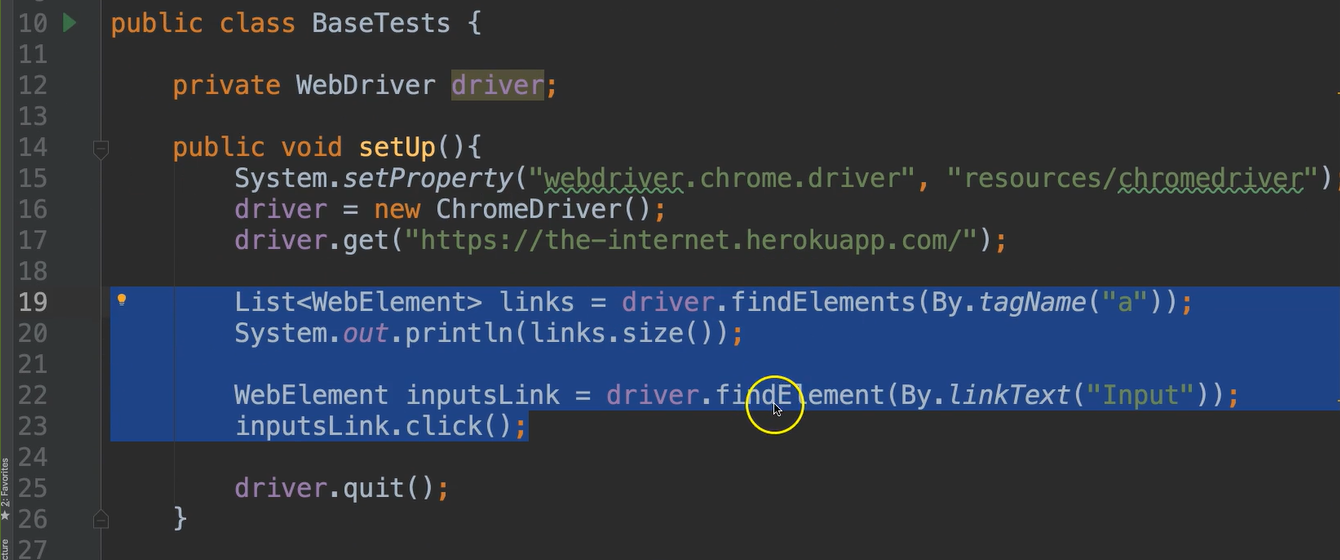
These are interactions on the website.
Now if we look in our project structure, we see that “BaseTests” is not in the framework, it's in the test section.
Therefore, these types of interactions are not encouraged at this level. These are framework level things.
Let's go ahead and remove those. We don't need them anymore anyway. So, let's remove this code.
After we launch the application, we’re going to provide a handle to that HomePage, because that's where we are now.
Let's make another variable here, and we'll make this one protected, and I'll explain this a bit later.
protected HomePage homePage;
And then after we launched the application we can go ahead and instantiate HomePage and pass the driver to it. We’ll do this inside of the setUp method.
homePage = new HomePage(driver);
What we've done here is provided a handle in our test layer to our application, and we'll talk more about that in the next section.
# BaseTests.java
package base;

import org.openqa.selenium.WebDriver;
import org.openqa.selenium.chrome.ChromeDriver;
import pages.HomePage;

public class BaseTests {

    private WebDriver driver;
    protected HomePage homePage;

    public void setUp(){
        System.setProperty("webdriver.chrome.driver", "resources/chromedriver");

        driver = new ChromeDriver();
        driver.get("https://the-internet.herokuapp.com/");

        homePage = new HomePage(driver);
        driver.quit();
    }

    public static void main(String args[]){
        BaseTests test = new BaseTests();
        test.setUp();
    }
}
Resources
Quiz
The quiz for this chapter can be found in Chapter 4.3
