

Transcripted Summary
In the last session, we created all the framework that we need to do a Login test.
Just to remind you of the login test, let me show you the flow.
We want to launch this website http://the-internet.herokuapp.com/, and then we are going to click on the Form Authentication link
Then we are going to enter “tomsmith” and “SuperSecretPassword!” and then we're going to click the Login button
And finally, we're going to make sure that this alert [“You logged into a secure area!”] appears.
Let's do that now.
We have all of our framework pieces in order to do this, now, all we need to do is write the test.
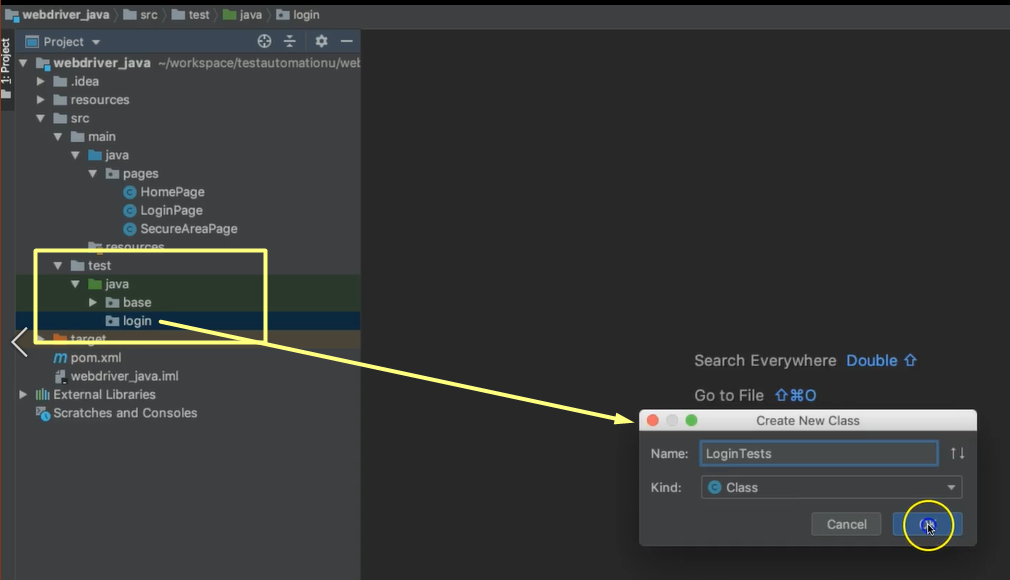
Again, all of your test cases should appear in this test folder.
We have “java” and we have “base”, but we will make another package under here that we'll call “login”.
This package is going to represent the type of test that we're doing. And because this is a login test, it makes sense to have a package called “login”.
In the “login” package, I'm going to make a new class called “LoginTests”.
Notice that our class name ends with the word test. This is not a requirement, but it's a pattern that I like to use so that at a glance I know that this is a test class.
I like to put all of my tests that have to do with the login functionality inside of this one class so that it's easy to find. This is not a rule, you can break this up, or design it any way that you choose. But that's what we'll do in this course as a pattern.
Let's go ahead and write a method.
We’ll make this public and the return type will be void.
I like to start my methods with “test”. This is the verb and then I finish it with whatever it is that I'm testing.
So, testSuccessfulLogin — this is a nice clean name to let us know what it is that we're testing.
public class LoginTests extends BaseTests {

    public void testSuccessfulLogin(){

    }
}
Now all of our test classes are going to inherit from the BaseTests class.
Let's look inside of here to see why.
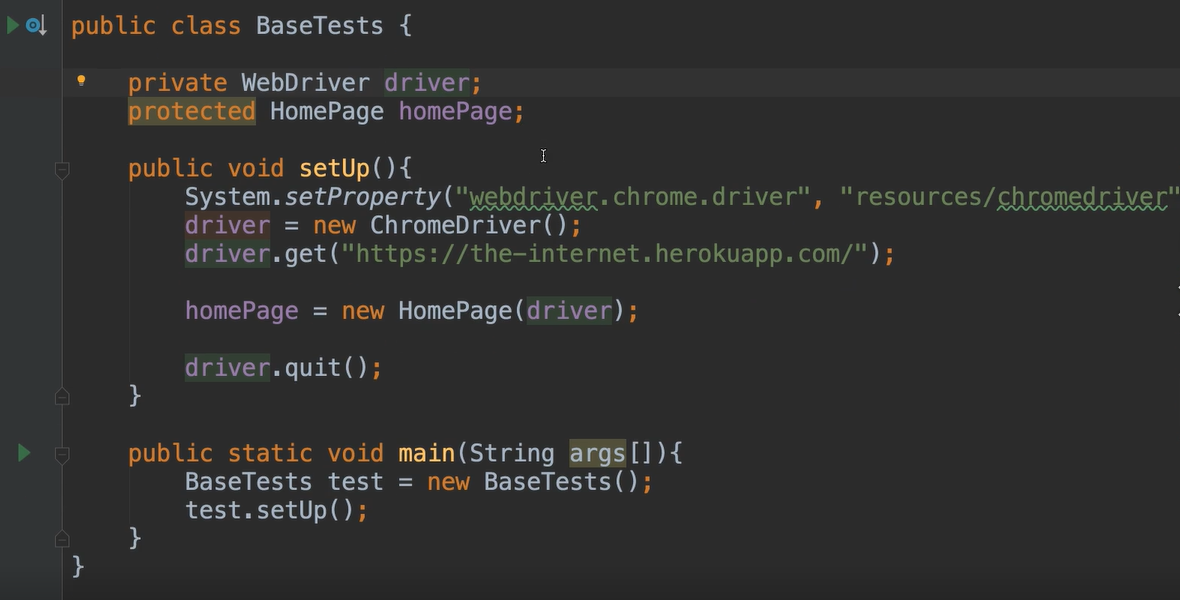
So, in the BaseTests class, we see that this is where we create the driver.
This is where we actually set up our browser and we launch the application. Also, we have this homePage handle here.
So, this will do all of our setup. We don't want to repeat this same setup in every test class that we have.
That's why we put it at this level, and we'll allow it to be a parent. That way we won't have to repeat it in our test class, but we'll still have access to it.
We already have the homePage and that's where the link is that we need to click.
We can use this homePage object that we've inherited from BaseTests and we see the method there clickFormAuthentication.

We also see that this method returns a “LoginPage”.
When we click on this, we know that we'll be moved to the Login Page and we have access to it.
Now you see why it's important to return those handles.
Let's go ahead and call that method and we'll assign this to a new object for the login page.
public void testSuccessfulLogin(){
    LoginPage loginPage = homePage.clickFormAuthentication();
}
Now, we're moved to the login page — we want to enter the username, the password, and also click the button.
Let's do that.
public void testSuccessfulLogin(){
        LoginPage loginPage = homePage.clickFormAuthentication();
        loginPage.setUsername("tomsmith");
        loginPage.setPassword("SuperSecretPassword!");
        SecureAreaPage secureAreaPage = loginPage.clickLoginButton();
    }
}
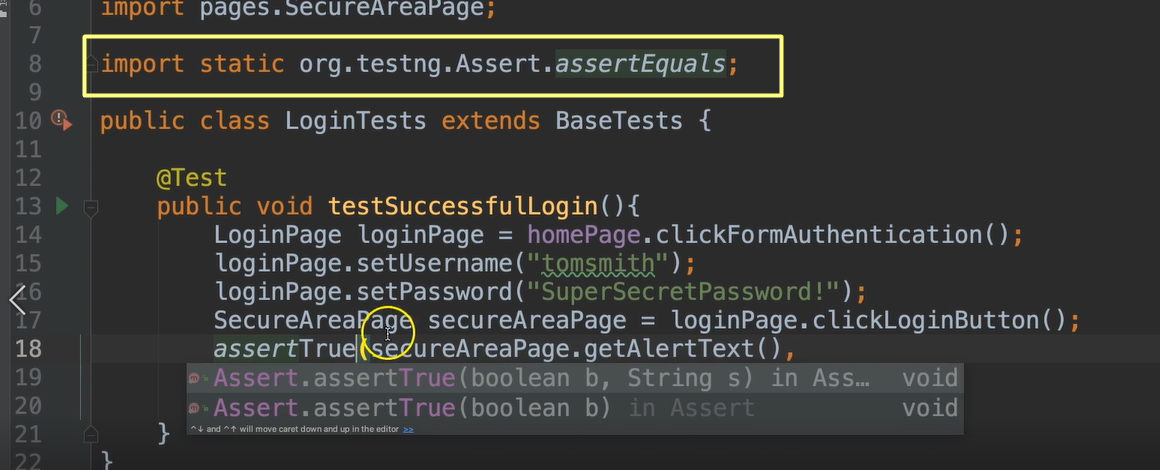
This will log us in, and this clickLoginButton returns a SecureAreaPage
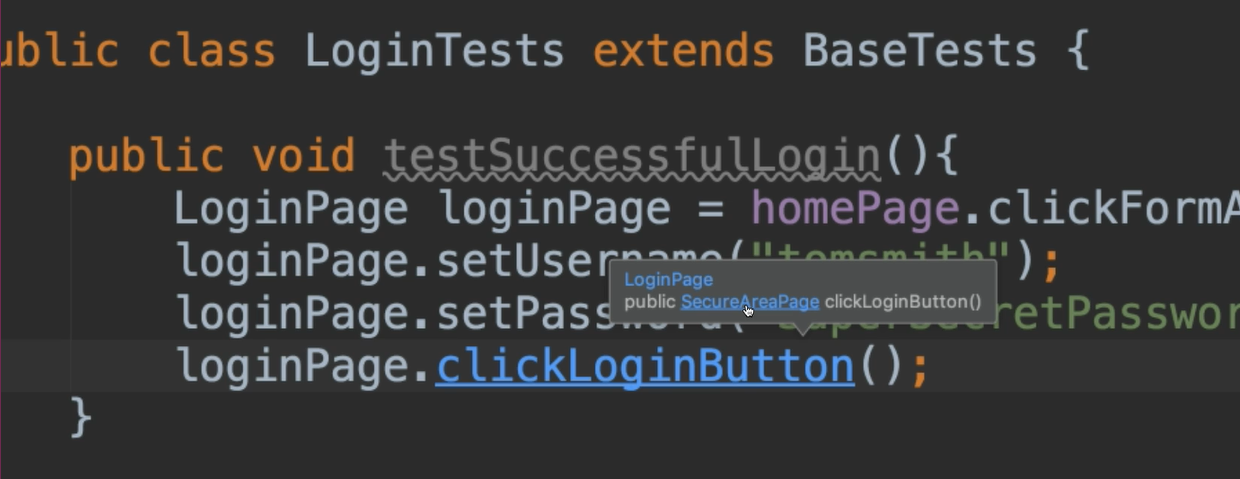
So, it has moved us, and we have a handle.
Let's do make a variable for it: SecureAreaPage secureAreaPage. Now we can do any actions we want there.
We'll say — secureAreaPage.getAlertText(). While I can get this alert text, I'm not doing anything with it.
I need to be able to verify that it is what I expect it to be.
Selenium WebDriver is not a test tool
Selenium WebDriver is not a verification tool. It is only used to automate the actions on the browser. So, we need to add a verification/assertion tool to our framework to be able to actually run these as tests.
Let's go back to our pom.xml file.
We have this dependency for Selenium, but we need to add the assertion library.
In this course, let's go ahead and use TestNG, so, I'm going to go to the Maven Repository.
Go ahead and copy this and we're going to add this dependency to our pom file.
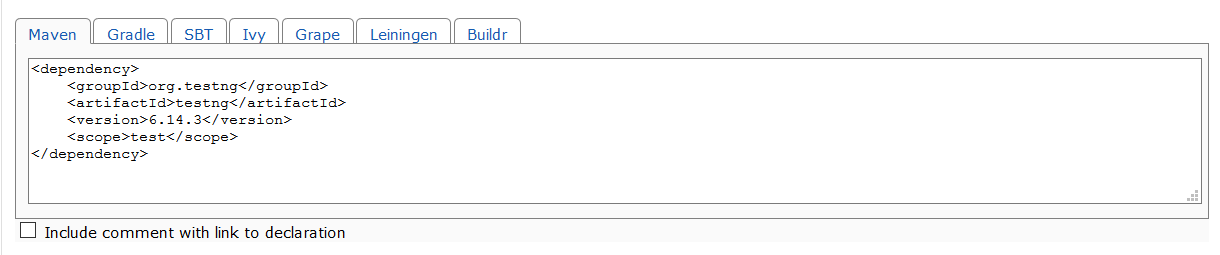
We’ll paste this inside of the <dependencies>.
<dependency>
    <groupId>org.testng</groupId>
    <artifactId>testng</artifactId>
    <version>6.14.3</version>
    <scope>test</scope>
</dependency>
Go to the Maven view in IntelliJ to make sure it's there. I don't see it there. I only see this one, the Selenium Chrome.
So, I'm going to refresh that and now we see that it's there.
And now, we can add some tests to our project.
We can say assertEquals because we're going to give it this text that we got from the page and want to make sure it’s equal to what we expect.
This is our actual result and then we're going to paste in our expected result.
And then there's one more argument that's optional. You can put a message that will appear if this fails.
assertEquals(secureAreaPage.getAlertText(), "You logged into a secure area! x", "Alert text is incorrect");
Now I see that this is red because we need to import it.
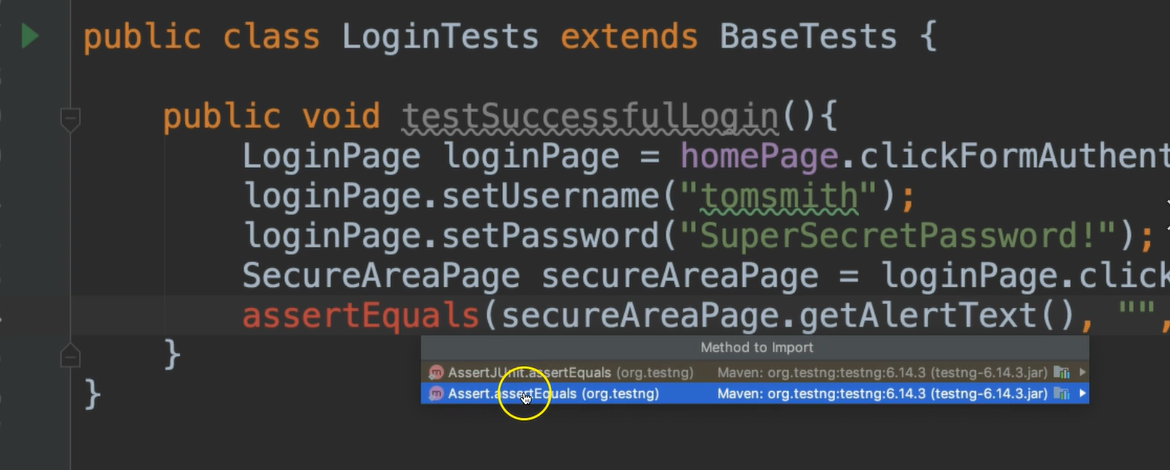
When we choose to import it, there are a couple of options here.
- We don't want to use the “AssertJUnit” one
- We want to just use “Assert.assertEquals” one
Let's go ahead and import that.
Here’s our test.
public void testSuccessfulLogin(){
    LoginPage loginPage = homePage.clickFormAuthentication();
    loginPage.setUsername("tomsmith");
    loginPage.setPassword("SuperSecretPassword!");
    SecureAreaPage secureAreaPage = loginPage.clickLoginButton();
    assertEquals(secureAreaPage.getAlertText(), "You logged into a secure area! x", "Alert text is incorrect");
}
In order to run this as a test, we actually need to use an annotation from TestNG.
TestNG Tutorial
We do have a full course on Test Automation U for TestNG taught by Rex Jones. So, if you need to learn about TestNG, you can do so there.
Okay, so the annotation that we use is @Test and this let's TestNG know that this will be a test method.
@Test
public void testSuccessfulLogin(){
There are some things we can do in our BaseTests as well, now that we have an assertion library.
Let's go to BaseTests.
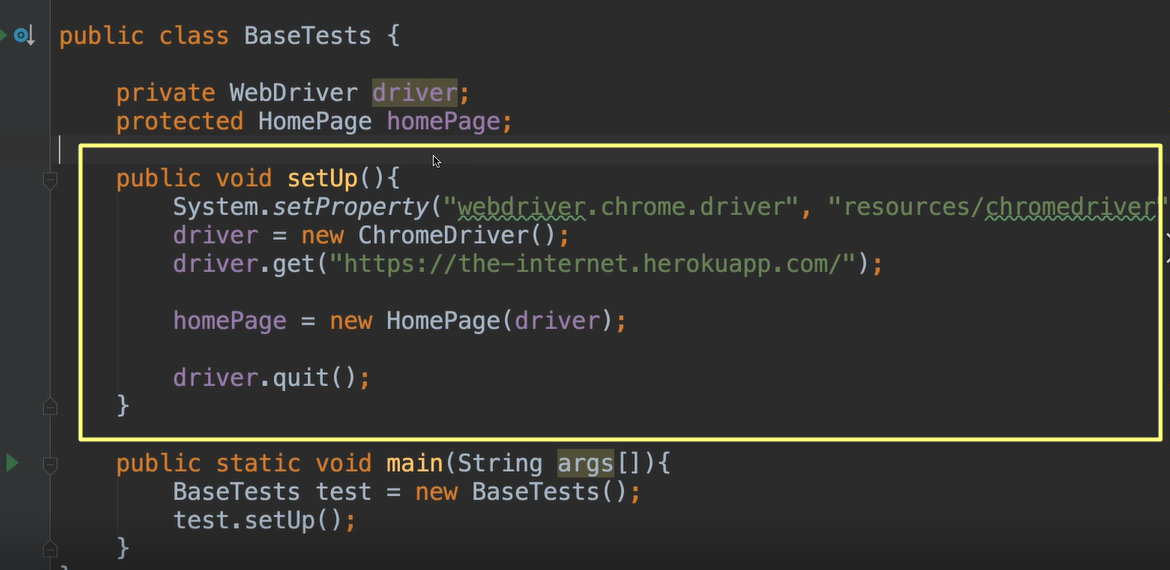
Inside of here, we have this setUp method.
We want this to run before any of our test classes run because we have to make sure that the browser is loaded and it's launched and the application is ready and that we have a page class in order to do some things within our tests.
We can add an annotation right above this setup.
And the annotation we are going use is @BeforeClass.
This will run before each of the test classes.
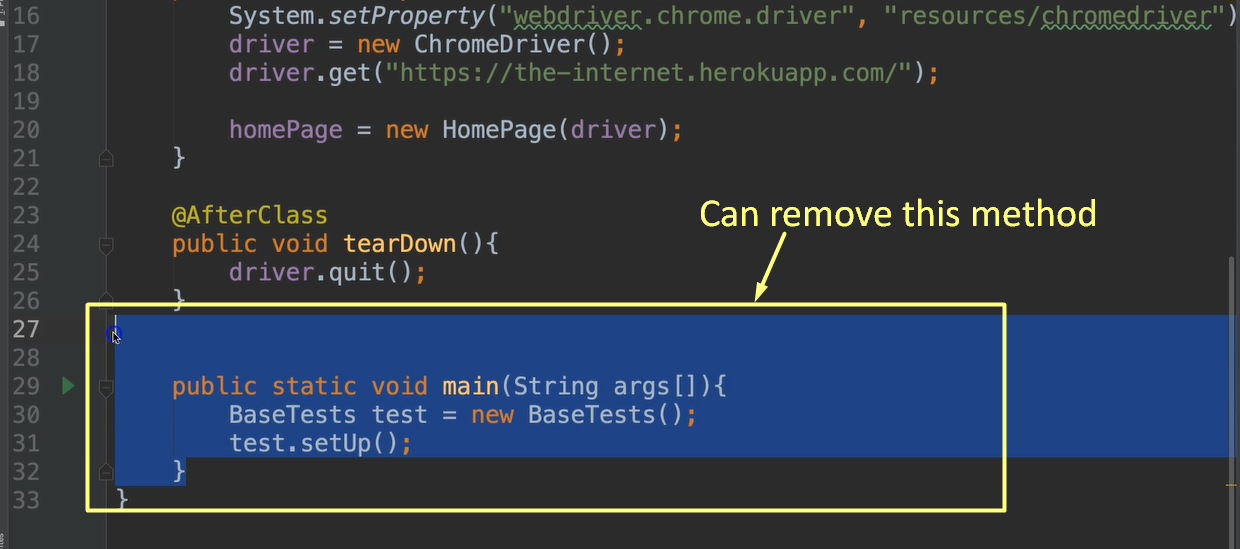
Let's make another method because we need to get this quit() out of here, otherwise it will never run our tests.
We'll launch it and then right away we would quit it.
We're going to make another method and we're going to annotate this with @AfterClass. We'll call this one whatever you want, but let's say maybe “teardown” and we'll move this quit() to there.
@AfterClass
public void tearDown(){
    driver.quit();
}
The way that this will work is:
- It will first call the
setupbecause of the@BeforeClassannotation - Then it will call any of the methods that are annotated with
@Test - Then after those tests have run, it will call this
@AfterClassannotated methodtearDownto quit
We can get rid of this main method as well. We no longer need it because now TestNG will come in and find what it is that it wants to run.
Let's just quickly go back over what we have.
# BaseTests
package base;

import org.openqa.selenium.WebDriver;
import org.openqa.selenium.chrome.ChromeDriver;
import org.testng.annotations.AfterClass;
import org.testng.annotations.BeforeClass;
import pages.HomePage;

public class BaseTests {

    private WebDriver driver;
    protected HomePage homePage;

    @BeforeClass
    public void setUp(){
        System.setProperty("webdriver.chrome.driver", "resources/chromedriver");
        driver = new ChromeDriver();

        driver.get("https://the-internet.herokuapp.com/");
        homePage = new HomePage(driver);
    }

    @AfterClass
    public void tearDown(){
        driver.quit();
    }
}
We have our driver, and we have a page object.
We have a setup method that will run before any of the test classes. And we are launching the application.
Once the application is launched, we know that we're on the HomePage so we create a new instance of that. This is why this is marked as protected, so that test classes that inherit from this will have access to this homePage.
And then finally in this base class we have an @AfterClass method to quit once the tests are done.
Now we go to the “LoginTests”.
# LoginTests
package login;

import base.BaseTests;
import org.testng.Assert;
import org.testng.annotations.Test;
import pages.LoginPage;
import pages.SecureAreaPage;

public class LoginTests extends BaseTests {

    @Test
    public void testSuccessfulLogin(){
        LoginPage loginPage = homePage.clickFormAuthentication();
        loginPage.setUsername("tomsmith");
        loginPage.setPassword("SuperSecretPassword!");
        SecureAreaPage secureAreaPage = loginPage.clickLoginButton();
        assertEquals(secureAreaPage.getAlertText(), "You logged into a secure area! x", "Alert text is incorrect");
    }
}
LoginTests extends BaseTests, so it's inheriting from here.
We have a test method that we have annotated with the word @Test.
Now, we have this homePage object that we've inherited from BaseTests and we use it to click the Form Authentication link.
Then we entered the username. We entered the password. We click the login button, which takes us to the Secure Area page.
Then we asked to get the alert text and we compare it with what we think it is. The test will pass or fail based on if this is equal.
Let's run this!
We're just going to right click and do a Run LoginTests.
So, we have a failure. Let's see what we have here.
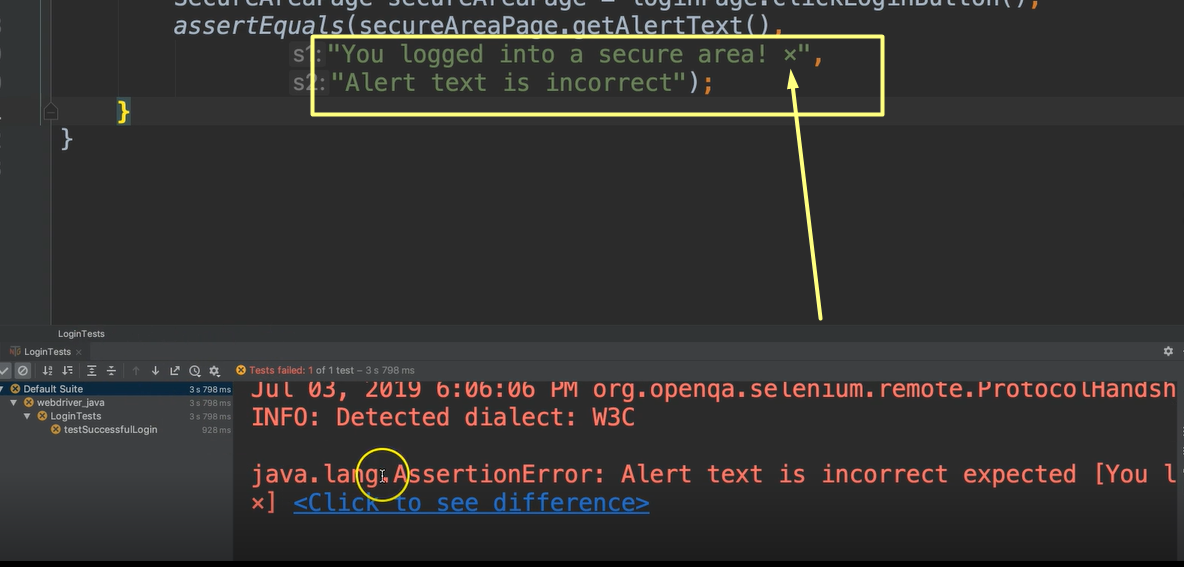
Okay, so it says we have an assertion error, which is from our assertion library.
It says the alert text is incorrect.
- It expected this: “"You logged into a secure area! x"
- But it found: "You logged into a secure area! x"
It says Click to see the difference.
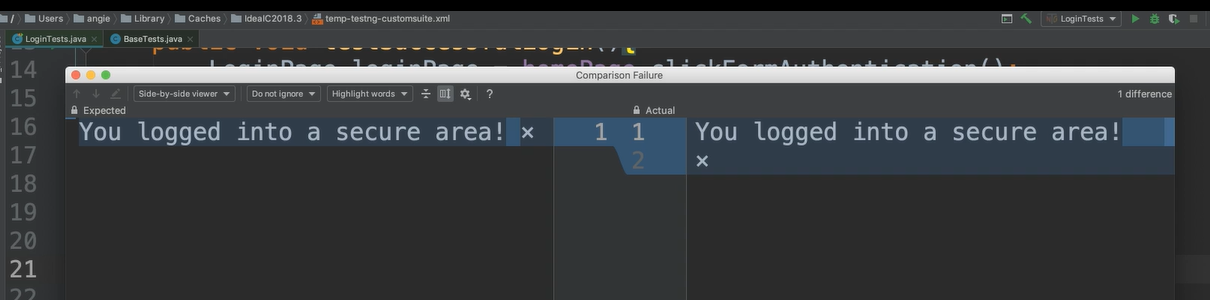
And we see here that some spacing issues with this “x”.
Okay, so let's look at our message again on our website.
Even though we copied this, it also copied this “x” thing, it appears.
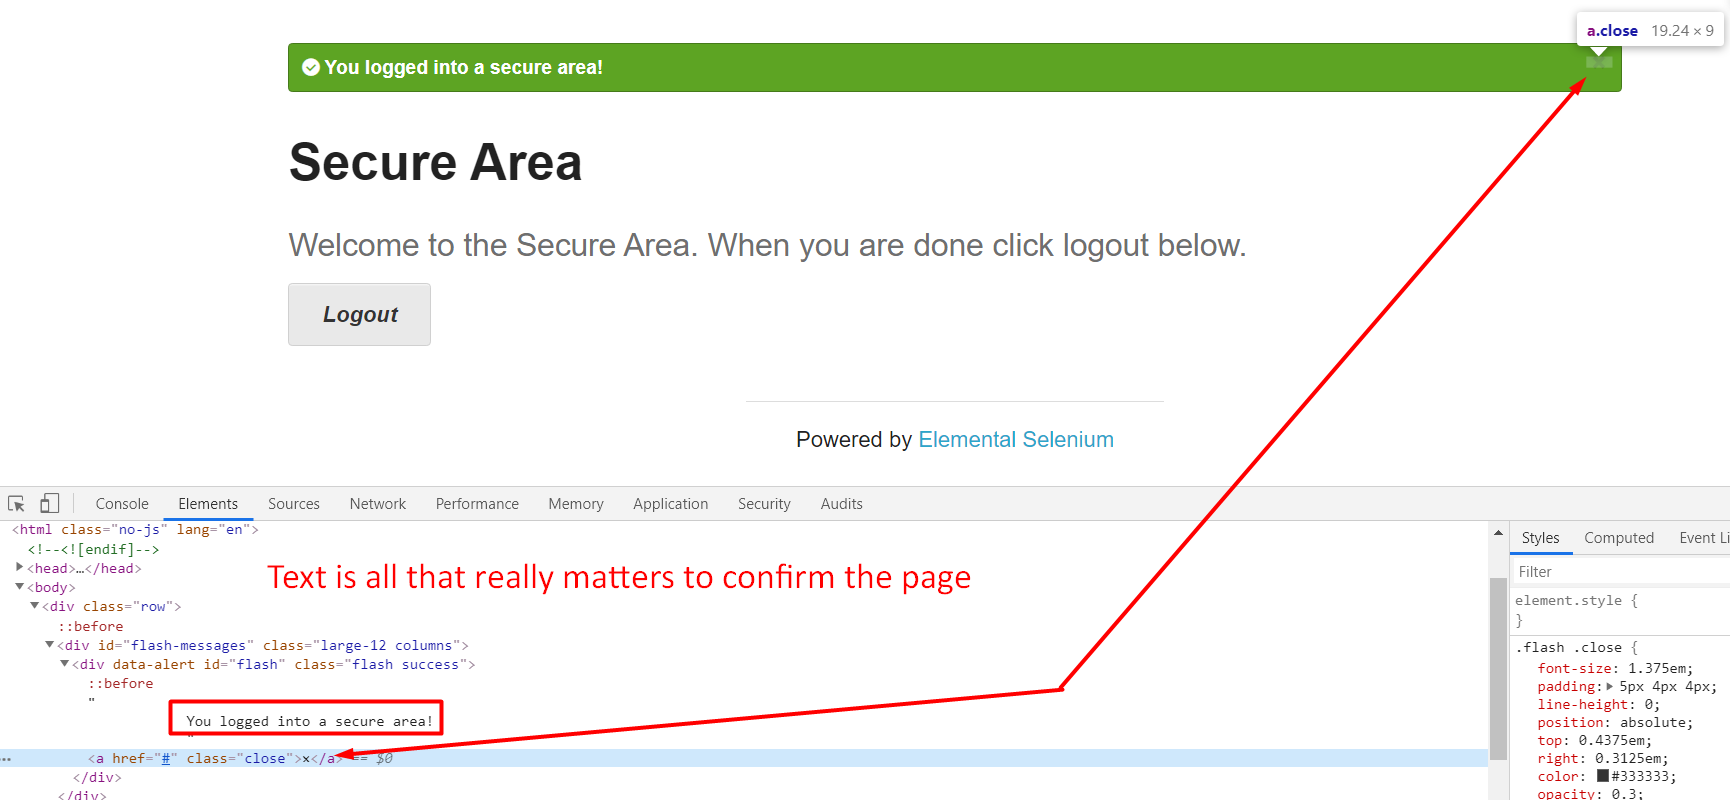
And if we inspect this a little closer, we can look at this element and we see that there's this, which is the text of this.
But there's also this <a> element, which is a “close”. So, there's some spacing issues here.
We could just take the “actual” from our results and copy that into the “expected”, but I don't want to deal with these spacing issues, or that x button.
What I really want to verify is this “You logged into a secure area!”. So that's the part that I care about.
We're going to actually change our assertion.
You don't have to just use assertEquals. There's so many other ones you can use as well.
We could do something like assertTrue.
And I'm going to change this import from assertEquals to just be “star” [“*”] which will import all of the assert methods
import static org.testng.Assert.*;
We're going to say:
assertTrue(secureAreaPage.getAlertText()
        .contains("You logged into a secure area!"),
        "Alert text is incorrect");
All right, so let's run our test again.
Great. And now we see that it's green and it passed.
Again, remember this red text doesn't mean anything. This is just the default output.
We've seen the methods available on the web element class such as click — we've used that.
We've also used the sendKeys, which will send the text.
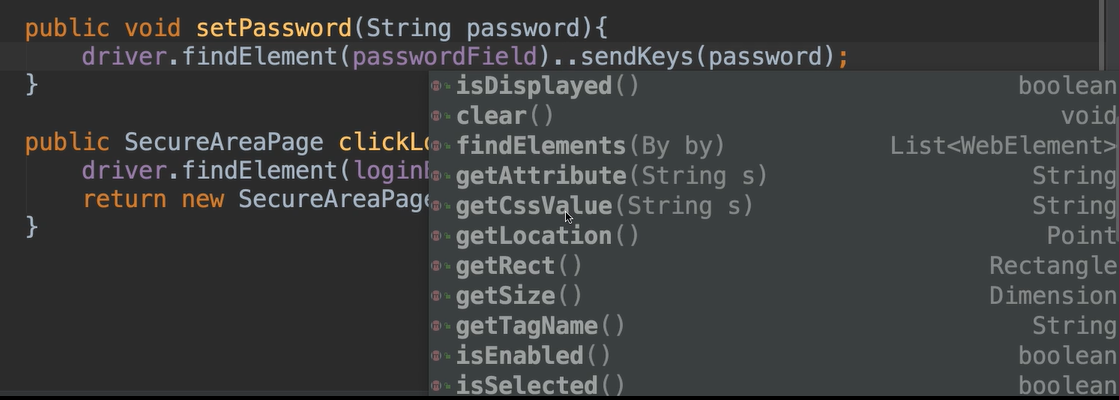
And other methods that are available on web element are things like:
isDisplayed, which will tell us if that element is actually displayed- There's
clear - There's some getter methods as well to allow us to get attributes, CSS values, the location
- We can
getRect, which is a rectangle - We can
getSize, which gives us dimensions - The tag name
getTagName - We can see if it's enabled with
isEnabled - We can see if it's selected with
isSelected– so this works with radio buttons and checkboxes - And then there's also a
submit
And then of course, we use this getText one which allowed us to read. So not necessarily taking an action upon, but still interacting with the browser to read from it.
Let's take a look at a form.
This form has lots of different types of web elements.
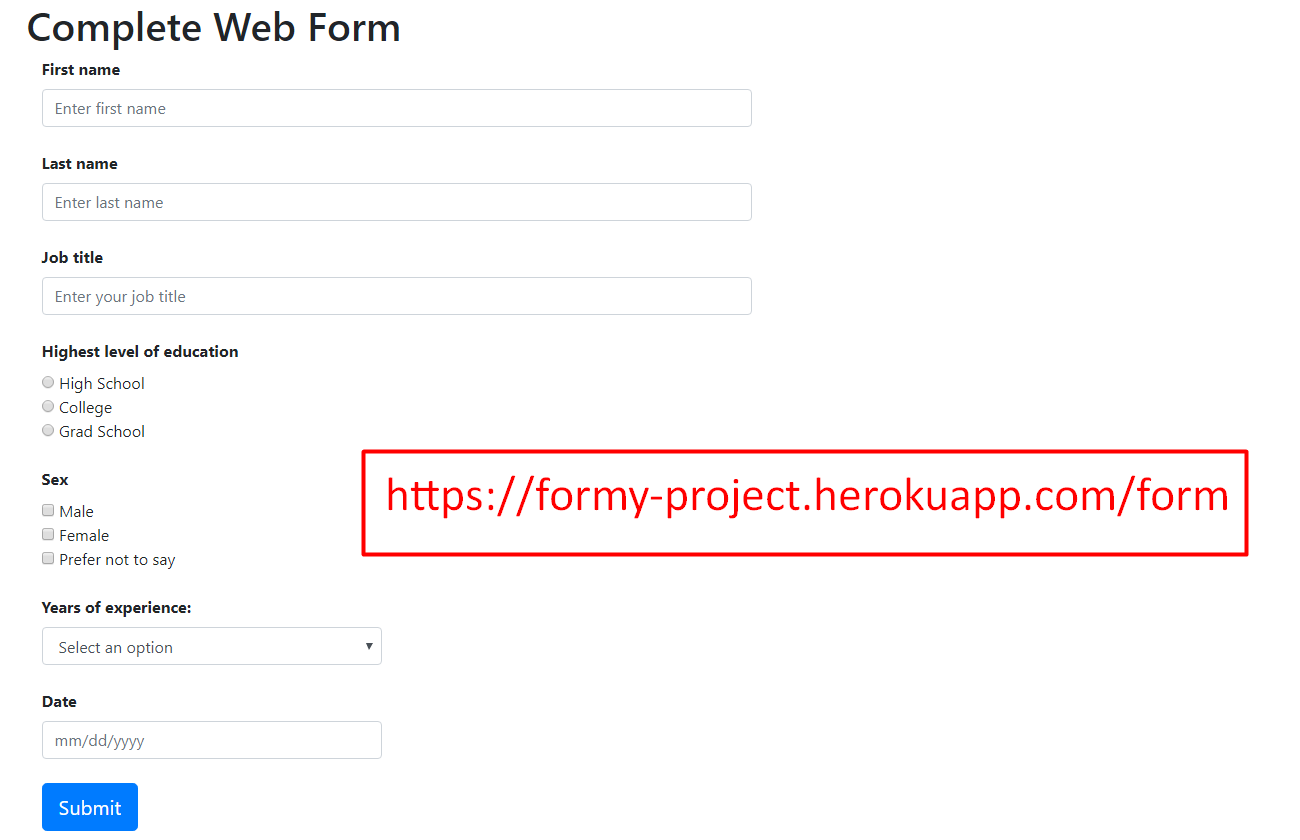
So, if we wanted to enter a text into a field, we use
sendKeys.If we wanted to read texts from a field, we use
getText.For a radio button, if you want to select one of these, you just find the radio button and you do a
.clickon it.For checkboxes, same thing. If you want to select it, you just
click.For a date field, you could just enter the text by doing the
sendKeys. Or you couldclickthat field and thenclickon any of these calendar elements that you wanted to.For a button, of course, you
click.Again, to see if any of these are selected, you would just call
isSelectedand then you can doisDisplayed,isEnabledon buttons and all those types of actions.
Resources
Quiz
The quiz for this chapter can be found in Chapter 4.3
