

Transcripted Summary
In this chapter, we'll use selenium WebDriver to launch an application.
All of the coding for this course will be done in Java. If you need to brush up on your Java, I do have a free course on Test Automation U called Java Programming.
Okay, so we're going to create a new class.
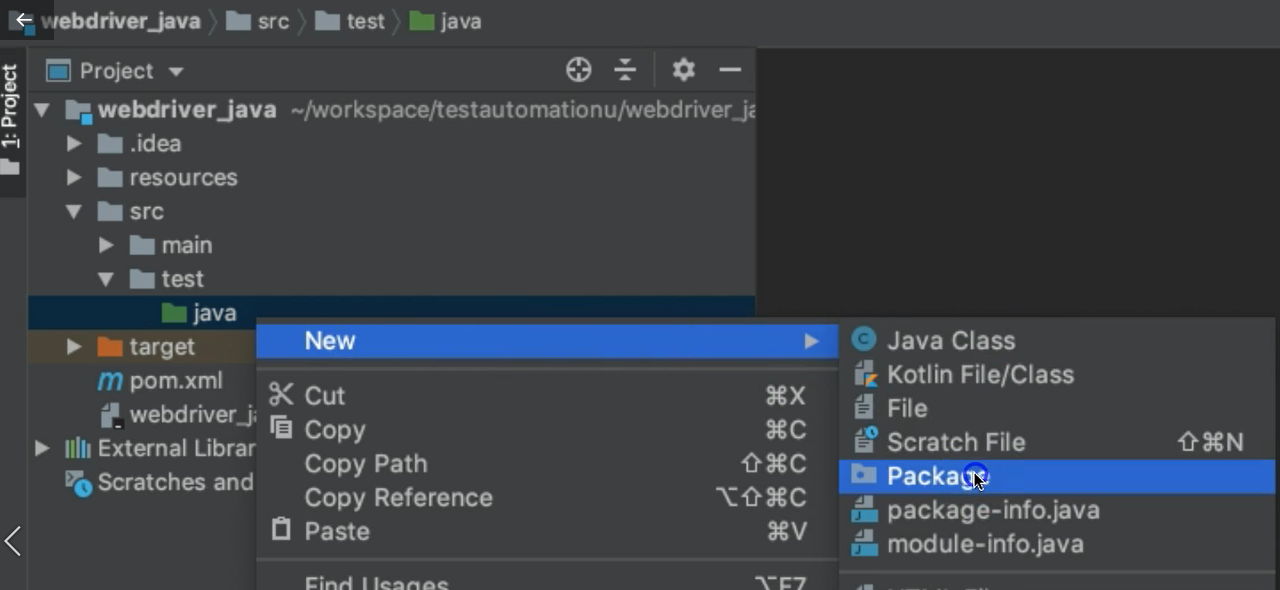
Under this source directory, we have a “main” directory and a “test” directory. We're going to create one under the test and we have this Java folder. We'll just right click on the Java folder, select “new" and select “Package”.
We're going to create a package here called “base”. Inside of the base package we'll create a new Java class, and this one we'll call "BaseTests".
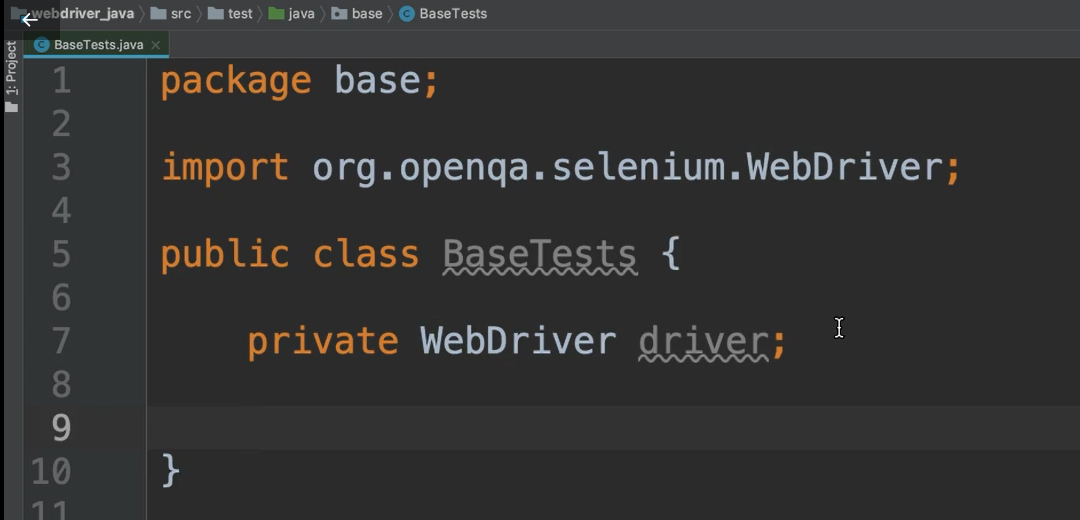
Now inside of here, the very first thing I want to do is create a WebDriver object.
Let's go ahead and say private WebDriver driver. We'll go ahead and import the WebDriver.
Next I want to create a method — we'll just call this setUp.
Inside of here, Selenium WebDriver is going to need to know where is that executable file that you have, because I need it in order to run. We do this using a System.setProperty() and we give this the name of the property. And this property that Selenium will look for is called webdriver.chrome.driver, and it must be specified exactly like this because this is what Selenium will look for. This is like a key.
Next we do a comma, and the next argument here needs to be the location of that chromedriver file.
Remember we placed it in this “resources” directory so we can simply say, look in the “resources” directory and the file is called chromedriver.
public void setUp(){
    System.setProperty("webdriver.chrome.driver", "resources/chromedriver");
}
Windows Users
If you are on Windows, you need to also add an “.exe” here [ chromedriver.exe ], but only if you're on Windows. If not, your file is just called chromedriver
After we've set up the property, now let's go ahead and instantiate this WebDriver object.
You can specify what type of driver you like to use. Now we have downloaded the chromedriver, so that's the one we want to use, but there are other options as well for the different browsers.
The WebDriver that we're using is an interface, so we're using it as a type, but we must instantiate it using one of the implementing classes. There are multiple ones:
- ChromeDriver, which we'll use
- EdgeDriver for the Edge browser
- FirefoxDriver
- InternetExplorerDriver
- OperaDriver
- SafariDriver
- RemoteWebDriver
Let's go ahead and instantiate our driver as a ChromeDriver, so, we say:
driver = new ChromeDriver();
Any interactions that we want to automate or read from the browser is done using this driver.
This is our secret weapon for doing test automation.
We can say — driver. — and we see that there are lots of different methods here and all of them have to do with interacting with the browser.
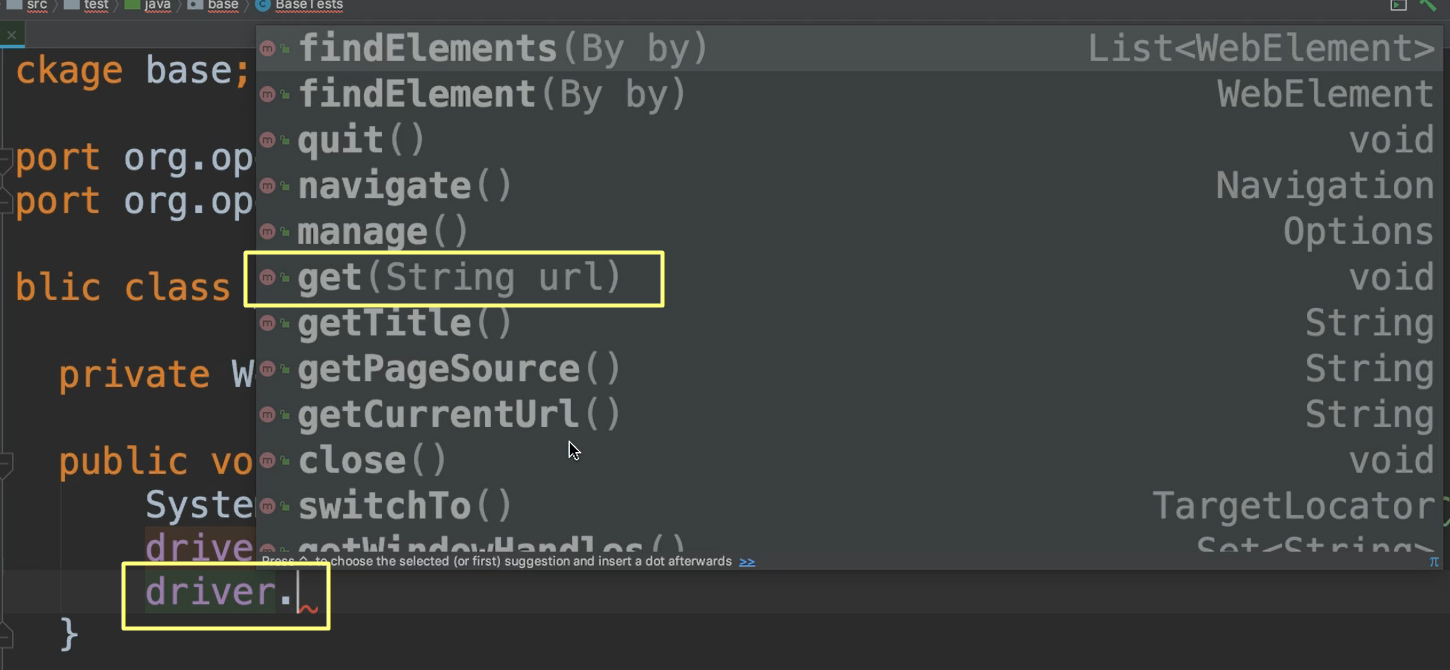
We'll talk about most of these for right now what we want to do is to launch the browser.
We use this get method and we pass in a String, which represents the URL. So, we call driver.get() there, and then we'll give it a URL.
Let's look at the application that we want to launch.
This is an open source project that's used for automation. It's called “the-internet”.
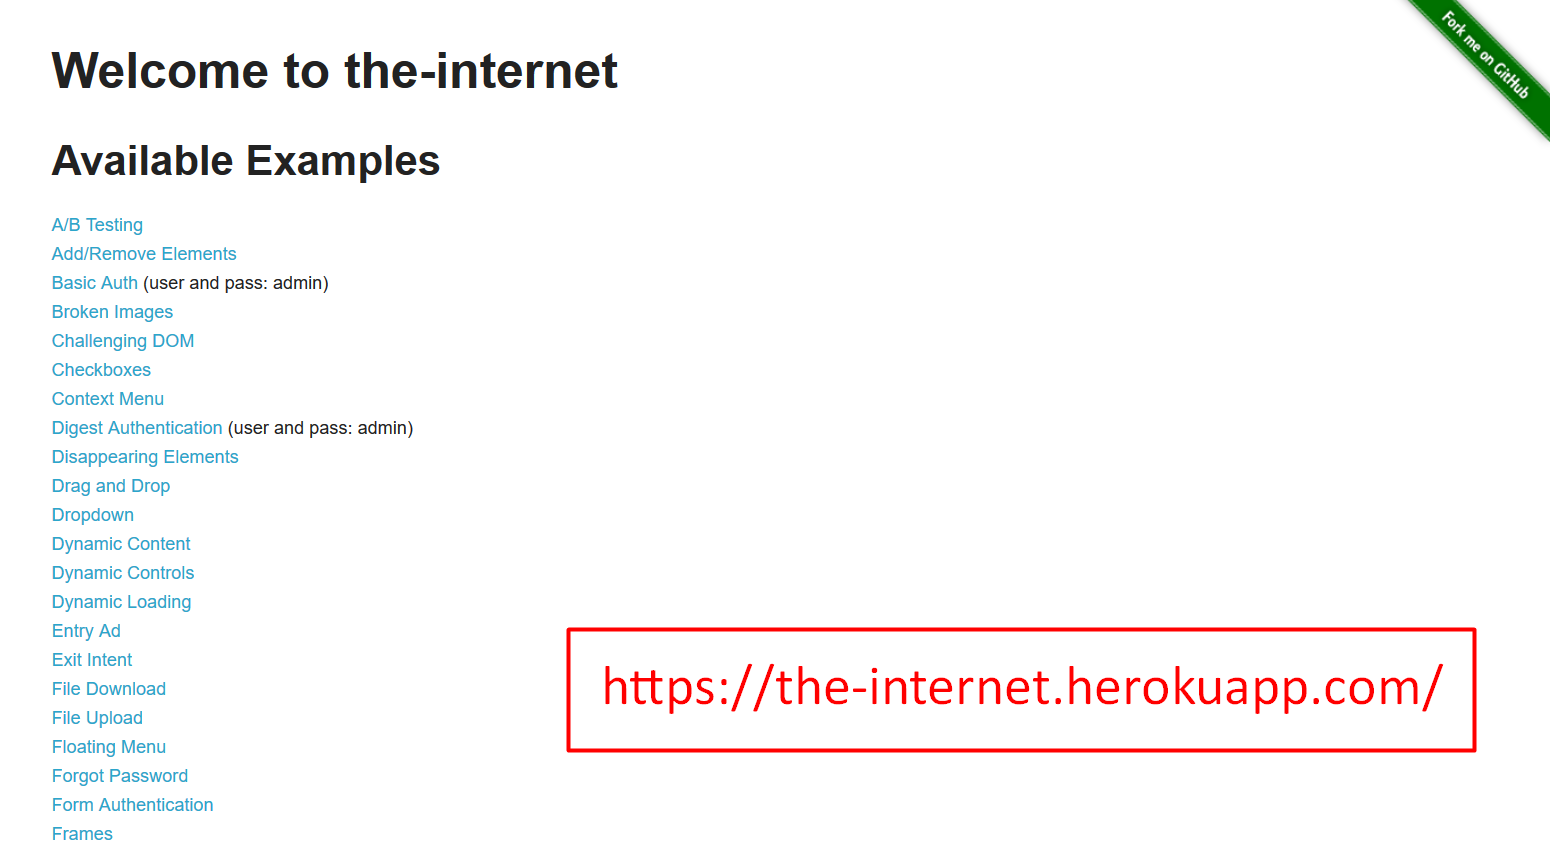
The application “the-internet” has all types of examples of different web elements and things that you usually see on websites. It gives us a lot of good practice for test automation. This is the site that we want to use in our course.
So, we are going to copy this URL and paste it inside of our code, and that's enough to launch the browser.
driver.get("https://the-internet.herokuapp.com/");
This is all that we need in order to launch the browser.
Now just to make sure that the browser does launch and that it actually loads to this application, let's write one more command to print something out.
System.out.println(driver.getTitle());
This will get the title of the application.
Let's go ahead and run this.
In order to run this, we'll need a main method just because we haven't set up our project to do any test runs just yet.
For now, we're going to write a temporary main method, but we'll get rid of this later on.
Inside of this main method, let's just go ahead and create an instance of this class and call the setUp method.
public static void main(String args[]){
     BaseTests test = new BaseTests();
     test.setUp();
}
We'll call this method and it'll run these things for us.
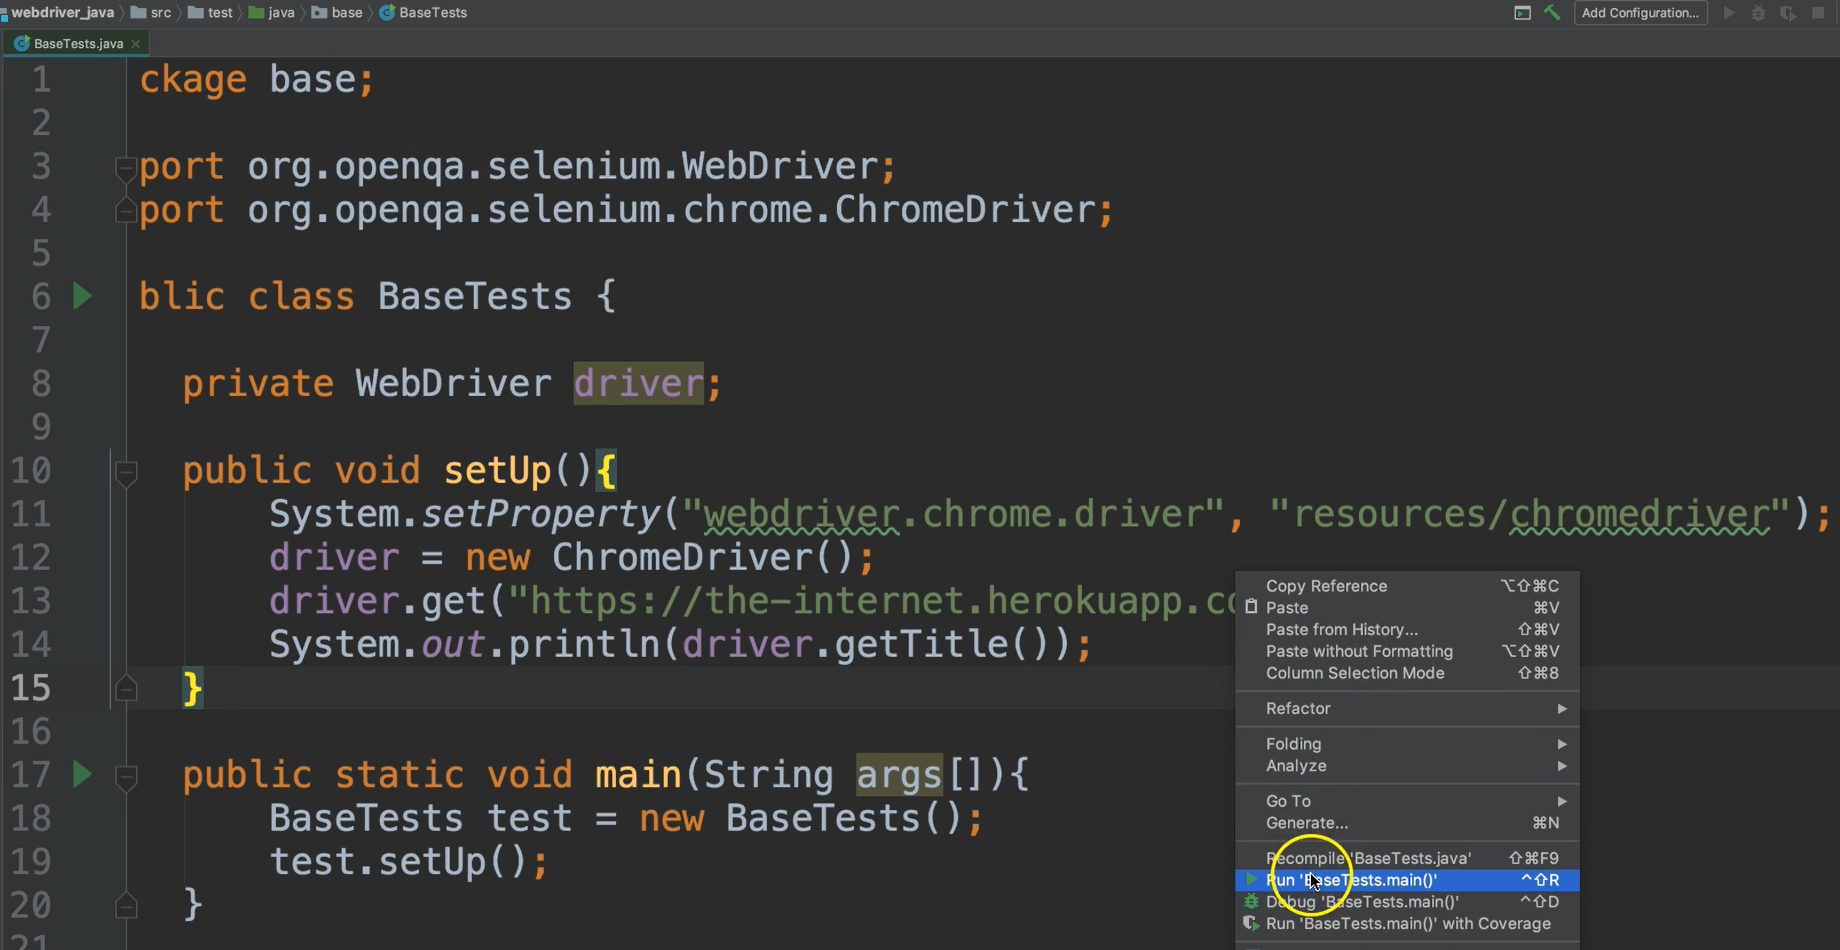
Okay, so we'll just right click anywhere and say Run this.
And we see here that this browser has loaded, and it has come to this application.
We also see a little message here that says: "Chrome is being controlled by automated tests software." That's our Selenium.
And if we go back here, we see that it did indeed print the title of this page.
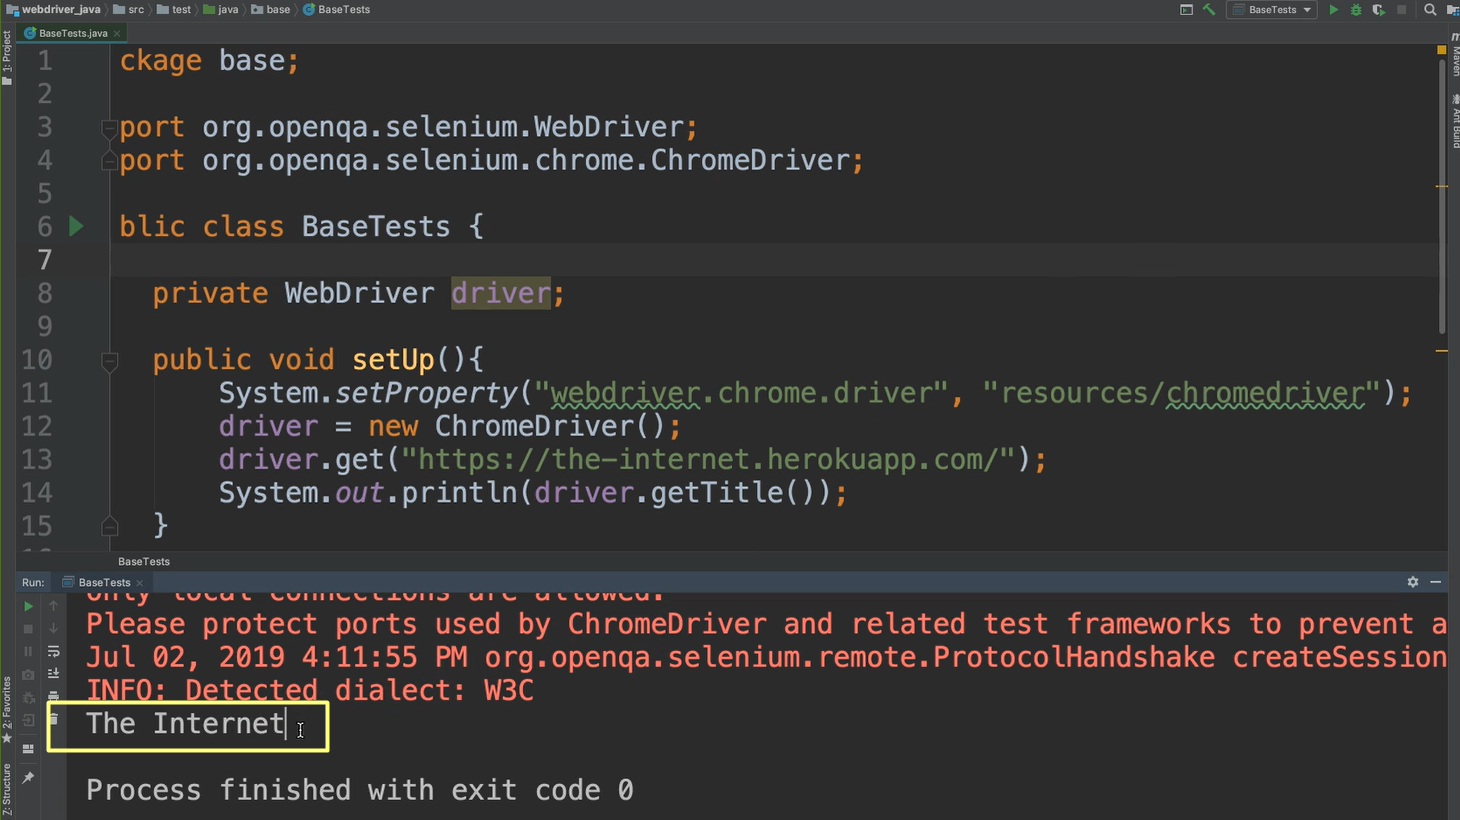
Note
There are some other outputs here that are in red. If this is your first time using ChromeDriver, this may seem alarming to you because it's in red and red usually means a type of error. But rest assured, this is not an error, this is just information being printed out and we can ignore it.
We see that our Selenium has worked.
We might want to close the browser as well because we have it left hanging open.
We can close our browser by using another driver command quit().
driver.quit();
There's also a close() method which will just close the window, but not necessarily the session. If you call quit(), then it'll close any of the windows that are open and complete out this session.
Let's just go ahead and run this again, and we'll see this time when it runs it will be very fast. So, it loaded it, and then it closed it. Before we could even see anything, it was over and done, and closed. But we do see our printout here, so we know that this works.
This is enough to launch the application but notice that our browser window was opened in a certain size, and it didn't fill the entire screen.
Maybe you want to do things like change your window size before you start doing your testing.
You can definitely do this in multiple different ways. Let me show you a few.
After we call the get(), which launches that application in the browser, let's call manage().window().
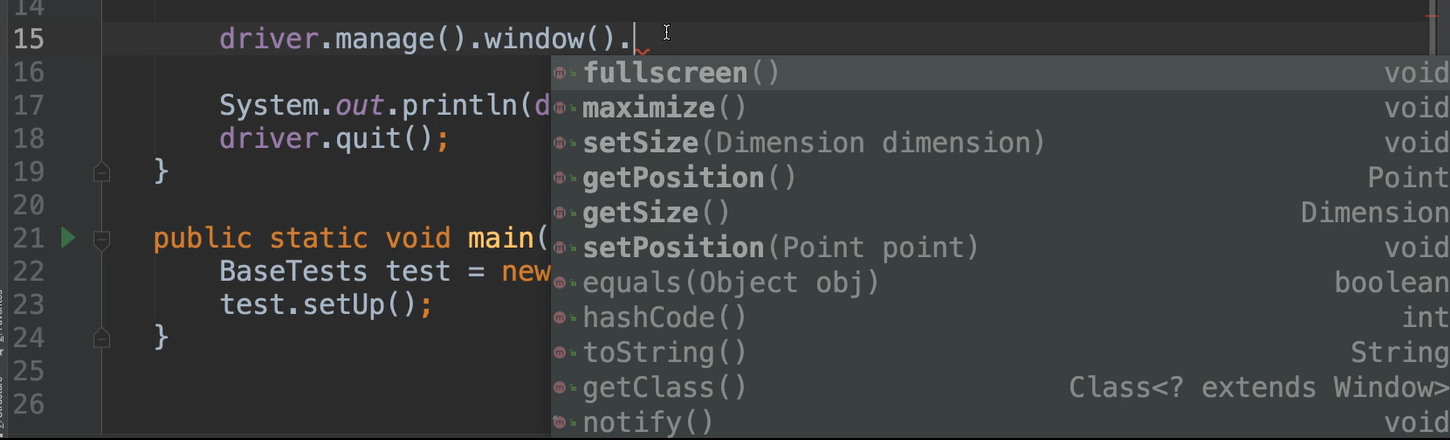
This will provide us methods to allow us to manage the window.
For example, I can use this maximize().
//1 - Maximize the window
driver.manage().window().maximize();
If I use maximize(), we can see that it'll launch the application, maximize it, and then do whatever else we want to do.
I'm going to put a brea point on the quit() so that it doesn't close, and we can actually see this work. Let's run this again. So, it launches and we see here that it has maximized that window, and we'll let that finish running so that it kills the browser.
Okay, so that maximizes the window.
Another option is fullscreen mode.
//2 - Fullscreen mode
driver.manage().window().fullscreen();
So maybe you want it in full screen, not just maximize.
Let's run this one — it opens default size, but then it becomes fullscreen. And we'll let that close.
And then one more I want to show you.
What if you have a specific size you want the browser to be in?
For example, let's say that we wanted to test our application in the size of a mobile device. Let's take a look.
This is our site, the-internet, and let's go ahead and do right click and then Inspect.
When we do this, there's this toggle device toolbar. I can click this, and it'll put this in mobile view.
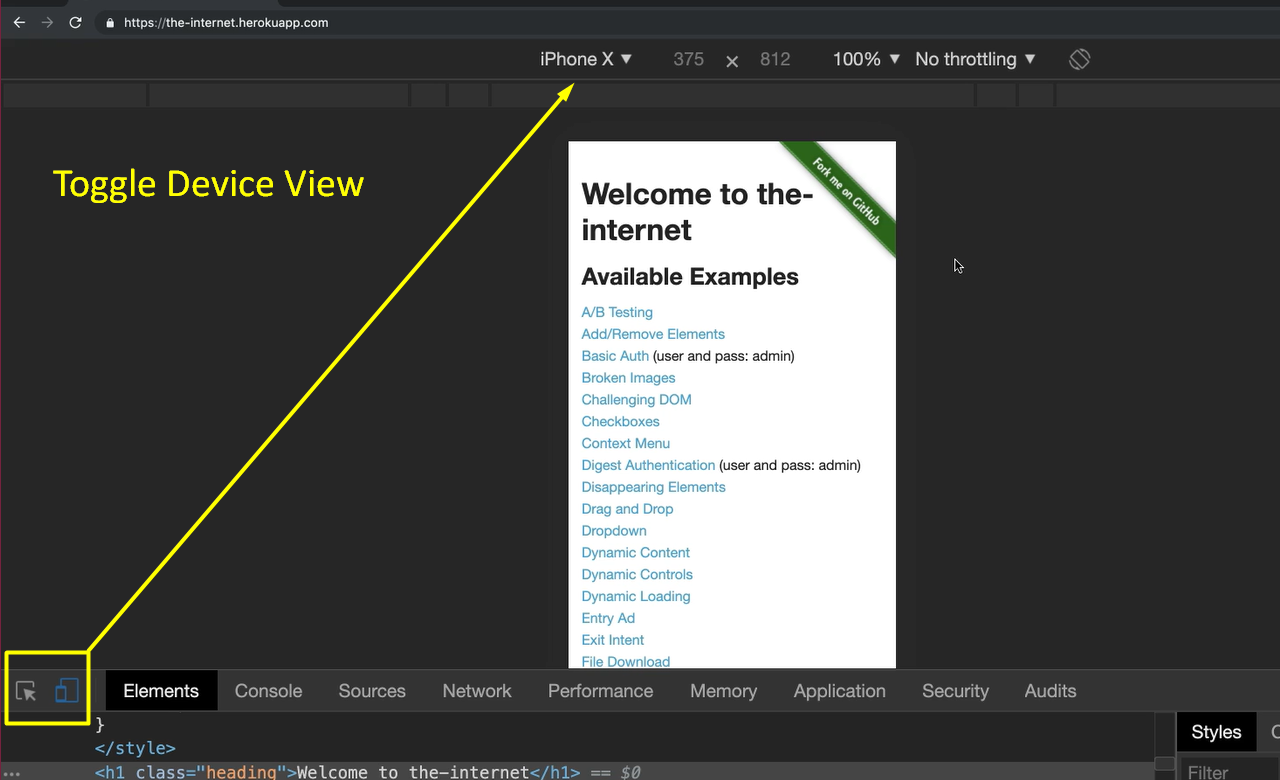
I can select from various mobile devices or I can input width and height. This iPhone X and this will show us what the application will look like in that view.
If I wanted to use Selenium to run my test in this view, I can do so by just giving it this 375x812. Let's do that.
On the window object, I can call setSize(). This takes a Dimension object which takes two integers: a width and a height. So, the width again was 375, and the height was 812.
//3 - Specific width (show Chrome iPhoneX emulator)
Dimension size = new Dimension(375, 812);
driver.manage().window().setSize(size);
Let's run this one now and see it in iPhone mode. Great.
We see that this is now in the width and the height that we've given it, and we'll finish our tests and we're done.
# BaseTests.java
package base;

import org.openqa.selenium.Dimension;

import org.openqa.selenium.WebDriver;

import org.openqa.selenium.chrome.ChromeDriver;

public class BaseTests {

    private WebDriver driver;

    public void setUp(){
        System.setProperty("webdriver.chrome.driver", "resources/chromedriver");
        driver = new ChromeDriver();
        driver.get("https://the-internet.herokuapp.com/");

        //1 - Maximize the window
        driver.manage().window().maximize();

        //2 - Fullscreen mode
        driver.manage().window().fullscreen();

        //3 - Specific width (show Chrome iPhoneX emulator)
        Dimension size = new Dimension(375, 812);
        driver.manage().window().setSize(size);
        System.out.println(driver.getTitle());
        driver.quit();
    }

    public static void main(String args[]){
        BaseTests test = new BaseTests();
        test.setUp();
    }
}
Here's how you can launch your application, set the size if you want to, print out the title and close the browser.
