Transcripted Summary
Selenium offers an interface called WebDriverEventListener, which provides methods that will listen for Selenium events and allow you to add additional functionality when those events occur.
For example, what if we want to write reports that capture the actions that were taken on the UI during our test?
We could do that by implementing the WebDriverEventListener interface.
Let's see how we add this to our project.
In our BaseTests class, we're going to change our driver type from a WebDriver to a specific instance of WebDriver called the EventFiringWebDriver.
private EventFiringWebDriver driver;
Then instead of this being an instance of ChromeDriver, we're going to make it an instance of the EventFiringWebDriver, which takes another instance of WebDriver.
So, we can say it is a ChromeDriver, but we want to wrap this in this EventFiringWebDriver.
This EventFiringWebDriver is the one that will listen out for events.
The way that we tell it to listen for events is we have to actually register a class that is implementing the WebDriverEventListener interface.
So, we say driver.register, and then we provide the instance of the listener class, which we haven't created yet.
@BeforeClass
public void setUp(){

    System.setProperty("webdriver.chrome.driver", "resources/chromedriver");
    driver = new EventFiringWebDriver(new ChromeDriver());
    driver.register();

    goHome();
}
We'll come back to this in a moment.
Let's go and create this class — in our project we want to create this listener.
Let's put this under the framework part, so in the “main” section.
It isn't a page, of course. We can put it in the “utils” package.
So, let's make a new class here and we'll call this class EventReporter.
Now in order for this to be a listener, it has to implement the WebDriverEventListener interface.
Let's go ahead and add that.
package utils;

import org.openqa.selenium.support.events.WebDriverEventListener;

public class EventReporter implements WebDriverEventListener {

}
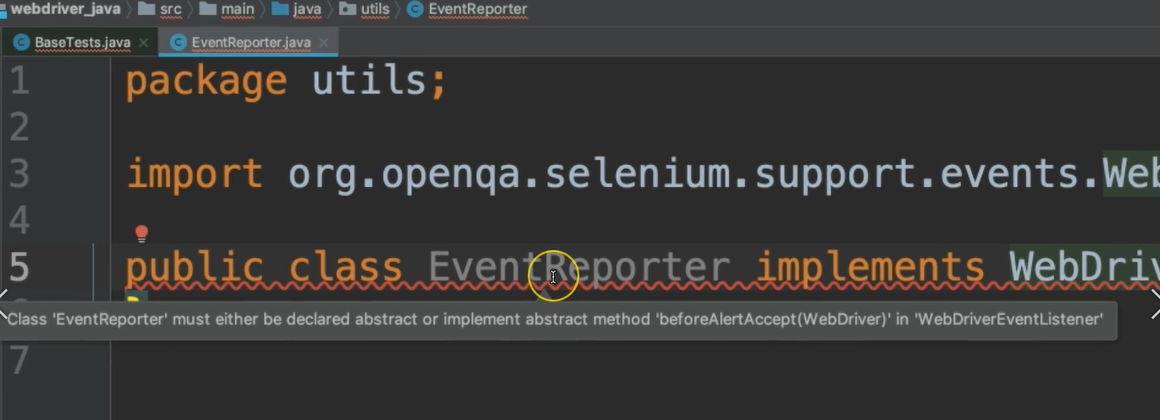
Notice here, we have an error because we need to implement these inherited methods.

So, we can go ahead and say implement the methods, and it'll show you all of the methods that you need to implement.
Let's say, “OK”.
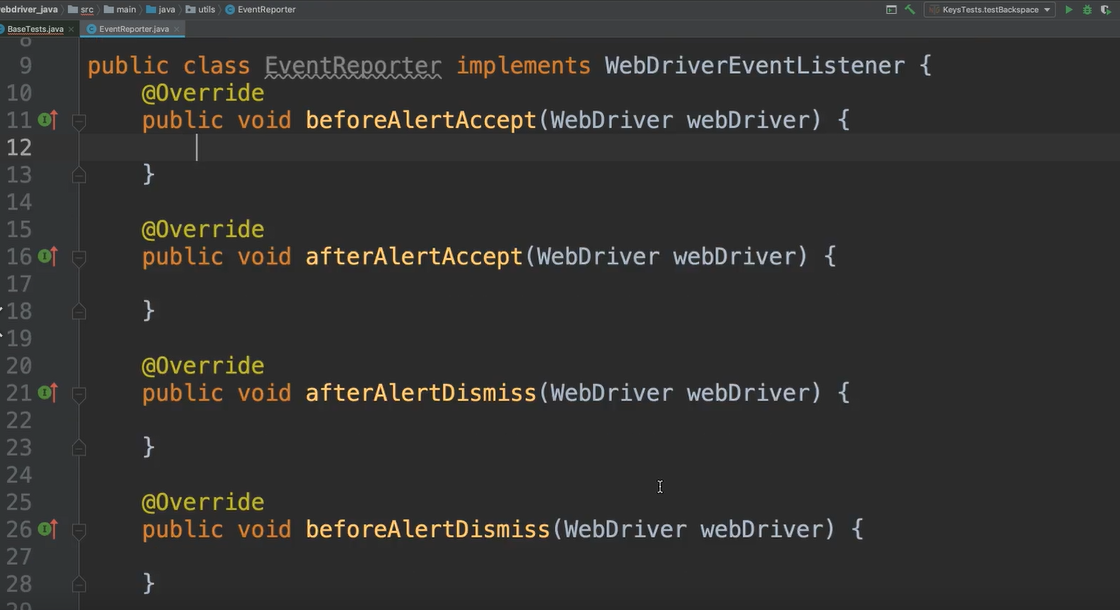
Now we have all of these methods.

Notice all of their bodies are empty, none of them do anything right now.
But these methods will allow you to add anything you want for any of the actions — before and after all of the actions.
Here we have before accepting an alert (beforeAlertAccept)— is there something we want to do after accepting the alert?
Or dismissing alerts; navigating to? There's all of the different types of actions here.
Let's go ahead and just pick one so that we can see it in action.
Lt's say maybe before we click something.
Notice a lot of these methods take a WebElement and also WebDriver.
Some of them even take a By — so after you found something, what did you find it by?
Some of them only take the WebDriver.
You can use these methods to do whatever it is that you want to do.
For our case, we're going to use it just to report what's going on.
Let's add some code inside of here just to print out what we're doing. It's a simple printout statement that just says we're clicking on, and it'll give the text of the element that we're clicking on.
@Override
public void beforeClickOn(WebElement webElement, WebDriver webDriver) {
    System.out.println("Clicking on " + webElement.getText());
}
So anytime that we're about to do a click on anything in our project, then this method will be called first and it'll print this out.
Let's go back to our BaseTests so we can register this class.
driver.register(new EventReporter());
And now we're ready to go.
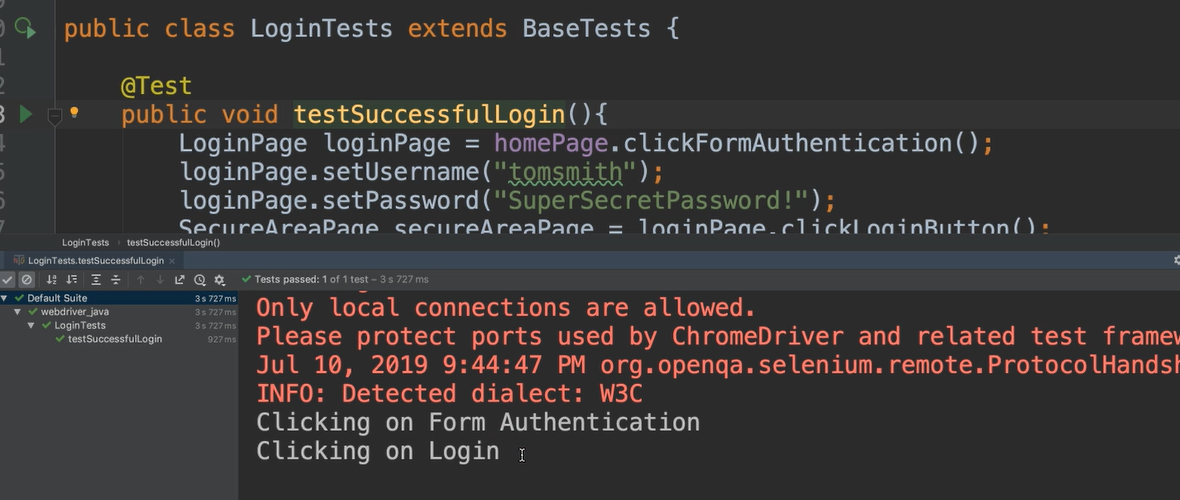
Let's run any test, one that does some clicking, maybe the LoginTests.
Okay, let's run this one.
Beautiful.
Notice here, we have those print statements.

So, it showed when it clicked on the first link, and then it showed when it clicked on the Login button.
You can implement this interface any way that you like to, but it's nice to know that this is there.
Optional Independent Exercise
For your optional exercise for this chapter, just pick a few of these to implement.
Go ahead and add some print statements to them and then run your tests in your framework just to see them in action.
