

Transcripted Summary
Now that we have installed all our dependencies and we are able to run code, we're going to go into writing some code and learning the different functionalities that WebdriverIO has.
Before we do that, there's a key thing that you should know, and that is WebdriverIO version 7 comes installed using asynchronous mode.
The previous version of this course used WebdriverIO version 5, and that allowed you to select whether or not you wanted to run your code synchronously or asynchronously.
For me, I love writing my test automation synchronously as testing can be a step-by-step process.
You'll navigate to a webpage, you click login, you enter your username, you enter your password, and you click the submit button. And then you wait for the dashboard to show up.
This is generally how test automation, and testing in general, flows in a step-by-step process. So, for me, using synchronous makes sense.
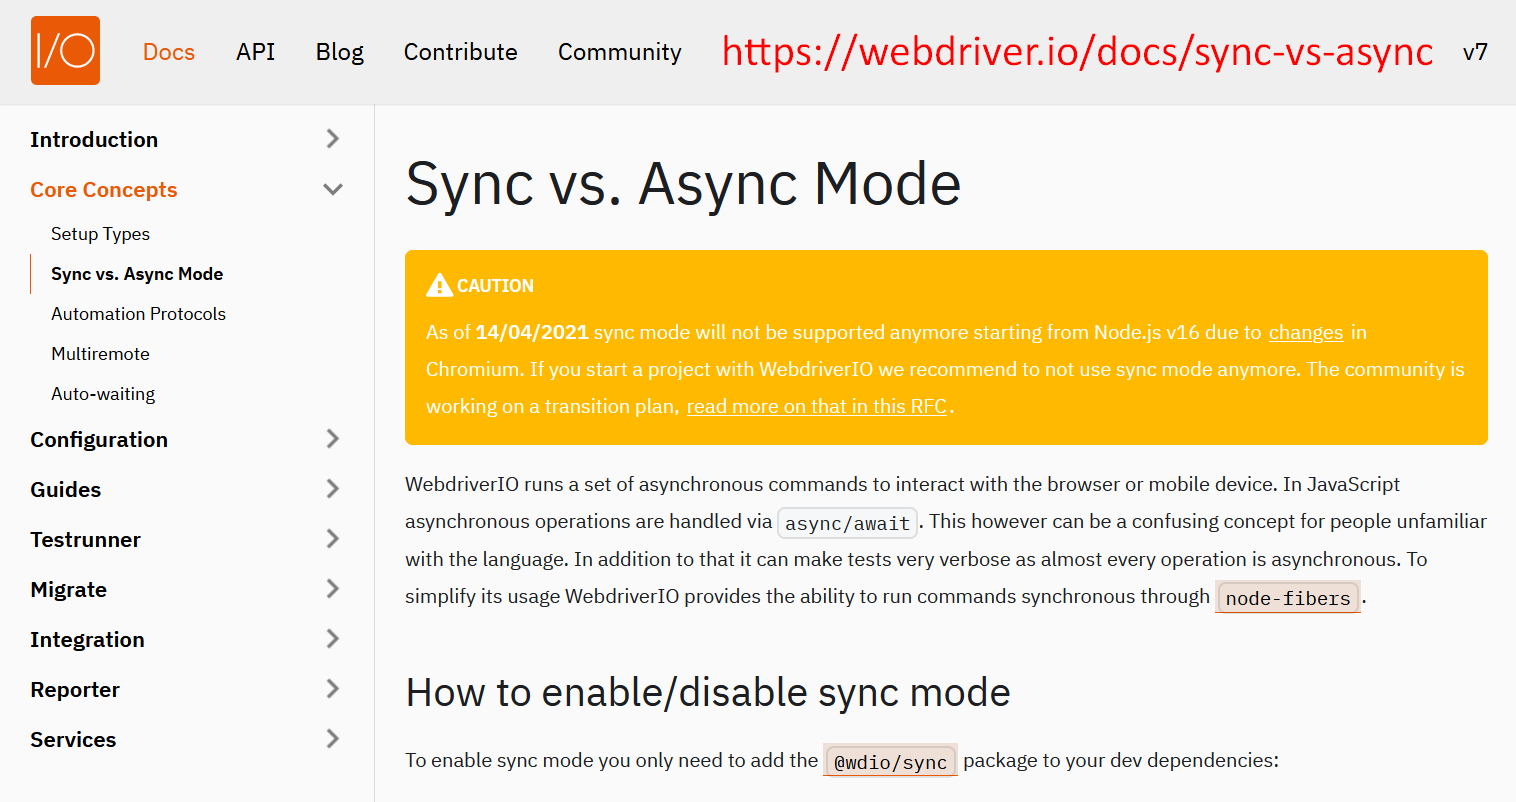
There have been some changes regarding WebdriverIO support in sync mode.
- So as of April 2021,
syncmode will not be supported if you are using Node.JS version 16 and above. - There have been some changes in Chromium, and this allows the WebdriverIO project to not be able to support
syncmode anymore.
If it is that you're starting a new project, it's recommended that you use the async mode.
title
There is an RFC, or request for comments, that WebdriverIO's Christian Bromann has, and they are trying to see how WebdriverIO moves forward, given that we cannot use the WebdriverIO sync module. You can check that out and you can give your input if you think that there's a direction that it should go in or not.
# What is Async/Await?
You're probably now wondering what is async and what is await?
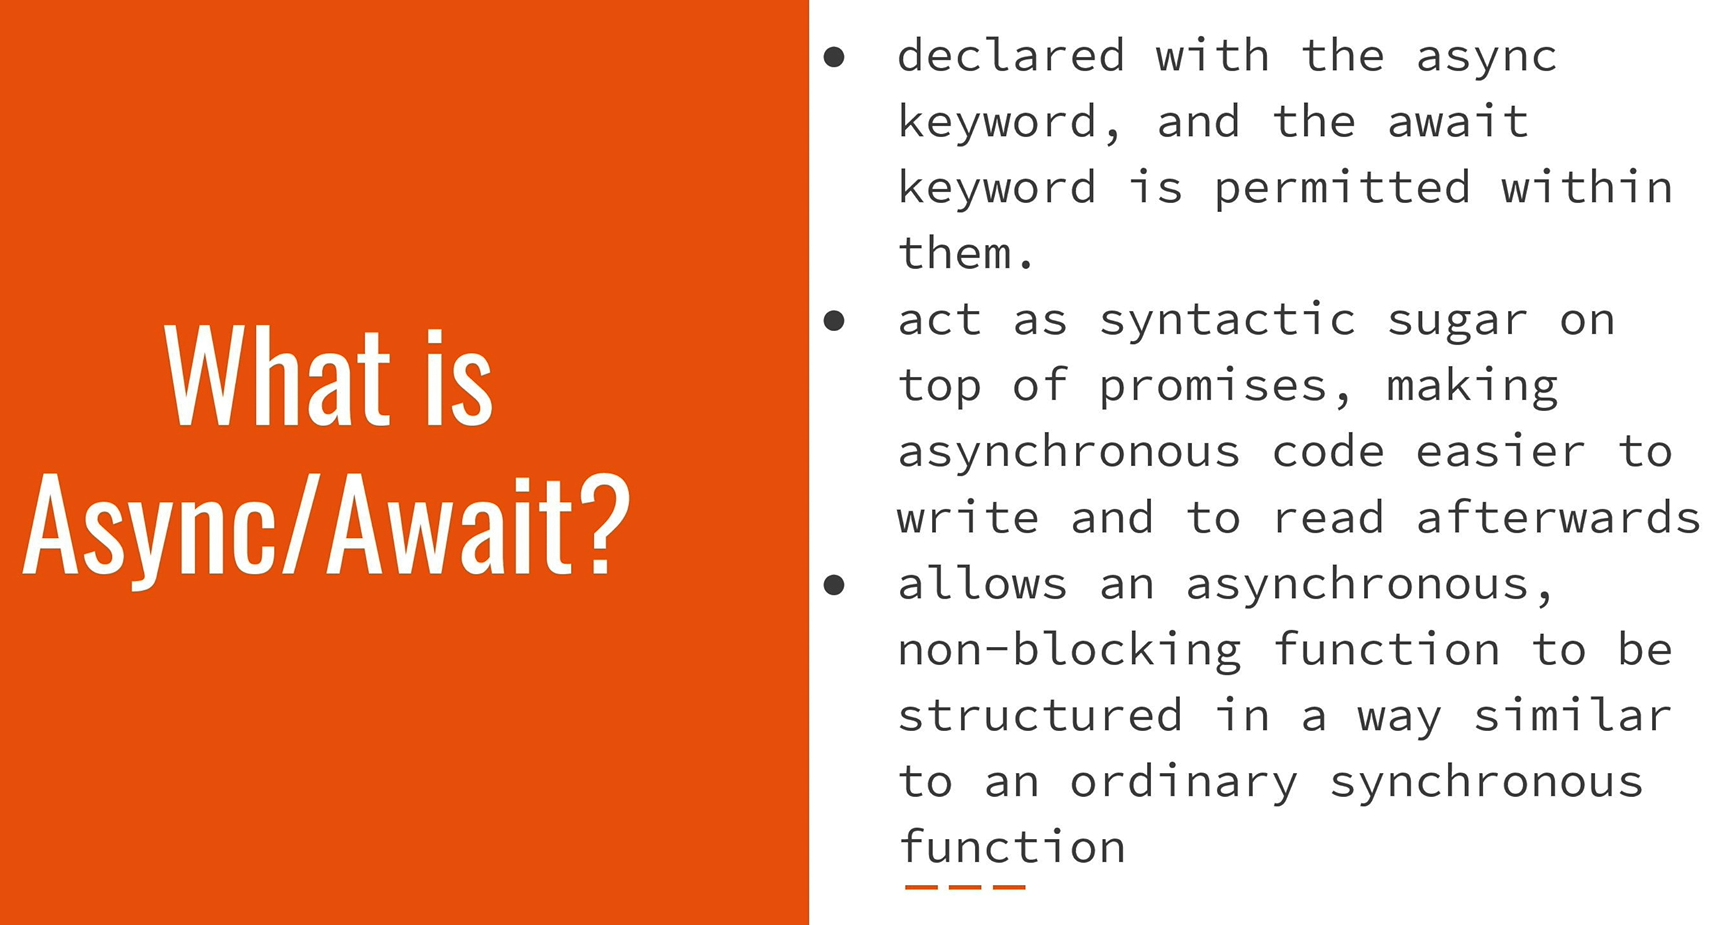
Async is a type of function that you can have in JavaScript, and it comes along with the await keyword that is permitted to be used within an async function.
- They act as syntactic sugar on top of promises, making asynchronous code easier to write and to read afterwards.
- It helps you to write asynchronous code, which are operations that allows you to move on to another task before the previous one is finished.
- In the same manner as you would write synchronous code, code that is run one after the other and is blocking. That is the first line has to complete for the second line completes.
It allows you to write an asynchronous non-blocking function in that step-by-step manner, as you would write an ordinary synchronous function.
If we look in our login page file, we see that we have an async login function that accepts a username and a password.
    /**
     * a method to encapsule automation code to interact with the page
     * e.g. to login using username and password
     */
    async login (username, password) {
        await (await this.inputUsername).setValue(username);
        await (await this.inputPassword).setValue(password);
        await (await this.btnSubmit).click();
    }
Within that function, each line has an await keyword; this is saying, before you move on to the line below me, allow me to finish.
- We are going to be inputting the username.
- Once that is finished, we input our password.
- Once that is finished, then we click on the submit button.
If we did not have this await keyword, then entering the username, clicking the submit button, could have happened in any order. Imagine you're trying to log in and before you enter the username or the password, the submit button has already been clicked on. That is going to result in your test failing.
So, because we want it to operate in a specific order, we have to use this await keyword in an async function to get it to follow the step-by-step that we are used to if we were using a synchronous function.
Similarly, in our example test file, our it is an async function.
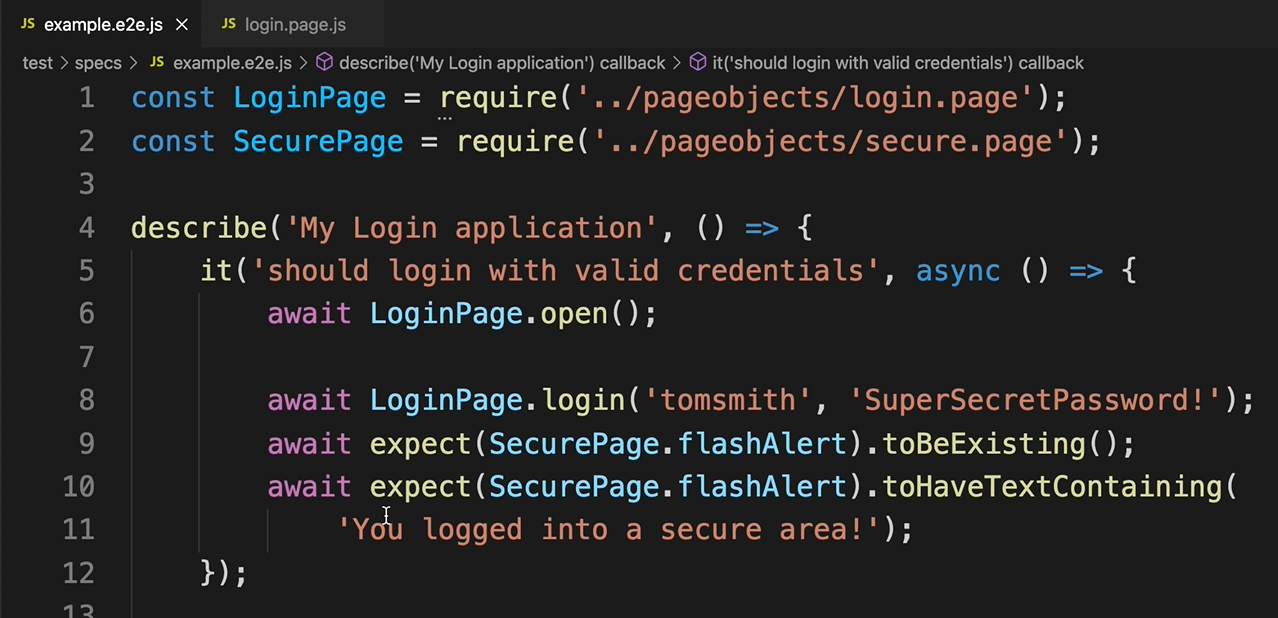
const LoginPage = require('../pages/login.page');
const SecurePage = require('../pages/secure.page');

describe('My Login application', () => {
    it('should login with valid credentials', async () => {
        await LoginPage.open();

        await LoginPage.login('tomsmith', 'SuperSecretPassword!');
        await wdioExpect(SecurePage.flashAlert).toBeExisting();
        await wdioExpect(SecurePage.flashAlert).toHaveTextContaining(
            'You logged into a secure area!');
    });
});
- We are awaiting for the login page to open.
- Then we are calling the login function.
- And then we're awaiting the assertions that we have
toBeExistingandtoHaveTextContaining.
So, all of this is going to be run in the correct order that we wanted to.
Now, this course, as I mentioned before, was originally written using WebdriverIO version 5, and I selected for it to be run synchronously.
So, a lot of the code that you'll be seeing in many of the chapters, such as waitUntil, waitForDisplayed, et cetera, will not have this async/await.
You can still run your code synchronously if you are below Node.JS version 16. I am going to show you how you can still run your code synchronously.
However, if you want to continue running this course asynchronously, and it is recommended that you do, you can just go ahead and change all those functions to async functions.
The aim of the course won't be changed. The functionality of the different commands won't be affected.
It's just that one function is synchronous while the next function is async.
In order for your code to run synchronously, you need to have the WebdriverIO sync module.
So you can say — npm i --save @wdio/sync.
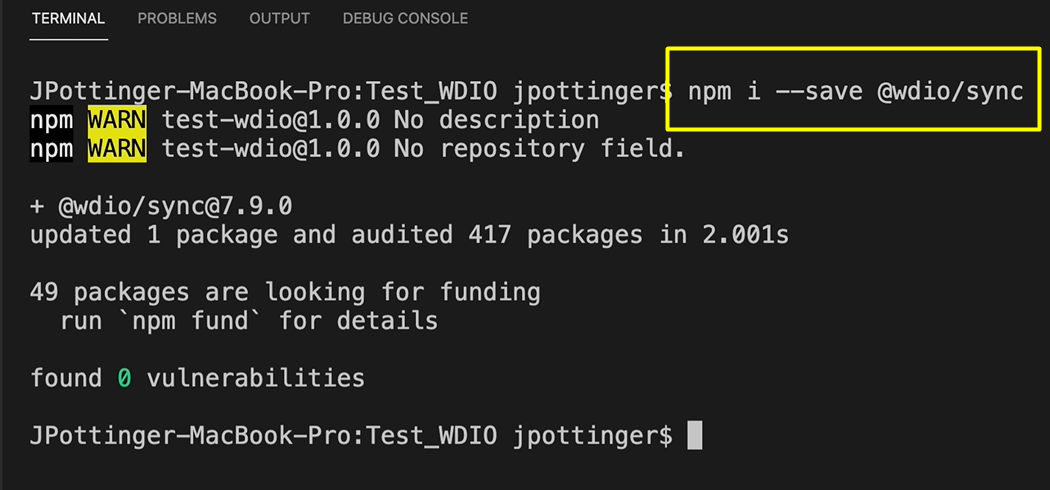
Once you have installed that, then you should now be able to run your test synchronously.
Your async functions that you have should continue to work as well so they can both work together.
However, as I said, I'm recommending that you continue this course using the async function.
However, there are other persons that have their projects already in synchronous, and it may take some time for them to switch over. So, you can still continue running your synchronous code while you're in the process of switching over to async.
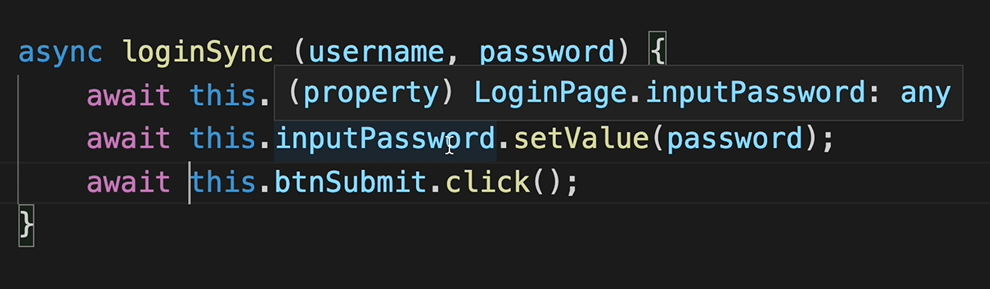
If you look in our login page here, we see, as I said before, an async function. I have duplicated this and call it loginSync.
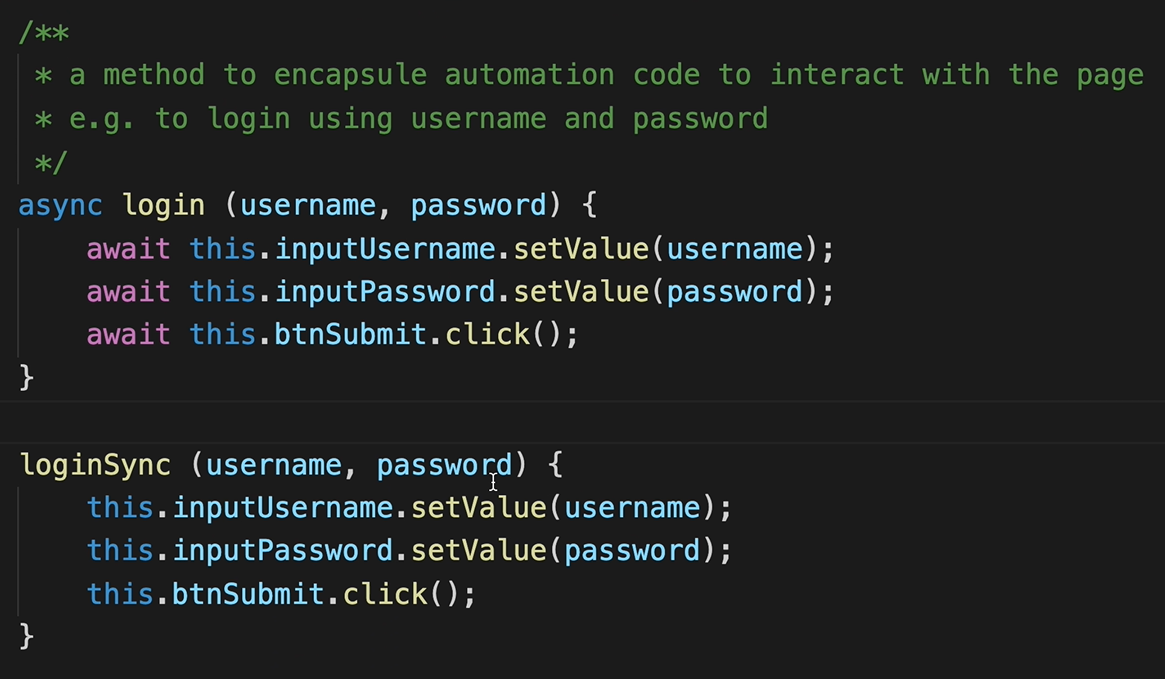
The only difference between both functions is of course the function name, “login” and “loginSync” to differentiate them.
But along with that is the async keyword to denote that this is an async function and the await command to ensure that each line runs after the other.
In the synchronous mode we do not need that because we have just installed the sync module and it allows you to run your code synchronously. It automatically knows that you're going to wait for the username to be inputted, the password to be inputted, and then you click on the button. So you don't need to explicitly await those things.
If I wanted to change this loginSync to an async function, I would just put async here. And then for each line I would put await and this makes it an async function.
So, in the following chapters, you may see where I'll just have synchronous functions as I'm encouraging you to keep this to an async course, you can just add the keyword async to your function and the await keyword and everything should still work.
- For your tests, you would have
awaitkeyword once it's inside anasyncfunction. - If your function isn't async, then you'll get an error trying to run the
awaitkeyword.
So, you see that our it is async here, and the await keyword.
I have the same function below, but it is a synchronous function. So, I don't have the async keyword here.
And I don't have the await, but as you can see, they are the exact same thing apart from the async and the await.
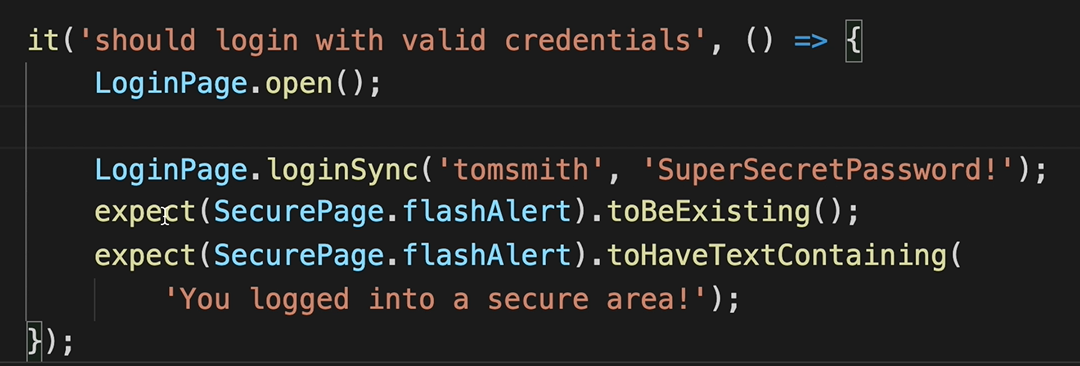
That's the difference — the async and the await.
So, it should be okay for you going forward to use the async and the await.
If I were to run these tests, they should both pass because they're both doing the same thing. One is just an async function and the next is sync function.
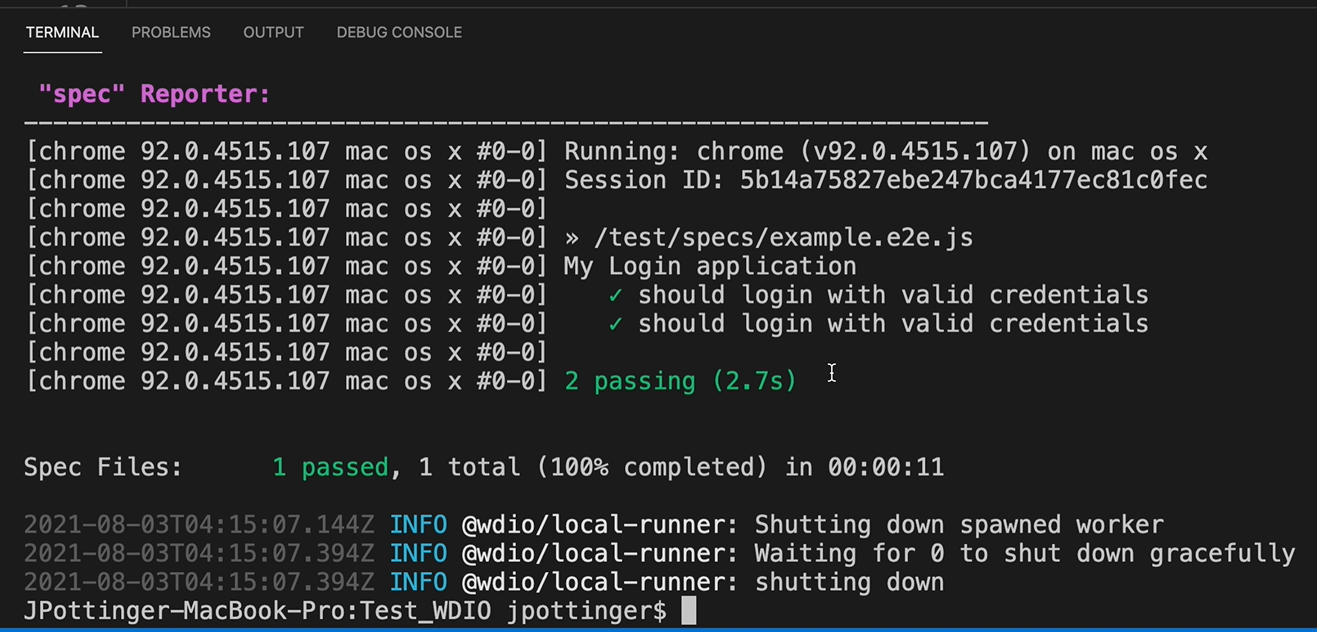
So, as you could see, it logged in twice, so both work.
