
Transcripted Summary
The waitForExist is another wait strategy that WebDriverIO has.

It waits for an element to be present within the DOM and returns true if the selector matches at least 1 element. Otherwise, it throws an error.
Similar to the waitForDisplayed, if we enter the reverse flag of true, the command will return true if the selector does not match any element.
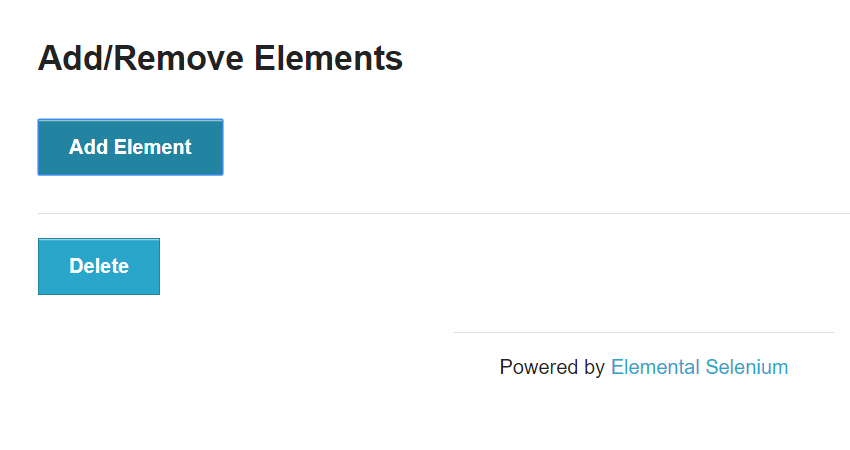
What we can do is use this page to add an element, wait for it to exist, and then verify that it exists by using the element state isExisting. And then delete this and then use the element state isExisting and compare to the Boolean False.
Let's show you an example of that.
First, we would need to create our element selectors.
If we inspect here, we see that the element here says "example" and it has a button.

So, we say: — get exampleButton() { return $('.example button') }
Then if we click on the "Add Element" and we see "Delete". If we Inspect the “Delete”, we realize that it is in a div that has the id “elements”, and it contains the button.
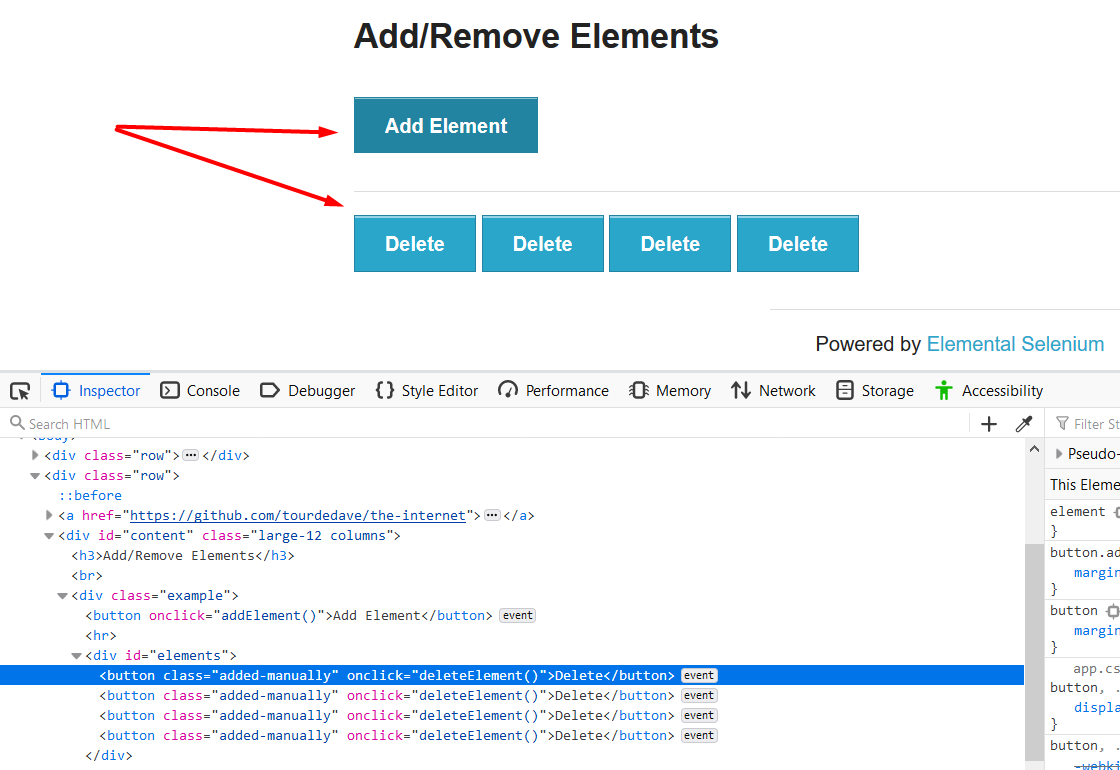
Now, if we add multiple of them, it will have a lot of buttons, so we are going to use the nth-child on the button.
So that is what we did here — deleteButton(index) { return $(#elements button:nth-child(${index})) } — we created our element deleteButton with an index and said #elements button:nth-child and passed in that index.
We then then needed to have 2 functions to click on the exampleButton and to also click on the deleteButton
    /**
     * Click the Example Button
     */
    clickExampleButton() {
        this.exampleButton.waitForDisplayed()
        this.exampleButton.click()
    }
    /**
     * Clicks the delete button
     * @param {Number} index index of the element
     */
    clickDeleteButton(index) {
        this.deleteButton(index).waitForDisplayed()
        this.deleteButton(index).click()
    }
So, we created our 2 functions here:
- The first one is
clickExampleButton— it waits for theexampleButtonto be displayed, then it clicks on it. - Then for the
clickDeleteButton(which accepts an index) — it waits for thedeleteButtonto be displayed and then it clicks on it.
We also created a “waitForExist.test.js” test.
waitForExist.test.js
internetPage = require('../pages/internet.page')

describe('Wait For Exist', function () {
    it('should wait until the delete button exists', () => {
        browser.url(`${browser.options.baseUrl}/add_remove_elements/`)
        internetPage.clickExampleButton()
        internetPage.deleteButton(1).waitForExist()
        assert.equal(true, internetPage.deleteButton(1).isExisting())
    })
})
In this test, we required our internet page. Then we had to describe "wait for exist" function. And in that function, we have 2 its.
The first one says it should wait until the delete button exists.
And we see a browser.url and we use our ${browser.options.baseUrl} and open to it this URL here that says “/add_remove_elements/”.
Then after that we are going to use the internetPage object to click the ExampleButton. So, we are going to be doing this.
Then we are going to say "wait until the delete button with an index of 1 exists" because first, it would not have existed in the DOM. So, if you did a waitForExist without clicking the button, it would probably have given you an error. But we clicked the button first, and we are waiting until this exists.
And then we are going to assert on isExisting by saying — assert.equal(true, internetPage.deleteButton(1).isExisting()) — and we're going to use the element state that we had used previously to say isExisting.
Let us run this test and see what happens — npm run test -- --spec ./test/waitForExist.test.js
If we put our browser.pause(2000)…
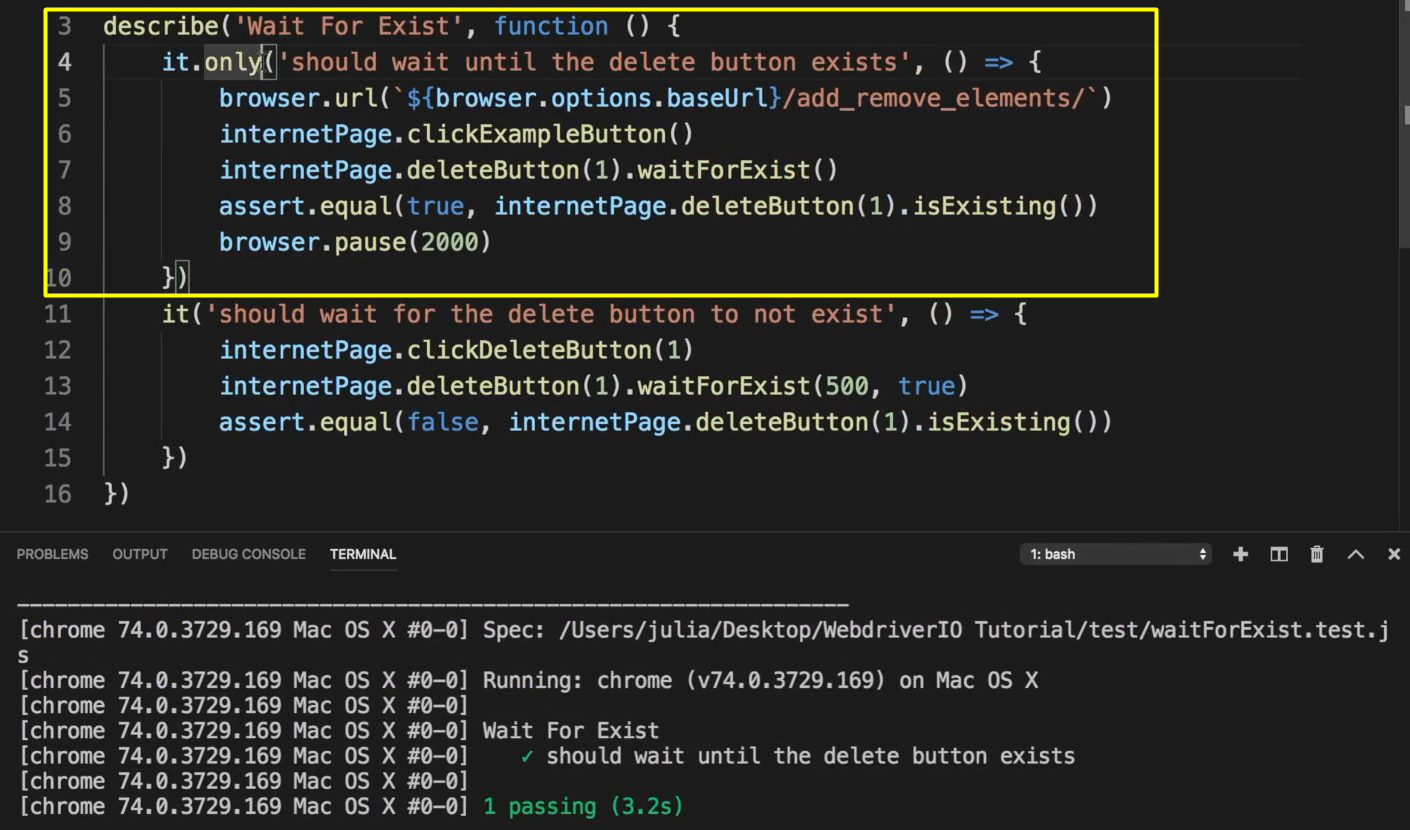
We will realize that it clicked the exampleButton, waited for the deleteButton to exist, and then verified that it existed. So that was it.
In the next test, what we are going to be doing is the reverse of that.
We are going to click the deleteButton, wait for it to no longer exist, and verify that it does not exist within the DOM.
    it('should wait for the delete button to not exist', () => {
        internetPage.clickDeleteButton(1)
        internetPage.deleteButton(1).waitForExist(500, true)
        assert.equal(false, internetPage.deleteButton(1).isExisting())
    })
So, what we can say is — click the delete button with a parameter of 1, wait for it to not exist by passing in 2 parameters: a time parameter and the Boolean True.
And then we're going to assert that it is “false” for the isExisting element state.
Let us run those tests.
And it passed; but let us add a browser.pause(2000) here for us to see that it indeed removed the delete element.
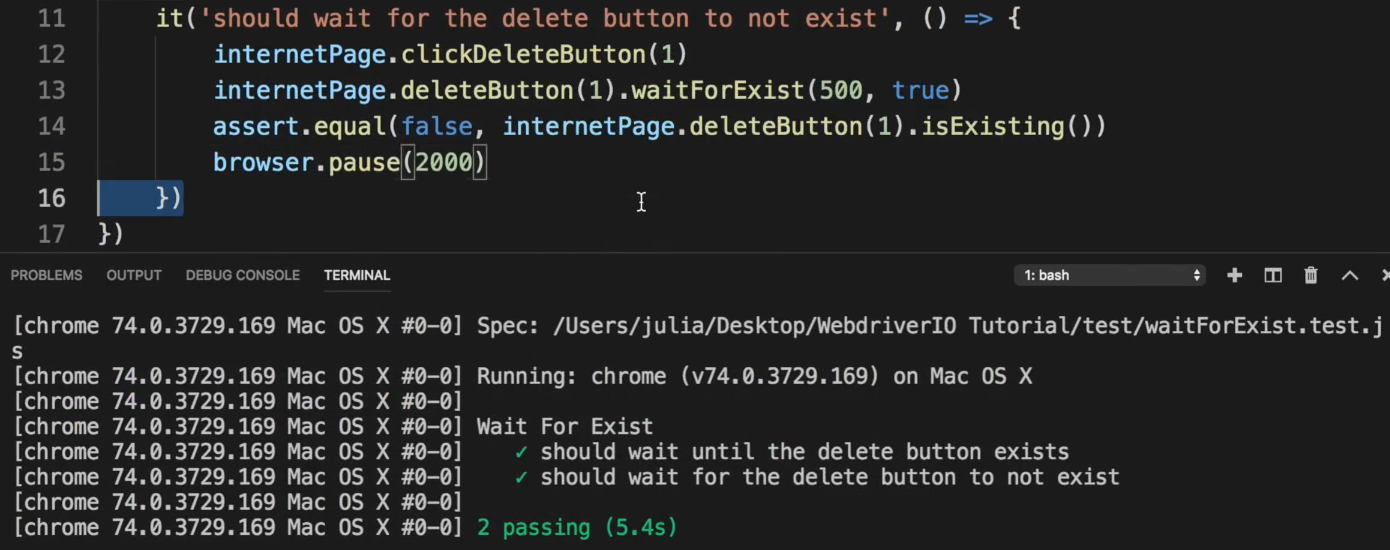
And it removed it.
**Let us do another thing right now where before we click on the exampleButton, we're going to say, "wait for exist", right? **
Let us comment out clicking the exampleButton. We should get an error for this test as the deleteButton does not exist, however we are waiting for it to exist. So, it would return false in this case.
Let us .skip the second test.
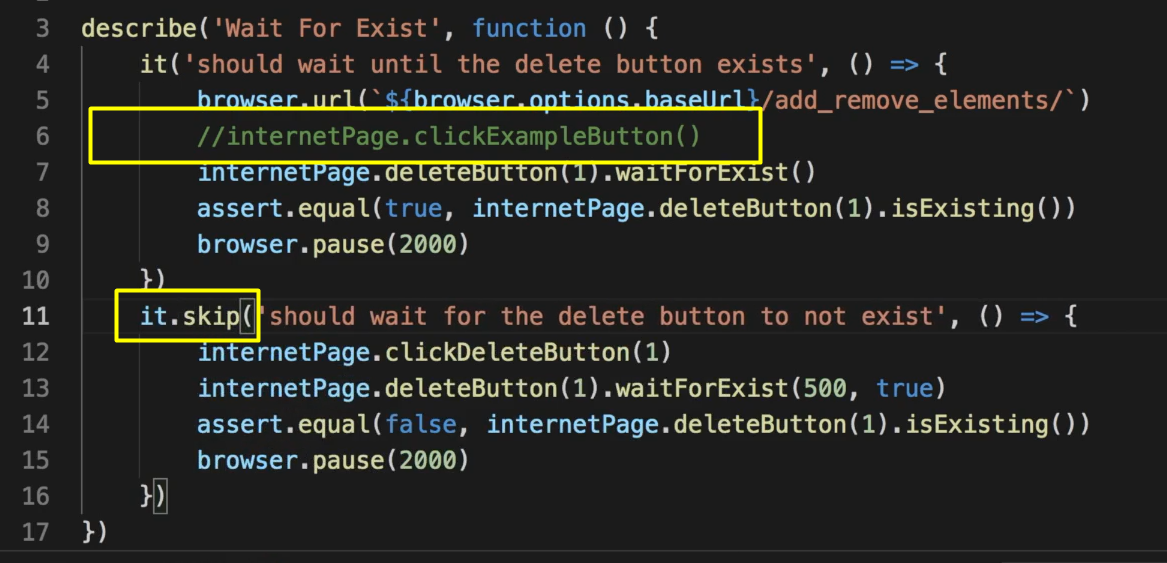
So, it did not click the "Add Element" and it is going to give it the default wait time to wait for the element to exist.
And we get an error that says — “element (“#elements button:nth-child(1)”) still not existing after 10000 milliseconds” — which is the default time.

So that's how the waitForExist works and we can pair it with the isExisting element state to determine that something that should be there is there, or something that should no longer exist does not exist.
And if we take back this, and run our test again, it should pass.
Okay.
Resources
Quiz
The quiz for this chapter can be found in Chapter 7.6.
