

Transcripted Summary
This video is going to talk about the Expect Assertion by WebdriverIO.
WebdriverIO , in version 6 and 7, created its WebdriverIO expect assertion.
When you first install your WebdriverIO package, it is there if you do the auto-generation, so it is default.
The old version of this course which used the WebdriverIO version 5, would not have used WebdriverIO expect. So, throughout the course, you probably would have seen me use Chai instead of WebdriverIO expect.
Challenge
A challenge to you would be at the end of this video, and at the end of this course, if you can use what you have learned from the expect assertion and convert some of the Chai Assertions that we have been using throughout the course to WebdriverIO expect. That should be pretty interesting.
Right now, we are going to look on the WebdriverIO expect documentation and we are going to talk about the multitude of commands that it has. We are also going to talk about how you can install and have both WebdriverIO expect and Chai running in the same project.
Let's get into that.
# WebdriverIO Assertion Library
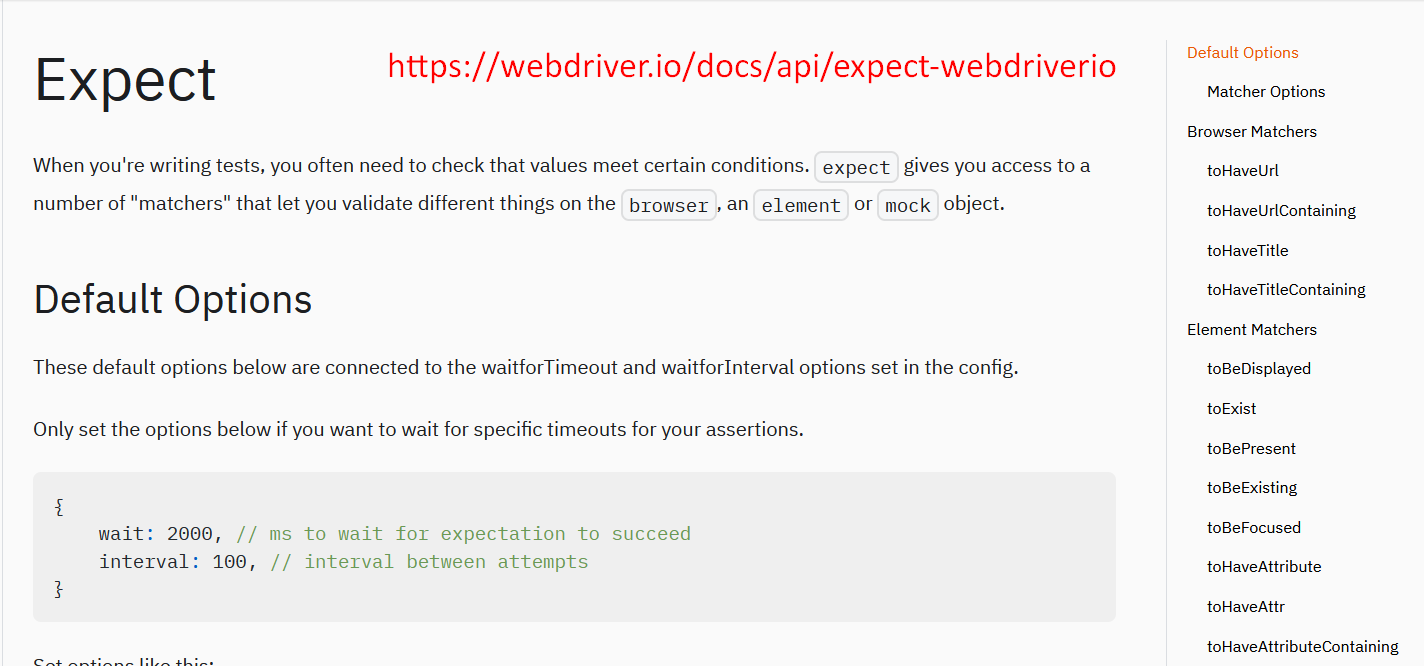
The WebdriverIO testrunner comes with a built-in assertion library and this allows you to make powerful assertions on the browser level or on elements that you want to assert.
It extends Jests “matchers” so you have additional functionality.
For example, if you want to check that a button is displayed. If you want to check that the button exists. That sort of thing, then you can do so with WebdriverIO expect. It has a lot of different commands that we're going to go through a few of them.
It also has a Network Matchers and this allows you to check that a mock was called.
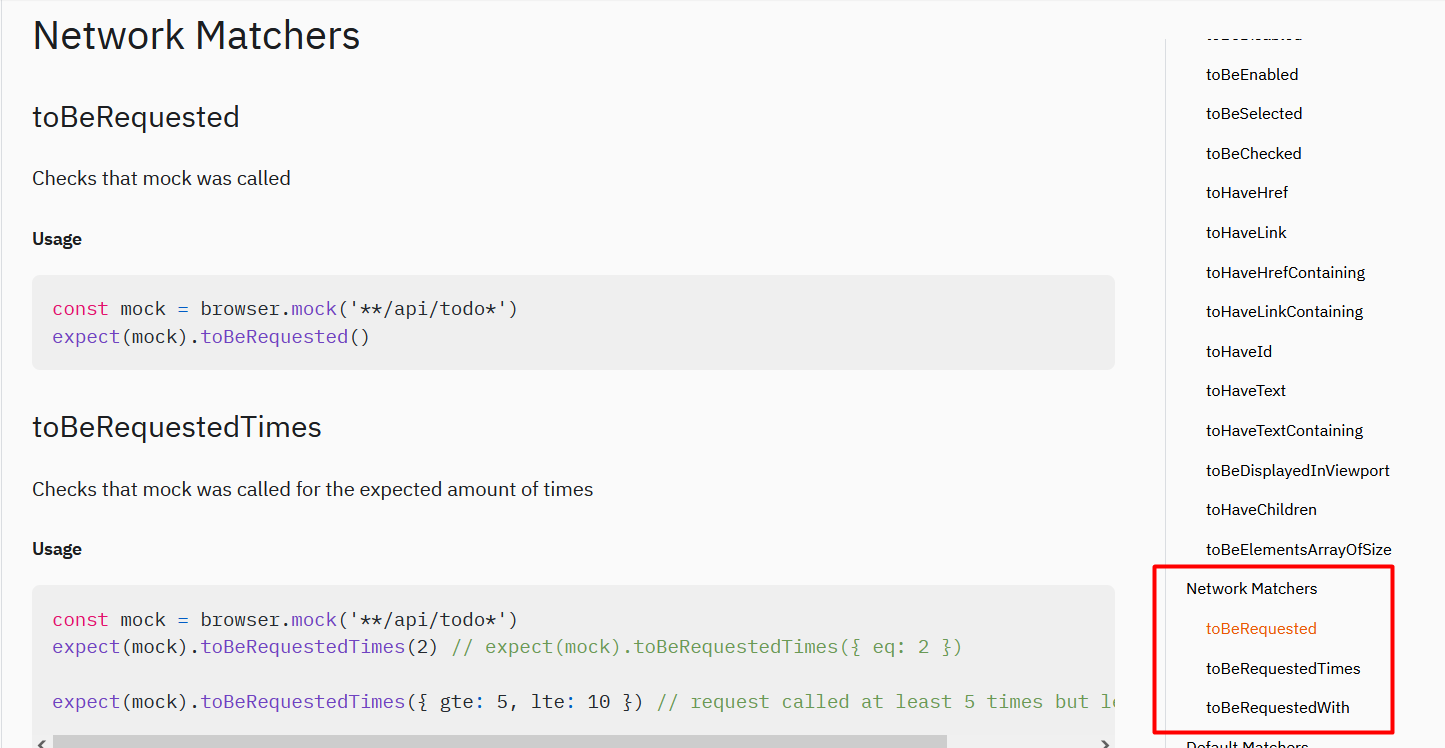
So, you pass in what the mock is. WebdriverIO has a mock module that you can check out and you can use that along with expect to verify that what you're expecting to be mocked has been mocked.
In addition to the commands that you see here for expect-webdriverio, you can use Jest expect assertions.
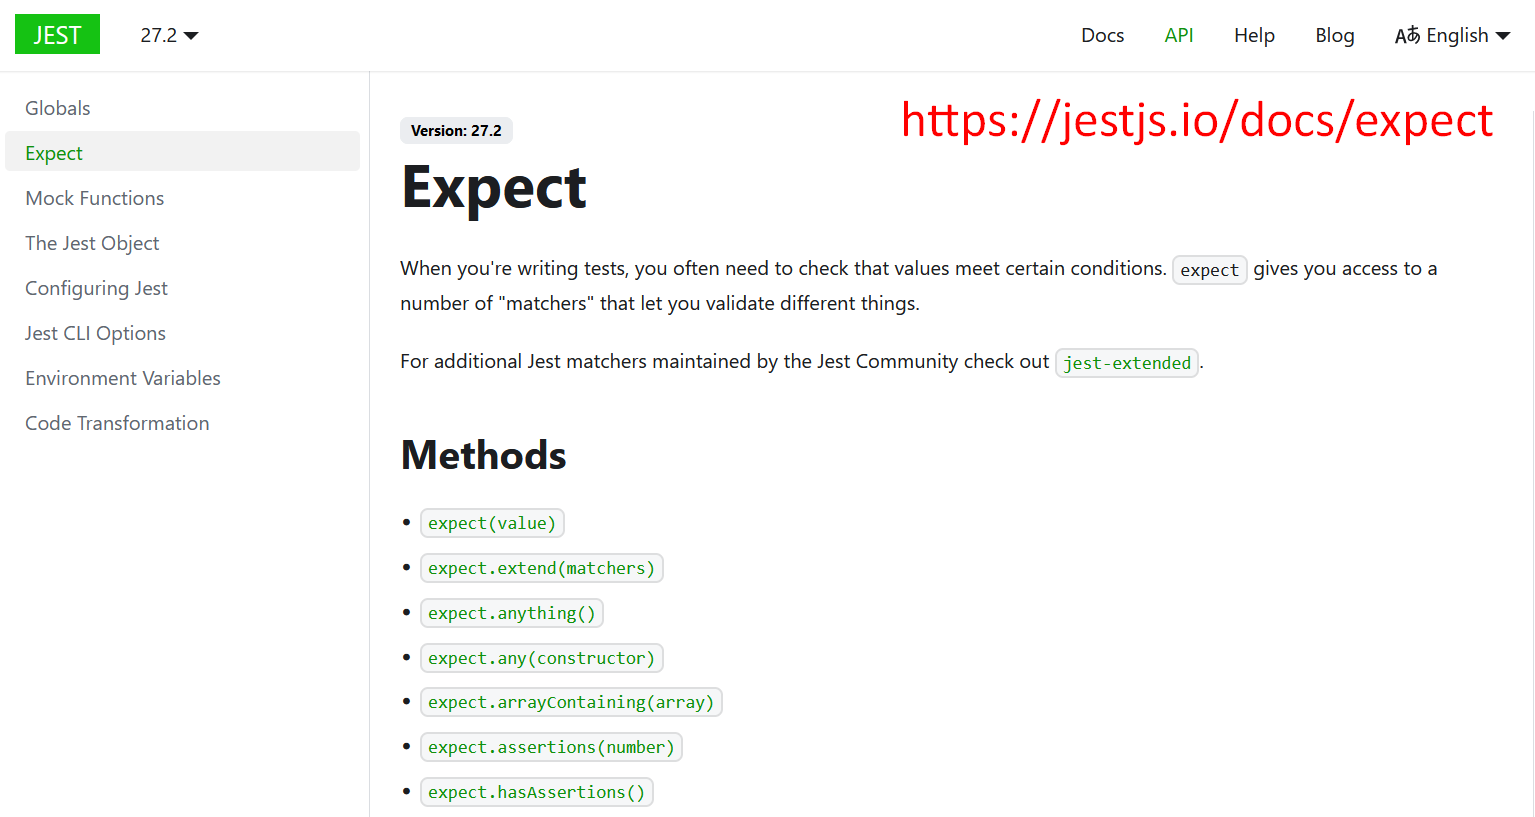
Or you can use expect or expectAsync for Jasmine.
Now, there are some default options that WebdriverIO provides you with in terms of waitforTimeout and waitforInterval options.
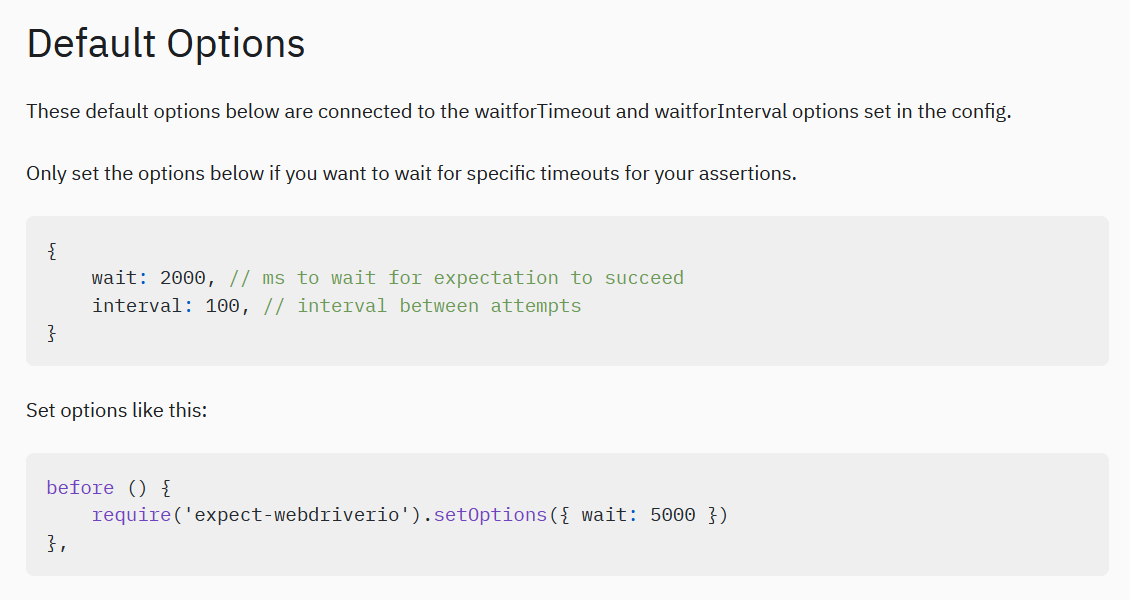
These are automatically added from the WebdriverIO config file. So, you don't necessarily have to add those to your expect assertions, but you can if you want to.
There are also Matcher Options.
Each matcher can take several options that you can modify based on the assertion. We are going to go through a couple of these.
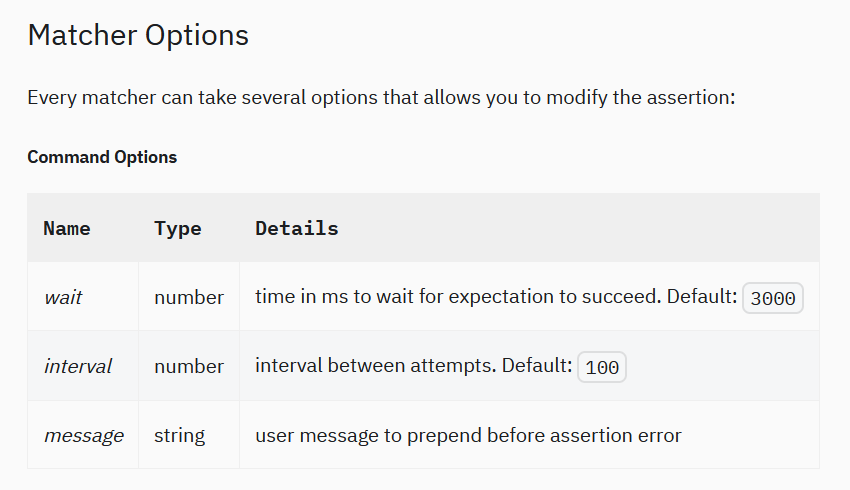
You have the Command Options, which would be the wait and the interval, and if it is that you want to add a message
You have String Options that talks about ignoring case, trim, check if something is containing... We'll do the ignoreCase on containing later in this video.
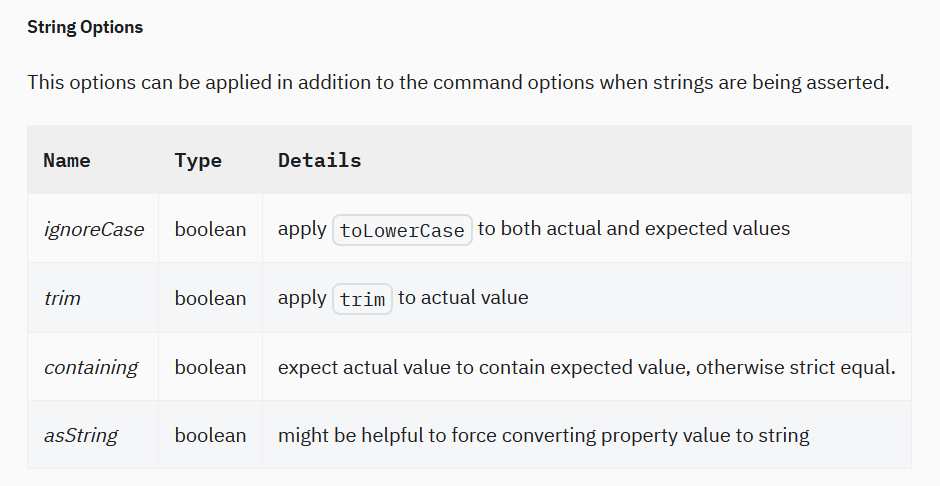
These matchers are looking for a Boolean, so you're going to say “true” if you want it to ignoreCase; or “false”, if you don't want it to ignoreCase.
So, it tells you what the details of those are, and I'll walk you through some examples of using that later.
There are also Number Options.
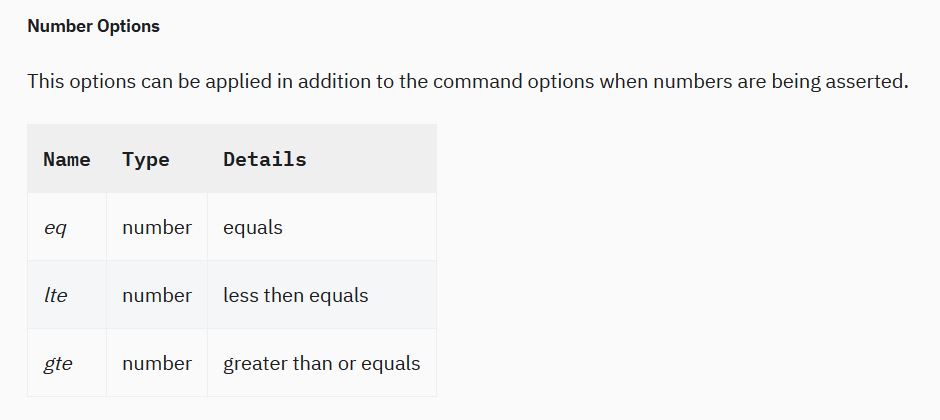
And these options, you add them similarly to how you would add the string options or both. You write eq to mean equal, and less than (lte) and greater than (gte).
So, these are matcher options that you can add it to WebdriverIO expect to do additional functionality for you.
# Code and Test Examples
Now we just installed WebdriverIO a while ago and we use the auto-generated tests. It gave us page objects and it also gave us tests.
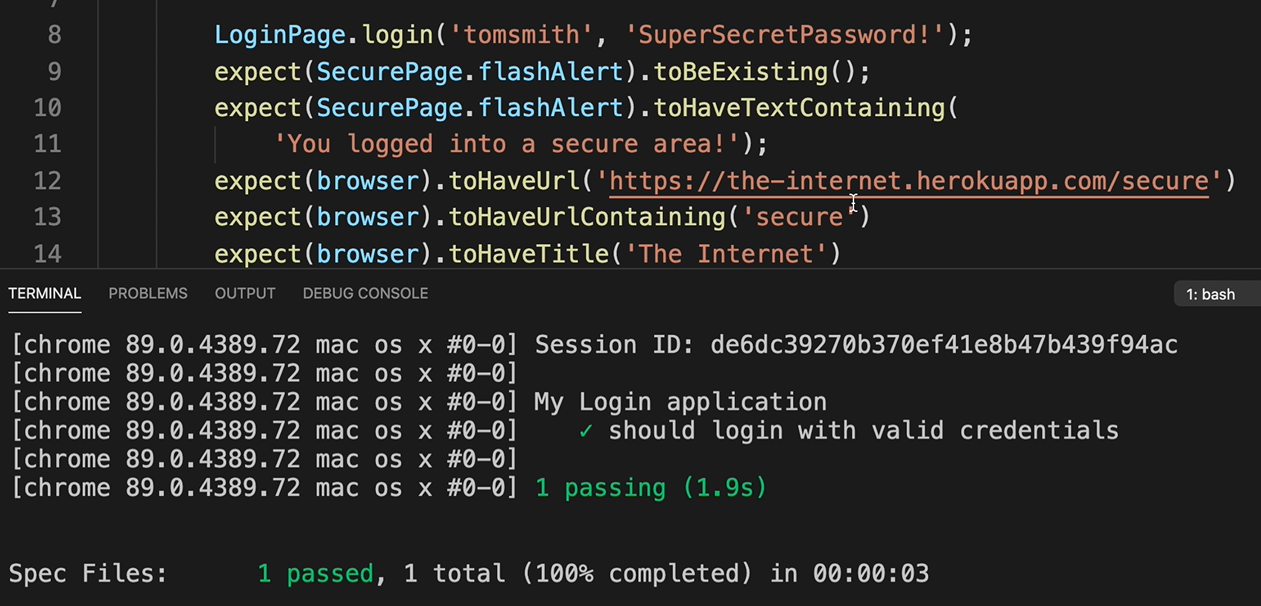
It's currently set up to be using the WebdriverIO expect, and it is using that toBeExisting and toHaveTextContaining.
const LoginPage = require('../pages/login.page');
const SecurePage = require('../pages/secure.page');

describe('My Login application', () => {
    it('should login with valid credentials', () => {
        LoginPage.open();

        LoginPage.login('tomsmith', 'SuperSecretPassword!');
        expect(SecurePage.flashAlert).toBeExisting();
        expect(SecurePage.flashAlert).toHaveTextContaining(
            'You logged into a secure area!');
    });
});
We'll go over what those are specifically in a minute, but this is how the WebdriverIO expect looks.
We can run our test by using the command that they gave us after we set up our project — npx wdio run wdio.conf.js.
Once we enter that command, we see that our tests run, and it logs into the browser.
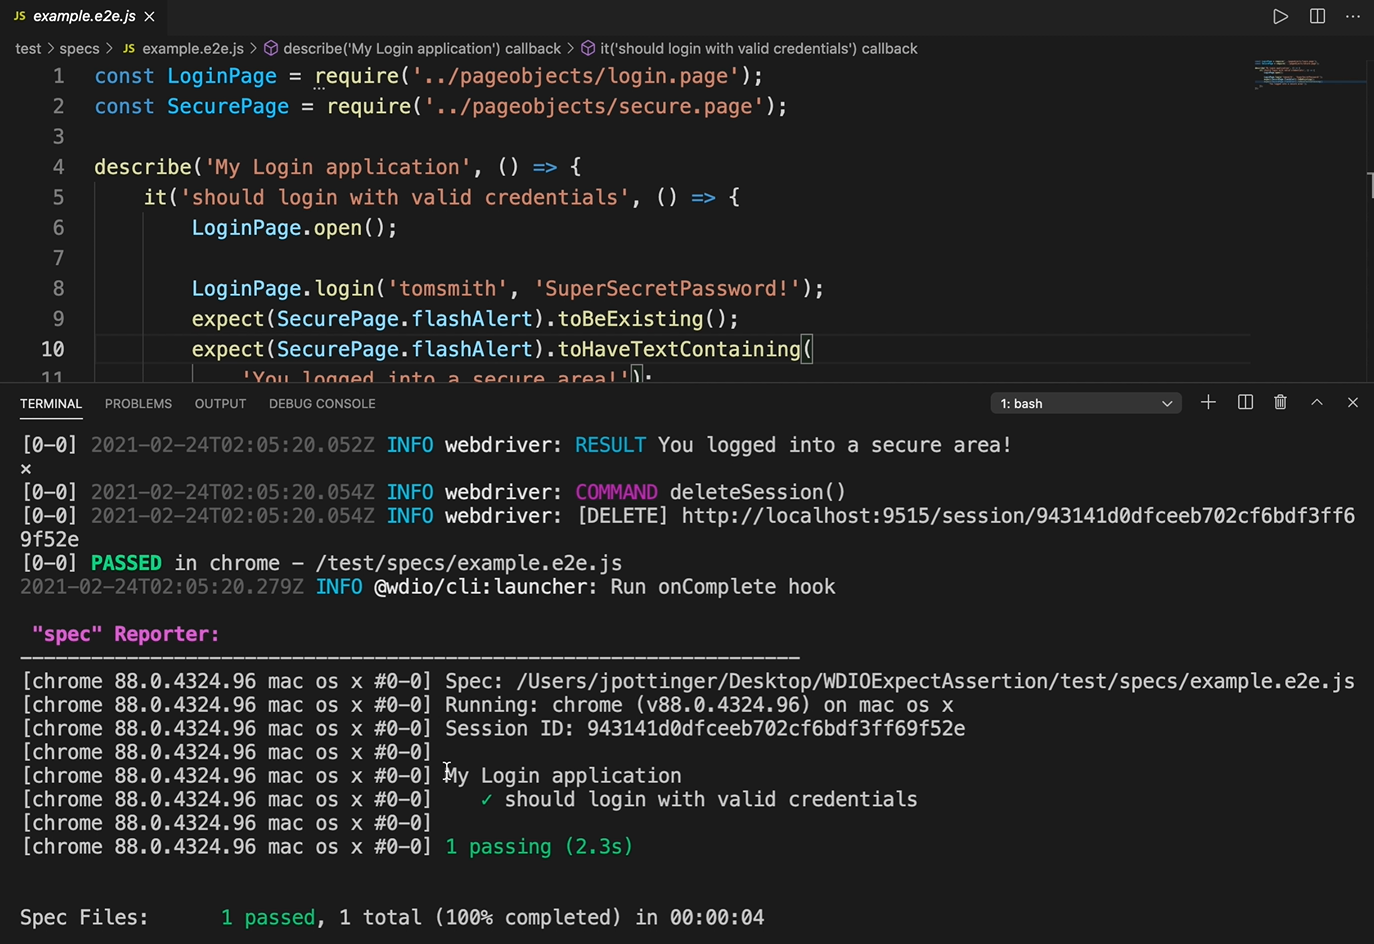
And we see the success message.
If we change the text that we are asserting against (“You logged into a secure area!”) and rerun our test, then it should fail as it should not have that specific text contained in what we were getting back.
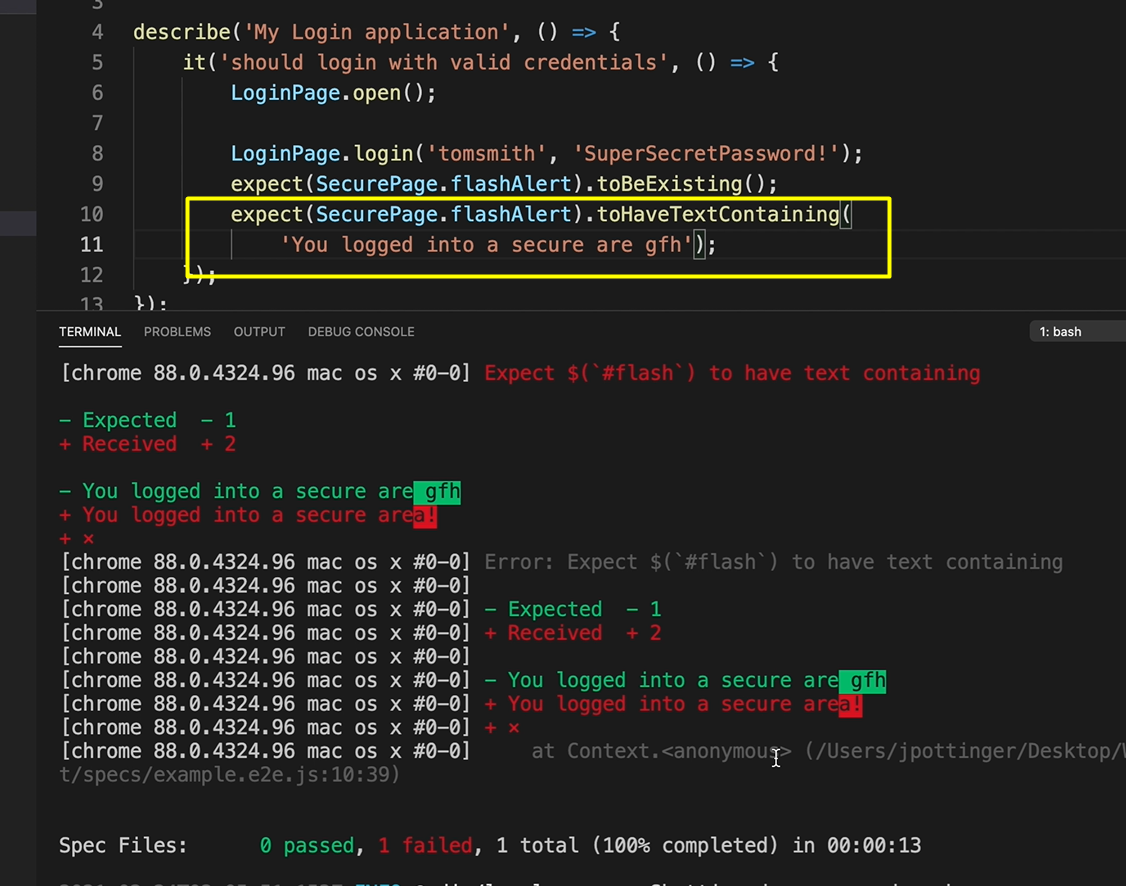
So, it fails because it had additional things that was not retrieved when we did our assertion.
Now there are different Browser Matchers that you can use.
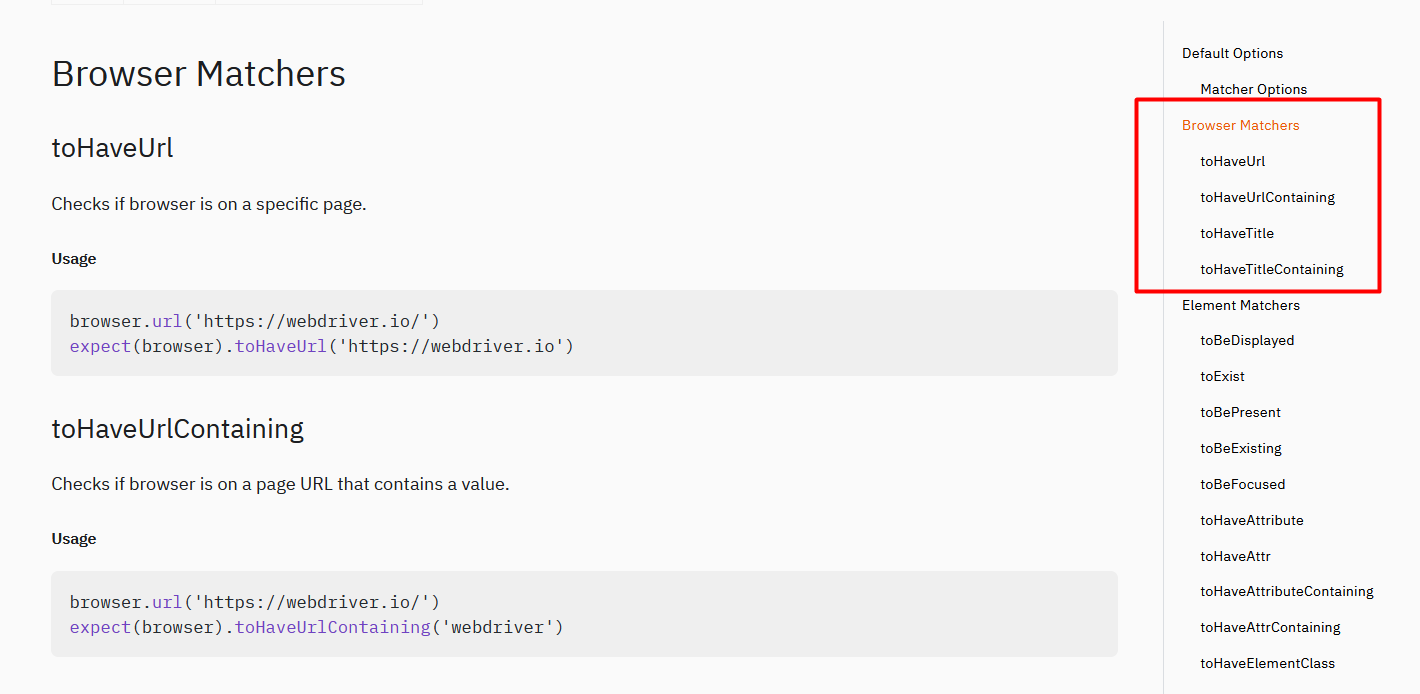
You can use toHaveUrl, toHaveUrlContaining, toHaveTitle, and toHaveTitleContaining.
Let's copy the toHaveUrl command and put that in our test.
We are going to check that once it is, we log in the URL that it navigates to is the correct URL.
So, we're going to fix back or first expect assertion, just ensure that passes.
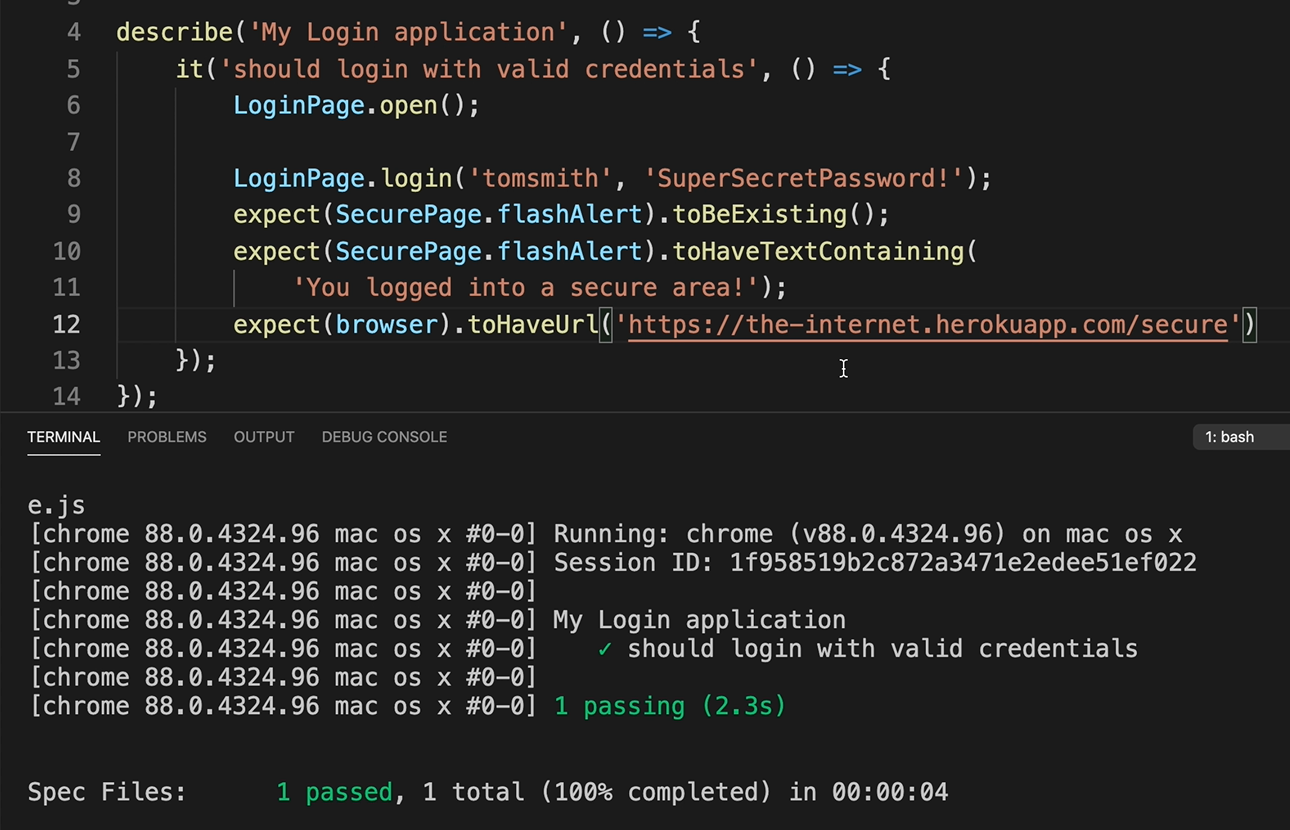
Then we say expect(browser).toHaveUrl and we are going to go to “http://the-internet.herokuapp.com/”.
And when we log in the URL changes to “secure”, so we can say “http://the-internet.herokuapp.com/secure”.
expect(browser).toHaveUrl('http://the-internet.herokuapp.com/secure')
Once we do that and run our test, it should pass as we are logging in and we're going to the secure URL.
We can do toHaveUrlContaining and this is going to be similar to the toHaveUrl command, but you don't need to enter the full URL.
So, we can just say “secure”.
expect(browser).toHaveUrlContaining('secure')
If we run this test again, then it will pass.
We can also do toHaveTitle. If we go to the particular page, the secure URL page and we right click, we inspect and we go into our head.
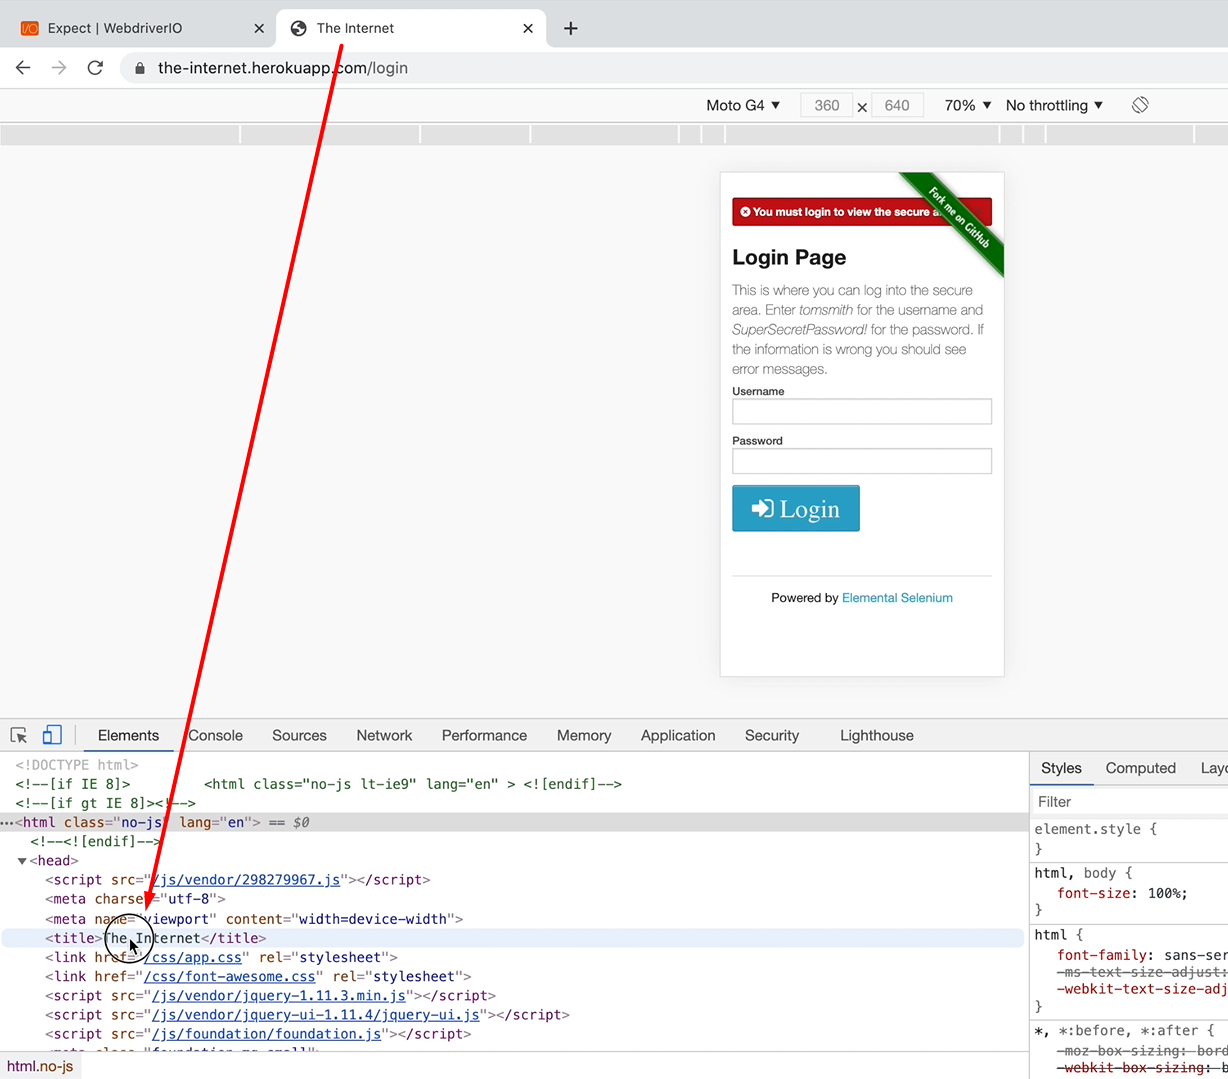
Then we should see the title says, “The Internet”.
So, we can go ahead in our test use the toHaveTitle command by saying expect(browser).toHaveTitle and we pass in the title that we're expecting, which is “The Internet”.
expect(browser).toHaveTitle('The Internet')
We run our test again, and it passes.
Now we can also do toHaveTitleContaining, and that's just checking that it contains some text.
These are the 4 different Browser Matchers that WebdriverIO expect provides you with.
Let's take a look at some other commands.
We have been using the toBeExisting and toHaveTextsContaining. These are Element Matchers and toBeExisting is the same as toExist.
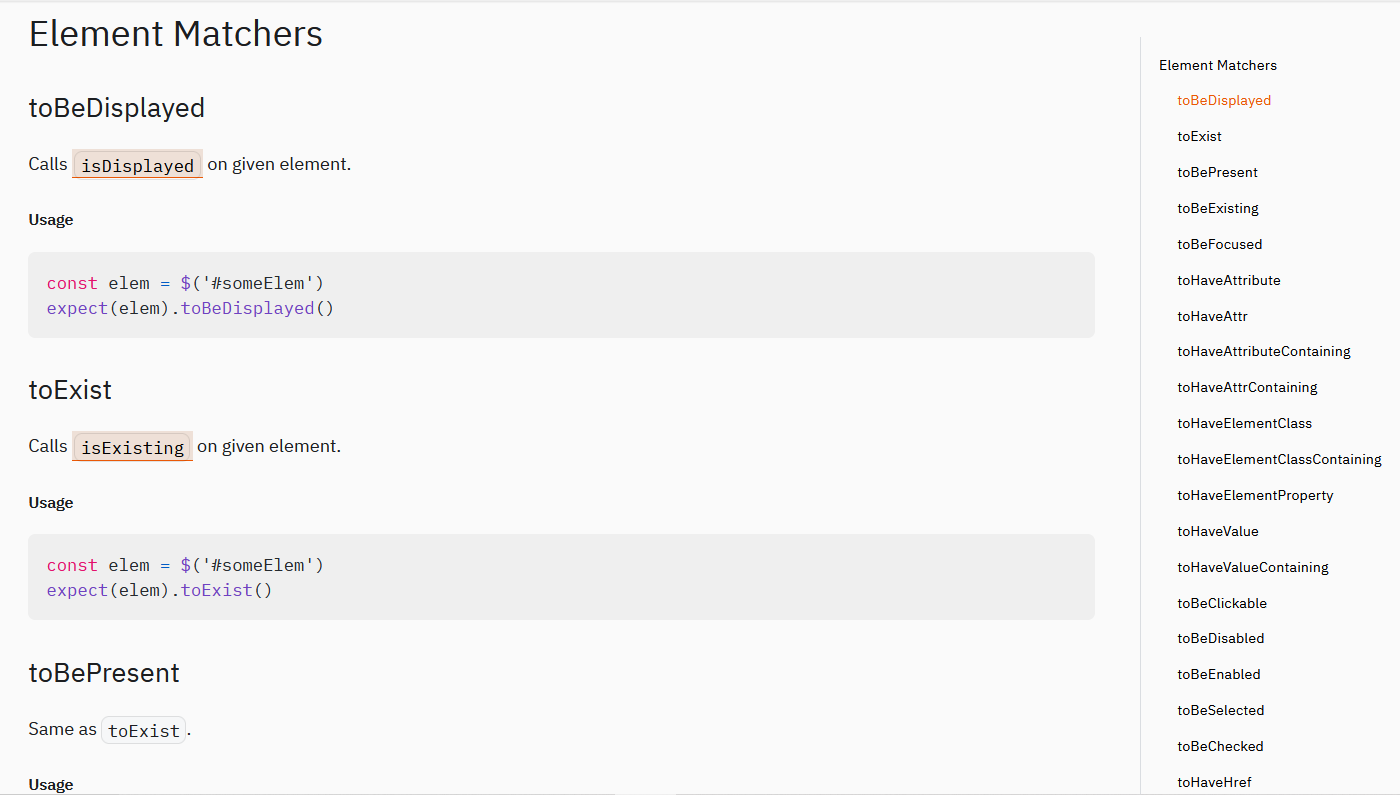
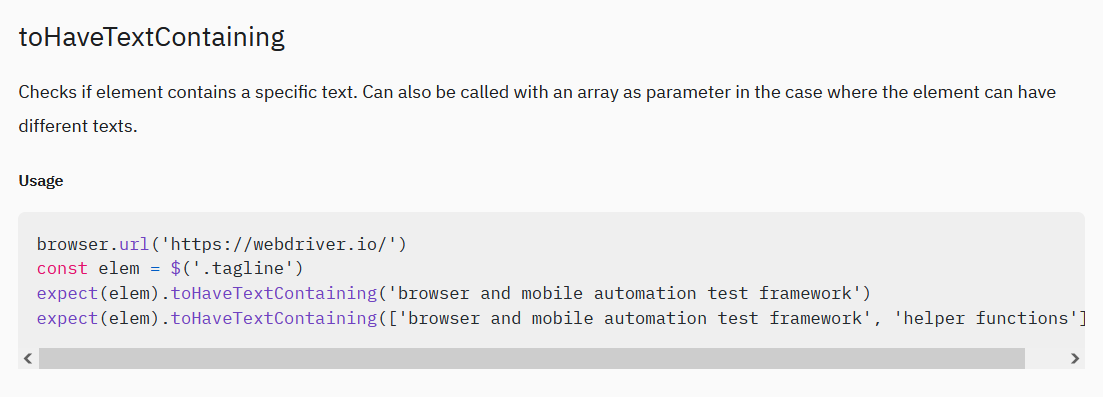
We also have toHaveTextContaining and that command just checks if the element contains a specific text.
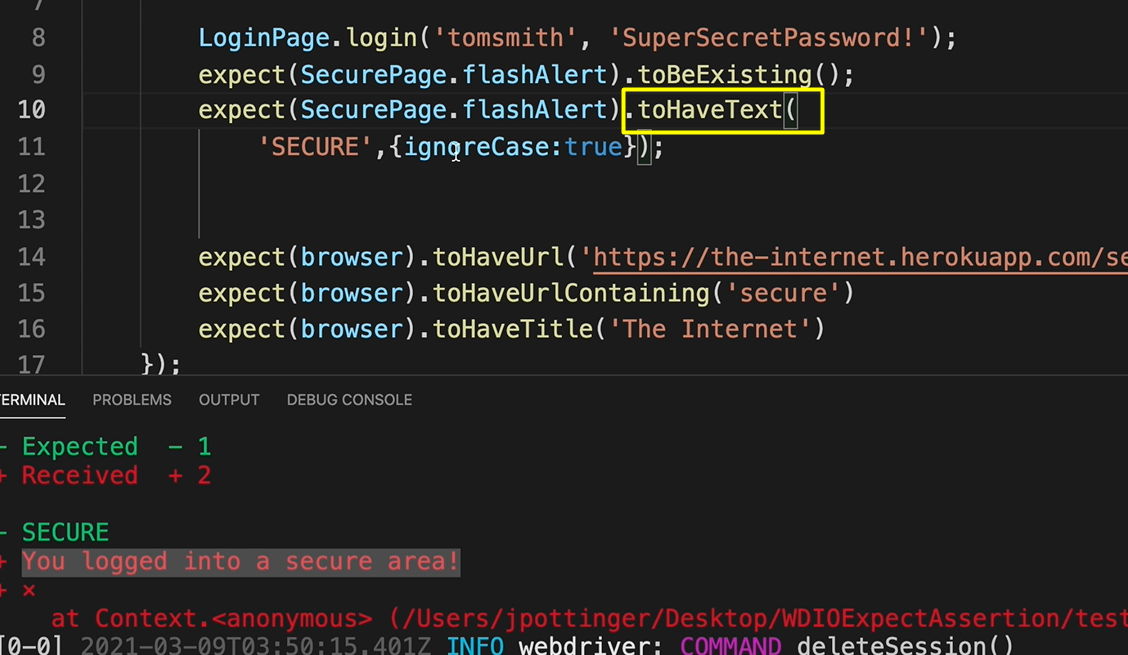
What we can do is change that long text (“You logged into a secure area!”) to say “SECURE”. And if we do that, you realize where using uppercase.
        expect(SecurePage.flashAlert).toHaveTextContaining(
            'SECURE');
If we run that test, it will fail because the “secure” that is coming back from the test is lowercase. But the “Secure” that we're checking it against is in upper case.

So, this would be a good time to use a String option if it is that you wanted to ignoreCase.
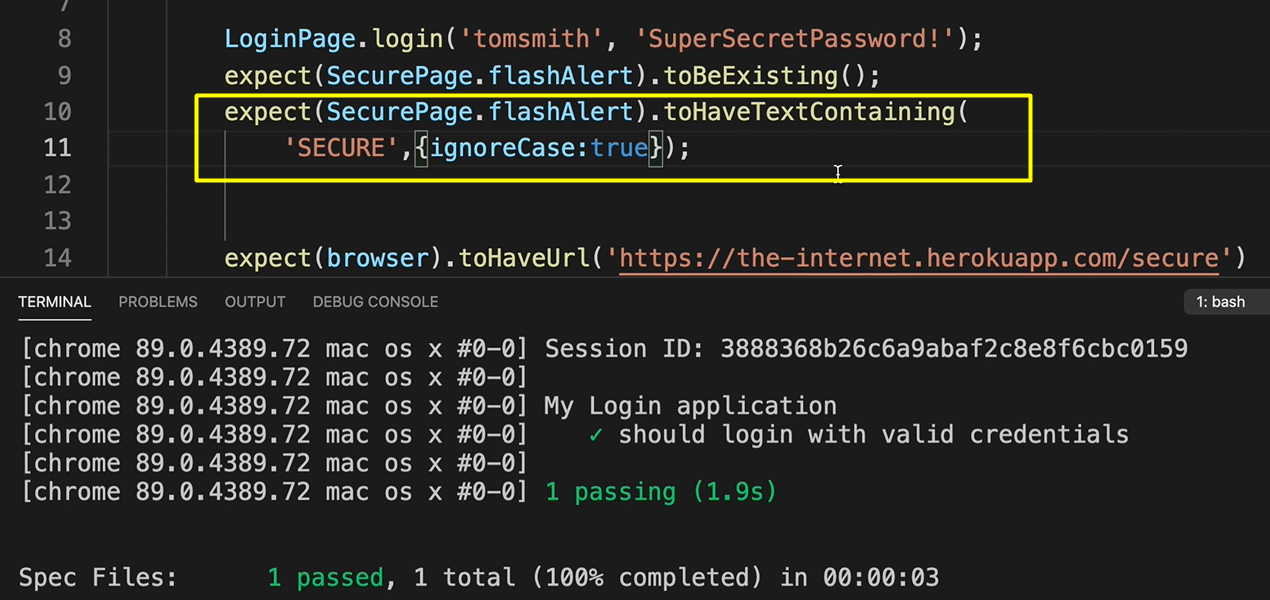
You use that String option by saying open curly brace, what the string option is, in this case ignoreCase, and you put in a Boolean “true” if you want it to ignore case; “false” if you don't.
        expect(SecurePage.flashAlert).toHaveTextContaining(
            'SECURE',{ignoreCase:true});
So, we enter that. And if we run our test again, it should pass because it is ignoring the case that we have in, and it is converting both cases to lowercase.
Now we can use the containing String option.
Instead of saying toHaveTextContaining, we could possibly use toHaveText command.
Now this is kind of not necessary but is just to show you an example.
If we run our tests to say toHaveText, it will fail because it's looking for the entire text to match what we have there, but we only have a partial text.
So, we can change it to add the String matcher containing and put “true”.
        expect(SecurePage.flashAlert).toHaveText(
            'SECURE',{ignoreCase:true,containing:true});
Therefore, it's going to change it really to say toHaveTextContaining.
There are a lot of options that you can use, and they will all be added into your assertion in the same way.
The next command we’re going to check out is the toBeEnabled.

If we go to Dynamic Controls, we click on Enable, it enables the field.
And then if we click Disable, it disables the field.

So, you're going to run tests on this and use WebdriverIO expect assertion to assert that the input field is disabled and enabled respectively.
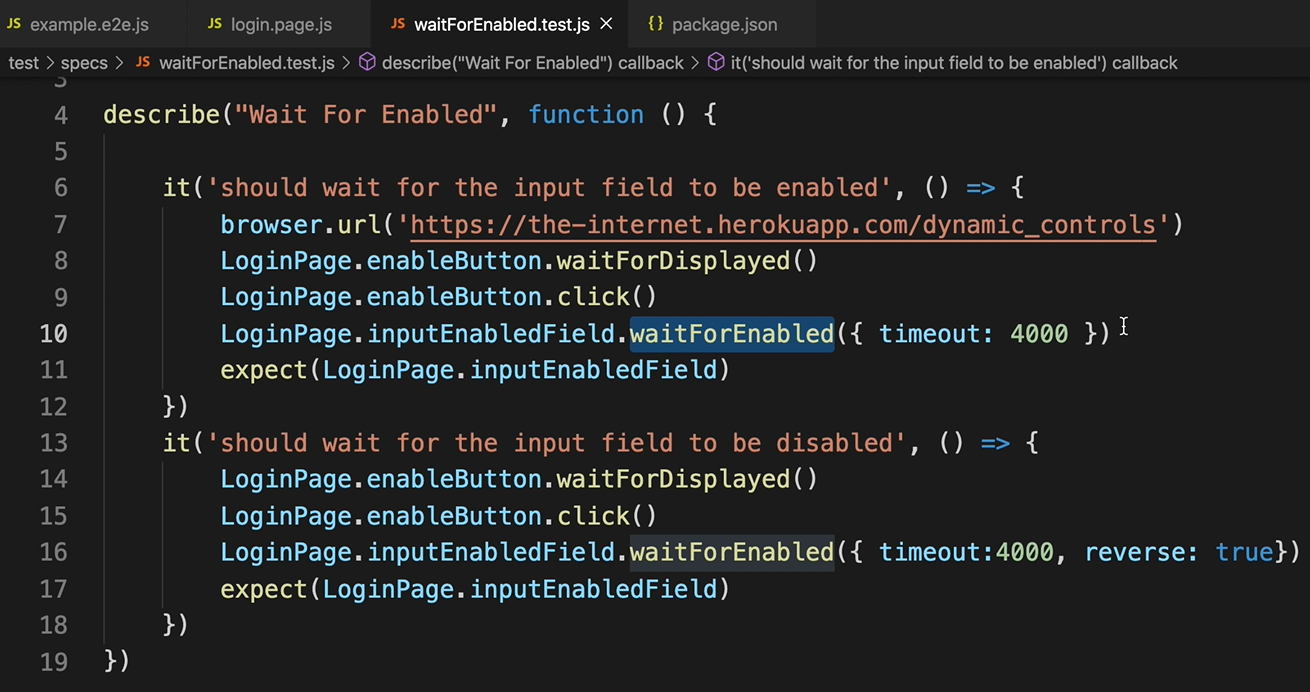
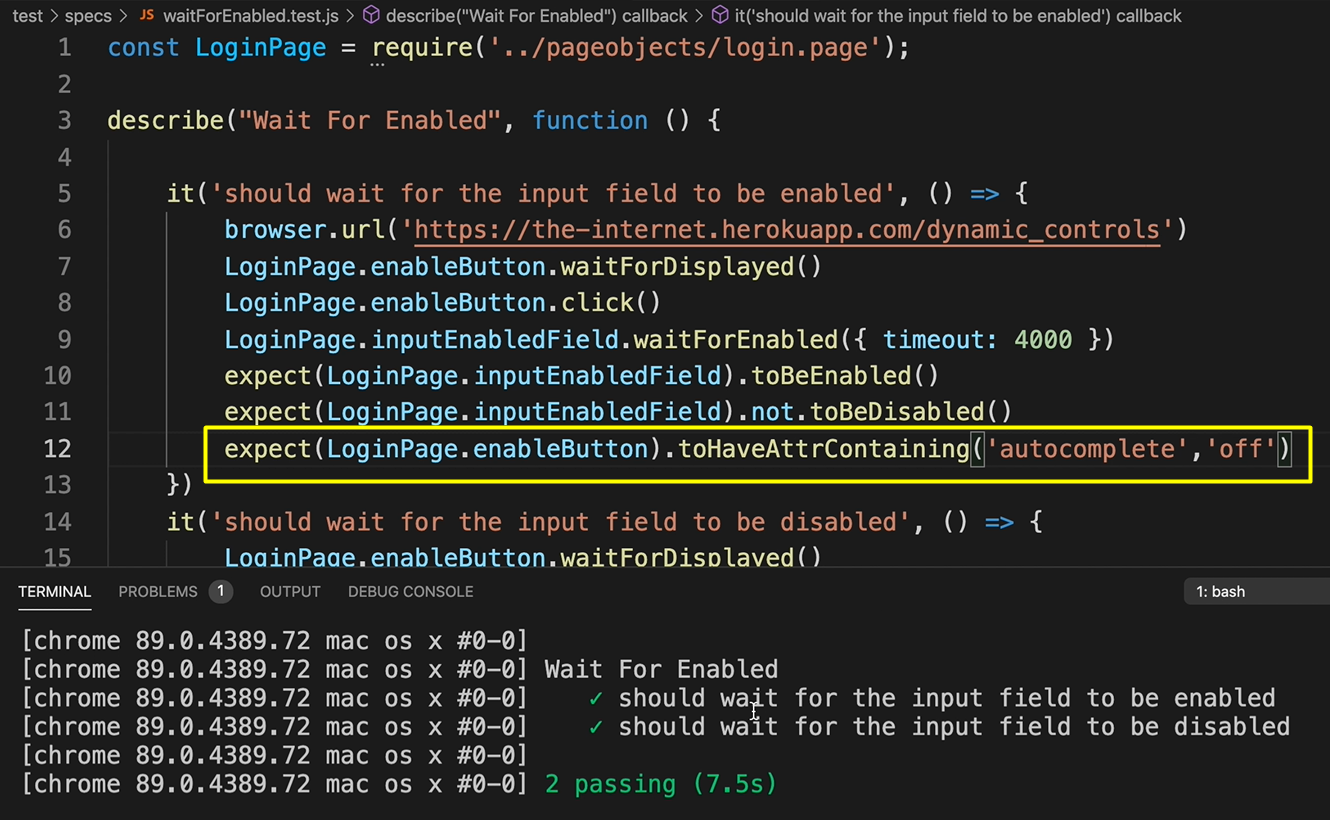
We have the button and we're waiting for it to be displayed and we're clicking on it.
Once that is done, we're using the waitForEnabled command. And we have a timeout of 4,000 milliseconds.
Then you need to have some expect; this is our assertion.
We're going to use toBeEnabled. So, when we say expect and we put in our element as this is an Element Matcher, we are going to say, expect the enabled field toBeEnabled.
We also see here that we can use expect element to not be disabled; and it would mean the same thing as to be enabled.
        expect(LoginPage.inputEnabledField).toBeEnabled()
        expect(LoginPage.inputEnabledField).not.toBeDisabled()
So, we can just add that in there as a demonstration that you can use either way to be enabled or to not be disabled. And we're using the same locator, so the “inputEnabledField” is located.
We can then just do toBeDisabled on the second test as each is going to check that the field is disabled after we click the button again.
expect(LoginPage.inputEnabledField).toBeDisabled()
So right here I'm using npm test.
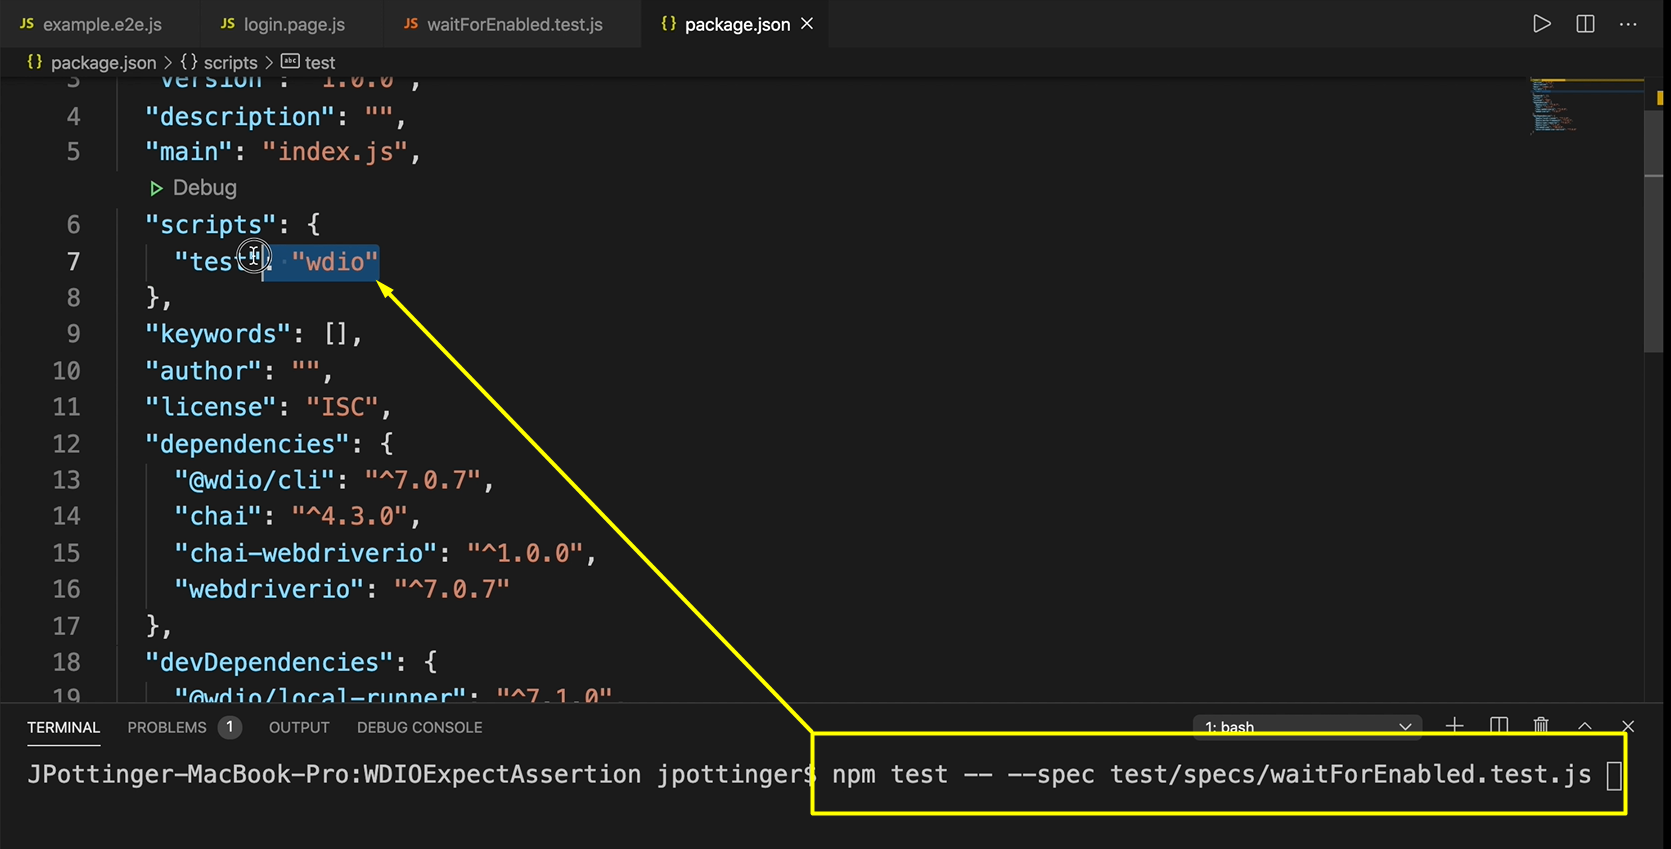
I changed the command and I just put “wdio” in my package.json — "test": "wdio" — so that it's easier for me to run my test.
Then I call a specific test, as I now have more than 1 test, and I don't want to run all of them. I just want to run this specific one, so I say npm test -- --spec — and I put the part to the test.
If I run this test, I see where it clicks the button, it waits for it to be enabled. Then it's asserting that the field is enabled. It clicks the button, and then waits for it to be disabled.
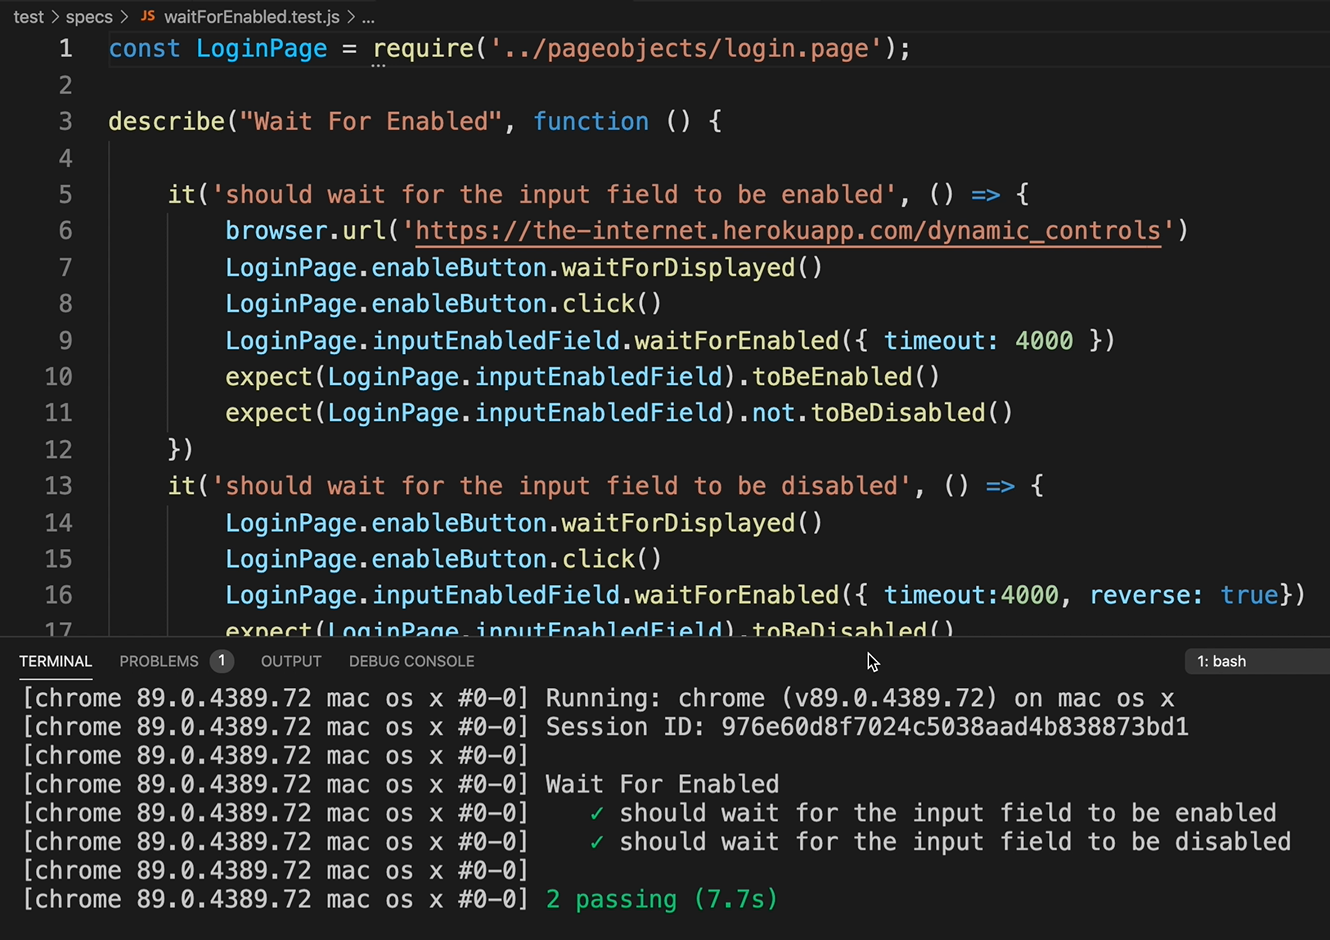
And so, it passes.
So, we can use the toBeEnabled matcher as well as not.toBeDisabled; or the toBeDisabled matcher, and these would all work.
Let's look at the toHaveAttributeContaining matcher.
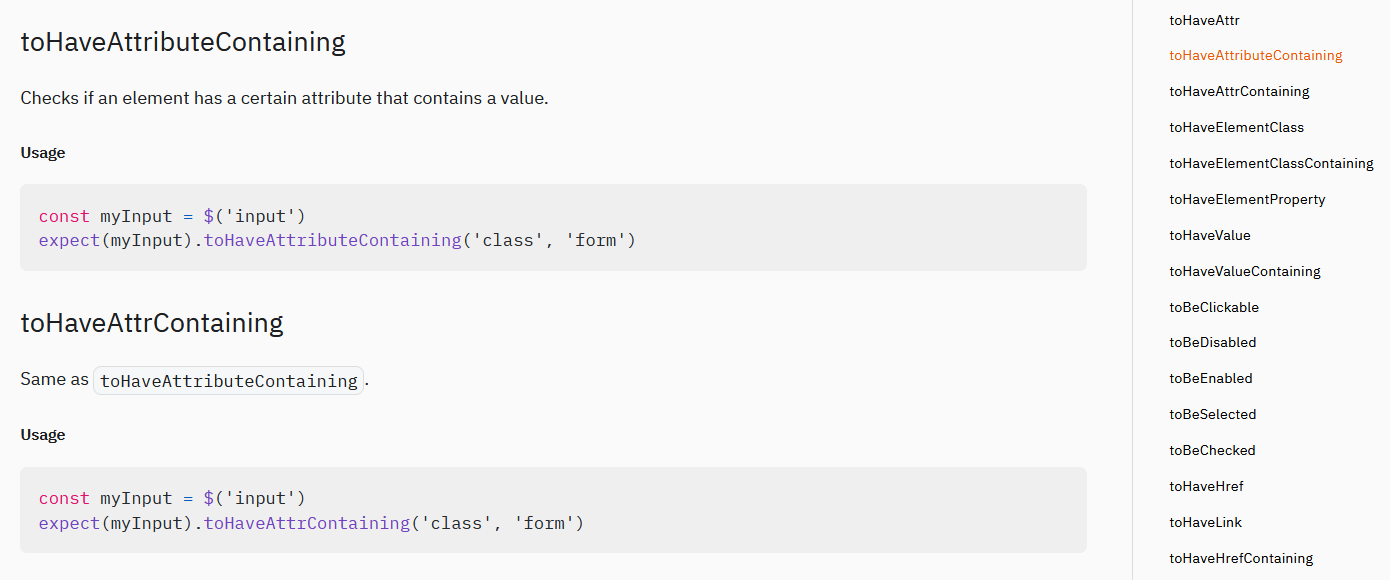
This matcher allows you to pass in 2 values — the attribute and the value that you're expecting it to have.
If we inspect here, we see that the Enable button has some attributes.
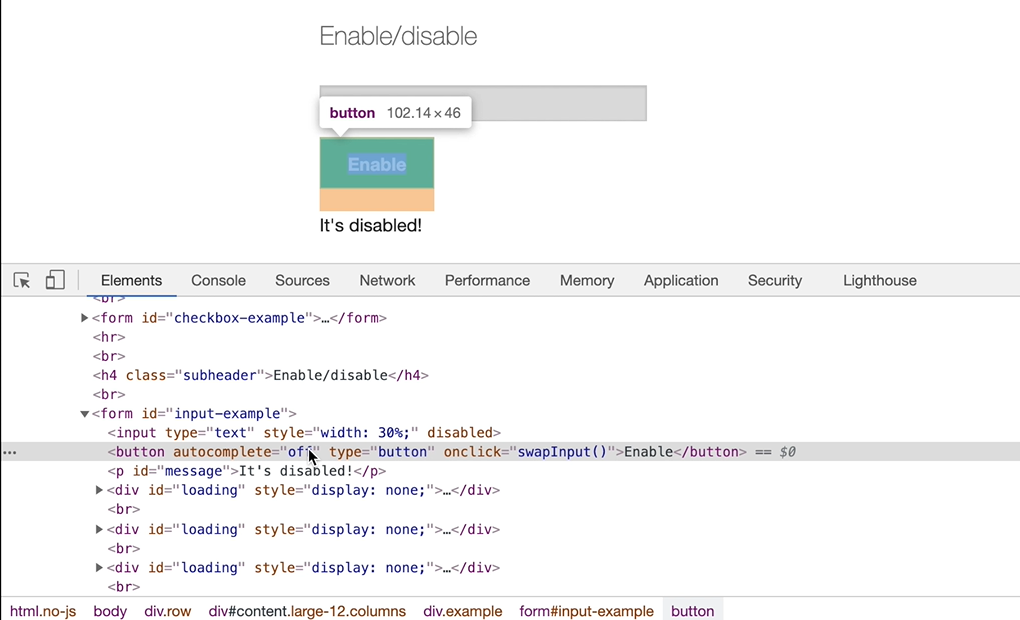
It has onclick; it has _autocomplete=“off”. _We are going to check for the autocomplete=“off”.
We just take element, say it toHaveAttributeContaining and we pass in the attribute and the expected value.
expect(LoginPage.enableButton).toHaveAttributeContaining ('autocomplete', 'off')
When we run our test, it passes.
It's checking that there is some attribute on this “enableButton” called “autocomplete” and it has a value of “off”.
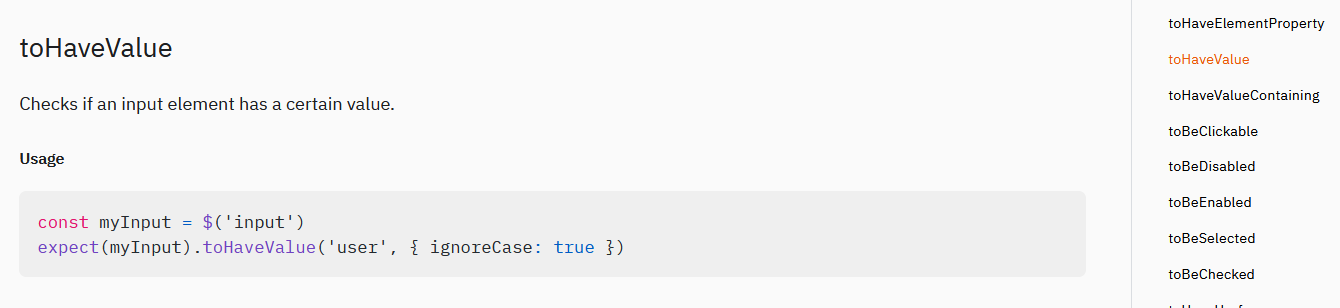
The toHaveValue checks that an input element has a certain value.
Now we have used toHaveText before and that is on a text field.
Remember, there's a difference between get text and value, and how you use them.
So, if we go to our login field and we inspect that we'll see that it's an input.
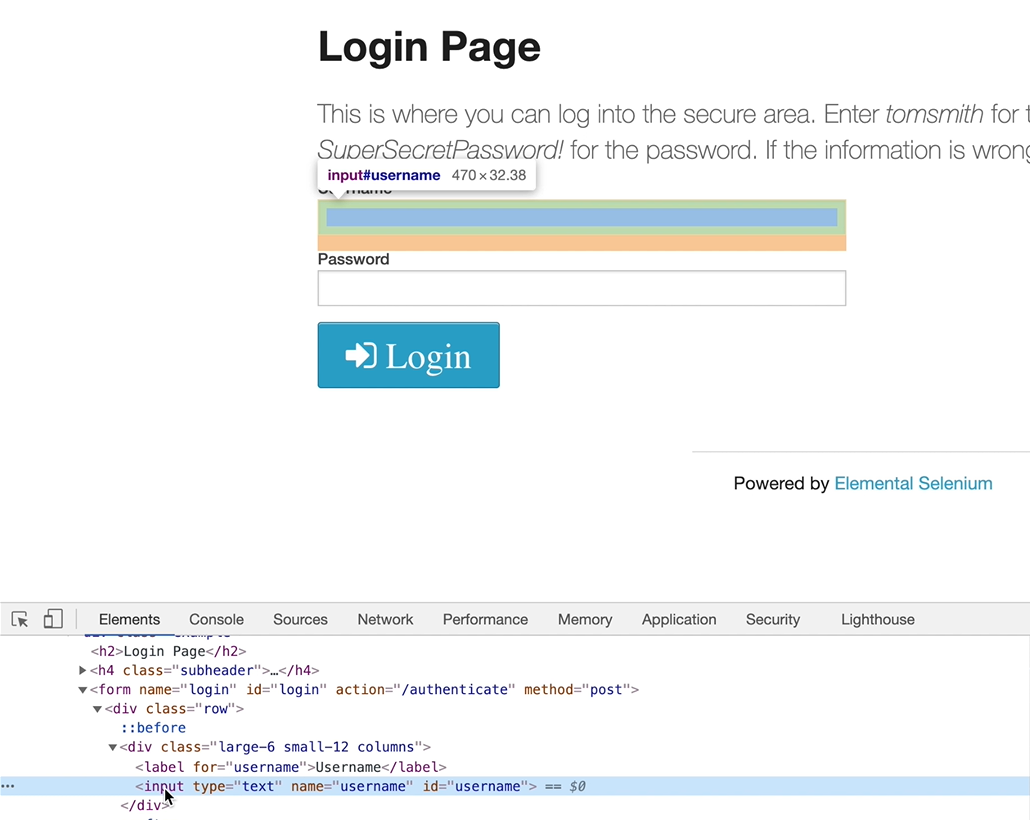
Therefore, to get the text on that, you'd have to use toHaveValue.
If you're doing the h2, the “Login Page”, et cetera, then you can use toHaveText as that will be on a text element and it will work.
So just a refresher there.
Let's take a quick look at toHaveHrefContaining.
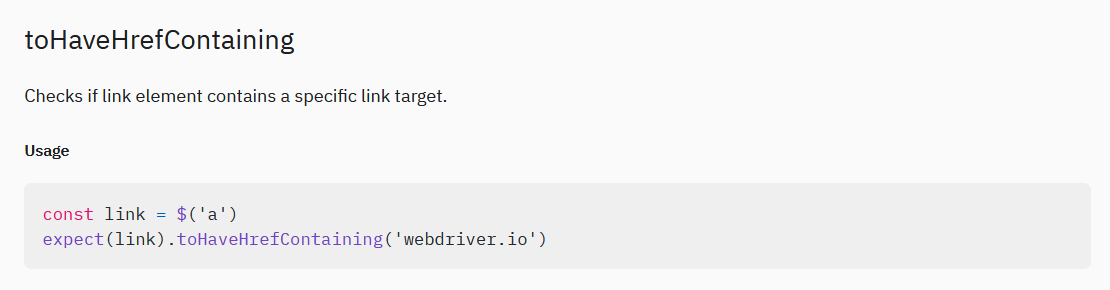
Now this just checks that the link element contains a specific text like we have in our footer here.
It contains “Elemental Selenium”.
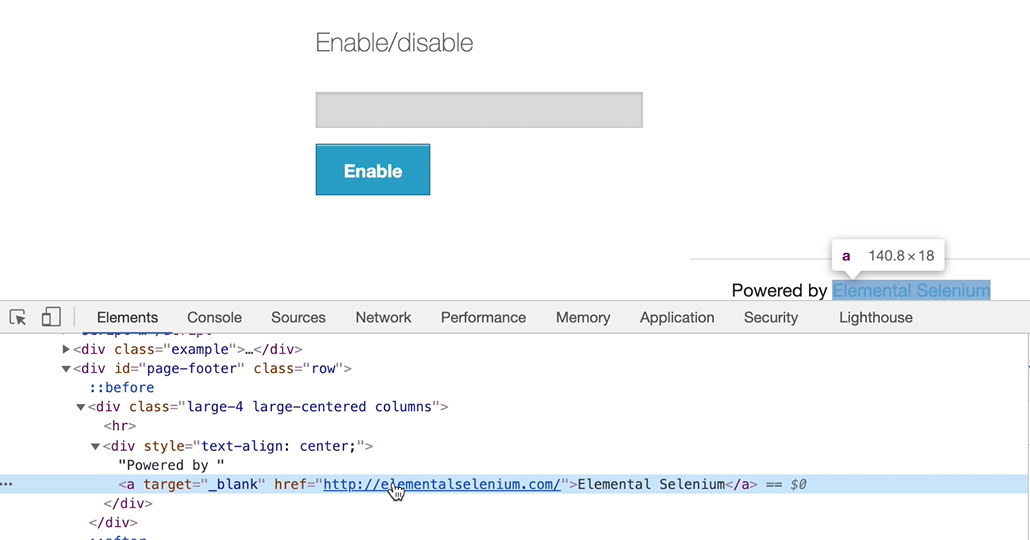
So, we can check this link here, contains the word “Elemental”.
We're going to create the page object for the page footer. We're going to say:
expect(LoginPage.pageFooter).toHaveHrefContaining('Elemental')
That's our locator.
If we go ahead and run our test it should work because we're checking for that specific link. And we're saying it should have “Elemental” in its Href.
Now there are several other matchers that you can use.
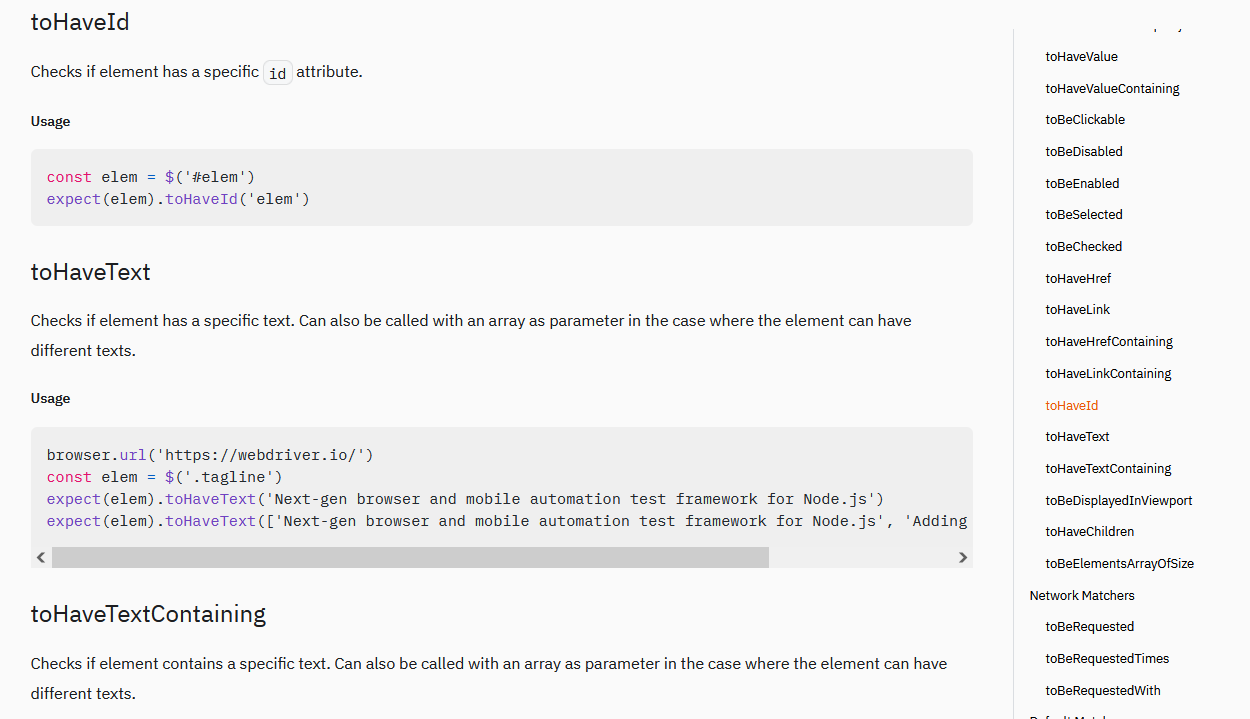
You can use toHaveId, toHaveText, toHaveTextContaining that we've shown before, and toHaveId (for that, you just put in the ID that you're expecting it to have).
You can use toBeDisplayedInViewport to be visible in the viewport, which is the same thing as toBeVisibleInViewport.
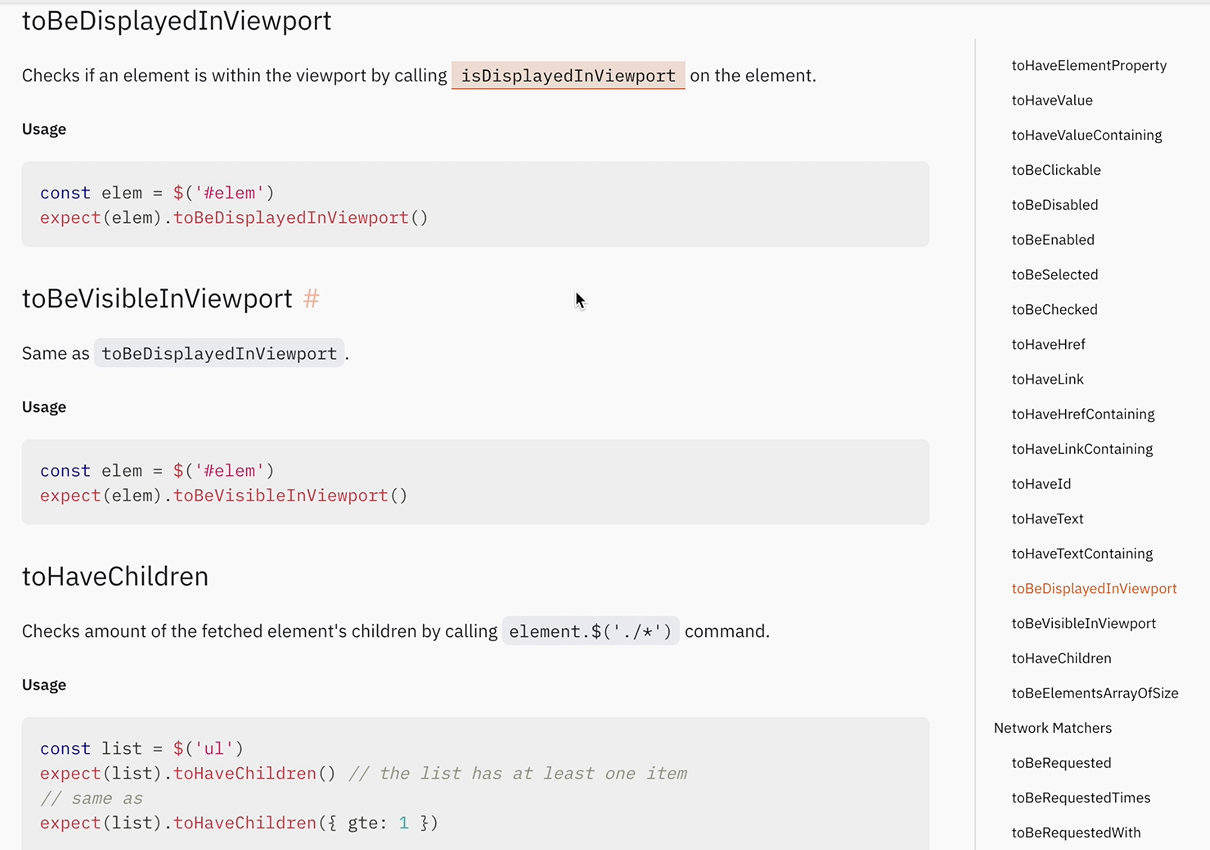
We have toHaveChildren…
There are a lot of matchers that expect by WebdriverIO provides you with.
That's what I love about it. It gives you so many different options and it's really intuitive and easy to use.
Resources
- Lesson Code – Login Page Object
- Lesson Code –Example
- Lesson Code – Internet Page Object
- Lesson Code –Wait For Enable
- WebdriverIO Docs - Expect
- Project Application – the-internet
- WebdriverIO Docs – Migrating from Chai
- Jest Docs - Expect
- Jasmine Docs – Expect
Quiz
The quiz for this chapter can be found in Chapter 3.2.
