

Transcripted Summary
In our test folder under specs, we're going to create a new file called element.test.js.
The first thing that we're going to look at is how to interact with elements using WebdriverIO.
Each WebdriverIO element interaction accepts a String, which is used to locate the associated element in the DOM. This String can be used to reference an element's ID, tag, class, or other forms of elemental interaction.
We are using Mocha syntax. So, each test suite and test case is defined by a describe and it respectively.
Let's get started — describe("Interacting with elements", function ().
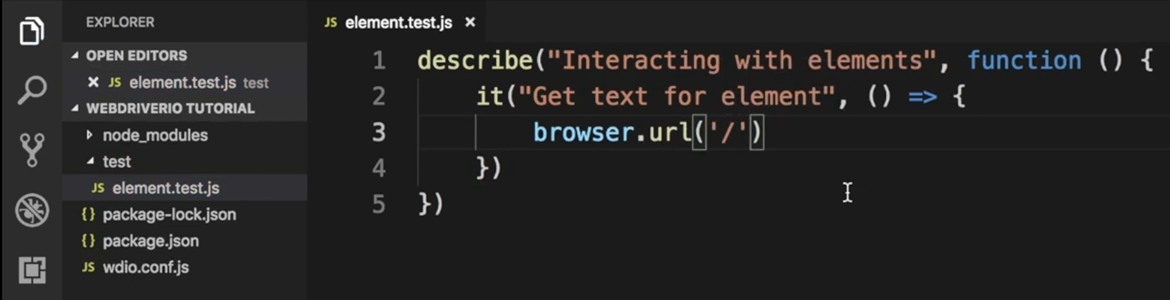
And then in our it, we're going to say “get text” right?
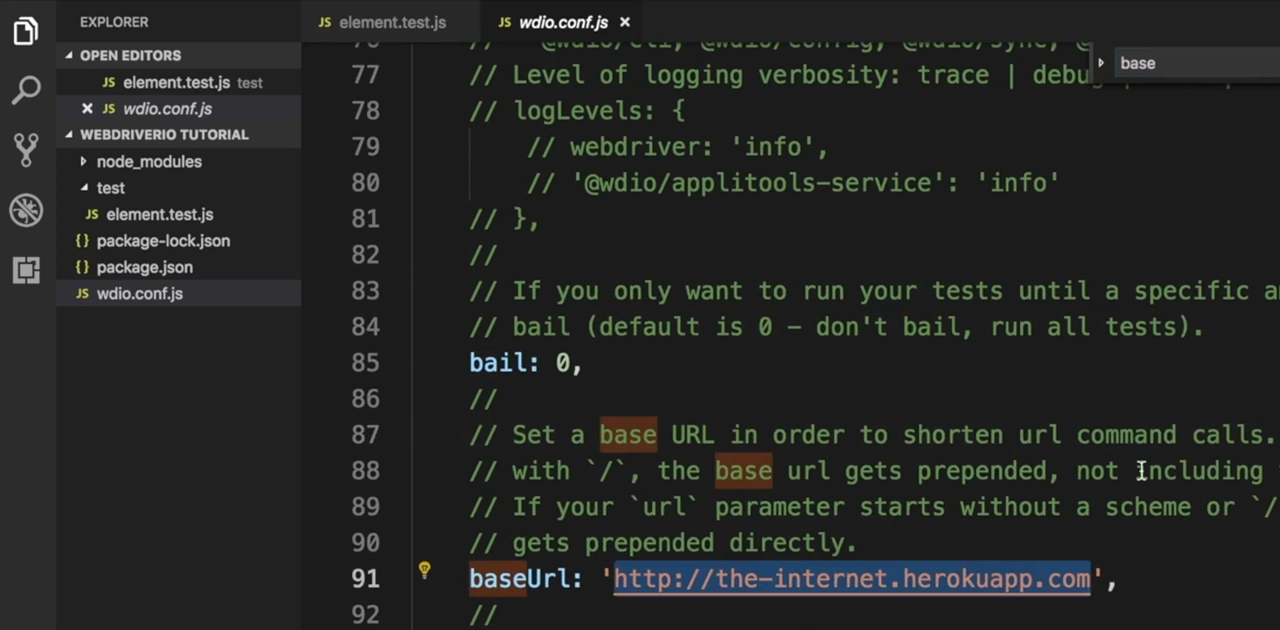
We're going to first say browser.url('/'), and we're going to put a backslash.
This backslash will just go to the baseURL that we have previously defined here in our config file.
If we open up a browser and we go to this URL, the-internet.herokuapp.com, we'll notice that it contains a large library of elemental interactions.
If you look at this one, “Available Examples”, and we say inspect, we realized that it is in an H2 tag.
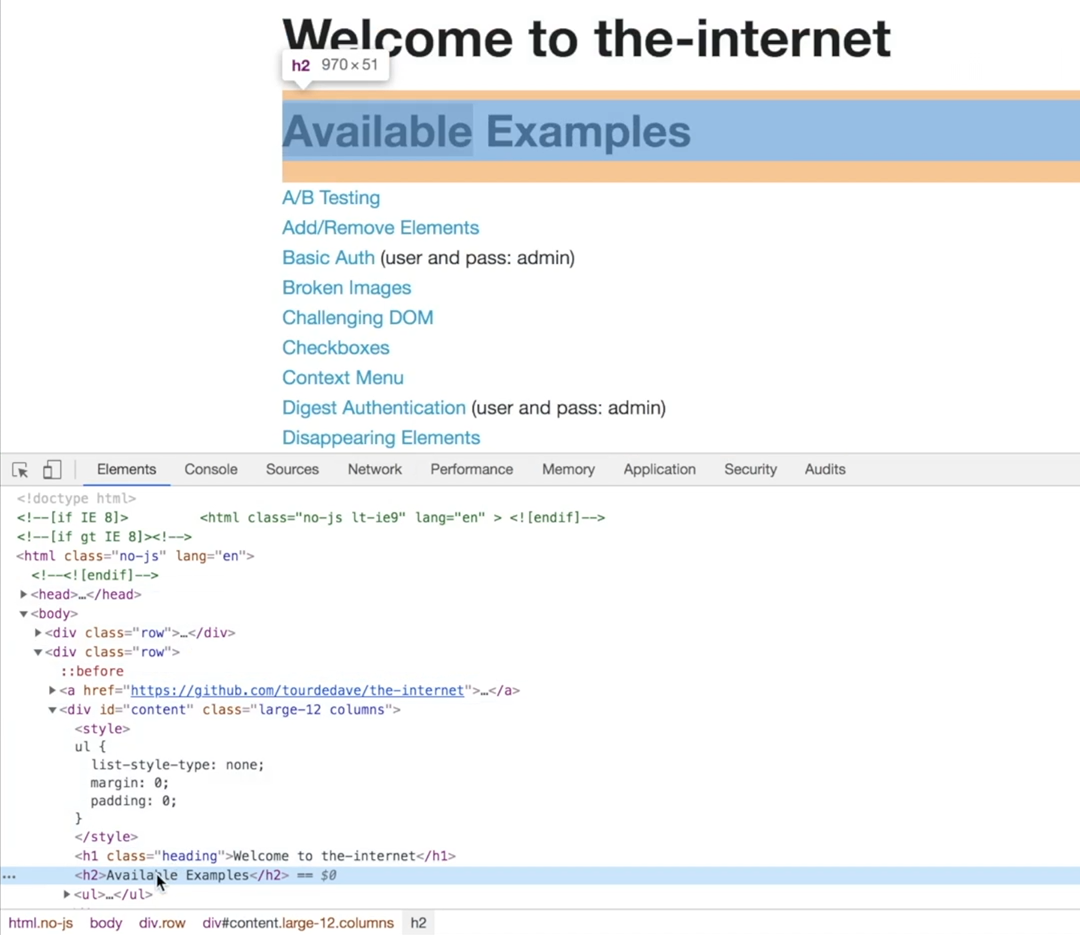
So, we can use that tag to interact with the element.
We can then say in our test, let text=$(), with the element, which is “h2”, .getText.
We can console.log(text).
describe("Interacting with elements", function () {
    it("Get text for element", () => {
        browser.url('/')
        let text = $("h2").getText()
        console.log(text)
    })
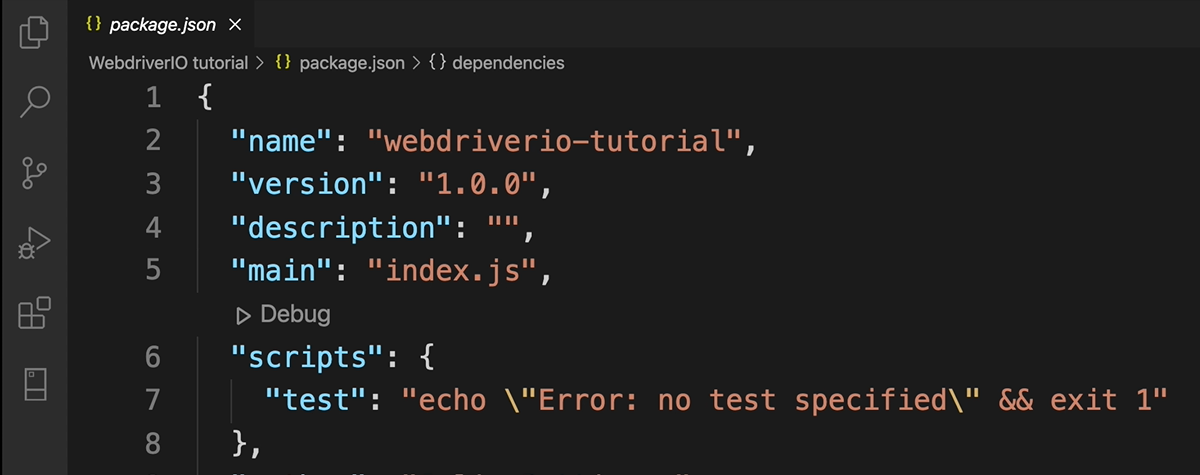
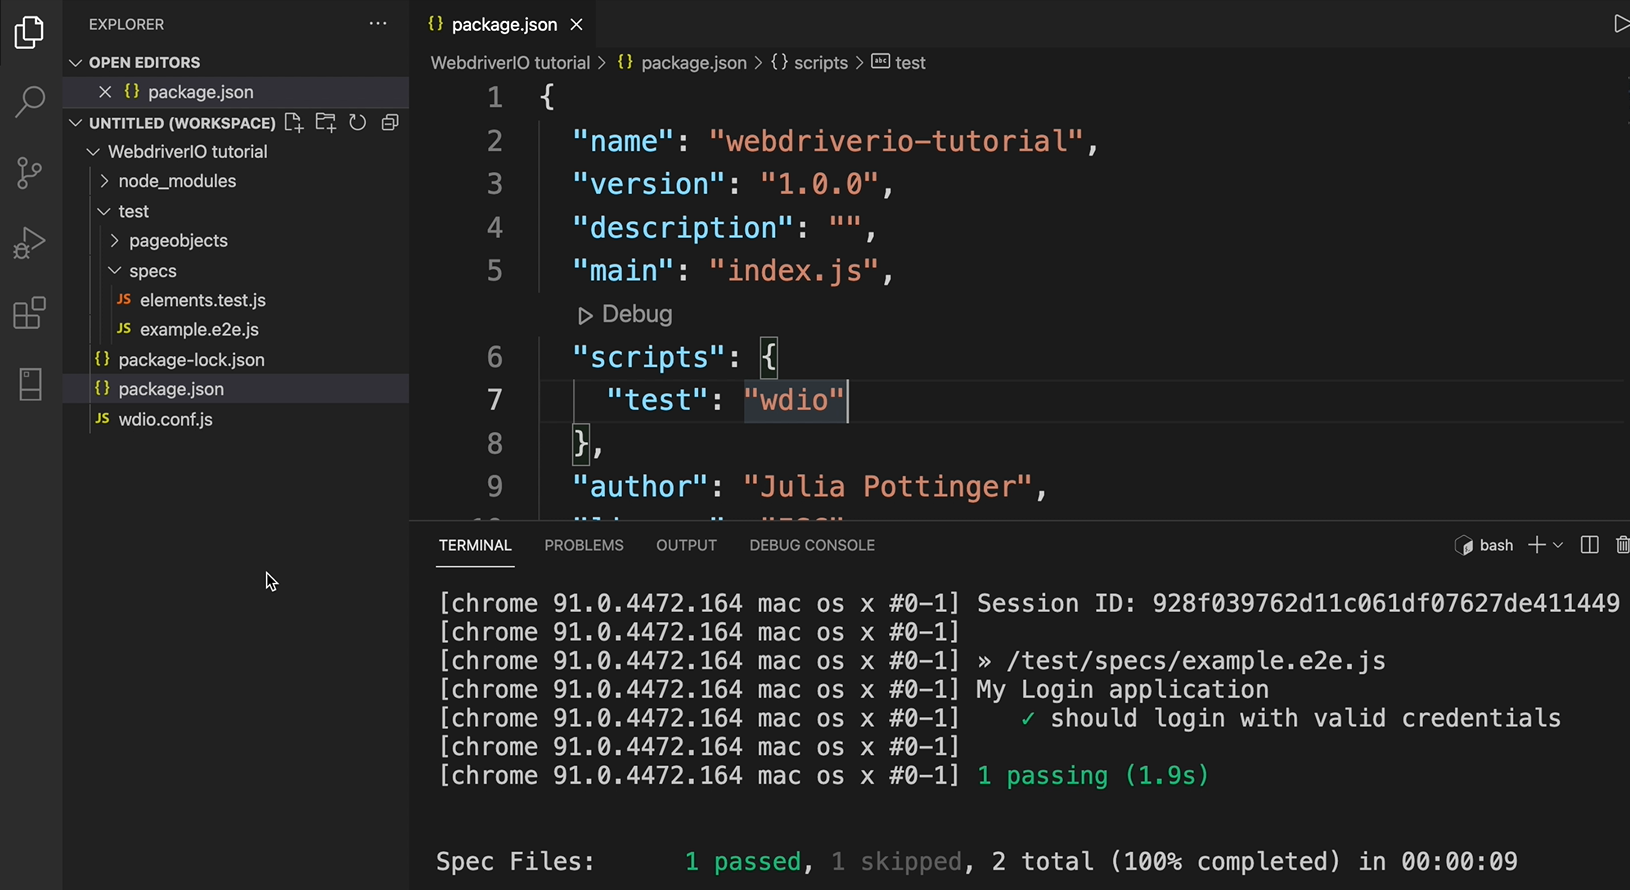
Before we run our test, let's just go through our [package.json](https://github.com/jpott77/webdriverio/blob/master/package.json).
In our package.json, where we have “scripts” and then “test”, we see that we have the default message, which is “echo \ Error no test specified`”, right?
If we were to say npm test, which is a common command to run tests, we would not be able to run our test successfully.
Previously in the command line, we are using the command that WebdriverIO gave to us, which is npx wdio run wdio.conf.js.
But suppose, we just wanted to run npm test. If we do that right now, our test will fail, we'll get the default error, “no test specified” and “exit 1”. So, we need to fix that.
The command that WebdriverIO gave us to run our test, which is npx wdio run wdio.conf.js, we are going to replace what we have in our test script and put it there.
  "scripts": {
    "test": "npx wdio run wdio.conf.js",
  },
So now, if we go ahead and say npm test, our test will pass, because it is calling this command.
Additionally, we could just say “wdio”, as WebdriverIO and Node takes care of all the additional things that we were talking about.
  "scripts": {
    "test": "wdio",
  },
As long as we have our config file called “wdio.conf.js”, WebdriverIO will automatically know to look for it.
So, if we just say “wdio” for a test script, and we run that test again by saying npm test, then you see that it works as well.
# Folder Structure
The folder structure that we have here is updated.
If you had done the course before, when we are using WebdriverIO version 5, then we would have had something different.
There was a test folder at the root, and then you would have had a pageobjects folder outside of that.
You can maintain this, however, to ensure that the course continues the way that the previous version was, and that the other videos that were here before can still be run and there aren't any troubles with structures and folders, I'm going to change the folder structure that we currently have.
So, I'm going to move specs outside. I'm also going to move _pageobject_s outside, and I'm going to delete the test folder.
I'm going to rename the specs folder to test.
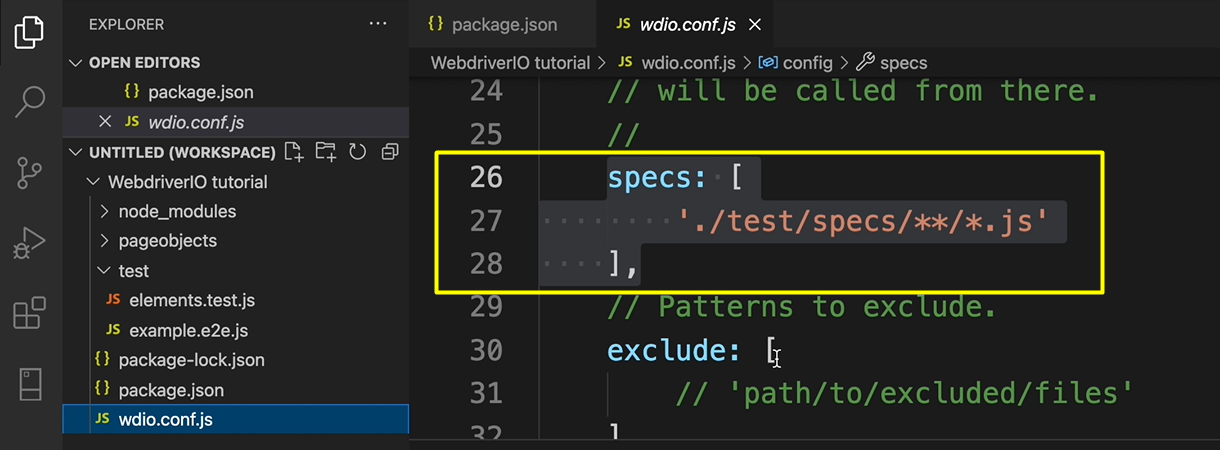
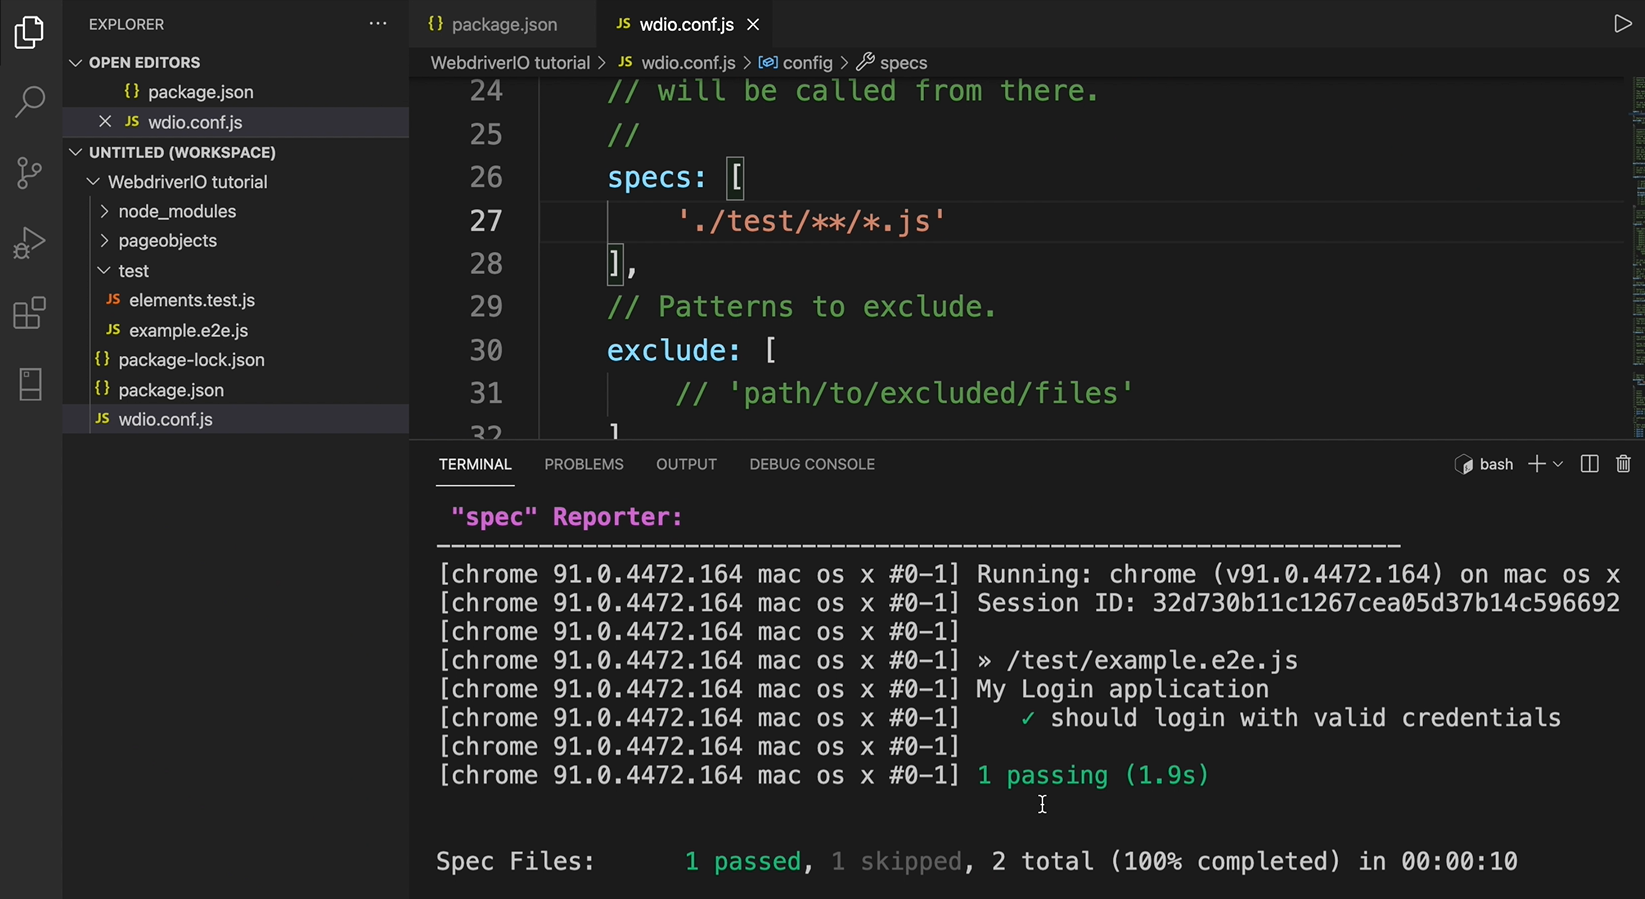
Because of this change, I also have to go into my wdio.config file in the specs and ensure that the folder path is correct.
Now specs in the wdio config file is looking for your tests.
Wherever you have your tests, whatever folder structure you have for your test, you need to ensure that it is correct here so that WebdriverIO can find your test and run them.
I have modified my project folder structure. I no longer have my test folder, and then specs in there. I only have a folder called test. So, I'm going to edit this and I'm going to remove specs.
    specs: [
        './test/**/*.js'
    ],
Now, my folder is correct.
After you go to the root of the project, then you go into test and then you will see all my tests.
And I want everything in here to be run once it is in the test folder and ends with “.js”.
So, if I go again and say, npm test, we see that our test still run and still passes, even though we have modified the folder structure a little bit.
Hopefully this isn't confusing.
I did this so that we can have continuity between the updated version of the course and the folder structure that was in the old version of the course.
NOTE
If you want to, you can still maintain the folder structure that comes when you auto-generate the page objects and the test that WebdriverIO gives to you. Just remember to check for certain folder issues that may come up in terms of the way you set up your specs in your wdio config file, et cetera.
All right, so our test is now running.
If we go back to our element.test.js and say, npm run test, or npm test, it should open up a new browser and that test should pass.
And if we scroll up just a bit, we should see where a console will log out what that element was, which in this case was “Available Examples”.
Let us try another element.
Let's say we have the class, and we have the class name here if we inspect on “Welcome to the-internet”, we have the class “heading”.
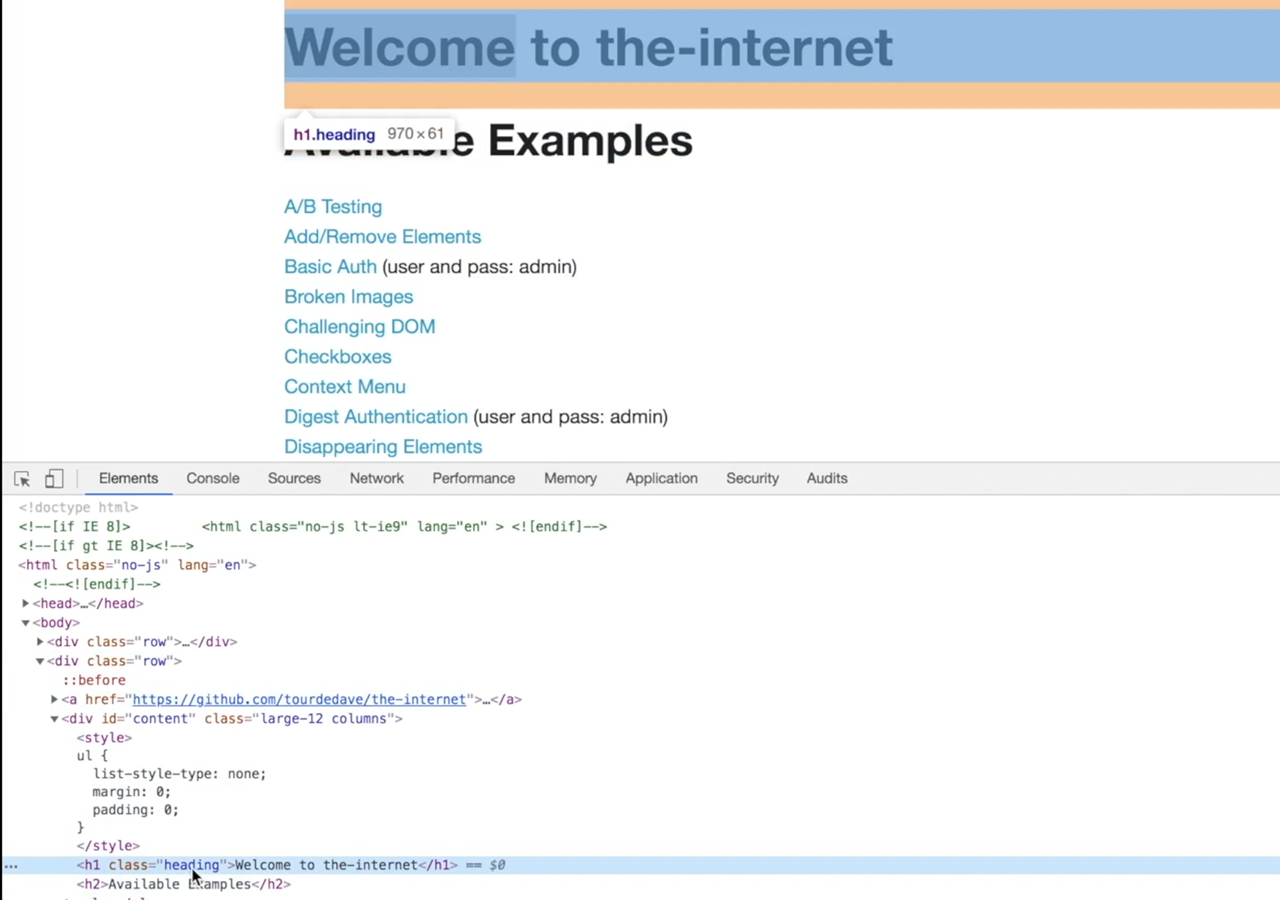
So, we could also say, .heading.
describe("Interacting with elements", function () {
    it("Get text for element", () => {
        browser.url('/')
        let text = $(".heading").getText()
        console.log(text)
    })
If we run the test this time, it should print out, “Welcome to the-internet”.
Okay.
Let's say that we are looking for an ID.
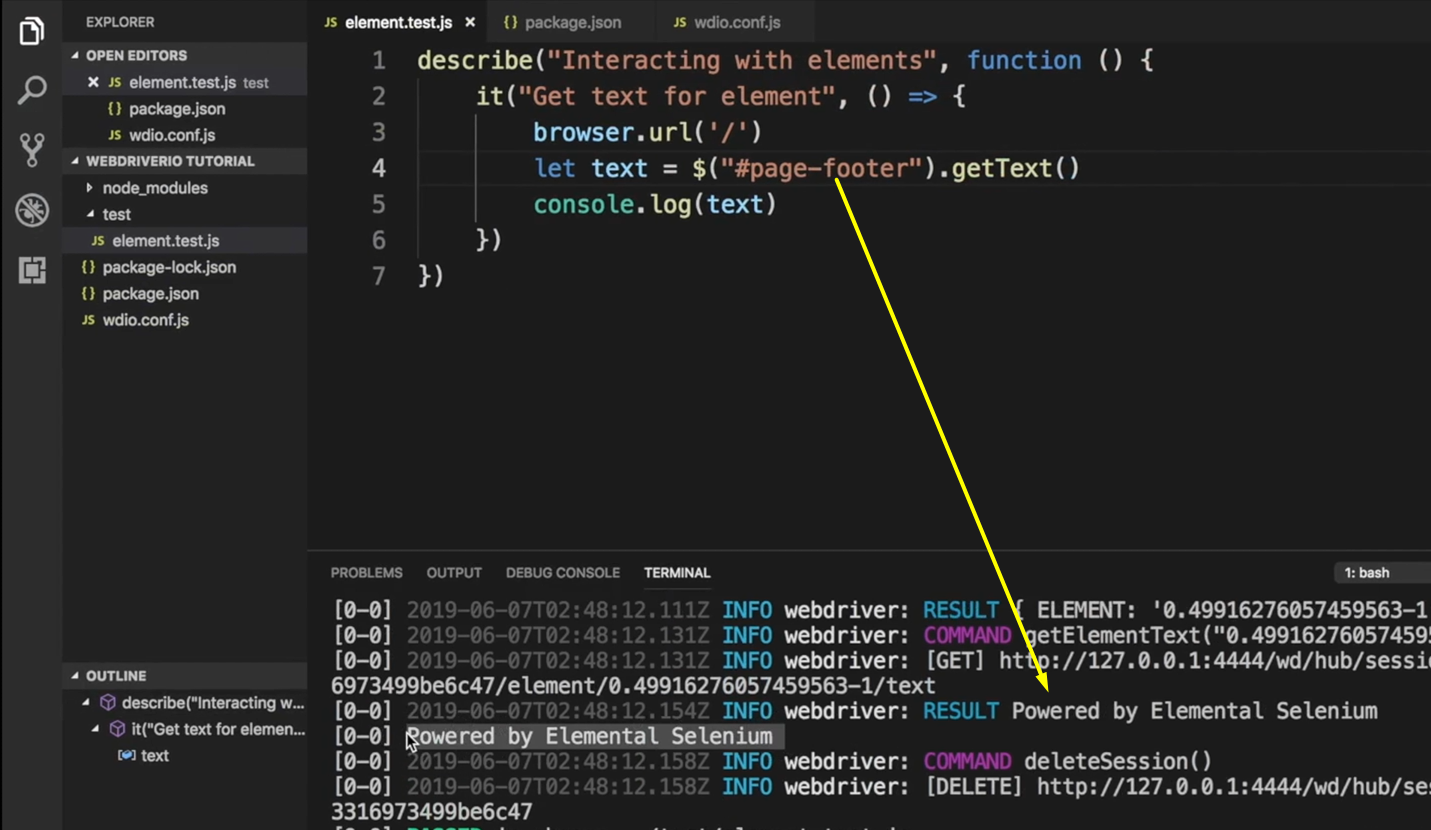
We realize here that the footer of this page is an ID called “page-footer”.
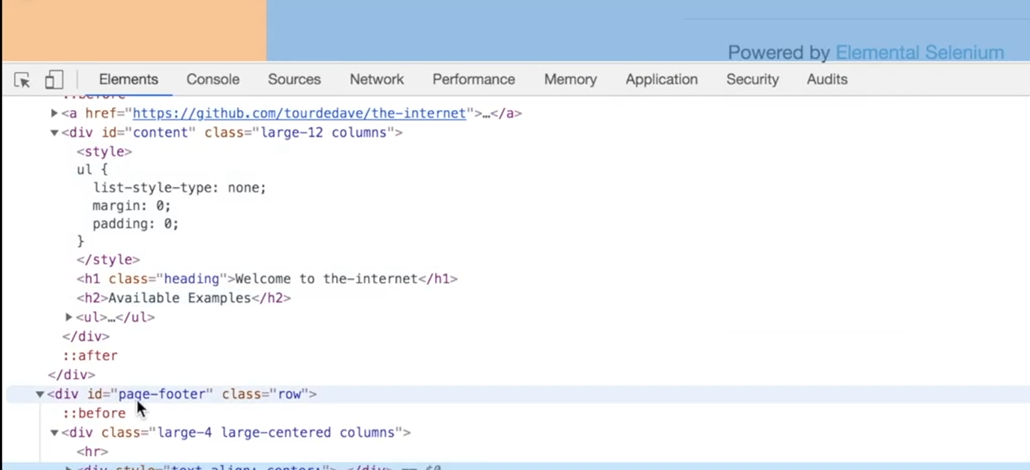
We can say "#page-footer", and it should get the text for that footer.
describe("Interacting with elements", function () {
    it("Get text for element", () => {
        browser.url('/')
        let text = $("#page-footer").getText()
        console.log(text)
    })
If we look here, we see “Powered by Elemental Selenium”.
This not only works with CSS, but it also works with XPath.
We could also say “//*[@id='page-footer']")” and we should receive the same value when we run our test.
describe("Interacting with elements", function () {
    it("Get text for element", () => {
        browser.url('/')
        let text = $("//*[@id='page-footer']").getText()
        console.log(text)
    })
And it prints out the same thing.
So, that is how you interact and find elements using WebdriverIO.
We will get into some more details further on, where we talk about elements state, element actions, as well as different inputs and waits.
Resources
Quiz
The quiz for this chapter can be found in Chapter 4.3.
