

Transcripted Summary
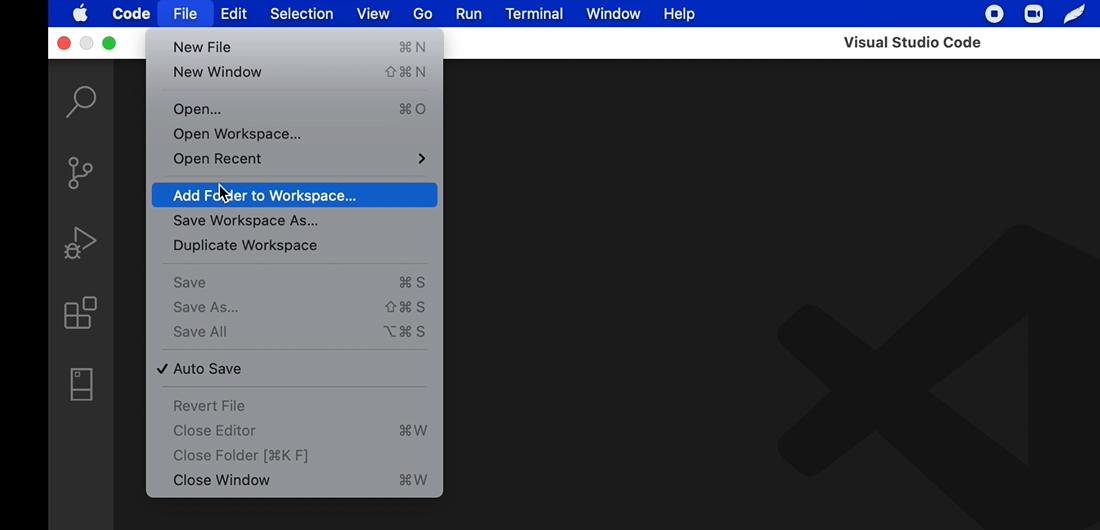
In our Visual Studio Code, we're going to say: File > Add Folder to Workspace.
We're going to be on our Desktop and we're going to say: New Folder.
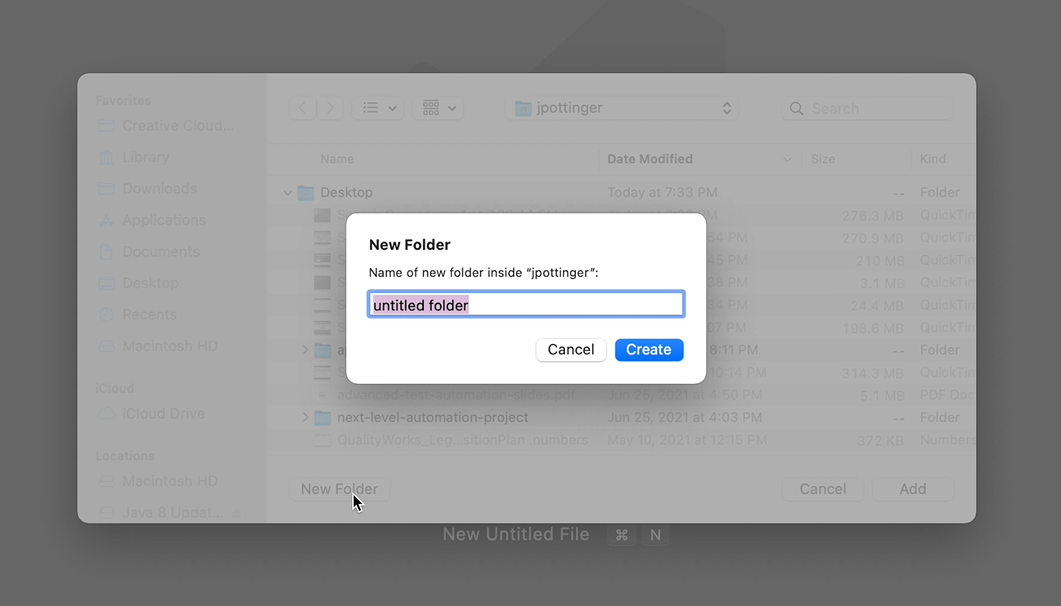
We're going to call this “WebdriverIO tutorial” and we're going to say: Create.
Once we do that, we click on Add. I just created this folder, so I'm going to trust the authors of the files in this folder.
The next thing you want to do is, you can toggle the terminal using this option here.
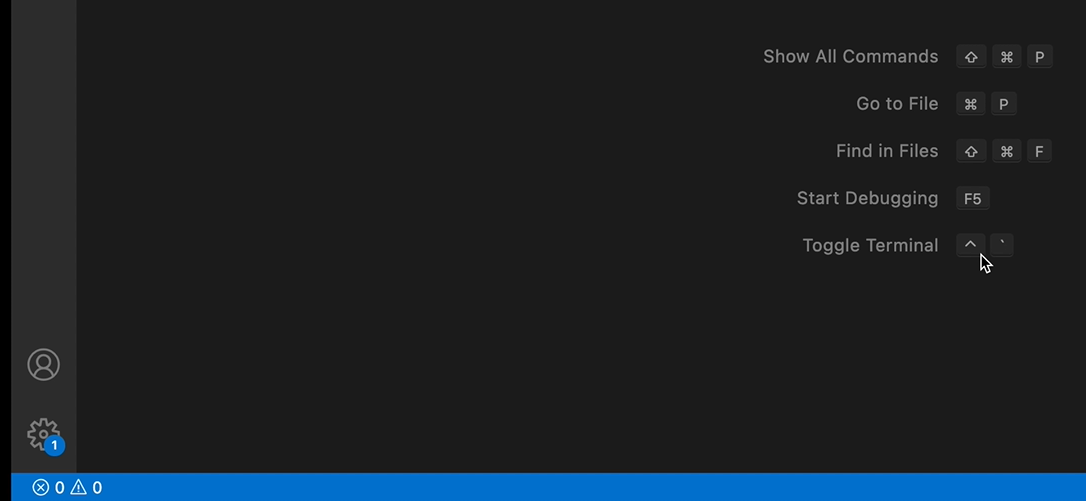
Or you can say: Terminal > New Terminal.
You want to ensure that you are in the folder, the root of the folder.
So, I'm going to say — npm init — and what this does is set up a new npm package.
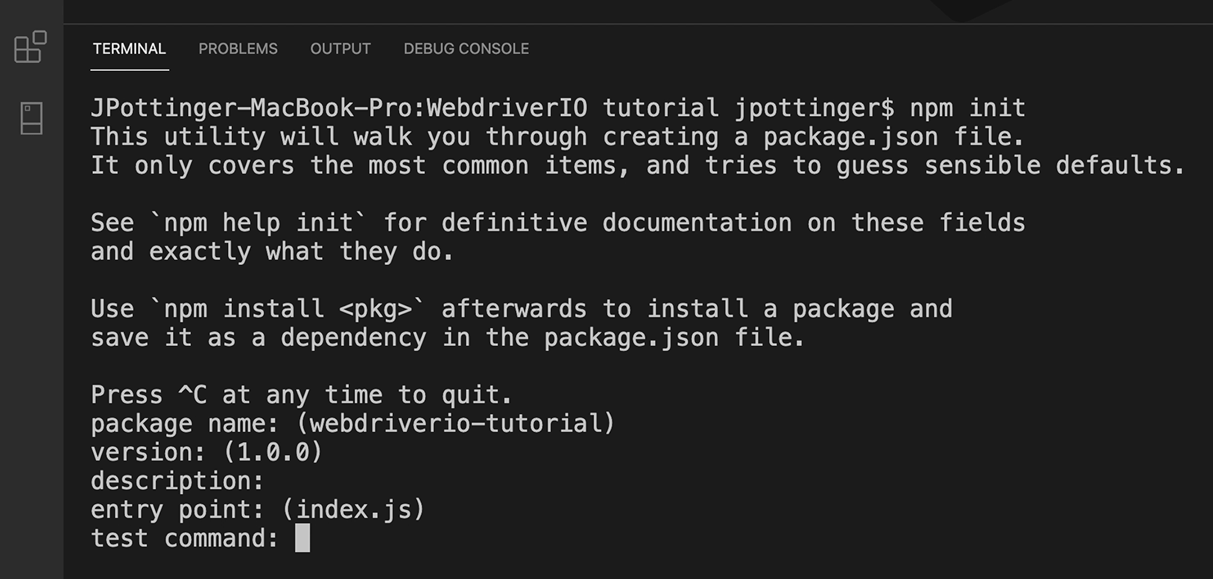
We are going to be initializing a new npm package.
It's going to be asking us for some details, such as package name, version, description, entry point, test command.
We are going to leave those blank for now.
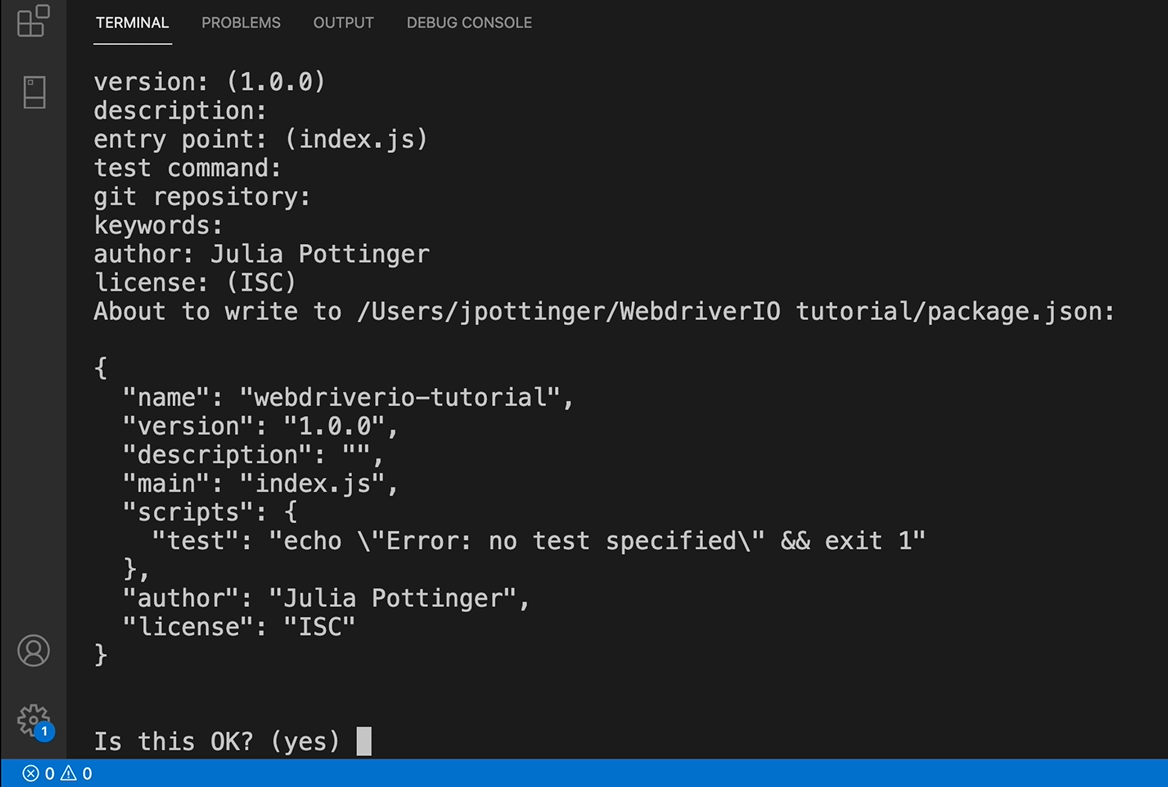
Git repository, keywords, author (you can enter your name), license…
And then it presents to you what it is about to write, and you can just enter, if it's OK. In this case it is, so I'm going to type in “yes”.
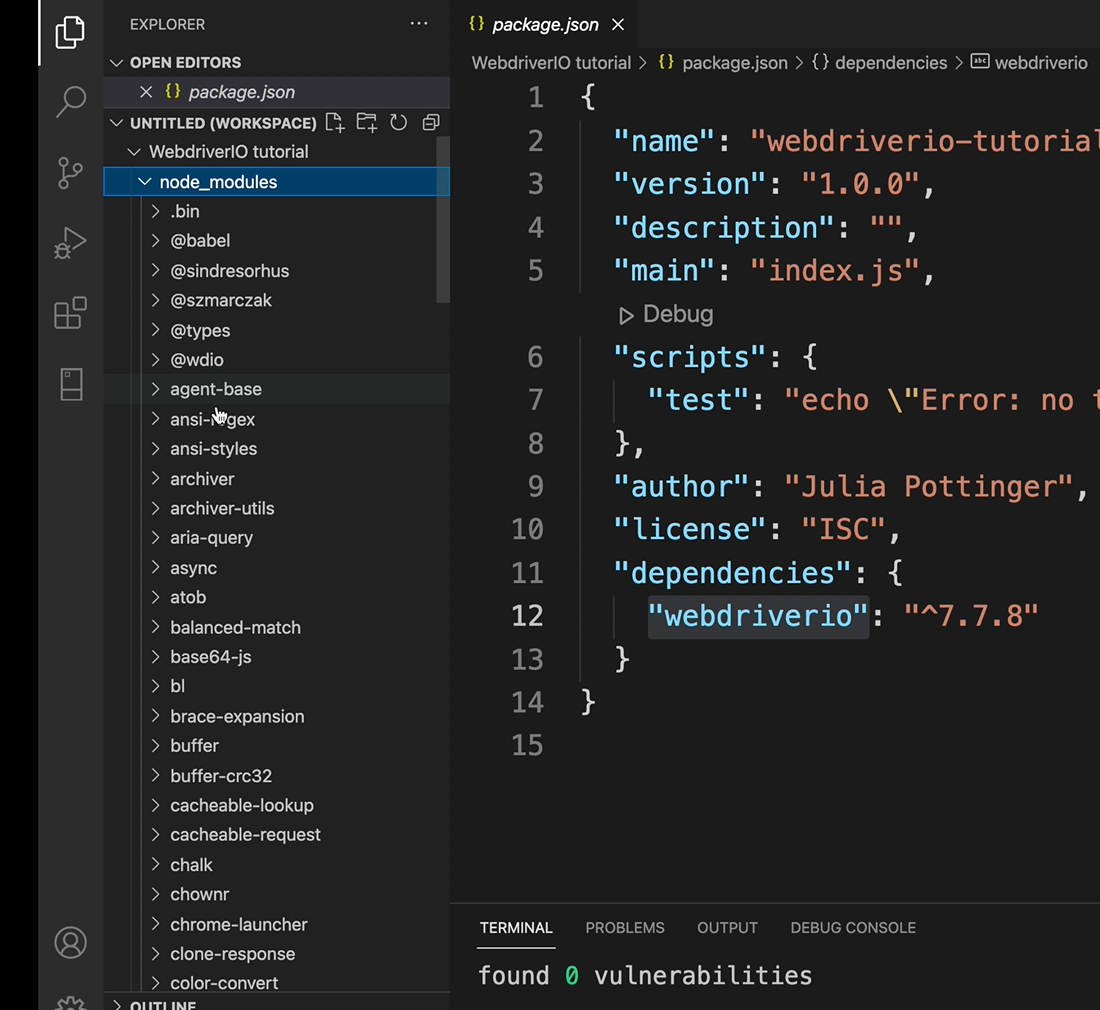
Then over here, I should now be able to see package.json.
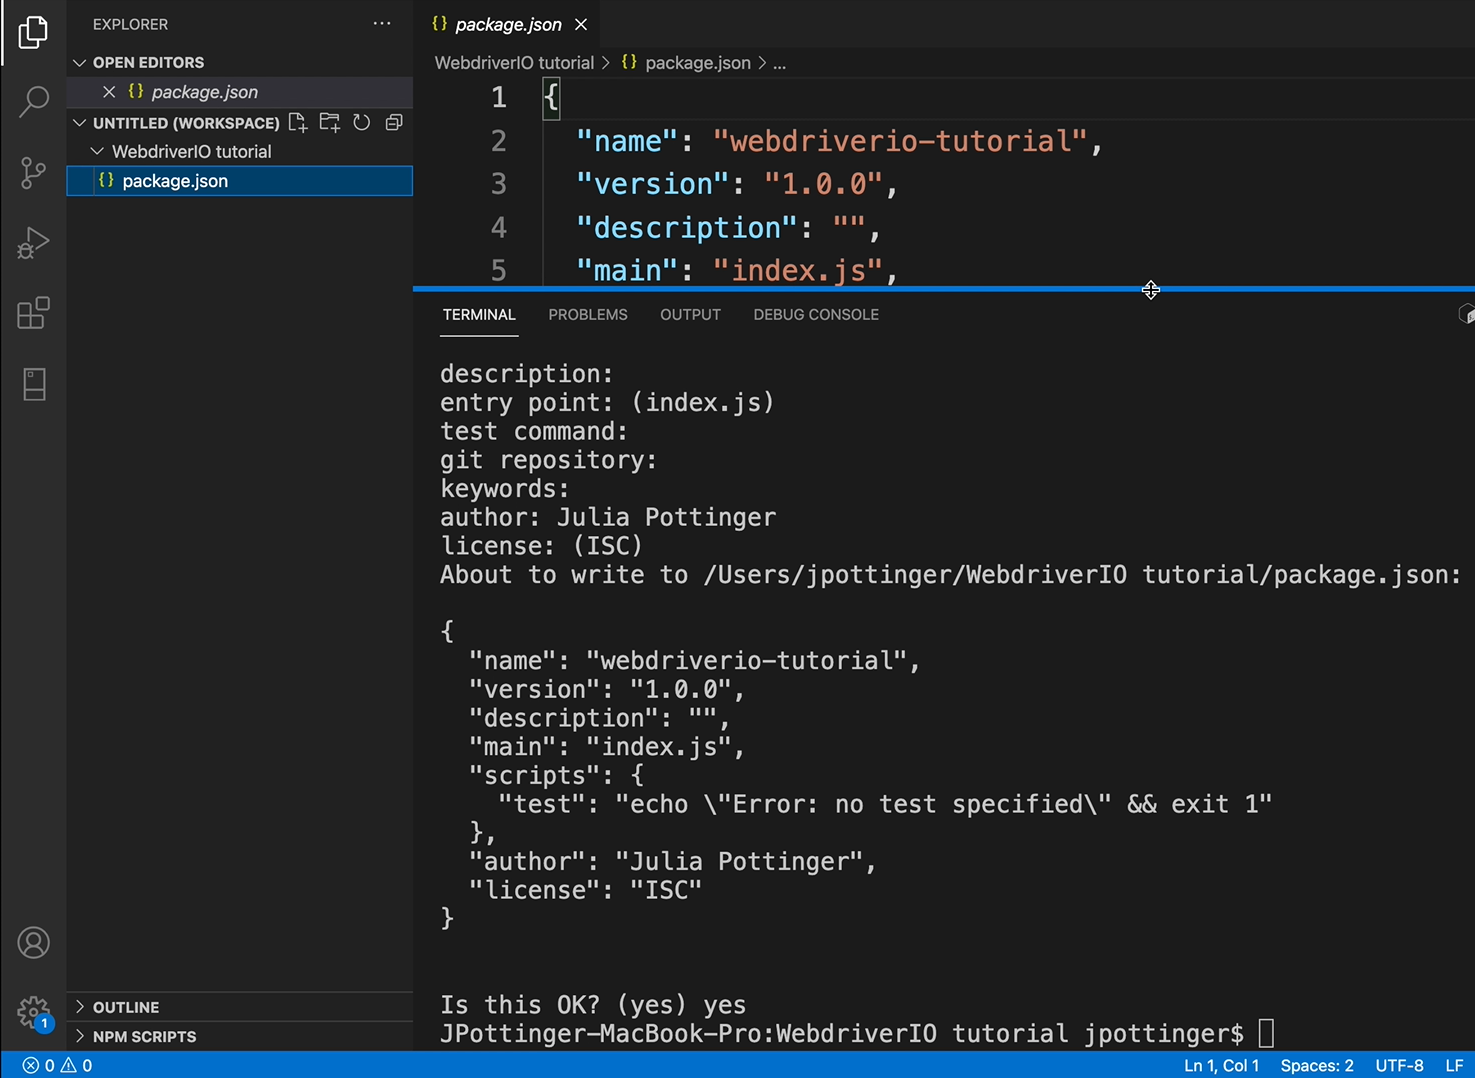
This [package.json](https://github.com/jpott77/webdriverio/blob/master/package.json) is going to contain everything that I just typed in. So, "webdriverio-tutorial" and author "Julia Pottinger". Everything else was left as default.
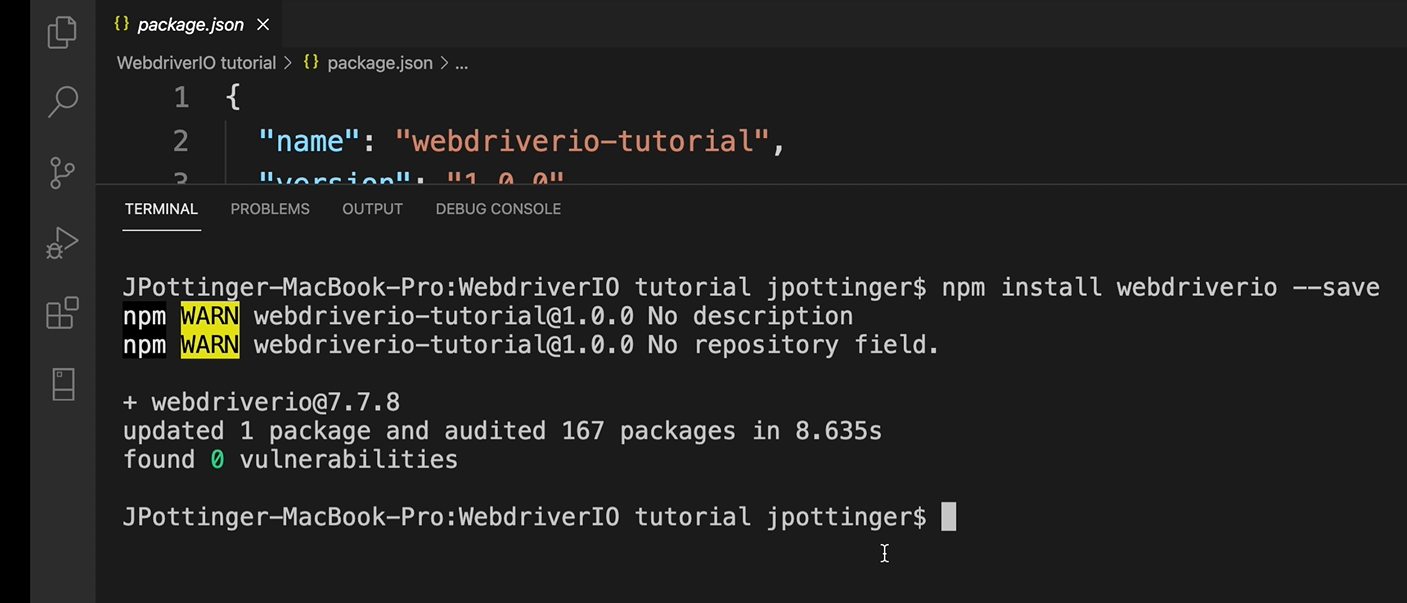
The next dependency that we will need is WebdriverIO.
We're going to say — npm install webdriverio --save.
NOTE
This --save allows you to save it to your package.json, so that if you're working or collaborating with other persons, they have a list of all the packages or npm modules that you are using. They can do an NPM install and pull down all of those packages, so that their project will also work.
So, WebdriverIO has been successfully installed.
If we look at our package.json, we see here that it has the dependency of WebdriverIO version 7.7.8 (or whatever is current when you install). This is the latest version of WebdriverIO and this is the version that we'll be using throughout this tutorial.
If you go into your root of the folder, you'll see that we now have a package-lock.json, and also a node_modules folder.
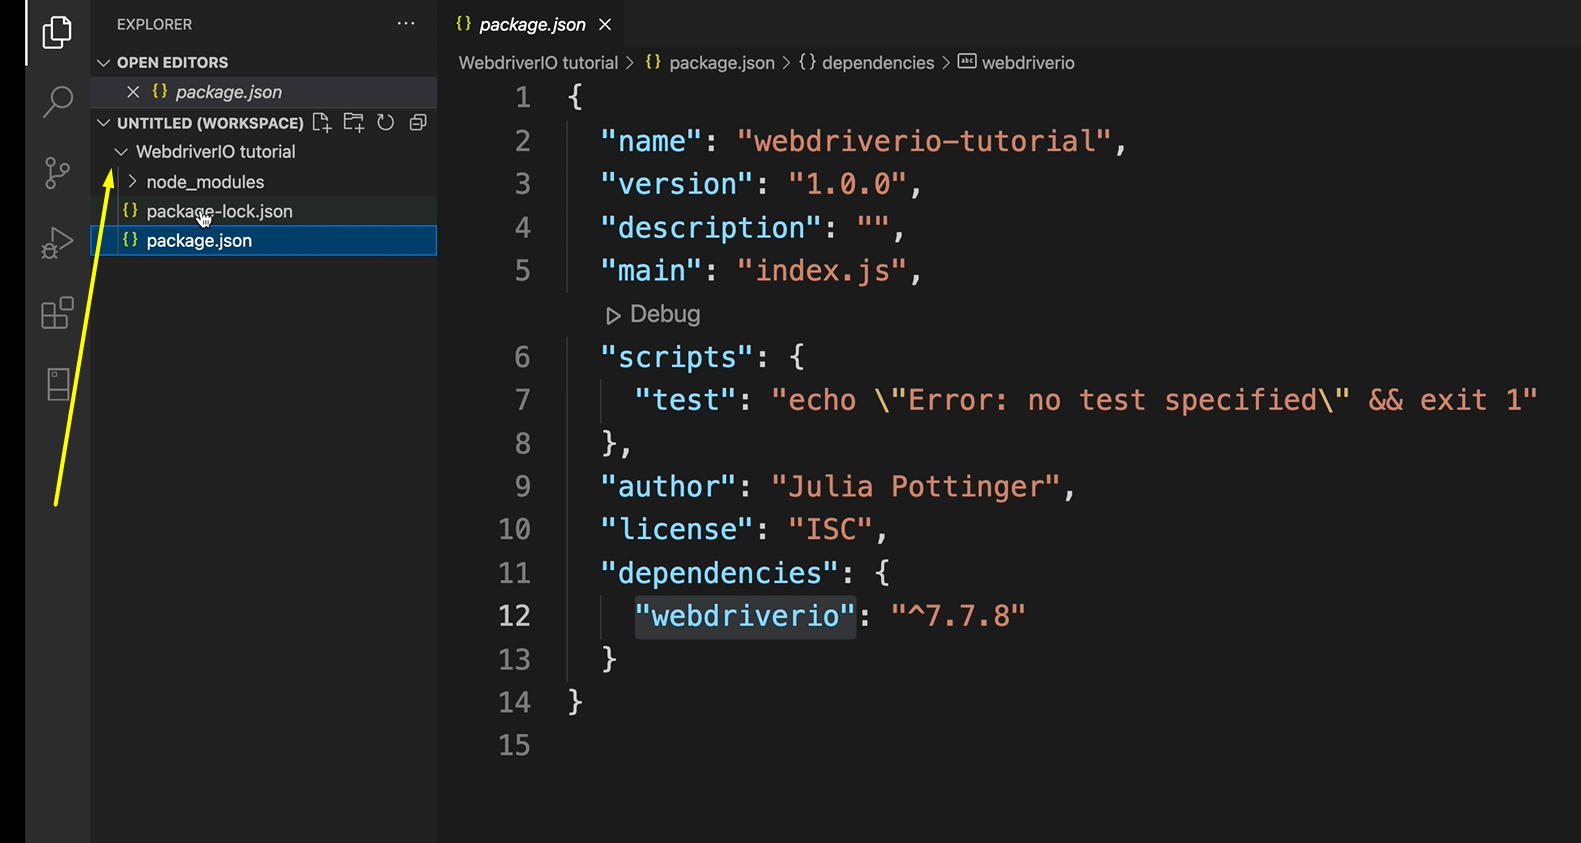
The node_modules folder contains all the extended versions of the packages that we have installed, so you'll see things like Babel. All of those comes with WebdriverIO, et cetera.
NOTE
Now, normally, if you're going to be sharing this project with someone, you will git ignore the node_modules folder. But we won't go with Git and all of that in this tutorial but that's something to note.
Now that we have installed WebdriverIO, the next thing that we want to do is install the wdio/cli.
This is a command line interface for WebdriverIO that is going to allow us to set up the WebdriverIO config file.
Now this config file is going to store the path to our test that we want to run, any frameworks that we want to use, reporters, if you're going to be running it on Chrome, Firefox, different browser versions, if you want to run it headless… Our WebdriverIO config file is going to contain all of that detail.
So, by installing WebdriverIO CLI it makes it easier for you to install and configure your project, as they are going to ask you some questions and give you some pre-configured options that is going to save you a lot of time, especially if you are starting a new project.
We are going to install the CLI by saying — ``npm i @wdio/cli –-save.
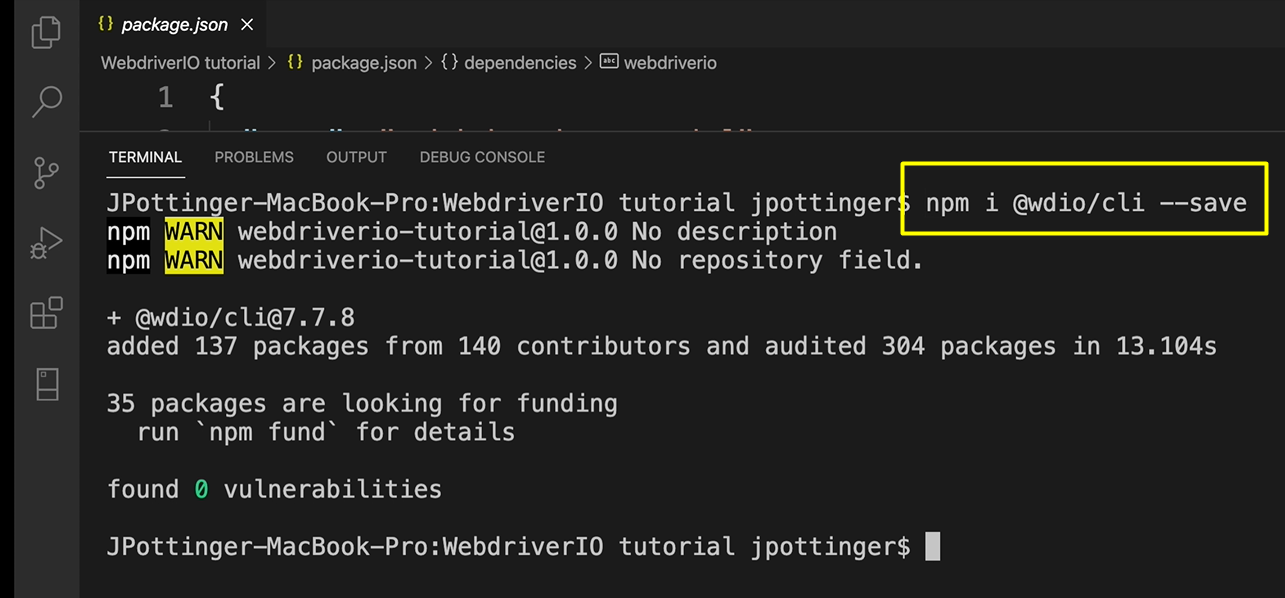
We have now installed the wdio/cli and we want to run it.
We do that by saying — npx wdio config.
Now npx means “node package execute”, and it comes along with npm when you install it, so you don't have to worry about installing npx separately, it comes along with npm.
So, we say npx wdio config and that is going to run the config file for us and it's going to ask us a lot of questions. We can use the arrow keys to go to the different options.
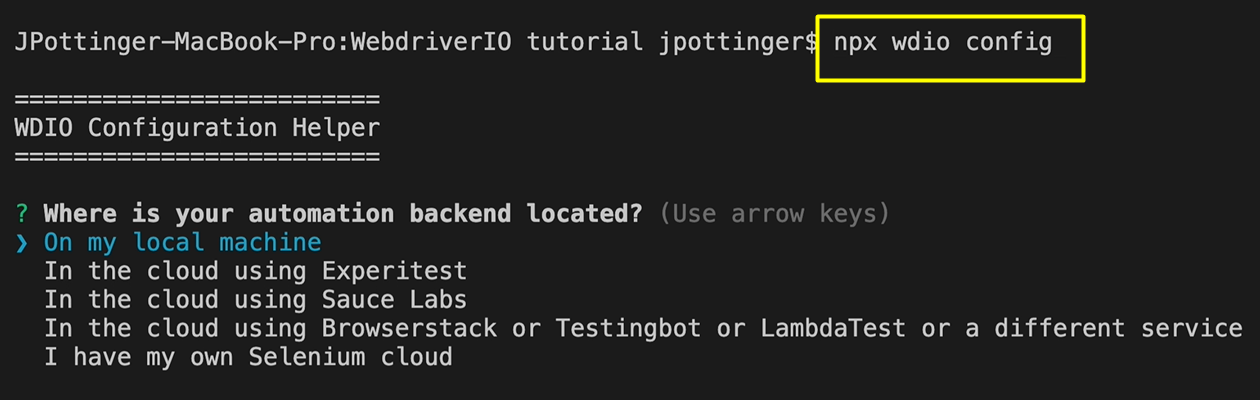
Where are we doing our automation backend? For now, we are doing it on our local machine. WebdriverIO allows you to run in the cloud using Experitest, Sauce Labs, Browserstack, Testingbot, LambdaTest, different services, or if you have your own Selenium cloud and you want to set it up.
NOTE
As we go through this set up, you're going to see a lot of the different options that WebdriverIO allows you to run with, and they are different options that you can explore. There are also other courses on Test Automation University, such as WebdriverIO with Appium and WebdriverIO with Applitools. These are frameworks and tools that work along with WebdriverIO, that after learning this course, you can go and take a look at, just to learn more about all the features that WebdriverIO has.
Now we're doing this on our local machines, so we are going to press enter.
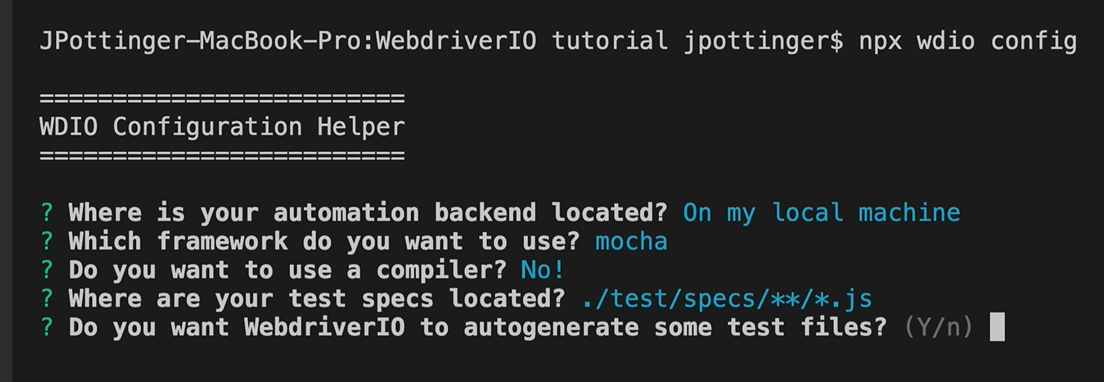
Different frameworks that we can use WebdriverIO with — Mocha, Jasmine, Cucumber... There's a course on Test Automation University as well about Mocha. You can definitely go and check that out. Mocha and Jasmine are pretty similar in that they use the describe and it. I personally use Mocha a lot, so in this tutorial we'll be using Mocha.
We aren't going to be using any compiler.
We're going to select the default for where our tests are located.
It asks us if you want WebdriverIO to autogenerate some test files. We're going to say yes and WebdriverIO is going to autogenerate some test files for us, in addition to setting up our config file.
UPDATE NOTE
Autogenerating the test files is a new feature that WebdriverIO have added in version 6 and 7. So if you've taken this course before when it was just for version 5, then this option would not have been there. But with the recent updates, they allow you to autogenerate some test files and some page objects. That just really helps you to get a better start of how the project works and it's really helpful for beginners.
We want to create some page objects. So, we're going to say yes.
Where our page objects are located. We're going to select the default.
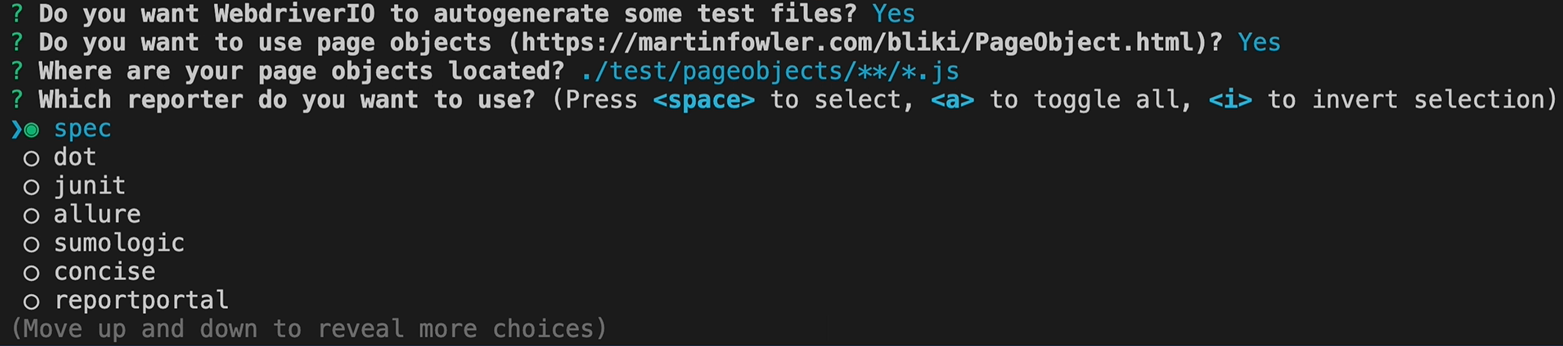
Now, it's asking us which reporter we want to use. There are different options for reporters. I normally use spec, you can use Allure, you can use Dot, et cetera.
So, there are different options that you can use. I normally use spec, so to select I've pressed space, or in that case is unselecting and then I could have gone down and selected others with my arrow key.
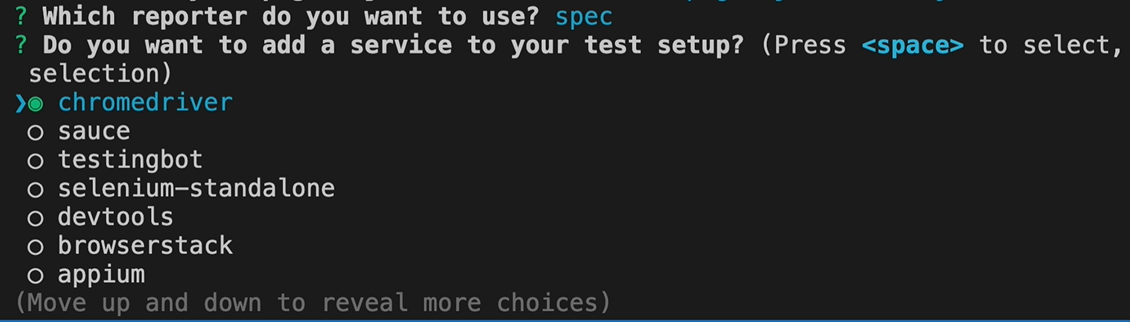
Now it's saying if we want to add a service to our test setup.
These services are what helps us to run our test.
- We have, as I mentioned, Appium, which is very good for mobile automation.
- Browserstack and Sauce are very good for running in the cloud on different devices.
- Saucelabs has a lot of different devices that you can use.
- Selenium-standalone and ChromeDriver, they allow you to run on browsers locally or in the cloud.
For this project, we are going to be using selenium-standalone. So, we're going to press space to unselect chromedriver as it is currently selected and then we're going to use the down arrow to go down to selenium-standalone, press space to select selenium-standalone.
NOTE ABOUT SERVICE OPTIONS
If you just scroll down, you see a lot more options. So, there's appium, firefox-profile, crossbrowsertesting, eslinter-service, wait-for, lambdatest, reportportal, docker, wdio-ui5, wiremock, slack integrations, image-comparison, winappdriver (which is really good if you want to do automation on a windows desktop or windows devices), performancetotal, aws-device-farm, et cetera. But out of those many options, and you can just see the amount of things that WebdriverIO allows you to work with and integrate with, we're just going to be using selenium-standalone.
For the base URL, we're going to leave that blank.
Then it starts installing all the dependencies. We see local-runner, mocha-framework... We selected spec and we also selected selenium-standalone-service. So, it's installing all those things that we selected.
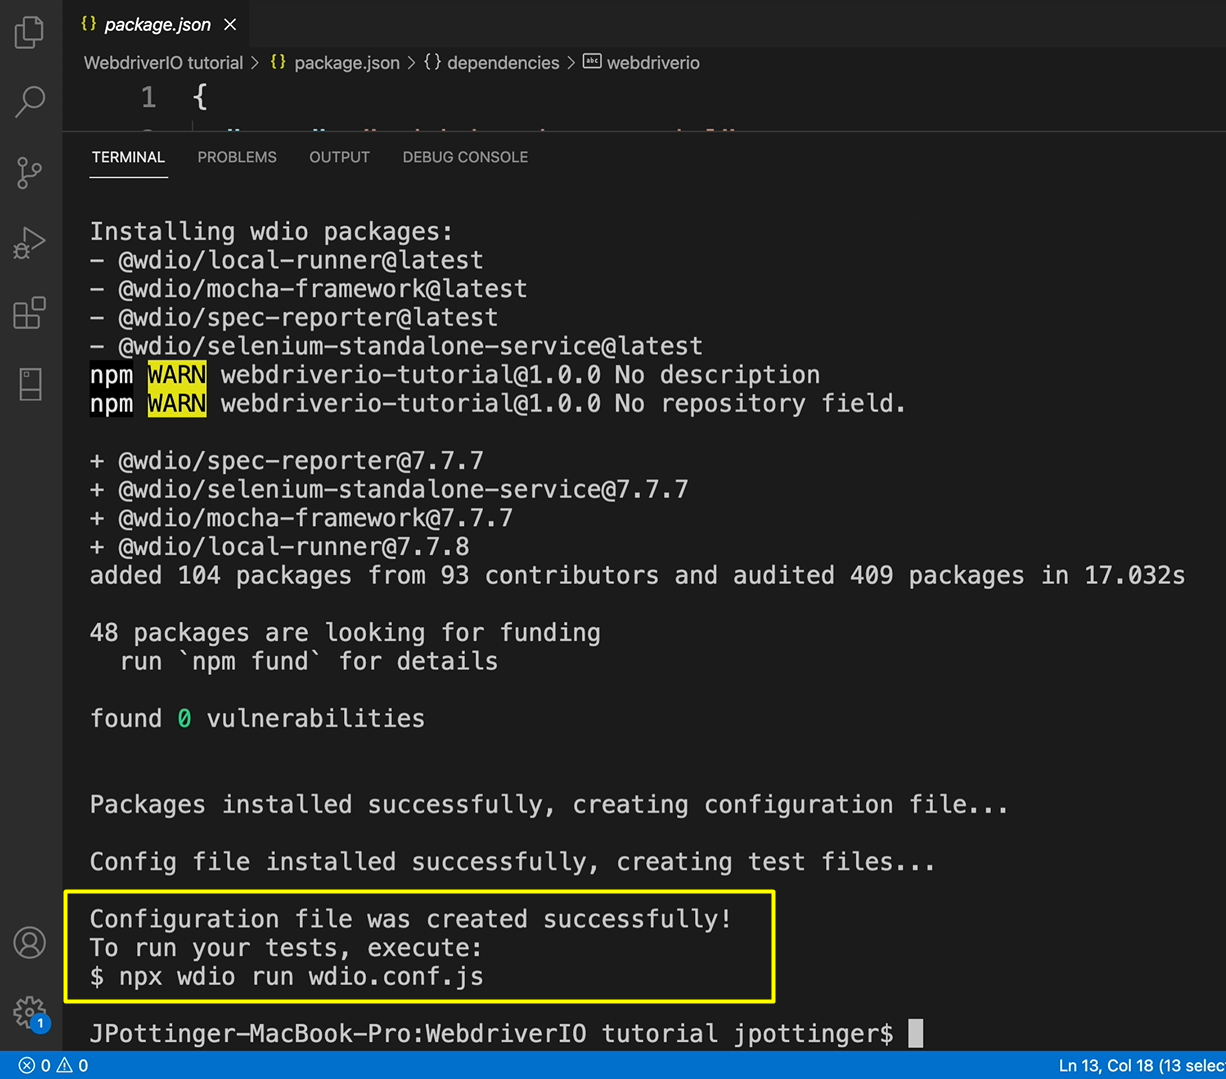
Now, it gives you instructions on how to start. So, it says npx wdio run, and it gives the name of the config.
Before we get into that, let us look at what we have.
We now have a folder called “test”. Within that folder we have “pageobjects” and “specs”, right?
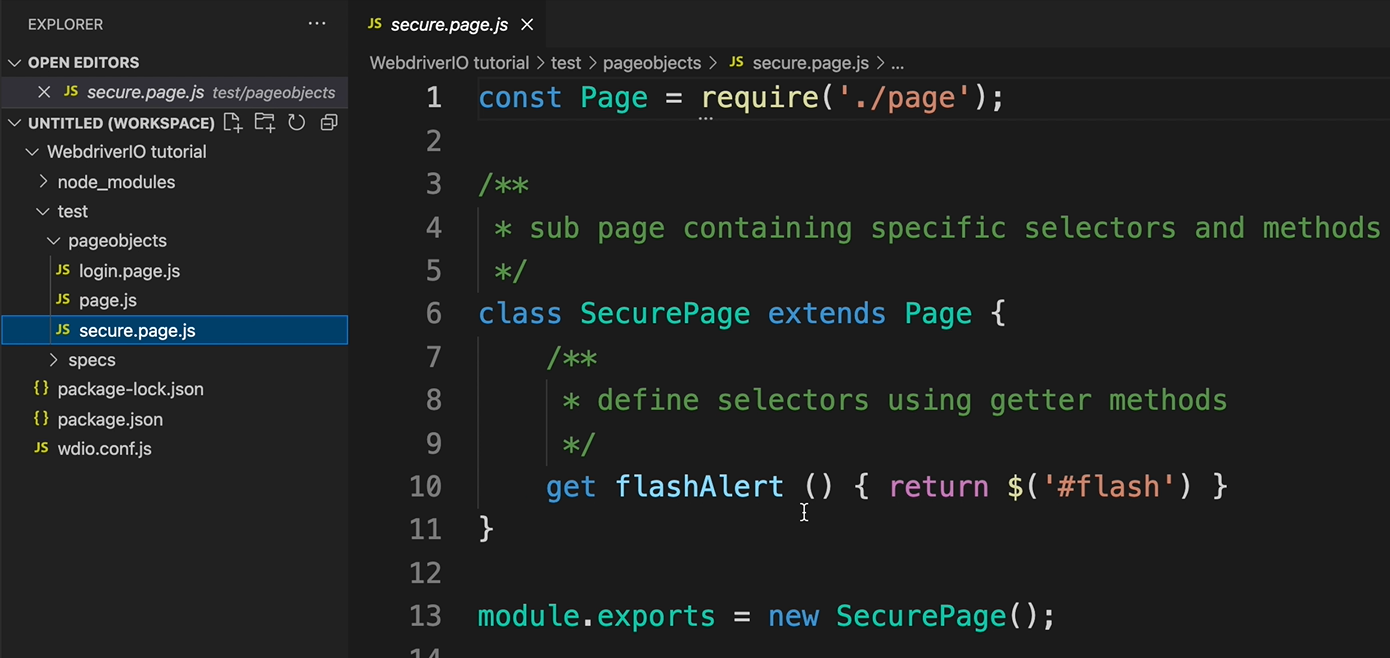
If we go into page objects, we are going to see “login.page”, “page”, “secure.page”, et cetera.
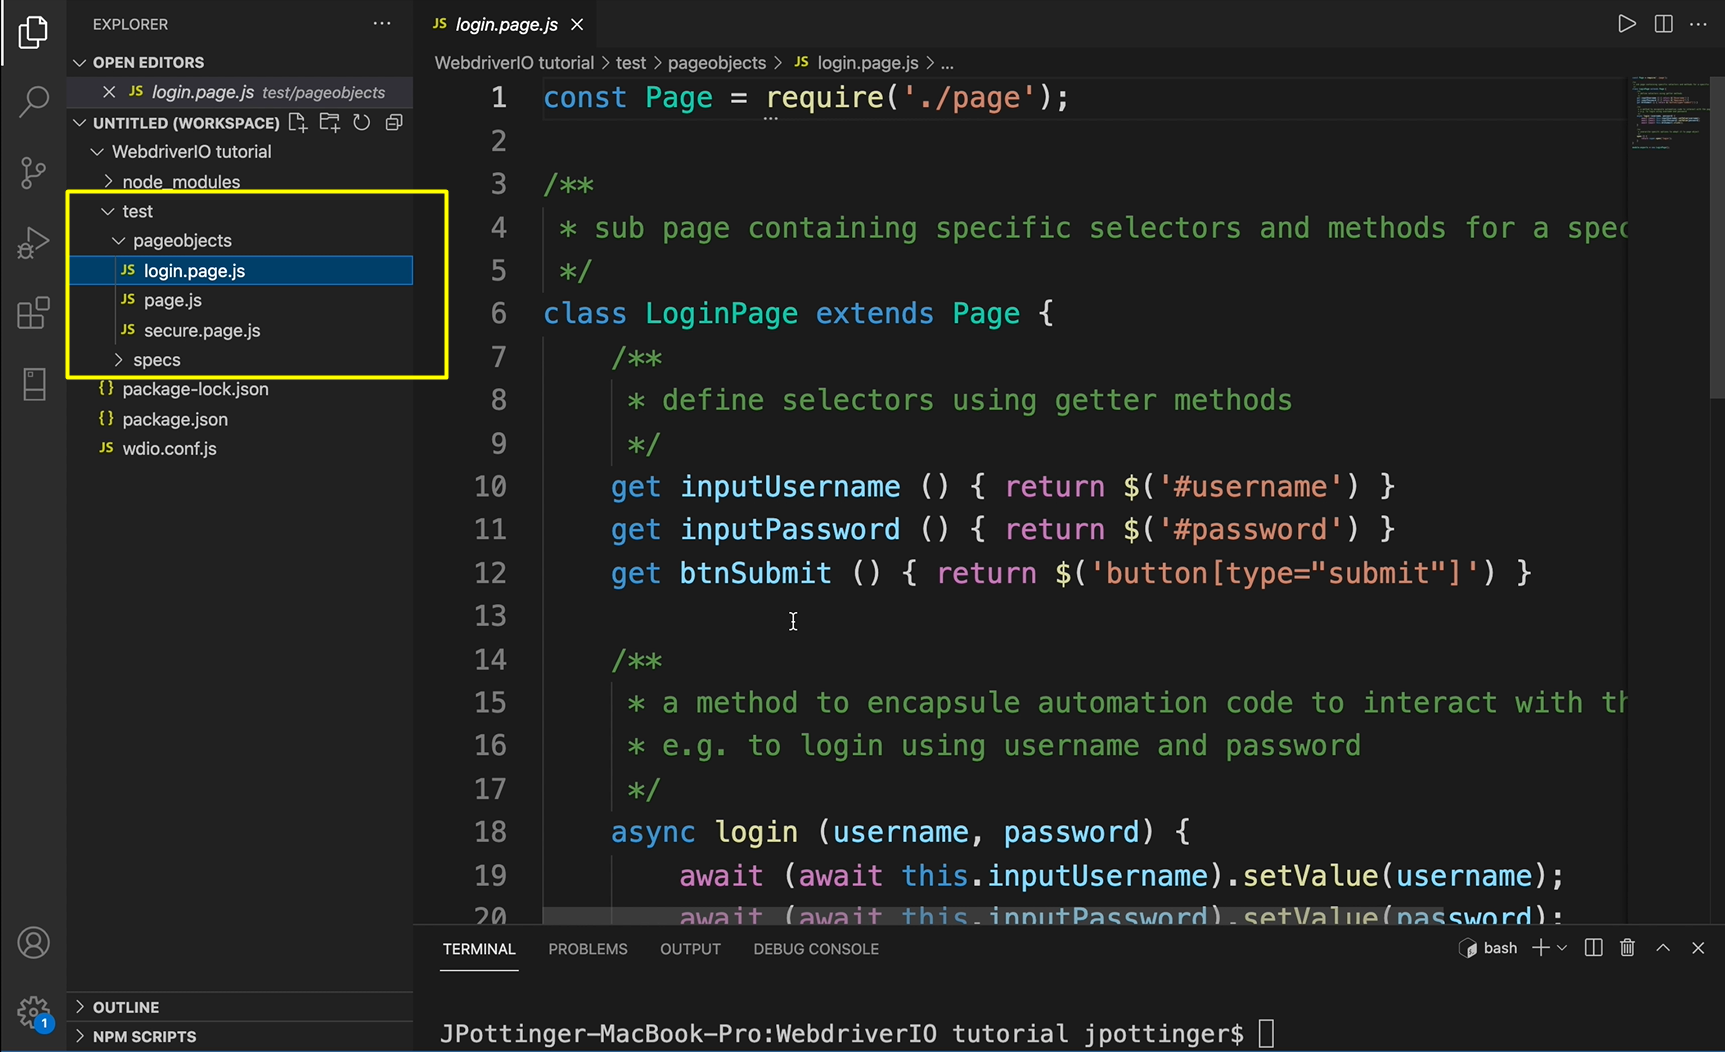
Now we go into that “login.page”, we see how WebdriverIO sets up page objects.
You have the locator here for username. You have the locator here for password and button submit.
Then it has a function to log in.
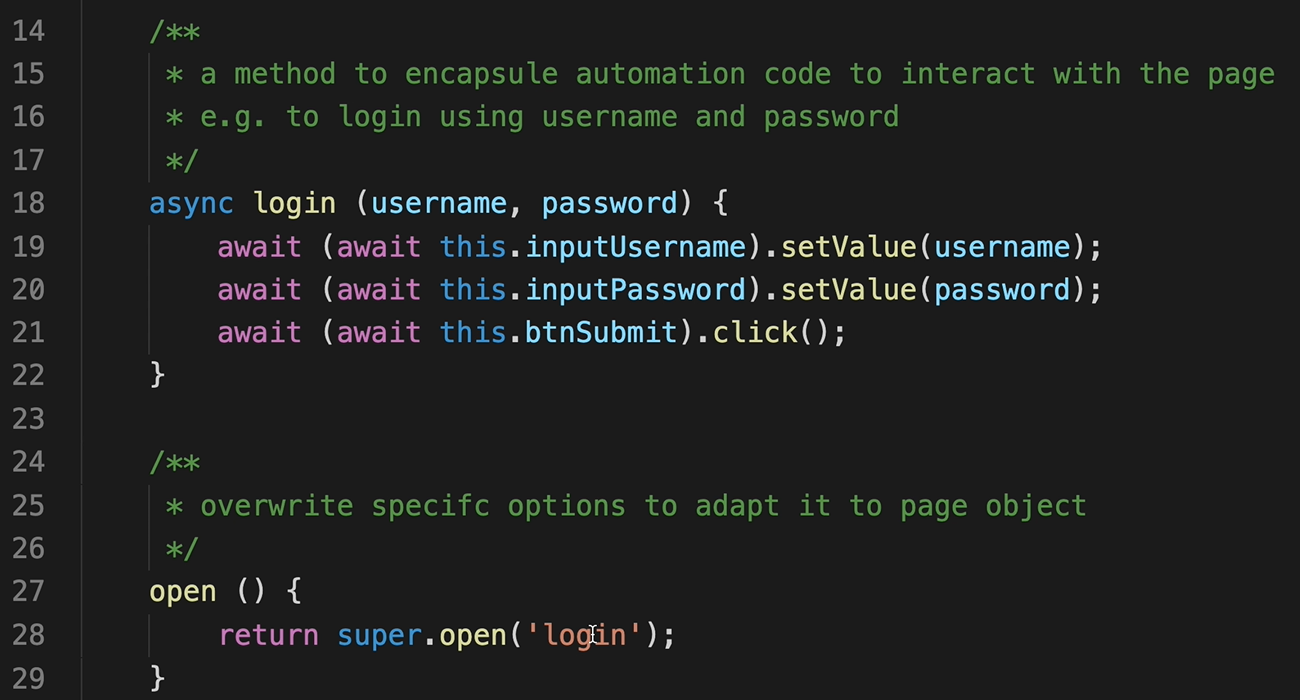
It's going to take a username and a password and it's going to click on it and so this is opening the login page.
Based on these returning a super, I am assuming that there is a main open function that is accepting a parameter, in this case “login”.
If we go back to “page.js”, we should see a main page and as I said, open is accepting our primary tool.

It's going to http://the-internet.herokuapp.com and it's a pending login that was passed in.
This is also the same website that we'll be using throughout this tutorial. If we go to it, it is the-internet.herokuapp.
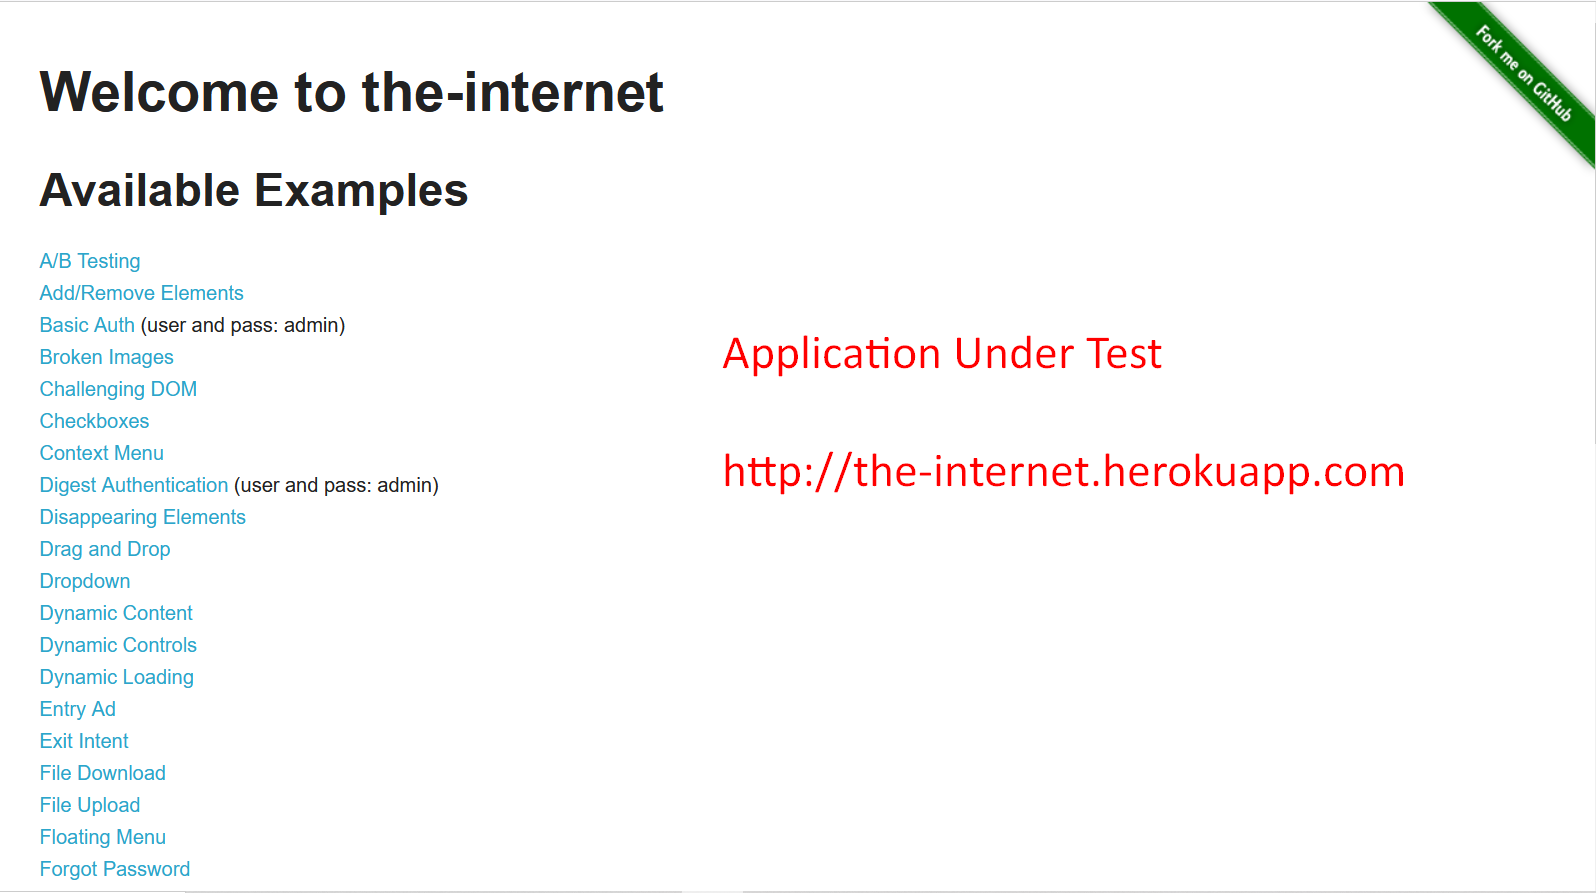
It has a lot of different examples that you can choose from and practice such as drag and drop. It also has form authentication, so it has username and password.
There are lots of different things that you can just check out and get a feel for when you're doing test automation at this website.
Now, if we go into “secure.page”, this is where we are checking for our flashAlert.
When we're on the the-internet.herokuapp and we are on login, right? So, if I say “/login”, because that's what the test says, this is the flashAlert.
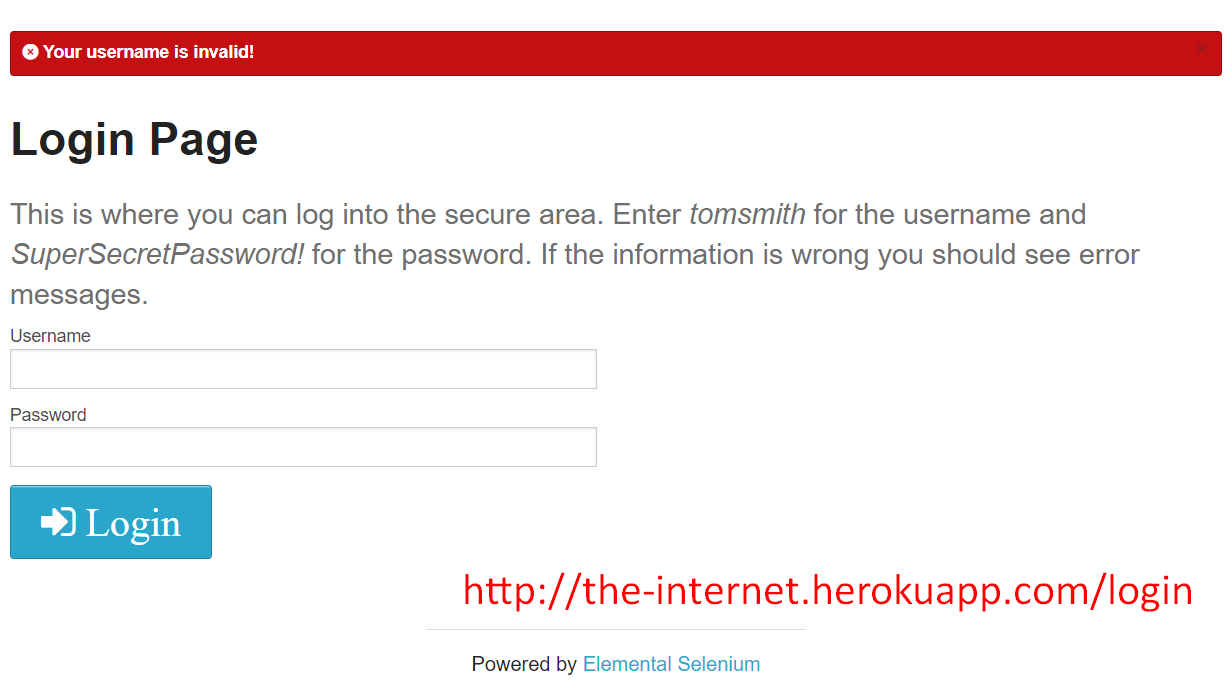
If I right click and I inspect this, I see it has an ID of “flash”, so I'm expecting that the ID of “flash” is used somewhere in the test, right?
So “#flash” gives us the flash ID here.
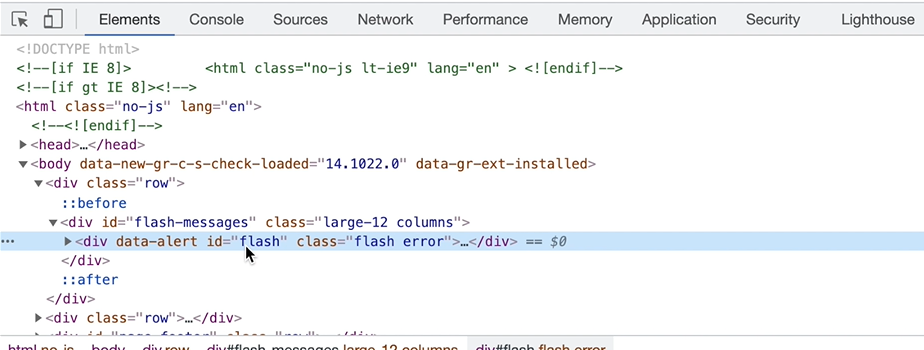
Whether it's a positive scenario or a negative scenario, it returns that “flash” and we can validate that the user's successfully logged in.
If we go to the “specs” file, this is where the test will be.
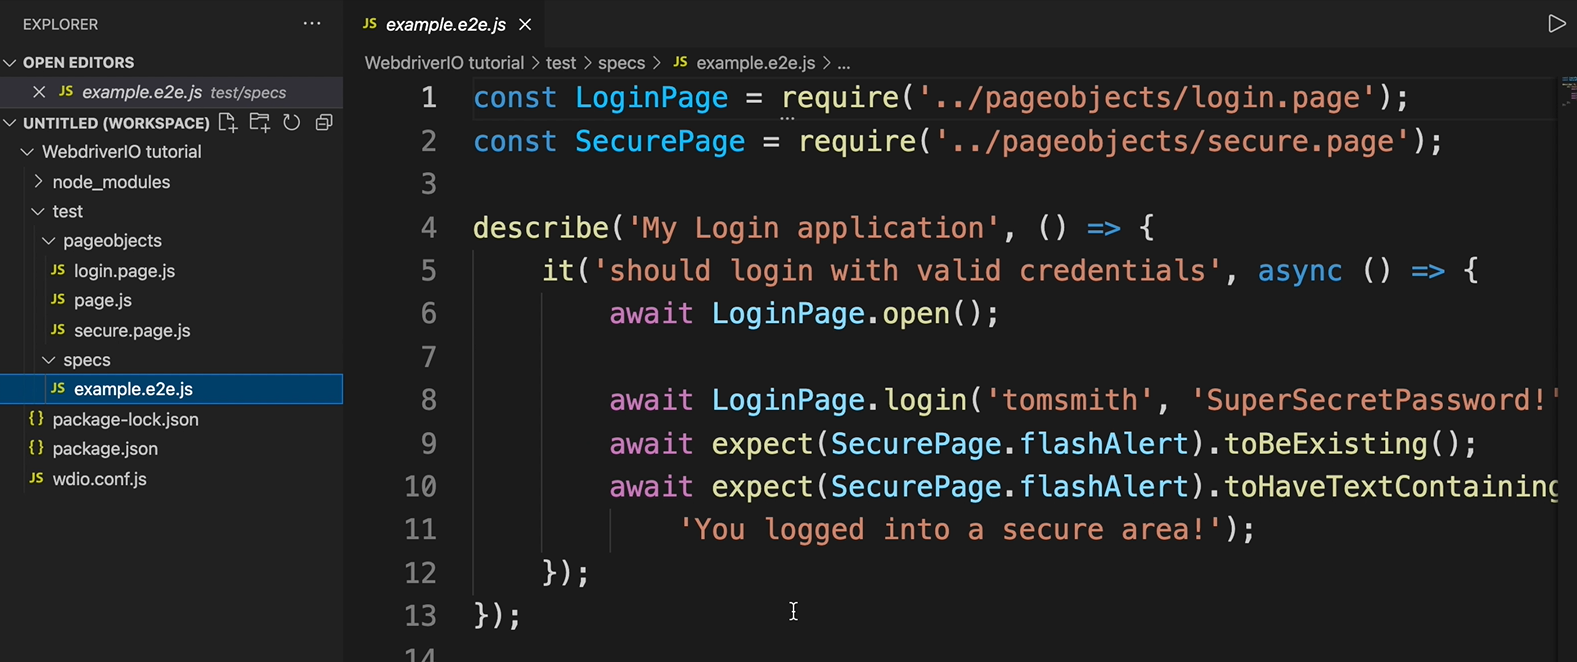
- We are saying I should log in with valid credentials, which are “tomsmith” and “SuperSecretPassword!”.
- I'm expecting secure flashAlert
toBeExisting. - I'm expecting secure flashAlert
toHaveTextContaining.
You may be wondering what these assertions are and WebdriverIO in version 6 and 7 have started to use their own expect assertion.
Before that they didn't have their own assertion built in like this, but you could have installed other assertions like chai.js. You can still do that. Later on I'll show you chai.js and make comparisons between it and the WebdriverIO expect assertion.
All right, so this is the test. It's going to log in and is going to expect the secure page to be existing and to contain the text you log into a secure area.
If we go ahead and look back in our terminal, we see that the command to run is npx wdio run wdio.conf.js.
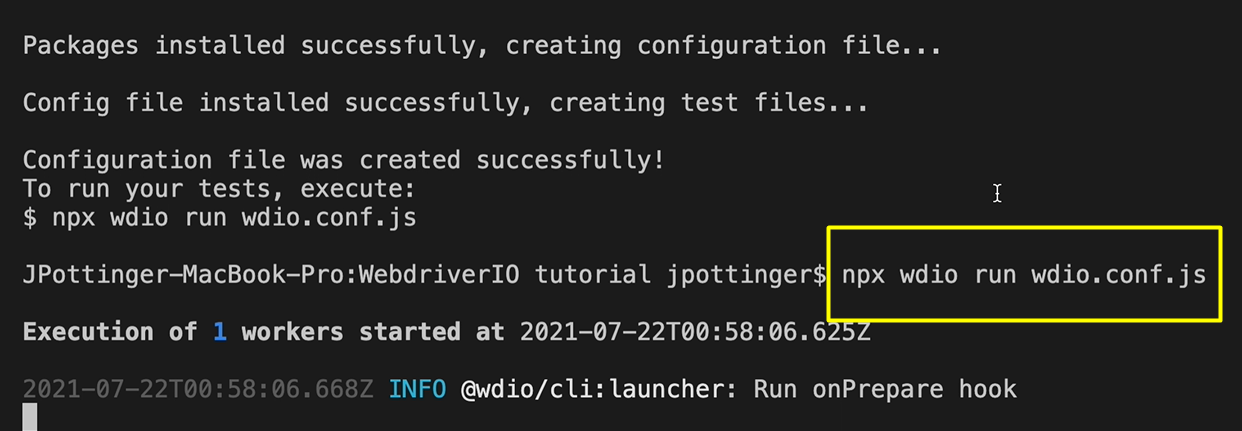
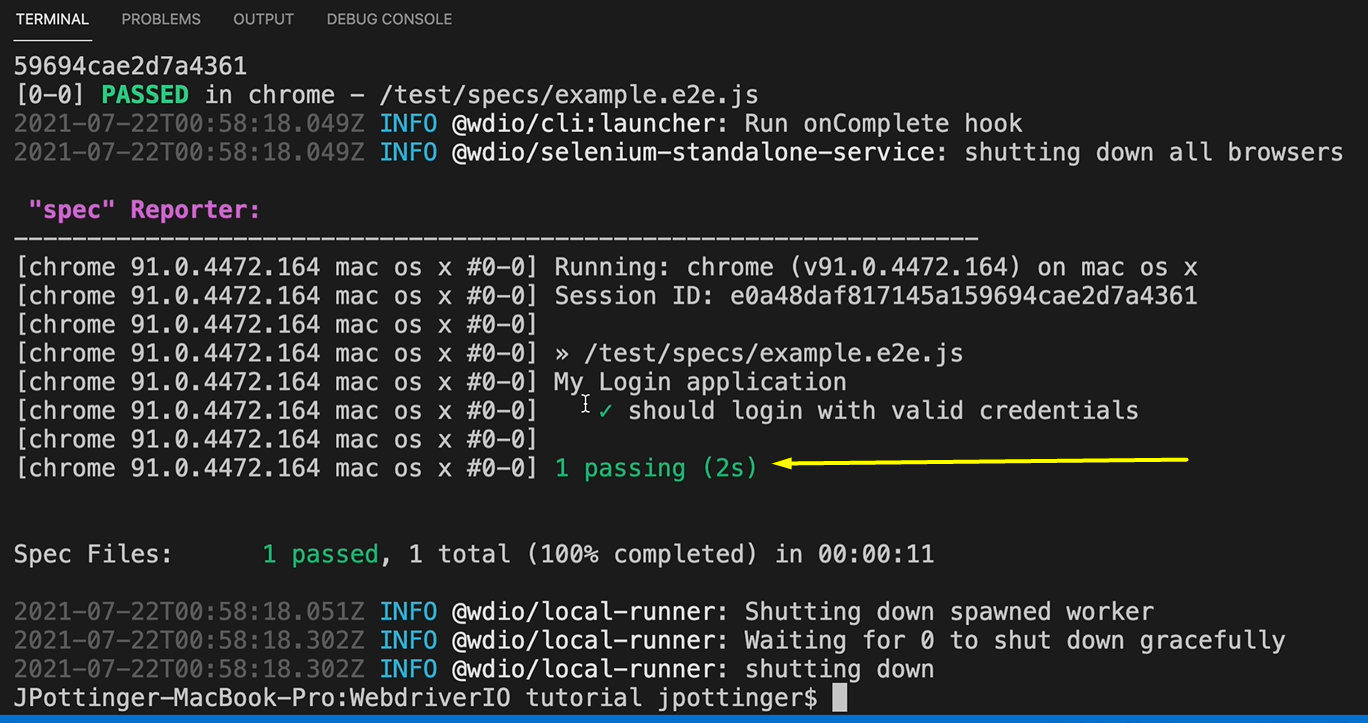
If I copy that paste here, then it starts to run the tests.
It opens it in Chrome, and it ran. That was a bit fast but as we see here, it says it passed.
So those are all the dependencies that you need to set up WebdriverIO and in the further tutorials, we'll talk more about how everything works together.
Resources
- Git Repo for Course
- Lesson Code – webdriverio/package.json
- Project Application – the-internet
- WebdriverIO
Quiz
The quiz for this chapter can be found in Chapter 1.3.
