

Transcripted Summary
By the end of this video, you will be able to select and access options in dropdown lists in Playwright.
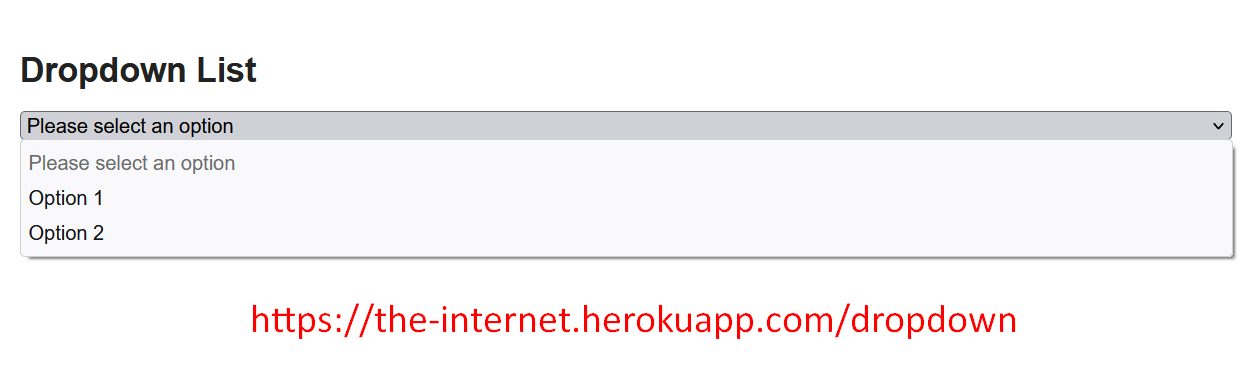
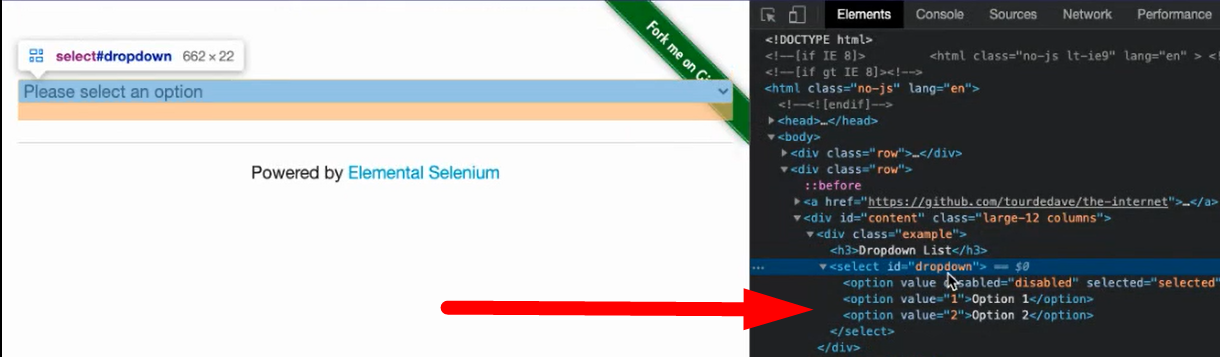
Let's pretend that we want to come to this page, and we want to select Option 1, or Option 2.
So how can we achieve that Playwright?
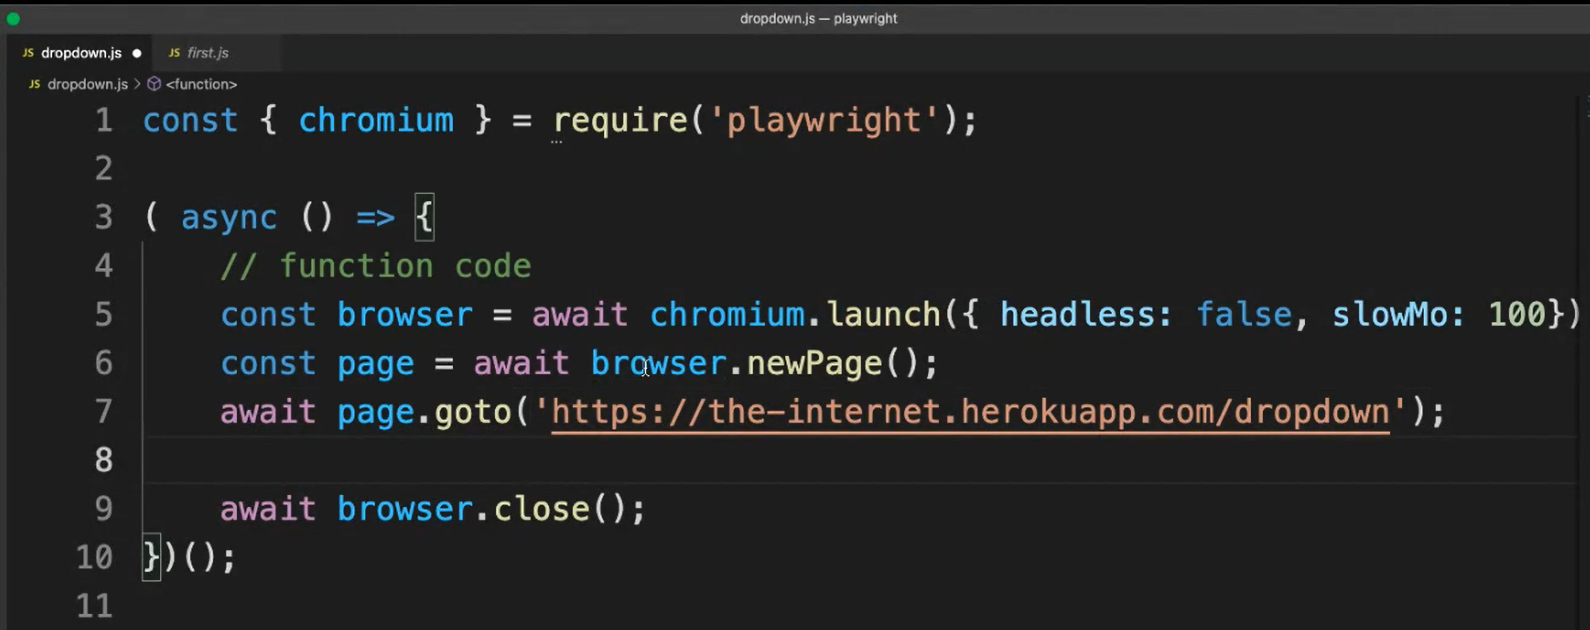
Let's go back to Visual Studio Code and let's create a new script. I'm going to name mine dropdown.js.
And again, I'm just going to copy all that is in the first group we created, so we can save some time. You have to update the webpage because it's definitely not Google.
And we can start now creating an element handle which is going to contain all of the options in that dropdown.
Now, let's create that handle — const dropdown, because I want to name it “dropdown”, and we’ll set this equal to await page. It’s going to wait for the page to locate the element selector that we’re going to retrieve by looking back again using dev tools.
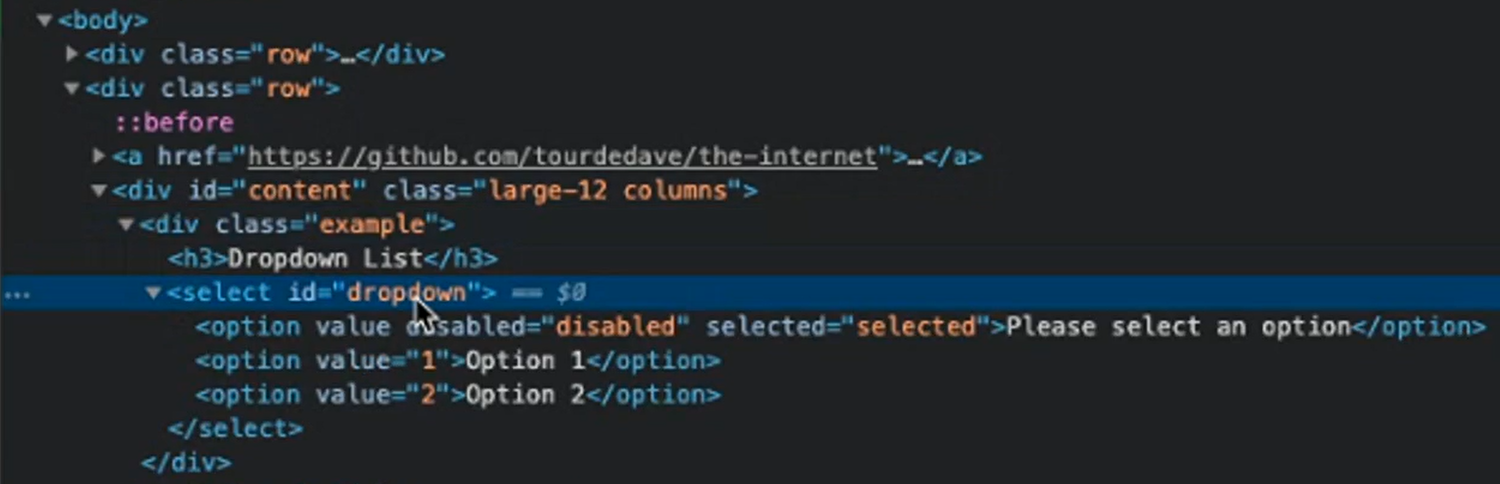
And it seems that there is actually an ID, which we can use (“dropdown”). So, let's use that ID.
const dropdown = await page.$('#dropdown');
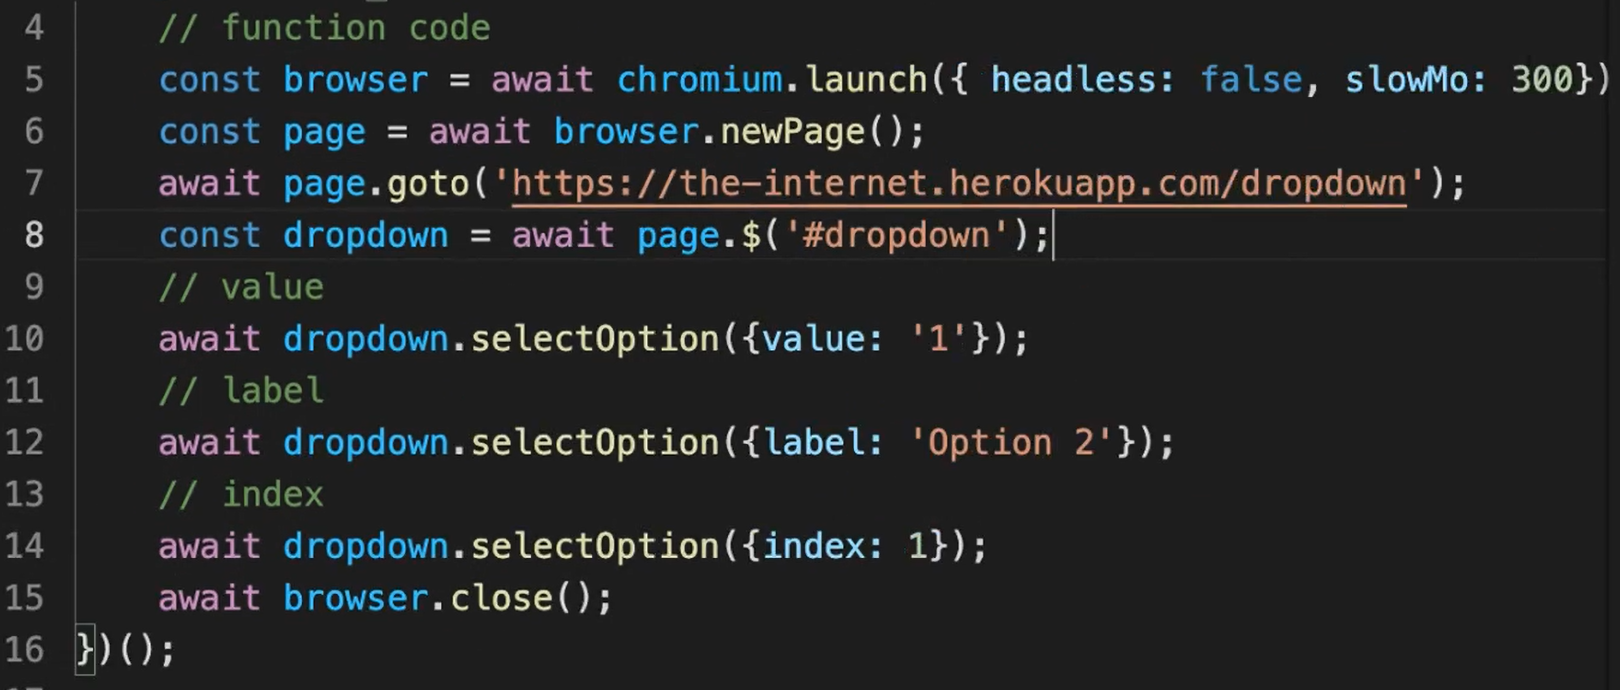
In Playwright, we can use value to select the option, or we can use the label, or we can use the index.
So, let's do something, let's first select by label.
Here, await dropdown.selectOption and we want to select be label. So, we have to pass the label here. And in this case let's do “Option 2”.
    // label
    await dropdown.selectOption({ label: 'Option 2' });
Now, if we wanted to select use in the value, the only thing that we have the change is this.
    // value
    await dropdown.selectOption({ value: '1' });
And here we have to pass, of course, the value.
And at the end, if we want to use the index, we just need to change to index, and here we have to pass a number. In this case, I'm going to pass 1.
    // index
    await dropdown.selectOption({ index: 1 });
So, what we should see happening is that we are going to select option 1, then option 2, and finally option 1 again.
Let's change the slowMo to 300 because I think it may be a little bit fast.
So just give it a try to see if we can observe with our eyes while it's happening [ run in Terminal with node dropdown.js.
And there you have it. This is how you can interact with dropdowns using Playwright.
Now, let's think of a scenario where you want to get the values inside this select, or the dropdown.
If we take a look at the DOM, we can see that there is the select and inside it there are some options.
So, what we can do in order to print the values of these options, is to store in an array these option elements, and then just access their inner text to print it on the screen.
Let's do that.
We're going to create an “availableOptions” constant, which is going to look inside our dropdown, and it's going to hold the options text inside it.
What goes inside here is the selector. I'm just using “options”. And I'm using the double dollar symbol ($$)because I want to read more than just one element.
Now, we need to do our for loop in order to iterate through our array, which is the availableOptions.
for (let i = 0; i < availableOptions.length; i++) {
This is just a regular for loop.
And to log this inside it, we can do await availableOptions[i].innerText, which is what I mentioned before.
# Example Code - dropdown.js
const { chromium } = require('playwright');
// https://playwright.dev/docs/input#select-options

(async () => {
    // function code
    const browser = await chromium.launch({ headless: false, slowMo: 300 });
    const page = await browser.newPage();
    await page.goto('https://the-internet.herokuapp.com/dropdown');
    const dropdown = await page.$('#dropdown');

    // value
    await dropdown.selectOption({ value: '1' });

    // label
    await dropdown.selectOption({ label: 'Option 2' });

    // index
    await dropdown.selectOption({ index: 1 });

    // values inside this select
    const availableOptions = await dropdown.$$('option');

    for (let i = 0; i < availableOptions.length; i++) {
        console.log(await availableOptions[i].innerText());
    }

    await browser.close();
})();
Let's try this again and let's see what happens once we run it.
It's going to be changing the values first, and then it's going to have to print them.
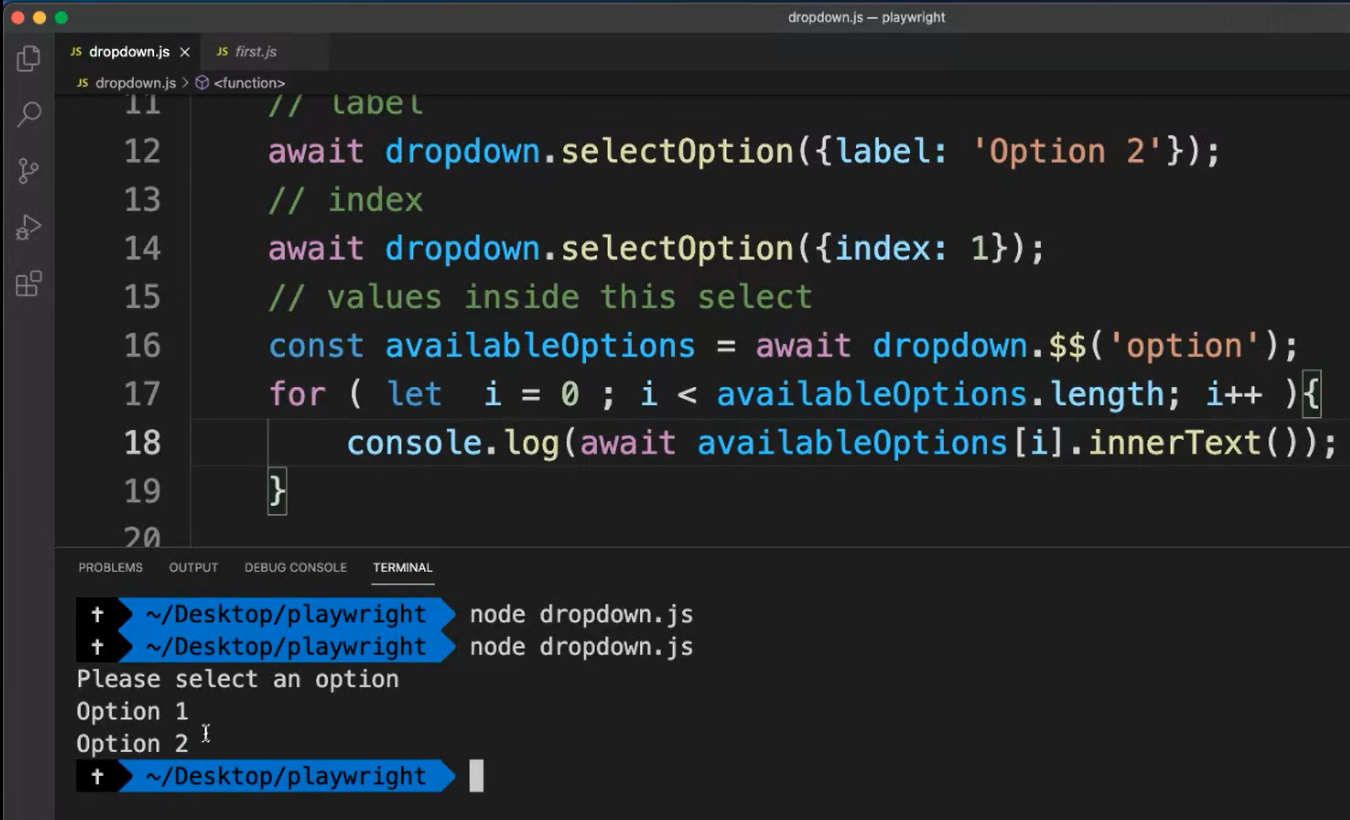
And that's what happened.
Resources
Quiz
The quiz for this chapter can be found in 3.6
