

Transcripted Summary
Okay, let us create a folder by saying: File > Add Folder to Workspace
Then we're going to say New Folder and we are going to name this “WebdriverIO Tutorial” [and click Create].
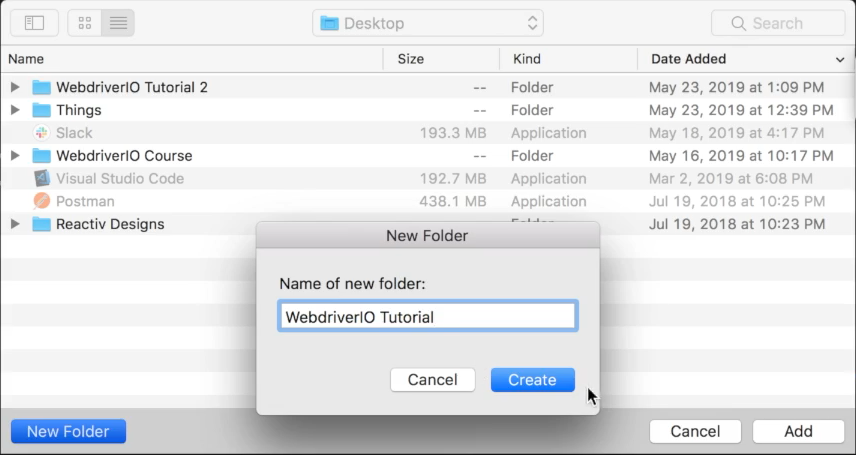
And then we click Add.
We can then say: View > Integrated Terminal.
In our terminal, we are going to ensure that we are in the root of our project and we're going to say
npm init
and what that does is sets up a new npm package.
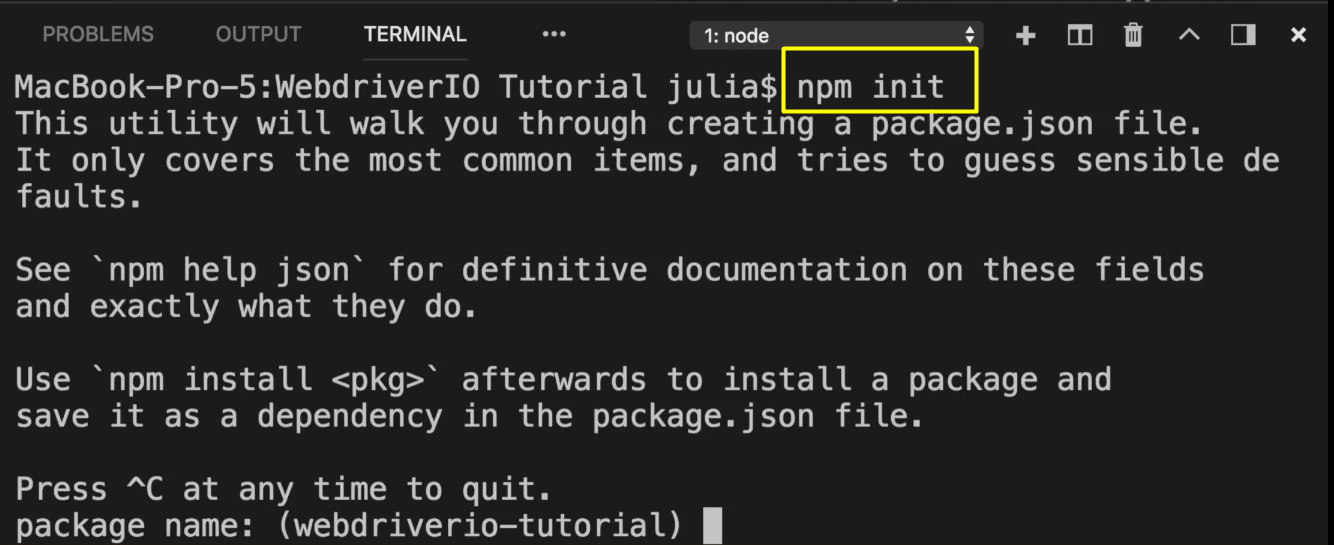
On initializing, you will be prompted to enter a package name, a version, description, test command, author, etc. You can fill this in as you like, or you can just press enter for each to get started.
And then at the end you're going to be asked, "Is this okay?" And if it is you type, "Yes."
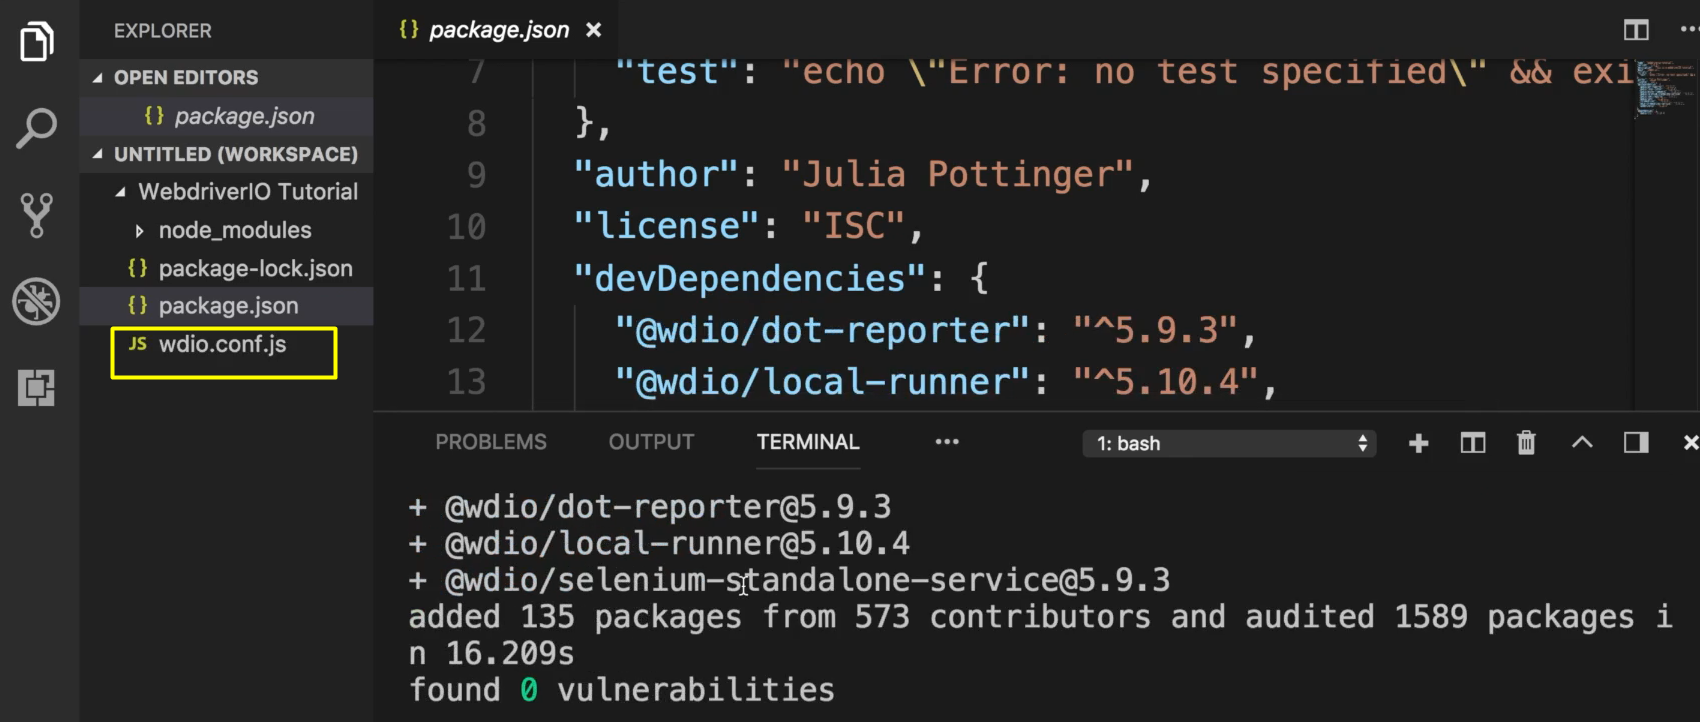
We are now going to be installing some dependencies that we will need and the first one is WebdriverIO.
We are going to say
npm install webdriverio --save-dev
and this is going to save it to our devDependencies.
Okay, to check that this has been successfully installed, we can open our folder and go into our package.json file.
In our package.json, if we go down to devDependencies, we can see webdriverio. And for this project we will be using version 5, which is the latest version of WebdriverIO.
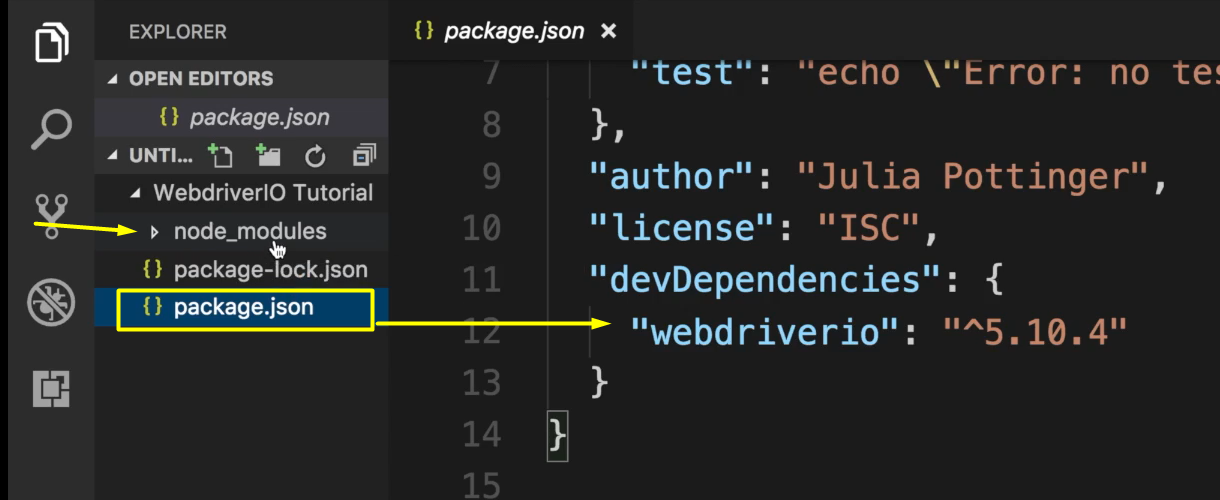
You may also notice that node_modules appeared and this is where all the dependency packages are stored.
Now that we have installed WebdriverIO, the next thing that we are going to do is to create a wdio config file.
This file will specify the location of the tests, the framework that we want to use, reporters, browsers, general configuration of the project. WebdriverIO is a command line interface that allows us to make this file very easy.
Ensuring that we are in the project root, we are going to say:
npm install @wdio/cli
And then we're going to say:
./node_modules/.bin/wdio config
We're going to be going into the folder that contains the wdio package and we run the command config.
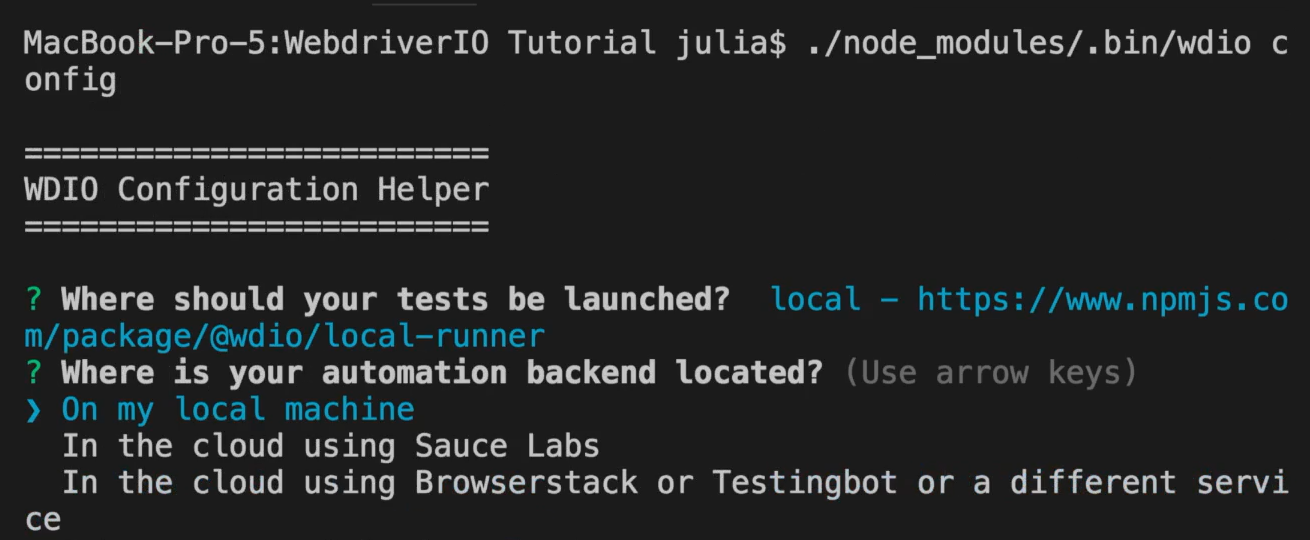
This is going to ask us some questions and we're going to just go through them [selecting from pull down options provided and entering space for the ones we want].
Where should your test be launched? Local, okay.
Where's your automation backend located? In our local machine for this.
Which framework do you want to use? We want to use Mocha.
Do you want to run WebDriverIO commands synchronous or asynchronous? We want to run WebdriverIO synchronously.
Where are your test specs located? For our test specs, we just leave it there for now.
Which reporter do you want to use? We are going to just use dot and spec so we can say space to select.
Do you want to add a service to your test setup? We want to add our service. We want to add Selenium standalone. So, we are going to go down to _selenium-standalone _and click space. And we want chromedriver as well.
What is the base url? The base URL that we are going to use for this project is: http://the-internet.herokuapp.com/
And then it installs everything for us.
Okay. And if we realize our wdio config file [wdio.conf.js] was created and it contains everything that we wanted it to — our specs, our browser name, our log level.
The next thing that we are going to do is install Chai.
Chai is going to be the assertion library that we're going to use. So, we're going to say:
npm install chai --save-dev
We are also going to install Chai WebdriverIO so that further on we can use it to set global assertions.
We're going to say:
npm install chai-webdriverio --save-dev
NOTE
When we say --save it allows it to be saved to our package.json so that whenever we say npm install, if it is that we lose our node_modules, or if it is that we are uploading it to our repository, other persons when they're using the project can just say npm install and all of the packages that we use, which will be stored in our package.json, will be unloaded for them and they will have their own node_modules folder.
Okay.
And then we're going to install our local runner.
We say:
npm install local-runner --save-dev
Our project already installed for us the Selenium standalone service and the Mocha framework, so we don't need to install those.
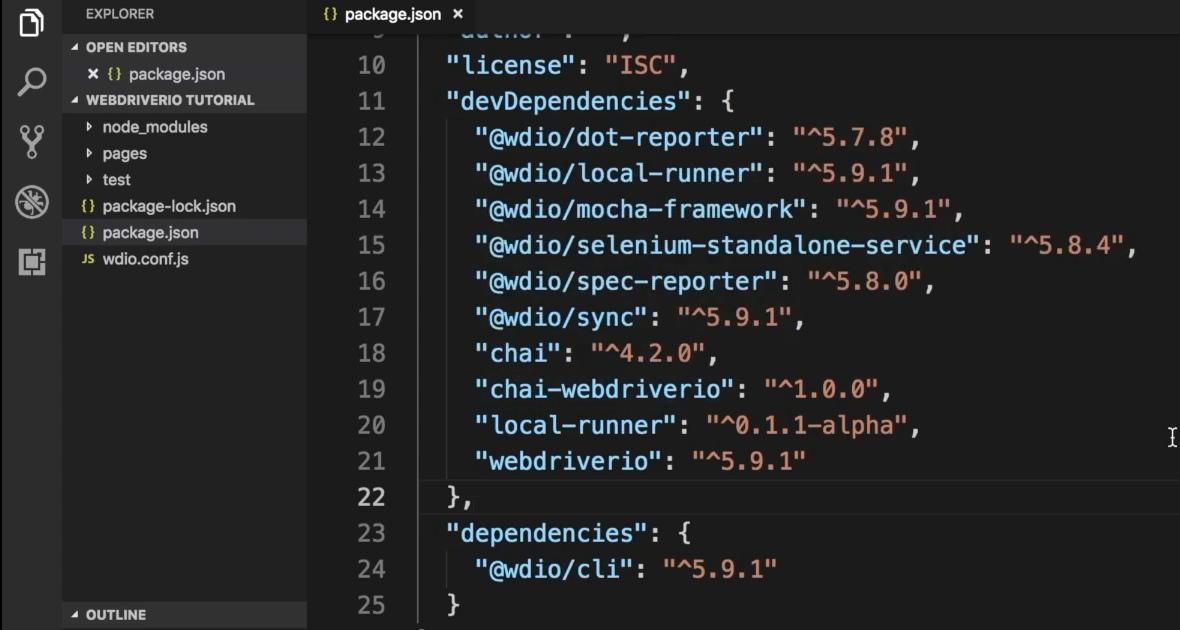
If we take a look in our package.json, we will realize that we have installed Chai and Chai WebdriverIO.
Let us now set this up in our configuration file so that we can use Chai assertion throughout our project.
We are going to go into our configuration file [wdio.conf.js] and we are going to go to the beforeTest section. Let's uncomment it.
And what we are going to add is
const chai = require('chai')
const chaiWebdriver = require('chai-webdriverio').default
chai.use(chaiWebdriver(browser))
What we are doing is adding the Chai assertions.
We can use assert, we can use expect, we can use should, as the Chai module contains all those three assertions. We're putting it in the “before” snippet because it will run the containing code before every test, regardless of where the file is stored.
In this case, we're going to be setting global asserts, global should, and global expect, so that we won't need to import it in every file.
Now, we are going to say:
global.assert = chai.assert
global.should = chai.should
global.expect = chai.expect
These are the 3 different types of assertions that we will be using throughout the duration of this project.
Resources
Quiz
The quiz for this chapter can be found in section 1.3
